Tag Archives: Lights Aglow 6" x 6" Specialty Designer Series Paper

Lights Aglow Colored Strips Christmas Card

Lights Aglow Colored Strips Christmas Card

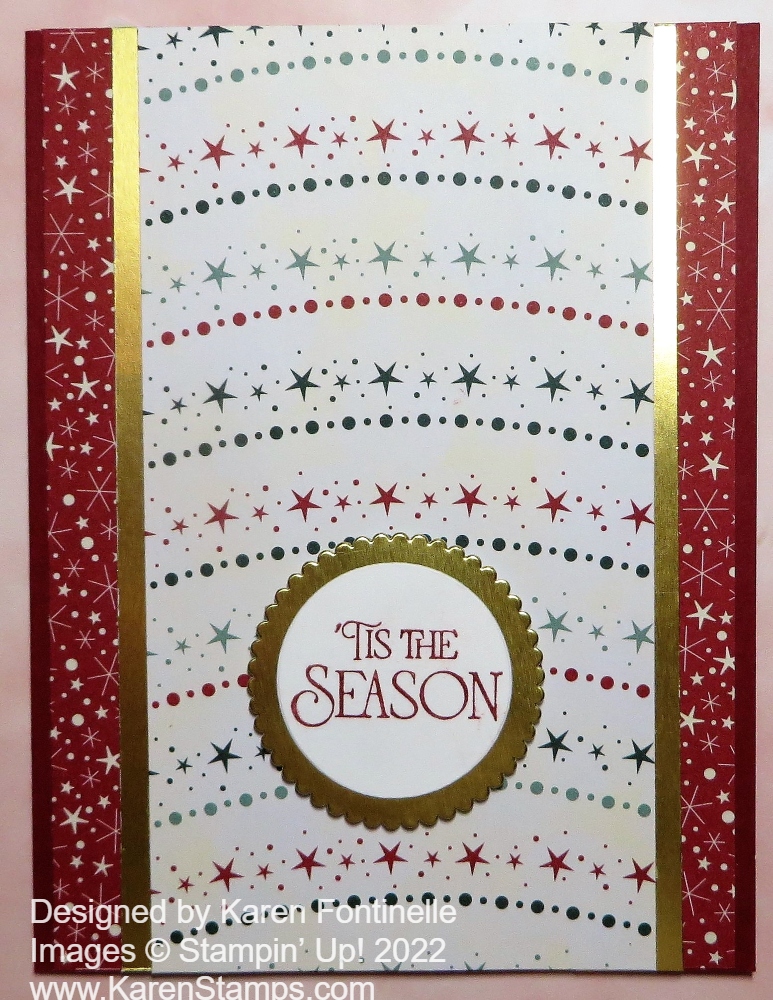
This Lights Aglow Colored Strips Christmas Card came about after seeing a pretty similar card in the Stampin’ Up! Holiday Mini Catalog on page 32. It’s a great way to use up designer paper scraps by using various designer paper strips for the background of the card. It shows off lots of the pretty paper and provides a nice card front. And no waste if you have saved a bunch of scraps!

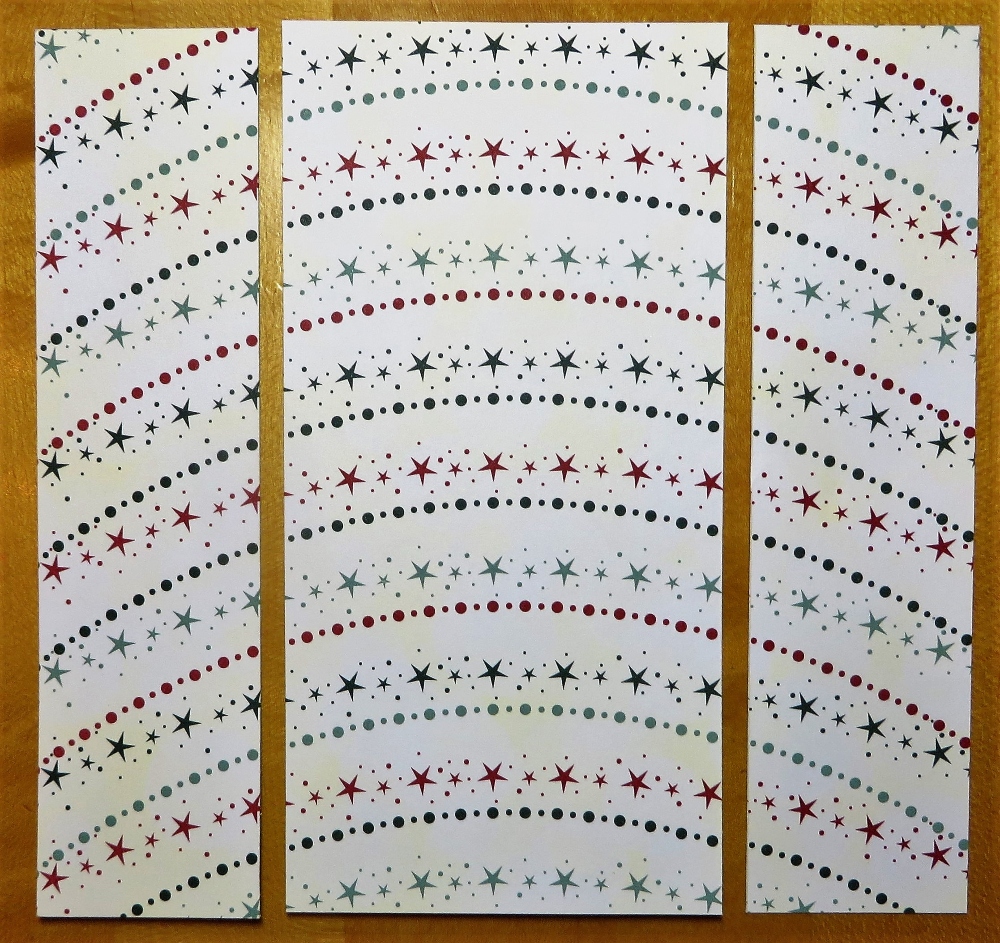
This card starts with a Cherry Cobbler Cardstock card base. I had a lot of scrap strips from the Lights Aglow 6″ x 6″ Specialty Designer Series Paper. In whatever way I had cut up the paper, I had a lot of 4″ x 3/4″ strips. I began laying out the strips on the card base, just eyeballing it. Then I got the idea that with the paper having gold foil accents, it might look nice if there was gold foil in between the strips. Finally, I decided to cut a piece of Gold Foil for the background of the strips. Fortunately, six strips fit just right on that layer of Gold Foil! If you want to do all the math and figure out the space measurements and all that, go right ahead, but you are very likely to just lay out the strips and have them spaced apart pretty evenly! My Stampin’ Up! Grid Paper was a little bit of help but mostly I just eyeballed it.

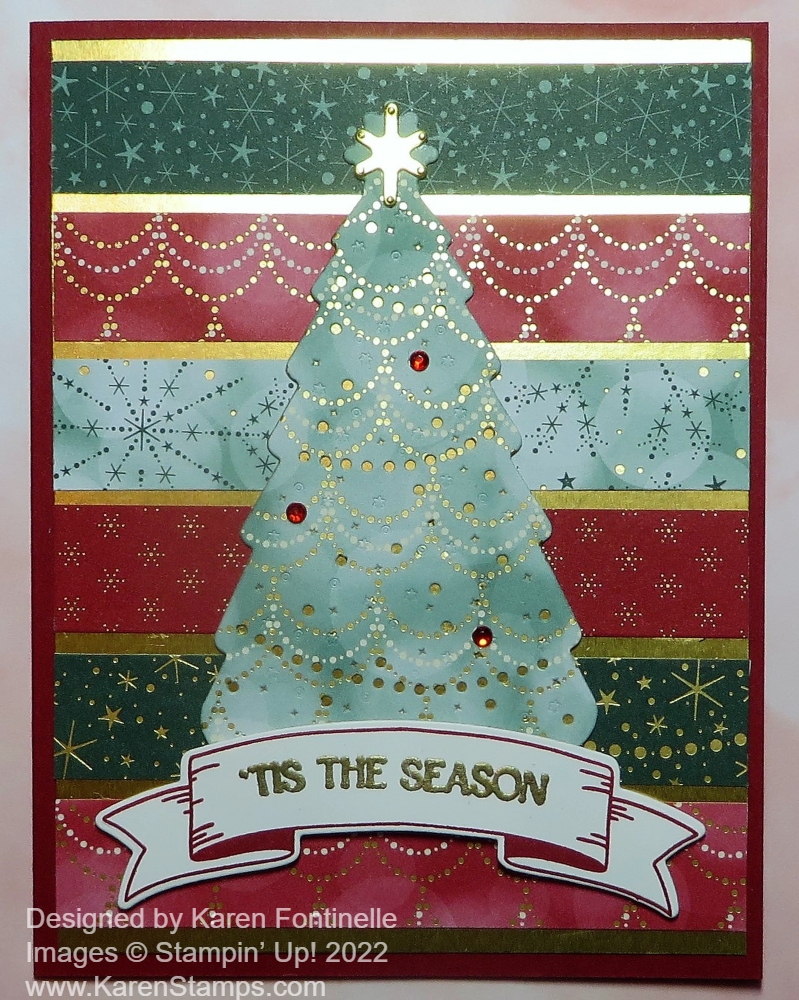
I die-cut a Christmas tree out of one of the green Lights Aglow papers using the Twinkling Lights Dies. I also cut out a tree in Gold Foil just with the outline die to adhere behind the tree die so the gold would show through the little holes in the Christmas tree! The tree was then adhered to the card front. You can pop it up if you like, I just glued mine flat. You could instead pop up the background with the strips of paper. If you are going to mail the card, though, you don’t want it

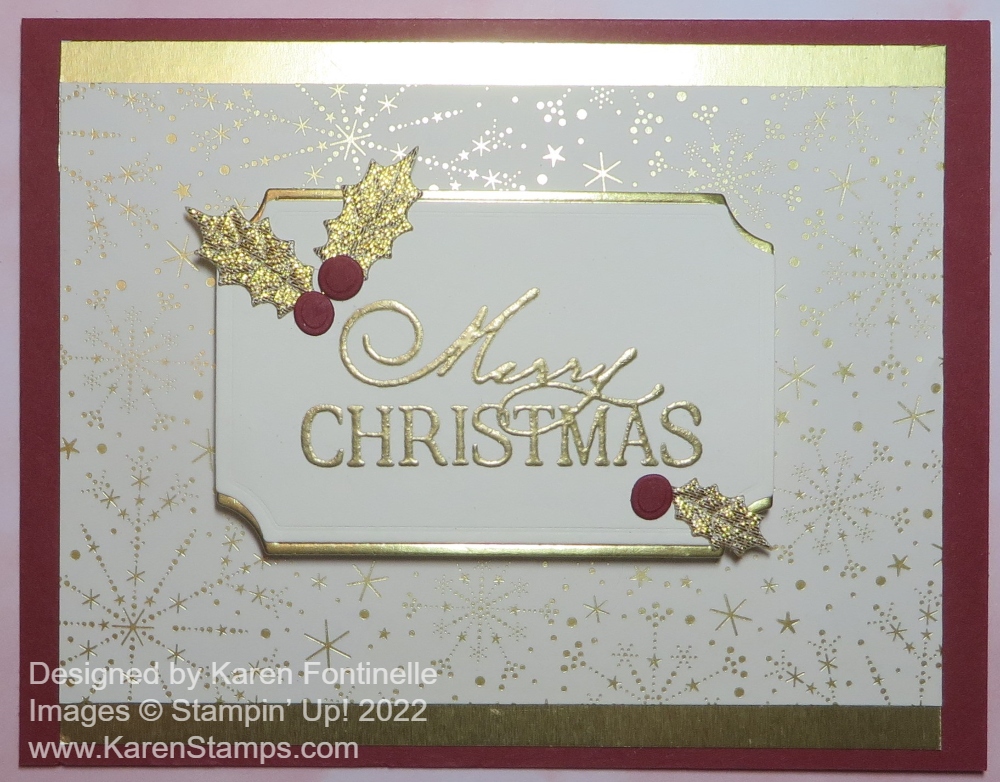
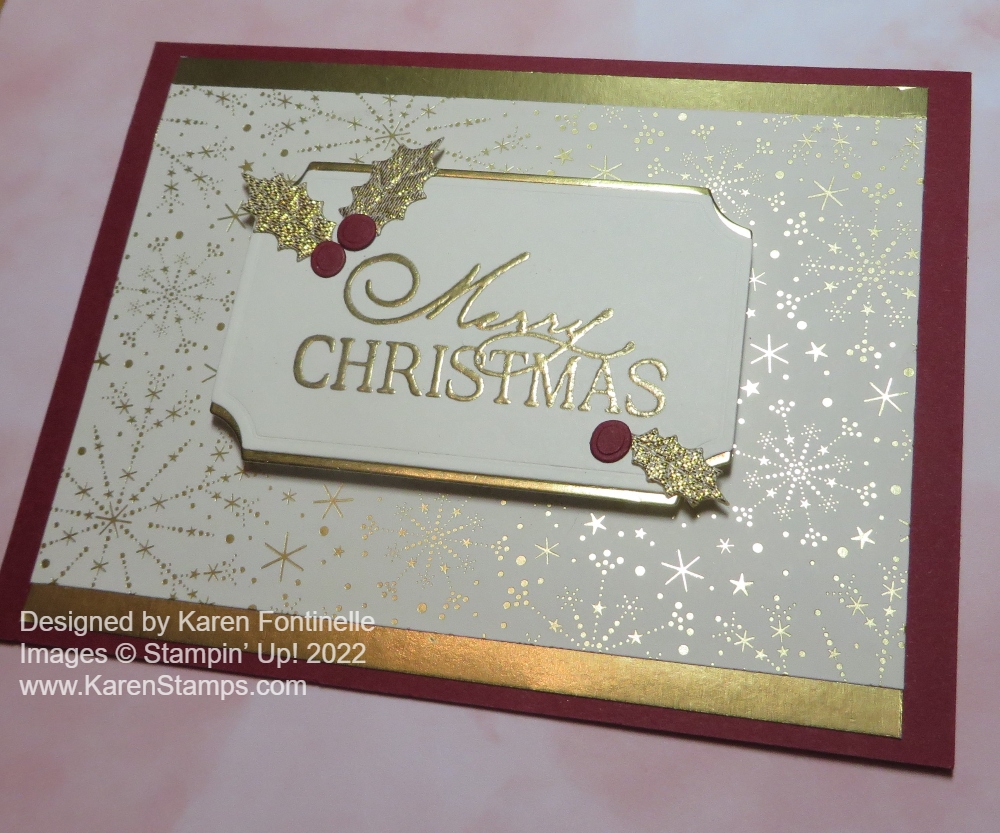
For the greeting, I stamped the banner in Cherry Cobbler ink in the Christmas Banners Stamp Set and cut it out with the Christmas Banner Dies. You can get both in the Christmas Banners Bundle and save 10%. Since I wanted the greeting to be gold to match the card, I stamped the greeting with Versamark Ink and embossed it with Gold Powder using the Heat Tool. The greeting is in the Christmas Banners Stamp Set. I popped up the banner using Stampin’ Dimensionals.

To finish off the Christmas tree, I die-cut the little “star” at the top of the tree with one of the dies out of Gold Foil. I also placed a few Red Rhinestone Basic Jewels on the tree for just a little more sparkle!

I don’t think you would want to mass-produce this card to send, but if you have some scraps, it is easy enough to make one or a few more cards with this design!

Lights Aglow Gold Christmas Card

Lights Aglow Gold Christmas Card Closeup

I looked through the Lights Aglow Designer Paper and chose this pattern without knowing what I would make. That’s a good way to get started when you are trying to come up with an idea. In a little while, I had this Lights Aglow Gold Christmas Card made!

After deciding on this gold foil snowflake pattern of paper in the Lights Aglow 6″ x 6″ Specialty Designer Series Paper, I decided to make the card base Cherry Cobbler cardstock. I started with Real Red, but I think just knowing the coordinating color for this designer paper pack was Cherry Cobbler, Real Red just didn’t feel right. I cut the snowflake layer down a little so I could add some Gold Foil strips to the top and bottom. I cut two Gold Foil strips 3/4″ x 5″ to add a 1/4″ edge peeking out.

For the greeting, I stamped “Merry Christmas’ in the Brightest Glow Stamp Set. I stamped it with Versamark ink so I could heat emboss it with Gold Embossing Powder in the Metallics Embossing Powders using the Heat Tool. I used Very Vanilla cardstock.

To help the Very Vanilla greeting stand out, I diecut it with one of the Painted Labels dies and immediately cut another one out of Gold Foil. The gold foil is then cut in half horizontally so that it could be layered just a tiny bit under the top and bottom of the greeting piece. It’s not absolutely perfect, but plenty close enough.

For a little embellishment, I remembered that I had Gold Holly Leaves leftover from last year’s Holiday Catalog but carried over to the current Holiday Mini. They are almost like little fabric leaves and come in two sizes in the package. Then I die cut some Cherry Cobbler berries from the Christmas Banners Dies. I think they are a little larger than I would have liked but they still are okay. I popped the greeting up not on Stampin’ Dimensionals but on Foam Adhesive Strips. They seem to be a little higher than the Dimensionals so I might have preferred the Dimensionals. But it is fine!

So once you know what the design is on this card, it’s really fairly simple! You can change the background designer paper and make it a little different or even make the card for a different occasion, instead of this Lights Aglow Gold Christmas Card.

Lights Aglow Gold Christmas Card Closeup

SHOP STAMPIN’ UP! and SALE-A-BRATION (until Aug. 31st)!

Lights Aglow Tis the Season Christmas Card

Lights Aglow Tis the Season Christmas Card

I just got this designer paper and sort of copied a sample card in the Holiday Mini Catalog to come up with this Lights Aglow Tis the Season Christmas Card. When you don’t have an idea of what to make with one of your Stampin’ Up! products, always remember to look in the catalog for ideas. You might think you will copy the card exactly, but I’m willing to bet that as you go along you may just change it up a little as your ideas start to flow.

Although I don’t have the Christmas Lights Bundle in the Lights Aglow Suite, I wanted to get the Lights Aglow 6″ x 6″ Specialty Designer Series Paper. As I write this, the Lights Aglow Paper is not available but should be back in stock in early September. I must have ordered the last pack! LOL! This paper has gold foil dots that are meant to look like twinkling lights! Very pretty papers!

To make this card, I started with a Cherry Cobbler card base. Then I used the Cherry Cobbler paper with tiny stars all over as a layer on the card base. If you wanted to save paper, you could just add strips to the side. I made all the paper layers on this card run the full length of 5 1/2″. The Cherry Cobbler paper with stars is 5 1/2″ x 4″.

The center portion of the card, the arcs of stars and dots, needs a little extra care. Surprisingly I realized that before I cut it! To get the proper arc, you need to cut the center portion of the sheet of that paper. Below is a photo of how I cut the paper. Since I wanted a 3″ wide section, that left 3″ so I cut 1 1/2″ off each side.

How to Cut the Paper

Before adhering that center paper to the card, add some Gold Foil strips to each side, or as the Holiday Catalog shows (page 30) use the Gold Glimmer Paper in the Glimmer 12″ x 12″ Specialty Paper.

For the greeting, I sort of copied the design of the sample card but changed it up a little bit. I used a sentiment in the Brightest Glow Stamp Set. I think this is a fantastic set of traditional Christmas greetings in pretty fonts. I chose the ‘Tis the Season stamp and stamped it in Cherry Cobbler. Then I die cut it with a small plain circle in the Layering Circles Dies and layered it on a scalloped circle die in the same set, cut out of Gold Foil.

On the inside of the card, I used a layer of Basic White and added a strip of designer paper with the little stars that I used on the front of the card. That way you can stamp a greeting or write a note.

That’s all there is to this Lights Aglow Tis the Season Christmas Card but if you wanted to add any extra embellishments you could do that.

SHOP STAMPIN’ UP! ONLINE HERE!