Tag Archives: Christmas Banners Bundle

Lights Aglow Colored Strips Christmas Card

Lights Aglow Colored Strips Christmas Card

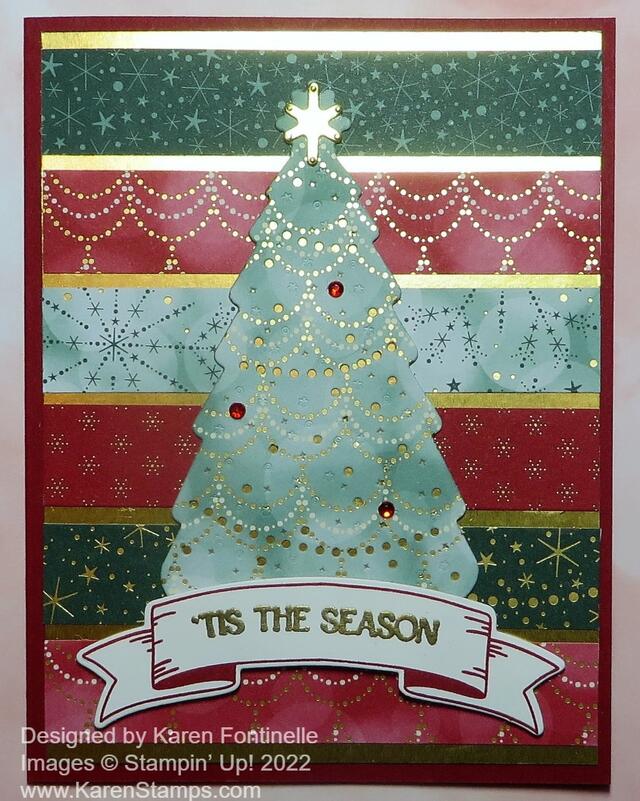
This Lights Aglow Colored Strips Christmas Card came about after seeing a pretty similar card in the Stampin’ Up! Holiday Mini Catalog on page 32. It’s a great way to use up designer paper scraps by using various designer paper strips for the background of the card. It shows off lots of the pretty paper and provides a nice card front. And no waste if you have saved a bunch of scraps!

This card starts with a Cherry Cobbler Cardstock card base. I had a lot of scrap strips from the Lights Aglow 6″ x 6″ Specialty Designer Series Paper. In whatever way I had cut up the paper, I had a lot of 4″ x 3/4″ strips. I began laying out the strips on the card base, just eyeballing it. Then I got the idea that with the paper having gold foil accents, it might look nice if there was gold foil in between the strips. Finally, I decided to cut a piece of Gold Foil for the background of the strips. Fortunately, six strips fit just right on that layer of Gold Foil! If you want to do all the math and figure out the space measurements and all that, go right ahead, but you are very likely to just lay out the strips and have them spaced apart pretty evenly! My Stampin’ Up! Grid Paper was a little bit of help but mostly I just eyeballed it.

I die-cut a Christmas tree out of one of the green Lights Aglow papers using the Twinkling Lights Dies. I also cut out a tree in Gold Foil just with the outline die to adhere behind the tree die so the gold would show through the little holes in the Christmas tree! The tree was then adhered to the card front. You can pop it up if you like, I just glued mine flat. You could instead pop up the background with the strips of paper. If you are going to mail the card, though, you don’t want it

For the greeting, I stamped the banner in Cherry Cobbler ink in the Christmas Banners Stamp Set and cut it out with the Christmas Banner Dies. You can get both in the Christmas Banners Bundle and save 10%. Since I wanted the greeting to be gold to match the card, I stamped the greeting with Versamark Ink and embossed it with Gold Powder using the Heat Tool. The greeting is in the Christmas Banners Stamp Set. I popped up the banner using Stampin’ Dimensionals.

To finish off the Christmas tree, I die-cut the little “star” at the top of the tree with one of the dies out of Gold Foil. I also placed a few Red Rhinestone Basic Jewels on the tree for just a little more sparkle!

I don’t think you would want to mass-produce this card to send, but if you have some scraps, it is easy enough to make one or a few more cards with this design!

Slimline Painted Christmas Banner Card

Slimline Painted Christmas Banner Card

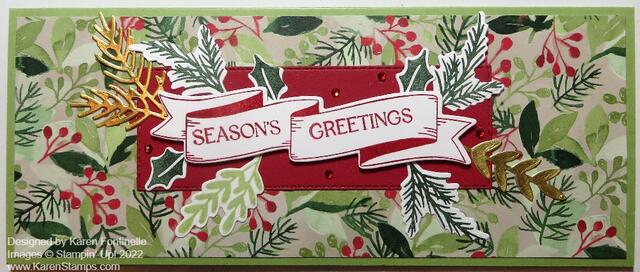
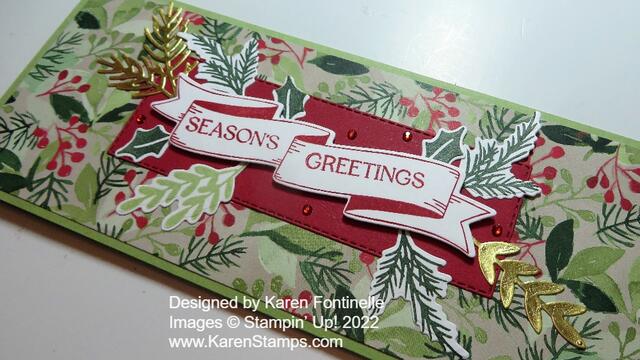
I remembered that one of the Christmas papers in the Holiday Mini Catalog is a returning one, Painted Christmas! And I have it from last year so I was anxious to try it out again! After pulling out all the papers and some coordinating colors of cardstock, I came up with this Slimline Painted Christmas Banner Card, much to my surprise!

I say “much to my surprise” because I didn’t imagine I would be making a slimline Christmas card! But you never know what you may come up with! As it turned out, from the pieces of designer paper and scraps of cardstock, it just seemed like they would fit well as a slimline card! This is even a fairly large one that could be used if you wanted a lot of people to sign the card!

The card base is 8 1/2″ x 7″, folded in half so the width is 3 1/2″. I used Pear Pizzazz cardstock. The layer of Painted Christmas Designer Series Paper is 3 1/4″ x 8 1/4″.

For the greeting, I decided to use the Christmas Banners Stamp Set. I stamped the banner in Real Red ink, diecut it with the Christmas Banner Dies, then stamped the words. You could do all the stamping before die-cutting. The stamp set and dies can be purchased together as the Christmas Banners Bundle so you can save 10%. I thought the banner might need a background to stand out better so I used Real Red cardstock to die cut a Stitched Rectangle. You might notice it is longer than the actual die. I used that technique to partially cut the rectangle, then stop and move the die down longer, lining it up with the already cut die-cut lines. You will feel it fit in there. But don’t roll that end of the die through the Stampin’ Cut & Emboss. Start it farther down and then roll the platform past the longer end. If you try it, you will figure it out! It always takes me a minute to remember how it works, but it’s a good technique when you want a longer die.

Next, I stamped and diecut lots of the leaves and stems in the Bundle to decorate around the greeting. I even found a scrap of gold foil in my little pile so I used that for a little gleam on the card. The banner greeting is popped up on Stampin’ Dimensionals® and the stems can be slid a tiny bit underneath the banner around the sides. Just lay around with the pieces that you have and see what looks good. For a finishing touch, I added some Red Rhinestone Basic Jewels.

This card will fit into one of those long business envelopes or you can use the Slimline Envelopes in the Annual Catalog. Here is another slimline card, but much smaller, in this post. That one is 3″ x 6″ but I think that’s a good size too. Just make your cards to fit the envelope you have! We are past July 25th so it is LESS THAN five months until Christmas! I hope this Slimline Painted Christmas Banner Card offers you some inspiration for a holiday card!

SHOP STAMPIN’ UP! ONLINE HERE!

Sweet Candy Canes Christmas Card

Sweet Candy Canes Christmas Card

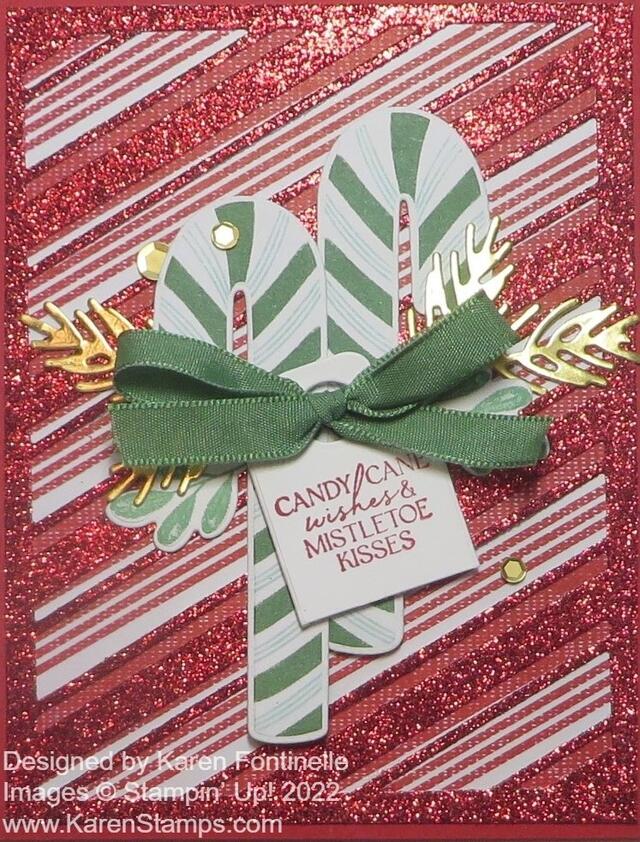
My first order from the new Holiday Mini Catalog arrived yesterday, and after a busy day, I got to open it late last night. The first thing I wanted to make was this pretty Sweet Candy Canes Christmas Card that is pictured in the catalog on page 10 in the Sweetest Christmas Suite Collection. I didn’t want to try to figure out my own design at that moment since it was late, but I look forward to playing more with the paper, stamps, dies, and embellishments as soon as possible! I already had ideas dancing in my head just opening the designer paper package! I didn’t take time to look up the sample recipe for how Stampin’ Up! made this card, I just stared at the catalog page multiple times to figure out at least something close to this sample card! The sparkle is so pretty!

I started with a card base of Real Red and used the large striped die in the Candy Cane Dies to die cut the new Real Red and White 6″ x 6″ Glimmer Paper. I only used it once, but there are a lot of narrow slivers of glimmer paper that will come out of your die-cut piece. I believe that if you turn the glimmer paper over to the other side, you will be able to see the die-cut lines better and see if you got all of them out of your piece.

You can use just the die first to see how it lines up with the diagonally striped designer paper in the Sweetest Christmas Designer Series Paper to make the background look like candy cane stripes, just to get the idea. I’m not sure yet the best way to size a piece of designer paper to line up with that die, so for now I would say either cut a larger piece of designer paper than you need, adhere the glimmer paper, then trim off the excess or just adhere the die-cut glimmer paper on the large 12″ x 12″ paper and then trim. Someone will figure out a less wasteful way to get the diecut placed correctly on the designer paper!

The Candy Canes Dies work with the candy cane printed paper in the Sweetest Christmas DSP. You might want to just cut with your scissors into the candy cane you want to diecut. At that point, it really is almost easier to just cut out the candy cane with your scissors! But the dies do match and that’s what I did for this card. Just make sure you get the candy canes that face different directions if that is what you want. You can also use the stamps, inking up the whole candy cane in one color or use Stampin’ Write Markers to color multiple colors on the different stripes. I think that will be fun too to make your own custom candy canes! I adhered my candy canes flat on the card but you could pop them up on Stampin’ Dimensionals.

Next, I stamped the tag with a greeting from the Sweet Candy Canes Stamp Set. There is a die for making this tag and you can use it a couple different ways. I simply cut off the bottom half of the tag and the bow went over the hole when I adhered it to the card. The ribbon is in the new Real Red & Garden Green 3/8″ Ribbon Combo Pack in the Suite.

The small green leaves on the card sticking out from behind the tag and candy canes are stamped from the Sweet Candy Canes Stamp Set and die cut. The Gold Foil leaves are die cut with the dies in the second Bundle in the Suite on page 11 of the catalog. These are the Christmas Banner Dies. There are several leaf options you can choose from.

For a finishing touch, use a few of the Adhesive-Backed Seasonal Sequins in the Suite. These are metallic and somewhat shiny but not sparkly and come in two sizes and several colors. Since you have a lot of glimmer going on already on this card, you don’t need too much more sparkle!

I think this is going to be a useful and fun Suite to work with making Christmas cards and other projects. There are lots of sample ideas in the catalog to get us started! Soon there will be hundreds and thousands of ideas online I’m sure for using this Suite of products! Maybe you make all your cards the same, but if you like a variety, when you design and make one card you make go ahead and make several more (like 4 more) then you will have five cards that are done and ready to go. When you make the same card over and over it is faster because you are not figuring out the design each time and you can make the additional cards assembly-line style!

If you want ALL of the products on pages 8-11, just use the Sweetest Christmas Suite Collection number #159579. If you want to leave out certain items, then order each product you want separately or order extras of certain ones you want more of! You can try out this Sweet Candy Canes Christmas Card to get you started with a very lovely card to send and then come up with more of your own creative ideas or use the other samples in the Holiday Catalog for inspiration!

SHOP THE HOLIDAY CATALOG HERE!