I remembered that one of the Christmas papers in the Holiday Mini Catalog is a returning one, Painted Christmas! And I have it from last year so I was anxious to try it out again! After pulling out all the papers and some coordinating colors of cardstock, I came up with this Slimline Painted Christmas Banner Card, much to my surprise!
I say “much to my surprise” because I didn’t imagine I would be making a slimline Christmas card! But you never know what you may come up with! As it turned out, from the pieces of designer paper and scraps of cardstock, it just seemed like they would fit well as a slimline card! This is even a fairly large one that could be used if you wanted a lot of people to sign the card!
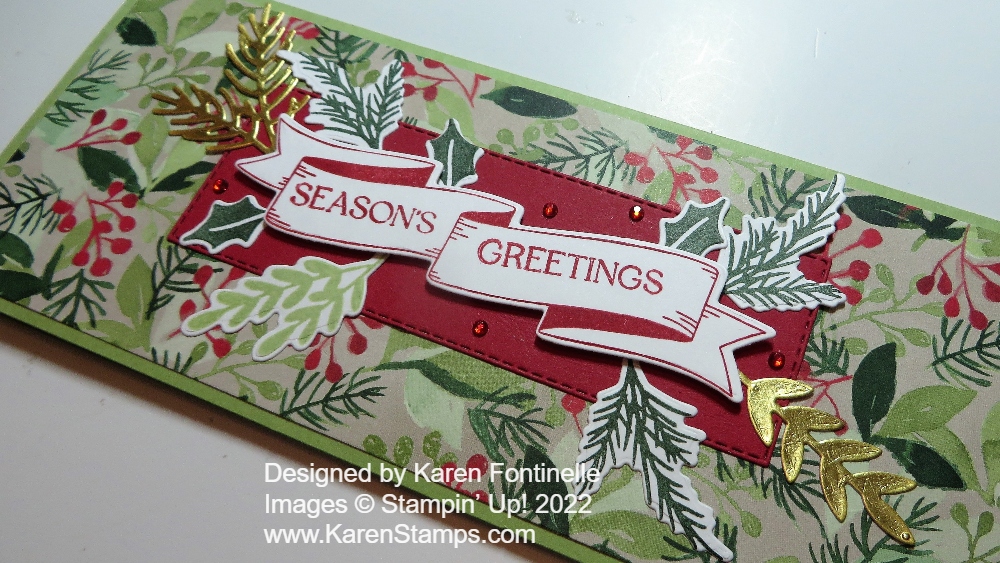
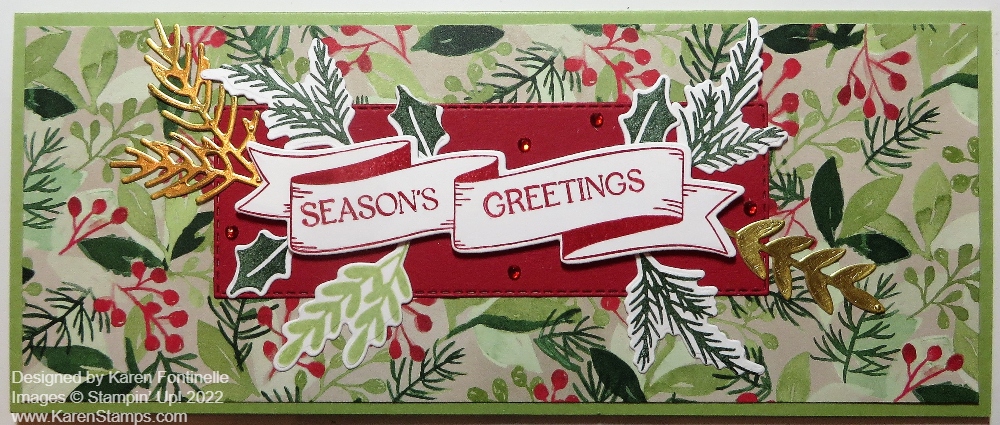
The card base is 8 1/2″ x 7″, folded in half so the width is 3 1/2″. I used Pear Pizzazz cardstock. The layer of Painted Christmas Designer Series Paper is 3 1/4″ x 8 1/4″.
For the greeting, I decided to use the Christmas Banners Stamp Set. I stamped the banner in Real Red ink, diecut it with the Christmas Banner Dies, then stamped the words. You could do all the stamping before die-cutting. The stamp set and dies can be purchased together as the Christmas Banners Bundle so you can save 10%. I thought the banner might need a background to stand out better so I used Real Red cardstock to die cut a Stitched Rectangle. You might notice it is longer than the actual die. I used that technique to partially cut the rectangle, then stop and move the die down longer, lining it up with the already cut die-cut lines. You will feel it fit in there. But don’t roll that end of the die through the Stampin’ Cut & Emboss. Start it farther down and then roll the platform past the longer end. If you try it, you will figure it out! It always takes me a minute to remember how it works, but it’s a good technique when you want a longer die.
Next, I stamped and diecut lots of the leaves and stems in the Bundle to decorate around the greeting. I even found a scrap of gold foil in my little pile so I used that for a little gleam on the card. The banner greeting is popped up on Stampin’ Dimensionals® and the stems can be slid a tiny bit underneath the banner around the sides. Just lay around with the pieces that you have and see what looks good. For a finishing touch, I added some Red Rhinestone Basic Jewels.
This card will fit into one of those long business envelopes or you can use the Slimline Envelopes in the Annual Catalog. Here is another slimline card, but much smaller, in this post. That one is 3″ x 6″ but I think that’s a good size too. Just make your cards to fit the envelope you have! We are past July 25th so it is LESS THAN five months until Christmas! I hope this Slimline Painted Christmas Banner Card offers you some inspiration for a holiday card!
SHOP STAMPIN’ UP! ONLINE HERE!