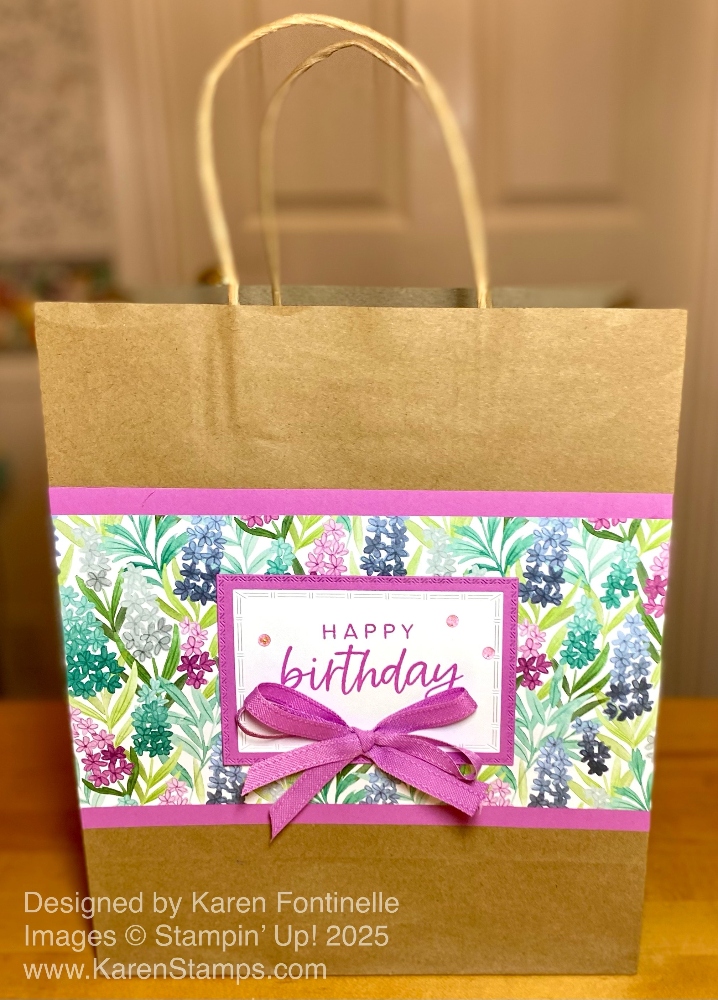
Tag Archives: birthday gift bag

Pattern Party 2-4-6-8 Birthday Gift Bag

If you are able to get this Pattern Party Designer Series Paper, I think you will really enjoy using it as I did making this Pattern Party 2-4-6-8 Birthday Gift Bag! I thought this festive diagonal stripe would make a fun gift bag, at least for a small gift or treat, and certainly a 2-4-6-8 gift bag (or box) is easy enough to make!

The Pattern Party Designer Series Paper is an item you can choose as one of your Stampin’ Rewards with an order of $150 or more. That’s a big order but maybe some friends would like to go in on the order with you and you could divide up the paper because it’s a big package! Twelve different designs and four pages of each!

We’ve made this bag a bunch of times before but even I have to go back and review the directions. It is very easy though! Once you know how to do it, you can vary the size by using a larger or smaller piece of paper. Always be sure the pattern of the paper is going in the direction you want it to go in so you don’t end up with upside down flowers or animals or a stripe going sideways when you wanted it to go up and down.

For this gift bag, I started with a piece of paper 8 1/2″ x 5 1/2″. I just scored it at 2″, 4″, 6″ and 8″ going across the paper. Then I turned it and scored at 1 1/2″ for the bottom tabs of the bag. Trim off the little 1/2″ bottom piece and cut on the 2″, 4″, 6″, and 8″ score lines for the bottom flaps up to the 1 1/2″ score line. Difficult to see in the photo below but you can get the idea.

Pattern Party Small 2-4-6-8 Birthday Gift Bag scoring

Assemble the box, putting adhesive on that 1/2″ piece on the side. You can just fold over the other side of the bag with it laying flat on the table. You don’t have to try to maneuver it in your hands! Apply adhesive to the bottom flaps, first doing a “test” to see which way you want the flaps to go in before you glue. Then pay attention to where the seam is and try to have that face the back. Fold in the bottom flaps, trying to make the front of the bag look nice.

To decorate this bag, I stamped “Happy Birthday” in the Pansy Patch Stamp Set in Pale Papaya Ink. Then I die cut it with one of the Layering Circles Dies and layered it on a scalloped circle die in Pale Papaya Cardstock. It’s perfect fit! I needed something big enough to fit the greeting but not too big for the bag! I popped that up with two Stampin’ Dimensionals.

For the top of the bag, you can leave it open, or kind of squeeze in the sides and pinch the top together. Punch or poke some holes in the top for ribbon. I used the Pale Papaya 3/8″ Open Weave Ribbon to tie the top closed in a bow. Have I said how much I love that ribbon?! Then for a little extra, I added some of the Genial Gems on the greeting and on the bag. These come in two colors, Pale Papaya and Mint Macaron but I think you can use them even without matching colors.

Knowing how to make a 2-4-6-8 bag is something you should know how to do as a papercrafter! They are fun to make, not to mention useful when you need some cute packaging for a small gift or treat! Here’s a very similar one made for Valentine’s Day. Being able to make an easy gift bag just might save you a trip to the store!

SHOP STAMPIN’ UP! ONLINE!

Poppy Moments Altered Birthday Gift Bag

Poppy Moments Altered Birthday Gift Bag

One of my favorite projects to make is to decorate a gift bag like this Poppy Moments Altered Birthday Gift Bag that I made for a friend’s birthday. Sometimes I use a bag I got out shopping and even if it has the store name on the side, I can cover the name with paper and decorate. It’s almost like making a card on the side of a bag! And if you don’t already have a cute shopping bag, you can buy a bunch at the craft store.

To decorate this shopping bag, I used the Poppy Moments Dies and just cut out a few flowers and leaves! I also used the Sprig Punch to punch a few leafy sprigs out of Vellum Cardstock. I made this bag pretty simple because there was no store printing that I had to cover up. After putting a gift inside the bag with tissue paper, you could also tie a ribbon around the bag handles. You could also attach a gift tag that you made. So many possibilities!

Here’s a birthday gift bag I decorated several years ago. The bag itself is pretty with a swirly leaf print on it, but I did need to cover the store name but that’s usually easy to do, sometimes on the front and back of the bag.

This gift bag turned out really pretty I think! I don’t remember if the bag was plain on the front or if it had printing on it, but it was easy to cover almost the whole front of the bag almost like if I had been making a card! You can see how you could make the same design for a card just by making it smaller!

If you are cleaning up closets and cabinets during the pandemic, save those small shopping bags and do something creative with them! Decorate for birthdays or Christmas or something generic and then you will have some personalized gift bags ready to go! Or maybe you can make a bag that matches your gift.

Altering or decorating bags you have around the house is something fun you can easily do and a great way to recycle! And it just might save you a trip to the store for a gift bag!