Category Archives: Birthday

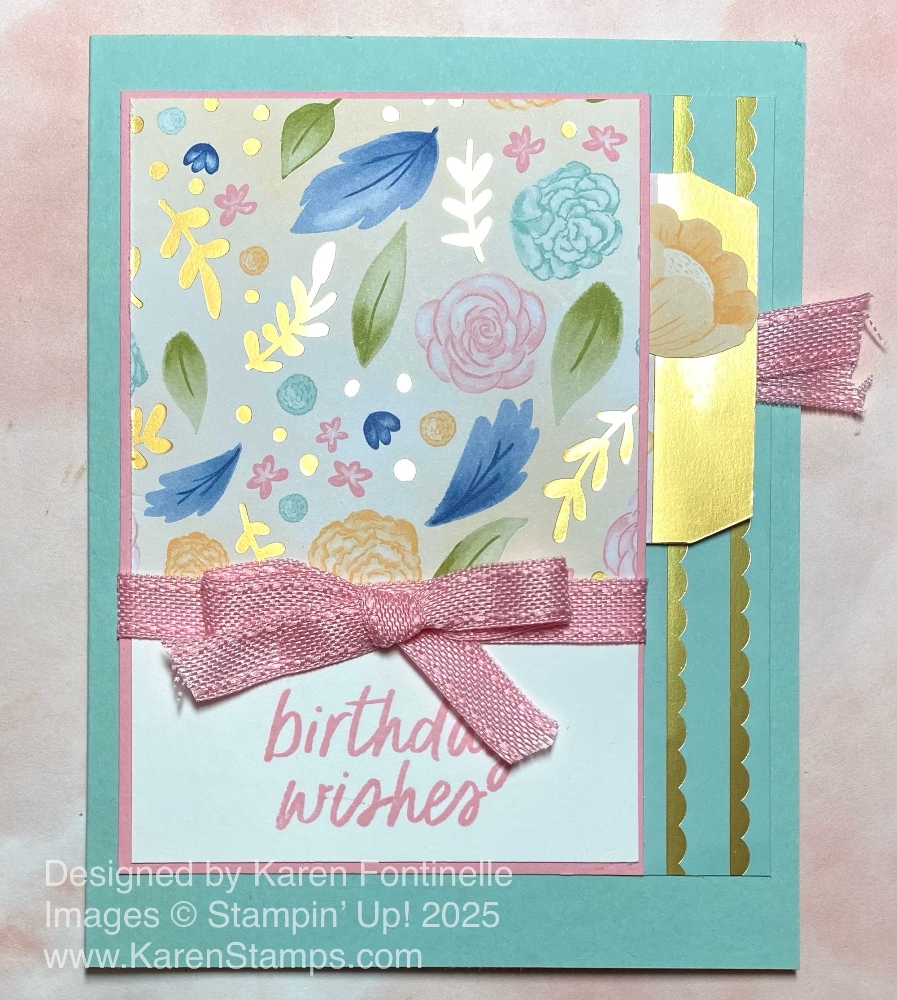
Wildflower Birthday Hidden Tag Card

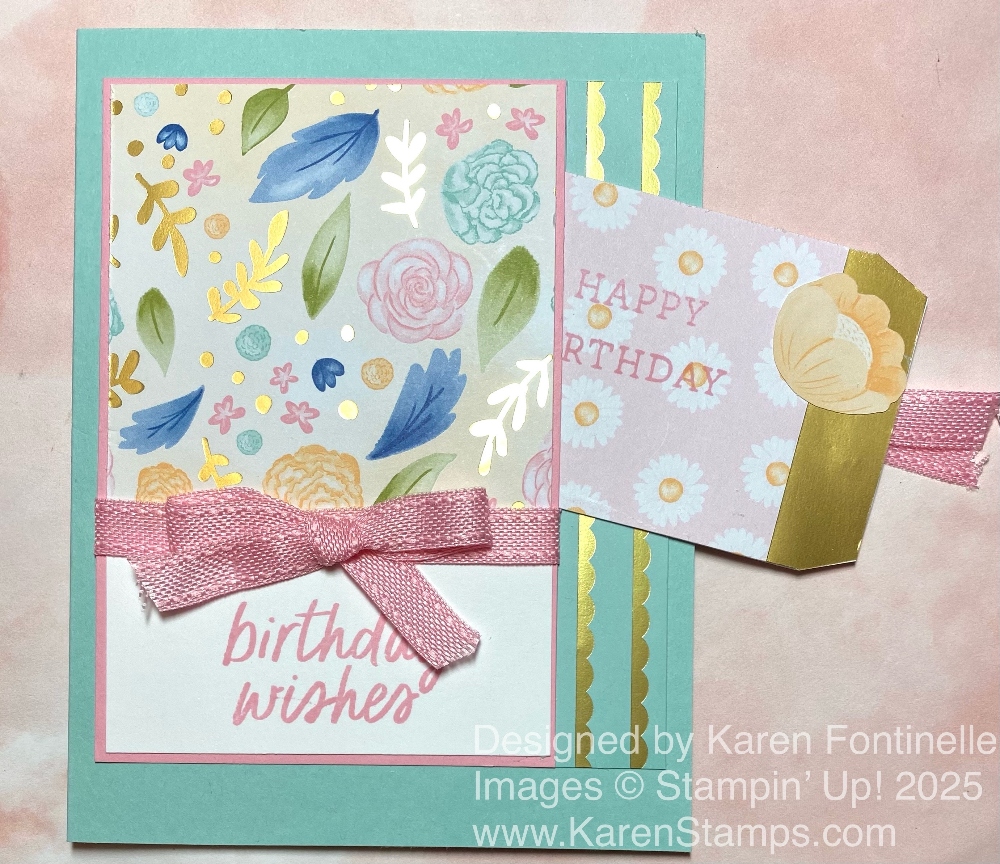
Wildflower Birthday Pull Out Tag Card

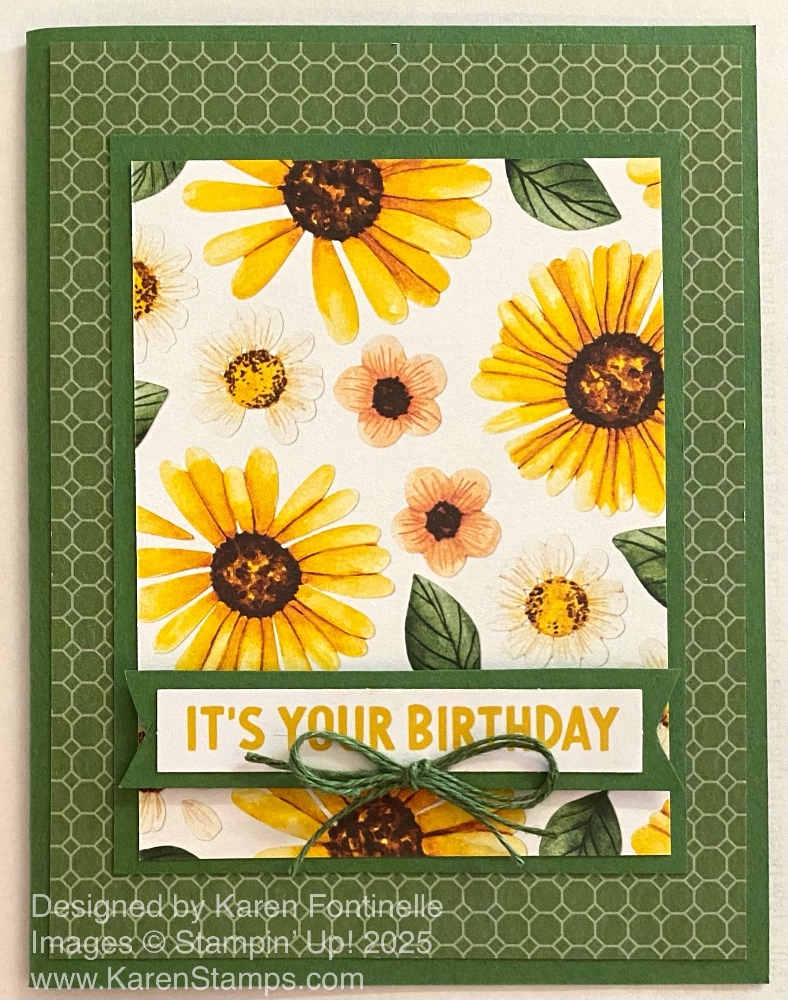
Last Saturday Stampin’ Up!® held a virtual event, Creativity Now, for Demonstrators to “attend”. I made this card, Wildflower Birthday Hidden Tag Card, in the same design as one of the cards but with paper I already had. They used a specific upcoming Suite, Peaceful Garden, to do their projects. This Suite will be one in the new September-December 2025 Mini Catalog (Holiday Mini). We could preorder that Suite or any of the products in the Suite to stamp along during Creativity Now, but I decided to wait and see what would be in the Mini Catalog. I did find I was more drawn to the Suite seeing it being used in making cards and one little box, and it’s not just for Christmas cards at all, but you could use it for holiday cards.

I mostly copied the Creativity Now design of this card that they made, but I used the Wildflower Birthday Specialty Designer Series Paper. I changed up the design a little bit from how Stampin’ Up! made their card but it is basically the same and easy to make.

The card base is Pool Party cardstock but other colors could have been used also. Stampin’ Up! just used the square of designer paper and the greeting block underneath on the card base, but I adhered them to a layer of Pretty In Pink cardstock first before adhering to the card. The Wildflower Birthday Designer Paper is cut at 3″ x 3″ and the Basic White block is 3″ x 1 1/4″. On this block, I stamped a sentiment in the Simply Said Stamp Set in Pretty In Pink ink. I measured the size of both of these blocks of paper together which was 4 1/2″ x 3″ and then cut the Pretty In Pink cardstock at 4 5/8″ x 3 1/8″ so there would be just a little margin around the edge. Before adhering to the card, I added a piece of Pretty In Pink Ribbon and bow around the seam of the DSP and the greeting.

Now I should have popped up that panel described above of the designer paper and greeting with Stampin’ Dimensionals to make it easier to slide the tag in and out from underneath, but I didn’t think of it in the moment! However, I did remember not to put glue on the right side where the tag would slide in and out, so it still works. Just not as easily. For the tag, I used one on the sheet of tags included in the Wildflower Birthday Specialty DSP and trimmed it down to fit better. I stamped the “Happy Birthday” greeting in Pretty In Pink ink from the same Simply Said Stamp Set on the tag. I decided to adhere it to a piece of Basic white cardstock to make it a little sturdier and then just trimmed off the excess white cardstock around the shape of the tag. To make sure the recipient would notice this tag should be pulled out, I added one of the diecut flowers across the gold top that is included in the DSP plus added a bit of Pretty In Pink Ribbon to the end of the tag. You could also write a message on the back of the tag if you wanted to.

To the side of this front panel with the Designer paper and the greeting is a strip of the designer paper. At the Creativity Now event, they used a small embossed piece and a piece of glimmer paper on that side. I decided to just use one strip of the coordinating designer paper instead. It is cut at 3/4″ x 4 5/8″. I think the gold scallops on the paper add a nice accent to that side of the card.

Wildflower Birthday Hidden Tag Card

This is a fun card design and you can make it with whatever paper and greetings you have for many occasions while you wait for the Peaceful Garden Suite Collection to come out in the next Mini Catalog in September! Maybe you will want that Suite or part of it. I always find it just as fun to watch others stamp and make pretty things as making them myself so I enjoyed Creativity Now even though I wasn’t stamping along with the new sneak peek Suite!

Remember, we are entering the LAST DAYS of the SUITE BOGO 50% OFF SALE so make your list and put in your order if you want to take advantage! Click on that link and scroll down to list the list of the many Suites we have that you can choose from. Read my blog post from yesterday to get more information.

SHOP STAMPIN’ UP! ONLINE HERE!

Full Of Life Slimline Hip Hip Hooray Card

Full Of Life Slimline Hip Hip Hooray Card

I knew I wanted to use the Full Of Life paper and this Full Of Life Slimline Hip Hip Hooray Card is what eventually turned out! I think this paper is so colorful and fun. You can use it for so many occasions, and if you want more subtle color, just turn over on the other side. I think this card could be for a birthday or a celebratory occasion such as a graduation. Maybe a good masculine card!

This is a slimline card for something different. The Full Of Life 6″ x 6″ Designer Series Paper worked well with that. The Basic White card base is cut at 6″ x 6″ and folded in half at 3″ to make the slimline design. I cut the paper with the little squares at five rows which is about 2 1/8″ wide. That was the section with colors of greens, blues, and purples. Just by chance, the “other side” of the scrap I cut off had a dark blue stripe which I liked against the many colors of the squares. I cut that in half so I could adhere about 1/4″ to the top and the bottom of the squares piece.

I wasn’t sure what greeting I wanted to put on this card, but I found the “Hip Hip Hooray” in the Saying Something Ephemera. While it doesn’t show up dramatically on the front of this card, I think it shows up well enough and gives the card an interesting look. I also added a few Iridescent Foil Gems to the empty space over on the left side.

Try out the Full Of Life Designer Paper and see what fun cards you can make with it!

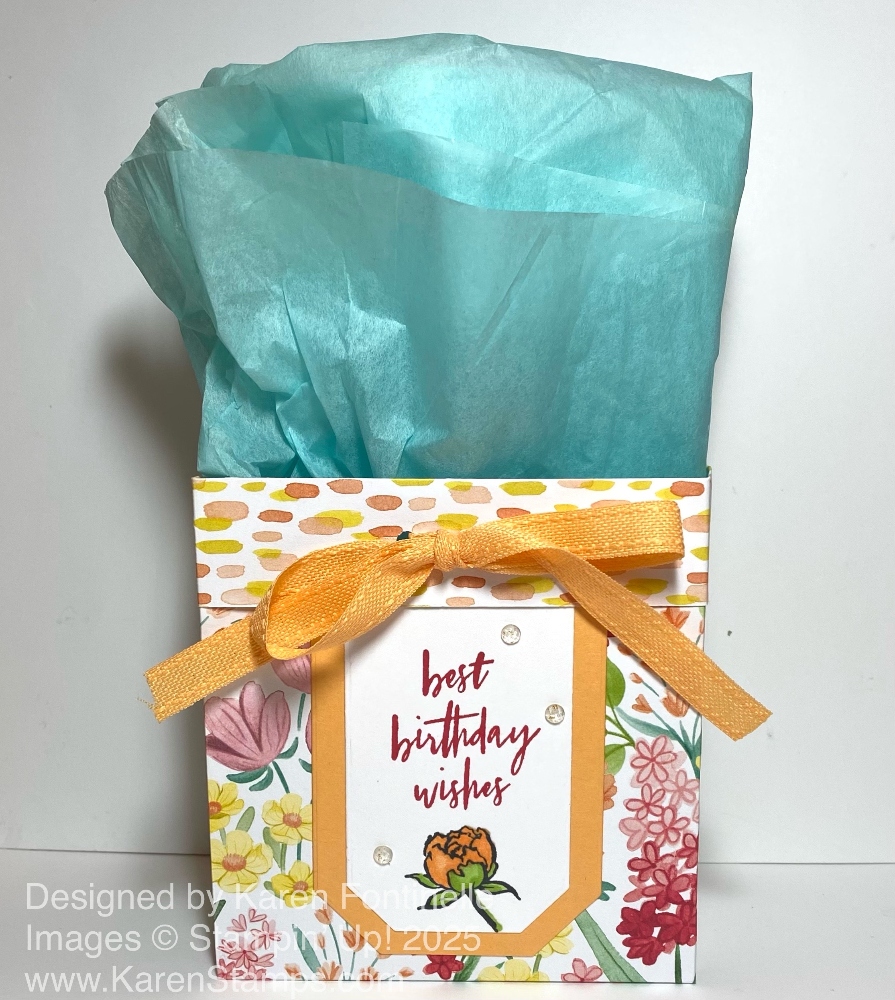
Florals In Bloom Birthday Gift Bag

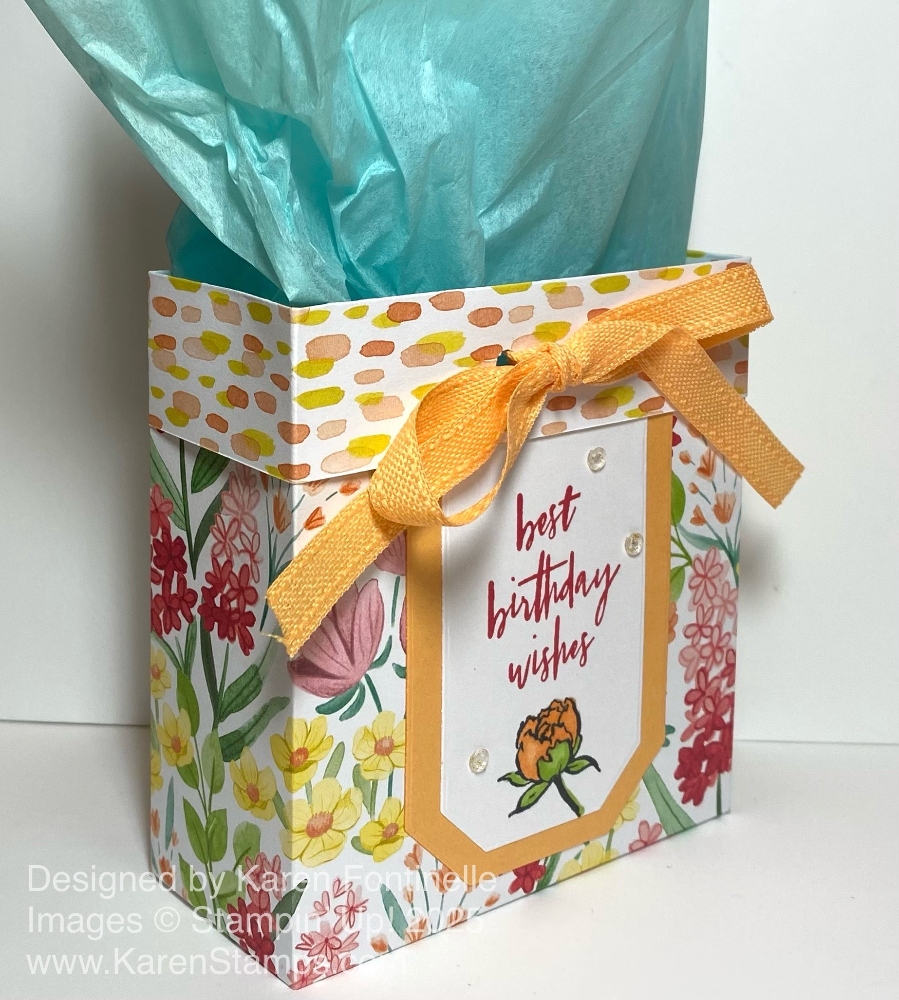
Florals In Bloom Birthday Gift Bag

And sometimes you forget to hit the “Publish” button after you write a blog post! It was supposed to be on my blog Friday, but I forgot to push the button! Anyway, here is this fun and easy gift bag you can make in no time!

It might be time to make a few gift bags to have on hand this time of year. You probably have graduations coming up or lots of summer birthdays, hostess gifts for parties, maybe even Father’s Day! You can make your own small gift bag in just a few minutes and decorate for the particular occasion.

This particular pattern of gift bag is made with just half a sheet of 12″ x 12″ sheet of paper, whether card stock or designer series paper. This finished gift bag is 4 1/4″ tall, 4″ wide, and 1 3/4″ deep. It is large enough for a small gift or maybe a gift card and a congratulatory card. You could put a cello bag with a few cookies or candies in there. So it is small but not tiny!

While you can cut the paper at 6″ x 12″, I made mine 7″ x 12″ so that I could fold the top edge down 1″ to show the other side of the paper for a little interest on the bag. Either way the rest of the measurements and scoring are the same.

For this bag, I used this floral pattern in the Florals In Bloom Designer Series Paper. You’ll find it in the Annual Catalog. It is part of the Florals In Bloom Suite Collection. Make sure any pattern on any paper is going in the direction you want it to go on your project when you cut your paper and when you score, depending on the project.

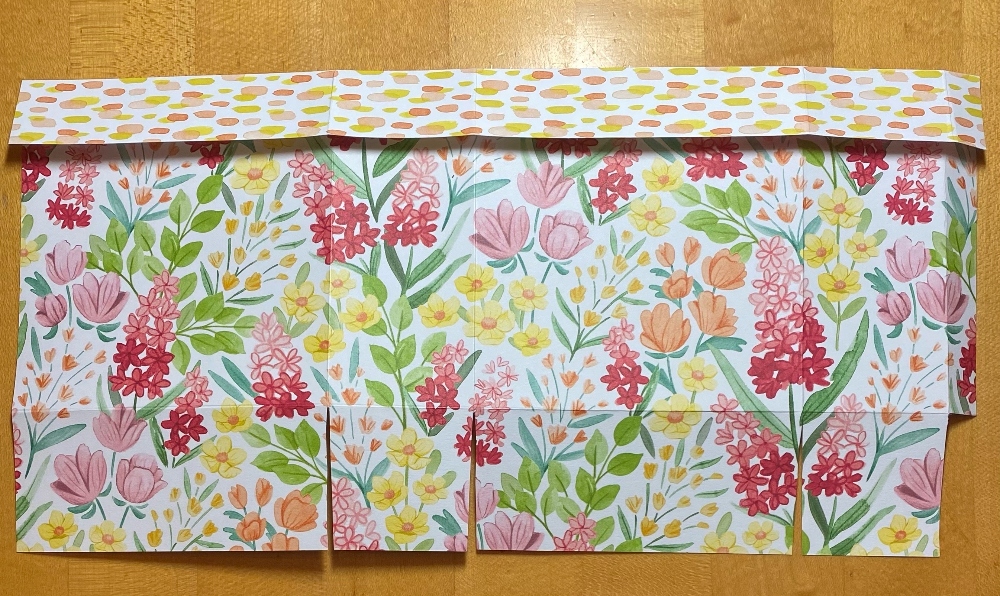
Start with a 6″ x 12″ piece of paper (or if you want to fold over the top make your paper 7″ x 12″). Score at 4″, 5 3/4″, 9 3/4″, and 11 1/2″. Turn the paper so the short edge is at the top and score at 1 3/4″. This will make the bottom flaps of the bag. Cut those short bottom tabs up to the 1 3/4″ score line. Cut off the little 1/2″ tab on the bottom.  Fold on all the score lines and crease well with the Bone Folder.  Adhere the tab on the end to the other side to assemble the bag.  Then adhere the flaps on the bottom. I used Multipurpose Liquid Glue for the ease of getting things lined up properly before it sticks together or you can use Tear & Tape Adhesive.

Florals In Bloom Gift Bag Scoring

Have fun decorating your bag! I folded over the top 1″ before assembling the bag. You can punch holes front and back to tie ribbon through in order to close the bag or just do it decoratively with a bow as I did. I stamped a Basic White Countryside Corners diecut (dies on the Last Chance list) with a greeting in the Poised Peony Stamp Set (retired). You can use whatever greeting you have. I layered this diecut on the next larger die in Peach Pie cardstock. The greeting is stamped in Strawberry Slush ink and the little peony is stamped in Memento ink and colored in with Peach Pie and Granny Apple Green Stampin’ Blends alcohol markers. I stuck this up underneath the folded over top edge and I think it fits just fine. It looks a little like a banner. I added a few of the new Strawberry Slush & Pretty In Pink Gems to the greeting for a little sparkle.

And that’s how easy making this basic gift bag is!

SHOP STAMPIN’ UP! ONLINE HERE!

Florals In Bloom Birthday Wishes Gift Bag

Sweet Jar Happy Birthday Card

Sweet Jar Happy Birthday Card

Create this card in May when you get the new Sweet Jar Bundle! You will find it in the Online Exclusives coming May 6th! Can you believe it will be May 6th next week already?! This is going to be fun set to be very creative with, I believe!

In the Sweet Jar Bundle, you get the Sweet Jar Stamp Set and the Sweet Jar Builder Punch. The Punch punches out the jar and the lid. You can stamp them first and then punch or just punch plain paper and jazz it up if you want.

For this slimline card, the card base is Peach Pie cardstock with a layer of a pinkish/peachish paper in the Full of Life 6″ x 6″ Designer Series Paper. One of the “other sides” of this very colorful pack of paper! Start with a 6″ x 6″ piece of cardstock, score at 3″ and you have a slimline card, as we call it. You can vary the measurements if you have a larger envelope that your card will fit in.

The jars are punched from Basic White cardstock and the candies inside are stamped on there. It’s easy to ink up the stamp to make all the candies the same color. If you want to make them different colors you have to use a Stampin’ Write Marker for each candy. Since my photopolymer stamp was new, it wasn’t working great with the marker on another card I made no matter what I tried. So this method is easier. You can even imagine these candies being something else in the jar. Use your imagination! I also took a Pool Party Stampin’ Blend marker and just lightly let the brush tip run along the edge, ON the edge, of the jar just to put a hint of color to make it look like a glass jar, with a few little highlight streaks. Hold the jar in your hand when you apply the ink to the edge so you’re not really drawing it on. You could probably use a gray marker as well. The lids I punched out of Gold Foil scraps. All three jars luckily fit on this slimline card with a couple of them tilted a little bit. It makes them fit and looks a little more fun! The greeting is in the set and is stamped in Peach Pie ink. I cut the ends to make a little banner out of it and made the strip narrow to fit on the card. Everything is glued down flat to the card. Not one to leave off some embellishment, I had to add three little Strawberry Slush & Pretty In Pink Gems, also coming in the Online Exclusives.

This Sweet Jar Bundle will also allow you to make shaker cards for fun! Start thinking of ideas of what you will want to make!

Storybook Moments Z-Fold Bunnies Card

Storybook Moments Z-Fold Bunnies Card

I think this Storybook Moments Z-Fold Bunnies Card turned out so sweet, not because I made it, but because the paper and the bunnies are just irresistible. I didn’t even add a greeting because this was not meant to be an Easter card (although it could be!) and I wasn’t sure for what occasion I would send it or to whom I would send it. And I could have no sentiment and just write a personal message inside.

This is a Z-Fold card which I think always looks special and yet is simple to make. It is just the front of the card folded back on a center score line. The only tricky part is adhering the center panel on the front, centered properly, so that if you have a stamped greeting on the inside, it is completely hidden from the front because of how you place it.

This card starts with a base of Boho Blue cardstock. Cut the usual card size, 8 1/2″ x 5 1/2″. Score at 2 1/8″ and 4 1/4″. Or score the card at 4 1/4″ as usual, then score the card front in half. Half of 4 1/4″ is 2 1/8″. Or just fold the card front in half lining it up with the card fold. Then decorate however you like.

I used the Storybook Moments Specialty Designer Series Paper for this card. I have liked this paper so much I have almost used all of it and that doesn’t usually happen! I just love the patterns with the strawberries and I got to use both on this card! One has a pinkish background and one has blue. My friend said she’d like to have the blue one for wallpaper! That would take a lot of packages of paper!

I adhered a piece of the pink strawberry pattern to the front panel. It is cut at 5 3/8″ x 2″. The main thing to think about is keeping margins the same wherever you place paper on the card. This measurement gave a teeny tiny margin around the edges. If you want the usual margin, then cut the designer paper a little narrower and shorter. But then so that with the inside layer and the strip on the right-hand edge of the card, IF you are doing those. The inside of my card has a Basic White piece cut at 4 1/8″ x 5 3/8″. I played and played trying to decide on the paper design for the edge of the card and finally the blue background strawberry pattern looked perfect.

The Basic White paper on the inside of the card (for a stamped or written message or note) looked too stark white against the other papers so I used a Small Blending Brush (or you could use a sponge) to apply just a very light shade of Crumb Cake ink just around the edges and even a bit in the center. Very light! It’s just enough to match the background of the paper with the bunnies instead of looking so white.

The focal point of the card uses the Storybook Moments DSP pattern with the larger images of bunnies in a variety of poses and actions. I used the largest circle die in the Stylish Shapes Dies because that was the size I needed to get every bit of the bunnies in the die. That left me with nothing larger for the layer. After looking through my dies, I chose the Memorable Blooms Dies (which were on the Last Chance List and now must be discontinued). The octagon shape fit the bunny diecut very well and the Old Olive cardstock helped it stand out from the background.

The strip on the side of the card is 1″ x 5 3/8″, again, matching the same length of the other papers and margins on the card. You can vary this size or not even add it. For a finishing touch, I added a small bow under the bunny piece. I haven’t gone through my ribbons in awhile so this one may be retired as well. It was a Granny Apple Green in a Ribbon Duo Combo Pack. Use whatever you have. Linen Thread would look perfect on this card as well. Another important tip is to only put glue or adhesive on the half of the focal point panel so that it only is sticky on the side going on the Z-Fold and not sticking to the inside of the card!

Here is a photo of the card opened up so you can see how the Z-Fold looks.

Storybook Moments Z-Fold Bunnies Card Open

As much as I like to add bling or sparkles, I felt this card was fine without anything else, just the bow!

Don’t forget about the Last Chance List! Some items are discounted but not all and once they are gone from there, they are gone. The Last Chance List of retiring products has now taken the place of the Clearance Rack. If a product in any retiring catalog is carrying over, if you don’t see it in the new catalog it is in the Online Exclusives category in the Online Store!

Also, remember that now you get Stampin’ Rewards in your account to spend on a future order any time you place an order of $20 or more in merchandise! In fact, I noticed that when you view a product in the Online Store, it will tell you what your rewards would be for that product!

SHOP STAMPIN’ UP ONLINE HERE!

Wildflower Birthday Cupcake Birthday Card

Wildflower Birthday Cupcake Birthday Card

Make this Wildflower Birthday Cupcake Birthday Card easily with the Wildflower Birthday Specialty Designer Series Paper in the Stampin’ Up! Spring Mini Catalog. It’s not “just” for birthdays (as you can see with the floral paper in the background) but you will have some fun options for making birthday cards or birthday scrapbook pages.

This card is made with a card base of Blueberry Bushel Cardstock. It coordinates with some of the flowers in the background paper. The pretty floral paper in the background has gold foil accents which makes almost anything look fancier!

The extra special feature of the Wildflower Birthday Designer Paper is that it comes with two sheets of diecut images. These are great to use on cards and scrapbook pages and make designing the project quick and easy, not to mention fun! For this card, I used three cupcake diecuts on these sheets on the front of the card. They are popped up on three layers of paper underneath to help them stand out. The green paper with white dots underneath the cupcakes is cut at 4″ x 1 1/2″ and is in the Wildflower Birthday DSP. The layer underneath that paper is Blueberry Bushel cardstock cut at 4 1/4″ x 1 3/4″. The layer underneath that is Gold Foil to match the gold foil accents and is cut at 4 1/2″ x 2″.

The greeting is stamped on a scrap strip of Basic White cardstock and layered on Gold Foil with the ends flagged like banners. I just cut these by hand. Just for a little extra embellishment on this card, I added some Shiny Sequins (retired) from the Flowering Zinnias Suite on the top of the cupcakes using the different colors. You can use anything sparkly that you have!

Since the card base is a dark color, add a Basic White layer inside the card on which to stamp or write a personal message. Make it extra nice with either a strip of the designer paper along the bottom and/or a diecut or two!

SHOP STAMPIN’ UP! ONLINE

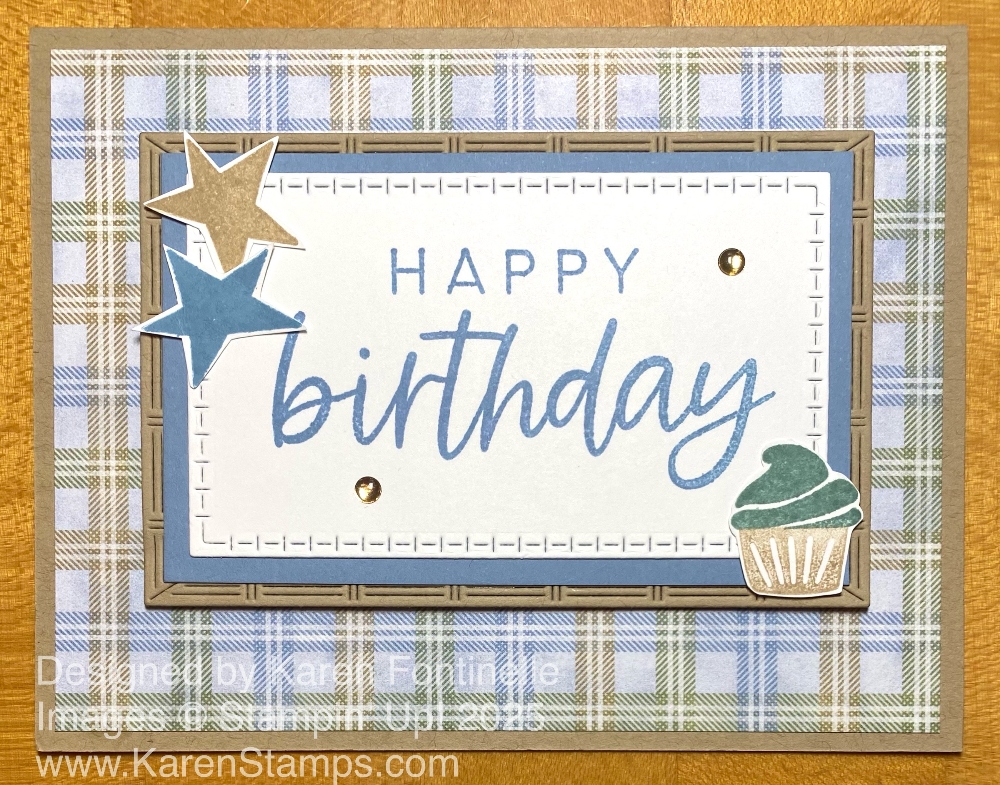
With You In Mind Masculine Birthday Card

With You In Mind Masculine Birthday Card

This With You In Mind Masculine Birthday Card uses some rather new products and a soon-to-be-new product! The plaid paper and the colors make it a great masculine card that we often have difficulty coming up with.

I wanted to use the Timeless Plaid 6″ x 6″ Designer Series Paper for a card and this is what I came up with. You’ll find it in the Stampin’ Up! Spring Mini Catalog. This plaid has brown and blues in it. I chose Crumb Cake cardstock for the card base and then the plaid designer paper.

The greeting is stamped in Boho Blue ink on Basic White with the With You In Mind Stamp Set. This stamp set is also in the Spring Mini. I really like this stamp set! It has rather large greetings in a fun font and are ones everyone will use, plus some small images like the stars and cupcake you see on this card. This greeting was then diecut using new dies “coming” on March 4th in the Online Exclusives! Demonstrators were able to preorder. These are the Textured Notes Dies. These are all rectangles with different diecut border designs. They will be very useful dies to use for layering or cutting frames to use. For this card I added an extra plain Boho Blue layer under the Basic White greeting, just cut with the Paper Trimmer, and then the whole greeting piece is layered on top of a Textured Note diecut piece of Crumb Cake. For this card I really liked the extra Boho Blue color layered under the white. I popped up the whole greeting with Stampin’ Dimensionals.

For some embellishments, I stamped two stars, one in Boho Blue ink and one in Crumb Cake ink, plus a cupcake. To stamp the cupcake, I inked up just the cupcake bottom with Crumb Cake ink, stamped that, then inked up just the frosting in Lost Lagoon ink, and stamped that right above the cupcake bottom. It happened to work out perfectly! You could also use Stampin’ Write markers to color both areas, breathe on the stamp, then stamp. It might turn out a little light but it would probably be fine. Then I just cut out the stars and cupcake with my Paper Snips. I felt like the card still needed a little sparkle or something so I added two gold dots in the Low Profile Dots. I really like these dots which are really “low profile” because they don’t add bumpy lumps to the envelope when mailing!

Although I labeled this card as masculine, it could be for anyone as is because the colors are so pretty together in the plaid, but you could change the plaid paper to other colors and brighten up the whole card a little bit. Be sure to check out these Textured Note Dies when they come out next week.

SHOP STAMPIN’ UP! ONLINE HERE!

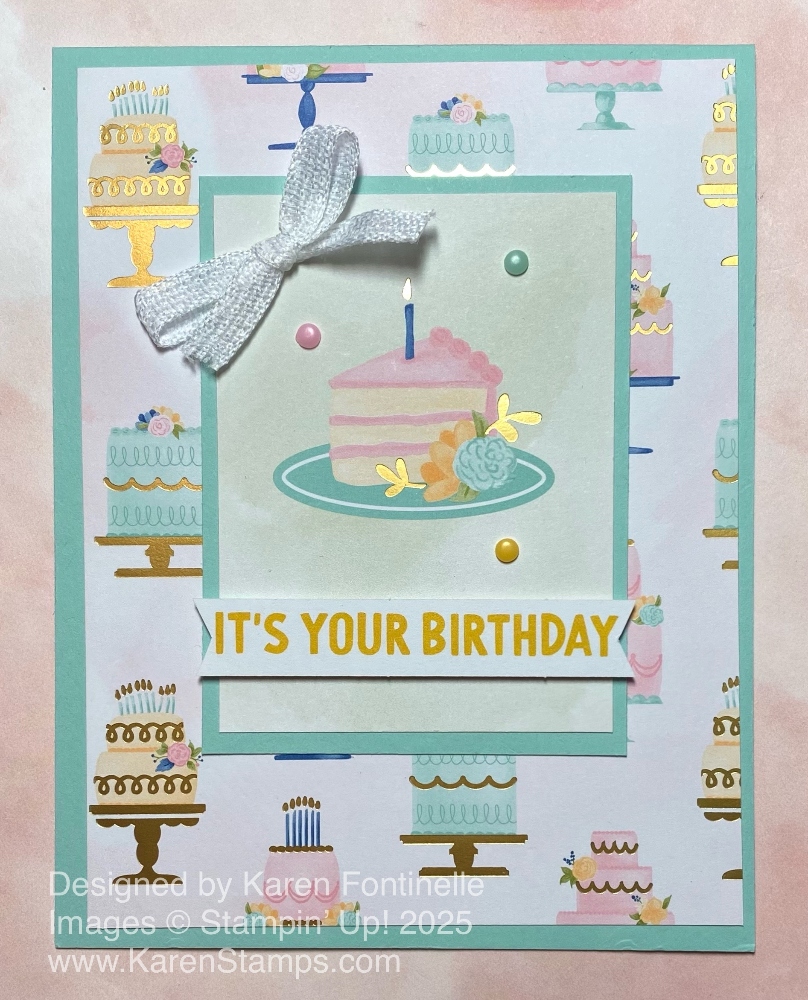
Wildflower Birthday Slice of Cake Card

Wildflower Birthday Slice of Cake Card

This Wildflower Birthday Slice of Cake Card is the first one I made with this package of paper and a couple other products. My order came the other day and I’ve been trying to organize some of my older (retired?) papers and my new ones. It’s a never-ending battle, right?! I think the products in this Wildflower Birthday Suite will make it real easy for you to make all the birthday cards and others that you can think of! So pretty, festive, and very “useable”.

The card base is Pool Party cardstock, one of the many pretty colors that go with this Suite. I chose one of the papers in the Wildflower Birthday Specialty Designer Series Paper for the background layer of this card. It was a tough choice to start because all the papers are so festive and pretty! I chose the one with lots of pretty small decorated cakes and it also has gold foil accents.

The center focal point of the card started as one of the tags on two of the sheets that can be cut apart. It had an Old Olive top edge on the tag, and although I started to work with that, I finally realized I just didn’t like it on this card but I wanted the cake slice, so I just got off the top Old Olive edge of the tag! Then I even trimmed it to be a little shorter. I layered it on a piece of Pool Party to match the card base and then I was happy. The cake slice piece is 3 1/4″ x 2 3/8″. The Pool Party layer is 3 1/2″ x 2 5/8″. I adhered that flat on the card but I almost popped it up. Instead I popped up the greeting, which I found in the Saying Something Ephemera Pack in the Annual Catalog. The color and size were fine, although I did snip off bits on the ends to make it look like a banner shape.

To embellish the card I added some Party Dots around the cake slice. I used all three colors of dots – Pretty in Pink, Pool Party, and Peach Pie – and they all go together with the cake image. The ribbon is new and coming in the next Online Exclusives in March. It is the White 1/4″ Ribbon.

This is a pretty simple card yet the birthday-themed paper with the pretty cakes and gold foil on each one make it stunning. Also included in the Wildflower Birthday Specialty Designer Paper are two sheets of diecuts which will be fun to use on cards, scrapbook pages, and other projects. You will find this Wildflower Birthday Suite Collection in the Spring Mini Catalog. Get it all or choose which products you want the most!

SHOP STAMPIN’ UP! HERE!

New Year! New Products Galore at Stampin’ Up! Today!

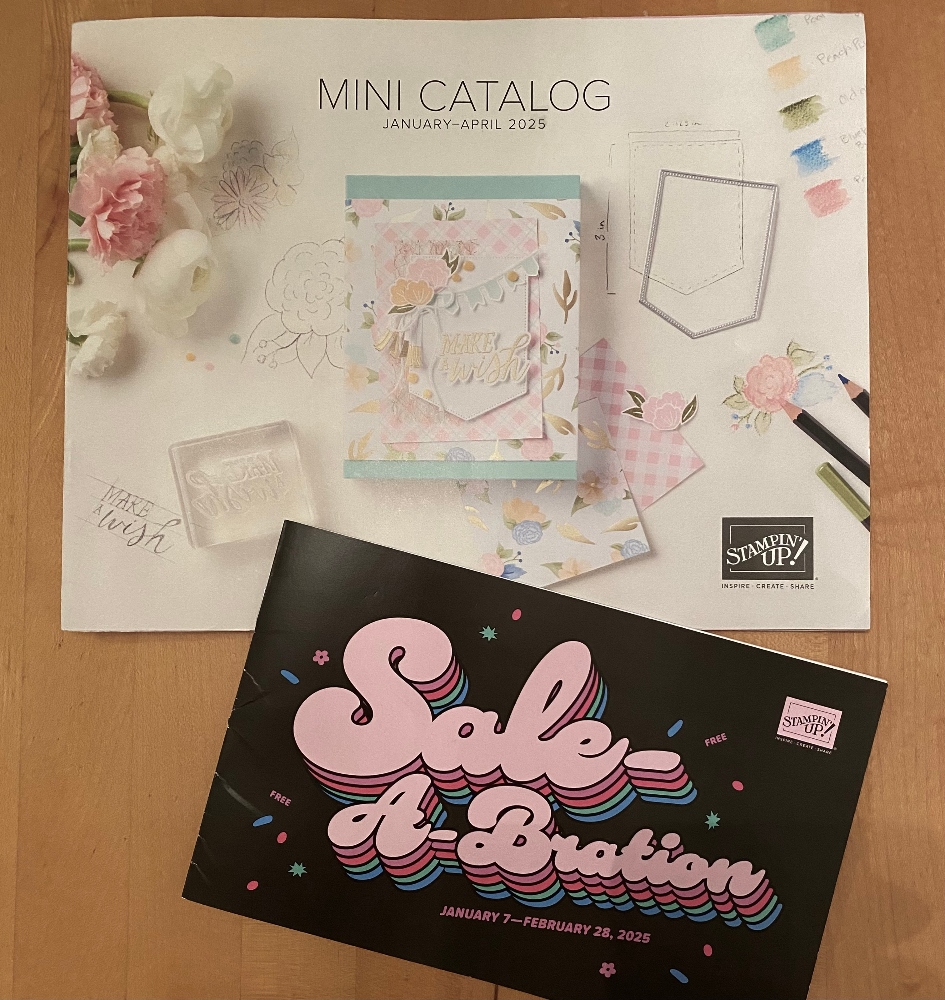
Spring Mini 2025 and Sale A Bration Catalogs

New Stampin’ Up! Spring Mini Catalog Is LIVE TODAY….

Plus It is Sale-A-Bration Time!….And More!

Today is like Christmas or your birthday at Stampin’ Up! So many new things! And what do we stampers like better than NEW PRODUCTS! Not only do we have the new January-April 2025 Mini Catalog (I like to call it the Spring Mini for short!) but Sale-A-Bration has started! Sale-A-Bration is a big promotion Stampin’ Up! has held “forever” almost and we love it because we get to earn FREE products from the Sale-A-Bration brochure with every $60 purchase (before shipping and tax, of course).

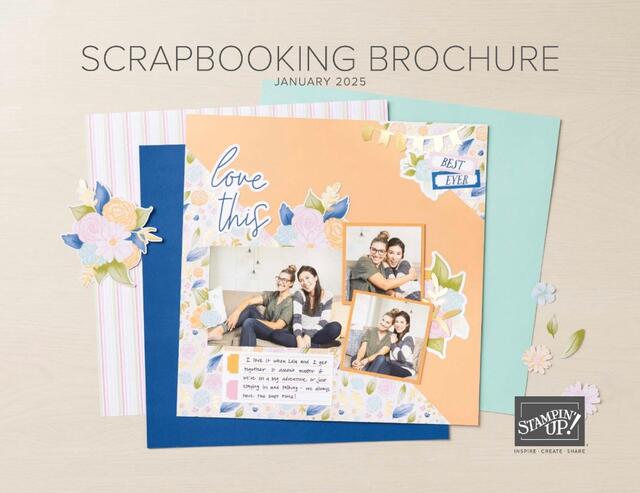
Scrapbooking Brochure Jan 2025

New Scrapbooking Brochure for January 2025!

This Scrapbooking Brochure for January 2025 incorporates new scrapbooking products available without waiting for a new catalog! You will have to scroll through the brochure online to take in all the new products available! Read the description of each. You’ll find 12″ x 12″ cardstock, designer series paper, sticker sheets and diecut images, and more! This is great for starting your New Year getting into Memory Keeping that we all just put off!

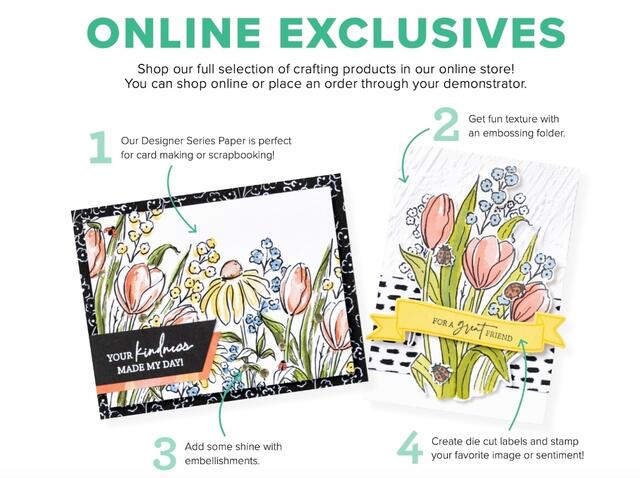
SU Online Exclusives January 2025 Partial Flyer

New Online Exclusives For January!

Check out this Flyer of new Online Exclusives for January!

SHOP HERE for ALL the Online Exclusives! Remember, these are available as long as supplies last and as long as Stampin’ Up! can restock anything that sells out.

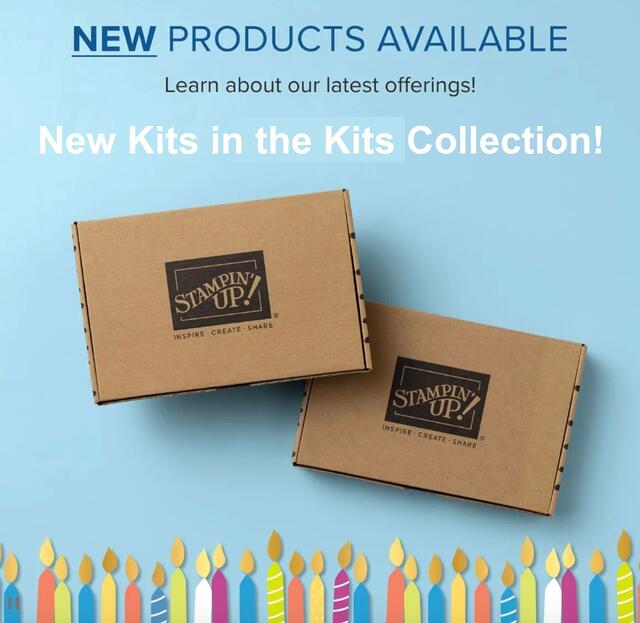
Kits Collection New Products Jan 2025

There are 3 new Kits released today in the Stampin’ Up! Kits Collection!!

The Stampin’ Up! Kits Collection makes it easy for ANYONE to craft and make beautiful creations! Each Kit contains all the supplies you will need except maybe a scissors, if that! Follow the directions for the project OR change it up however you like! There will be information in the instructions of where to go for more help with the kit, if you need it.

Brightest Birthday Kit

Thank You Kindly Kit

Birthday Bash Kit

Just check out the Stampin’ Up! website, click all around, and you’ll get caught up with all the new products! I know after the Christmas holidays it is difficult for me to take in all the new information but I hope this post and links will be helpful to get you started! Remember, anything you REALLY want, be sure to order early just in case certain things sell out quickly. You never know what the most popular things will be!

SHOP STAMPIN’ UP! ONLINE HERE!

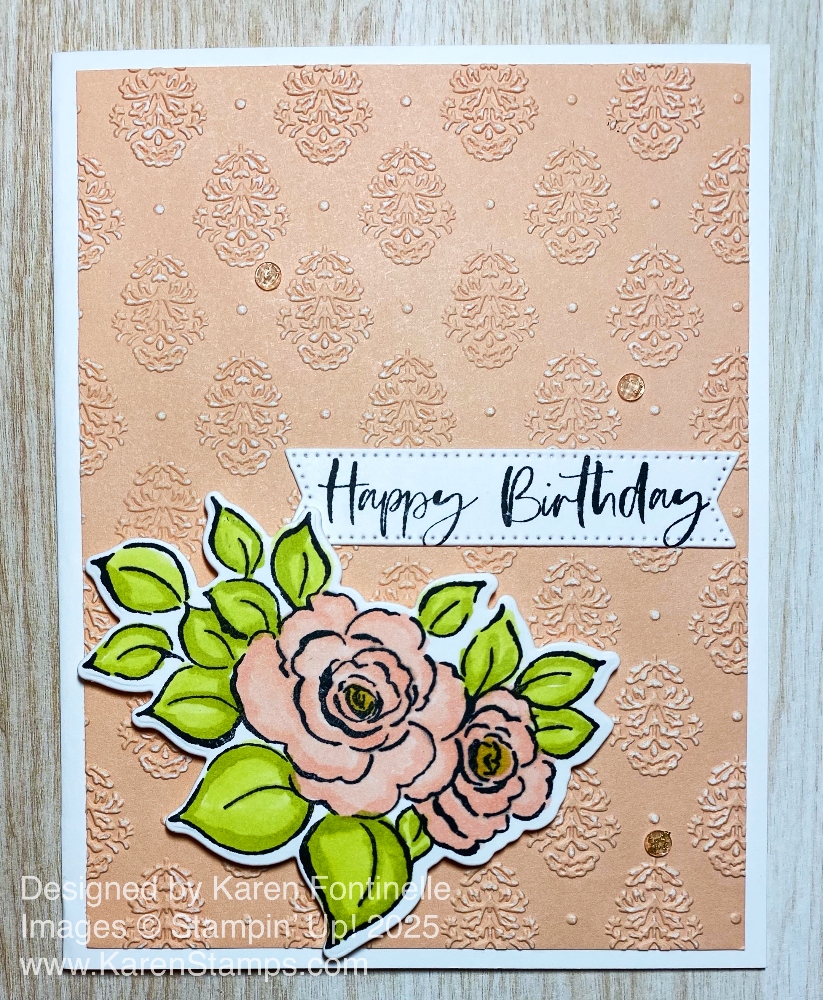
With You In Mind Birthday Card

With You In Mind Birthday Card

Now that the Christmas holidays are over, we are getting real close to the new year. That brings thoughts of getting organized and getting birthday cards ready like this With You In Mind Birthday Card. Especially if you have birthdays coming up in January after the busy-ness of the holidays, you need to get on the ball and get cards ready to send right away in the New Year!

This With You In Mind Stamp Set is one that is coming January 7th in the new Spring Mini Catalog (officially known as the January – April 2025 Mini Catalog). This stamp set appealed to me because it has four all-occasion greetings with one of the words in a rather large font. You get “Thinking of You”, “Happy Birthday”, “Best Wishes”, and “Thank You” plus a small flower, star, heart, cupcake, and leafy sprig.

To try to get back into create mode after being very busy with Christmas and children home, I started off making up a card beginning with copying a sample from the new mini catalog. I thought the “Happy Birthday” tag with cupcakes was pretty cute and could be made into a card. To choose colors for the card, I tried out the Color Coach. I’m not a real expert using the Color wheel but I decided to choose three colors next to each other on the wheel. I chose Pool Party, Balmy Blue, and Azure Afternoon. I really wasn’t sure how that combination was going to work, but I think it did!

The card base is Basic White and on top of that I used two of the cardstock colors I mentioned above. I used two panels of Pool Party with a panel of Balmy Blue in the middle. These are cut at 1 3/4″ x 4″. I adhered them right next to each other with no space in between. After I adhered them to the Basic White card base, I stamped stars around the background using the star in the stamp set with Versamark ink to give it that light, watermarked image.

As I said, the tag in the middle of the card is like the sample in the mini catalog. It is a piece of Basic White cardstock cut at 2 1/4″ x 4 1/2″. The greeting is stamped in Azure Afternoon ink ( one of the three colors next to each other on the Color Wheel). The three cupcakes are stamped with Daffodil Delight ink for the frosting and Pool Party ink for the cupcake holder. I inked up just the frosting top portion with the ink pad and stamped that three times for the three cupcakes. Then I went back and inked up just the bottom portion of the cupcake and stamped it underneath the frosting. This worked better than using Stampin’ Write Markers because these stamps were brand-new and not cooperating with trying to color on with a marker. The ink pads worked much better.

The end of the greeting was cut in a flagged end and a small 2 1/4″ x 1″ piece of Azure Afternoon card stock was adhered to the left side of the tag. I had also stamped it with a few Versamark stars. I tied around some Balmy Blue twine in the Baker’s Twine Three Color Pack and made the strands spread out just for a fun look. Then I took three pieces of the same twine and tied a knot in the center. The whole greeting was then popped up with Stampin’ Dimensionals.

This is an easy card to make! The only thing that took time for me was deciding the best way to do the cupcakes and what colors to make them. I love the new stamped greeting and love seeing something big but not huge. The greetings in this With You In Mind Stamp Set will get a lot of use!

Remember, Sale-A-Bration also begins on January 7, 2025 and runs through February 28 during which time when you make a qualifying purchase, you get to choose a product from the special Sale-A-Bration brochure for FREE! This year the qualifying amount is $60 in product (before tax and shipping).The products include stamp sets, designer series paper, embellishments, an embossing folder, and more. And if you choose to join Stampin’ Up! and become a Demonstrator, with your purchase of the Starter Kit (stamping products you choose yourself plus business supplies to get your business started), you can either choose from certain free items or an additional amount to add to your Starter Kit. It’s all in the last pages in the Sale-A-Bration brochure!

It all begins a week from tomorrow!!

So Much New At Stampin’ Up! Today!

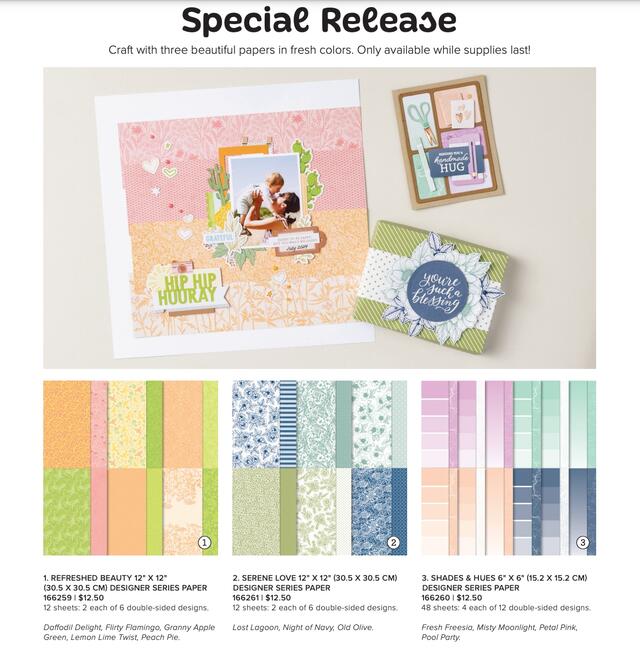
DSP Special Release Recolored

Stampin’ Up! has taken these designer series papers we have had previously and changed the colors to fresher, updated ones! You will find these papers in the Online Exclusives category and are available while supplies last!

Refreshed Beauty (#166259) is the previous Blackberry Beauty DSP. This paper is 12″ x 12″.

Serene Love (#166261) is the previous True Love DSP. This paper is 12″ x 12″.

Shades & Hues (#166260) is the previous Color Theory DSP. This paper is 6″ x 6″.

Watch this video to see the papers a little closer:

NEW LAST CHANCE LIST

Last Chance Products Ad1

This is a new way to present the retiring products from catalogs, which beginning today are products in the September – December 2024 Mini Catalog (or Holiday Mini Catalog as we know it!). But from now on, this list will contain any retiring products from any catalogs and from Online Exclusives and Kits in the Kits Collection. (This does not include Paper Pumpkin kits.). Some products will be discounted and product discounts may change over time. This will take the place of the Clearance Rack.

The good thing is that everything is in one place and instead of, for example, a stamp set retiring from the Holiday Mini Catalog, will not go away at the end of the catalog, but instead will be in the Last Chance list for however long, until it sells out and is then discontinued. So you will have access to all those products “while supplies last” once they are on the Last Chance list. You can sort for “Discount Applied” in the Online Store for the Last Chance List if you want to see the sale items without scrolling through everything.

What this means is that the “retirement list” for the Holiday Mini is out today but it is in the Last Chance category and those products will remain there until they sell out, whether one day or whether two months. Go check it out!

NEW KITS IN THE KITS COLLECTION!

There are new Kits in the Kits Collection today!

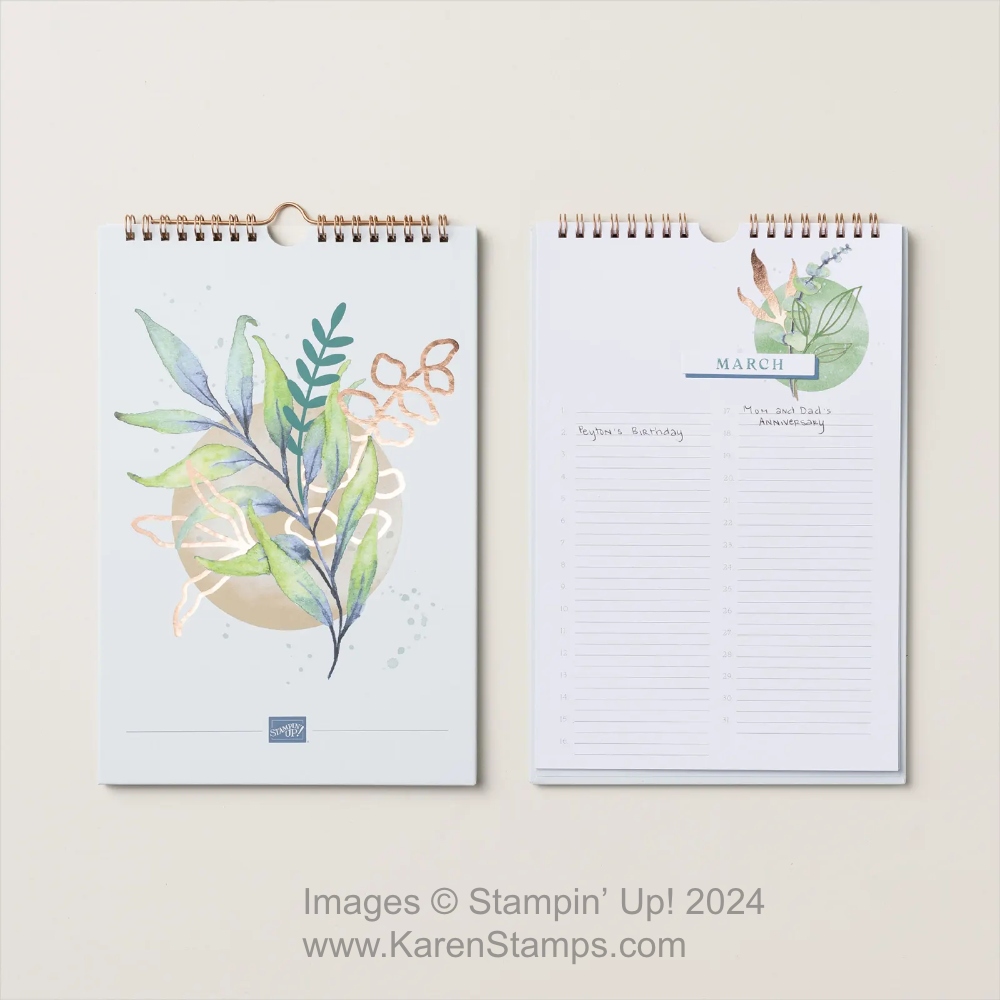
You will want the Perpetual Beauty Calendar Kit here at the beginning of the New Year to have your list of birthdays and anniversaries and other occasions all in one list for each month!

Perpetual Calendar Kit

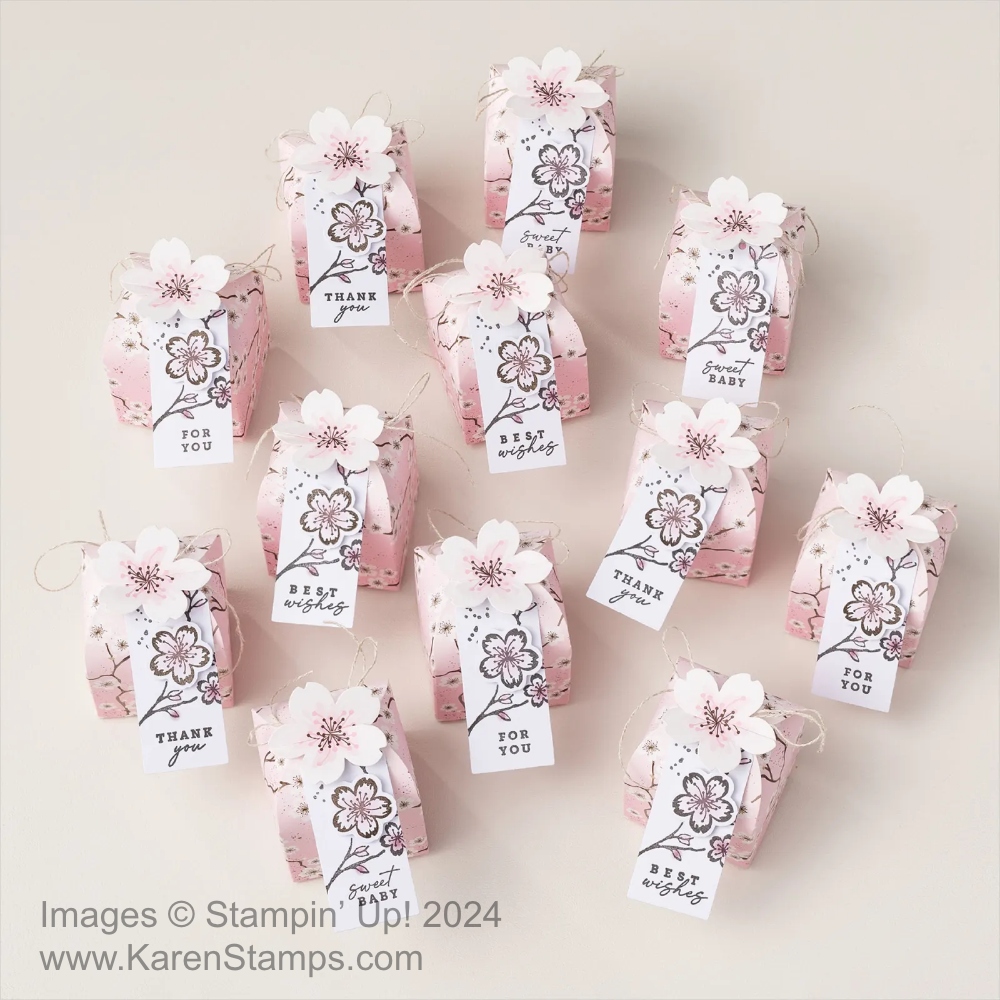
The Cherry Blossom Treat Boxes Kit will make beautiful favors for parties, showers, weddings, or birthdays, even just small gift boxes. The boxes are already printed, you just need to assemble and stamp the greeting on the tag.

Cherry Blossom Treat Box Kit Assembled

That’s a lot for one day! There might even be more that I missed but it’s time to get this post out!

Check out the LAST CHANCE LIST right away!

Meandering Meadows Happy Birthday Card

Meandering Meadows Happy Birthday Card

This is the Meandering Meadows Happy Birthday Card which I made for my son, in kind of a hurry since it became really a “belated” birthday card! At least I mailed it on his birthday, I think! I actually did make this card for him because he loves to go hiking in the mountains where he lives. I thought this beautiful scene on this designer paper looked like a trail he might find when he goes hiking. Maybe it looks more like a trail I would like since it looks flat and there are no drop-offs on the side!

This card has a Basic White cardstock card base with a little wider than usual margin before we get to the card layers. Your layer colors will be determined by which of the papers you choose from the Meandering Meadows 6″ x 6″ Designer Series Paper. I don’t have the card in front of me as I write this, but I believe for this pattern I chose Shaded Spruce and Lemon Lime Twist cardstock for the layers. I almost always play around with a couple different colors as I work on a card to see which ones look best together on the card.

The greeting is stamped with two different stamps in the Choose Happy Stamp Set. You can make up many different greetings with this set. It also has a lot of cute little images that might be fun to use in your cardmaking and other projects. It is diecut with one of the small banner dies in the Stylish Shapes Dies. I cut off the left side of the banner, lined it up with the edge of the designer paper, and adhered a bow made with a double layer of the Garden Green Natural Tones Linen Thread. You get three colors in this pack of this linen thread!

And if you want to decorate the inside, this is what I added to the inside of this card:

Meandering Meadows Happy Birthday Card Inside

That’s how easy this card is because you just have to let the Meandering Meadows Designer Series Paper show off its beauty! Add a greeting and maybe an embellishment and you have a beautiful card.

SHOP STAMPIN’ UP! ONLINE HERE!

Unbounded Beauty Split Birthday Card

Unbounded Beauty Split Birthday Card

This is one of the quickest cards I have made lately! I had the card idea in my head from one I saw online so all I had to do was choose paper and make it! I didn’t even stop to find another card like it to see how to make it. I just had to get it done and out came this Unbounded Beauty Split Birthday Card! I don’t even know what this card design would be called, but that’s what I am calling it.

The card base is Petunia Pop, one of the new In Colors. It coordinates with the pretty Unbounded Beauty Designer Series Paper. The patterns you see on this card are the two colors on one sheet of paper. I guess my geometry skills were lacking because I thought I would just cut this 5 1/4″ x 4″ piece of designer in half diagonally and flip one piece over to show the other side. But that didn’t work! so I cut another piece from the same designer paper at 4″ x 5 1/4″, cut it on my Paper Trimmer diagonally, but this time I cut it from the opposite top corner of the paper than I did the first time. Here is a photo of how to lay your paper on the Paper Trimmer:

Unbounded Beauty Cutting

When I swapped out one of the halves from each piece of paper, then they lined up properly! You could even have another layer on the card base and adhere the designer paper to that, but I put mine right on the card. Also, you can have the space in between the two pieces or you can push them together. I liked having that diagonal line going through the middle.

For the greeting, I diecut two circles with the Deckled Circles Dies in the Online Exclusives. One is Basic White cardstock and the larger one is Summer Splash cardstock. At first, I was going to use Petunia Pop cardstock, but I liked using the Summer Splash better for a little more color. I stamped the greeting on the Basic White circle in Summer Splash ink. The stamp is in the Unbounded Love Stamp Set. The birthday greeting seemed like just the right size for the look of this card. After stamping, I adhered the white circle layered on the Summer Splash circle.

I had even forgotten I had the ribbon in the new In Colors, so when I saw I had those, I used the Summer Splash 3/8″ Bordered Ribbon. The texture and feel of this ribbon is really nice! I applied Stampin’ Seal adhesive on the back of the Summer Splash circle and applied the ribbon back and forth behind that piece. When I popped up that greeting with Stampin’ Dimensionals, those Dimensionals helped hold the ribbon in place even more.

And why not apply a few embellishments to this card for a little more pizzazz? I used the 2024-2025 In Color Resin Dots for a little bling on the greeting in Pretty in Pink, Petunia Pop and Summer Splash to represent all the colors on this designer paper.

I just realized this is the first day of August and I made a birthday card….and it’s my birthday month! I didn’t even have that in my head! I was probably thinking of a friend whose birthday is the day after mine so I could send her this card. And there probably are other August birthdays I will need cards for!

Remember, now you can redeem your Bonus Days coupon codes!

SHOP STAMPIN’ UP! ONLINE HERE!

Have You Seen the Circus Celebration Kit in the Kits Collection?

Circus Celebration Kit

If you or someone you know loves the circus, this Circus Celebration Kit in the Stampin’ Up! Kits Collection is the kit for you or them! I think this is one of the cutest circus themes I have seen! What child (or adult!) could not be super-excited to receive this card in the mail for their birthday or whatever occasion you want it to be? Years ago Stampin’ Up! sold circus-themed designer series paper, maybe a stamp set, that was very cute. I remember my daughter being home for a visit and made a scrapbook page for a friend with the paper. We no longer have that, but now you can purchase this Circus Celebration Kit and think about circus days while you make the cards!

Make magical birthday cards with the Circus Celebrations Kit! This DIY card-making kit has all the pieces you need to create four birthday cards in two circus-themed designs with adorable animals doing tricks for your audience. The playful designs are perfect to celebrate birthdays for all ages. This stamp-free kit makes it even easier to craft than most, so it’s great for beginners!

Kit includes:
* Predesigned projects
* Step-by-step instructions
* Precut pieces (No prep work! Get right to crafting)
* Makes 8 cards: 4 each of 2 designs
* Folded card size: 5-1/2″ x 4-1/4″
* 8 preprinted envelopes
* Enough adhesive to complete projects
* Printed die cuts
* A 9-7/8″ x 6-1/2″ x 2-3/4″ printed designer box for storage or crafting on the go

Product colors: Copper Clay, Crushed Curry, Granny Apple Green, Night of Navy, Poppy Parade

Circus Celebration Kit Supplies

If you need some cards for children or want some easy-to-make cards that children would be able to make with you, this is really a cute kit for any of those reasons! No stamping involved, so just punch out the diecut pieces and design your cards. If you want to make something else besides cards, the supplies are yours to do with what you want!

Check out the other Kits in the Stampin’ Up! Kits Collection HERE!

Zoo Crew Musical Birthday Card

Zoo Crew Musical Birthday Card

As I looked for a card idea to make with a stamp set that was retiring from the Stampin’ Up! Annual Catalog, I had a difficult time finding a set I had that wasn’t already sold out! This is the one I came up with and made this fun Zoo Crew Musical Birthday Card with this retiring designer series paper that I love! I wish this whole stamp set, dies, and designer series paper were sticking around another year! These little animals, doing various things from camping to crafting to playing instruments are just so cute and fun! It may be Tax Day, but these little guys will put a smile on your face!

For this card, I started with the Zoo Crew Designer Series Paper in the Zoo Crew Suite Collection. It was tough deciding which characters to use, but I decided on the musical guys. I used my Paper Trimmer to cut out each animal without getting too much other background. You could use a punch or rectangle die or whatever you like but I find just using the Paper Trimmer to be the easiest. Then I layered each animal on colored cardstock and then onto a narrow piece of black. You could do just one layer. I won’t put all the exact measurements because your cut-out animal might be a different size than mine.

The frog was already colored in, but I did decide to color in the bear and the first animal, whatever he is. Maybe he is a wild boar. I used Stampin’ Blends. Their instruments were already colored, I just colored the animal body. You could use Watercolor Pencils or some ink and a Blender Pen or even leave them blank. I didn’t think about how they weren’t colored at first.

The card base is Basic Black with a layer of Lemon Lime Twist. The background designer paper is in the Zoo Crew paper. You could choose from several different patterns.

Fitting these three musicians on the card was a little tricky, but I finally was satisfied with how I have them placed. I decided to pop all three of them up with Stampin’ Dimensionals. Where the corners overlapped, I did not put a Dimensional.

For the greeting, I chose one in the Zany Zoo Stamp Set and stamped it on a scrap strip of Basic White. I have a lot of these scrap strips of cardstock, and they are often handy for a narrow greeting. Rather than making banner ends on my greeting, I added some Iridescent Adhesive-Backed Discs to each end. These are great because they are flat and didn’t add any more bulkiness to the card.

As I am writing this, you can still get the retiring Zany Crew Suite Collection or the individual products in the Stampin’ Up! Online Store! Let me know if you have any questions about what is available or not available during this Last Chance retirement time!

SHOP STAMPIN’ UP! ONLINE HERE!