
Tag Archives: Artisan Sketched Garden Designer Series Paper

Artisan Sketched Garden Floral Birthday Card

Artisan Sketched Garden Floral Birthday Card

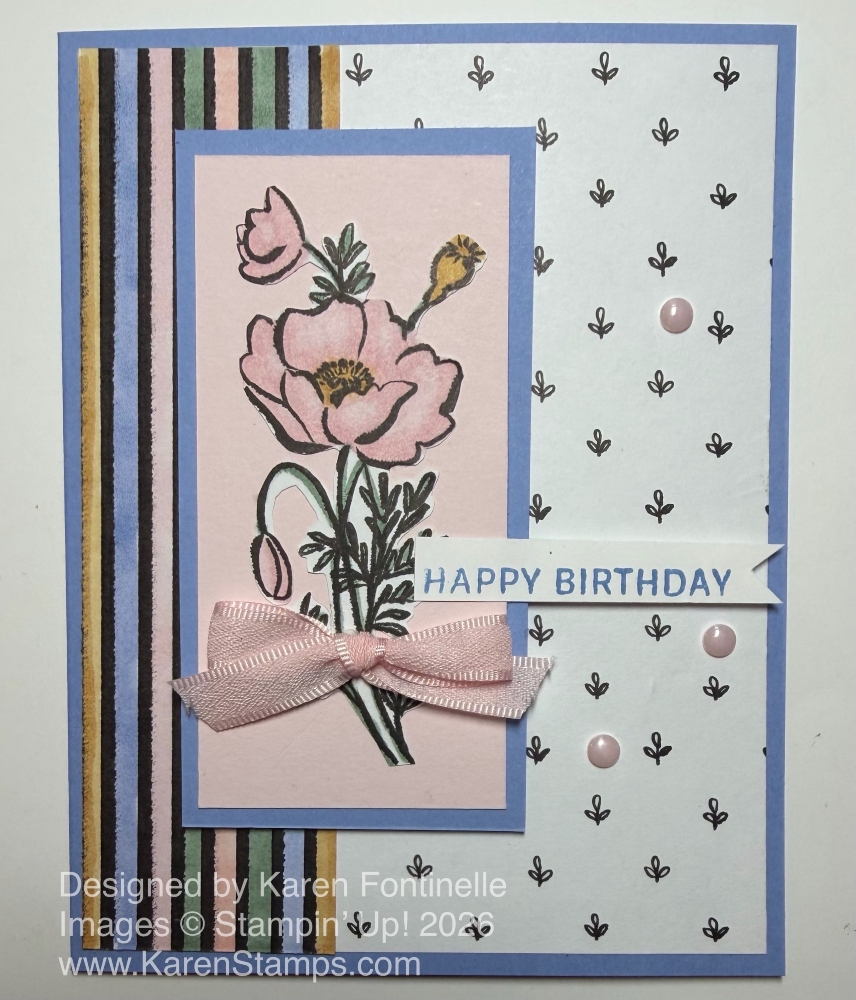
This Artisan Sketched Garden Floral Birthday Card is one I put a birthday greeting on, but could be made for many other occasions. I was inspired to make this card by one I saw on a Stampin’ Up! post SOMEWHERE! It doesn’t look like I “saved” it anywhere. I probably thought I was positive I could easily find it again, but I could not! Have you ever done that?! Liked a card, wanted to copy it, and then couldn’t find it anywhere! What intrigued me about that card was the colored striped piece placed somewhere on the card, I don’t remember where. Rather than keep feeling frustrated, I went ahead and made my own card with the Artisan Sketched Garden Designer Series Paper. This is the pack of all black & white paper, floral images of all kinds, as well as more generic patterns.

I wouldn’t have thought of coloring in between the lines of the black and white striped paper in the package! That’s what I love about stamping and seeing everyone’s ideas. There is always something new and something I never thought of. I cut a piece of the stripes at 5 1/4″ x 1 1/2″ and colored in with all the new 2026-2028 In Color Stampin’ Blends alcohol markers. If you click on that link and sort for “Newest” the new In Colors will come up. But you could use any colors you like.

The card base is Hydrangea Hue. The background layer of paper, I thought, was plain enough but cute to go with the flower. I don’t know if those tiny images are foliage or flowers, but it makes a cute design. The flower is printed on one of the designer papers. They are all pretty close together, so it’s not easy to cut one out with the Paper Trimmer, so I just roughly cut around it, near the bottom of the sheet, to get it separated from the paper. I colored the flower with Barely Blush using the Stampin’ Blend Combo. This is a VERY light pink, so I put on a couple layers of light and dark Barely Blush. The little seed pod is colored in Golden Glow, and the leaves are Peaceful Pine green. After coloring the flower, I fussy cut it with my Paper Snips. If you need new scissors, new ones are coming soon!

I adhered the flower to a panel of Barely Blush cardstock cut at 3 3/4″ x 1 3/4″. It looked fine just that way, but I decided to add a layer of Hydrangea Hue cardstock to go with the card base. It is 4″ x 2″. This whole panel is popped up with Stampin’ Dimensionals.

You might think Stampin’ Up! Demonstrators are very skilled and creative at all times, but that is not true! I was trying to get some glue out of this nearly empty small bottle I use for intricate areas I need to glue, but it was clogged. Next, I turned to my close-to-empty bottle of Multipurpose Liquid Glue (what I put in the little white bottle), but it was clogged up too. After trying to unclog the tip, I wisely thought to see if any would come out on a piece of scrap paper. Well, it certainly did come out in a big blob of glue! So I used the green bottle to pick up little bits of glue from that puddle and dab it on to the fussy-cut flower very carefully. There are other ways I could have done it, but this worked ok.
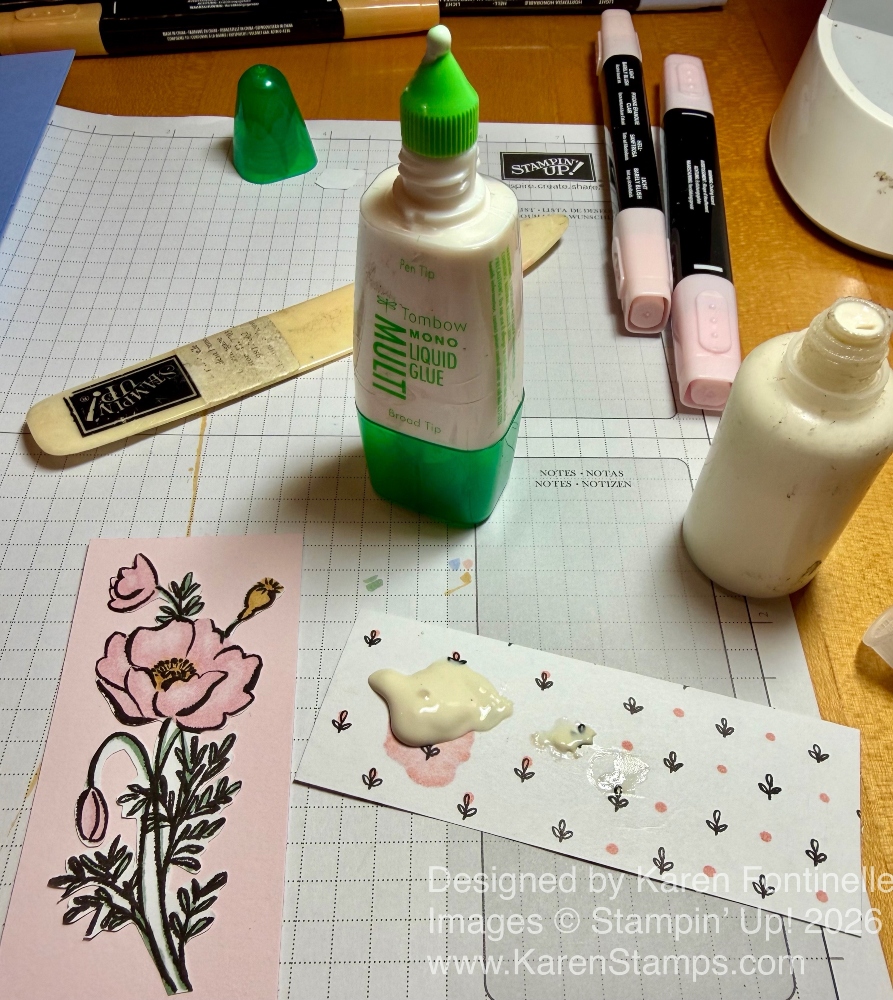
Glue Blob

The best idea would be been to stick that roughly cut out flower from the designer paper on to an Adhesive Sheet, then I could have had the flower be like a sticker with no need for glue! But I didn’t and usually don’t think that far ahead with Adhesive Sheets!

To finish off this card, I added as small a bow as I could make with the Barely Blush Ribbon using Mini Glue Dots on the back. I realized I didn’t have a greeting, so I stamped “Happy Birthday” with Hydrangea Hue ink using the Lovely Arrangements Stamp Set. Since the flower was popped up I needed to pop up just the right side of the greeting so the left side could lie flat on the flower panel. I also added three Barely Blush 2026-2028 In Color Dots to the card.

It looks to me like a lovely, simple card, maybe with the In Colors being very soft and calming. Don’t forget to try different things with our designer papers!
SHOP STAMPIN’ UP! ONLINE HERE!

Artisan Sketched Garden Black & White Birthday Card

Artisan Sketched Garden Black & White Floral Birthday Card

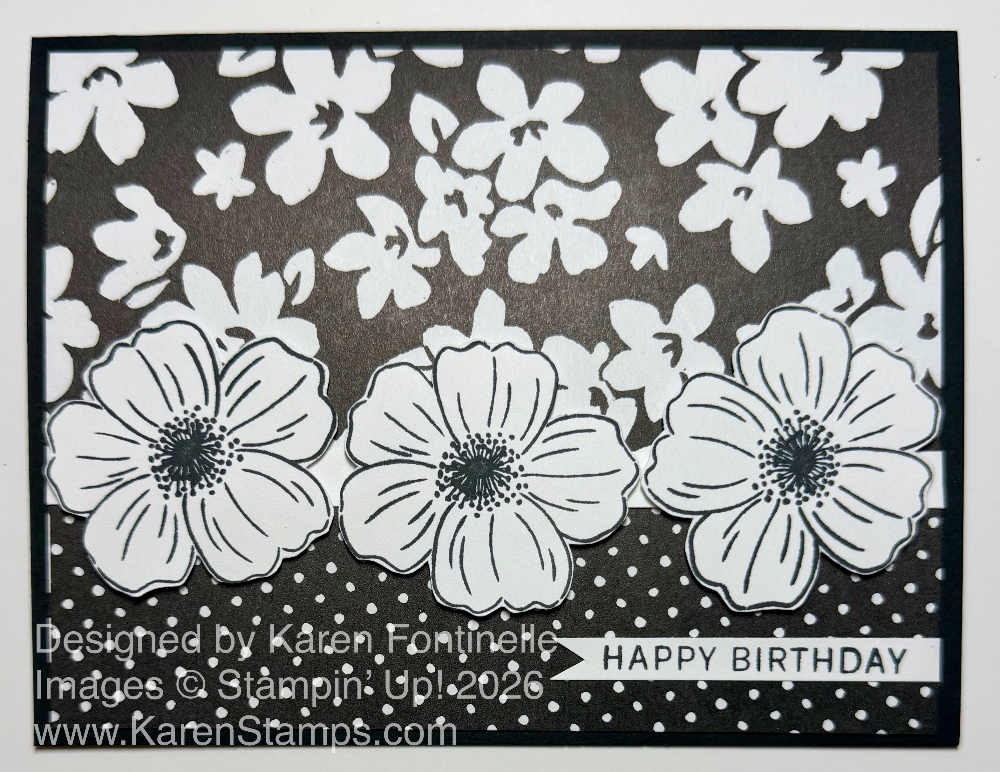
Sometimes just black and white together look classic and elegant, so if you make a card like this Artisan Sketched Garden Black & White Birthday Card, you will have a beautiful card without all the color matching and coloring. This card is easy to make as is, and if you did want to add color in any of several ways, you could do that.

This card starts with a Basic Black card base. You will need to add a Basic White layer inside the card for a stamped greeting or written personal note. The paper I used is the Artisan Sketched Garden Designer Series Paper. It has all sorts of flowers and other generic designs you can use on your projects, cards, or scrapbook pages. I chose a white floral design for the top section and a white polka dot strip for the bottom part. This is a basic design you can use for any easy card showcasing two different patterns of designer series paper. The bottom strip is about 1 1/2″ wide but you can make it any size you want. Since I didn’t have any white ribbon, I added a narrow strip of Basic White across the seam where the two DSPs overlap. I think that adds a nice finishing touch when you have two papers meeting up or overlapping a bit.

The flowers are stamped with Memento ink and fussy-cut from the Lovely Arrangements Stamp Set and fussy-cut, as we say. Just cut around the edge, not right on the outer stamped line. Cut just a smidge outside the flower border so you can still see the stamped edge. These are popped up with Stampin’ Dimensionals across that white seam.

The birthday greeting is stamped on a scrap of Basic White from the same Lovely Arrangements Stamp Set, but you could use whatever you have or whatever occasion you want the card to be for. I cut it as narrow as I could, with one flagged end so it would fit nicely at the bottom of the card.

That’s all there is to this card. You could add some black or white dots if you really wanted to but I’m not sure how well they would show up. Just keep this one simple!

Remember, Free Shipping is going on at Stampin’ Up! right now through June 13. That’s Saturday! You must have a minimum order of $75 and if you deduct any Rewards, it still has to remain above $75. You can read all the terms of free shipping HERE.

SHOP STAMPIN’ UP! HERE!

Artisan Sketched Garden Happy Birthday Card

Artisan Sketched Garden Happy Birthday Card

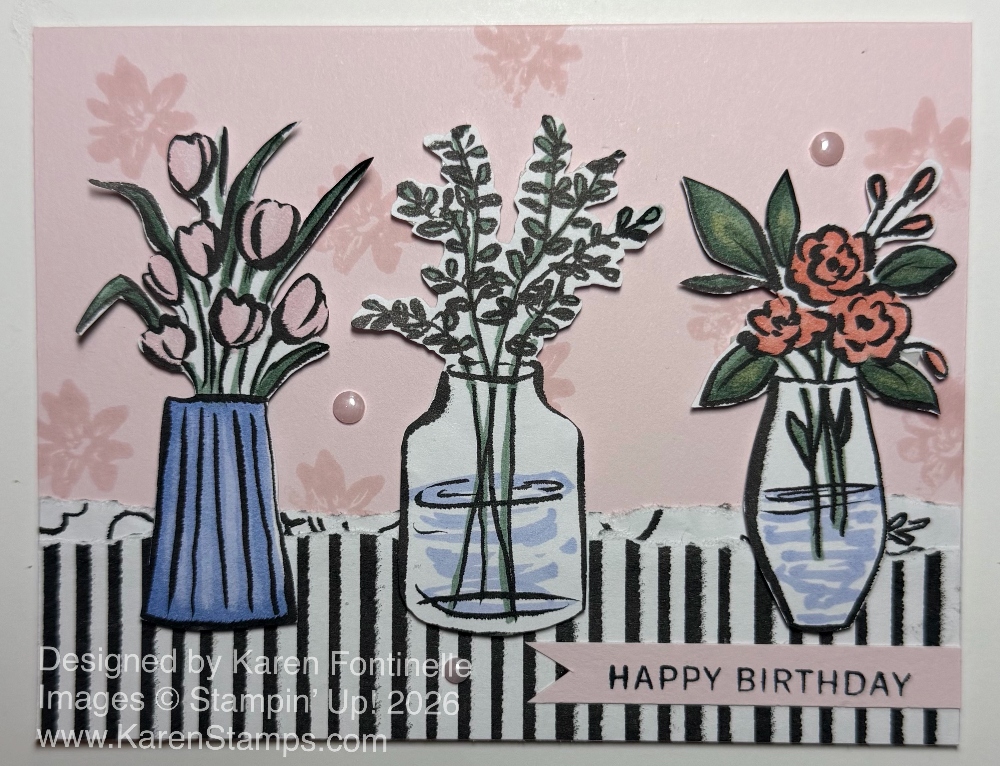
I was excited to play with my new In Color Stampin’ Blends markers and cardstock, plus the new Artisan Sketched Garden Designer Series Paper, and I finally got the chance to make this Artisan Sketched Garden Happy Birthday Card. I have to say I love the look of this card! Sometimes you make a card, and you really like it!

The card base is Barely Blush cardstock, one of the new 2026-2028 In Colors. It is a very light pink shade, and I’ll have to see how I like the ink color, but I think the light shade goes so well for this card. I didn’t add another layer of any paper for a background, but I felt like it needed a little something in the background. I decided to do a “watermark” look by stamping a small flower with the Barely Blush ink randomly on the card front. I only did a few, and when I stamped the flowers, I wished I had stamped off first. But as the ink dried, it became a lot lighter, so it worked how I wanted it. The flower was in the Paradise Garden Stamp Set.

I did see the idea for the black and white stripes and torn edges at the bottom of the card somewhere online and liked that look. This striped paper is the Artisan Sketched Garden Designer Series Paper. I measured a piece of the striped paper at 5 1/2″ x about 1 1/2″ or 1 3/4″. Remember, the tearing technique – hold the paper and tear toward yourself so that the side you want to show the torn edge is facing you. In this case, I took the torn piece, turned it over, and used that as a layer underneath the striped piece at the top. It is just stuck down a little bit behind the stripes.

For the flower vases, I cut some apart from the Artisan Sketched Garden DSP that I liked and colored them with my new In Color Stampin’ Blends. I used the Barely Blush for the flowers on the left, Crisp Cantaloupe for the flowers on the right and Peaceful Pine for all the green foliage. For the vases, I used Hydrangea Hue for the vase color with the pink tulips, and to look like some water in the clear glass vases in the middle and left. I just barely scribbled on some color. Hydrangea Hue is really a purplish blue, but I think it did fine as water, and mainly, I only wanted to use the new In Colors. I popped up the vases with Stampin’ Dimensionals, regular size and Minis. You could also glue them down flat. Or if you thought about it ahead , (I never do!), you could adhere a piece of Adhesive Sheets on the back of the DSP before cutting out the vases and turn them into stickers so you wouldn’t have to use adhesive on the narrow little foliage and flowers.

The greeting is stamped with the Lovely Arrangements Stamp Set. I wanted something small to fit on the card without taking away from the vases. It is stamped with Memento Black ink on a piece of Barely Blush cardstock and cut like a banner only on the left side. It is glued down flat, but could be popped up. For a finishing touch, I added three of the 2026-2028 In Color Dots in Barely Blush.

Be sure to check out the Artisan Sketched Garden Designer Series Paper on page 63 of the new Stampin’ Up! Catalog. We’ve had black and white paper before, (Here’s an old example!) and I think it offers a lot of creative options, whether you color on it in any one of a million ways or if you leave it black and white. Get some and try it out!

SHOP STAMPIN’ UP! ONLINE HERE!