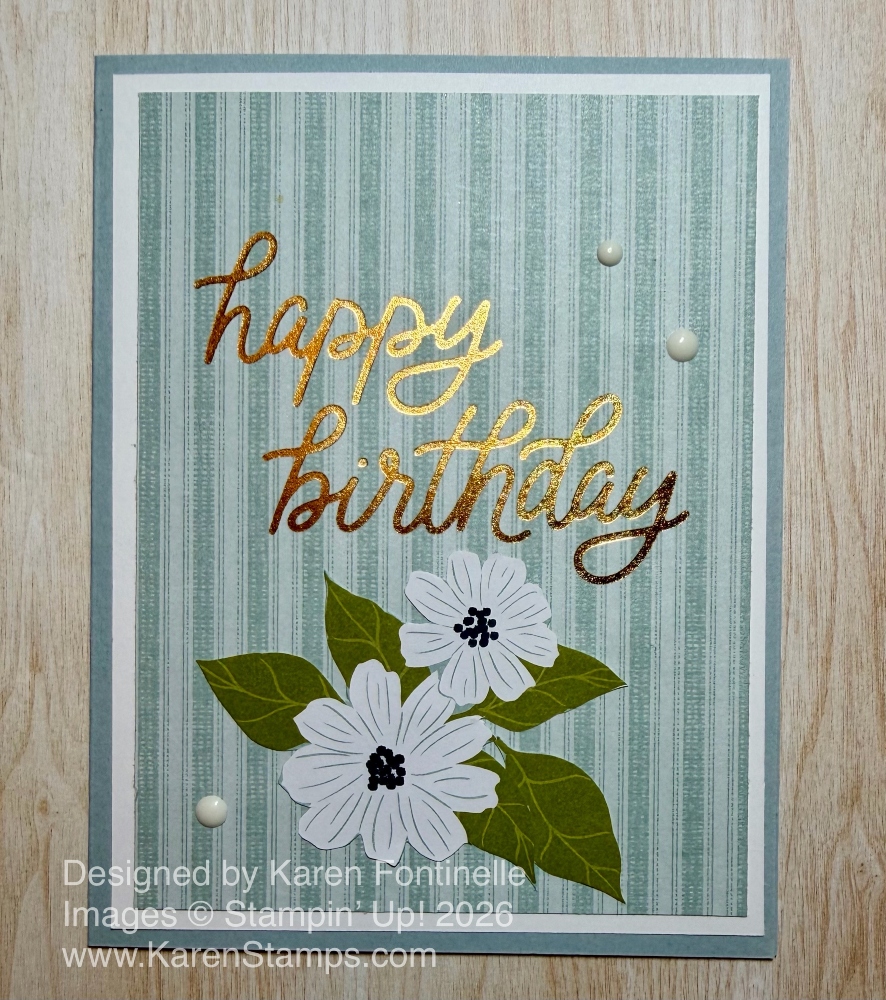
After all my hot foiling and diecutting the other day, this Lovely Blossoms Hot Foil Birthday Card is one I made after trying out hot foiling on a piece of the Lovely Blossoms Designer Series Paper. I could have cut out the hot foiled “Happy Birthday” sentiment, but I decided to leave it as is and make it into a card with the designer series paper being the background layer.
The card base is Cloud Cover Cardstock, one of the In Colors. I trimmed down the foiled designer paper to 3 3/4″ x 5″ so I could add a layer of Basic White underneath to help the paper stand out a little. Then I looked through the Lovely Blossoms DSP to see if I wanted to cut out a little flower to cover a messy foil spot on the card. I found this combination of two flowers and decided to fussy-cut them. As it turned out, I liked the way it looked underneath the birthday greeting (made with the Classic Greetings Hot Foil Dies) so I adhered it flat to the card. I considered popping it up on Mini Dimensionals. That would be okay, too.
To cover the little smudge of gold foil, I added some white dots from the Moody Palette Glossy Dots. They worked perfectly and look just right on the card. Hot foiling gives such an elegant and professional look to your cards! It’s surprising every time!
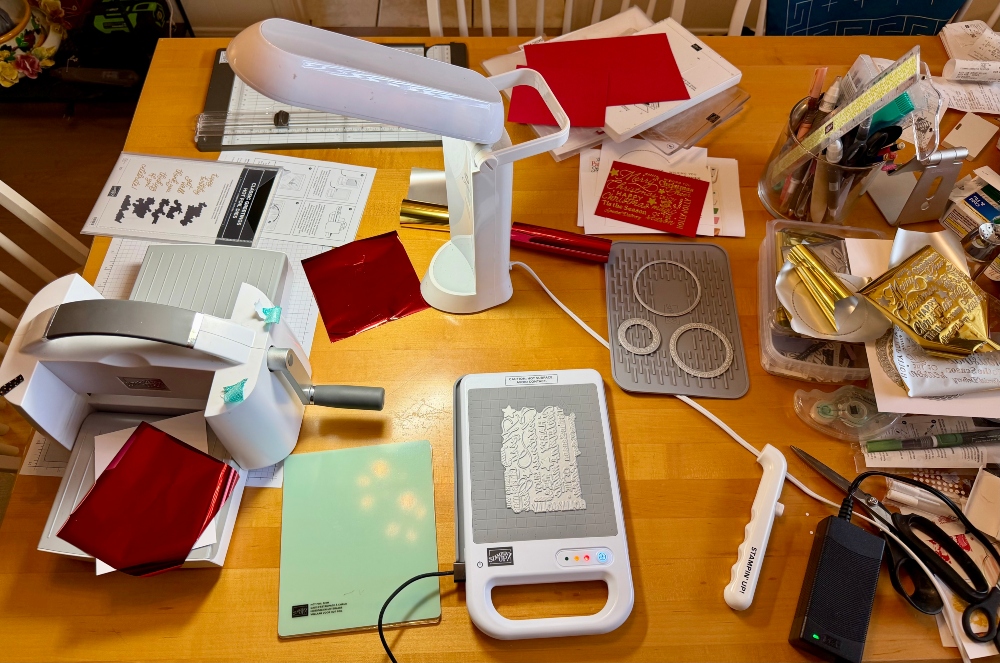
It was a hot foiling kind of afternoon using theStampin’ Hot Foil System and some of the hot foil dies I have already accumulated! I don’t really have a good crafting spot to have all of this set up, so the space is a little tight on my kitchen table! The Stampin’ Cut & Emboss Machine needs to be right by the hot foil platform because as soon as everything is heated up and the sandwich made, it needs to go right through the Cut & Emboss Machine. And then, if it is something that needs to be cut out, then it goes through the Cut & Emboss Machine again in the standard diecutting way! So as long as I had all these things set up on the kitchen table, I decided to make multiples of some things and try out the newest dies I just got, coming out September 1st!
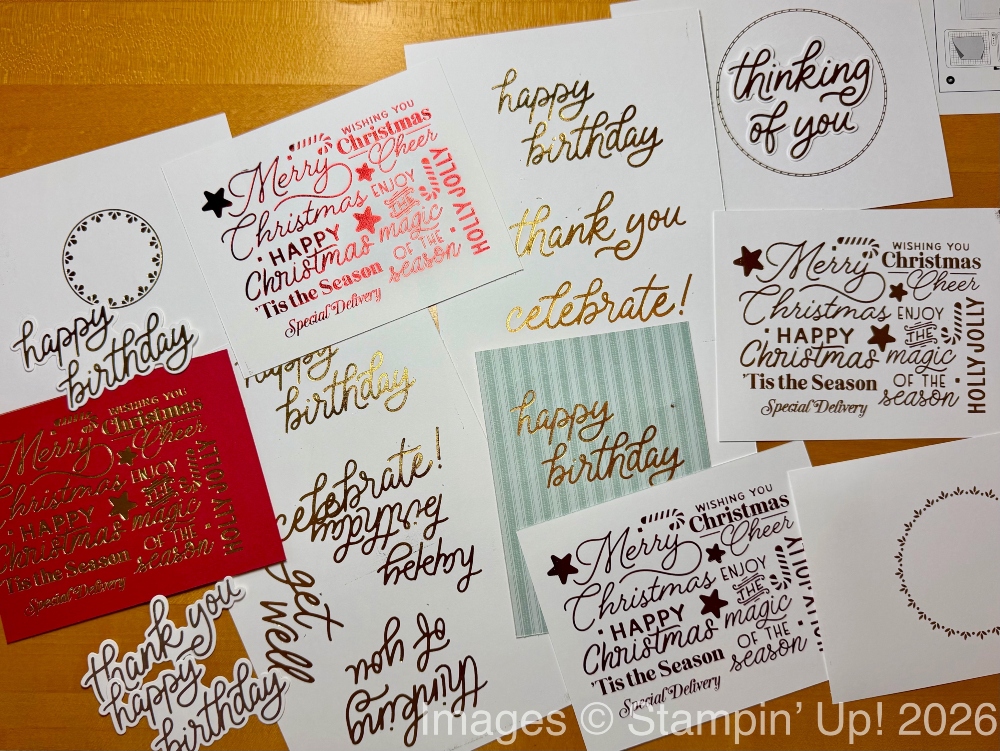
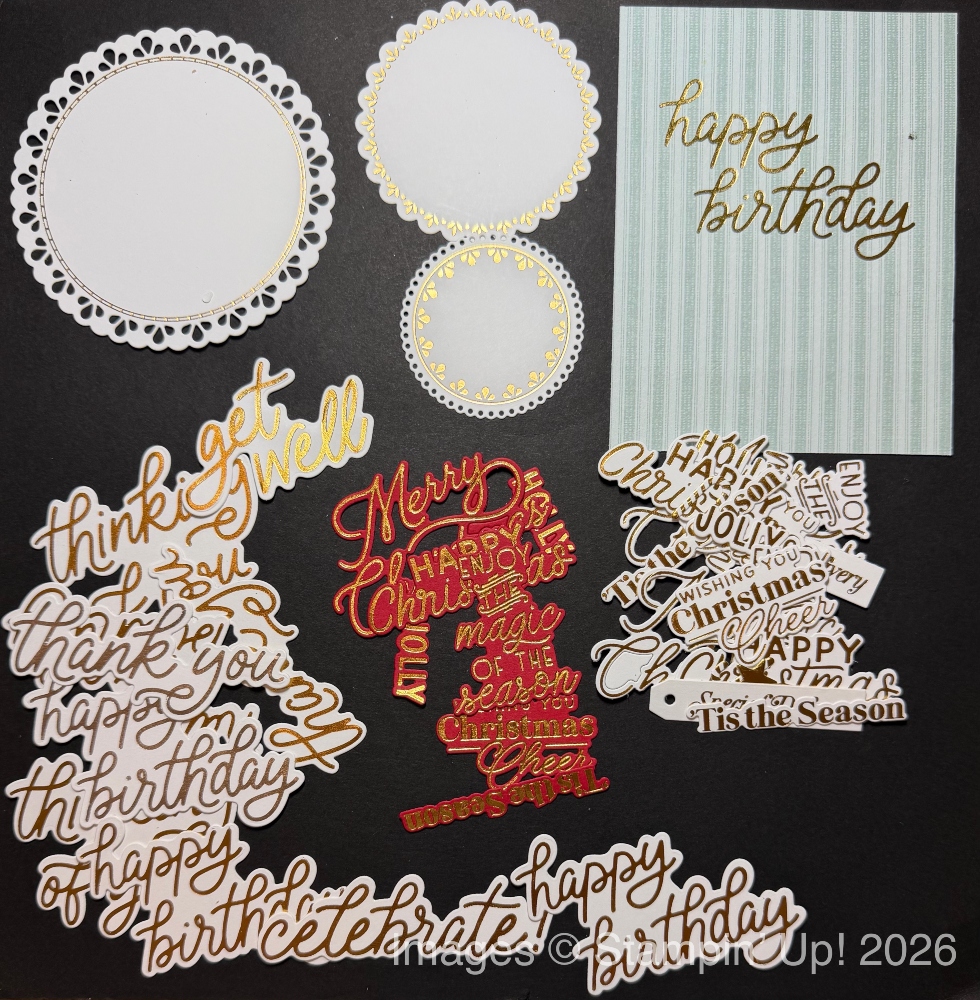
After lots of cutting foil and paper, including my new Red Stampin’ Hot Foil Rolls, coming September 1, alomg with the gold and silver foil, these are the creations I came up with. I had no ideas or intentions for projects at this point. I just wanted to keep getting used to the steps in hot foiling and to end up with extra pieces I could use almost like ephemera. Each time that foil is peeled off the paper, it is just magical to see what you just made!
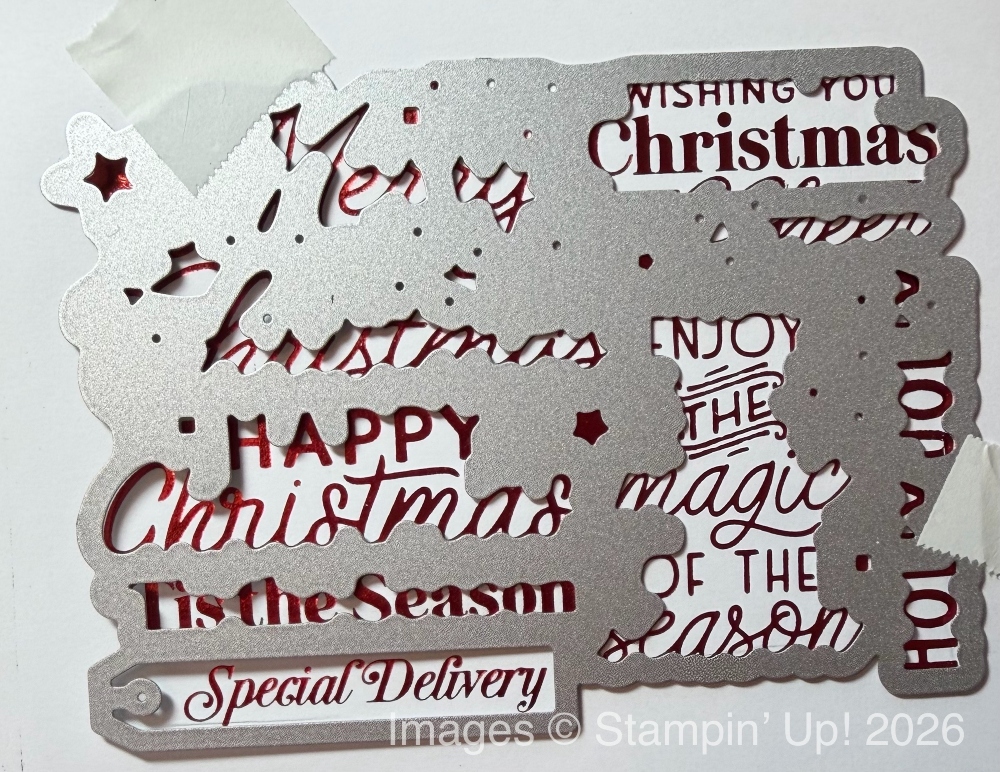
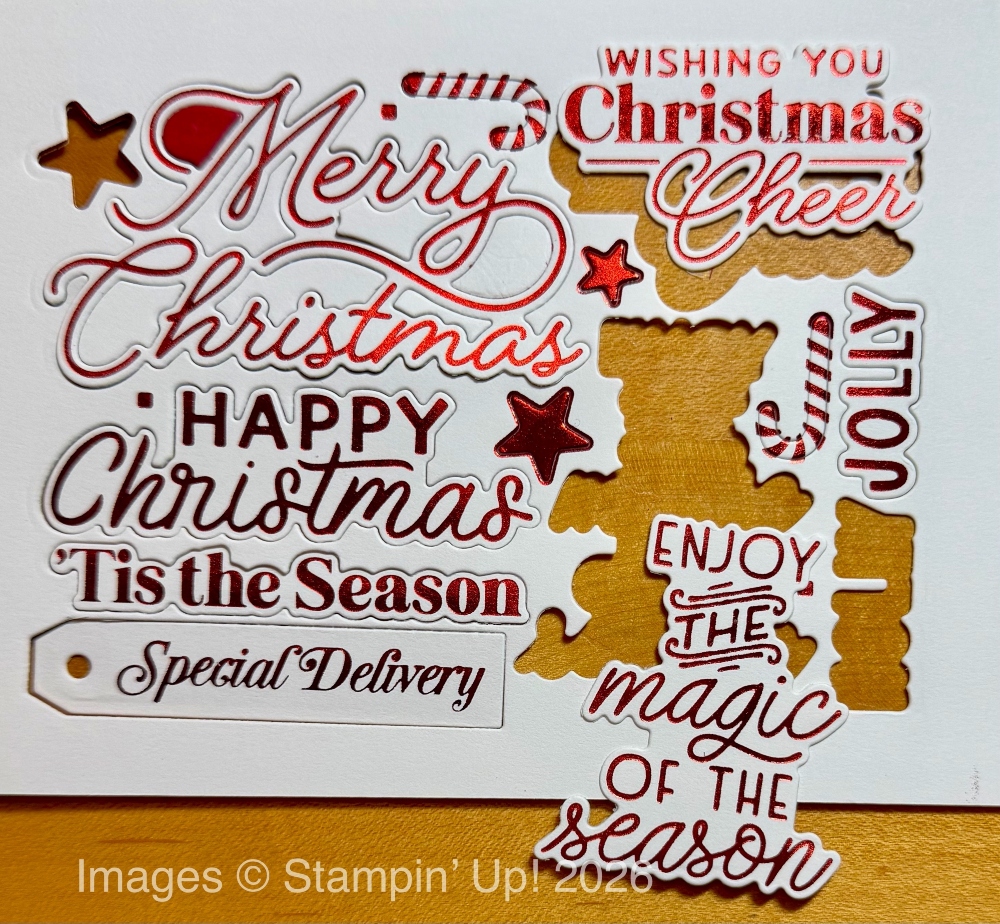
The large diecut greetings are the Classic Greetings, which are perfect for cards for lots of occasions. The Christmas hot foiled greetings are one die and then a die that cuts all the words apart. It doesn’t look like you have it placed right, but as long as you get the tiny squares inside the squares on the die, you have it set properly for cutting out the words. This is the Magical Christmas Hot Foil Dies, available Sept. 1st. The three circles are in the Framed & Fabulous Hot Foil Dies, also coming on September 1. There is also a wonderful stamp set with the same name that you can Bundle with the dies.
We have the Magical Christmas Hot Foil Die, which is the amazing one die for foiling and then using this one for cutting out all the words in one fell swoop!
Here are the fruits of my labors today:
I even fot foiled a greeting right onto a piece of designer series paper that I had handy, as you see in the upper right corner. I’ll see what kind of card I can make out of that! As long as you are hot foiling, you may as well make multiples and use different colors or foil, maybe even on different colors of cardstock so you are ready for the next project!
Remember, with the purchase of the Stampin’ Hot Foil System, you will receive the Metallic Magic Craft Class free when purchased by the end of the year. Do not put it in your cart, just order the Hot Foil System and your free class will be included! It is recorded by Stampin’ Up! and shows you how to use the system and gives tips and tricks for using hot foil on your projects!
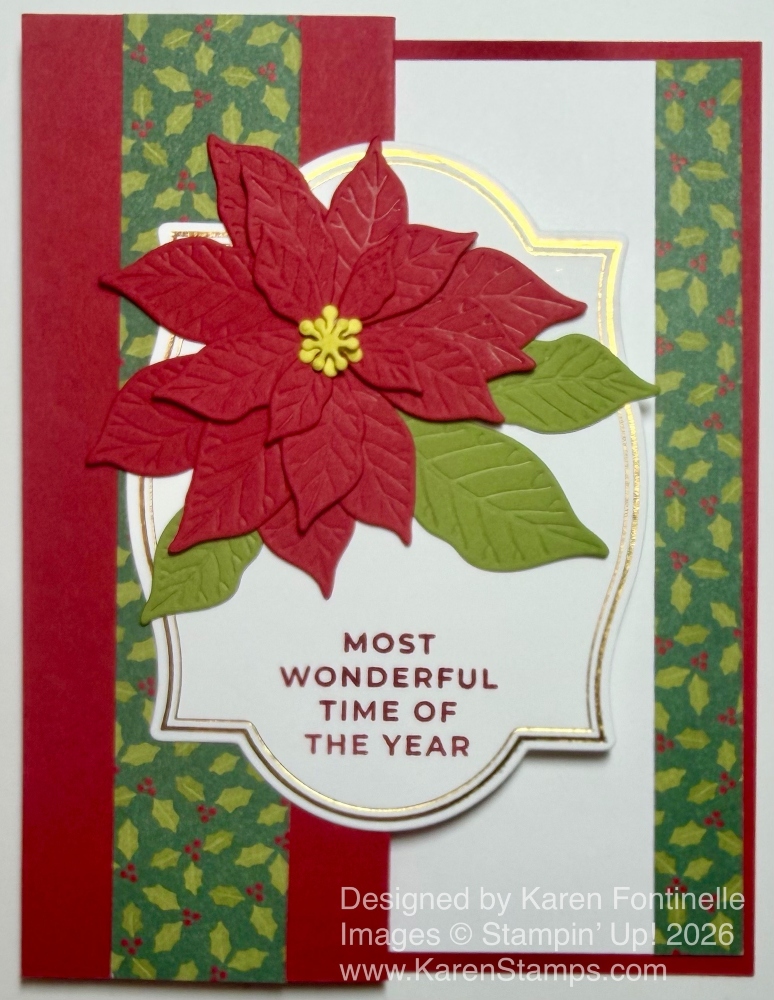
Christmas is less than six months away, so no, it’s not too early to start making Christmas cards! Yikes! This Pretty Poinsettia Z-Fold Christmas Card is made with the Pretty Poinsettia Bundle in the Stampin’ Up! Online Exclusives. You get the Pretty Poinsettia Stamp Set and the Pretty Poinsettia Dies in the Bundle, and you will save 10%. The dies kind of confused me at first as they all looked like leaves, but actually, the leaves on the stem are actually leaves (but you can cut them apart) and the four dies with four or five “leaves” on them are the poinsettia petals which you can stack.
This card was actually pretty quick and easy to make! I love to make Z-fold cards because they are simple and make a great presentation for the recipient. It’s probably the easiest “fancy-fold” you can make. Just fold half of the card front back! I had already made the large white label on which the poinsettia is adhered another day with the Stampin’ Hot Foil System and the Flourish & Frames Hot Foil Dies. You can see the pretty gold foil border around the edge. You could use any large label-type piece you have similar to this one or just a cardstock rectangle. You may even have some ephemera piece you could use.
The poinsettia itself is made with Real Red cardstock, diecut with the poinsettia dies. I used Mini Glue Dots to adhere them together in layers, but you could also use tiny dots of the Multipurpose Liquid Glue. If you have it, this would be a good time to use the Silicone Craft Sheet to keep the adhesive on it instead of your table! Just stack the poinsettia petals, placing them however you think looks best. You probably have heard that what we think of as the flower petals of poinsettias are specialty leaves called “bracts”. The real flower is the little yellow centers on poinsettias! When you stack the four layers of petals and add the tiny diecut yellow centers, it kind of turns into a 3D flower! If you like, you can curl the petals carefully with a Bone Folder or crease on the center line to make them stand out, perhaps on a gift bag or box. It wouldn’t work so well for mailing. I added the green leaves, just sticking them under the poinsettia after cutting them off the stem.
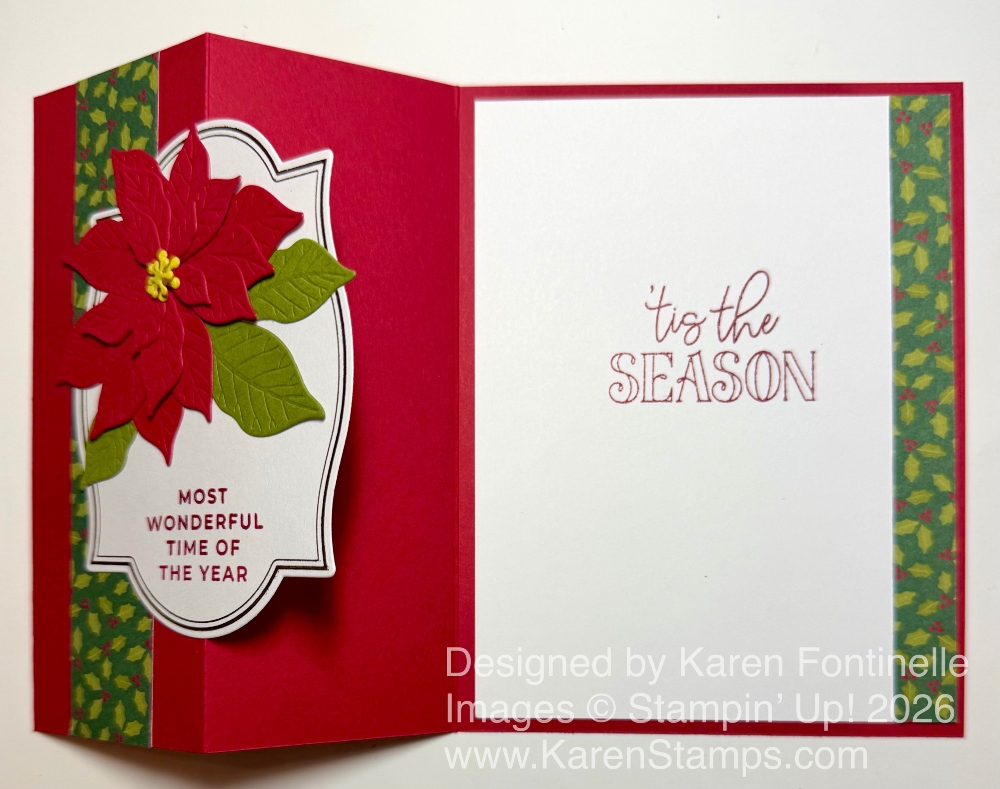
The greeting is one in the Pretty Poinsettia Stamp Set. It fit just perfectly on that label piece below the poinsettia. It is stamped in Real Red ink. I used another greeting for the inside of the card as you will see in the photo below. I added a piece of Basic White cardstock, 4″ x 5 1/4″ for the inside of the card for either a stamped sentiment or personal message. You do want to make sure the greeting is tucked behind the z-fold and focal point so that it can’t be seen from the front of the card.
The card base is cut at 5 1/2″x 8 1/2″ as usual, then scored at 2 1/8″ and 4 1/4″. Fold the card in half as you always do, then fold back on the 2 1/8″ score line so the card front is folded back toward the card fold. That’s all there is to it! I added a strip of the A Stitched Season Designer Series Paper down the center of that folded back piece. It is 1″ wide by 5 1/2″ long. I also added a 1/2″ strip along the inside Basic White layer, which shows from the front.
For the most difficult part, if anything is difficult, the white frame with the poinsettia is adhered with the center lined up with the creased fold of the front. Be sure to only put adhesive on the half that is attached to the z-fold, otherwise you will have glue sticking to the inside of the card! You can see how the whole card looks opened up in the photo below.
I like this card so much that as soon as I do some more hot foiling with the Flourish & Frames Dies to make more pieces for the front of this card, I want to make more poinsettia cards just like this one. I just love the colors, the way the poinsettia looks rather built up even though it is flat and the pretty designer paper.
You can still purchase the Pretty Poinsettia Craft Class in the Online Store and stamp along with Stampin’ Up! staff as they show you how to use this Pretty Poinsettia Bundle. Or watch and stamp on your own later. I bought the class but missed watching it on the day during the live (plus it was my anniversary!). But the good thing is, I can watch it any time or multiple times. The couple of other online stamping events with Stampin’ Up! that I have done proved to be fun and had lots of good tips for the projects.
There are lots of creative possibilities with the Pretty Poinsettia Bundle, so even though it is a little early for the holidays, start thinking ahead and planning for some ideas you might like to make!
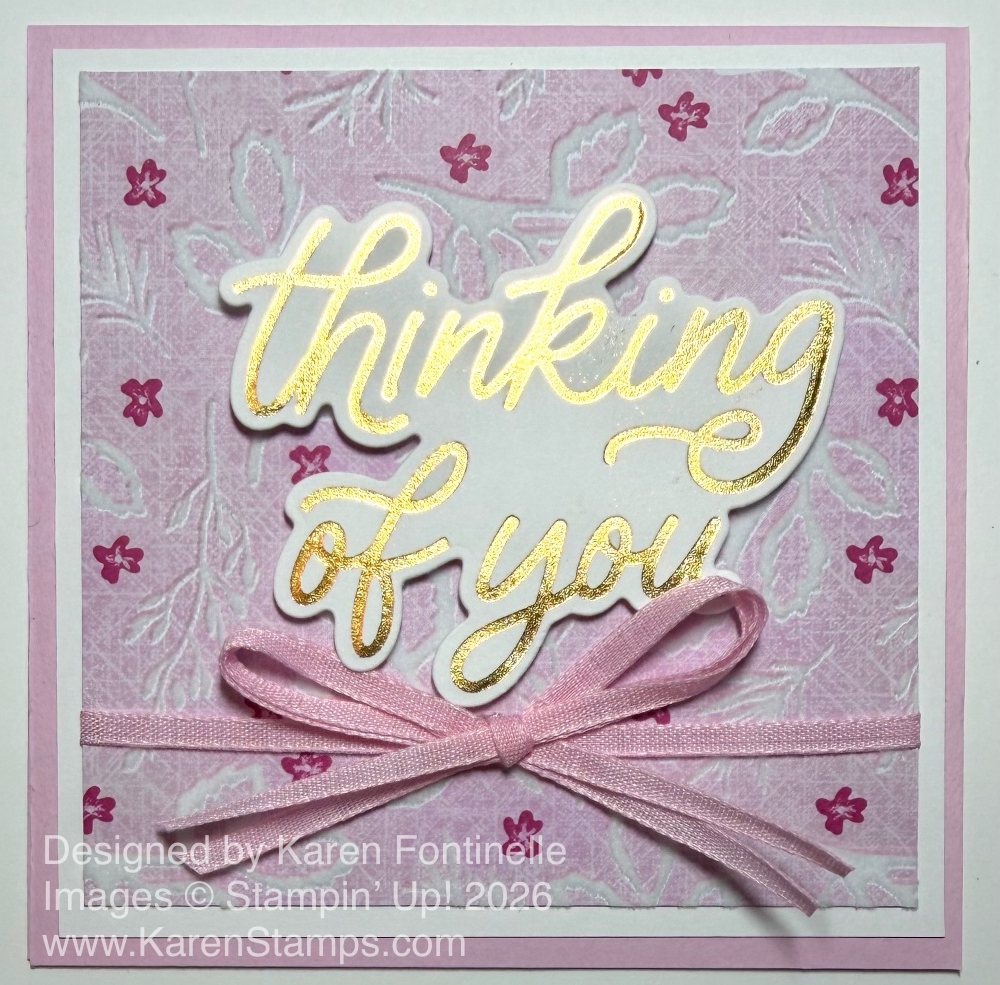
This Velvet Meadow Thinking of You Square Card was super quick and easy to make, except for tying the bow! I didn’t even have a design idea for a card, but I happened to grab this package of Velvet Meadow Specialty Designer Series Paper with the soft flocking on the sheet. I found this square scrap of paper which gave me the idea to make a square card for something different. The new hot-foiled greeting fit perfectly on the square card, which saved a lot of time.
The card base is Bubble Bath cardstock, which coordinates with the paper. I decided to add an extra layer of Basic White under the designer paper to help it stand out a little with the white flocking. The card base is 8 1/2″ x 4 1/4″. Score at 4 1/4″ and you have a square card. You can put the fold at the top (which I did) or on the side. The Basic White layer is 4″ x 4,” with the designer paper layer then being 3 3/4″ x 3 3/4″.
Before I adhered the layers together, I wrapped a piece of Bubble Bath 1/8″ Faux Linen Ribbon around the designer paper layer. The bow is two pieces of ribbon tied together and adhered to the center of the ribbon with a Mini Glue Dot.
For the greeting (which almost looks like professionally printed emphemera!), I used the Classic Greetings Hot Foil Dies. I hot foiled these greetings (several of them at one time) on my first session with the new Stampin’ Hot Foil System. After you do the hot foil, you can use the regular cutting dies in the set and your Stampin’ Cut & Emboss Machine to cut apart each greeting so they are ready to use. I think it would be a good idea to make several of each greeting in the set in both gold and silver and keep them in a container so you can use them quickly and easily. The greeting is popped up on Stampin’ Dimensionals.
I think this card with the special Velvet Meadow paper and the gold hot-foiled greeting in such a lovely font really looks lovely, if I do say so myself!
As I am writing this post, the Velvet Meadow DSP is “currently unavailable” but will likely be back in stock the week of August 3, along with the Classic Greetings Hot Foil Dies. Fill out the notification in the Online Store by each product so you will be notified right away if you would like to purchase either or both of them. This system works well, but sometimes you have to move quickly so the product doesn’t sell out as soon as it comes back in stock! Sometimes it comes in earlier than expected, too.
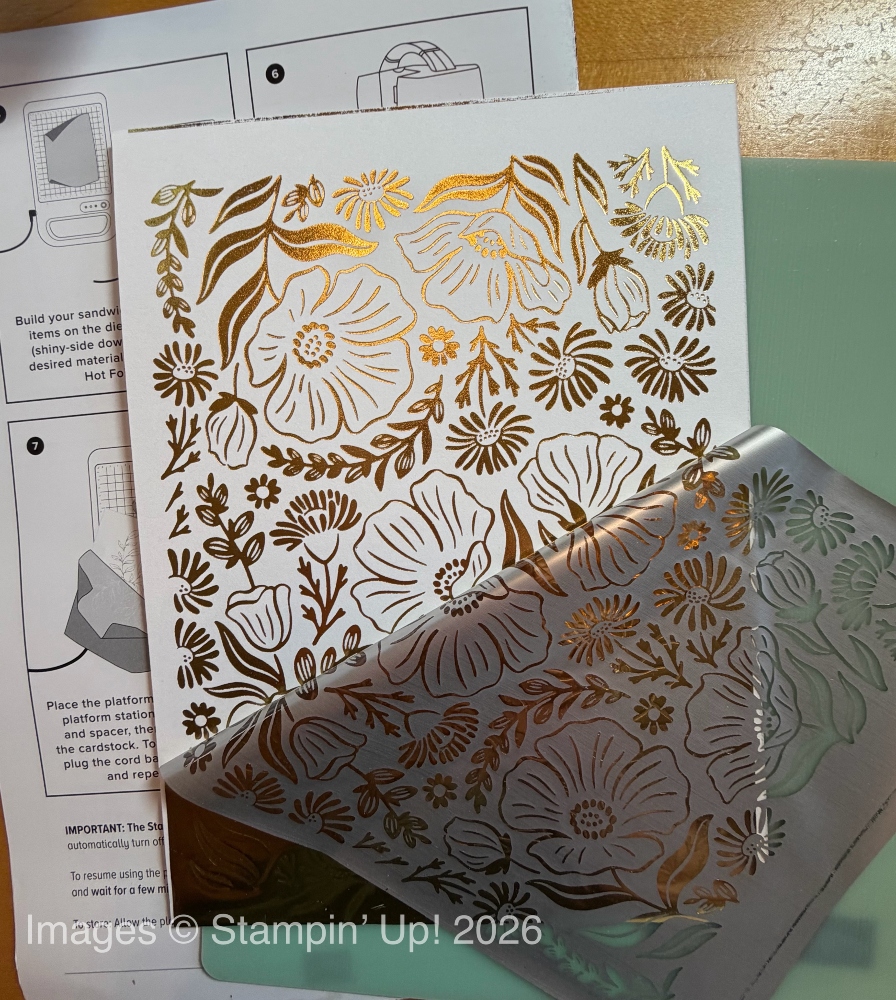
My new Stampin’ Hot Foil System arrived the other day along with a few dies, stamp sets, and foil. It took another day or two to find a block of time to try it out. I admit I was a nervous wreck checking and rechecking the directions at first, so I didn’t make a mistake and ruin the whole thing. However, even my first attempt turned out BEAUTIFUL and PERFECT. I would say it looks “professional”. And that was just my first try!
Here is my FIRST TIP!! Your system will come in a variety of boxes. When you take the power cord out of its box, be sure you also take out the little extension plug, I’ll call it. I took out the main power cord, with a big black box attached. I set up all my supplies for the hot foiling and when I went to plug in the platform, the plug did not match the outlet on the side!! I thought I would be calling Stampin’ Up! today and probably would have to send the whole thing back because obviously I got the wrong thing. I checked all the numbers on my order and the box. I knew the plug is actually magnetic, but this thing did not match at all. When I told my husband about this major problem, he looked in the box and there was a short little cord with the correct plug on the end that I needed to connect to the other big cord! My HERO!! I was thrilled that I had everything I needed and glad I had not thrown out the boxes before using the whole system! So KEEP your boxes, just in case. If anything was wrong, you would want those boxes if you had to return the system. And look for that extra little cord and plug!
The next day I got everything set up again and tried it out! Everything worked perfectly! Make sure you have the little pamphlet of instructions handy and be sure you read them. I think there is just a little learning curve on the initial set up and steps, but we will all get the hang of it quickly!
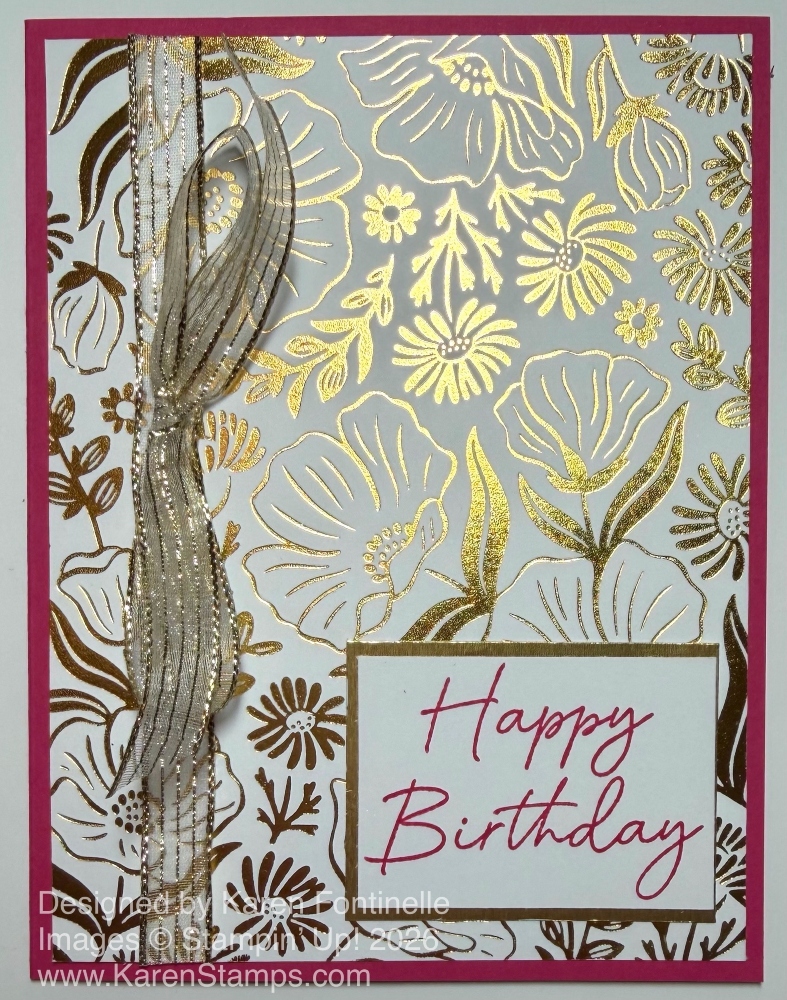
My favorite hot foil die is the Garden Silhouette Hot Foil Die. It is one big die. After foiling your paper, you can cut it down to fit your card front or whatever size you want it. I used my Paper Trimmer and it worked fine. The Paper Trimmer worked fine with cutting the piece of foil, too, but you can also use a scissors. Another tip: Save your used pieces of foil in a folder or box because there are ways to reuse them.
The foil on the Basic White Cardstock just looks perfect!! Below is the card I made with it. I decided to put it on a card base of Melon Mambo. The greeting is in the Scalloped Blooms Stamp Set. It is stamped in Melon Mambo ink. However, if you wanted it extra-fancy, you could dry emboss (our old method with the Heat Tool and powder) the greeting in gold. I layered it on a piece of Gold Foil. The ribbon is the Gold Striped 3/8″ Mesh Ribbon, which is currently unavailable but due back in stock the week of September 14th. You can use whatever you have. Another ribbon that is retired I believe, that looks good with this card is the White With Gold 3/8″ Ribbon in the Spring Mini on page 24. You may have that. I adhered a piece of ribbon from top to bottom wrapped around on the ends to the back of my hot foiled piece, then added a large bow separately with Mini Glue Dots on top of the ribbon.
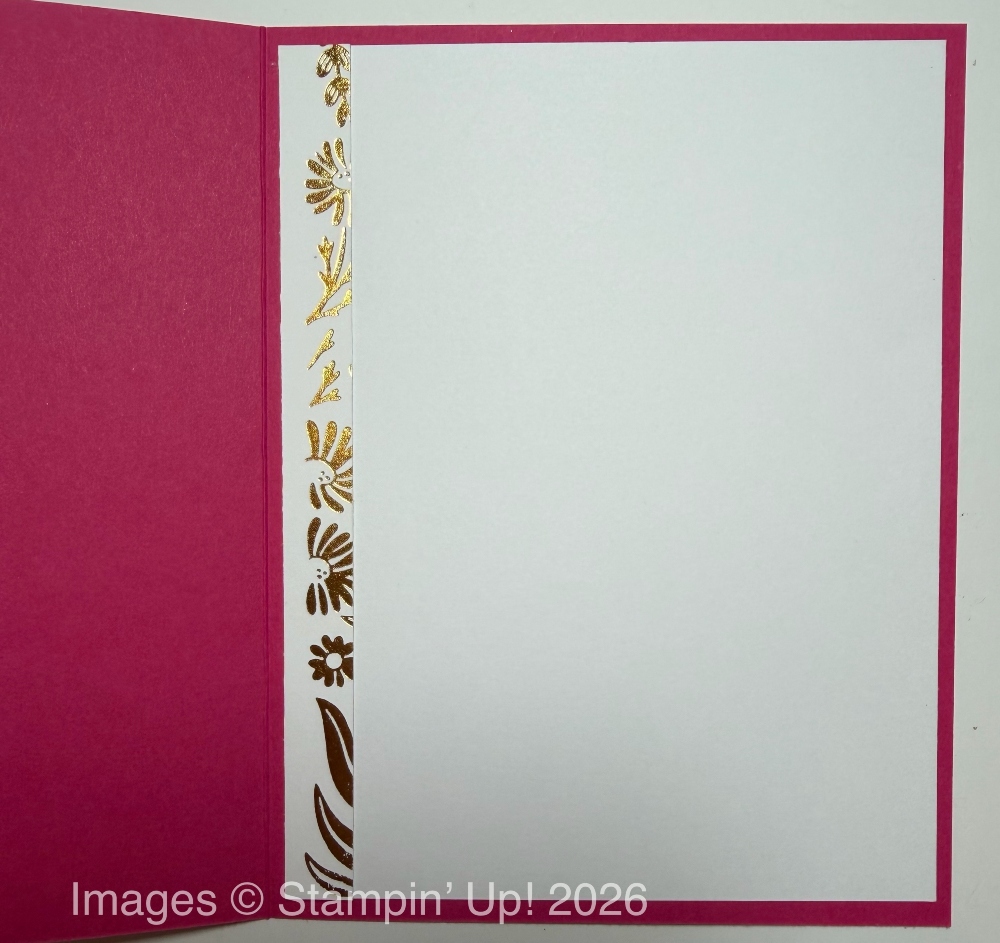
Here is the inside of the card. I added a Basic White layer on which to stamp or write a message. Along the side I added a scrap of hot foiling that I had cut off the Garden Silhouette piece to make it fit on my card front. Depending on what you cut off as scrap, you might save those pieces and maybe you can use them in some way!
I thought the Butterfly Flight Dies would be the most popular, but apparently it is the Garden Silhouette Hot Foil Die because it is “currently unavailable”. If you want this die, please put your email in the notification box when you look up that die, and Stampin’ Up! will email you when it is back in stock. Then jump on it, if you can, because sometimes a popular item sells out again as fast as it is back in stock.
If you do not want the Stampin’ Hot Foil System, do not look at any videos online of Stampin’ Up! Demonstrators and Customers enjoying their new toy! Everyone seems so thrilled, so do not watch and get taken in by all the excitement!! :). You may not be able to resist!! Don’t forget – even though it is a big investment, you will earn Rewards to use on future orders and/or you can apply any Rewards you already have to bring down the cost (a little!). You know how creative all these stampers are, so I think we are only at the beginning of what we can do with hot foil! Plus, you receive the Metallic Craft Class FREE with the purchase of the system before January 2027! You can watch it any time and as many times as you like.
Stampin’ Hot Foil System! Get it todayin the Stampin’ Up! Online Store!
I would say in all my years at Stampin’ Up!, this Stampin’ Hot Foil System is the biggest thing since the first Big Shot came out! Stampin’ Up! says it was quite popular during the Demonstrator opportunity to preorder recently so they expect that Customers will love it too, and it could go on backorder for a while. They have already ordered more supplies, but if you don’t want to wait, you might want to order it very soon!
While the main thing is the Hot Foil System itself, you will also need the Stampin’ Cut & Emboss Machine. Stampin’ Up! has tested the Hot Foil System with our current products, and that is how they can offer a 1-year limited warranty on the system as long as you are using Stampin’ Up! products. The hot foil dies are different from our usual die-cutting dies so you do need to use the appropriate ones.
I’m sure there is a bit of a learning curve, but from the videos I have watched, it looks like we will all catch on pretty quickly! You just plug in the platform, let it heat up, lay the die on it, let it heat up, then make the sandwich with the foil, paper, and other two pieces. Pick it up and run it through the Stampin’ Cut & Emboss Machine SLOWLY, they say! Then peel off the foil and prepare to be amazed at the beautiful piece you have just created!
I do not doubt that as more and more people get the hot foiling system in their hands, we will all learn more tips and tricks and get many more ideas for things to make and card designs! Just like when a new stamp set comes out, and stampers come up with the most amazing projects that we all benefit from!
I put in my order last night and am excited to get it! At first, I wasn’t sure I “needed” it, but in the end I could not resist and did not want to wait if things sold out! It is an expense, especially with the dies and things you need, just like buying stamp sets, but you do get the virtual Metallic Magic Craft Class for FREE (do not add it to your order; it is included with the system for free) AND you do get 10% in Rewards to use on future purchases within a year. (You do need to have a Stampin’ Up! account to earn Rewards. It’s easy to do.) You can order the system, the gold and silver foil (I held off on the pink for now), and then choose which dies you like the most. Please look at the Bundles, especially, and save 10% off the cost of purchasing the two items separately, like our stamp set bundles. You don’t need ALL of them right now. Some have a matching stamp set, the butterfly dies have masks for coloring in, and some items are stand-alone, like the Garden Silhouette Die.
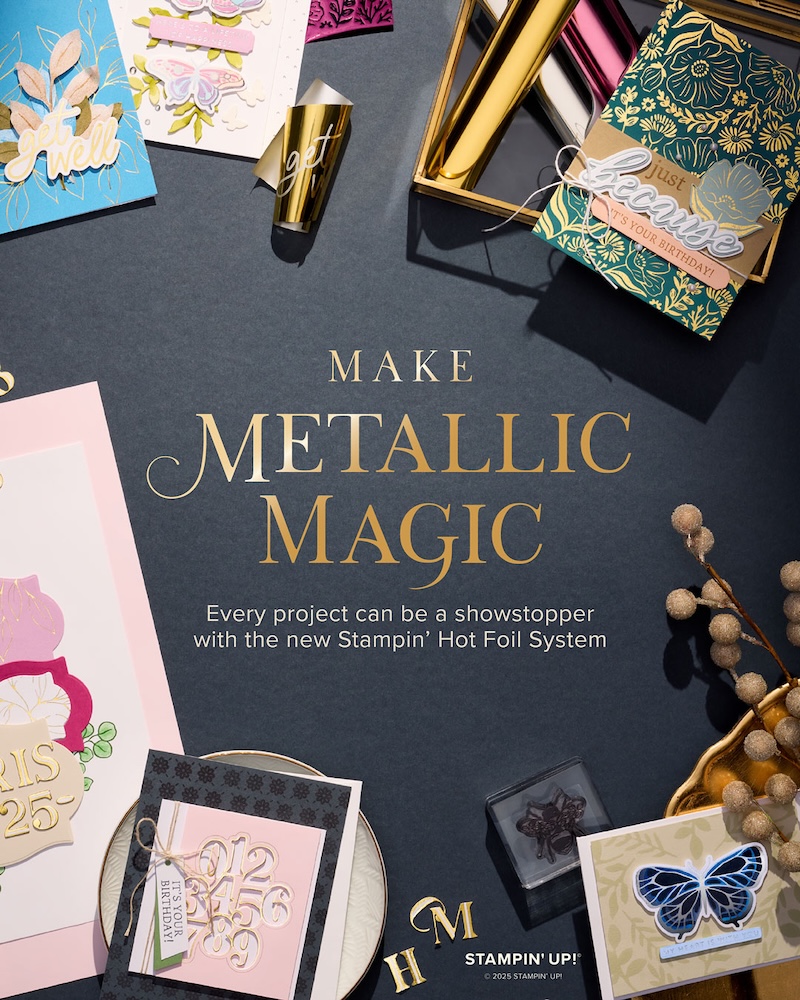
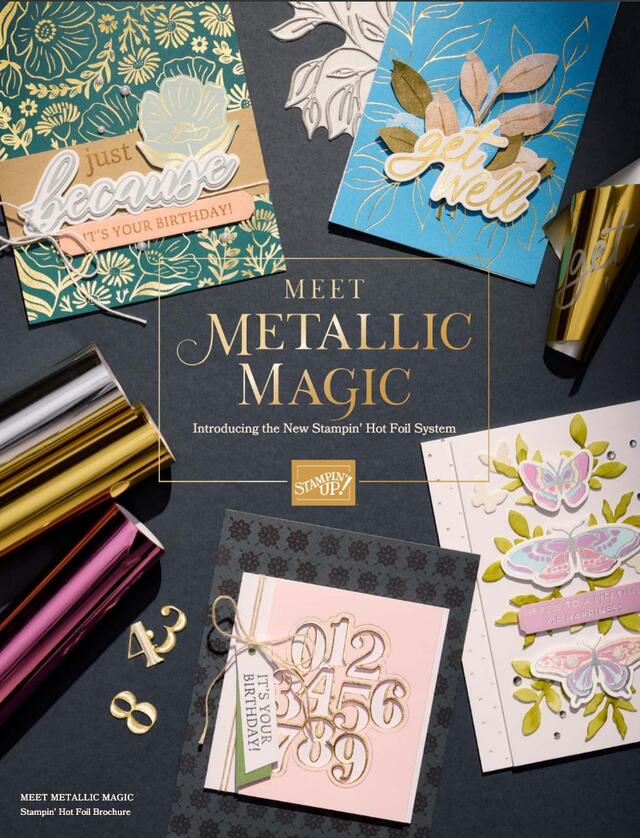
Go check out the Stampin’ Foil System in the Online Store and/or download the Metallic Magic Brochure and see what you like!
This new Stampin’ Hot Foil System from Stampin’ Up! is coming to all markets this Friday, July 10th at midnight! If you want to be one of the first to own this new system by Stampin’ Up! and if you don’t want to wait in cases it sells out, be sure to order early! This new system has been “top secret” for a little while until Stampin’ Up! had enough supplies stocked up and ready for customers to order. That day is Friday!!
What is Hot Foil? Hot foiling is a technique that uses heat and pressure to transfer metallic or colored foil onto paper, cardstock, and more. The result is a shiny, professional-looking finish, similar to what you see on luxury stationery or packaging. You can experiment with foiling on different materials to see what shines.
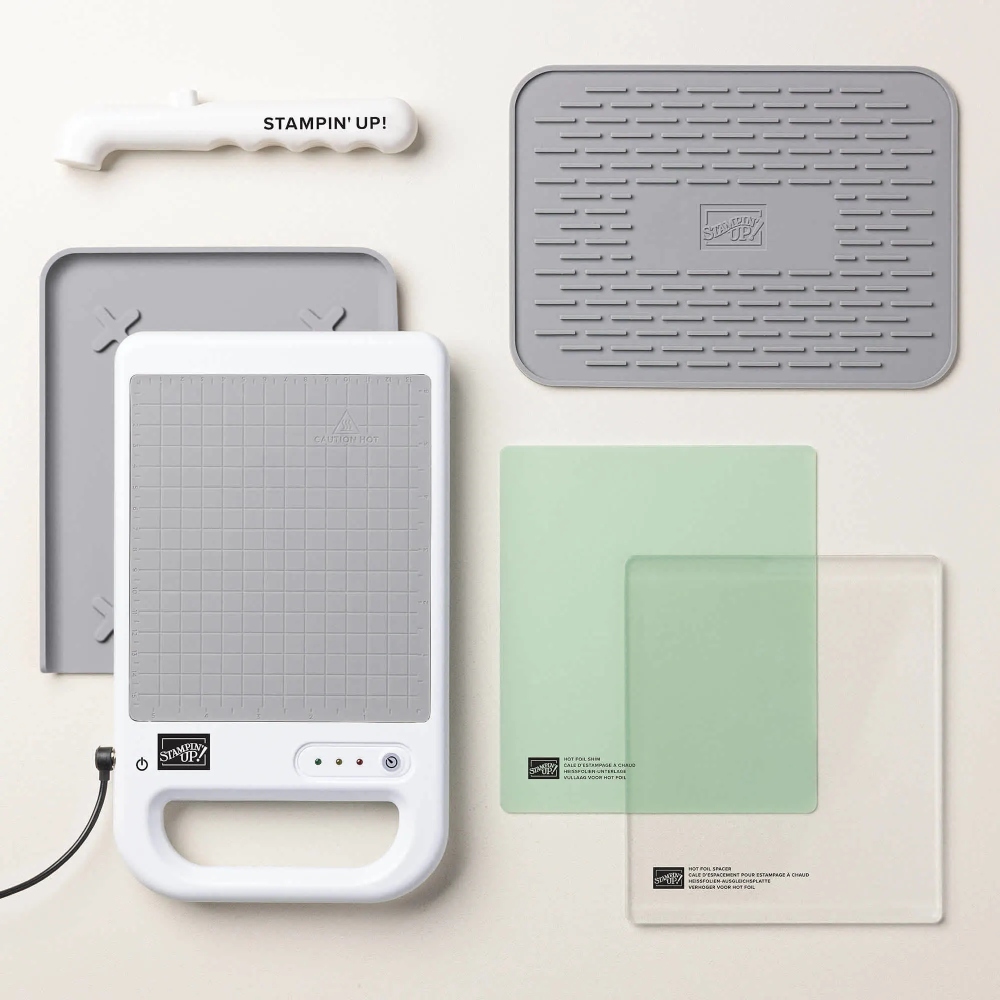
What is the Stampin’ Hot Foil System? The Hot Foil System comes with these products:
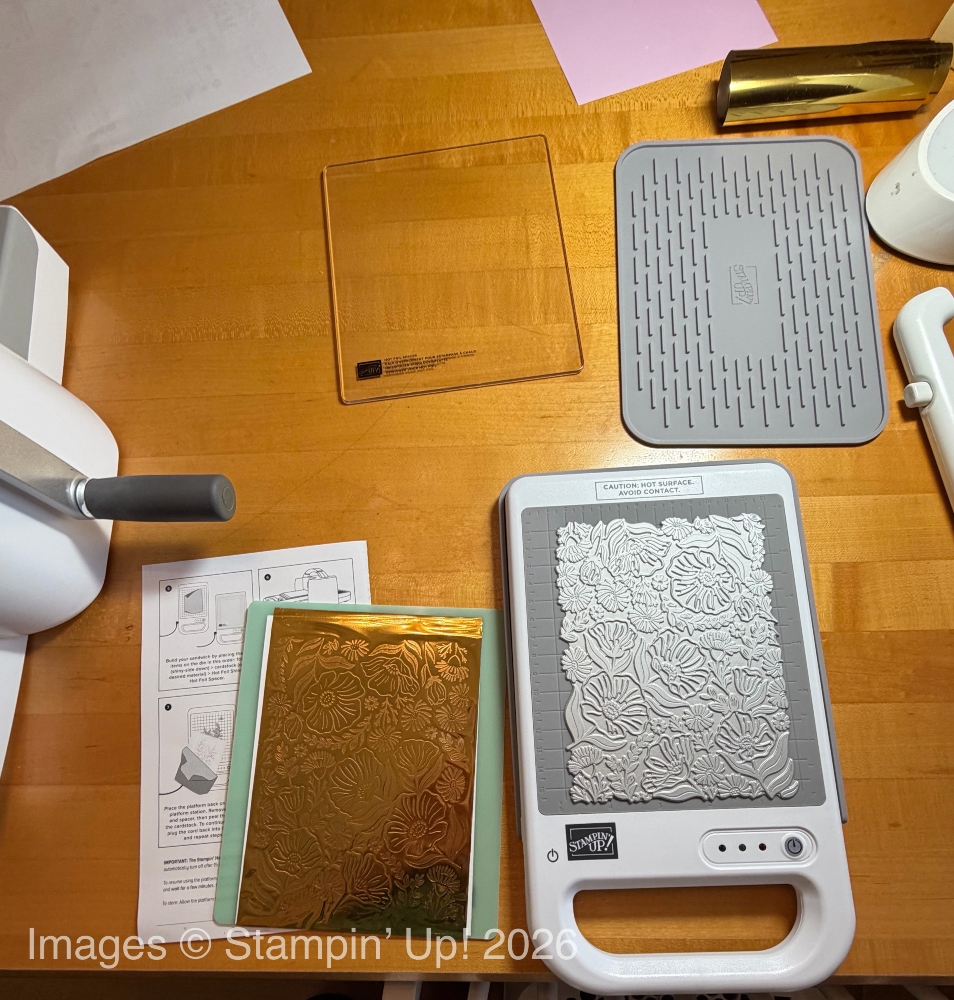
On the left, you see the platform that heats up and the silicone mat that it sits on to protect the surface. It takes 6 minutes to heat up initially, but then stays warm while you work on your projects.
To the right, you see the green hot foil shim and the clear hot foil spacer, two pieces you put on the hot platform as you build the sandwich.
Above those two pieces, you see another silicone mat on which to place the hot dies.
The white tool at the top is the magnetic pick up tool, to pick up hot dies from the platform.
You will also need the Stampin’ Cut & Emboss Machine. Stampin’ Up! is aware of many similar products out there, but you will need to use Stampin’ Up! products with this Hot Foil System for the 1-year limited warranty because they know these products work with the system.
Purchase the Stampin’ Hot Foil System and receive the virtual Metallic Magic Craft Class (a $30 value) FREE until January 4, 2027. You will also need to purchase the Stampin’ Hot Foil Rolls and Hot Foil dies to complete the hot foil process. The Foil and Dies are sold separately.
Stampin’ Hot Foil System and Craft Class (170009)$160.00
Page through the brochure above to learn all about the new Stampin’ Hot Foil System!Just click!
Things to Know:
You can foil on a variety of products such as cardstock (Two-Tone and White Willow are recommended), designer series paper, Stampin’ Up! Vellum, window sheets, and pearlized specialty paper. Porous or textured papers may give inconsistent results.
The cutting dies we already have are not designed to be used with hot foiling, and you can’t die cut using foiling dies. They are different and you may risk damaging the dies and the system.
Go slow when running the foil sandwich through the Cut & Emboss Machine.
Use any Rewards you have to purchase the Hot Foil System and/or earn Rewards when you purchase the system and the other products like dies and foil rolls. That helps with the expense!
I think this covers a lot of information, but we will all learn a lot more as more people get this foiling system in their hands and begin using it, just like when new catalogs come out and we see what everyone is doing with the new stamps and products! It will be a fun adventure, I’m sure. Maybe a bit of a learning curve, but the ladies in the video say we will catch on quickly after just a couple of tries!
More to come, but check out the brochure above (you can print it out if you like) and see that you think!