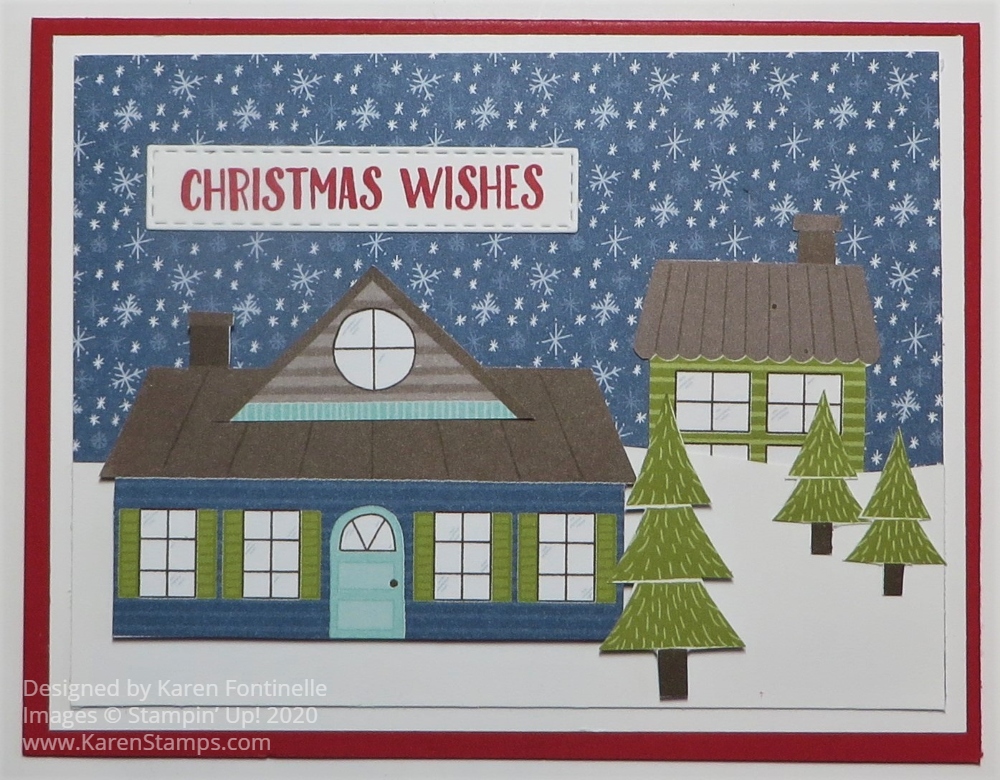
If you would like to have some fun with designer paper and card design like this Trimming the Town Christmas Wishes Card, this designer paper is for you! If you like, you can feel like a kid playing with paper and scissors and building a little town or landscape!
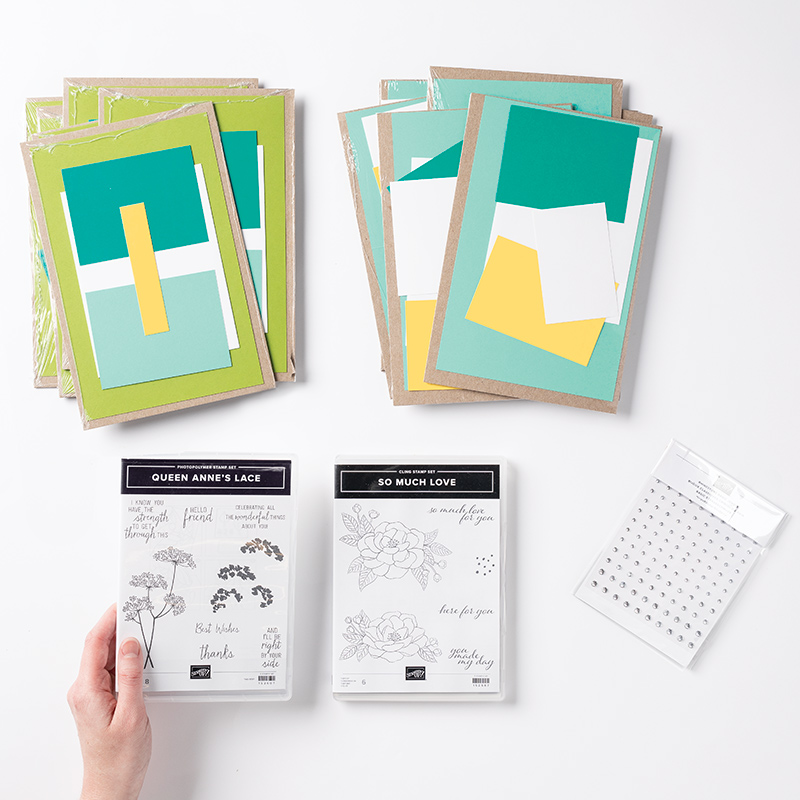
During the Stampin’ Up! Designer Series Paper Sale this month, I couldn’t resist purchasing this Trimming the Town Designer Series Paper. I also purchased the stamp set, but for this card, I only used the paper except for the greeting. I simply took one of the papers that had the larger houses and buildings printed on it and cut out some of the images with Paper Snips.
The large house on the front of my card I actually “remodeled”! The basic house was printed on the paper but as I tried to conserve as much of the paper as I could while cutting into it, I noticed that at the very bottom of the paper was a partial building and it was this roof piece with the round window, so I cut that roof piece out and adhered it to the top of my large house! The other little building on my card was also at the bottom of the page so I cut that out and stuck it behind the snow as it looked like the lower part of the image could have been cut off being placed at the bottom edge of the paper.
The card base is Real Red. The actual coordinating color with the paper is Poppy Parade, but I think the Real Red worked just fine on this card. Besides, I love Real Red! I put a layer of Whisper White underneath the Trimming the Town DSP with the snowy sky pattern. What a perfect paper to use as a background on a card or project! I covered the bottom portion of this designer paper with a piece of Whisper White to look like snow. I cut this the size I wanted to fit and then just added a little curviness to the top, just freehand although there are some dies that could do the same for you.
I just placed the two buildings and trees where I wanted them on the card and popped up the larger house with Stampin’ Dimensionals® as well as the large tree. If I had cut out some smaller buildings, I could have played a little more with the landscape. There is so much design potential with this designer paper as well as if you used the Coming Home Bundle (stamp set and dies).
One of the papers in the Trimming the Town package, is a full sheet of a winter scene that you could actually frame as is for a home decor piece, or use as a scrapbook page background or cut out various sections. It’s really a fun package of designer paper for the holidays!
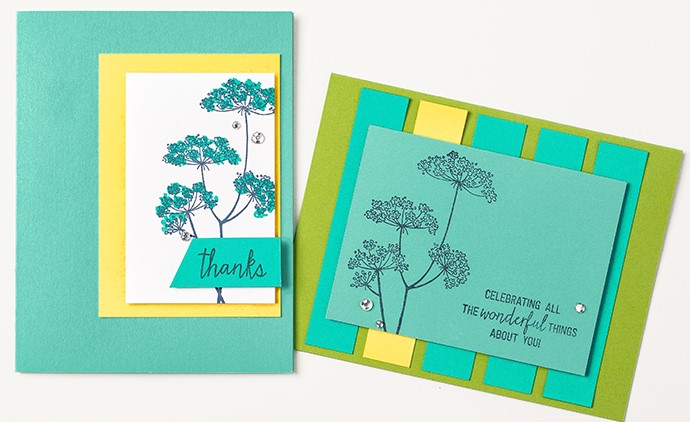
The greeting I used on this card is from the Banner Year Stamp Set. I stamped it in Real Red ink and die cut with one of the Rectangle Stitched Dies. I think it is a perfect fit on this card.
Don’t miss out on the Designer Series Paper Sale going on until October 31 in the Stampin’ Up! Store! There is a good choice of select papers and Trimming the Town is one of them 15% off! I think you will enjoy using this paper as I did on this Trimming the Town Christmas Wishes Card.