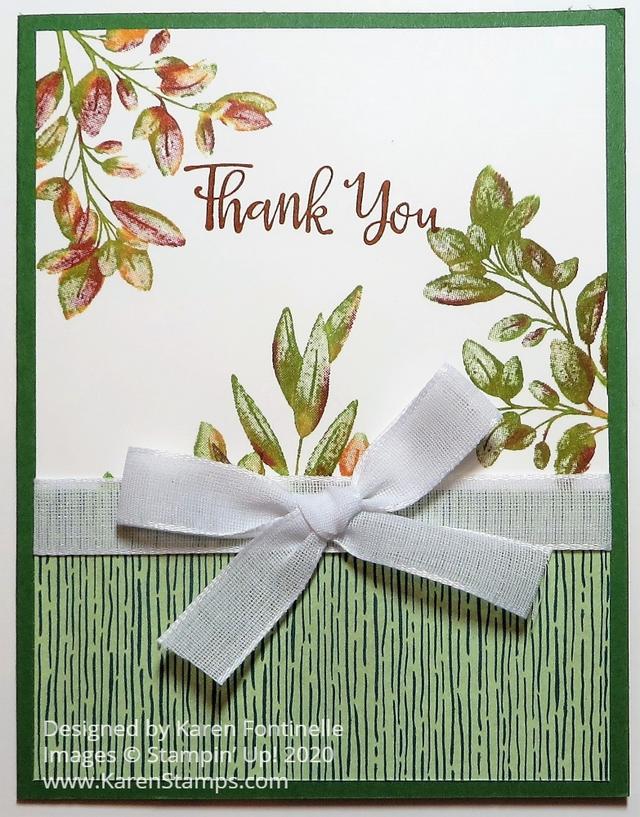
While we mostly think about “green” when we think about the Forever Fern Bundle, I wondered if I could use fall colors instead, and I ended up with this Forever Fern Fall Leaves Thank You Card. I really like it!
The card base is Garden Green with what was going to be a full Whisper White stamped layer. There is nothing difficult about the technique I used, but placing the stamps resulted in too much of a hodgepodge at the bottom of the Whisper White that I did not like. Luckily I thought of just cutting off that bottom portion and using a piece of Forever Greenery Designer Series Paper instead. I wanted a rather plain piece of designer paper so it wouldn’t look distracting and busy against my stamped leaves.
After I cut off the bottom mess of leaves, there were a few sticking up, but there seemed to be too much white space in the middle, even with the greeting stamped in Cajun Craze. The greeting didn’t look right stamped lower. So, what to do? I chose one of the long tamps in the Forever Fern Stamp Set and stamped it so it went up into the center of the card a little bit. I got lucky and really liked how it turned out!
After adhering the two papers, I wrapped the Whisper White Faux Linen Ribbon in the Flowers For Every Season Combo Pack (you get 3 ribbons!) around the seam. I tied the bow separately and adhered it with Mini Glue Dots. One tip I could have done would have been to tie a piece of white twine around the ribbon where I would place the bow to cinch that ribbon going across the card just to make it look more like I tied the bow on that ribbon going across!
Let’s talk about the stamping technique! I just used my Stampin’ Write Markers (not Stampin’ Blends) to color directly on the stamp. I pulled out various green markers, yellow, orange, darker yellow, even Cherry Cobbler for a dark reddish. It’s best if you start with the lightest colors, but even if you don’t, just scribble the darker color off your marker on scrap paper. You don’t have to be precise, just use the side of the brush tip of the marker to randomly color on the leaves all around, then use another color and another, whatever look you are going for. Don’t forget to “huff” (breathe) on the stamp to moisten the ink that might be drying, and then stamp. Each time you stamp it’s a surprise!
You can see on my card that the top bunch of leaves have a little more Cherry Cobbler ink on them, which I loved. The other ones have more green with a little yellow and orange. Each time you use this technique and stamp it will be different because while you can see the wet marker ink on the stamp, you can’t really see the colors until you stamp! In the end, I loved how this card turned out!
If you haven’t done this technique before, you can practice a few times, but it is plenty easy and I’m sure you will be happy with your efforts! Remember that the Forever Greenery Designer Series Paper is on the Stampin’ Up! Designer Series Paper Sale during the month of October.
