Author Archives: Karen Fontinelle

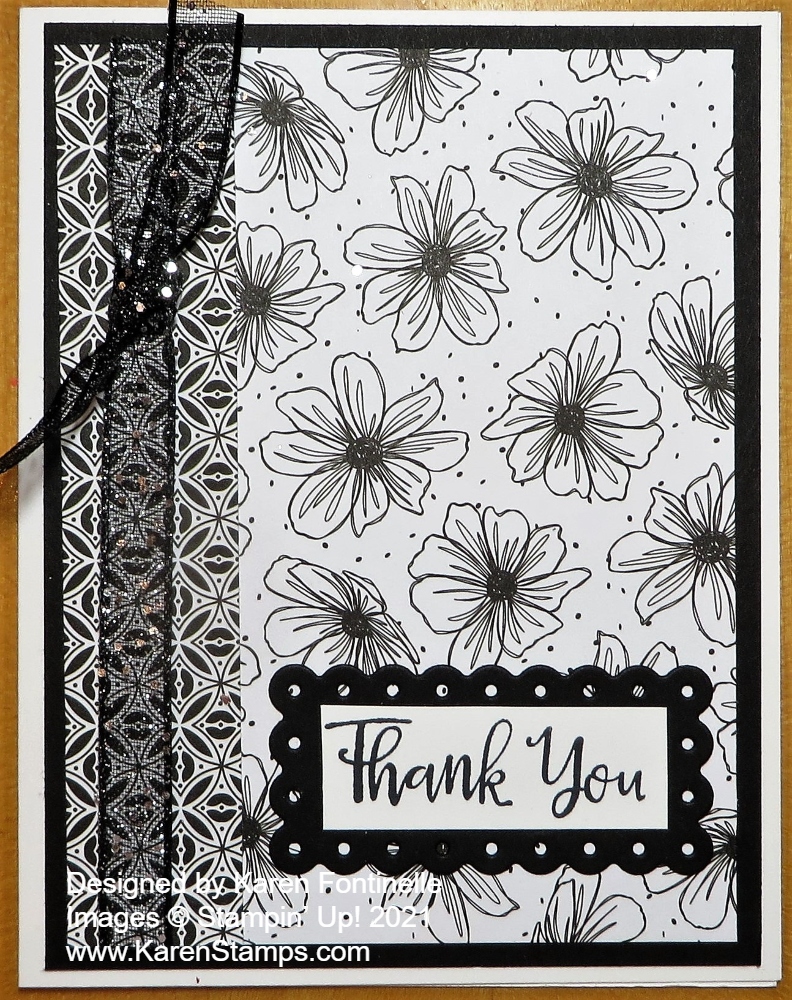
Terracotta Tile Fine Art Floral Thank You Card

Terracotta Tile Fine Art Floral Thank You Card

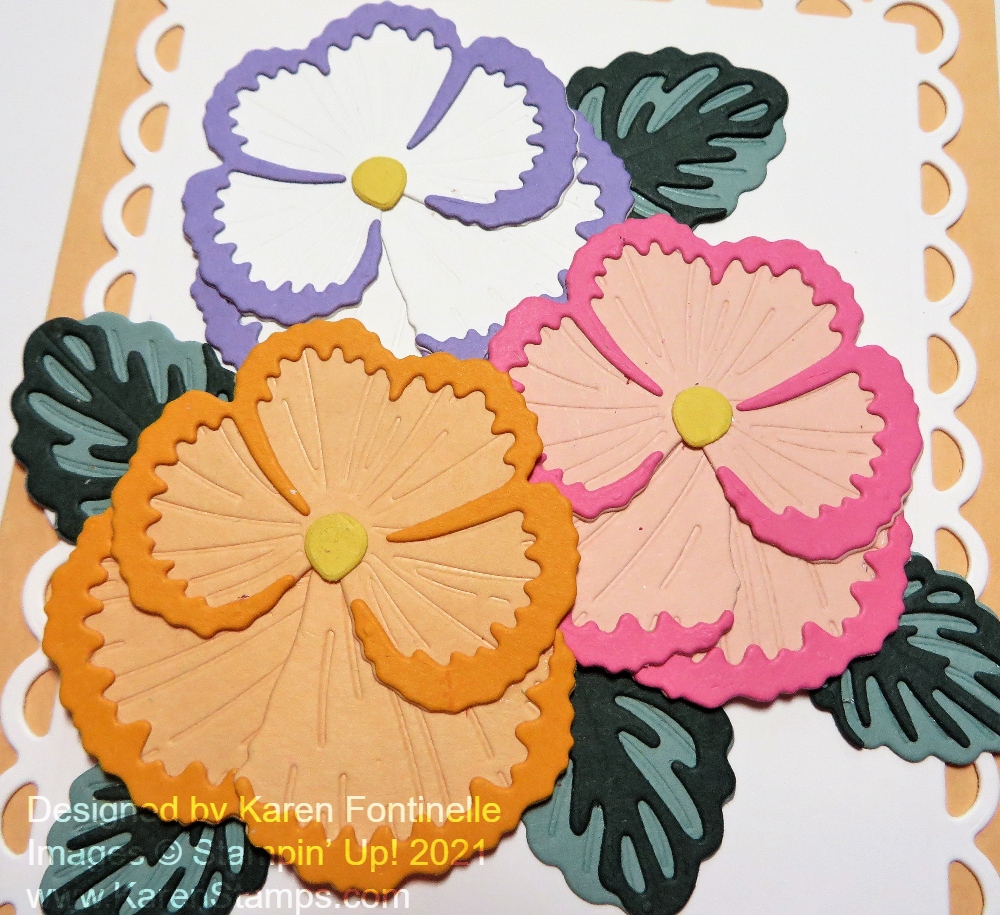
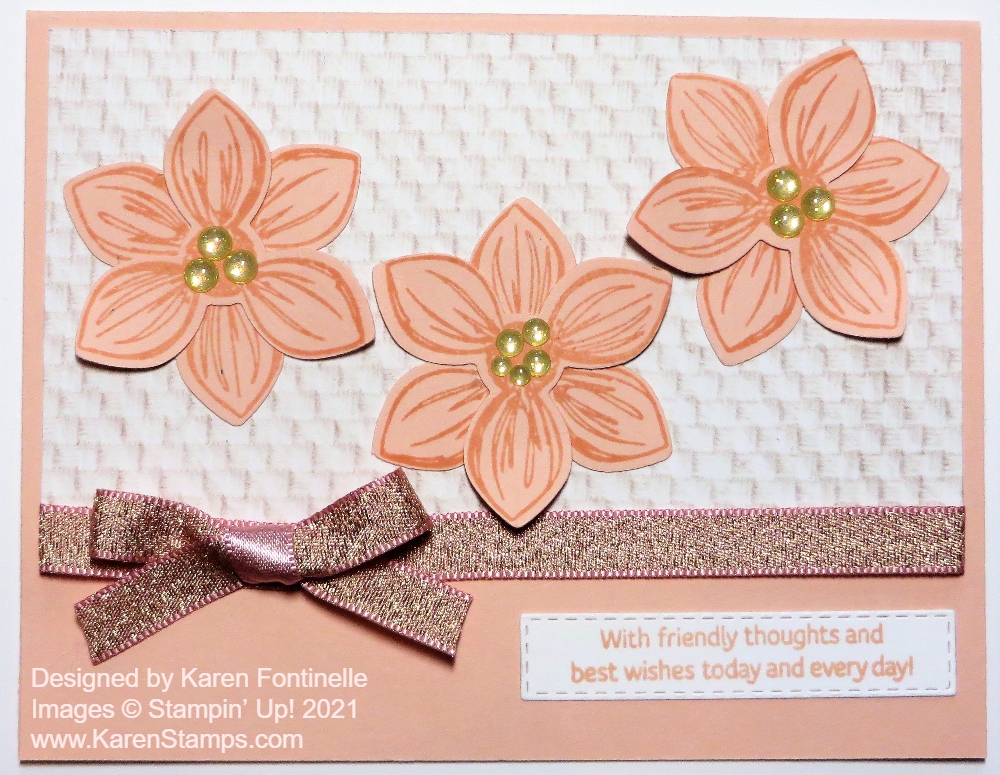
I’ve discovered that sometimes we don’t fully appreciate the Stampin’ Up! In Colors until they are going to retire, such as when I made this Terracotta Tile Fine Art Floral Thank You Card and realized that Terracotta Tile was one of the colors in one of my favorite papers. Honestly, I haven’t been a fan of the outgoing In Colors (although I think I am really going to like the new In Colors!) but when I wanted to use some of this ribbon, I discovered it goes with this paper!

This card is made with a card base of Terracotta Tile Cardstock. When I noticed that Terracotta Tile was one of the coordinating colors of the Fine Art Floral Designer Series Paper, I really was surprised because I hadn’t thought about it before, even though I wrote a list of all the colors on the back cardboard of designer papers because the Stampin’ Up! printing is too small to read easily. You can even see the beauty of this paper in my photos, the image of the texture of the paint that the Stampin’ Up! artist used in designing this paper! It almost looks like the front of this card is the actual painted canvas! So I was surprised to find that some of the patterns of paper in this Fine Art Floral pack had Terracotta Tile in them.

I used the Terracotta Tile 1/2″ Scalloped Linen Ribbon (retiring soon!) to embellish the card. I just adhered a strip of the ribbon around on the back of the designer paper and made a separate bow out of the ribbon and adhered it with Mini Glue Dots. Then the designer paper is adhered to the Terracotta Tile card base.

The greeting is stamped from the Many Mates Stamp Set (retiring soon!) and then die cut with a die in the Ornate Frames Dies. While I had everything out, I cut more of the designer paper trying to get the most Terracotta Tile color into the layer and stamped some more greetings, and die cut them with various dies. I popped up this greeting with Stampin’ Dimensionals. If you think of it, particularly when you are making rather easy, basic card designs, it is a good idea to make several cards while you have everything out and then you have extras to grab when you need a card!

Although the Spring Mini Catalog is not retiring until the end of June, you might consider that most, if not all, designer papers usually retire so that they can bring in new papers, so I would imagine that the Fine Art Flora Designer Series Paper will retire at that time, but not now!

The Terracotta Tile ribbon that I used is retiring May 3 so if you haven’t paid too much attention to the In Colors even after two years, maybe you want to take another look!

SHOP STAMPIN’ UP! ONLINE HERE!

Good Morning Magnolia Enjoy Today Card

Good Morning Magnolia Enjoy Today Card

This Good Morning Magnolia Enjoy Today Card is one I had to make before this beautiful stamp set retires soon! I can’t believe they are taking away this beautiful, dramatic flower, but I think it has been around for two years. However, I haven’t had enough opportunity to play with it!

The Good Morning Magnolia Stamp Set is on the Last-Chance List for the Stampin’ Up! Annual Catalog. It is easiest to see what is retiring and still available by going to the Stampin Up! Store. There are also coordinating dies, the Magnolia Memory Dies, that are retiring along with the stamp set. You can get these dies for the low, low, ridiculously low price of $8.75!! Be sure to check these out!

To make this card, I started with a card base of Petal Pink. I stamped the large magnolia using my Stamparatus because with a very large stamp like this one, it could be that one area of the stamp might not stamp as well. If you are using the Stamparatus, you can simply reink the stamp, still attached to the Stamparatus, and stamp again focusing on the area that needs more pressure or more ink. The Stamparatus is so great for things like this! The Stamparatus even has its own Craft & Carry Stamparatus Bag that is on sale for only $11.60 after being reduced from $29.00. This is a great bag, actually, even if you don’t own a Stamparatus. Even if you do, you can use the bag for other things. There are nice pockets inside for holding all kinds of things, crafting or otherwise.

After stamping the magnolia on Basic White Cardstock, I colored it with Stampin’ Blends. You can use various methods of coloring but I love using the Stampin’ Blends. I used the Petal Pink Combo on the flower and then for some crazy reason added tiny bits of Melon Mambo. It really was a strong color on the flower and I figured I had ruined it! BUT, I kept blending with my Petal Pink colors and I think it all worked out! I die cut it with the Magnolia Memory die. As I got ready to layer the flower on the card, I saw a piece of designer paper from the Peony Garden Designer Series Paper and thought this Petal Pink pattern would look good behind the flower. (Honestly, I had looked all over for the Magnolia DSP I thought I had and had loved, but I guess that was from the year before!)

Because the die cut had a bit of white showing on it, I decided to put a layer of Basic White with a very narrow margin underneath the pink designer paper, which helped it stand out a little from the Petal Pink cardstock base. The magnolia is popped up with Stampin’ Dimensionals®. I chose a greeting in the stamp set and stamped it in Petal Pink Ink and die cut it with a frame in the Ornate Frames Dies. To finish off the card, I added two Champagne Rhinestone Basic Jewels to the Ornate Frame.

Here is a similar card I made with the Good Morning Magnolia Stamp Set and the designer paper almost two years ago. Really, this Good Morning Magnolia Enjoy Today Card is an easy card to make so check out the stamp set and dies if you don’t already own them on the Stampin’ Up! Retiring List.

Hydrangea Hill Butterflies

Hydrangea Hill Butterflies

Make some pretty butterflies using pretty designer paper and a punch, like these Hydrangea Hill Butterflies on this card. It’s springtime so it’s time for butterflies and Stampin’ Up! has an assortment of butterflies to choose from. Some are retiring soon and some are new. But paper and a punch help you make a pretty simple, elegant card.

The card base is Highland Heather Cardstock. I started off planning to make a white on white card, but I changed my mind! It’s allowed! The top layer has wider margins than normal. Instead of cutting the layer 5 1/4″ x 4″, I cut it at 5″ x 3 3/4″. I ran the Basic White paper through the Stampin’ Cut & Emboss Machine embossing it with the Subtles Embossing Folder. This folder is difficult to see in a photo but it just puts a “subtle” pattern of lines on the paper so you have some texture but just barely. It’s perfect for when you want something but not a lot. This embossing folder is retiring soon so check it out if you are interested!

I added a narrow strip of Hydrangea Hill Designer Series Paper along the side of the Basic White embossed layer. I used the Butterfly Duet Punch to punch out several butterflies out of another pattern of the same paper. I chose a pattern that had the little floral pattern all over the paper so it would definitely show up inside the punch. Otherwise, you might have to be careful to get a colorful enough pattern inside the punch area. This punch punches out a small and large butterfly so it is very handy. But it is retiring by May 3, so if you don’t have it yet, you might want to see if you need it in your stash! I just drew on the little antennae on each butterfly with a fine tip black marker.

The greeting is from another retiring item, the Itty Bitty Greetings Stamp Set. All the “Itty Bitty” stamp sets are retiring which really makes me sad. I have used all of them a lot. On some cards, you don’t necessarily want the greeting to be the focal point or there just isn’t enough room for larger greetings, so the Itty Bitty series always came in handy! These Itty Bitty Sets are all retiring – Itty Bitty Greetings. Itty Bitty Christmas, and Itty Bitty Birthdays. Check them out. I used the Lovely You Punch for both the Highland Heather layer and the greeting.

The two large butterflies are popped up with Mini Stampin’ Dimensionals and the wings are folded up a little bit to add some dimension. For a little bling, I added some Artistry Blooms Adhesive-Backed Sequins scattered around and on the greeting. These are Coastal Cabana in color but go fine with the blues in the designer paper.

This is an easy card to make and easy to change up according to what supplies and punches you have. You could also punch out flowers and make the card in the same design. Try making a card with what you have today similar to this Hydrangea Hill Butterflies card and see what you come up with!

Last Minute Easter Ideas

Three Easy Paper Easter Baskets

Make An Easy Easter Basket

Cute and easy to make and decorate!

Easy Easter Folded Candy Holders

Easy Easter Folded Candy Holders

These are so fun and easy to make for a piece of candy or a tea bag or treat!

Candy Basket For Easter With Candy Chicks

An Easy Candy Basket For Easter With Candy Chicks

I have this little basket out for an Easter decoration this year! Looks complicated but it is NOT!

Easter Bunny Tiny Treat Box For Candy

Easter Bunny Tiny Treat Box For Candy

Love this little punch art or die-cut bunny! Make one to put on the front of a card or for a treat!

Easter Card with Bunny and Eggs

The Easter Bunny is Hiding Some Easter Eggs!

Just punch or cut out a bunch of oval “eggs” of different sizes from designer paper and cardstock plus bunny shapes for an easy card!

Happy Easter!

Springtime Joy Spring Card

Springtime Joy Spring Card

I can’t resist playing with this bunny and other cute stamps in this set so the result is this Springtime Joy Spring Card. This card has a “Welcome Spring!” greeting, but it could also be an Easter card, of course, or it could be a “Welcome Baby!” card! Bunnies and little chicks are perfect for baby cards as well.

This card uses the Springtime Joy Stamp Set in the January-June 2021 Mini Catalog (Spring Mini). This Spring Mini Catalog goes through June, but eventually it will end and many products in it will retire so you might want to get this stamp set and any others before the rush sets in during June! Just in case!

To make this card a little different and a little more fun, I punched three holes for the bunnies and chick to peek out of! I made the card base of Blushing Bride Cardstock with a layer of Basic White. I randomly used the 1 1/2″ Circle Punch (retiring!). (I had a hard time finding this punch by searching for the name, so just look under “Punches” under Products and scroll through until you find it.) I just punched three holes in the card for the two bunnies and the chick.

On scrap paper I had stamped the bunnies and chick and colored them in with Stampin’ Blends. Then you can punch or cut out the images with plenty of space around them and see how you can place them on the card base with the punched white layer over the top. It is just a matter of a little fiddling to get them placed correctly. I lifted up the white layer leaving the stamped images in place. While holding those in place, I carefully lifted up one side and then the other, sneaking some adhesive underneath so I wasn’t moving the images out of place. I got lucky and it went well!

Before adhering the white layer, I stamped some tulips from the same Spring Joy Stamp Set in Blushing Bride Ink. I wish I would have also stamped the butterflies, but that was an afterthought! I stamped the butterflies later on scraps, colored them in and cut out. I could have popped those up but just adhered them flat t the card and drew in their antennae with a black pen.

The Basic White layer is popped up on Stampin’ Dimensionals®. I used pretty many on the underside of the white since I had the punched holes and wanted the card front to be sturdy. The greeting is in the stamp set and I just stamped it on a scrap strip of Basic White, made one end flat against the right side since there wasn’t a lot of space for a greeting on this card and made a flagged end on the other side.

If you aren’t convinced at how adorable the Springtime Joy Stamp Set is, take a look at the cute lamb, also in this set, as you see on THIS CARD.

This Springtime Joy Spring Card is sweet for this Easter weekend or just as a spring card or add another greeting for birthday or thinking of you!

Hydrangea Hill Happy Easter Card

Hydrangea Hill Happy Easter Card

Easter is coming in just a few days, so if you wanted to have a few Easter cards to mail or hand out, this Hydrangea Hill Happy Easter Card is a super simple one to make! You can see it is just a basic, easy card design and one you can change up with different paper and greeting.

The Hydrangea Hill Designer Series Paper is a beautiful paper on it’s own so it works well with a simple card like this one. You wouldn’t want a lot of other embellishments or fancy greetings and die cuts that would take away from the beauty of the paper as it is.

The card base of Gorgeous Grape Cardstock is one of the coordinating colors with the Hydrangea Hill Paper. A lighter shade of purple would be Highland Heather. I just cut a piece of the designer paper to the usual layer size of 4″ x 5 1/4″. When you have a design like this, with the larger hydrangea flowers, you might want to try to strategically cut the paper to get the best view of the flowers. On this particular paper, you can see how there is one hydrangea that is kind of the focal point because all of it is on the card. You might not have a choice depending on if you have already cut up your paper for other projects, but I still had enough of this paper to cut a 4″ wide strip the length of the paper. Then I could go back in and cut out just the portion that showed off the flower well. You might end up with not one full flower on your card front but it would likely still be pretty because that would just be a different look of all the colors of the various flowers.

Before adhering the designer paper to the card front, I added some Blackberry Bliss 3/8″ Striped Ribbon. Actually, I originally thought it was Gorgeous Grape but it still matches just fine! The sheerness and the pretty stripes of this ribbon are beautiful on this card. I tied the bow on separately.

The greeting is from the Arrange A Wreath Stamp Set and is stamped in Gorgeous Grape. I cut it out with one of the Layering Circles Dies and layered it on a pretty decorative circle in the Painted Labels Dies. You can see that you could put a birthday greeting, anniversary, thinking of you, sympathy, even a wedding sentiment on this same card and it would be perfect. I could have added some pretty sequins or rhinestones around on the card as well. But as I said, the paper is so pretty, you almost don’t want to add much because you want the recipient to focus on the beautiful paper design.

This Hydrangea Hill Designer Series Paper is in the January-June 2021 Mini Catalog so is not in danger of retiring right away as the Annual Catalog products are. However, usually all designer paper retires eventually to bring in new, so enjoy your hydrangea paper while we have it! The Arrange a Wreath Stamp Set is retiring from the Annual Catalog along with the Wreath Dies by May 3.

Here is another basic card design using the Hydrangea Hill Designer Paper, with a less busy design, but you could change it out using this floral pattern.

Finish up your Easter cards and projects, but you can also make this Hydrangea Hill Happy Easter Card card for any other occasion.

SHOP STAMPIN’ UP! ONLINE HERE!

Love You Always Happy Easter Card

Love You Always Happy Easter Card

Can you use Valentine paper to make an Easter card? Sure, with the Love You Always Specialty Designer Series Paper with its beautiful foil floral design on three different colors of papers. Of course, it is not officially Valentine paper. It is just presented in the January – June 2021 Mini Catalog in “sort of” the Valentine section of the catalog, in the Love You Always Suite. It is actually beautiful paper that you can use for many occasions. Since two of the three sheets of paper are pink (Blushing Bride and Rococo Rose) and since the suite contains hearts, we perceive it as Valentine’s Day paper. But if it would have been added to a floral suite, we wouldn’t consider it Valentine paper! All this to say, you can use this Love You Always Paper to make almost any pretty cards that you want!

This easy Easter card starts with a Blushing Bride Cardstock card base. The layer is the Love You Always Paper in Blushing Bride. I wanted to keep the card simple so I didn’t try for anything fancy. I stamped the greeting with stamps from two different stamp sets. First, stamped the Easter greeting from the Arrange a Wreath Stamp Set (retiring from the Annual Catalog!) and then for a little extra, I remembered the tulip in the Springtime Joy Stamp Set which I thought would sort of match the designer paper. I stamped just one tulip but decided on one on each side of the greeting.

Next, to cut out the greeting, I looked through my dies and finally decided on a large one in the Tasteful Labels Dies. Then I tried various things to make a layer of Blushing Bride Cardstock under the greeting, usually by cutting another die in half so it would just show out to the sides of the greeting. Nothing seemed to add anything to the card.

I thought I would try ribbon, so I used the Blushing Bride 3/8″ Metallic Ribbon. I’ve been using this ribbon pretty often. It’s very pretty with its one satin side and one metallic side. I wrapped this ribbon horizontally around the designer paper and added a bow separately. This seemed to enhance the card without interfering with the large die-cut greeting.

The greeting is popped up with Stampin’ Dimensionals®. For a little bling, I added a few of the smallest Champagne Rhinestone Basic Jewels, which I really liked on this card!

If you were to copy this card, you would find it very quick and easy to make because you wouldn’t have to figure out which elements to use! So if you need a quick and easy Easter card, try this card design! You can change it up however you like, but at least you will have a quick and easy idea to go by if you need to make some Easter cards and get them in the mail today! This Love You Always Happy Easter Card is really a basic card design so you can make a card like this for Easter.

SHOP STAMPIN’ UP! ONLINE HERE!

Check Out the Stampin’ Up! Annual Catalog Last-Chance Products!

Last-Chance Banner 2021 my info

It’s here! It’s the Stampin’ Up! Annual Catalog Last-Chance Product Sale and list of retiring products. The new annual catalog is coming out a month earlier this year so it’s time to make room for all the new products in the new catalog coming out May 4th! Some products are as much as 75% off!

Remember, Bundles are all on the list because some products WILL retire, but others will just be separated into their separate products and carried over into the new catalog. And some will stay in their Bundles. There will be new Bundles in the next catalog.

The Tear & Tape Adhesive will be “reconfigured” but it is in the new catalog!

The Stamping Sponges are going away! They have been around since I’ve been a Demonstrator!

The Clear Tiny Treat Boxes, both the white and gold Mini Pizza Boxes, and the cute Stampin’ Up! Mini Shipping Boxes are all retiring. I have especially used those Clear Tiny Treat Boxes a LOT!

All three Itty Bitty Stamp Sets (Greetings, Christmas, and Birthdays, are all retiring (and are backordered right now). I have used these stamp sets a lot. The small greetings were perfect for lots of projects and you can find any greeting you need out of those sets!

The Embossing Powders are on the Last-Chance list but they are just going to be repackaged into three colors in one package – Basics and Metallics. So if you need to restock on just one color, you might want to get the single color now.

The Circle Punches we have left are retiring. We use dies a lot but sometimes punches are easier and handier so check those out. The Classic Label Punch, another very useful punch, is also retiring.

The Craft & Carry Stamparatus Bag is retiring and is priced at only $11.60 (reg. price $29.00)! This bag is designed to carry your Stamparatus, to store it or to carry it to stamping events or take on vacation or stamp with a friend. BUT even if you don’t own a Stamparatus or don’t plan on taking your Stamparatus with you, this might be a great bag just to own! It has pockets inside for various things and is a nice, tailored looking medium size bag for daily use, for vacations, for anything! Look at it that way and see if it would be useful to you, especially for only $11!

The Stitched Shapes Dies are retiring!! I may be wrong, but I think these were some of the first or early dies we ever had. But they are so basic and useful, layer easily, and that stitched edge add a nice little bit of embellishment. If you don’t already own these, you really might like them if you do a lot of die-cutting. Also, the Layering Ovals Dies are going away.

If you need more Snow Globe Shaker Domes for your stamp set, get them now on sale before they are gone.

Some Stampin’ Blends colors are retiring, even a couple of current ones, plus the outgoing In Colors, so if you want those, grab them!

There is a lot more I could list about the Last-Chance List, but these are some of the things that jumped out at me and might be helpful for you to consider. Remember, it is all “while supplies last”!

SHOP STAMPIN’ UP! LAST CHANCE PRODUCTS!

This is the easiest and most reliable way to check what is still available. If you want to see a list of retiring products, here is the Stampin’ Up! list.

Arrange a Wreath Easter Card

Arrange a Wreath Easter Card

This Arrange A Wreath Easter Card uses several products, unfortunately, from the Stampin’ Up! Last-Chance List. Every year we go through this with a bit of excitement and a bit of nostalgia. We wonder what will be retiring and then we groan when our favorites are on the list! It’s really kind of funny after you have been through it many times! And then when the new Stampin’ Up! Catalog comes out we’re all excited about the new products and almost forget about what retired! Yet there are always those products that we each must have in our stash, whether they have been around for awhile or maybe only a year or two.

Easter is coming next weekend so be sure you are ready for the Easter Bunny! Make some Easter cards to send and get them in the mail! If you already have the Arrange a Wreath Bundle, you can make some very pretty cards for Spring and Easter. This Bundle is good for all seasons, actually. I really wish it was not retiring yet! However, on this card, I just used the Wreath Builder Dies. The stamp set, dies, and Bundle are all backordered as I write this. Hopefully, they will be back in stock soon!

Another product retiring, that I just purchased, is the Playing With Patterns Designer Series Paper. These are 6″ x 6″ papers with such colorful and happy colors and patterns! I can’t believe I didn’t have it before now. There were several papers that I could have used for a background for this Easter card, but I chose this Calypso Coral paper with white dots and layered it on top of Basic White cardstock to brighten it up. The card base is Calypso Coral.

The wreath is one of two choices in leafy wreaths in the die set. And then you get all kinds of dies to add elements to your wreath. I chose the wreath with the small sprigs of leaves and decorated it with colored die-cut eggs and flowers along with the die-cut bow in the Wreath Builder Dies. For flower centers, I used the Gold Glitter Enamel Dots. I have used these a lot because Gold Glitter goes with a lot of things especially since they come in different sizes of dots. These dots are also retiring soon so get them while you can!

I actually forgot about the matching Arrange a Wreath Stamp Set, so I used the Easter greeting in the Itty Bitty Greetings Stamp Set. ALL the Itty Bitty Stamp sets are retiring, which really upsets me because I used all the Itty Bitty stamp sets a lot. You can find just about any greeting you could need in one of these sets! If you don’t have them, be sure to check them out in case you “need” them! The greeting is stamped in Calypso Coral Ink and punched out with the Classic Label Punch. Can we really live without this basic punch??! It was just perfect with the Itty Bitty greetings and many others.

Check out the Last-Chance Products List and Sale. The Classic Label Punch is even on sale, but is backordered. All of these products are available while supplies last.

The easiest way to see what is still available is just to go to the Stampin’ Up! Online Store and shop there. If you already have the Arrange a Wreath Bundle or dies, make a card for a friend or neighbor for Easter like this Arrange A Wreath Easter Card. You can even add a bunny if you want!

SHOP STAMPIN’ UP! ONLINE HERE!

Springtime Joy Bunny and Easter Basket

Springtime Joy Bunny and Easter Basket

This Springtime Joy Bunny and Easter Basket Easter card came out of planning to make a monochromatic or almost monochromatic card like one I made a previous year that turned out cute! Only the background turned out to be monochromatic! But it is fun to make a stamped background! Just some good old stamping that feels good in your hand!

The card base is Crumb Cake Cardstock with a layer of Petal Pink. The top layer is Shimmery White Cardstock. I stamped the Easter basket in the Springtime Joy Stamp Set randomly on the piece of Shimmery White with Crumb Cake ink. The Shimmery White has just a very subtle shimmer to it which makes it so elegant and beautiful (but difficult to photograph!).

The bunny and the Easter basket in the Springtime Joy Stamp Set are both stamped on Shimmery White and then cut out with Paper Snips scissors by hand! Then they were adhered to a die-cut piece of Shimmery White, cut out with the Stitched Shapes Dies. These dies are on the Last-Chance List which makes me sad because they have been some of my favorite and most used dies. They are just basic shapes you can use over and over but the little stitching around the edge really adds a nice touch. Plus they can be layered on other die-cuts. In this case the Stitched Shapes circle is layered on a Layering Circles scalloped die-cut. (The Layering Ovals and Layering Squares Dies are both retiring!)

The bunny and basket are both popped up on Stampin’ Dimensionals®. They are colored in with Stampin’ Blends alcohol markers. Some Stampin’ Blends colors are retiring as well! Crazy! The bow is tied with the Blushing Bride 3/8″ Metallic Ribbon.

If you really wanted to make a monochromatic Easter card, here is one I made last year all in Highland Heather Ink.

On the inside of the card, I added a Shimmery White piece of cardstock with the Easter greeting stamped in Crumb Cake from the stamp set, plus the Easter basket in the bottom corner.

Be sure to check out the list of retiring Stampin’ Up! Annual Catalog products. Some are discounted but not everything. Bundles are not carried over at the Bundle price with the 10% off price, but some Bundle items are carried over to the new catalog separately. There will be new Bundles in the new catalog! A few products are not really going away, such as the Tear & Tape Adhesive, but are being “reconfigured”. The embossing powders are not going away but will be packaged in sets of three colors.

It’s time to make Easter cards so I hope this Springtime Joy Bunny and Easter Basket card will give you some inspiration.

Last-Chance Products Sale HERE!

Last-Chance List PDF

Keep Up With the Stampin’ Up! News!

Join Our Stamping With Karen Mailing List

It’s time to be a part of the Stamping With Karen Mailing List since a lot of things will be coming up! Tomorrow, March 24 at 1 PM Mountain Time, the list from the current Stampin’ Up! Annual Catalog of the retiring products will come out! Some select products will be on sale and usually, those go fast! Then in May this year, it will be the new Stampin’ Up! Catalog time, with new products, things to learn about! You’ll want to keep up with all the news surrounding these two big events!

Also, keep up with news about the new Paper Pumpkin Kit every month and what is new with Stampin’ Up! each week!

If you are on my blog, you will see a red sign-up box in the top right corner where you can simply put your name (or first name) and best email. If you are on your phone, you probably need to scroll way down to get to the sidebar things. OR you can go to my sign up page HERE.

You will receive an email with a link to your free gift from me, as a thank you for signing up with me!

I send out a weekly email every Tuesday afternoon with the latest Stampin’ Up! news and offers plus stamping ideas with a supply list and directions. Even if you never make the project, maybe just seeing ideas will do your crafty heart good! I know it does mine! I’m all about the ideas!!

In the fall, as a thank you to my mailing list subscribers, I always send out a special email called The 12 Weeks of Christmas with an exclusive holiday idea for each week leading up to Christmas. You can only get these ideas if you are on my mailing list. I value my subscribers and have fun sending out these holiday ideas.

Let’s stay connected and in touch with each other over our favorite thing to talk about…..stamping with Stampin’ Up!

You are also welcome to follow me on Facebook, Instagram, Twitter, and Pinterest.

Easter Bunny Wreath Easter Card

Easter Bunny Wreath Easter Card

There are so many pretty cards you can make with this die-cut wreath including a card like this Easter Bunny Wreath Easter Card. You can use this wreath and the other design that comes in the set as well to make all kinds of cards for many occasions. I love adding the Easter bunny and his basket of eggs to the wreath!

The die-cut wreath is made with the Wreath Builder Dies. I die cut two wreaths, one out of Pear Pizzazz and one out of Soft Sea Foam for a lighter color. You can use just one wreath but I think two look more interesting. Just glue one on top of the other, however you would like to place it, and then adhere to the card front.

The card base is Pear Pizzazz with a layer of Shimmery White Cardstock. I thought the background needed a little something, so I embossed it with the Ornate 3D Floral Embossing Folder. I think it adds a nice background without being too much.

The Easter bunny and basket, from the Springtime Joy Stamp Set, are stamped on Shimmery White with Memento Ink and colored in with Stampin’ Blends. I then cut out each by hand. To get your scissors inside the handle of the basket, you can punch a hole or maybe a couple of holes carefully which might work better than trying to stab the point of your scissors into the cardstock! I just used Multipurpose Liquid Glue for everything, although you could pop some things up with Stampin’ Dimensionals if you wanted to.

I also added a bow with the Daffodil Delight 1/4″ Ruched Ribbon and adhered it with Mini Glue Dots. There is also a die for a bow to hang on the wreath, but I preferred a real bow. For the greeting, I stamped one in the Itty Bitty Greetings Stamp Set and made a tiny tag out of it to tie on behind the bow. You can even cheat and add Glue Dots behind a little tag like this to hold it in exactly the position you want it or even behind ribbon tails or bow loops to keep them where you want them!

Here is another card I made for fall die-cutting one each of both the wreath designs on one card!

Easter is in two weeks from yesterday so it’s time to make Easter and Spring cards if you want to send them.

Shop the Last-Chance Products Sale March 24 – May 3 on select, retiring Annual Catalog products! Be ready!

(Sale probably begins at 1:00 PM Mountain Time, 2:00 PM Central Time when the Retiring List is released. Stay tuned!)

Art Gallery Floral Card For Spring

Art Gallery Floral Card For Spring

I may have missed the first day of Spring, but this Art Gallery Floral Card For Spring is for the second day of Spring! I was pleased with how this card turned out with “just stamping”. The large flower stamps in the Art Gallery Stamp Set can be used with two-step stamping which adds extra interest, texture, and dimension with the possibility of different colors on the same flower.

For this card, I used pretty bright colors, like Melon Mambo for the card base and for the first top flower. I think with the holidays and winter, I hadn’t used Melon Mambo for a long time and it’s one of my favorites. For the other flowers, I used Daffodil Delight and Highland Heather, plus Mango Melody and Melon Mambo for the smaller flowers.

When you do two-step stamping, one way to do it is to ink up your stamp and then stamp lightly on scrap paper first, then stamp the image on your cardstock. This gives a light image, over which you can then stamp the second stamp, usually a little more detailed, which then shows up darker over the light image but doesn’t fully cover it at all. Or you can do it in reverse…..stamp the detailed image first and then the lighter image. Depending on the stamp, you might even be able to stamp full strength both times if the detail shows up well enough.

With two-step stamping, you can also use two different colors on the stamp. For example, you could stamp the lighter color in yellow and then use an orange shade for the second stamp. It might produce a colorful, shaded version of a flower like you might see in nature.

In order to stamp the large stem and leaf stamp in the set now on my card with not much space in between flowers, I stamped the large flower on scrap paper and then cut it out to use as a mask. After inking up the leaf stamp, I placed the cut out mask over the flower that would get the green ink on it if not covered. Then I stamped the stem and leaf. That way, the extension of the leaf and stem gets stamped over the mask instead of ruining your stamped flower. Then remove the mask and place it on another flower. Maybe don’t ink you the whole leaf image if that works so you don’t get ink where you don’t want it.

For the greeting, I simply stamped it right on the card. I could have made it a layer, but I ended up with that small empty space at the top of the card and it seemed perfect to just put the greeting there. This greeting is also in the Art Gallery Stamp Set as are many other choices in sentiments.

While you can use Basic White or Very Vanilla for the top card layer, for a change I used Shimmery White Cardstock. This is my favorite paper because it has a subtle shimmer. It’s just beautiful! It usually doesn’t photograph because it is so subtle, but in person, you can see it. You can stamp well on it and you can watercolor on it better than Basic White. Use Shimmery White when you just want something a little more special! It’s very nice paper!

Hopefully you are feeling spring where you live! We have certainly had some beautiful spring days to be outside in Houston lately, although it has been a little chilly in the mornings. In spite of our winter storm, our grass is turning green again (maybe a lot of weeds!) and the azaleas are blooming! The bugs are back out (yuck!), especially the mosquito hawks, that like to hang around doors and fly in the house. This is the perfect weather which we have to enjoy until the very hot, humid summer arrives.

Celebrate spring by making a few light, bright, and colorful cards after the doldrums of winter! It will lift your spirits and those to whom you send the cards!

SHOP STAMPIN’ UP! ONLINE HERE!