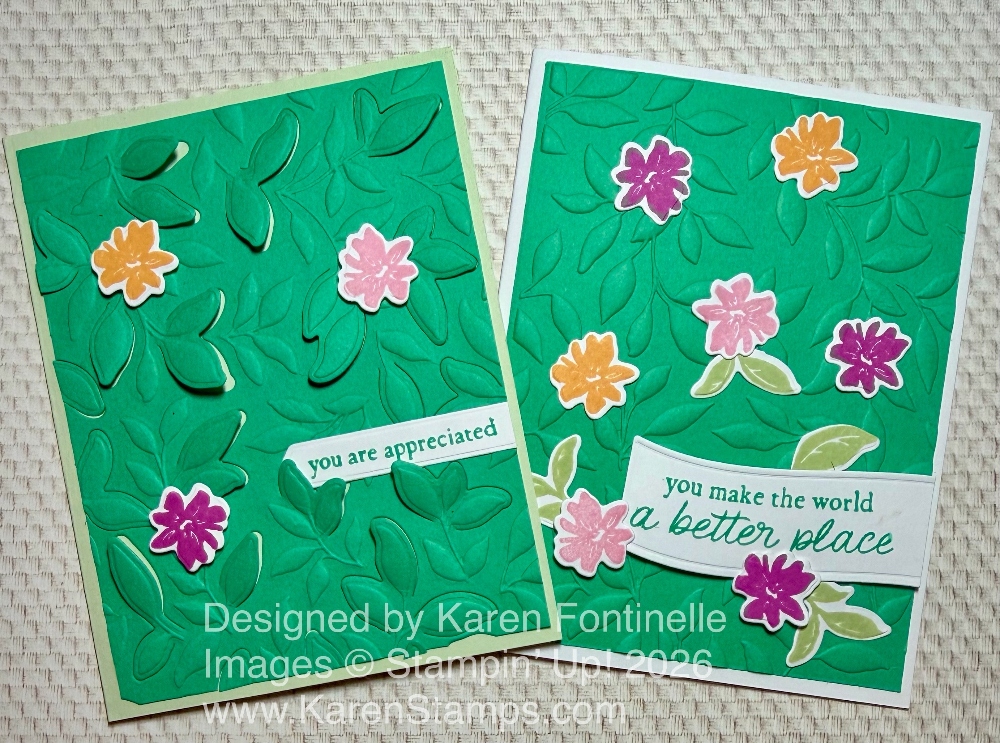
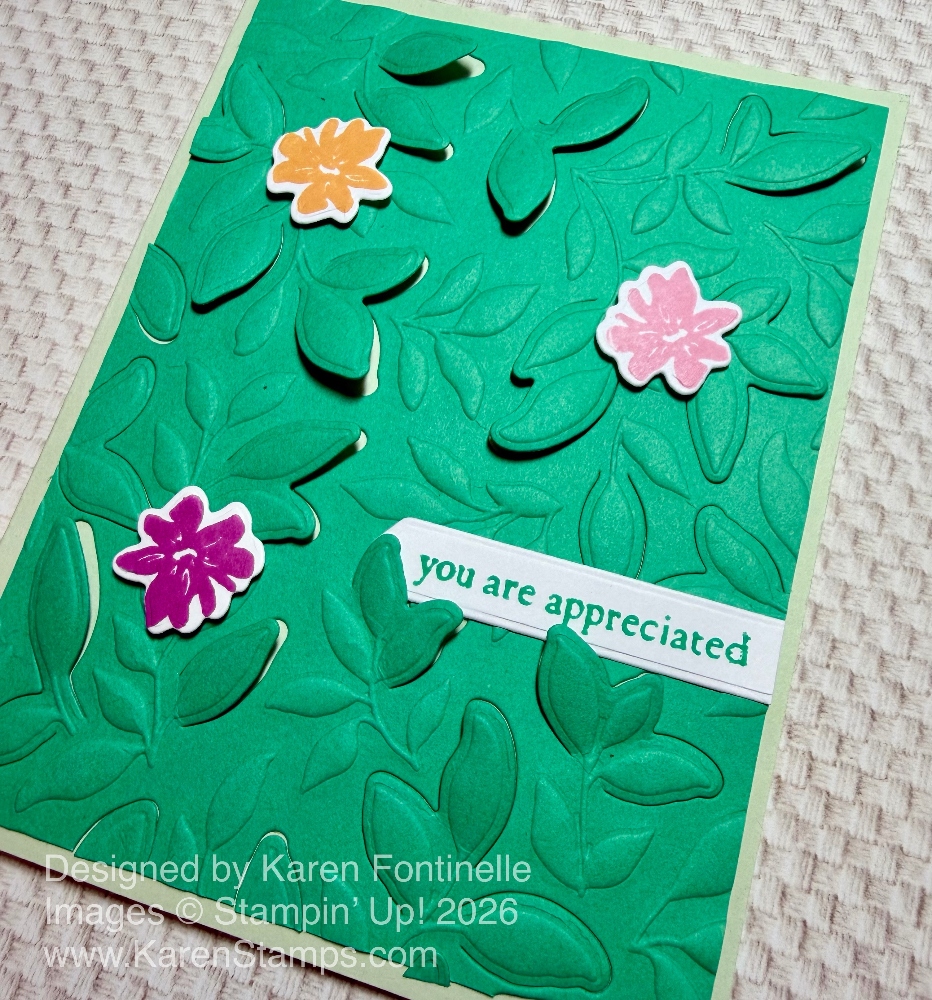
Can you see the difference in these two similar cards, the Paradise Garden Embossed Cards? They are very much alike with a Shy Shamrock embossed leafy background. The answer is that I used the Paradise Garden Hybrid Embossing Folder. On one card, I used only the embossing folder with gives the leafy texture on the card on the right, and for the card on the left, I used the embossing folder PLUS the leafy die, which fits right in the folder around the leaves and diecuts a few of the leaves so you can lift them a little bit to give a 3D look to the card.
This card has a Basic White card base with a layer of Shy Shamrock card stock. Actually, I decided to use the outgoing In Colors on these two cards, with just a little Soft Seafoam ink for additional leaves for the flowers. This card is embossed with just the Paradise Garden Hybrid Embossing Folder, but without the extra die. Just the normal way to emboss, as we have been doing with all of our folders. Even just this is so pretty. If you wanted to add some accent, you could very lightly swipe an ink pad across those embossed leaves, or lightly add ink inside the embossing folder before embossing. Try different looks!
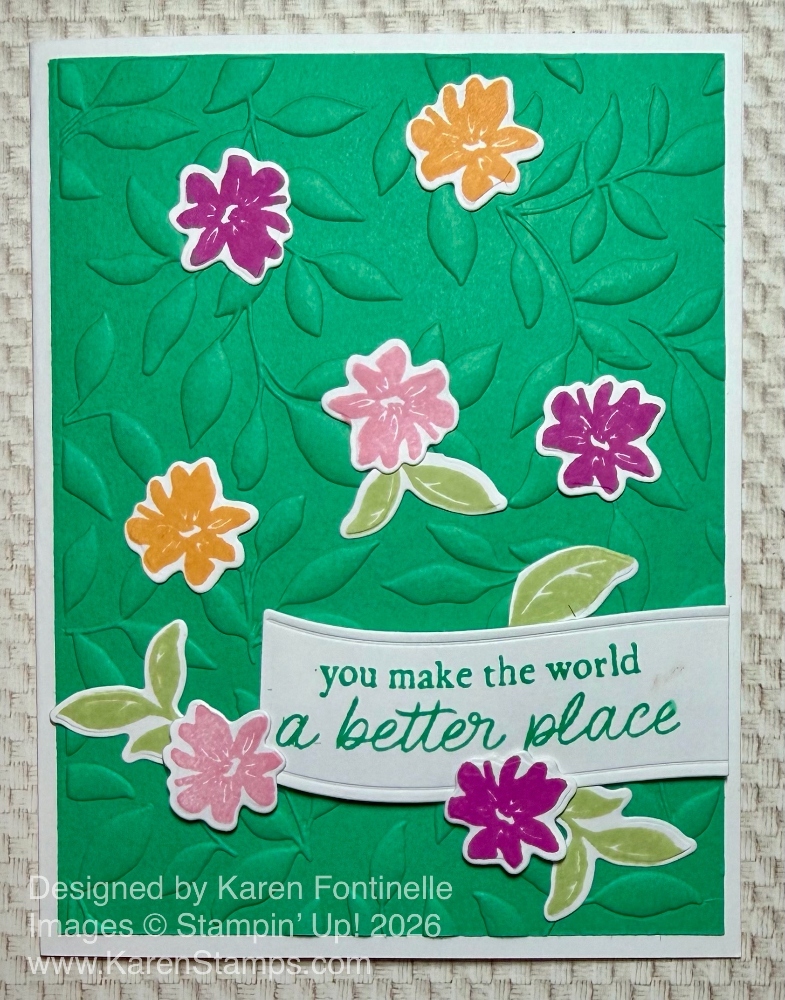
I used three other retiring In Colors for the flowers – Pretty in Pink, Petunia Pop, and Peach Pie. I stamped the flowers and leaves that are in the Paradise Garden Stamp Set, using Soft Sea Foam ink for the leaves. These pieces were all diecut with the dies included with the Paradise Garden Hybrid Embossing Folder. You can get the stamp set and folder with dies in a Bundle.
The greeting is stamped in Shy Shamrock ink from the Paradise Garden Stamp Set. It is stamped on Basic White and cut out with the banner die in the set. I trimmed off the right end of the banner to line up with the Shy Shamrock cardstock on the right since I wanted it shorter. It is popped up on Stampin’ Dimensionals. The flowers and leaves are adhered flat on the embossed layer except for a couple of flowers that are popped up along the greeting.
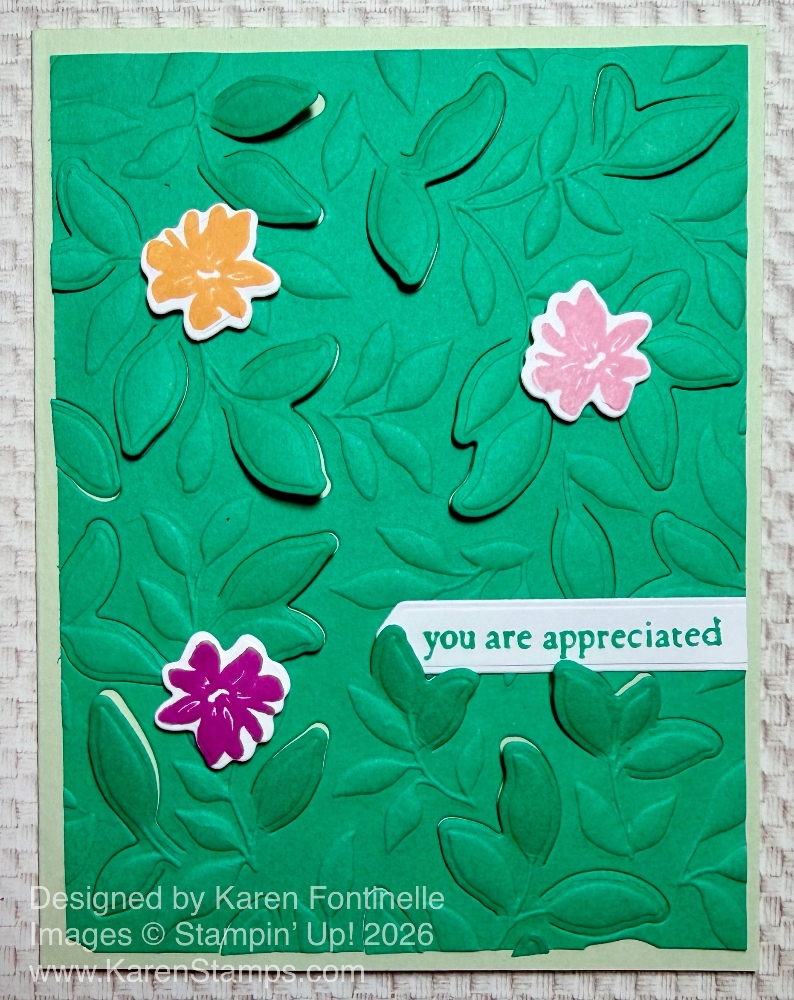
This card has a card base of Soft Sea Foam cardstock for something different. The Shy Shamrock embossed layer has pop-up leaves because of using the leafy die inside the Paradise Garden Hybrid Embossing Folder. You will feel the die click when you hit the right spot when it fits around the leaves of the folder. Then just emboss as usual. Some side pieces of leaves may fall out because they are on the edge, but I just glued them back into the empty spot. It was only a couple pieces on this card and easy to do, or you can skip it. You can pull the leaves up a little bit by hand so hopefully the recipient will realize they should do the same when they receive the card, especially if it is mailed and gets flattened.
The little flowers, in Peach Pie, Pretty in Pink and Petunia Pop are stamped and diecut and popped up among the leaves. The greeting is in the Paradise Garden Stamp Set and is diecut with a little banner shape in the set. Again, I cut off the right end to line up with the edge of the Shy Shamrock cardstock. The greeting is stamped in Shy Shamrock ink. I tried to nestle it in amongst the popped up leaves.
You could add some ribbon or gems and jewels for a little more pizzazz for these cards, but the leafy embossing, whether plain or using the die with the folder, provide an interesting enough background that you don’t have to add a lot.
You will find this Bundle with the Hybrid folder and dies plus stamp set in the Garden Poetry Suite Collection in the March Online Exclusives. The whole Suite is great, but you can also just purchase the products separately that you want. As I am writing this, the Garden Epoxy Dots are unavailable, therefore the Suite is unavailable, but you can order the other products separately. And you can put in your email on the product page to be notified with the whole Suite, or the Dots, are available again.