
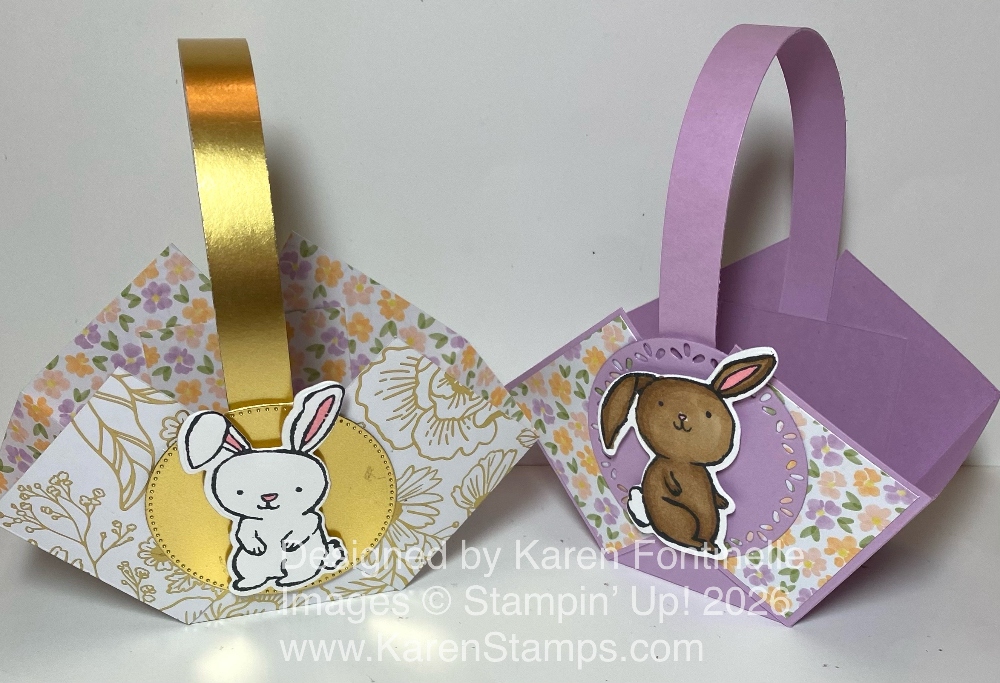
These Easy-to-Make Paper Easter Baskets are not new ideas, but with new paper and stamps, it’s always fun to make new baskets for Easter! Nothing could be easier to make than these little baskets which will hold some “grass” and candy treats! They can be made larger or smaller depending on what you need. Just start with a square piece of paper!
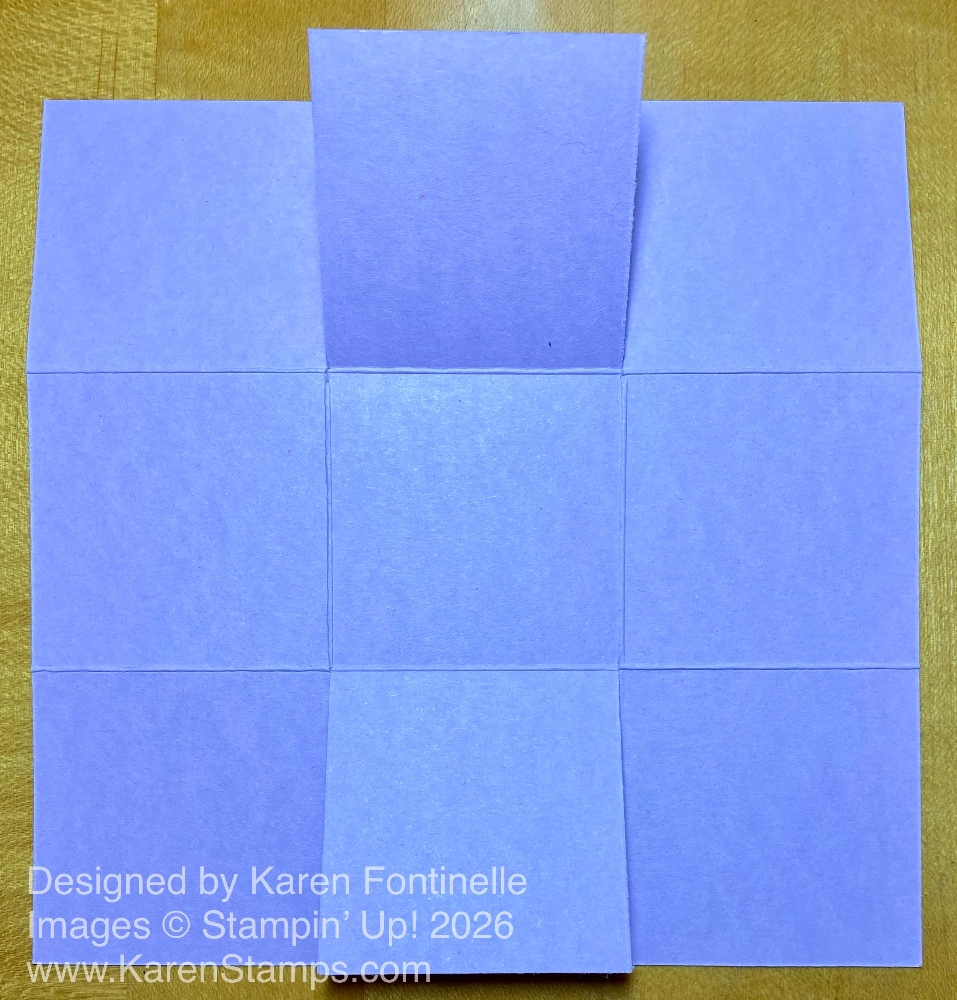
This is a 6″ x 6″ square of Fresh Freesia cardstock. You can use designer series paper as well, as I did on the other basket. The cardstock is scored at 2″ and 4″, then turned and scored at 2″ and 4″ so it looks like a tic-tac-toe board. Fold and crease all the score lines. Cut vertically on the bottom score lines up to the first horizontal score line, then from the top down the same way. This makes the center sections, top and bottom, cut so that everything can be folded to make the basket. If you want to, round the corners with a corner rounder punch or just with your scissors. Also, cut a handle to match about 8″ or 8 1/2″ long and about 1/2″ or 3/4″ wide.
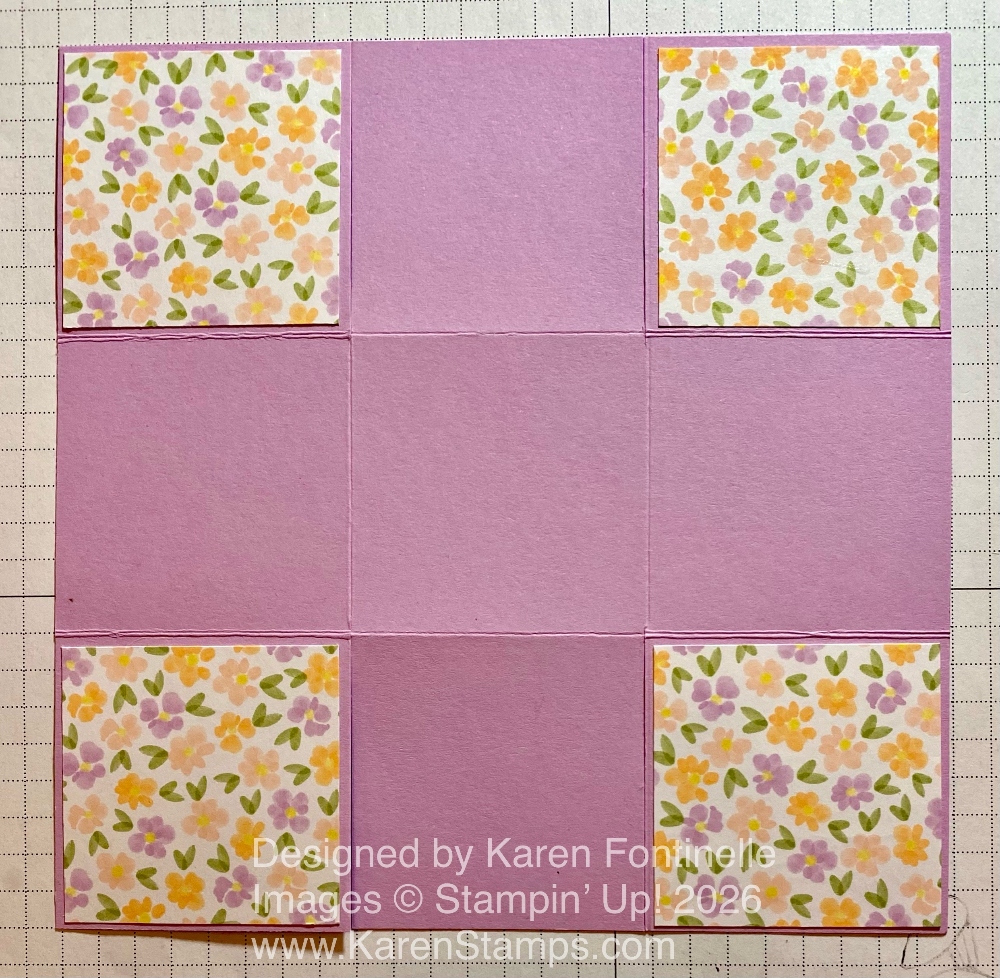
You can use the cardstock or designer paper as is after it is scored and creased, or you can use cardstock for the base of the basket and add designer series paper (or stamped images) to the sides to decorate. For this piece of Fresh Freesia cardstock, cut at 6″ x 6″, each square is 2″ x 2″, so to decorate, the designer paper is cut at 1 7/8″ x 1 7/8″ and glued on the four corners. The paper I used is the Lovely & Beautiful Specialty Designer Series Paper. This paper has gorgeous, large flowers primarily on the pages with gold foil accents, but I also loved this paper with the very small flowers. I think it is perfect for an Easter basket!

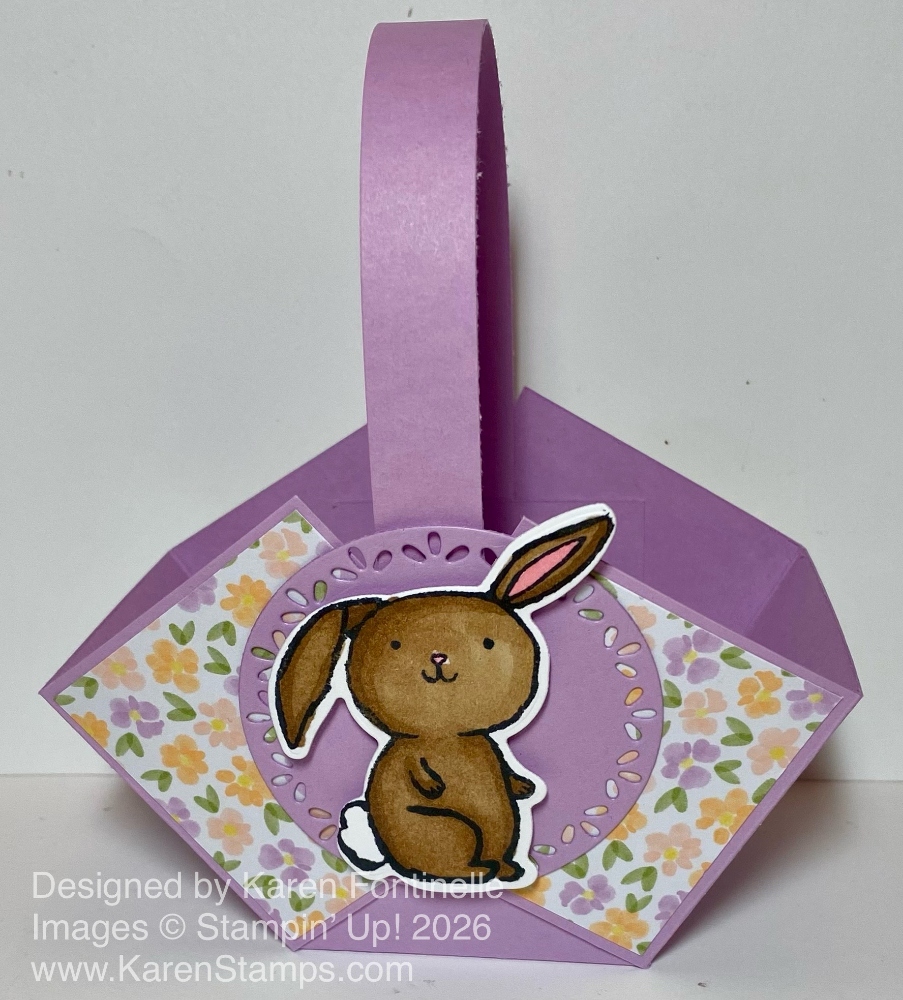
Fold the sides in to form the basket. Be careful where you apply adhesive (I preferred the Multipurpose Liquid Glue for those seconds when you can move the pieces into place, but you can use Stampin’ Seal if you like) so that you don’t get glue where it will show or be exposed. If you think ahead, try to insert the handle ends between the flaps on each side. If you forget, it is okay; it won’t be noticeable once you put the treats inside.
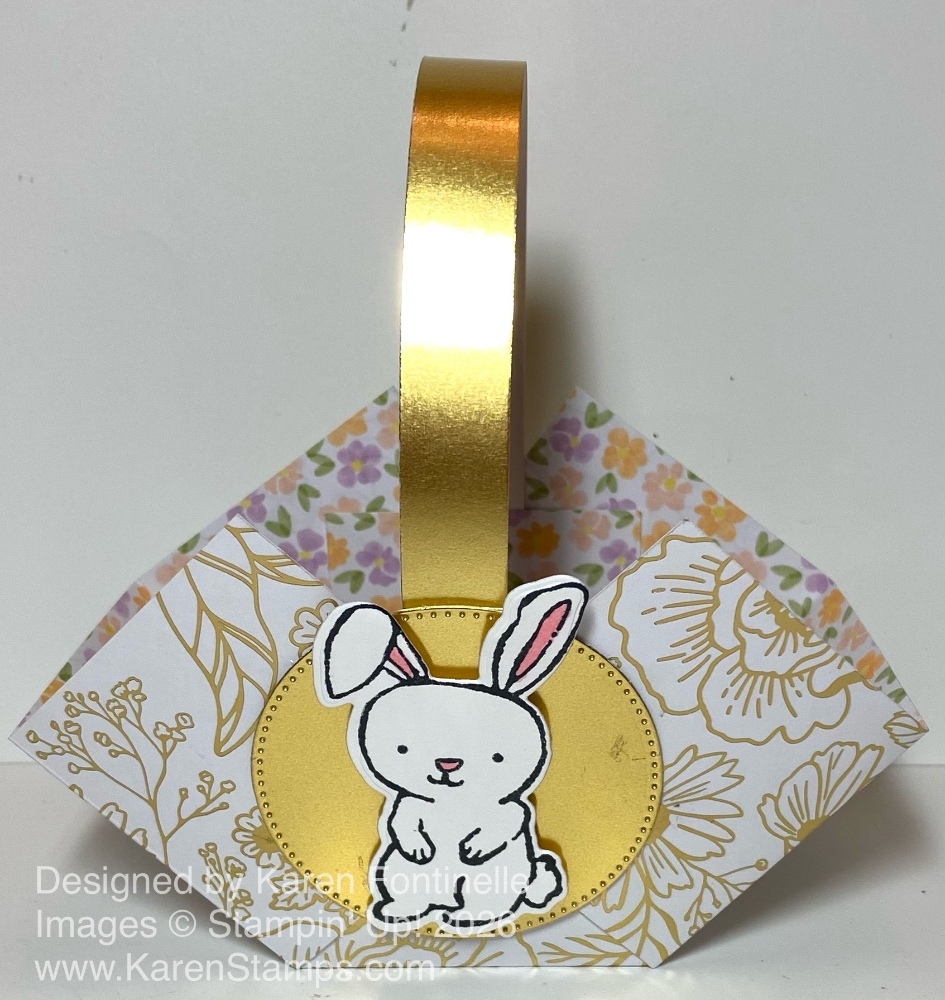
Decorate the basket however you like. I stamped bunnies from the Easter Basket Stamp Set and cut them out with dies in the Easter Basket Dies. They are colored or shaded with Stampin’ Blends alcohol markers. For the background behind the bunnies, I diecut circles from the Stylish Shapes Dies on one, and the Spotlight on Nature on the other basket. I stopped there to keep it simple, but you could stamp and diecut other Easter images with the Easter Basket Stamp Set to go with the bunny, cut out carrots, flowers, or eggs from the Easter Joy Designer Series Paper. You could also add a ribbon and bow to the handle. Do whatever you like! Put some Easter grass or paper “shred” in the basket or even make your own by cutting up cardstock into very thin strips, crimping with a crimper or crushing in your hands.
You can also make the basket just out of designer series paper, as I did with this basket. These gold foil flowers are the other side of the Fresh Freesia print flowers on the first basket. The basket is usually a little stronger made with cardstock, but you can use either. These baskets are cute for little gifts, party favors, or maybe table decorations at each place setting at your Easter dinner. Change the decoration and make these baskets for any occasion for little treat or gift holders.
Here is a link to other baskets I have made and posted on my blog in other years. They are still favorites! And a couple of baskets from last year! These are all fun to make and go together quickly, especially after you make the first one and see how they go together. You can even just make one or more for your own home decor! Bet you can’t make just one!