Tag Archives: Paradise Garden Stamp Set

Garden Poetry Thank You Card

Garden Poetry Thank You Card

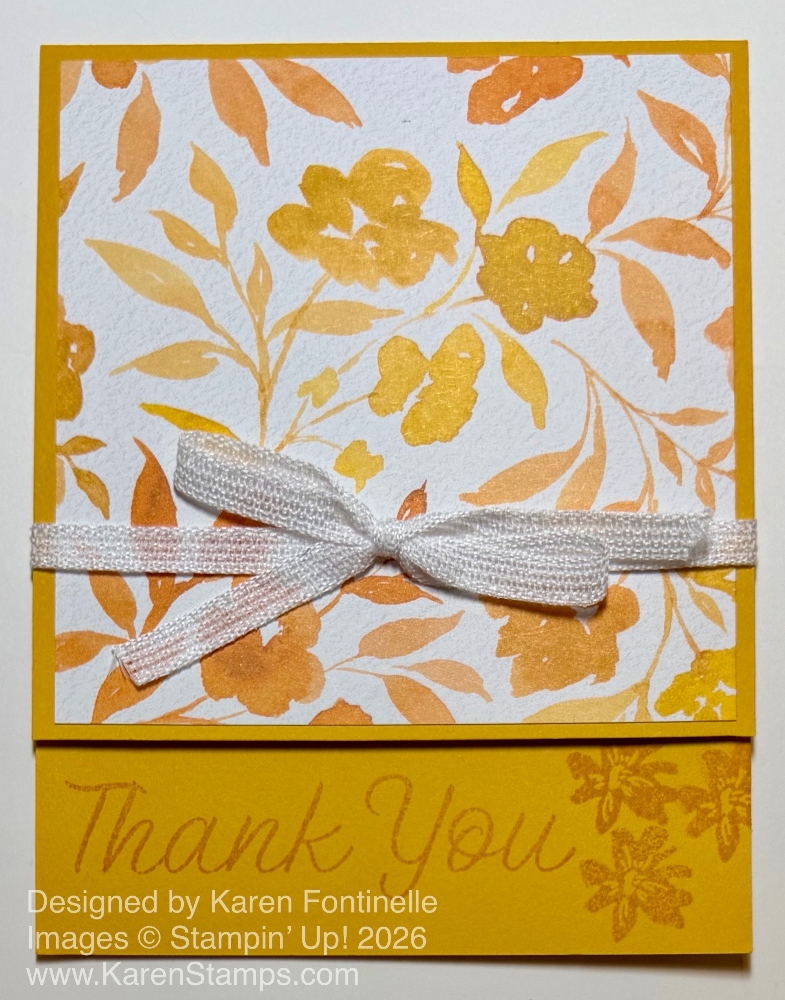
I made this Garden Poetry Thank You Card a little while back, but don’t think I posted it. It’s a slightly different design and certainly easy to make. It has a top fold with a shorter card front for a different look. This paper is quite colorful and beautiful, and the patterns are in many colors! You’ll find it in the Online Exclusives when you shop at Stampin’ Up!

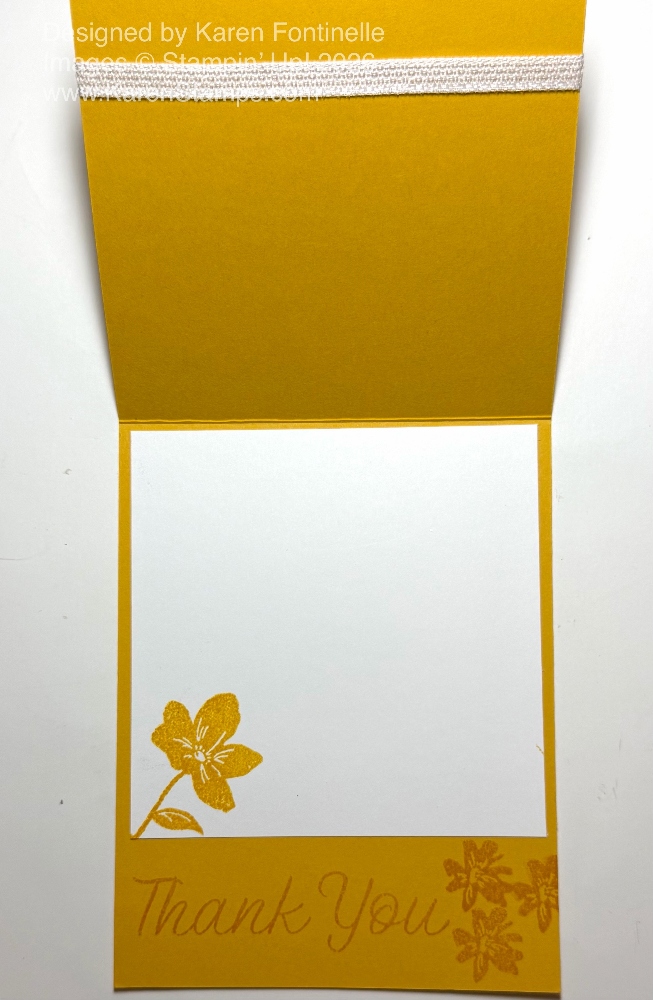
The card base is Crushed Curry cardstock, a color I don’t use very often. Start with a piece of cardstock cut at 8 1/2″ x 5 1/2″. Score at 5 1/2″. The interesting thing to do is to cut off 1 1/4″ from the bottom of the front of the card. Adhere a 4″ x 4″ piece of designer paper to the card front. I used the Garden Poetry Designer Series Paper. These papers have vibrant florals and greenery in really rich colors, and the “other side” of the paper has the colors but not the images to use as beautiful backgrounds. This paper is part of the Garden Poetry Suite Collection.

For the greeting, I stamped the “Thank You” from the Paradise Garden Stamp Set and added a few flowers as well, all with Crushed Curry ink for that watermark look. On the inside, I added a Basic White 4″ x 4″ piece to the inside of the card, lined up so it wouldn’t show from underneath the card front. I stamped one flower on it. You can write a note or stamp some additional message inside the card.

The ribbon is some retired white ribbon. It is just wrapped around the card front. If I had thought of it before I adhered the designer paper on the front, I would have wrapped the ribbon just around the designer paper and then adhered the paper. But the way I did it is okay, too! You could add a few gems among the flowers.

Another change you could make would be to add a Basic White strip where the stamped greeting is, which would be 1″ x 4″ or even just 3/4″ wide. You could stamp the greeting on that.

You can make this style card for almost any occasion! And it’s a little different, so that makes it extra-special!

Garden Poetry Thank You Card Open

SHOP STAMPIN’ UP! ONLINE HERE!

Artisan Sketched Garden Happy Birthday Card

Artisan Sketched Garden Happy Birthday Card

I was excited to play with my new In Color Stampin’ Blends markers and cardstock, plus the new Artisan Sketched Garden Designer Series Paper, and I finally got the chance to make this Artisan Sketched Garden Happy Birthday Card. I have to say I love the look of this card! Sometimes you make a card, and you really like it!

The card base is Barely Blush cardstock, one of the new 2026-2028 In Colors. It is a very light pink shade, and I’ll have to see how I like the ink color, but I think the light shade goes so well for this card. I didn’t add another layer of any paper for a background, but I felt like it needed a little something in the background. I decided to do a “watermark” look by stamping a small flower with the Barely Blush ink randomly on the card front. I only did a few, and when I stamped the flowers, I wished I had stamped off first. But as the ink dried, it became a lot lighter, so it worked how I wanted it. The flower was in the Paradise Garden Stamp Set.

I did see the idea for the black and white stripes and torn edges at the bottom of the card somewhere online and liked that look. This striped paper is the Artisan Sketched Garden Designer Series Paper. I measured a piece of the striped paper at 5 1/2″ x about 1 1/2″ or 1 3/4″. Remember, the tearing technique – hold the paper and tear toward yourself so that the side you want to show the torn edge is facing you. In this case, I took the torn piece, turned it over, and used that as a layer underneath the striped piece at the top. It is just stuck down a little bit behind the stripes.

For the flower vases, I cut some apart from the Artisan Sketched Garden DSP that I liked and colored them with my new In Color Stampin’ Blends. I used the Barely Blush for the flowers on the left, Crisp Cantaloupe for the flowers on the right and Peaceful Pine for all the green foliage. For the vases, I used Hydrangea Hue for the vase color with the pink tulips, and to look like some water in the clear glass vases in the middle and left. I just barely scribbled on some color. Hydrangea Hue is really a purplish blue, but I think it did fine as water, and mainly, I only wanted to use the new In Colors. I popped up the vases with Stampin’ Dimensionals, regular size and Minis. You could also glue them down flat. Or if you thought about it ahead , (I never do!), you could adhere a piece of Adhesive Sheets on the back of the DSP before cutting out the vases and turn them into stickers so you wouldn’t have to use adhesive on the narrow little foliage and flowers.

The greeting is stamped with the Lovely Arrangements Stamp Set. I wanted something small to fit on the card without taking away from the vases. It is stamped with Memento Black ink on a piece of Barely Blush cardstock and cut like a banner only on the left side. It is glued down flat, but could be popped up. For a finishing touch, I added three of the 2026-2028 In Color Dots in Barely Blush.

Be sure to check out the Artisan Sketched Garden Designer Series Paper on page 63 of the new Stampin’ Up! Catalog. We’ve had black and white paper before, (Here’s an old example!) and I think it offers a lot of creative options, whether you color on it in any one of a million ways or if you leave it black and white. Get some and try it out!

SHOP STAMPIN’ UP! ONLINE HERE!

Subtles Painted Patterns Note Cards

Subtles Painted Patterns Note Cards

Something new from the Stampin’ Up! May-August 2026 Catalog! These Subtles Painted Patterns Note Cards are made with the new Subtles Painted Patterns Designer Series Paper. Every year Stampin’ Up! offers patterned paper in the color families, like Brights, Subtles, etc. The patterns are the same, but the colors, of course, are not. This time, though, the paper is 12″ x 12″ instead of the 6″ x 6″. I really like these patterns, too!

Subtles Painted Patterns 12_ x 12_ Designer Series Paper

You can see how I mixed up the patterned paper on these cards. You can mix and match the patterns, maybe just turning the same paper over to the other side.

One of the best things you should have in your stash of crafting supplies are the Basic White Note Cards & Envelopes. These are a good size for writing a short note or making a simple card. Not that you couldn’t make something fancy on a note card if you wanted to! They are just handy to have and come with envelopes so you don’t have to hunt for a smaller envelope.

The note cards are 5″ x 3 1/2″ folded. I cut the patterned paper at 4 3/4″ x 3 1/4″. The strip on the left is cut at 3/4″ x 4 3/4″. The sentiment is stamped on a Basic White scallop diecut. Wait until you see all the scallop dies in the package! You’re going to be able to cut a pretty large scallop plus an assortment of smaller layering sizes. These are the Scalloped Blooms Dies. These probably should be on your Shopping List! The greeting is in the Paradise Garden Stamp Set. Wouldn’t that particular greeting just cheer up anybody receiving this card?! My friend would call that a “happy card”!

One set of cards was made with the Calypso Coral paper and the other with the Balmy Blue paper. Each card is stamped in the same color ink. I also added a little white bow out of some retired ribbon. Everything is glued down flat but if you wanted, you could pop up the greeting with Stampin’ Dimensionals, or add the ribbon behind the scallop.

That’s how easy this card is and the new Painted Patterns DSP is so fun to use!

SHOP STAMPIN’ UP! ONLINE HERE!

Flowers Fair Lovely Day Card

Flowers Fair Lovely Day Card

I knew it wouldn’t be long until I tried out stamping and coloring all these flowers on this new stamp “set” I recently got! This Flowers Fair Lovely Day Card is how a card might look if you inked up the whole stamp and then had fun coloring in the various flowers. The coloring actually goes pretty easily and quickly, so don’t get scared about it!

If you do not want to do a lot of coloring, check out my monochromatic card using this stamp set HERE.

First, I chose the colors I was going to use to color the flowers, and then I used a couple of the same colors for the card itself. The card base is Melon Mambo with a Peach Pie layer. I had cut the Basic White cardstock to the usual 4″ x 5 1/4″ when I stamped it with the Flowers Fair Stamp Set, which really isn’t a set, it is one large stamp! We used to call these a background stamp. When I decided to add the Peach Pie cardstock layer, I just trimmed down the stamped piece to 3 3/4″ x 5″.

The flowers are colored with Stampin’ Blends alcohol markers, but you could use Watercolor Pencils, Pastels, ink and a Water Painter...whatever you like! In this case, the flowers are stamped with Memento Ink, but you could use Stazon if that suited your coloring better. However, we will be getting a new Hybrid black ink pad in the new May catalog! The flower colors are Melon Mambo, Peach Pie, and Pretty In Pink. First I used the Light Stampin’ Blend color, then used the Dark to add some shading. You can also add another color to the flower, you don’t have to stick with only the light and dark markers of one color. The leaves were colored with Soft Sea Foam Stampin’ Blends and maybe a little Granny Apple Green.

The greeting is stamped in Memento ink on Basic White and diecut with one of the circle dies in Spotlight On Nature. You will find the greeting in the Paradise Garden Stamp Set. I love this little pattern that cuts out around the edge. To help those little designs stand out, I cut a piece of Melon Mambo with a plain Stylish Shapes Die right behind it. I didn’t want to cover up any more flowers than necessary, so I didn’t want to make a larger layer. I just added it to show behind the greeting. This is popped up with Stampin’ Dimensionals right over the White With Gold 3/8″ Ribbon, which just goes across the lower part of the card, so it would be centered with the greeting. I also added a few Iridescent Foil Gems, which I love! These go with almost anything.

If you want to get this Flowers Fair Stamp Set, you will find it in the Online Exclusives. The Paradise Garden Stamp Set is there, also!

Have fun working with these pretty flowers here in Spring!

SHOP STAMPIN’ UP! ONLINE HERE!