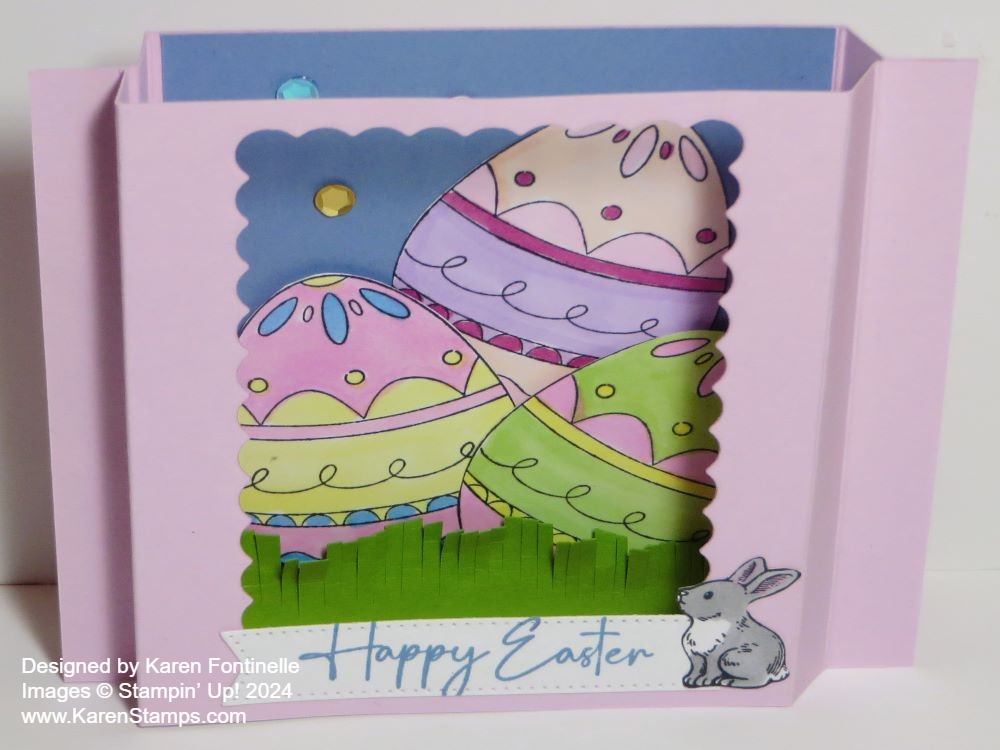
This diorama card is one that I have made for many years. It looks pretty dramatic, right, being a 3D kind of display for a card? Of course, with most projects in stamping, it is pretty easy once you know the basics! The basis of this Diorama Excellent Eggs Easter Card is that you score the ends of two pieces of cardstock that are the same size, cut some kind of hole in the top piece of cardstock, make some kind of scene on the back piece of cardstock that will show through the opening on the front, then crease the score lines and adhere the end sections together. This type of card can be folded flat for mailing so that is not a problem!
This card base is Bubble Bath cardstock. Cut two pieces of cardstock at 5 1/2″ x 4 1/4″. Of course, you can vary your measurements if you want a similar card in a larger or smaller size. Score each end of each piece of cardstock at 1/2″ and 1″. See the photo below for the side score lines and then whatever type of opening you want in the center.

Score those ends first and then you can more easily place the opening on just the top piece of cardstock so that it is centered. Crease and fold those score lines back and forth so that when you hold them together they will make the card into the diorama shape. You can see from the top view on this photo below. Don’t glue them together yet so you can more easily make the scene in the center of the back piece.
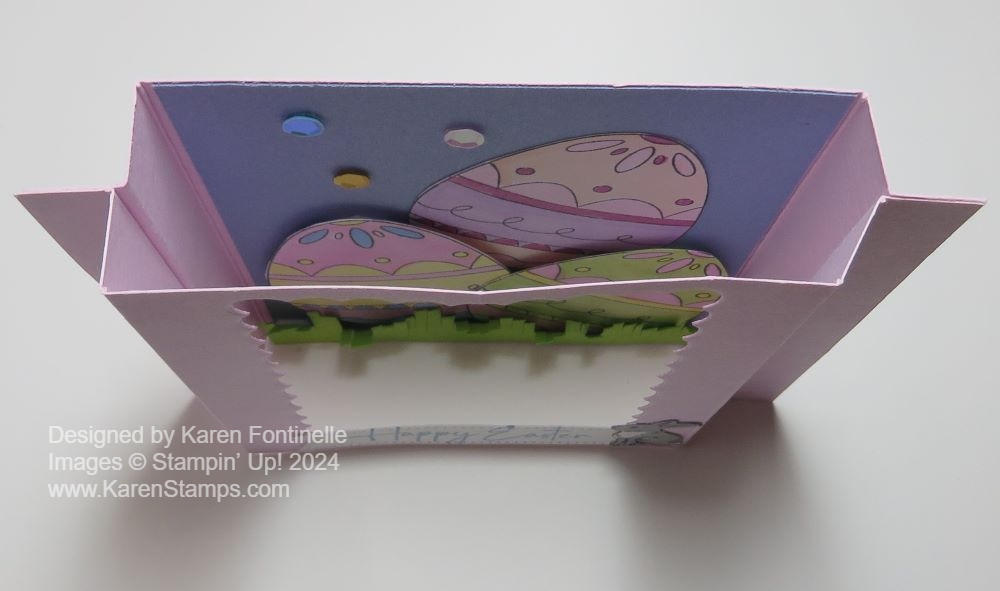
Decide if you want another piece of cardstock or designer paper for the background. I chose Boho Blue. Measure your space and see what size you want to cut the background paper. You may have to trim tiny bits off the sides to accommodate the score lines. Mine is 4 1/4″ tall and just a “smidge” less than 3 1/2″ wide.
I stamped three of the Excellent Eggs with Memento ink and colored in with Stampin’ Blends markers. They are easy to cut out by hand if you don’t have the dies, which is what I did. The one farthest back is glued flat to the card, the other two are popped up on Stampin’ Dimensionals.
The front opening for the diorama card is cut out with one of the Scalloped Contours Dies. You can use any shape or size.
The greeting is stamped in Boho Blue ink from the Excellent Eggs Stamp Set and then diecut with one of the banner shapes in the Stylish Shapes Dies. Since that cute little bunny was also in the Excellent Eggs Stamp Set, I stamped, colored, and cut him out also in hopes I could use him somehow. Luckily, he seemed to fit just fine at the end of the banner in the corner of the card!
For some sparkle and to fill in the empty space in the background, I added three Pastel Adhesive-Backed Sequins in gold, Balmy Blue, and Petal Pink. Remember, a lot of these embellishments can be used even if the colors are not exactly the same. My background is Boho Blue but the one sequin I used is Balmy Blue. The recipient is never going to notice or be critical of that! We are often too hard on ourselves trying to make everything perfect when we make a card!
Here’s another Diorama card I made for Easter a few years ago.
This Diorama card will fold flat to mail and fits in a regular size Stampin’ Up! envelope, but you may want to make one and use it for your Easter decor!
SHOP STAMPIN’ UP! ONLINE HERE!