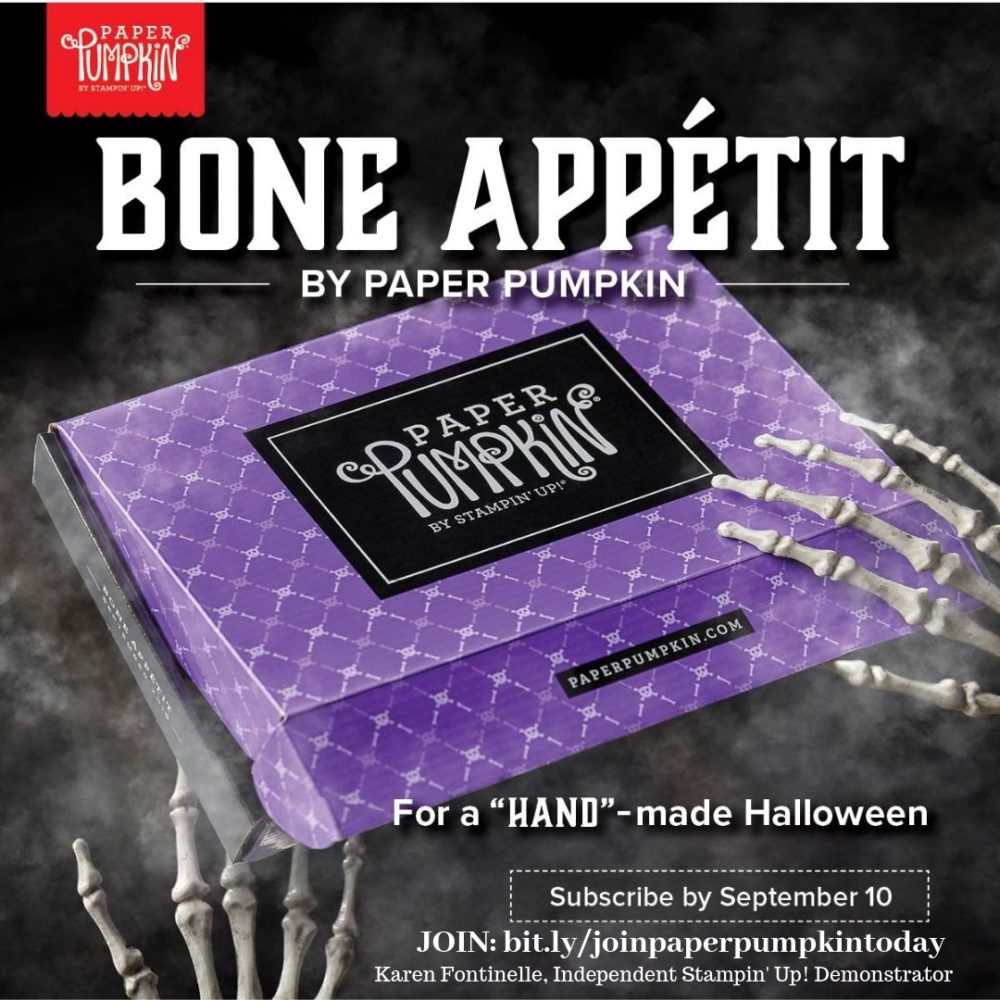
Halloween is nearly here, which means that Paper Pumpkin has been busy, busy, busy. Stampin’ Up! thought you might like “a hand” with your frightful festivities, so they designed September’s kit, Bone Appétit, with YOU in mind. I can’t wait for this kit!!!
This kit includes 20 food-safe treat boxes, a unique and exclusive Halloween stamp set, and a spooky, special-edition box. September’s kit also gives new meaning to the word “handmade.” (Cue the scary laughter!)
So don’t be in the dark this Halloween. Subscribe at paperpumpkin.com by September 10 to get in on the fun. Find my name to be on my list: Karen Fontinelle
This Easy Pressed Petals Thank You Card is simple to make and can be for almost any occasion, just change the greeting. Sometimes it is fun to try a more complicated technique or design in our cardmaking or make a card with lots of embellishments, but sometimes just a rather basic design is more than fine!
The Pressed Petals Specialty Designer Series Paper is an easy one to use on cards. This paper was designed by actually photographing real pressed petals for one side of the paper and vintage designs on the other side. One design is a sheet of individual blocks of flowers that can be cut apart to add to cards in different ways. We had something like that last catalog.
This card starts with a base of Pear Pizzazz Cardstock and then a piece of Pressed Petals Designer Paper with these leaves and ferns. So pretty on it’s own so you don’t need to add much to the card. I stamped a greeting and die cut it and some layers with the Layering Ovals Dies, one a Mossy Meadow Cardstock layer and one a Gold Glimmer Paper layer to match the ribbon.
The ribbon is the Gold 3/8″ Metallic-Edge Ribbon. I think this is one ribbon you should have in your stash because it goes well with so many cards and projects. I just tied a knot to keep it easy!
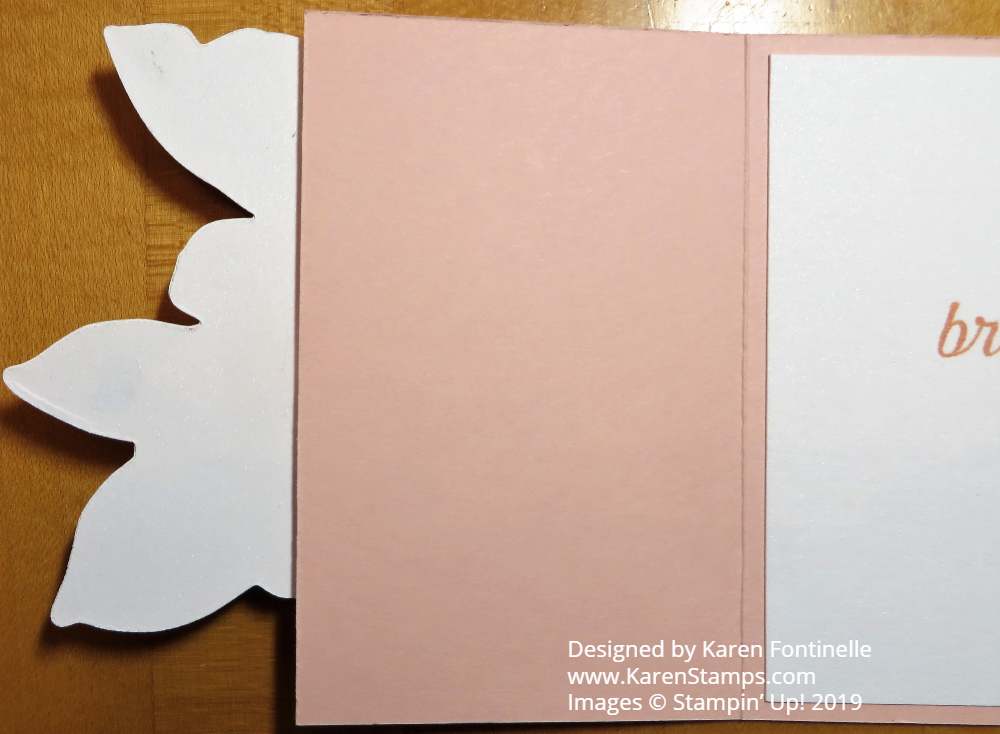
Inside the card, you can stamp something or write a personal note. If you find it difficult to write on the colored cardstock, just cut a layer of Whisper White or Very Vanilla Cardstock and adhere inside. You can first stamp something in the corner or add a strip of the same or coordinating designer paper. It makes for a nice surprise when the recipient opens the card!
The greeting is one in the Path of Petals Photopolymer Stamp Set which is part of the Pressed Petals Suite. I love how Stampin’ Up! has so many coordinating items to use in our projects and has put them together into these Suites. Of course you can always use any stamp set for a greeting or mix and match stamps and paper or whatever, but if you don’t want to think very hard about it, or you just like EVERYTHING that goes together, then it is easy to choose from a Suite….or order the whole Suite.
Enjoy the Stampin’ Up! Annual Catalog while you wait for the Holiday Catalog because once the Holiday Catalog goes live, we will all probably mostly be in holiday mode! I hear Holiday Catalogs are hitting some mailboxes already so be on the lookout!
Use this design that I used for this Easy Pressed Petals Thank You Card to make a batch of cards with different greetings and you will likely have a card ready to go for almost any occasion, especially when you are short on time.
It’s the first Christmas card of the season, the Wrapped in Plaid Christmas Trees Christmas Card! This is a peek at some of the new products in the Stampin’ Up! Holiday Catalog! And just to get myself going, I decided to just “CASE” (Copy And Share Everything”) one of the samples in the catalog! This is the card that made me want to buy some of the products in this Wrapped in Plaid Suite. Ok, all of the products except the jingle bells!
And wait until you see this Wrapped in Plaid Specialty Designer Series Paper! I guess the word “Specialty” should have tipped me off, but I didn’t catch on until I got the paper. I was flipping through the papers, looking for the ones that matched the trees in the catalog. Finally, I flipped one over to see the other side, and WOW! It had gold foil accent lines on all the plaid pieces! You get 12 designs, 4 each in the package of 6″ x 6″ paper. Although the trees don’t show it off well, those gold accents on the plaid designs are really pretty!
You can purchase the Pine Tree Punch in the Suite and even combine it with the Perfectly Plaid Stamp Set to save 10% in a Bundle. I know we have had other tree punches in prior catalogs but this is a nice one, different from the others. Very nice for punching out the stamped trees or just out of paper. You’ll be able to use it with some of the other suites, too.
The card base is Mint Macaron with a layer die-cut with the largest Stitched Rectangle Die. The trees are punched out and adhered to that die cut layer. They are larger than the rectangle so it is okay for them to hang over the top edge of the layer and over the bottom edge. Just don’t let them hang over the edge of the card base. I glued mine down with Multipurpose Liquid Glue but you could also pop them up with Dimensionals.
The greeting is stamped from one in the Perfectly Plaid Stamp Set in Shaded Spruce Ink on Whisper White. The catalog sample shows a Jingle Bell attached to the end of the greeting banner, but since I didn’t have the bells (yet) I found these All Is Bright Paper Clips that I already purchased. They are on the Clearance Rack! I clipped it onto the greeting and tied on a piece of Linen Thread. I actually think this will be better for mailing. I don’t think you can mail the Jingle Bells in a regular envelope, but they are cute for other projects or cards you will hand out.
I look forward to making many other cards with this cute designer paper and Pine Tree Punch! It’s not too early to start working on Christmas cards! Holiday Catalogs are probably in the mail, although they take longer than regular mail, but hopefully my customers will be receiving them soon!
If you are interested in purchasing Stampin’ Up! products and especially holiday and fall items and would like a Demonstrator to assist you, I would be happy to be yours! Send me your contact information and I can mail the catalogs to you.
In the meantime, keep checking out the new Annual Stampin’ Up! Catalog because once the Holiday Catalog comes out, the annual catalog doesn’t get much attention! Time will fly! We all need to get early starts on our holiday cards and projects!
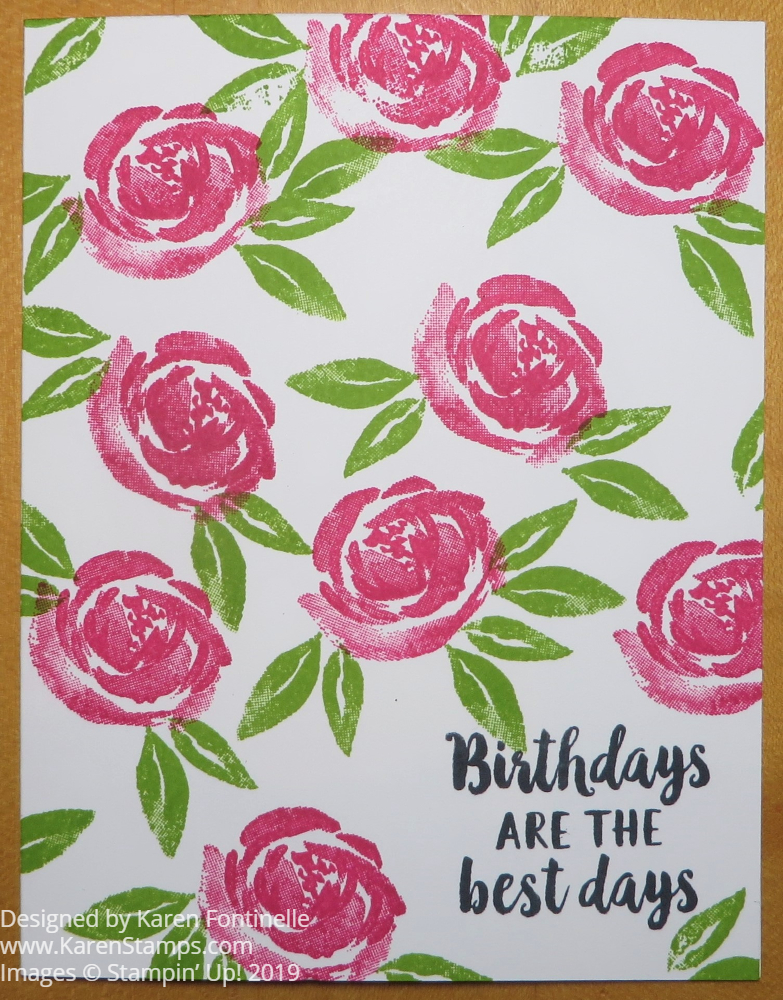
This Beautiful Friendship Simple Stamping Birthday Card is for someone who might love flowers and thinks that “Birthdays Are the Best Days”! And that would be me! What is it about hearing our birthday that just sounds extra special to each of us? There’s really no other day in the year quite like “our birthday”. When I had a baby, I realized a child’s birthday is just as special a day to the parents as it is to the child. But until then I never realized that!
Stampin’ Up! has been having challenges for us Demonstrators called #simplestamping. I think maybe the purpose is that we all get carried away with our stamping and seeing and trying so many projects that we forget about doing “simple stamping”. Maybe potential stampers see our sometimes elaborate projects and think they couldn’t possibly make something like that. Even though WE know the secret is that anyone CAN make whatever we make because stamping is so easy. You just have to have some supplies and learn about different techniques and how to use our supplies.
The #simplestamping challenge for August had a theme of making a birthday card using stamps, ink, and paper. Since it is my birthday, I thought I should make a card for this challenge. This card is the best kind of simple! It really is just stamps, ink and paper! Really back to basics!
The card base is the Whisper White THICK Cardstock so it can stand on its own. No layers, just the card base and stamping. I used the Beautiful Friendship Stamp Set which has several pretty flower stamps. I stamped the one flower in Melon Mambo ink with Granny Apple Green leaves. The greeting is in the same stamp set and is stamped in Memento Ink. That’s all there is to it!
If you were making this card with more steps than “simple stamping” you might stamp on a Whisper White card front and layer on a Melon Mambo layer. You might use some Wink of Stella for some glimmer on the flowers. or add a ribbon down the side of the card front. But even with only using stamps, ink, and paper I have a perfectly fine birthday card to send to someone.
Even if you are an experienced stamper, just remember sometimes all you really need to do is some #simplestamping!
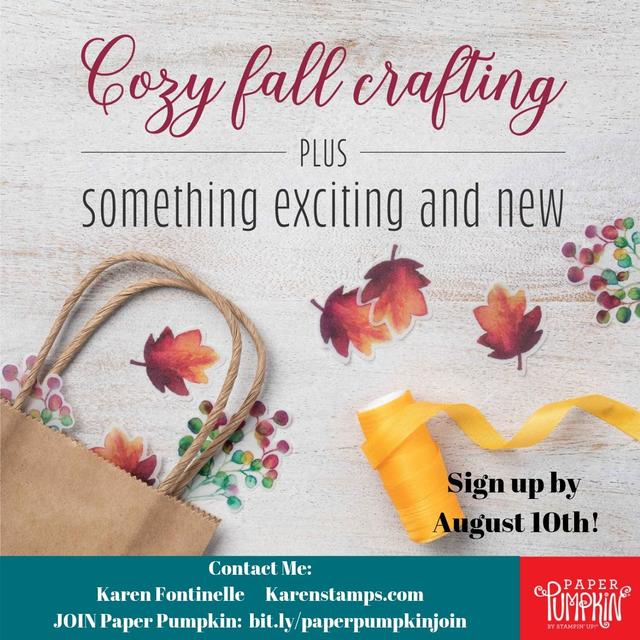
The August Kit is a special one. While most subscribers enjoy cardmaking, sometimes Stampin’ Up! likes to change it up and have a different kind of project. But often crafters will also make cards to go along with the project. So this month, there is the opportunity for the best of both worlds! The August Kit includes 6 gift bags and 12 gift tags with a fall theme! But if you are also interested in cards, you can purchase the Gift of Fall Add-On Bundle for only $10 in the Stampin’ Up! Online Store. You will see it listed in the left sidebar. But you must be a Paper Pumpkin subscriber to order it!
The Gift of Fall Add-On Bundle is a separate purchase for those who would like to convert their August Paper Pumpkin kit into cards.
The Gift of Fall Add-On Bundle card designs offer a great sneak of the designs and elements to come in the August kit.
Once you have completed the August kit, you will have extra kit components so you can easily combine them with the add-on without having to purchase additional kits.
This is a great time to sign up and be a Paper Pumpkin subscriber with holidays coming up!
Try it! You will probably like it! All kits are guaranteed by Stampin’ Up! You can skip a month or cancel completely any time. Just go into your account by the 10th of any month.
JOIN PAPER PUMPKIN NOW! TODAY IS THE LAST DAY FOR THE AUGUST KIT!
I wanted a little thank you gift for someone and one of the easiest things to make is a Clear Tiny Treat Box filled with candy! Chocolate of course! This is one of the things that I LOVE to make since years ago when I saw the idea. That is, covering candy nuggets with a 1″ x 3″ strip of designer paper (being careful not to get adhesive on the actual candy, only the paper!). We used to put them in tins that had to be specially ordered, but now we have the Clear Tiny Treat Boxes that work!
The Clear Tiny Treat Boxes come sixteen to a package and come flat, so storage is no problem. They come wrapped in some plastic to protect from scratches. Just open and crease all the flaps, then assemble and decorate! These boxes are food safe and acid free. They are sized 2″ x 2″ x 2″. Perfect for a candy treat or small gift.
The fun way to decorate candy pieces like these chocolate nuggets is to cut a strip of designer paper (or stamped or decorated cardstock, but designer paper is easiest) that is 1″ x 3″. Just wrap around the candy and apply adhesive to the overlap. I like to use the Multipurpose Liquid Glue, carefully. Keep any adhesive off the candy.
To decorate this Tiny Treat Box, I wrapped a piece of Pressed Petals Specialty Designer Series Paper around the box. Make it as narrow or wide as you want, but you won’t need the full 12″ strip. Start by just wrapping around, creasing on the corners, then cut off the excess and adhere. Depending on your design, if you are putting something on the front of the box like this box, start the end on the front of the box and that junction will be covered by the flower. Otherwise, put the ends on the back of the box.
To decorate the front of the box I made a washi tape flower as I described in THIS POST. The new Pressed Petals Specialty Washi Tape comes with a roll of individual flower petals that you can peel and stick however you like or make a flower like this one! I added a few small rhinestones to the flower center. You can add one of the Perennial Essence Flower Centers if you have them.
The ribbon wrapped around the box is the Gold 3/8″ Metallic-Edge Ribbon, one of my favorites because it is so versatile. The little greeting is stamped with the Itty Bitty Greetings Stamp Set on Very Vanilla and partially layered over a piece of Merry Merlot Cardstock. You can use the Tailored Tag Punch to punch the flagged ends. Just adhere with Mini Glue Dots.
This is a fun and easy thank you gift to personalize for someone! Put the Clear Tiny Treat Boxes on your next order and keep them on hand for when you need to give a little gift like this Clear Tiny Treat Box with Pressed Petals.
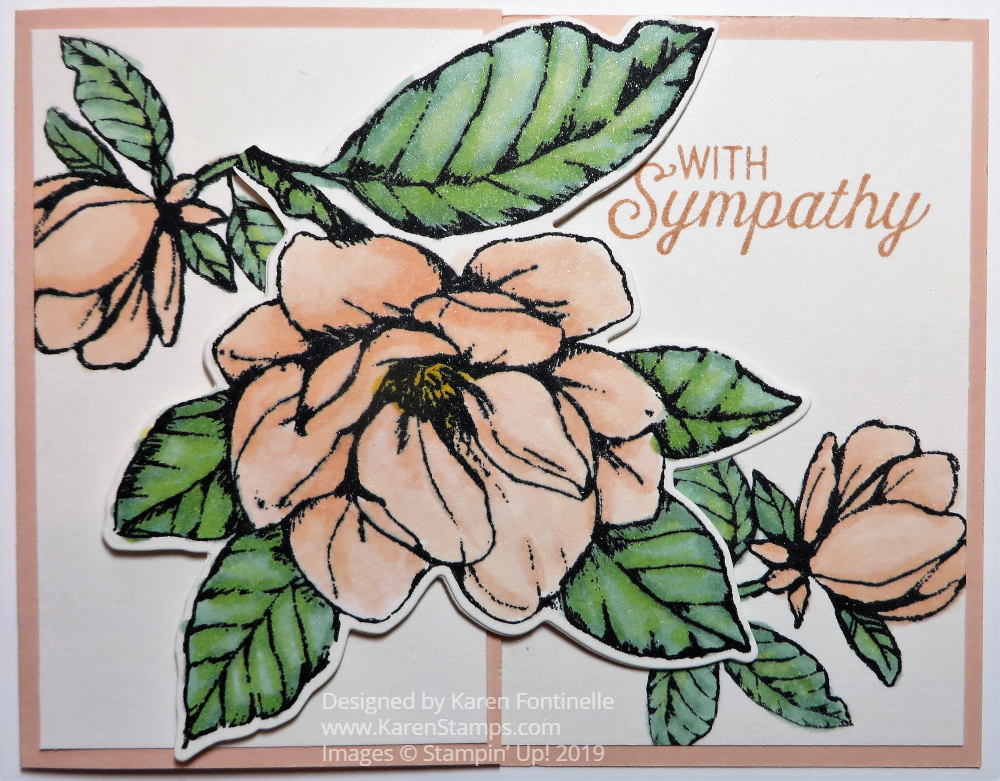
None of us want to have to make a sympathy card or send one, but this Good Morning Magnolia Z-Fold Sympathy Card seemed like the right one for this friend. I’m sure I got the idea from someone else. Maybe I changed some things about it a little but I don’t remember! It is a z-fold card which means the front of the card is folded back, essentially in half. Then you can either leave that front portion folded but not adhered, or you can adhere that folded back piece so the front underneath it.
The card base is Petal Pink with Whisper White layers. I stamped the very large magnolia from the Good Morning Magnolia Stamp Set with Memento Ink and colored in with Stampin’ Blends Markers. I used the Petal Pink markers, plus two greens on the leaves with just a touch of yellow. Then this large magnolia can be die-cut with the Magnolia Memory Dies. The other two smaller flowers are just stamped on the card and colored in. I had to play with the die-cut magnolia to get it in just the right place to fit on the card and line up with the other two flowers.
As you can see below, the edge of the flower hangs over the edge of the card.
You can still stamp something on the inside or just write a note. Just be cautious to have it hidden under the closed front of the card. You might want to make light pencil marks where the card front comes to when closed.
I love z-fold cards! I think they add some extra interest without being very difficult to make!
The greeting for this sympathy card comes from the Flourishing Phrases Stamp Set. I love that stamp set and have used it a lot.
You could change this card for another occasion by obviously changing the greeting. It would make a beautiful birthday card, Mother’s Day card, even anniversary, engagement, or wedding card.
If you haven’t ordered this Magnolia stamp and dies yet (or paper!), you probably want to put it on your next order! And when you do, if you have coupon codes from July, be sure to use them before the end of the month!
Only a few more days to sign up for the August Paper Pumpkin Kit so don’t delay if you are interested in a taste of fall! I need this kit to arrive soon!
Even though we hate to think about it, it would be a good idea to make a few different sympathy cards to have on hand like this Good Morning Magnolia Z-Fold Sympathy Card in case the need arises and you want a card to send quickly.
I finally got the chance to try out my flower-making on this Pressed Petals Card With Washi Tape Flower. The new Pressed Petals Specialty Washi Tape comes with two rolls of washi tape and one is really unique! One roll has floral washi tape with individual flower petals that you peel and stick! And of course, it all coordinates with the Pressed Petals Specialty Designer Series Paper!
Here’s how you make the washi tape flower with the Pressed Petals flower tape. Punch out a small circle for a base, like about 3/4″ or 1″. Use a larger circle if you want a larger flower using more petals. It’s a good idea to use the Silicone Craft Sheet so that the flower tape won’t stick while you work on the flower, or maybe some wax paper. For my 1″ punched circle, I started with 6 petals. Just peel them off the roll, then stick to the circle base. I put two opposite each other, then filled in with two petals on each side. It’s easy! I wasn’t able to stop playing with the petals, so I peeled off 4 more and made a second layer! You don’t have to do this. The petals seem to naturally curl up a little bit! When you have your flower made, take your Embossing Buddy and pat the backside of the flower petals to take away the stickiness.
When you have the flower made, put some kind of center in the flower. You can use cardstock, the Perennial Essence Floral Centers, or do what I did and cut out a flower center from one of the papers. My flower is popped up on the card with Stampin’ Dimensionals.
The card itself is very easy. The card base is Crumb Cake and the beautiful paper is one from the Pressed Petals Specialty Designer Series Paper. I think this floral pattern is my favorite. Actually pressed flowers were photographed to design this paper. The ribbon isn’t one of the official coordinating colors but I liked it on the card anyway. The ribbon is the Old Olive/Pretty Peacock Reversible Ribbon. This is a very pretty ribbon with two colors and a sheen to it! It’s been very popular!
I don’t have a greeting on my card yet. Actually, I think it looks very full and pretty without a greeting, but mainly I thought I would wait and see what greeting I want when I send the card. It could be a thank you or birthday or thinking of you or almost any occasion. I could even leave it plain and just write a friendly note inside.
Inside the card I adhered a layer of Very Vanilla to make it easier to write or stamp a greeting. When I saw a strip of the same designer paper laying on the table, I cut it a little narrower and adhered it to the bottom of the Very Vanilla so there will be a little extra prettiness inside the card! Very often you might want to stamp the layer inside or add a strip of designer paper to match or coordinate with the front of the card.
Here is a different way to use another pattern of the Pressed Petals DSP, making a gift bag and small card.
This paper also comes with two sheets of a collage of smaller pieces that you can cut apart and use various ways.
Put the Pressed Petals Washi Tape on your next order so you can play with making flowers with this washi tape for your cards and projects!
It’s time to sign up for Paper Pumpkin and get your August Kit in the mail in just a couple weeks! This kit will be most welcome because it will give us a taste of fall colors! The kit includes 6 gift bags and 12 gift tags. Some Paper Pumpkin subscribers like to have a variety of projects throughout the year, not just cards. Other subscribers only want cards.
Well, this month Stampin’ Up! has solved that problem! If you are a Paper Pumpkin subscriber, you will get this August kit with the gift bags and tags AND you have the option to purchase an Add-On Kit to make cards!
The Gift of Fall Add-On Bundle is a separate purchase for those who would like to convert their August Paper Pumpkin kit into cards.
The Gift of Fall Add-On Bundle card designs offer a great sneak of the designs and elements to come in the August kit.
Once you have completed the August kit, you will have extra kit components so you can easily combine them with the add-on without having to purchase additional kits.
You will need to purchase the add-on bundle in the Online Store. You will not be able to add it to a Paper Pumpkin subscription purchase.
The price for the add-on bundle is $10.00 and is available for Paper Pumpkin subscribers only. This add-on is available beginning August 1, while supplies last!
Watch this video to find out more about the August Paper Pumpkin Kit:
Don’t miss out! Remember, once you get the kit you can make whatever you want with the materials inside. And every month, alternative ideas are posted online if you want to try something different. Sometimes I made the project as described and then I might look online and see what else I could do and try one or two of those ideas.
You could use these gift bags for back-to-school teacher gifts or even back-to-school treats for your own kids. Maybe favors for a small party or dinner or make them and save for closer to Halloween. Cut them up and make cards!
Stampin’ Up! guarantees all kits so there is no risk. If Paper Pumpkin is not for you, contact Stampin’ Up! (The nicest people take your calls!) Or cancel any time just by going into your account and stopping your subscription. If you like it but need to take a break, just go into your account and skip a month or two. The magic date to make any changes is always the 10th of the month. Kits are billed and sent out a few days after the 10th.
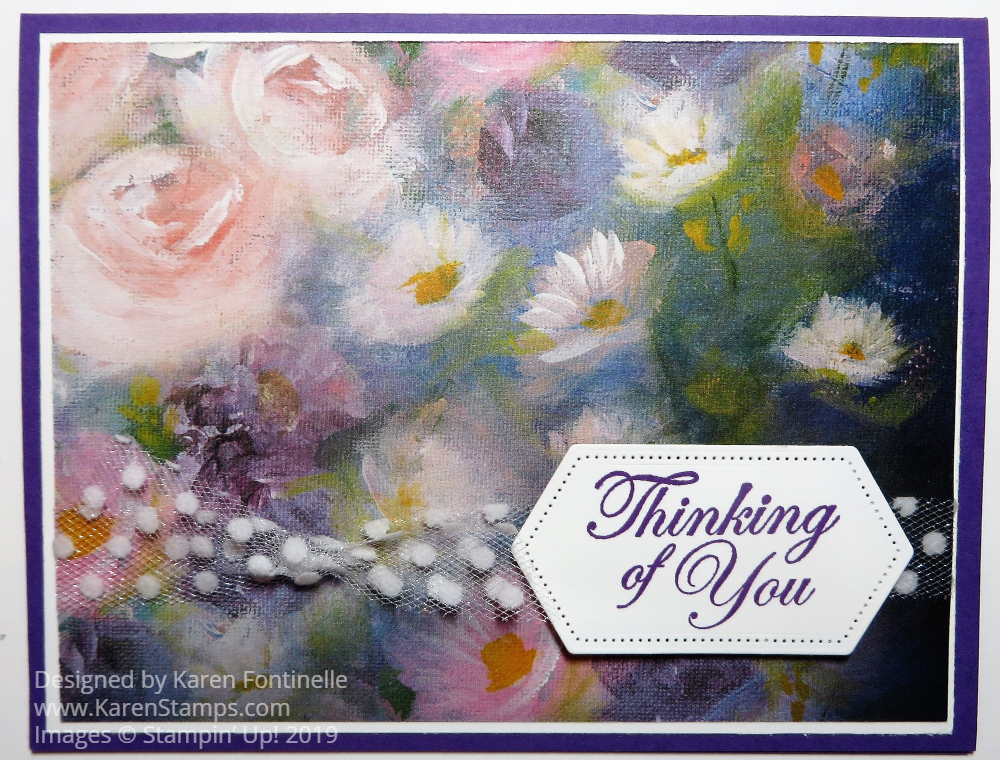
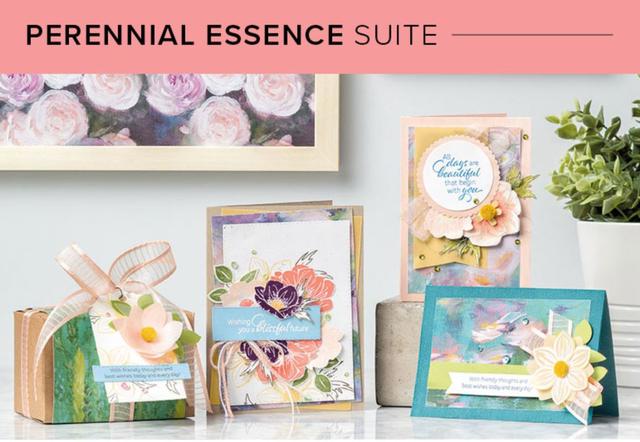
This Perennial Essence Thinking of You Easy Card is really easy and the paper makes it beautiful! This Perennial Essence Designer Series Paper is printed with hand-painted impressionistic images so it is really pretty and very special. The colors are very rich and you will love it! The paper even looks like it was painted on canvas!
This card base is Gorgeous Grape Cardstock, not one of the coordinating colors but I thought it looked nice with the paper anyway! I put a layer of Whisper White underneath the designer paper just to help set it off a little. The greeting is from the Good Morning Magnolia Stamp Set. I stamped it on Whisper White with Gorgeous Grape Ink. Then it was die cut with one of the Stitched Nested Labels Dies. The ribbon is the pretty Whisper White 5/8″ Polka Dot Tulle Ribbon. I love this ribbon.
I think any card or project you would make with this designer paper would be beautiful! You can even frame a piece of the paper it is so pretty on its own.
Watch this video to see both sides of all the papers!
Here is another card using this Perennial Essence Paper. It’s so easy to make a pretty card. All you have to do is change the greeting for another occasion.
Remember now in August you can spend your Bonus Coupons you earned in July! Have your email handy when you are placing your order so you can enter the codes in the “Manage Codes” area of your account. Let me know if you have questions.
When you need a card in a hurry, just think of this simple design. Layer the designer paper on the card base or even just a strip of it. Stamp a greeting and perhaps add some ribbon. Maybe you can even add another little embellishment to the greeting or somewhere on the card. Don’t overdo it, though!
Since this Gorgeous Grape Cardstock is dark, adhere a Whisper White layer inside the card so you can stamp or write a greeting inside. I stamped a couple of flowers from the Floral Essence Stamp Set just in the corner of the Whisper White layer.
Just experiment with the new papers in the Stampin’ Up! Annual Catalog! You don’t even have to know what you are going to make, just look through the papers and be inspired! See what looks good to you, what jumps out, what makes you feel like you want to sit down and create! Or look in the Stampin’ Up! catalog and see what samples they have. You will come up with something beautiful using the Perennial Essence Designer Series Paper.
This Petal Labels Dies Thank You Card is easier to make than you might think! It’s all about the dies! I hadn’t tried these out yet, but they give you an elegant-looking card just by cutting out this flowery die.
The card base is Whisper White and the layer is Pool Party. I wasn’t even sure what I was going to make. I looked through my designer papers but didn’t see one I wanted to put underneath the die cut layer. So I just decided to keep it real simple!
The Petal Labels Dies come with the larger and smaller two dies but a single oval if you want to die cut the center of the smaller die. After die-cutting the smaller floral die, I also die cut that oval in Whisper White and replaced it in the center of the floral piece after stamping a greeting on it. I had to find something I wanted to use and that would fit inside this oval. This greeting is from the Flourishing Phrases Stamp Set. This is often my go-to stamp set for sentiments and greetings.
That’s all there is to my card! Now certainly you can do a lot of variations so you can make cards for many occasions and designs with these dies. And if you just want to keep it rather plain and simple, you can do that like this card!
Remember, now it is August, so if you earned some Bonus Coupons in July from your Stampin’ Up! order(s), you can spend them now in August! When you get your order entered, you’ll see something at the bottom that says “Manage Coupon Codes” and enter your code(s) there. Then make sure your coupons are deducted from the total. Click the photo below to view it larger.
This Over the Moon For You Whimsical Cow Card is a fun one to make with this stamp set! If you like cows, or even if you think you don’t, this Over the Moon Stamp Set will win over your heart! I didn’t pay any attention to it at first and then I thought it might be kind of fun and it is.
You’ll be able to make many kinds of cards with this stamp set. You could even use it for Valentine’s Day or anniversary…..who knows, maybe even for a wedding!
This card is on a base of Whisper White Cardstock, layered with Crushed Curry, although you could also use Daffodil Delight. The front of the card is made with a layer of Night of Navy with a strip of green from the Perennial Essence Designer Series Paper for the grass. The moon is stamped on Crushed Curry and just cut out. The cow is stamped with Memento Ink and colored with Stampin’ Blends markers as is the “thought bubble” with the heart. The cow and bubble are both popped up on Stampin’ Dimensionals. The greeting is also in the stamp set and I just cut a little banner end on one side. I also used the retired stars that I had from last year. If you didn’t have these you could probably use some sequins or something to represent stars or find something in your stash! There’s always something!
While you are waiting for Holiday Catalog time, check out these cute cows in the Over the Moon Stamp Set in the Stampin’ Up! Catalog!
Surprisingly, it is already the end of July and in two days it will be the end of Stampin’ Up! Bonus Coupons. With every $50 you spend in July, you earn a $5 coupon to spend in August! (Kind of like Sale-A-Bration except you get a coupon to spend with every $50 instead of a stamp set!) If you have ordered in July, please check and make sure you received your email from Stampin’ Up! with your coupon codes. You will need these in August.
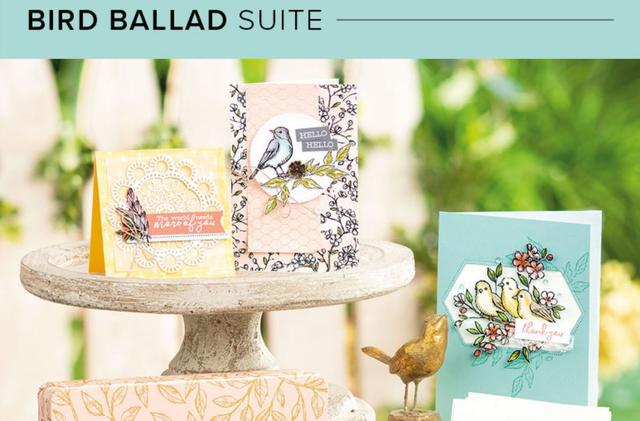
Love the Bird Ballad Suite, especially the Free As a Bird Stamp Set and the Bird Ballad Designer Series Paper! The Scalloped Lace Trim is also beautiful for an embellishment.
Images copyright Stampin’ Up! 2019
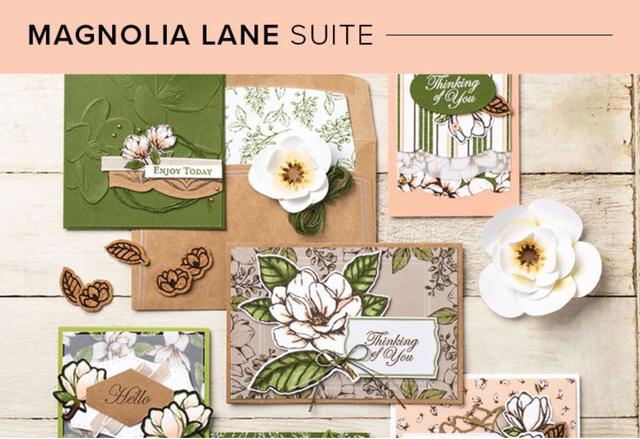
The Magnolia Lane Suite you have probably seen all over the place because of its popularity. The Good Morning Magnolia Stamp Set with the large flower stamp and coordinating dies, plus the gorgeous Magnolia Lane Designer Series Paper. You can even use the Hot Air Balloon Punch to make a large flower resembling a magnolia!
Images copyright Stampin’ Up! 2019
The Perennial Essence Suite is so pretty and somewhat different from other designs we have had. The Perennial Essence Designer Series Paper is the real star and for an embellishment, the Petal Pink Organdy Striped Ribbon is one of the prettiest ribbons we have had.
Of course, I also like most of the other Suites, if not all, but even Demonstrators can’t have everything! I posted the Suites so that you can see all the coordinating products, and they include the Bundle pricing of saving 10% on the particular Bundle.
The Recruiting Promo continues on through August if you are interested in becoming a Stampin’ Up! Demonstrator! Ask me if you have questions!
Also, remember Sales Tax Holidays in certain states to save a little bit of money on certain products. Check for your state and dates.
Go check your catalog today and see if you want to order in July in order to earn the Bonus Coupons!
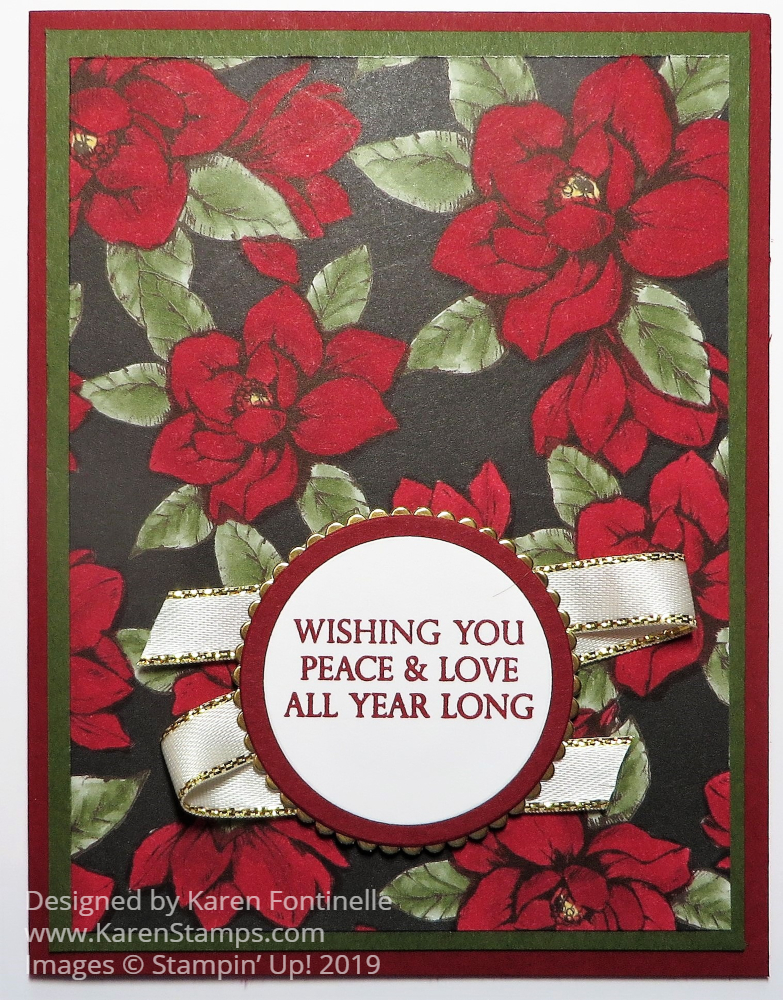
This is one of those creative ideas I never would have thought of myself, but I’ve seen samples that other Demonstrators did like this, coloring in the flowers on the Magnolia Lane Designer Series Paper! A few I saw colored the flowers red with Stampin’ Blends to look like a Christmas card! How cool is that?!
My Magnolia Lane Christmas Card has lots of coloring if you like coloring! This paper pattern has pinkish flowers and green leaves with a black background. Then I used my Cherry Cobbler Stampin’ Blends to color in the flowers. I did use both but if you wanted to make it quicker, just use one of the shades and don’t do any blending and shading. You almost don’t need it. The leaves are already green so you don’t need to color those! If you want to make more than one of these cards, you might want to use a smaller piece of designer paper so you can do less coloring!
The card base is Cherry Cobbler Cardstock with a layer of Mossy Meadow. The greeting is stamped in Cherry Cobbler Ink from the Merry Christmas To All Stamp Set. I die-cut a Cherry Cobbler layer underneath and then a back layer of Gold Foil with one of the scalloped circle dies. For some embellishment, I adhered a piece of Gold 3/8″ Metallic-Edge Ribbon back and forth behind the greeting and then popped up the whole thing with Stampin’ Dimensionals.
I could maybe have added some little embellishment to the greeting but this time I decided to stop while I was ahead! At least I have one Christmas card done! Do you realize Christmas is less than five months away?! Good thing the Holiday Catalog is coming out soon!
Here is a sneak peek of the cover, if you haven’t seen it online already! Demonstrators who earned the free cruise to the Greek Isles already have their copy and the rest of us will get them soon in August. The Holiday Catalog goes live September 4th, just two days after Labor Day!
If you want to get an early start on your Christmas cards, you can color in some of your Magnolia Lane Paper. But it doesn’t have to be for Christmas! Color the flowers some other color if you like! Maybe now we will look at some of our other papers and see if we can use them like this somehow!
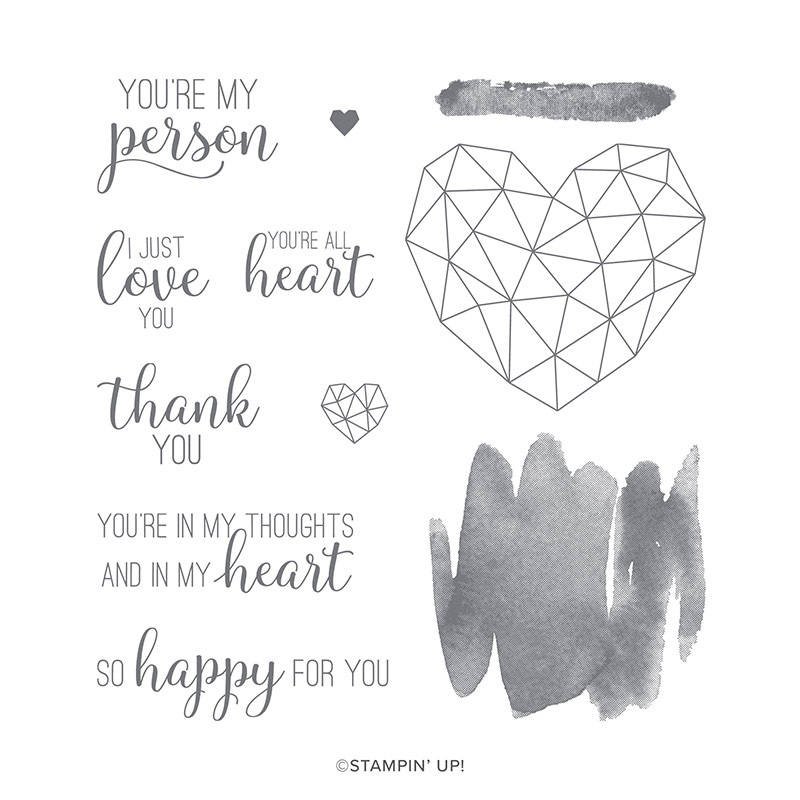
Sometimes I saw “Know when to stop!” but for this In Colors Modern Heart Card I said to myself “Keep going!” My brilliant idea in my head was to play with the new In Colors that just came out in the new Stampin’ Up! Catalog. I had purchased the package of markers since the Purple Posy Ink is still unavailable. What I thought I would do was scribble each marker on an acrylic block and then stamp that on paper. As it turned out, I got the idea to use the Modern Heart Stamp Set and it has a squiggle stamp in it that served that purpose rather than the block.
I started by coloring on the squiggle stamp with each In Color and then stamping it on the Thick Whisper White Cardstock, since I was only going to use this for the card with no layers or anything else. Then I stamped the Modern Heart in Memento Black Ink over the stamped squiggle. Next I stamped the greeting from the same set, but it was all too blah. I stamped the smaller modern hearts 3 times in each In Color around the card, but I still didn’t like it. Then I stamped the teeny tiny heart in each color just once. Somehow just that teeny heart I thought made it look better. But still…..
I gave in and chopped the card front off and added In Color cardstock layers and card base and just used the stamped Whisper White piece as the top layer. That was better. When I looked in my drawer for some other embellishment I found these little epoxy gold hearts (retired from last year) and added three of those. Not sure I should have added those, but altogether, I was happier with this card.
Actually, I think part of the problem is maybe I’m not too fond of this years In Colors, but neither have I played with them much. Sometimes that’s what you need to do to like something! So as I said, usually I think don’t overdo things on a card, know when to stop. But in this case, continuing to add some things I think made it better. Not my best or my favorite, but stamped, nonetheless! Nice to just do stamping sometimes!
Last few days to get your $5 Bonus Coupons with every $50 purchase to spend in August! And don’t forget your Tax Free Holidays for certain states on certain dates.