Monthly Archives: March 2021

Fine Art Floral Birthday Card

Fine Art Floral Birthday Card

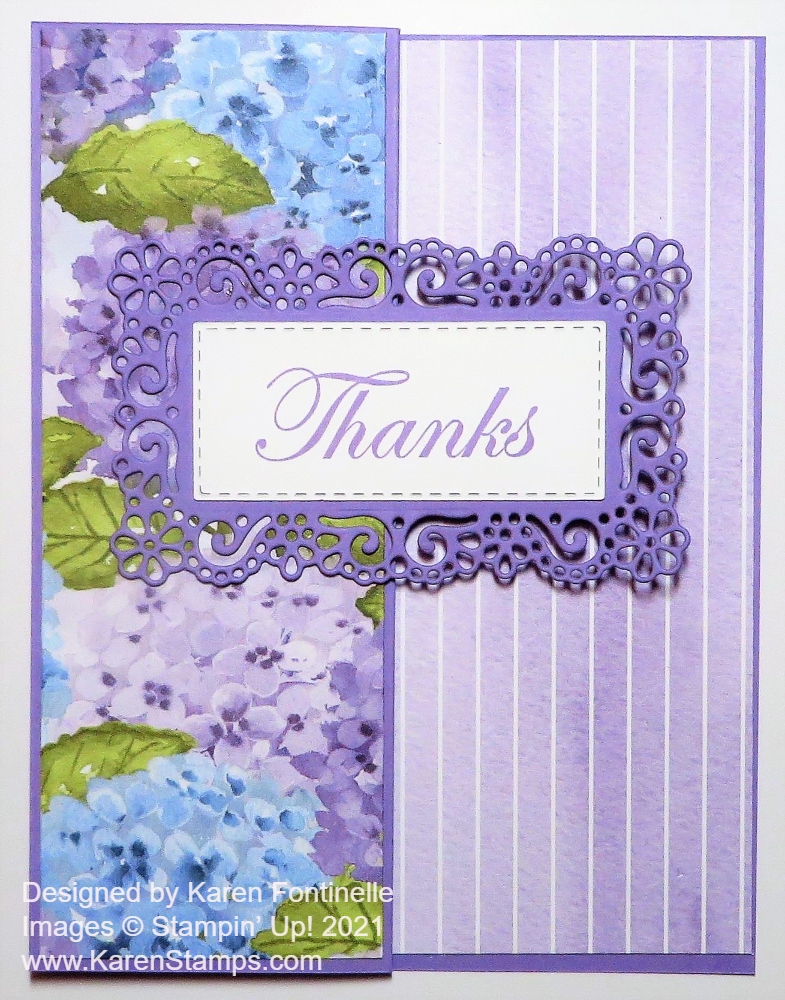
If you want to make a very quick and easy card, this Fine Art Floral Birthday Card is it! After hours of designing this card….I mean, when I pulled out the package of designer paper and saw this already cut strip of floral paper, I thought it would make a beautiful card! That’s how easy it is sometimes! Maybe sometimes you can spend hours working on one card, but it really isn’t necessary!

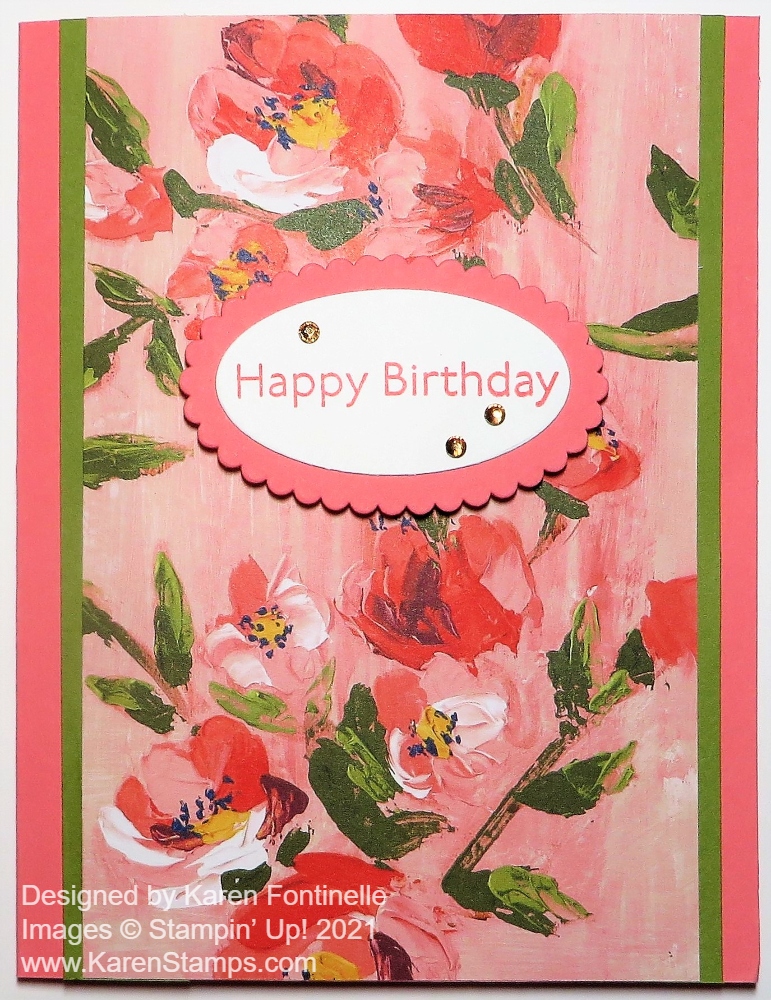
One of the many coordinating colors of the Fine Art Floral Designer Series Paper is Flirty Flamingo so I chose that color for the card base. I almost just glued on the designer paper, but I decided to try some strips of another color on each side. Old Olive won.

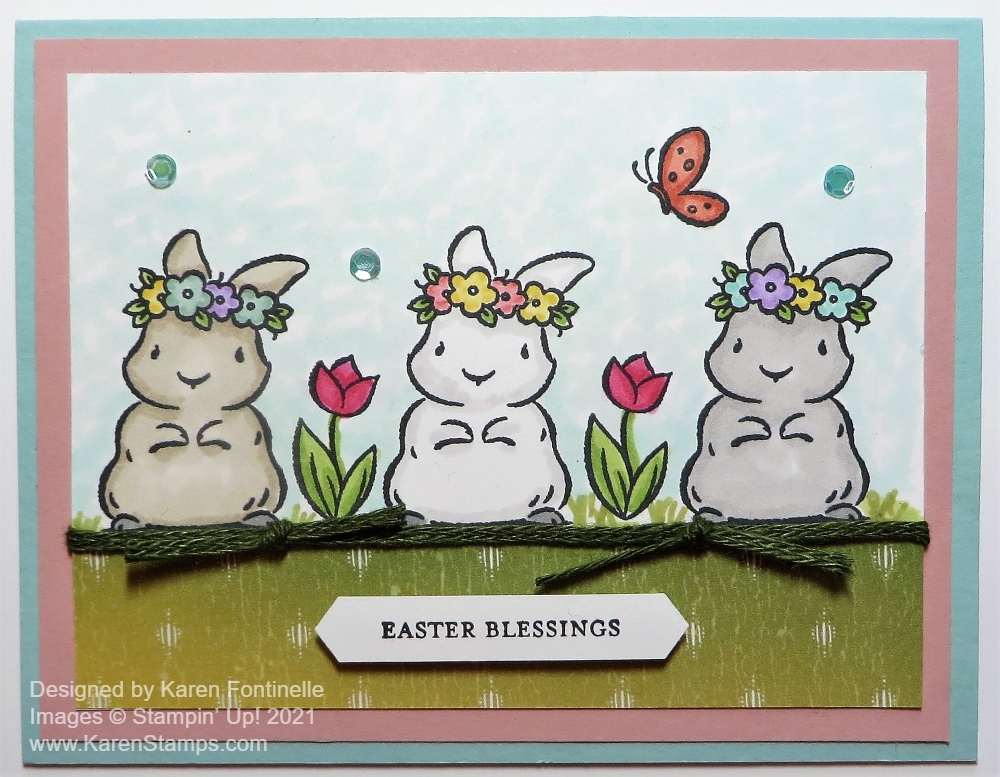
And as luck would have it, there was already a die-cut scalloped oval in the bag of cardstock so I just used that for the greeting. I stamped the birthday greeting from the Art Gallery Stamp Set on Basic White and die cut that with a plain oval in the Layering Oval Dies. I popped up the greeting with Stampin’ Dimensionals. As usual, I couldn’t resist adding a few Champagne Rhinestone Basic Jewels for some bling!

You could put an Easter greeting on this card and it would be beautiful to send, also! You just can’t go wrong with this beautiful Fine Art Floral Designer Series Paper for birthday cards or any other cards as well.

Trio of Bunnies Easter Card

Trio of Bunnies Easter Card

Here’s a Trio of Bunnies Easter Card, three little bunnies just waiting for Easter! They are just waiting in the grass, next to some tulips, thinking about spring!

The card base is Pool Party Cardstock with a layer of Blushing Bride Cardstock. I like these two colors together for spring, for softness, and for prettiness! The top layer is Basic White Cardstock, stamped with the bunnies from the Springtime Joy Stamp Set, a couple of tulips, and a small butterfly all in Memento Black Ink.

The bunnies, tulips, and butterfly were colored in with Stampin’ Blends alcohol markers. I had colored in some grass and even some sprigs of grass, but then I got the idea to cut a piece of green designer paper of some sort for the bottom border of the card to look like grass. I looked through my designer papers and ended up choosing this pattern from the Artistry Blooms Designer Series Paper. There are several you could choose from. I also colored in the background of the sky behind the bunnies with the Light Pool Party Stampin’ Blend.

I usually like to cover a “seam” or where a piece of designer paper ends on a piece of cardstock with a piece of ribbon or another strip of paper. On this card, I used a piece of Mossy Meadow 3/16″ Braided Linen Trim across the top of the designer paper and tied two knots along the trim.

The greeting is from the Itty Bitty Greetings Stamp Set. You can find almost anything you need in all of the “Itty Bitty” stamp sets! I love them! I punched it out with the Classic Label Punch. It was a good size for this card! It is popped up with a small Foam Adhesive Strip. These are just like Stampin’ Dimensionals except they are strips. Sometimes you use them in the same way as Dimensionals and sometimes they are used for special projects like shaker cards.

For one more little touch, I added some Artistry Blooms Adhesive-Backed Sequins in the background. I could have added an Easter Basket for at least one bunny to hold, but I wasn’t thinking about that when I made the card so I think it is fine the way it is. I could have also used the “Welcome Spring” greeting in the stamp set.

You will find a lot of uses for this cute Springtime Joy Stamp Set!

PS: Today is the last day to subscribe to Paper Pumpkin to get the March 2021 Kit!

CLICK HERE TO JOIN PAPER PUMPKIN!

Last Two Days! Get The March 2021 Paper Pumpkin Kit!

You only have today and tomorrow to sign up for the Paper Pumpkin Kit for March 2021! Sign up now so you won’t miss out!

This one is really different! It’s not more florals or a holiday theme, this kit has cards with a theme of hills and mountains to celebrate life’s milestones.

Three cheers for mountain air, a sky filled with sunshine, and finding joy in life’s journey! Adventure awaits inside this month’s majestic, mountain-themed kit. With enough elements and embellishments to create eight cards and coordinating envelopes, the Here’s to You Paper Pumpkin Kit is the perfect pick for celebrating life’s little moments and mountain-high milestones!

What makes March’s kit one-of-a-kind? The spectacular set of four free stencils—and a stamping sponge—that you’ll find inside! Pair this pack of stunning stencils with the kit’s contents to stamp a springtime scene, then store the set to stamp for any season in the future. Clean up your binoculars and dust off your hiking boots—the Here’s to You Paper Pumpkin Kit is ready to lead you on an excursion to explore your creativity!

ABOUT THE MARCH KIT
The Here’s to You Kit contains enough supplies to create 8 cards—4 each of 2 designs—and coordinating envelopes.

The kit’s contents include printed card bases, die-cut paper pieces, embellishments, adhesive, and more!
Card size: 4-1/4″ x 5-1/2″
Envelope size: 4-1/2″ x 5-3/4″
Coordinating colors: Bumblebee, Calypso Coral, Old Olive, Petal Pink, Pretty Peacock, Seaside Spray
Includes four free stencils and a stamping sponge!
Arrives in a cute and collectible box.

Don’t miss out on getting the four FREE stencils and stamping sponge! We always like “free”!! Plus, you deserve a package in the mail every month!

JOIN PAPER PUMPKIN!

Sand & Sea Embossed Friends Card

Sand & Sea Embossed Friends Card

This Sand & Sea Embossed Friends Card is one I received as a thank you card from my very dear friend who introduced me to Stampin’ Up! many years ago now! I still think she makes the most beautiful cards and this is certainly one of them! I couldn’t resist posting it to show it to you!

This card is made with the Sand & Sea Suite in the January-June 2021 Mini Catalog, otherwise known as the Spring Mini. From the samples I have seen online, I would guess that this was one of the most popular suites in the Spring Mini.

I did some sleuthing and I think my friend used our retired Bashful Blue Cardstock as a layer on a Basic White card base. It fits on the full front of the card base. She embossed it with the Seashells 3D Embossing Folder. This folder is just stunning! She even said in her note she really liked the embossing folder. The embossed top layer is also shiny so I think maybe she used Frost White Shimmer Paint just sponged on the paper! That way you can have any color paper with that pearlized finish!

She used a Rectangle Stitched Die as the base for the focal point of the card. The paper is in the Suite, the Sand & Sea Designer Series Paper. This sheet has the sand image on one side and a multitude of colored seashells on the other side. The greeting is in the Friends Are Like Seashells Stamp Set. She also stamped several seashells in the stamp set and arranged them around the greeting.

For extra embellishment, she tied a piece of Linen Thread around the embossed layer under the greeting piece. And she added a few sequins from the Whale of a Time Sequins. One type of sequin in the mix looks like a tiny seashell!

If this card doesn’t make you fall in love with the Sand & Sea Suite in the Spring Mini, I don’t know what would! Almost everyone loves the ocean and seashells so you can make lots of cards with this set that everyone will enjoy and appreciate.

SHOP STAMPIN’ UP! ONLINE HERE!

Springtime Joy Lamb Easter Card

Springtime Joy Lamb Easter Card

I am really falling in love with this spring stamp set and enjoyed this making this Springtime Joy Lamb Easter Card. Yes, Easter is right around the corner so it’s time to make cards!

Be sure to check out this Springtime Joy Stamp Set in the January-June 2021 Mini Catalog (Spring Mini)! You might miss it because it’s “just” a stamp set! No Suite, no Bundle, no dies, no embellishments, just a stamp set! Like in the olden days! You’ll find it on page 22.

I wanted to make a card with the lamb in the stamp set and this is what I came up with! The card base is Melon Mambo, a color I haven’t used in awhile somehow. It has a layer of Blushing Bride Cardstock on which I stamped tulips in the same color ink, Blushing Bride.

The lamb is stamped with Memento Ink on Basic White Cardstock. I die-cut the lamb with this die in the Stitched So Sweetly Dies. I started off just coloring the lamb image with Stampin’ Blends, using the lightest gray just around the lamb for a little definition around the flowers, around her face, and around the fluffs of wool on the body. The crown of flowers is colored with Melon Mambo and Flirty Flamingo and the leaves with Granny Apple Green. But I couldn’t stop! I added some grass under the lamb and then, of course, I had to have some sky with Pool Party! Just kind of scribble little scribbles if you are coloring in a larger area.

This lamb piece is layered on a scalloped rectangle of Melon Mambo, also die-cut from the Stitched So Sweetly Dies. I popped this up with Stampin’ Dimensionals.

The greeting is also in the Springtime Joy Stamp Set. It is stamped in Blushing Bride Ink and die-cut with a banner in the Tasteful Labels Dies. It is popped up on Dimensionals, too.

For the inside of the card, I adhered a layer of Basic White since the Melon Mambo is a little dark. It is stamped with the Easter greeting in the stamp set and a little tulip in the lower right corner.

For another idea, here is a card I made with the cute bunny in the Springtime Joy Stamp Set. Oddly enough, I also stamped the tulips in the background on that card, too! I was almost copying myself and didn’t know it!

If you plan to make spring and Easter cards, consider the Springtime Joy Stamp Set and make a card like my Springtime Joy Lamb Easter Card.

SHOP STAMPIN’ UP! ONLINE HERE!

Get the Butterfly Bouquet For Butterfly Lovers!

Today is the first day for butterfly lovers to get the Butterfly Bouquet! It’s a sure sign of spring after a hard winter for many, don’t you think?!

Bring in the beauty of nature with the artistic designs of the Butterfly Brilliance Bundle and coordinating designer series paper, along with textured specialty paper that will put a pop of brilliance on every project.

This is an early release of a new product in the upcoming Stampin’ Up! Annual Catalog! Here are the details:

  • The Butterfly Brilliance Stamp Set and Brilliant Wings Dies are available NOW, either separately or in the Butterfly Brilliance Bundle. These will be in the new catalog, too.
  • The two papers, the Butterfly Bijou 6″ x 6″ Designer Series Paper and the Natural Touch Specialty Paper are ONLY available now during this promotion until May 3. While supplies last. (That means this paper is not going to be in the new catalog, I imagine, so get it now while you can.) The Natural Touch Paper actually has some texture to it and is something different.

Get the Flyer PDF Here!

The stamp set is ONE BIG STAMP! It’s even slightly bigger than a regular card size so if you would like to make a larger card, this is a good stamp for that! Use your Stamparatus to get a good image for sure!

One of the dies cuts out all the butterflies on one of the sheets of butterflies on the designer paper! If you order the stamp set and dies, be sure to get the designer paper so you can do this!

Lots of possibilities with this fantastic collection! If you want everything, just order the Butterfly Brilliance Collection and get it all with one number!

Shop For Butterflies at Stampin’ Up! Today!

Hydrangea Hill Z-Fold Thank You Card

Hydrangea Hill Z-Fold Thank You Card

You can’t really get enough of this gorgeous designer paper that I used on this Hydrangea Hill Z-Fold Thank You Card. I decided to make a Z-fold card because that makes the card a little extra-special anyway, plus I could show off two patterns of the paper on the front of the card.

As you have seen on several of my other z-fold cards, it really just means the card front is folded back on itself in half. So after you make the card base, just score the card front at 2 1/8″ (half of 4 1/4″) and then fold that edge back to the card fold. Here is a card and photos where you can see exactly how the z-fold looks.

On the folded back part of the card, I chose the very full hydrangea print pattern in the Hydrangea Hill Designer Series Paper. I cut it so there would be a very narrow margin around the edge so the paper is cut at 2″ x 5 3/8″. The inside striped piece is cut at 5 3/8″ x 4 1/8″.

The greeting is stamped with the word “Thanks” from the Good Morning Magnolia Stamp Set. I used Highland Heather Ink to match the Highland Heather Cardstock. This greeting was die cut with a rectangle die from the Rectangle Stitched Dies and adhered to an Ornate Frames Diecut.

When you adhere the greeting on to the front of a z-fold card be careful that you only put adhesive on that area that will adhere to the folded front of the card. Otherwise, it may stick to the other side of the card as well! You can kind of eyeball it or maybe you would want to make a pencil mark to indicate exactly where you want the glue to go (and not go!). If you are putting a smaller greeting inside the card, make sure the front section covers the inside greeting. That can be a little tricky but it is something to think about as you assemble your card.

You will find the Hydrangea Hill Designer Series Paper in the January-June 2021 Mini Catalog. If you like hydrangeas, you must have this paper! They are beautiful flowers and so is this paper on this Hydrangea Hill Z-Fold Thank You Card.