Tag Archives: Stampin’ Blends

Are Stampin’ Blends Retiring?

Stampin' Blends Image
Image © Stampin’ Up!

One of my favorite products in the Stampin’ Up! Catalog is the Stampin’ Blends markers. So the other day when the Last-Chance List came out of retiring products I got a little concerned as I saw marker after marker on the list! You may have too! Fortunately, Stampin’ Blends ARE NOT RETIRING so no worries there if they are your favorite coloring medium!

What will be new, is that Stampin’ Blends will not be sold in singles in the new catalog. So if one marker goes bad, you will need to buy the Combo package regardless. Therefore, I suggest going through your markers and seeing particularly if you have any singles that you need to replace. Keep in mind these are a consumable product and will have to be replaced eventually. If you do need single markers, order them now during the retirement period. When the new catalog comes out you will only be able to get the Combo Pack.

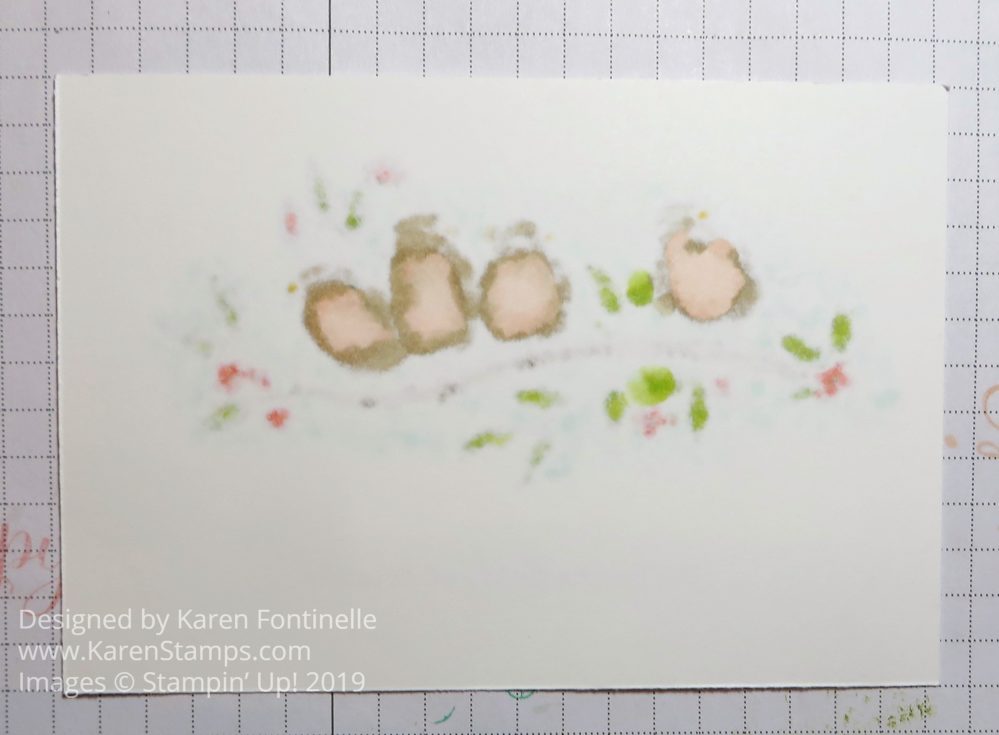
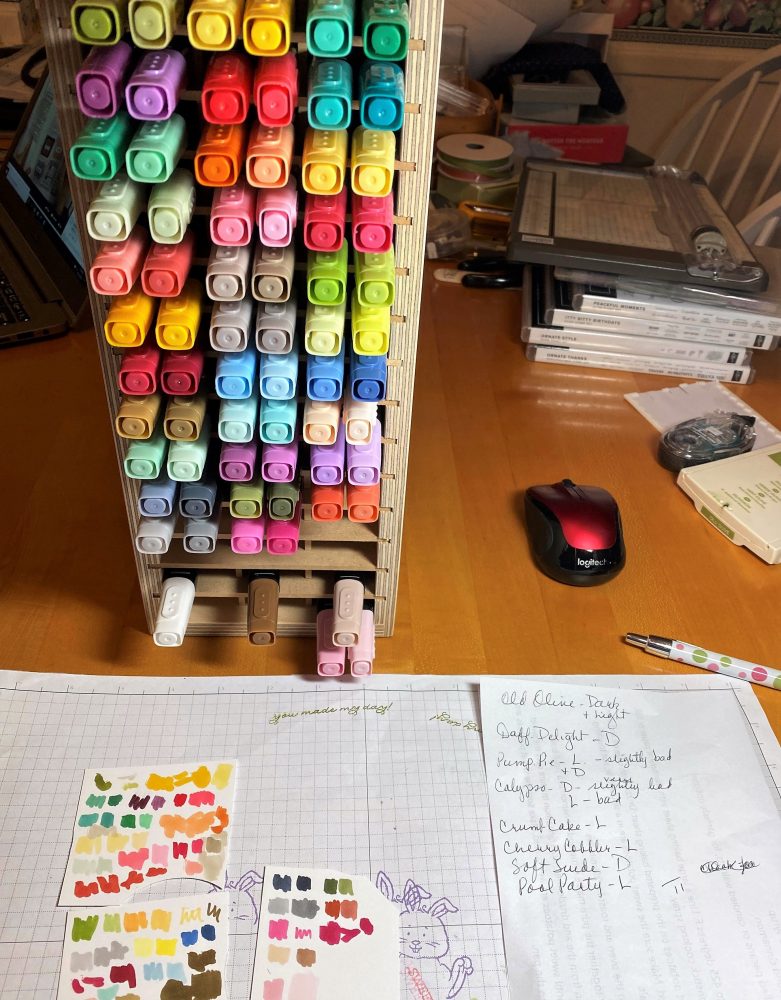
I already knew I had a few markers whose tips were scraggly but I hadn’t stopped the world to go through them and make a list of them. This is what I did the other day. I went through each marker and scribbled on scraps of Whisper White Cardstock with the brush tip and made a list of any that were bad or a little bit bad or whatever. I thought it was best to color on the Whisper White cardstock to get the proper feel for how the tip was working in case it didn’t work as well on scrap computer paper. Then I placed a Stampin’ Up! order for the singles I needed or both, if that’s what I needed. It looks like Old Olive only has the Dark marker available, no Light and no Combo Pack so that will wait until later.

Stampin' Blends Singles

The single Stampin’ Blends Markers will be available until June 2 or while supplies last. If they run out of a single color during this time, the item will no longer be orderable.

Stampin’ Up! says they have quite a bit of inventory for single Stampin’ Blends Markers so they will continue to fulfill orders for the new 2020–2021 Annual Catalogue combo packs with single markers until the inventory is depleted. After that time, they will automatically start shipping Stampin’ Blends Combo Packs. So if in the new catalog you still get markers in your order in single packages that is why, but when those are gone you’ll get the combo pack. Either way, they will be only sold as Combo packs starting June 3.

Also, beginning June 3, Bronze and Ivory Stampin’ Blends Markers will be sold exclusively in a combo pack (though they may arrive in separate packaging until the single marker inventory is depleted). The Stampin’ Blends Color Lifter will be the only Stampin’ Blends Marker sold individually starting with the 2020–2021 Annual Catalogue.

So when you are going through the Last-Chance products in my Online Store and the Clearance Rack, and maybe ordering the early release Ornate Garden products, be sure to check out your Stampin’ Blends markers and see if you need maybe just a few single markers while you have your chance. Remember, everything is while supplies last!

Ornate Garden Floral Stamp With Sequins

Ornate Garden Floral Stamp With Sequins

The Ornate Garden Suite offers so many beautiful ways to make cards whether you stamp and color in the image or use the beautiful designer papers! There are two sets of die cuts you can use too, but on this card, I was going for something simpler.

A few days ago I made another card with this same floral stamp in the Ornate Style Stamp Set from the Ornate Garden Suite, but I cut it out by hand. This one is just stamped and colored in on the card front. I love coloring all the flowers with my Stampin’ Blends markers, but you can use other techniques.

The greeting on this card is from the Ornate Thanks Stamp Set. This stamp set has large greetings to pair with the smaller script greetings but you can also just use some of the script greetings alone. That’s what I did on this card.

The Whisper White cardstock front layer is adhered to an Old Olive card base with the fold at the top for something different. For a little pizzazz, I added a few sequins that kind of matched the flowers and leaves.

If you want EVERYTHING that goes together in this Ornate Garden Suite Collection, just order the whole collection with one number on your order, #154153. Or you can pick and choose exactly which products you want on this order and get more on another order! This Suite will be in the upcoming Stampin’ Up! Annual Catalog so there is no rush unless you’d like to get your hands on something brand-new while you are staying home these days!

Welcome Easter Lamb Card For a Sweet Friend

Welcome Easter Lamb Card For a Sweet Friend

I’ve seen many people coloring this Flowering Foils Specialty Designer Series Paper various ways so I finally tried it on this Welcome Easter Lamb Card For a Sweet Friend. The Flowering Foils paper is one that you can earn FREE during Sale-A-Bration with a $50 Stampin’ Up! purchase until March 31. You can tell from the glare on the photo that this paper has foil accents in Rose Gold and Silver Foil. It’s beautiful but difficult to photograph very well!

I decided to color in the background around all the flowers. You might think (and I thought!) that it would be extremely tedious and ridiculous to color around all those little flowers! Somehow it was not! I got out my Stampin’ Blends, chose Granny Apple Green, and started coloring! It really went pretty fast and I think the Blends marker made it easy. I didn’t feel I had to be absolutely exact and yet it came out just fine! After coloring the background, I decided to color the silver flowers, too! I used Dark Flirty Flamingo.

After the designer paper was colored, I layered it on a card base of Flirty Flamingo Cardstock. I tied around a piece of Whisper White 5/8″ Flax Ribbon with a knot on the side of the card. Then I stamped the lamb from the Welcome Easter Stamp Set and colored him with Stampin’ Blends, particularly with Light Gray Granite. The lamb was die cut with a Stitched Shapes Die and then layered on a scalloped Layering Circles Die in Flirty Flamingo. The greeting is in the same stamp set and is stamped in Flirty Flamingo Ink. It is punched out with the Classic Label Punch.

If you like coloring, just sit down and relax and enjoy coloring this Flowering Foils Paper. And we all need activities that help us relax right now! Here’s a card I made the other day with the Flowering Foils paper without coloring. I even used three different papers on that card! So you can do it either way! The paper is pretty as is, or you can do lots of coloring like I did on my Welcome Easter Lamb Card For a Sweet Friend, but don’t miss out on Sale-A-Bration!

Welcome Easter Yellow Chick Card

Welcome Easter Yellow Chick Card and Stamp Set

I just ordered the Welcome Easter Stamp Set recently and it is so adorable I had to make this Welcome Easter Yellow Chick Card. It’s actually a great stamp set that is not just for Easter, as you can see from the stamp set photo! It’s even got a greeting in the stamp set for a new baby and a friend. You could certainly make a lot of cute baby cards and projects with this stamp set, so don’t look at it as only for Easter.

In making this card, I wanted to use the new, beautiful vellum paper, available FREE during these last few weeks of Sale-A-Bration! It’s one of the new products available as the 2nd release during Sale-A-Bration. It is called the So Very Vellum Specialty Designer Series Paper. It comes in three colors: Pool Party, Purple Posy, and Soft Sea Foam.

I just used a card base of Whisper White and added a layer of the Pool Party vellum, sponging it on the back with Multipurpose Liquid Glue so the adhesive wouldn’t show through.

The chick is stamped in Memento Ink and colored in with Daffodil Delight Stampin’ Blends Markers and the beak and feet in Pumpkin Pie markers. It’s so fun to color with these Stampin’ Blends Markers! I just love to do it! I also colored in some green grass just for fun using the Granny Apple Green markers.

The chick was then cut out with the Stitched Shapes Dies and layered on a scalloped circle die-cut in Daffodil Delight. Then I thought it would be fun to use the Whisper White 5/8″ Polka Dot Tulle Ribbon placed back and forth on the back. I popped this piece up with Stampin’ Dimensionals.

The greeting is stamped and then layered on a Stitched Rectangle Die in Daffodil Delight. It is just glued on with Multipurpose Liquid Glue or you can use Snail Adhesive.

That’s as easy as it is to make this Welcome Easter Card with the cute yellow chick on the front! Try your hand at making this simple card!

Remember, Sale-A-Bration ends March 31 so what with all the health news out there, don’t forget if you want to treat yourself to a Sale-A-Bration product!

Shop Stampin’ Up! Online!

Welcome Easter Yellow Chick Card

Thoughtful Blooms Card With Gold Accents

Thoughtful Blooms Card With Gold Accents

This Thoughtful Blooms Card With Gold Accents took me a little longer than I expected to get it exactly right. Not that there is ever an “exactly right” in stamping and cardmaking, but I always know when I finally hit something that pleases me. Just keep going if you aren’t happy with your creation because you may just be one step away.

For this card, I had the idea of using a cluster of flowers in the bottom corner, maybe three flowers. What took some time for me was finding the right layer for the sentiment at the top. Some dies were too big, some too little, a plain rectangle too plain. I kept working and came up with the combination you see. Adding the bits of ribbon, I think, jazzed it up just enough to make me happy.

The card base is Basic Black, so plan on putting a Whisper White layer inside the card for your greeting or personal message. I added two extra flowers I already had punched out plus some stamped leaves to the inside layer down in the right-hand corner.

The designer paper layer on the front of the card is the Golden Honey Specialty Designer Series Paper. This is the paper with the bees and coordinates with the Honey Bee Bundle in the Occasions Mini Catalog. You can earn this Golden Honey DSP FREE during Sale-A-Bration with a $50 purchase of Stampin’ Up! products! Besides the bees and beehives and honeycombs on some sides of the paper, there are also plainer designs like on my card today, so even if you’re not into bees, you can still use this paper!

Since my Thoughtful Blooms Stamp Set was still out on my table, I decided to just use those flowers again. I made a card yesterday with those flowers. Today I wanted to stamp the outline image of the stamp and color them in with my Stampin’ Blends alcohol markers. I wanted some bright colors so I used Lovely Lipstick, Daffodil Delight, Calypso Coral, and Pumpkin Pie.

There is a punch for these Thoughtful Blooms flowers that you can earn during Sale-A-Bration with a $100 purchase called the Small Bloom Punch. I wish there had been a little leaf punch, too, but there isn’t so I just cut out some leaves and the sprig of leaves by hand. A little tedious and I left some white margin so I didn’t have to be perfect, but since they are small it took a few minutes! But I like the look of having them! I just played around with grouping the flowers down in the lower-left corner, gluing two of them flat on the card and the rest are popped up on Stampin’ Dimensionals. These are the first six flowers I used in this grouping. When I was all finished with the card, I added the Gold Glitter Dots to the flower centers, which I loved, and also added one more flower at the “top” of the grouping and at the bottom left. This, to me, was the finishing touch!

The greeting is from the Thoughtful Blooms Stamp Set. It is die-cut with a die in the Painted Poppies Bundle. I tried to find a Gold Foil layer that I was happy with. Finally, one in the Stitched Rectangle Dies seemed to fit about right! I also punched a hole in each side and threaded some Daffodil Delight 1/4″ Ruched Ribbon through.

If you like this Thoughtful Blooms Card With Gold Accents, add the Golden Honey Paper and Thoughtful Blooms Stamp Set to your Stampin’ Up! order(s) during Sale-A-Bration in the Stampin’ Up! Online Store!

Christmas Gleaming Holly Leaves Christmas Card

Christmas Gleaming Holly Leaves Christmas Card

Here is a card I mostly copied from one I found online except I think she die-cut all the holly leaves and adhered them to the card. I simply stamped them randomly on the card front and colored them in on my Christmas Gleaming Holly Leaves Christmas Card.

The card base is Garden Green although you could also use Cherry Cobbler as the sample I saw did. I used Shimmery White Cardstock, one of my favorite papers. I think you can kind of see the shimmer in the photo a little bit on the colored areas. Even in person, you can barely see it, but it is there! It’s also the next best paper on which to watercolor if you don’t have real watercolor paper.

I stamped the holly leaves and berries in Memento Ink and colored in with Stampin’ Blends. It takes a little time to color even only using green and red. I used two shades of green to give a subtle bit of variation in the leaves.

There is a stamp in the Christmas Gleaming Stamp Set that makes those little dots. I stamped some of those around in Garden Green just to fill in the space a little bit around the leaves. I didn’t want to stamp too many holly leaves because then I’d have to color them in!

The greeting from the same stamp set is stamped in Cherry Cobbler Ink and die cut with a Layering Circle Die and Scalloped Circle Die in the same set.

The ribbon is the Cherry Cobbler Diagonal Stripe Ribbon (no longer available). The greeting is then popped up over the ribbon using Stampin’ Dimensionals.

This is a relatively easy card to make except for the coloring taking a little bit of time. But coloring is relaxing and therapeutic!

Have fun finishing up your Christmas cards, if you are still working on them!

Good Morning Magnolia Z-Fold Sympathy Card

Good Morning Magnolia Z-Fold Sympathy Card

None of us want to have to make a sympathy card or send one, but this Good Morning Magnolia Z-Fold Sympathy Card seemed like the right one for this friend. I’m sure I got the idea from someone else. Maybe I changed some things about it a little but I don’t remember! It is a z-fold card which means the front of the card is folded back, essentially in half. Then you can either leave that front portion folded but not adhered, or you can adhere that folded back piece so the front underneath it.

The card base is Petal Pink with Whisper White layers. I stamped the very large magnolia from the Good Morning Magnolia Stamp Set with Memento Ink and colored in with Stampin’ Blends Markers. I used the Petal Pink markers, plus two greens on the leaves with just a touch of yellow. Then this large magnolia can be die-cut with the Magnolia Memory Dies. The other two smaller flowers are just stamped on the card and colored in. I had to play with the die-cut magnolia to get it in just the right place to fit on the card and line up with the other two flowers.

As you can see below, the edge of the flower hangs over the edge of the card.

Good Morning Magnolia Z-Fold Sympathy Card Inside

You can still stamp something on the inside or just write a note. Just be cautious to have it hidden under the closed front of the card. You might want to make light pencil marks where the card front comes to when closed.

I love z-fold cards! I think they add some extra interest without being very difficult to make!

Good Morning Magnolia Z-Fold Sympathy Card Open

The greeting for this sympathy card comes from the Flourishing Phrases Stamp Set. I love that stamp set and have used it a lot.

You could change this card for another occasion by obviously changing the greeting. It would make a beautiful birthday card, Mother’s Day card, even anniversary, engagement, or wedding card.

If you haven’t ordered this Magnolia stamp and dies yet (or paper!), you probably want to put it on your next order! And when you do, if you have coupon codes from July, be sure to use them before the end of the month!

Only a few more days to sign up for the August Paper Pumpkin Kit so don’t delay if you are interested in a taste of fall! I need this kit to arrive soon!

Even though we hate to think about it, it would be a good idea to make a few different sympathy cards to have on hand like this Good Morning Magnolia Z-Fold Sympathy Card in case the need arises and you want a card to send quickly.

Shop Stampin’ Up! Online!

Magnolia Lane Christmas Card

Magnolia Lane Christmas Card

This is one of those creative ideas I never would have thought of myself, but I’ve seen samples that other Demonstrators did like this, coloring in the flowers on the Magnolia Lane Designer Series Paper! A few I saw colored the flowers red with Stampin’ Blends to look like a Christmas card! How cool is that?!

My Magnolia Lane Christmas Card has lots of coloring if you like coloring! This paper pattern has pinkish flowers and green leaves with a black background. Then I used my Cherry Cobbler Stampin’ Blends to color in the flowers. I did use both but if you wanted to make it quicker, just use one of the shades and don’t do any blending and shading. You almost don’t need it. The leaves are already green so you don’t need to color those! If you want to make more than one of these cards, you might want to use a smaller piece of designer paper so you can do less coloring!

The card base is Cherry Cobbler Cardstock with a layer of Mossy Meadow. The greeting is stamped in Cherry Cobbler Ink from the Merry Christmas To All Stamp Set. I die-cut a Cherry Cobbler layer underneath and then a back layer of Gold Foil with one of the scalloped circle dies. For some embellishment, I adhered a piece of Gold 3/8″ Metallic-Edge Ribbon back and forth behind the greeting and then popped up the whole thing with Stampin’ Dimensionals.

I could maybe have added some little embellishment to the greeting but this time I decided to stop while I was ahead! At least I have one Christmas card done! Do you realize Christmas is less than five months away?! Good thing the Holiday Catalog is coming out soon!

Here is a sneak peek of the cover, if you haven’t seen it online already! Demonstrators who earned the free cruise to the Greek Isles already have their copy and the rest of us will get them soon in August. The Holiday Catalog goes live September 4th, just two days after Labor Day!

If you want to get an early start on your Christmas cards, you can color in some of your Magnolia Lane Paper. But it doesn’t have to be for Christmas! Color the flowers some other color if you like! Maybe now we will look at some of our other papers and see if we can use them like this somehow!

Remember, Bonus Days ends on July 31.

Shop Stampin’ Up! Online Today!

Free As a Bird Notecard & Envelope

Free As a Bird Notecard & Envelope

Even though I posted a card with the Bird Ballad Designer Paper yesterday, I think that whole suite is so pretty I had to do something else with it for today, the Free As a Bird Notecard & Envelope. My original idea was to just stamp directly on the front of the Notecard, but since I was going to use my Stampin’ Blends to color in the stamped image, I didn’t want to have the coloring show through to the other side. I’m not positive it would since the notecard paper seems fairly heavy, but no point in taking a chance! I even decided to add a Petal Pink layer with a narrow margin behind the stamped layer.

Free As a Bird coloring
Back side of Whisper White

I absolutely love coloring with the Stampin’ Blends alcohol markers! Don’t be intimidated to use them, thinking about “blending”. Just color! I usually use the light color first and then maybe color the edges or highlighted areas on the stamped image with the darker color. Then maybe I even go back and color over again with the lighter marker to blend any rough lines. Just play and do whatever you want. I can almost guarantee you will be satisfied with the result with these markers.

Since I originally thought I was going to stamp the birds directly on the notecard, I knew I just had that one chance to get it right so I pulled out my Stamparatus®! In order to see how everything lined up, I put down a piece of clear Window Sheet on top of the notecard so I could stamp the image on the window sheet and see if anything was crooked (usually the words). Be sure to use the gridlines on the Stamparatus plate to see if you have your stamp or words straight if that is what you want. I could also put two stamps on the Stamparatus at one time and get everything spaced just right!

Free As a Bird & Stamparatus

When you have everything where you want it, remove the window sheet, make sure the cardstock is still in the corner or wherever you stamped it with the window sheet and have your magnets holding down the paper. Then stamp! If the image doesn’t come out fully stamped, just ink up the stamp again without moving anything and stamp again (or again if necessary) until you have a good image. That’s one of the most important benefits of the Stamparatus.

As I have said before, the Note Cards & Envelopes are just handy to have on hand always. When you want to do some quick stamping and write a short note, they are perfect. AND they come with their own mailable envelopes! To fancy up the envelope a little bit, I used a piece of the Bird Ballad Designer Paper on the back flap! You could put the paper inside as a liner if you wanted instead. I put the adhesive on the envelope flap, then glue on a larger than needed piece of paper. Then I trim off the excess with scissors. So easy and so pretty!

Always remember to be careful with the magnets because they really like to jump together and then they are difficult to pull apart. These magnets are very strong, which is good, until they get stuck together! Watch out for your fingers, too! I like to put the magnets on opposite sides of the table if I don’t have then in use so that they are FAR apart!

Check out all these great products in the Stampin’ Up! Online Store…..the Bird Ballad Suite, the Note Cards & Envelopes, the Stampin’ Blends Markers, and the Stamparatus. Stampin’ Up! has the best products! Have fun stamping something today!