Tag Archives: Celebrating You Stamp Set

Polished Pink Easter Bunny Card

Polished Pink Easter Bunny Card

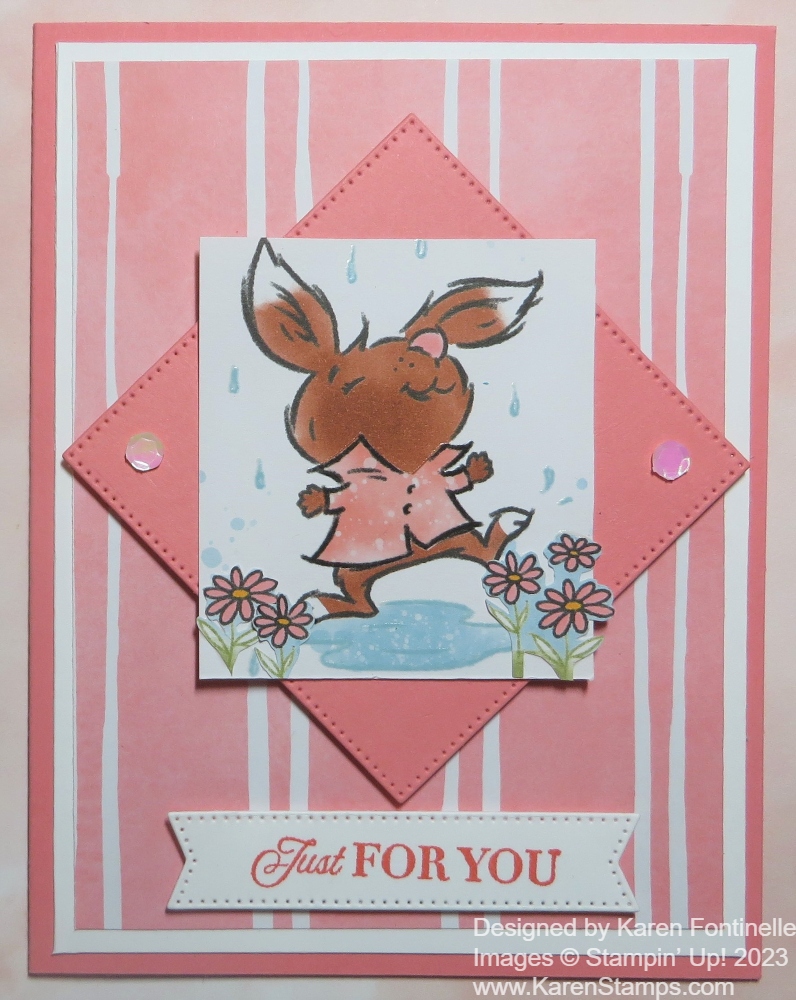
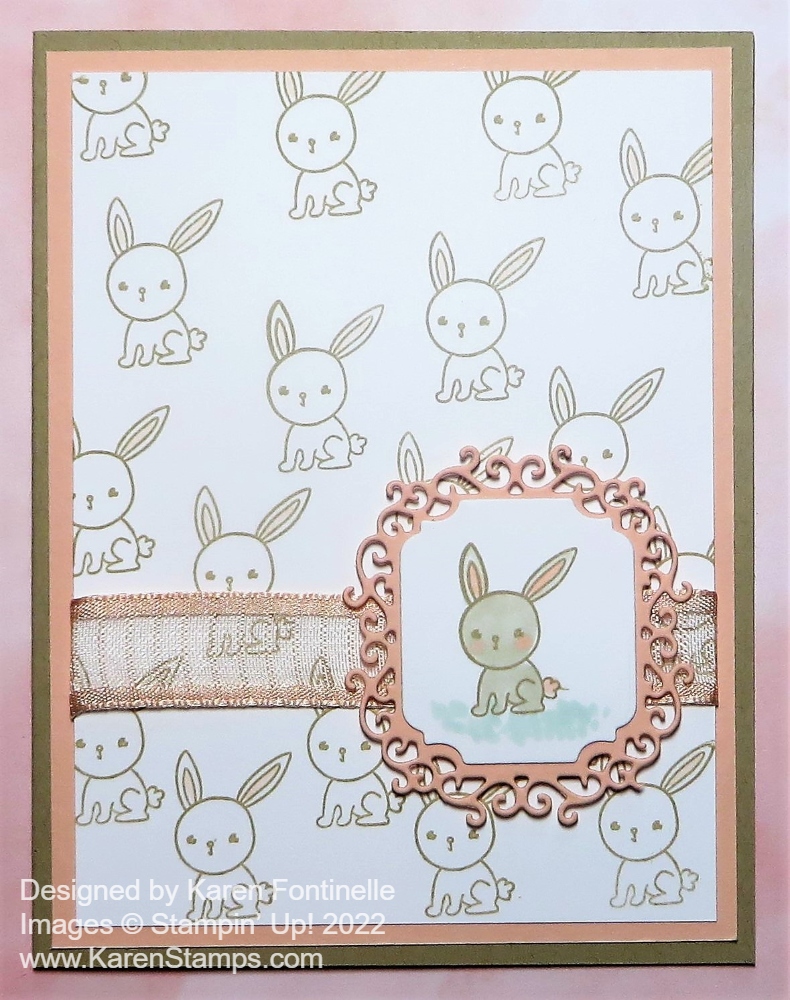
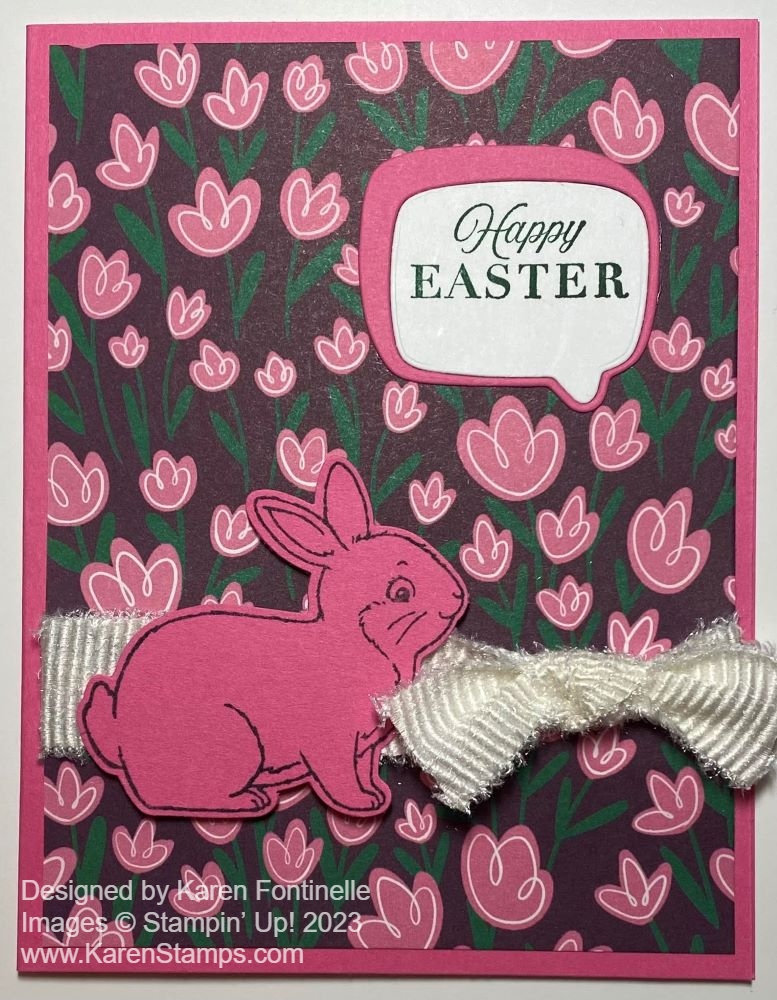
How about a hot pink Easter card? Well, this Polished Pink Easter Bunny Card probably fits the bill! As long as I already had the Polished Pink cardstock out and as long as this piece of designer paper had already grabbed me, I decided to go ahead and make this card! It’s quick and easy if nothing else!

You still have time to get a few Easter or Spring cards in the mail if you want to and hopefully, they will arrive in time! Easter is Sunday, April 9, 2023.

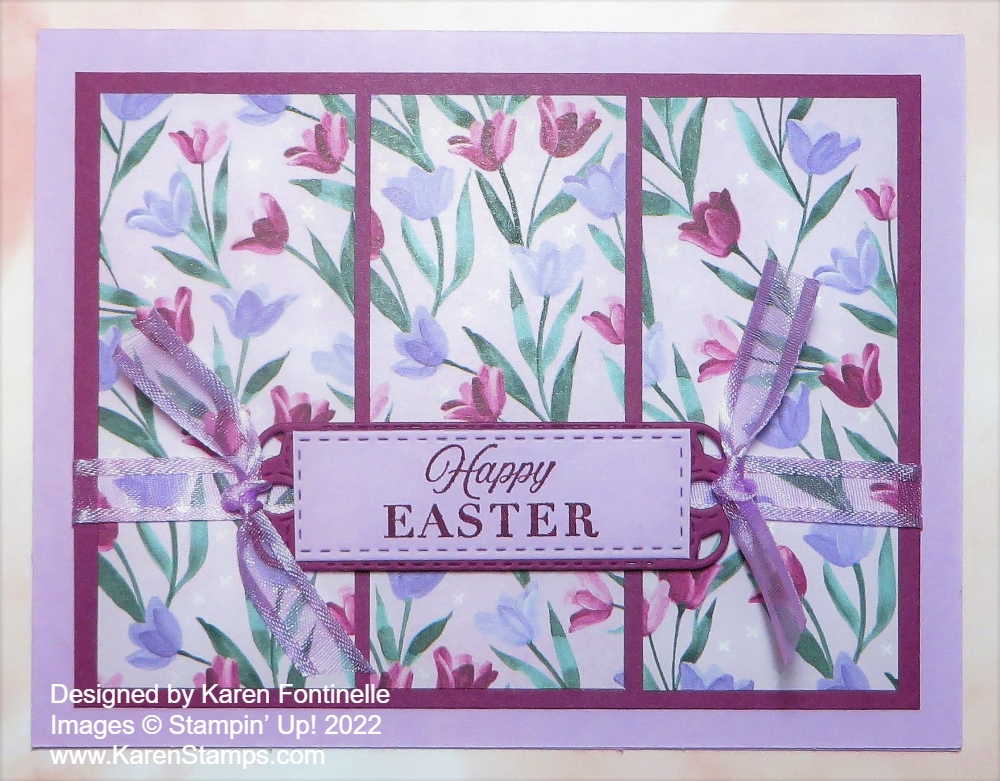
This card uses the Flowers & More Designer Series Paper that I have really enjoyed from the Spring Mini Catalog. I didn’t even pay attention to it at first, but once I got it as a Host Reward (p. 90) I loved using it. Before adhering the designer paper to the card base of Polished Pink, I wrapped around some ribbon. I pulled out several white ribbons but I liked my first try, the White 3/4″ Frayed Ribbon. Even though it is quite wide, I think it works okay. Instead of trying to tie ribbon all the way around a card layer, just cut it long enough for a small amount to wrap around to the back and adhere those ends. Then you can add a bow or knot or whatever you want separately.

The bunny is stamped in Memento ink from the Easter Bunny Stamp Set. I really have gotten a lot of use out of that stamp set for Easter and it will be good for baby cards, too, with those cute bunnies! I punched out the bunny with the Easter Bunny Punch. As I’ve mentioned before, it is backordered and hopefully will be back in stock around May 15. I popped the bunny up with just two Stampin’ Dimensionals, one to be over the top of the ribbon and one below. It might not be exact but get it as close as you can since the ribbon is a little thick.

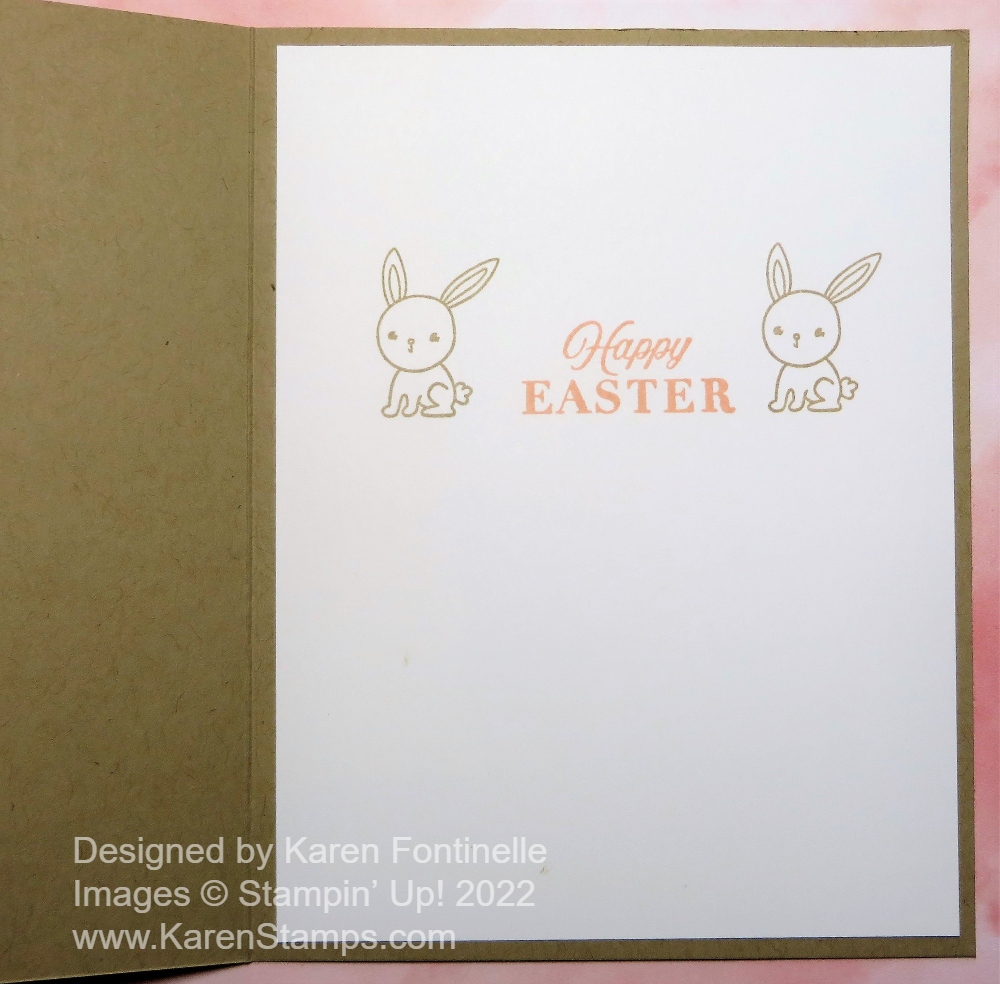
For the greeting, I stamped “Happy Easter” in the Celebrating You Stamp Set in Shady Spruce ink. Next, I use the Conversation Bubbles Dies to cut out the greeting. It actually cuts out the two separate pieces, so then I diecut a piece of Polished Pink cardstock to get the border piece I wanted. I first tried Shady Spruce for the border but I liked the pink better!

I did tie a small piece of the Frayed Ribbon around in a knot, which is a little thick, but I liked it fine! If you would like you could add a few rhinestones to the bottom of the greeting.

Remember, the Last Chance Sales for both the Annual Catalog and the Spring Mini begin on Tuesday, April 4th. If you are interested in the Conversation Bubbles Stamp Set and/or Dies which are retiring, do NOT buy the Bundle! The stamp set will be discounted 60% and the Dies 20%. The Bundle itself is still full price! So do the math if there are discounts on the things you want to buy when the sale begins! The Celebrating You Stamp Set is also retiring but not discounted. It is one I have used a lot for greetings! I’m sad to see it go!

SHOP STAMPIN’ UP! ONLINE HERE!

Rain or Shine Just For You Card

Rain or Shine Just For You Card

There are a lot of fun products in the Stampin’ Up! Spring Mini Catalog and one of them is the Rain Or Shine Suite Collection, especially the Rain or Shine Specialty Designer Series Paper. Not only do some of the sheets have cute characters on them, as I used on this Rain or Shine Just For You Card, but each sheet has a touch of a glossy coating, even on the raindrops, to add a little shine and interest!

To make this card, I started with choosing one of the whimsical characters on the designer paper and it happened to be this brown bunny dancing in the rain! It is a killer to cut into this cute paper but it must be done! I cut out this bunny leaving as wide a margin as I could around him and tried to find a die to cut him out for the card. One circle die just missed on one side so I ended up just trimming him out with my Paper Trimmer into a rectangle. Next, I tried to find a diecut to layer my rectangle on but nothing was a perfect fit. When I tried turning this Stylish Shapes square die, I thought my bunny fit perfectly on the diecut and was a different look!

The card base is Flirty Flamingo cardstock as is the square layer under the bunny. The background layer of the card is the opposite side of the designer paper with the characters. That piece was difficult to cut and use since I knew the cute animals were on the other side not seeing the light of day! But those are the sacrifices we papercrafters have to make with double-sided paper!! I love the striped pattern so I had to use it! To help it stand out a bit I added a layer of Basic White first on the card base. I popped up this die cut with Stampin’ Dimensionals and then the bunny is adhered flat on the square.

The greeting is from the Celebrating You Stamp Set. I love a greeting like “Just For You” or “Thinking of You” because you can use that on SO many kinds of cards. This greeting is stamped in Flirty Flamingo ink and die cut with a banner die also in the Stylish Shapes Dies. It is popped up on Stampin’ Dimensionals.

For a finishing touch, I added two pinkish sequins in the Pastel Adhesive-Backed Sequins to the side corners of the square diecut. Although you can’t see it in the photo, the shiny coating is on the pink jacket of the bunny, on the raindrops, and outlining the rain puddle. The little flowers were also scattered on the designer paper with the characters so I cut some out by hand and adhered them on the sides of the rain puddle. I thought they added just another tiny little something to the design of the card.

Here is another card, my first card I made with this Suite, using the turtle and actually diecutting him using one of the many dies.

You really must check out the Rain or Shine Suite and choose all or some of the products for making fun and happy cards that not only will brighten the recipients day when they receive it but will brighten your day as you create these cards and projects with these products!

SHOP STAMPIN’ UP! TODAY!

Hues of Happiness Easy Birthday Card

Hues of Happiness Easy Birthday Card

I saw someone somewhere make a card like this Hues of Happiness Easy Birthday Card but with a different paper and greeting, I think. Of course I couldn’t find it again to see who made it but it’s an easy design and one you might see anywhere. The main thing is it is so quick and easy to make! Just change the paper and greeting for any occasion and you have a nice-looking card with just a slight twist to catch the recipient’s eye with the diagonal greeting!

To make this card, stamp a greeting on a strip of cardstock that is longer than the greeting. Choose a designer paper you want to use or stamp a background, whatever you like. Adhere the greeting strip across the corner of the card with the ends extending beyond the designer paper edge. Turn the paper over and trim off the extended greeting strip. Then you have a perfect fit!

Hues of Happiness Easy Birthday Card Assembly

This card uses a card base of Melon Mambo cardstock. The designer paper is one of the gorgeous patterns in the Hues of Happiness Designer Series Paper. After adhering the greeting to the designer paper, trimming off the ends, adhere to the card base. That’s it!

The greeting I used is in the Celebrating You Stamp Set. This is a great stamp set to go back to again and again when you are looking for a sentiment to use. There are a variety of fonts and useful, traditional greetings that you need all the time.

If you want to embellish the card a little bit, add some bling with some Iridescent Rhinestones Basic Jewels or other jewels or gems. You could also add a small bow to the greeting if you had space. The idea is to make a quick and simple card, but a little embellishment and sparkle doesn’t hurt!

Remember, Sale-A-Bration comes to an end on August 31 so put in your Stampin’ Up! order of $50 or more and get your FREE product! You can check the Sale-A-Bration choices here in the Online Store.

Rings of Love You Are Wonderful Card

Rings of Love You Are Wonderful Card

If you want some pretty fall paper with which to make a card like this Rings of Love You Are Wonderful Card, then browse through the current Stampin’ Up! Sale-A-Bration brochure and check out this designer paper! You can earn it FREE with a $50 Stampin’ Up! purchase! You’ll find it on pages 6-7. It’s the Rings of Love 12″ x 12″ Designer Series Paper and has so many usable patterns. There are images of cottages, mushrooms, acorns, birds, tree rings, and flowers. So interesting and so pretty!

This card is so quick and easy to make! You could use almost any of the patterns in the designer paper package and use this card design. You could make the card fold any way you like, but I put the fold at the top for a change. Cut the sheet of cardstock in half lengthwise at 4 1/4″ (half of 8 1/2″, the width of the cardstock) and score at 5 1/2″ for the fold.

The card base is Parakeet Party, which is really a BRIGHT color! I used a layer of Poppy Parade underneath the Rings of Love Designer Paper. The Poppy Parade color is on the designer paper. I just love this sheet of designer paper! Such pretty designs with mushrooms, berries, and leaves plus a butterfly!

For the greeting, I used a strip of Basic White cardstock about 3/4″ x 3 3/4″. The stamped greeting is in the Celebrating You Stamp Set. It is stamped in Poppy Parade ink and off to the right side a little bit. Then it was layered on a wider strip of Poppy Parade.

For a final touch, I added some of the Adhesive-Backed Seasonal Sequins. They are Sweet Sorbet in color but they still look good on the card!

One interesting this about this Sale-A-Bration paper besides being free with a $50 purchase, is that it coordinates with the Ringed With Nature Bundle in the July-December 2022 Mini Catalog (Holiday Mini Catalog) on page 62. So if you purchase that Bundle that comes with the Hybrid Embossing Folder and 16 dies, you can choose this Rings of Love Designer Series Paper FREE and make all kinds of cards and projects with all these coordinating products!

SHOP STAMPIN’ UP! ONLINE HERE!

Friends of the Forest Bunnies Easter Card

Friends of the Forest Bunnies Easter Card

This Friends of the Forest Bunnies Easter Card is an easy one to make! But is it an Easter card?? Or is it a baby card?? Well, I made it as an Easter card but the whole time I was making it I thought this sweet bunny reminded me of baby cards! In fact, I was so taken with stamping the cute little bunny that I forgot about a greeting! But I’ll show you the inside and I think we don’t ALWAYS have to put a greeting on the outside.

This bunny is in the Friends of the Forest Stamp Set in the Spring Mini Catalog on page 19. This is not an “Easter” set but of course, the bunny is perfect for Easter. I did one of the things I like to do best … I randomly stamped the bunny on the Basic White layer to make my own designer paper! Or simply a pretty background! I used Crumb Cake ink and I went back and colored in the ears with the Light Petal Pink Stampin’ Blends Marker. I had to stop myself before I started doing even more coloring because I didn’t want all the bunnies colored.

The card base is Crumb Cake cardstock, although it looks darker in the photo. Then there is a layer of Petal Pink underneath the Basic White. You could use any pink and you could use a darker brown like Soft Suede. Or change up the color scheme altogether.

I actually copied myself making this card! I remembered a card in THIS POST that I had always liked so I updated it with this bunny!

I wanted a colored bunny to be the focal point so I stamped the bunny on Basic White and die cut with one of the dies in Ornate Frames that fits on the frilly die cut in the same set. This one is on Petal Pink cardstock and was already in my bag of cardstock so I must have diecut it before and didn’t use it! Just seeing it in with the other Petal Pink cardstock gave me the idea. It was the perfect size for the bunny!

The bunny is just colored with a Light Crumb Cake Stampin’ Blend Marker. I wanted to keep him light and didn’t do any blending with another color. I used the narrow tip of the Petal Pink marker to color the insides of the ears, the tail, and the cheeks. I could have stopped there but I added a bit of grass for him to sit in with the Light Mint Macaron marker.

To embellish the card a bit I simply wrapped around a piece of the Petal Pink 5/8″ Organdy Striped Ribbon. This has been one of my favorite ribbons so I am sad it is retiring on May 2, if not before. It is even on sale so check it out (or stock up!). The bunny piece, on the Ornate Frames diecut is popped up on Stampin’ Dimensionals®.

After I got this far on the card, I realized I didn’t have a greeting and no space for one. I guess I could have fit one on somehow, but sometimes I think a card is fine without a greeting on the front. Or sometimes I make a generic pretty card that I like and don’t want to put the greeting on until I need the card. That way I can add whatever the occasion calls for.

On this card, I got the idea to make the greeting inside a little fancier. I stamped the greeting from the Celebrating You Stamp Set. What a great set of greetings! It is in the Spring Mini Catalog but it is also carried over to the new Annual Catalog! Yea!! On each side of the Petal Pink greeting, I stamped the bunny in Crumb Cake ink to match the outside. I think it’s really cute! It’s common to stamp a little something inside the card or add some of the designer paper, but I like the idea of stamping something on each side of the greeting! I should color the inside of his ears with Petal Pink as I did on the front of the card.

Friends of the Forest Bunnies Easter Card Inside

Be sure to check out the Last-Chance products and sale on some of them in my Online Store! Get the goodies you want before they sell out!

SHOP STAMPIN’ UP! ONLINE HERE TODAY!

Flowering Fields Fresh Freesia Easter Card

Flowering Fields Fresh Freesia Easter Card

If you like purple or know someone who does, I think you will love this Flowering Fields Fresh Freesia Easter Card! Of course, the Flowering Fields Designer Series Paper (the tulip paper, I like to call it!) is so pretty to use on cards! I chose this purple-ish floral tulip pattern to use on this card and I like how it turned out!

The card base is Fresh Freesia, one of the coordinating colors with the Flowering Fields Paper and one of the 2021-2023 In Colors. These colors will be sticking around for another year but the 2020-2022 In Colors will be retiring.

A fancier way to do this card front is to cut the designer paper into strips rather than have a solid piece. These pieces are 1 1/2″ x 3 1/2″ and fit perfectly on the Rich Razzleberry layer that is 5″ x 3 3/4″. You can just eyeball the spacing, making sure it is as even as possible. Lay it out before you glue to make sure everything fits properly! I wanted the Fresh Freesia color to show so I made the margin wider than we usually do.

Before adhering the Rich Razzleberry layer with the strips of designer paper, I wrapped around a piece of Fresh Freesia 3/8″ Open Weave Ribbon. I wanted some ribbon on the card but not something that was going to overwhelm the tulips so this ribbon was perfect. It’s there but you can see through it and it adds a little bit to the card design.

For the greeting, I happened to have the die cut already in my package of Rich Razzleberry cardstock so I wondered it that would be good to use. The “Happy Easter” greeting is in the Celebrating You Stamp Set. This is a great stamp set to have with some basic greetings you will be glad that you have! I stamped it in Rich Razzleberry ink on Fresh Freesia cardstock. I thought Basic White might be too stark against the card since it didn’t have any other white on the card.

The die set I used is the Meadows Dies for the little label with the fancy ends. As I said, I already had one cut in my cardstock so I used that for the layer. After stamping the Easter greeting I cut it with the same die. Then I very carefully trimmed off the curvy ends, leaving the stitching. It just barely fits on the Rich Razzleberry layer even though it overlaps the fancy ends a tiny bit. Then I tied a knot on each end with the Fresh Freesia ribbon, which kind of obscures the die cut, but I still like it. The greeting is popped up with Stampin’ Dimensionals®.

Here is my first Easter card of the season, a Z-Fold card, but it uses another paper in the Flowering Fields package with similar tulips as on this card except in orange colors.

Because you don’t have to figure out the measurements for a card like this, just copy mine, this card will be easy for you to make! It really didn’t take much time. Easter is less than a month away now, so make some of those pretty Easter cards to send like this Flowering Fields Fresh Freesia Easter card.

Sweet Talk Lots of Love Valentine

Sweet Talk Lots of Love Valentine

This Sweet Talk Lots of Love Valentine seems like one of those traditional valentine cards you would make or send to someone! Lots of hearts, red paper, red and pink hearts, and a doily! Nothing else can say “Valentine” more than that!

Of course, this paper is in the Sweet Talk Designer Series Paper and is layered on a card base of Real Red cardstock. That’s a simple start! All those hearts crowded onto that designer paper really gets you in the mood for Valentine’s Day!

I wanted to use a doily on this card so I pulled out the new Heart & Home Doilies in the new Spring Mini Catalog as part of the Heart & Home Suite Collection. They come in three colors but you can turn them over and use the white side!.

Just because there was a Real Red die cut rectangle from the Scalloped Contours Dies already in my bag of cardstock, I decided to use it behind the doily. I think it helps it stand out a tiny bit against that busy background of all the little hearts.

Instead of using dies, I remembered we actually had a Heart Punch Pack of two coordinating punches! Dies are great but punches are faster! One heart has little scallops around the edge and the other is smaller and plain. I punched the scalloped heart in Real Red and the plain heart in Basic White. The greeting (actually stamped first before punching) is in the Celebrating You Stamp Set in the Spring Mini Catalog. The doily is glued down flat on the card but the hearts are popped up on Stampin’ Dimensionals®.

Since the Sweet Hearts Dies have some little bitty hearts dies, I decided to die cut a bunch of hearts in Real Red and Blushing Bride colors. They are adhered to the Basic White heart to mimic the many hearts on the designer paper. Partly for the sparkle and partly to cover up any bit of glue seeping behind the hearts, I added just three Champagne Rhinestone Jewels to the little hearts!

On the inside of the card, I added a layer of Basic White stamped with “Happy Valentine’s Day” from the Sweet Conversations Stamp Set and two little bitty die-cut hearts I had leftover!

Get Your Valentine Supplies at Stampin’ Up! Today!

Sweet Talk Lots of Love Valentine Closeup