Tag Archives: Friends of the Forest Stamp Set

Friends of the Forest Bunnies Easter Card

Friends of the Forest Bunnies Easter Card

This Friends of the Forest Bunnies Easter Card is an easy one to make! But is it an Easter card?? Or is it a baby card?? Well, I made it as an Easter card but the whole time I was making it I thought this sweet bunny reminded me of baby cards! In fact, I was so taken with stamping the cute little bunny that I forgot about a greeting! But I’ll show you the inside and I think we don’t ALWAYS have to put a greeting on the outside.

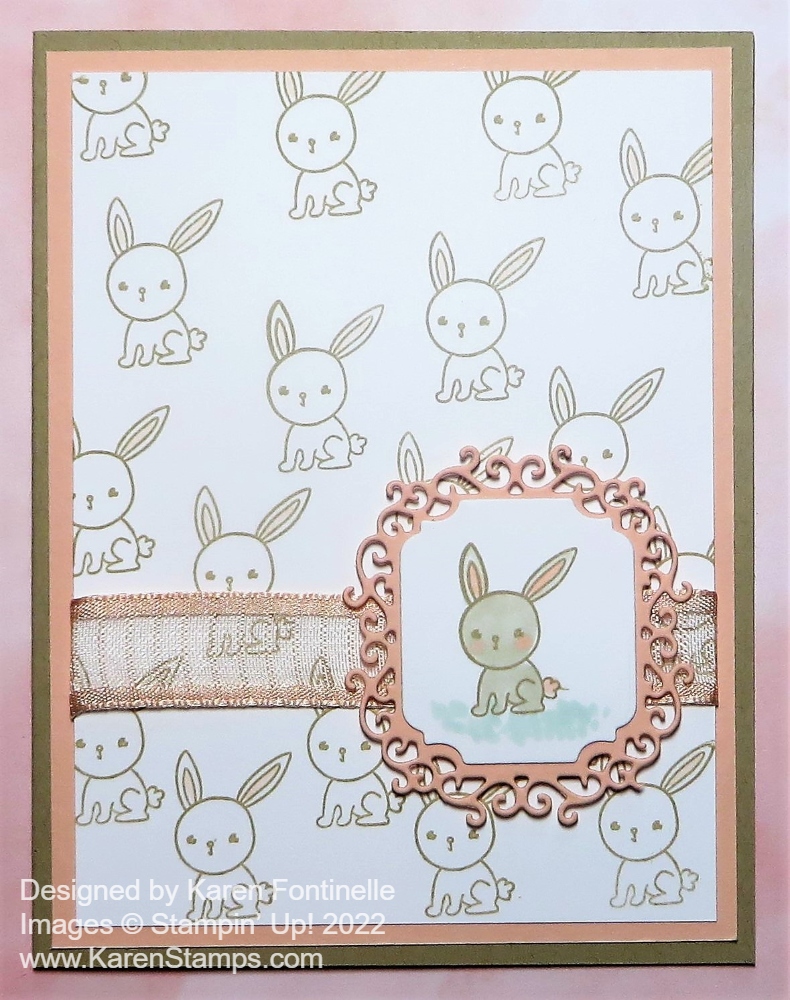
This bunny is in the Friends of the Forest Stamp Set in the Spring Mini Catalog on page 19. This is not an “Easter” set but of course, the bunny is perfect for Easter. I did one of the things I like to do best … I randomly stamped the bunny on the Basic White layer to make my own designer paper! Or simply a pretty background! I used Crumb Cake ink and I went back and colored in the ears with the Light Petal Pink Stampin’ Blends Marker. I had to stop myself before I started doing even more coloring because I didn’t want all the bunnies colored.

The card base is Crumb Cake cardstock, although it looks darker in the photo. Then there is a layer of Petal Pink underneath the Basic White. You could use any pink and you could use a darker brown like Soft Suede. Or change up the color scheme altogether.

I actually copied myself making this card! I remembered a card in THIS POST that I had always liked so I updated it with this bunny!

I wanted a colored bunny to be the focal point so I stamped the bunny on Basic White and die cut with one of the dies in Ornate Frames that fits on the frilly die cut in the same set. This one is on Petal Pink cardstock and was already in my bag of cardstock so I must have diecut it before and didn’t use it! Just seeing it in with the other Petal Pink cardstock gave me the idea. It was the perfect size for the bunny!

The bunny is just colored with a Light Crumb Cake Stampin’ Blend Marker. I wanted to keep him light and didn’t do any blending with another color. I used the narrow tip of the Petal Pink marker to color the insides of the ears, the tail, and the cheeks. I could have stopped there but I added a bit of grass for him to sit in with the Light Mint Macaron marker.

To embellish the card a bit I simply wrapped around a piece of the Petal Pink 5/8″ Organdy Striped Ribbon. This has been one of my favorite ribbons so I am sad it is retiring on May 2, if not before. It is even on sale so check it out (or stock up!). The bunny piece, on the Ornate Frames diecut is popped up on Stampin’ Dimensionals®.

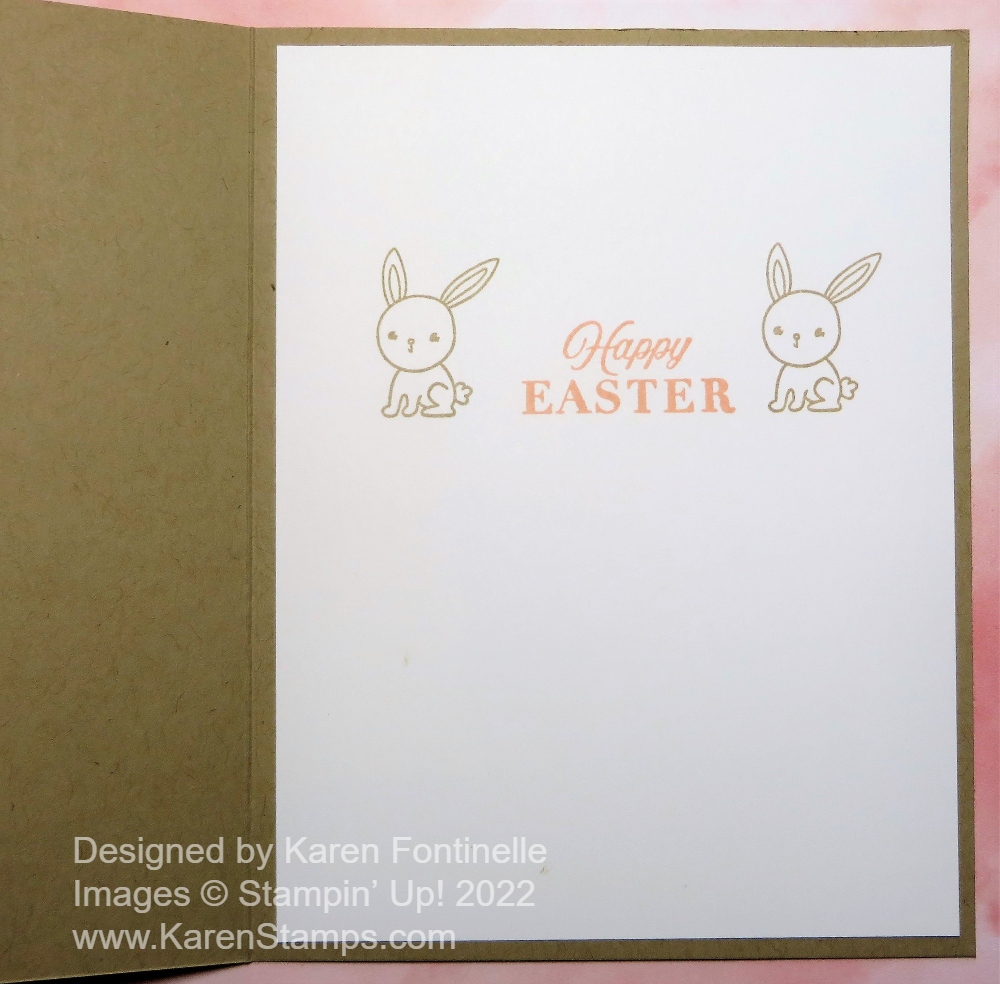
After I got this far on the card, I realized I didn’t have a greeting and no space for one. I guess I could have fit one on somehow, but sometimes I think a card is fine without a greeting on the front. Or sometimes I make a generic pretty card that I like and don’t want to put the greeting on until I need the card. That way I can add whatever the occasion calls for.

On this card, I got the idea to make the greeting inside a little fancier. I stamped the greeting from the Celebrating You Stamp Set. What a great set of greetings! It is in the Spring Mini Catalog but it is also carried over to the new Annual Catalog! Yea!! On each side of the Petal Pink greeting, I stamped the bunny in Crumb Cake ink to match the outside. I think it’s really cute! It’s common to stamp a little something inside the card or add some of the designer paper, but I like the idea of stamping something on each side of the greeting! I should color the inside of his ears with Petal Pink as I did on the front of the card.

Friends of the Forest Bunnies Easter Card Inside

Be sure to check out the Last-Chance products and sale on some of them in my Online Store! Get the goodies you want before they sell out!

SHOP STAMPIN’ UP! ONLINE HERE TODAY!

Friends of the Forest Easter Diorama Card

Friends of the Forest Easter Diorama Card

I’ve wanted to make this Friends of the Forest Easter Diorama Card ever since I got this stamp set in the Spring Mini Catalog! I could just imagine making a diorama card with some kind of little scene using the stamps in the Friends of the Forest Stamp Set!

This diorama card is actually a regular card size so you can fit it in an envelope. It folds flat! You could even make a middle layer inside a diorama card and make it as fancy and involved as you like, but this style is easy and just fine! All you need are two pieces of cardstock and an opening cut in the front so you can see the scene or decoration inside.

Start with two pieces of cardstock, each 4 1/4″ x 5 1/2″. Score at 1/2″ and 1″ from each end on each cardstock piece. Fold and crease the score lines and play with them a little to see how it is going to go together. For this card, I used Soft Sea Foam Cardstock for the front and Basic White for the back.

Here is the diagram I used on a previous card. Since we no longer have the oval dies, I changed this card to cutting the opening with a circle die in the Layering Circles Dies, the largest one. You could use a rectangle or whatever you have that would make a hole large enough for whatever you want to do. The lines show the score lines.

Diorama Easter card diagram

To make the card, I stamped a tree and a bunny on Basic White and cut them out for the front of the card. On the inside, I stamped the tree, fox, flowers and mushrooms directly onto the Basic White and colored them in. But I also stamped two bunnies and a tree stump separately and cut them out by hand to add to the inside scene. Some things are popped up on Stampin’ Dimensionals and some are glued flat on the card.

On the inside, after I had the scene made I decided to color in some grass. I used the Light Sea Foam Stampin’ Blend Marker. For the sky, I used the Light Pool Party Stampin’ Blend. Just scribble lightly, you don’t even have to cover all the white space. I punched out a cloud with the Cloud Punch. It was too big, so I just cut off the side that was too long and popped it up on Dimensionals.

I colored all my pieces with Stampin’ Blends. I didn’t keep track of the colors. It doesn’t matter because you can do your own thing! I did discover after I finished, that the Stampin’ Blends bled through the back of the Basic White background, which I hadn’t thought about so I cut another piece of Basic White to cover that up on the back.

I adhered one cut-out tree and one bunny on the front of the card. The greeting is stamped with the Celebrating You Stamp Set and die cut with a small rectangle in the Stitched So Sweetly Dies. For a little embellishment, I added a cute little Brushed Brass Butterfly on the greeting and a few little Iridescent Rhinestone Basic Jewels.

Here is a view of the card from the top. Just glue the ends together to connect the front and back and make sure everything creases well.

Friends of the Forest Easter Diorama Card Top

For another idea, here is a card I made two years ago in a similar design.

If you just try this card design, once you cut and score the paper and crease the lines, you will see how the card goes together. It’s really very easy but will make a great impression on whoever you decide to send it to!

SHOP STAMPIN’ UP! ONLINE HERE! REMEMBER THE LAST-CHANCE SALE!

Friends of the Forest Bunnies Hello Card

Friends of the Forest Bunnies Hello Card

I’ve been wanting to play with this new stamp set in the Spring Mini for a while now and finally, I got my chance to make this Friends of the Forest Bunnies Hello Card! I didn’t “plan” it very well, actually, in making it. I stamped the tree knowing I would cut it out, but I stamped the bunnies directly on the card front hoping it would all work out in the end! That’s the fun of it sometimes!

The card base is Pool Party, one of my favorite colors. I thought a square card would suit the little scene I planned to make so the card base is 4 1/4″ x 4 1/4″. The Basic White cardstock layer is 4″ x 4″. All this card takes is some stamping and some coloring and it’s not that complicated even though it may look tedious! It’s all in what you enjoy!

The stamps are in the Friends of the Forest Stamp Set in the January-June 2022 Spring Mini Catalog on page 19. It’s not a stamp set with a lot of fanfare except for the Deer Punch coordinating with the deer stamp. No dies, no matching designer paper, but maybe that’s why the set appealed to me besides the cute forest animals! Just simple stamping.

I stamped the tree with Memento Ink on Basic White and colored it in with Stampin’ Blends. The trunk and branches are colored with Light and Dark Soft Suede and the leaves with Light and Dark Granny Apple Green plus a bit of Light Mossy Meadow. You might think “Oh, I can’t color all those leaves!” but I just dabbed each one with some green, scattered around so there would be the different shades of green in the leaves. Don’t worry about perfection or staying in the lines. Just hit each one with a bit of green! I cut out the tree with Paper Snips, again not being perfect with the leaves, just wiggling my scissors around the edge going in and out the tiniest bit.

The bunnies would be fun to cut out but I just took a chance and stamped them on the card where I thought I wanted them to be. Two are colored with a Light and Dark Gray Granite and the other one with one of the new Natural Tones Blends, #500 plus a little shading with Light Soft Suede. The insides of the ears are pink. The tree stump is Dark Soft Suede. I also stamped the grass, flowers, and mushroom stamp several times and colored those in. But I needed more grass so I just drew in little sprigs of grass with two shades of the Granny Apple Green and then the Dark Mossy Meadow Blend. They are just little lines and squiggles, no big deal.

I couldn’t leave the background just white, so I just squiggled in sky with the Light Pool Party Stampin’ Blend. It’s fine if some white shows because that’s how skies look. Just squiggle in the color with the side of the marker here and there and don’t worry about it. You can fill in more if you want and it will dry lighter.

Since I didn’t have much space, I stamped the “hello” greeting directly on the front of the card. This word is in the Hello Ladybug Stamp Set. Had I messed it up, I would have stamped it on a small die-cut or rectangle and placed that over the boo-boo! There is always a way to fix your stamping! As I was getting ready to photograph my card, I noticed two little die-cut clouds from the Brilliant Rainbow Dies so I adhered those in the sky.

My Friends of the Forest Bunnies Hello Card is just a fun little springtime card that I could also use for Easter. Go take a look at this stamp set if you’ve missed it in the Spring Mini and see if you “need it” in your “collection”!

SHOP STAMPIN’ UP! ONLINE!