
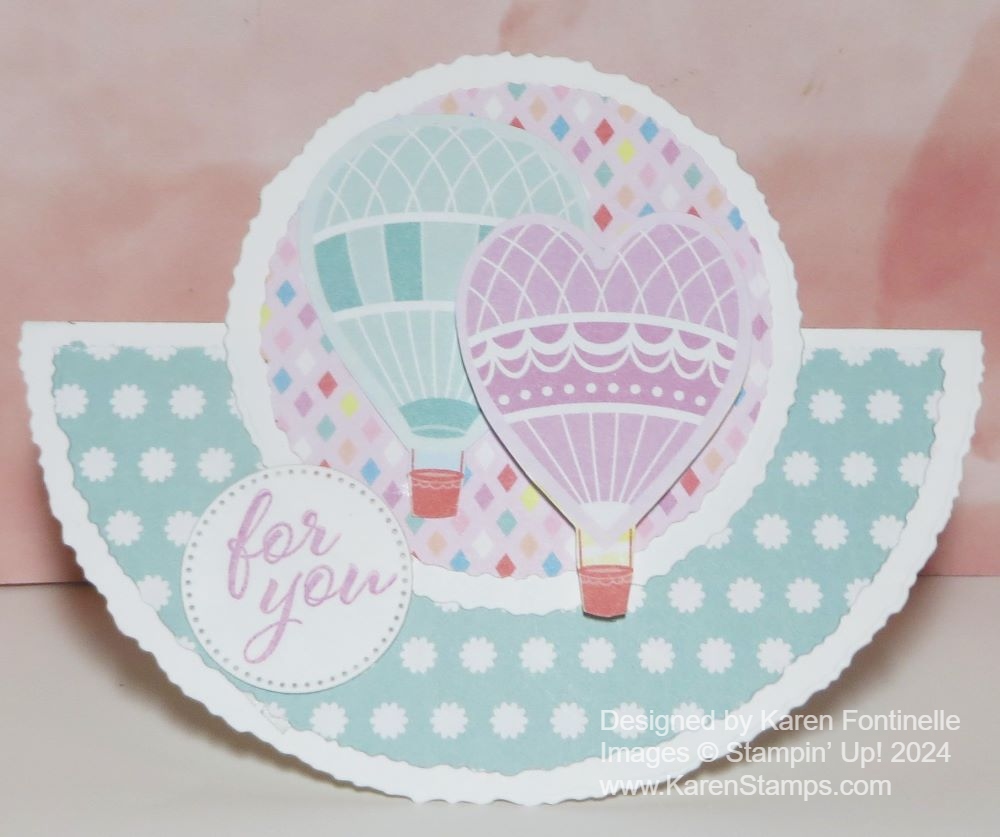
I’ve been seeing these “rocker cards” around on the internet so I thought I’d try one. The Deckled Circles Dies are perfect for this card, but you can use whatever circle dies you have. Or just cut out some circles yourself! This Lighter Than Air Rocker Card For You was fun to make! As you can imagine, it does rock back and forth a little bit!
The base for this card is a Deckled Circle in Basic White folded in half. I used the second largest die for the card base. I just cut a piece of Basic White that was 6″ wide to fit through my Stampin’ Cut & Emboss Machine. Put that die away and get out the third from the largest die and cut out either a half or whole circle out of designer paper. I used the Lighter Than Air 6″x 6″ Designer Series Paper for this card. Obviously you can use whatever colors of cardstock or designer series paper to make a card like this.
For the big circle in the top middle of the card, use the Deckled Circle die that is the seventh from the smallest to cut out a Basic White Circle, then use a circle the next smallest size (sixth from the smallest) to cut out another piece of designer paper. Depending on your design, you might want the next smallest die to cut out a piece of Basic White for the center on top of the designer paper for stamping or just a background. I stopped with the designer paper.
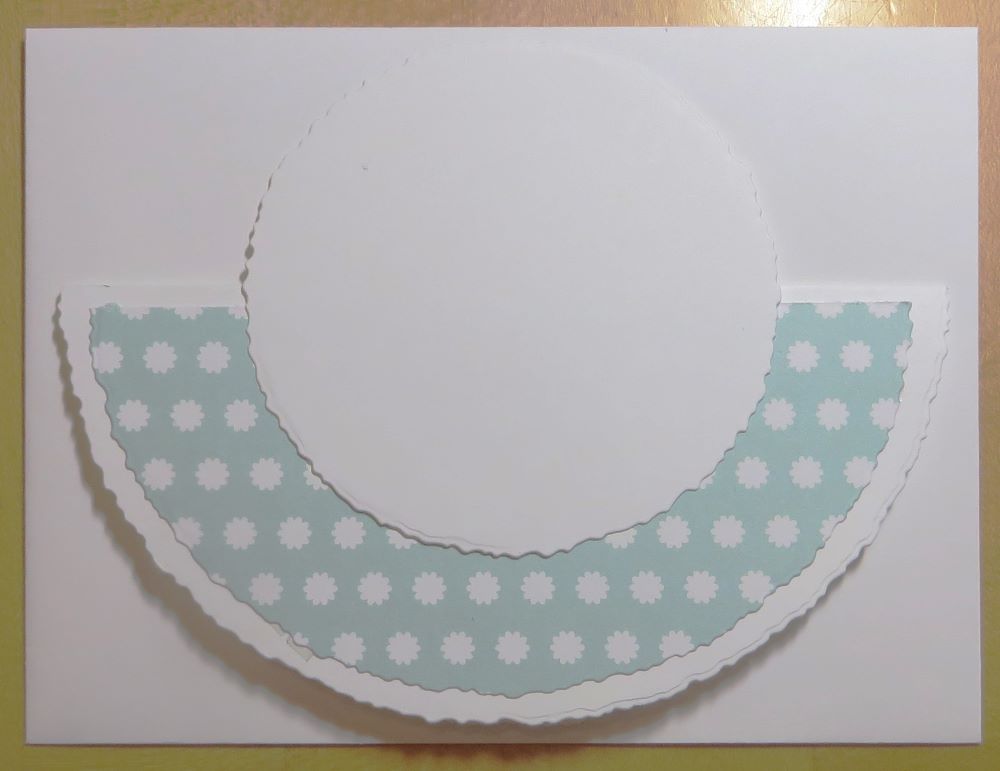
To assemble the rocker card fold the large circle of Basic White in half. That forms the rocker base. If you cut out a whole circle for the largest piece of designer paper, cut that in half or a tiny bit larger. You can measure or eyeball it. If you only cut out half a circle then you are ready to go. To get the margins, if you want those, place the designer paper where you want it on the folded Basic White base. Then push it up a little bit so the top of the designer paper extends over the folded edge. Holding everything in place, turn it over and either cut or mark a pencil line along that fold on the back of the designer paper. Now you can cut off that small strip of designer paper that you marked with the pencil line. When you place the designer paper back on the Basic White base you will have margins all around. Adhere the designer paper to the white base.
Adhere the designer paper to the center circle (which is not yet attached to the card). Grab an envelope that you are going to use and place the rocker base on top of the envelope. Then position the center circle so that it is centered on the base but will be contained within the envelope. (I should have used a colored envelope for this photo but hopefully you can see how I positioned everything so the finished card would fit in the envelope.) The white underneath the card in the photo is one of our Stampin’ Up! Medium White Envelopes (my favorite!).
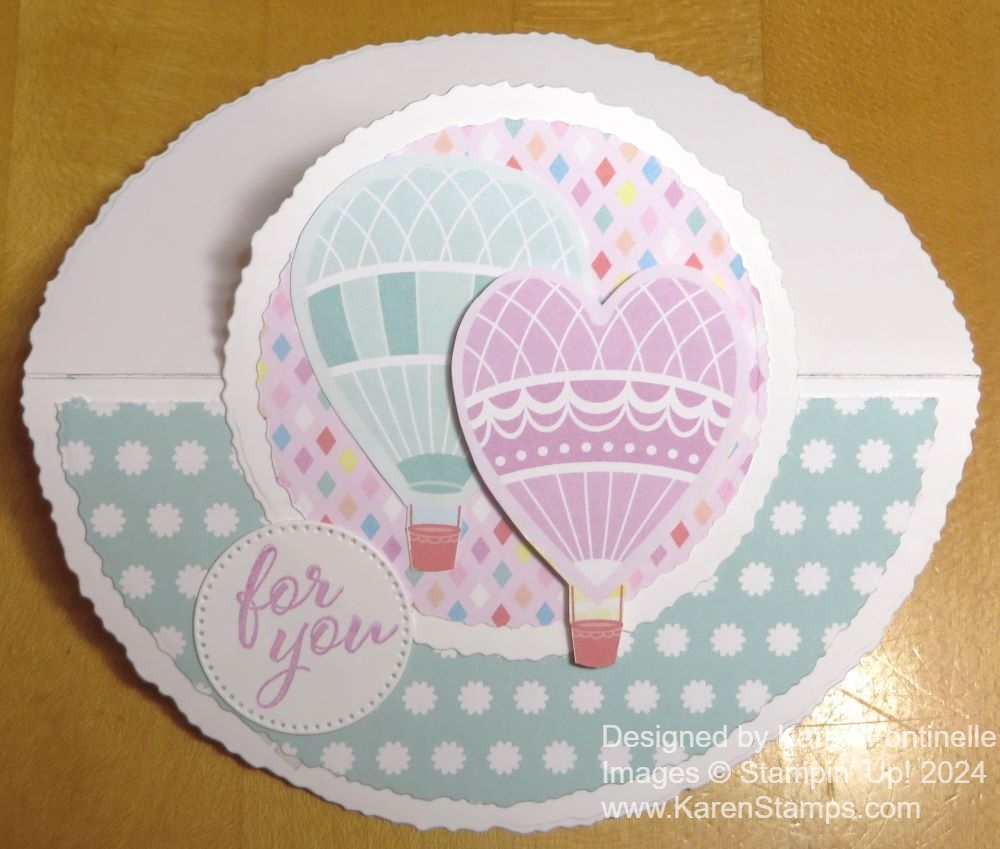
Now you can finish decorating your card however you like. I cut out two hot air balloons from the Lighter Than Air DSP. The one on the left is glued flat on the card and the purple one is popped up on Stampin’ Dimensionals.
The small greeting is stamped in Fresh Freesia ink and die cut with the smallest circle in the Stylish Shapes Dies. You can add a bow or jewels to the card, too, for additional embellishment. Then stamp or write your personal greeting or message inside the card. The recipient can set the card out on a table and let it rock!
This is what the card would look like if you opened up the base.
I think this rocker card will be a fun one to make and send out! Talk about impressing the recipient with your cardmaking skills! You don’t have to tell them how simple it really is!
LAST DAY OF SALE-A-BRATION IS ONE WEEK FROM TOMORROW, FEB 29TH!