Tag Archives: Textured Floral Bundle

Textured Floral Hello Card

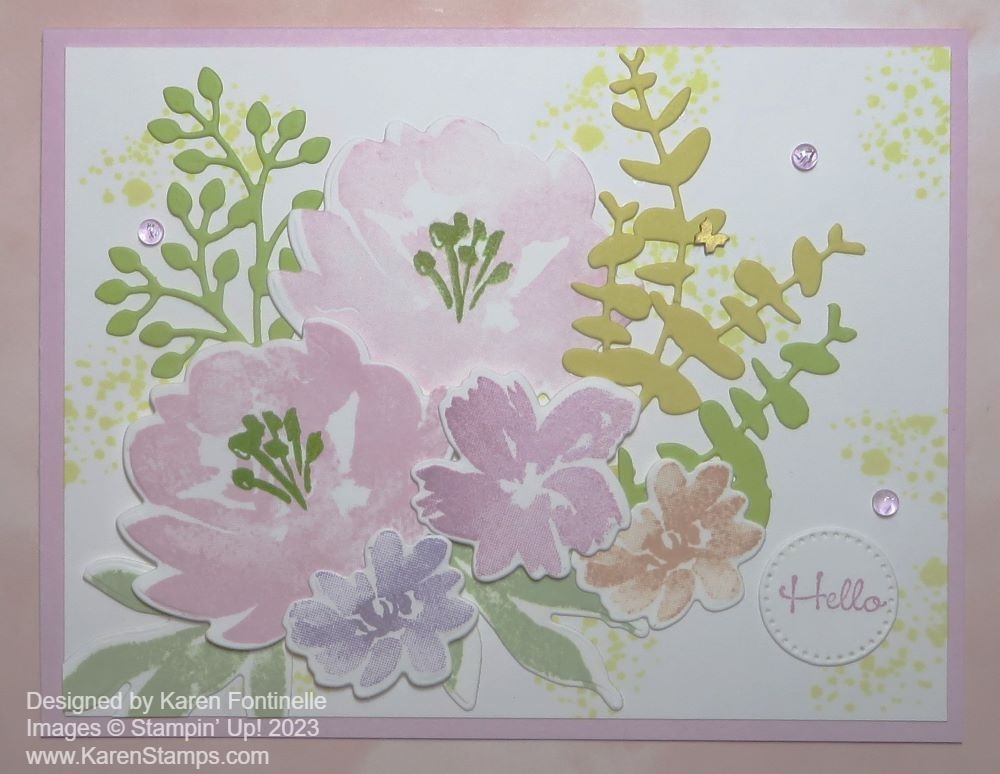
I’ve had this little pile of scraps on my table for quite a while so I finally decided I was going to just make a card right away with these stamped and diecut pieces. From that, I came up with this Textured Floral Hello Card just made of scraps!

The card base is Bubble Bath, one of our new colors. I thought that was the color these large flowers were probably stamped with. I added a layer of Basic White since the flowers were so light in color. As I tried out various flower arrangements I decided to add some texture in the background with the dotted stamp in the Textured Floral Stamp Set. I stamped these randomly in Lemon Lime Twist.

I also had three smaller flowers stamped in other colors – Highland Heather, Fresh Freesia, and Calypso Coral. I just played around with the placement of the flowers, the leaves, and the foliage stems until I was happy with it. At this stage, it’s often a good idea to take a picture with your phone so when you pick up the pieces to glue them down, you will be able to put them back in the design that you liked!

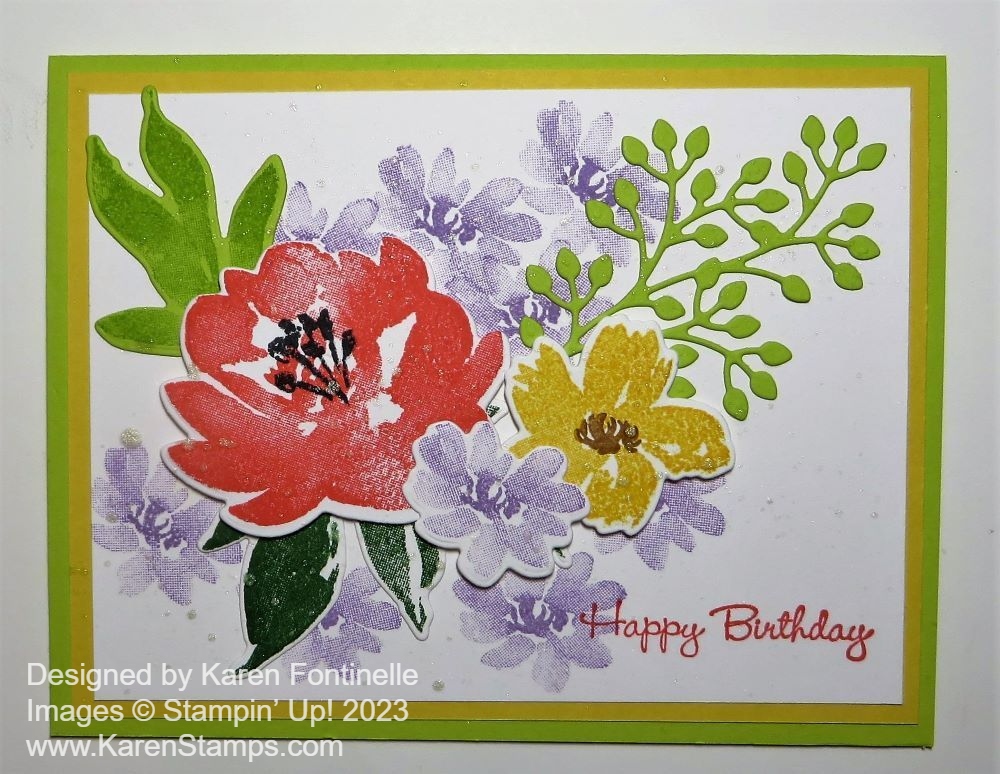
Here’s kind of a similar card I made by stamping and diecutting with the Textured Floral Stamp Set.

Since I took up a lot of room with all the flowers and stems, I didn’t have much, if any, room for a greeting. I almost left it off because that is fine, too. But in the Go To Greetings Stamp Set, I found this very small “Hello” and I thought that was perfect! I stamped it in Fresh Freesia and diecut it with the smallest circle in the Stylish Shapes Dies. I also die cut the next larger circle in Fresh Freesia, but it wasn’t as close in size as I would have liked to this small circle and it took up too much room on my card. I thought the Hello by itself looked fine.

For embellishments, I added a little Brushed Brass Butterfly on one of the leaves. I also added three Tinsel Gems Three Pack in Fresh Freesia. And that finished off my card made out of stamped and diecut scraps!

SHOP STAMPIN’ UP! ONLINE HERE!

Textured Floral Petal Pink Thinking of You Card

Textured Floral Petal Pink Thinking of You Card

After making a project for my Stamping With Karen newsletter I sent out today (are you on my Mailing List? If not, sign up in the red box!), I got the idea to make this Textured Floral Petal Pink Thinking of You Card. Specifically, I got the idea to stamp the little flower randomly to make a background layer for a card! The rest followed.

I was in a Petal Pink mood and didn’t know if this would turn out to be a monochromatic card or not, but it didn’t. It is all Petal Pink, though, except for the leaves. I even used a new product I just got.

The card base is Petal Pink with a Basic White layer stamped with the smallest flower in the Textured Floral Stamp Set. These stamps in this set have that “Distinktive” texture to them that produces various shades in the image just by stamping one time. I like the look, especially on these little flowers for some reason!

After stamping that background, randomly, I stamped the large flower in Petal Pink and diecut with the Textured Floral Dies. You can purchase both the stamp set and dies in the Textured Floral Bundle and save 10%. The leaves were stamped in Granny Apple Green ink and diecut.

As I played around with placing the flower and leaves and thinking about a greeting, I thought the flower needed something to help it stand out better as the focal point of the card. I cut a strip of Petal Pink cardstock 1 1/2″ wide by 5 1/4″ long to go across the card behind the flower. I felt it still needed something and I thought of the Vellum Basics Specialty Designer Series Paper which has three different patterns, two sheets each. Vellum always adds a softness to the look when it is used. The one I chose has polka dots and I diecut a stitched circle, the largest one, in the Stylish Shapes Dies. Once I put that behind the flower and leaves, I was satisfied.

After the Petal Pink strip was adhered across the card, I adhered the vellum circle, only putting Stampin’ Seal in the center of the vellum where I knew it would be covered by the flower. We usually try to hide adhesive when we use it on vellum because it shows through the vellum. The flower is poped up with Stampin’ Dimensionals and the leaves are adhered with Multipurpose Liquid Glue flat on the vellum. Then I stuck in a couple of leafy sprigs that were diecut out of two green colors of cardstock behind the flower.

For the greeting, I stamped one in the Layering Leaves Stamp Set with Petal Pink ink on Basic White cardstock and then diecut it using a label in the Timeless Arrangements Dies. Luckily it fit on the card, just barely, because I didn’t plan the greeting before I finished making the rest of the card! For a finishing touch, I spotted a diecut flower on the table, so I popped it up right below the greeting and I really liked that!

As I’ve said before, I am really liking this Textured Floral Bundle for making pretty floral cards! Check out this card I posted on my blog the other day. These stamps are also great for making quick and easy stamped notecards as I posted in my newsletter today. If you order the Bundle, order the Note Cards & Envelopes, in Basic White or Very Vanilla, also because you never know when you might want to write a quick note.

SHOP STAMPIN’ UP! ONLINE HERE!

Check out the Kits Collection Sale, too!

Textured Floral Happy Birthday Card

Textured Floral Happy Birthday Card

I just got this Textured Floral Bundle the other day, and wow, am I happy with this first card I just made! This Textured Floral Happy Birthday Card came together really easily! It reminded me a lot of a stamp set that just retired from the previous annual catalog, but then I saw samples online and couldn’t resist any longer! No matter how many floral stamp sets we have, we still need more!

These stamps have that “Distinktive” style which gives you some texture and makes the image look very artistic. They look good stamped right on the card or you can use the dies to cut them out.

I wanted this card to look bright and summery so I started with a card base of Lemon Lime Twist and a layer of Daffodil Delight cardstock. I stamped the three flowers in Flirty Flamingo, Daffodil Delight, and Highland Heather on a separate piece of Basic White cardstock and then die-cut them with the Textured Floral Dies. One set of leaves was stamped with Garden Green ink on Basic White and the other was stamped on Lemon Lime Twist cardstock with Lemon Lime Twist ink. The stem with the tiny leaves was die-cut from Lemon Lime Twist. I thought it was so pretty I had to use it on this card!

When I first stamped one of the smallest flowers with Highland Heather ink, I thought the flower was so beautiful that I got the idea to stamp those flowers directly on the card and the others would be fine to be diecut and popped up on the card. I think the beautiful Highland Heather flowers really make a pretty backdrop for the other flowers.

After stamping the Highland Heather flowers around where I planned to place the other flowers, I could fill in some empty spaces so it turned out I stamped more purple flowers than I first thought. But I really like them! Then I adhered the Flirty Flamingo large flower with a couple of Stampin’ Dimensionals and then the Daffodil Delight flower off to the side, and finally had to add a diecut purple flower, also popped up. When you know you are going to slip some leaves underneath, be sure not to have too much adhesive right on the edges of the flowers. I used Multipurpose Liquid Glue to adhere all the different leaves and the stem.

The greetings in the Textured Floral Stamp Set were too large for the space I had left, so I used a small “Happy Birthday” stamp in the Go To Greetings Stamp Set. I was going to stamp it on some small label, but took a chance and stamped it directly on the card. If I had messed it up, I still could have covered it with a large stamped greeting label. It’s pretty risky to stamp directly on a card that you have just spent time making!

For a little sparkle, I splattered some Wink of Stella around the front of the card. I could have used Iridescent Rhinestones or sequins instead for a little bling.

On the inside of the card, I did stamp a greeting from the Textured Floral Stamp Set and adhered an extra Highland Heather diecut flower to the corner. Now the card is all set to mail to a friend for her birthday!

Remember, tomorrow is the last day for the Bonus Days at Stampin’ Up! to earn your $5 coupons with every $50 purchase at Stampin’ Up! Then spend your coupons in August!

SHOP STAMPIN’ UP! TODAY!