Category Archives: 3-D, Gifts & Things

Last Minute Christmas Gift Wrap Ideas

Gift Wrap Ideas

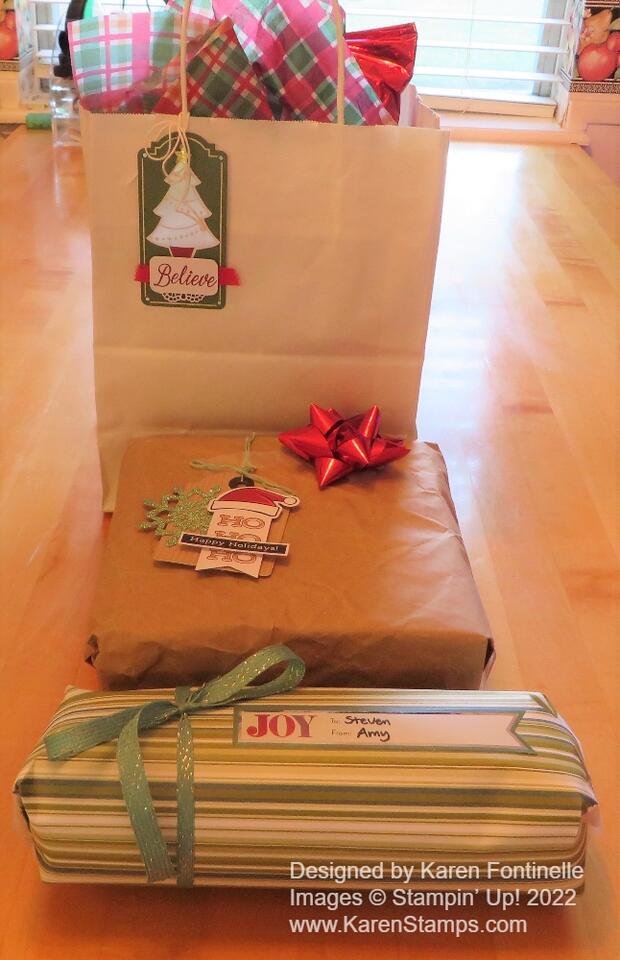
It’s Christmas Eve and if you don’t have your packages wrapped yet or ran out of wrapping paper, you might need these last-minute Christmas gift wrap ideas! I was afraid we might run out of wrapping paper so I did several presents without the fancy stuff just in case!

For the first one, I just used a plain white shopping bag, tied on a nice tag from either a Paper Pumpkin Kit or a Stampin’ Up! Kit from a previous Christmas. So handy to have those gift tags already made up! Put that on your summertime list and you’ll be ready! I just tied on a nice tag and with the colored tissue paper inside the bag it looks great!

I started out thinking I should use some of the brown paper we have from Amazon and other packages. One Etsy gal I have ordered from wraps her customers’ purchases in this paper and ties yarn around! Such a nice presentation, especially for a purchase! I didn’t have yarn handy, but I just added, again, one of my fancy Stampin’ Up! tags I already had ready and a stick-on bow! It’s fine!

Then late last night my daughter came out with one of her wrapped gifts. She used some of my retired designer paper taking up space in her bedroom and tied some retired ribbon around it! She was thrilled that it was such a pretty package!

Hope these last-minute ideas help you if you need it! But you probably have had all your packages wrapped since December 1st!

Merry Christmas! Stay warm!

Christmas Tree Triangle Box in Neutral

Christmas Tree Triangle Box in Neutral

It’s time to be wrapping packages this close to Christmas! If you need something cute for a small gift or treat, this easy triangle box might be just the thing for you! I’ve made a lot of them and they really are easy. Then you decorate however you like.

These are the basic instructions for how to make a Triangle Box:

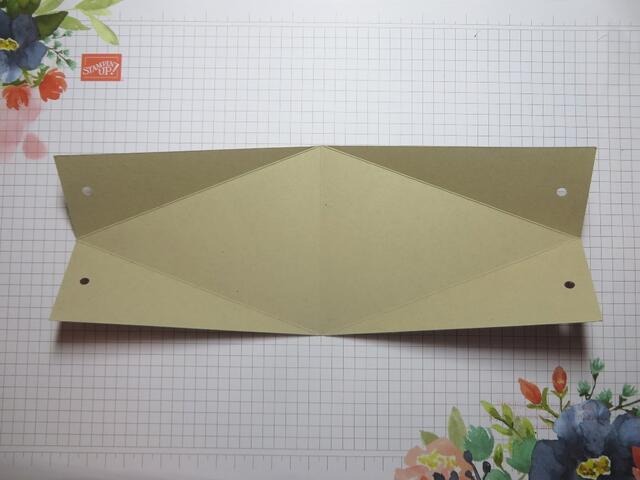
  • Cut card stock in half lengthwise:  4 1/4″ x 11″
  • Score at 5 1/2″.
  • Mark the center of the strip on both ends at 2 1/8″ with a pencil mark.
  • Score with the Paper Trimmer at an angle, putting that center pencil mark on the track on the Paper Trimmer while also lining up the middle score line on that track.
  • Score both sides of the paper and both ends of the paper. That will make two triangles, one on each half of the paper.
  • Fold all the score lines and put the box together.
  • At the top point of the box punch holes for the ribbon to go through.
Christmas Tree Triangle Box scored

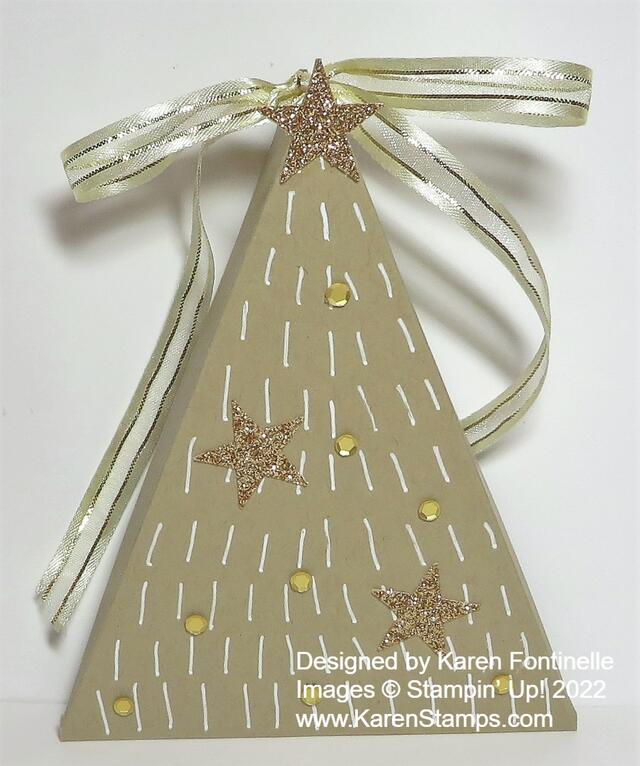
Somewhere I saw an idea like this: using a neutral color and a white pen to make the triangle box look like a Christmas tree. Of course, I couldn’t find it again, but I’m happy with my own version!

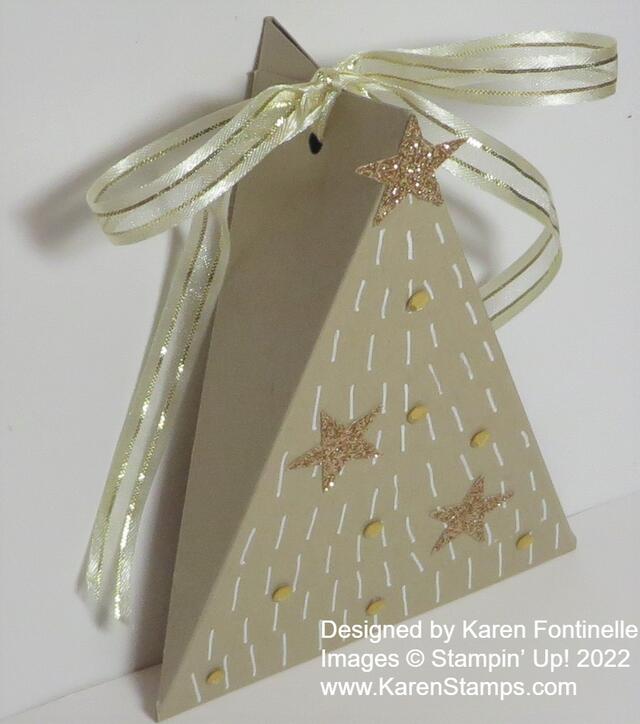
I chose Crumb Cake Cardstock for the neutral-colored tree. Before assembling, I just drew little white lines with a white gel pen to make it look like tree needles, I suppose. To tie the top closed I used a Gold & Vanilla 3/8″ Satin Edged Ribbon.

For the top of the tree, I found a retired star punch and some retired gold glitter paper (you could use Gold Foil Sheets, too). I punched a couple of extra gold stars and decided to use them on the front of the tree. It still needed a little more, so I used the Adhesive Backed Season Sequins in gold to fill in the tree.

Now the triangle box is ready to put a gift or treat inside and then tie up the bow at the top! Try one and see how easy it is! You could emboss the cardstock before assembling it if you like. Decorate one for any occasion!

Christmas tree triangle box

Make Your Own Stamped Gift Wrap

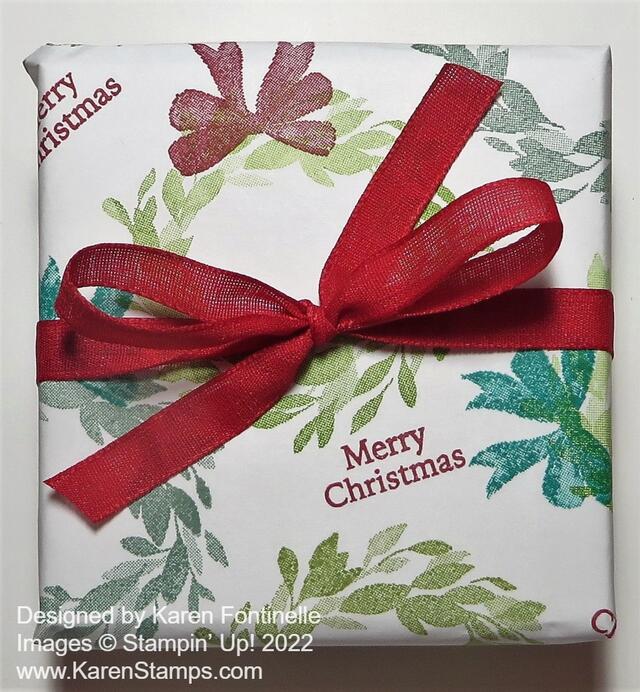
Cottage Wreath Stamped Gift Wrapped Package

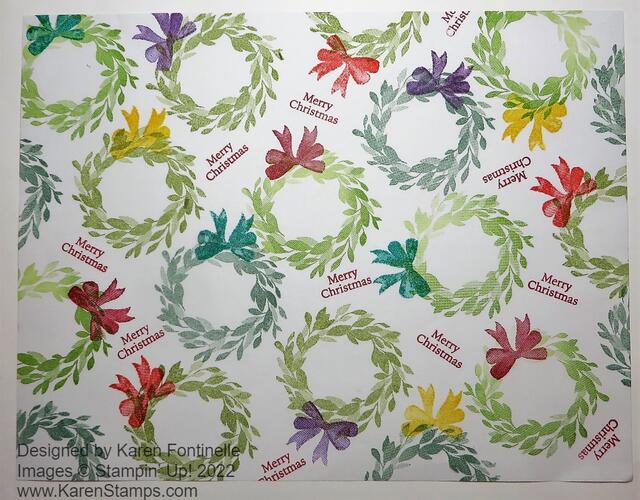
It’s that time of year! Time for wrapping presents! But what if you run out of store-bought wrapping paper? Or do you only have Christmas wrapping paper and you need to wrap a birthday gift? Just stamp your own paper! Now, this may only work for small gifts, although if you have some of that brown paper they use inside boxes to protect something being mailed you might be able to use that for larger packages. Anyway, keep this idea in mind for someday when you might need it!

I just used a sheet of computer paper to make the beautiful Cottage Wreath gift wrap in the photo above. You could also use cardstock, but it would be heavier and possibly not as easy to wrap around something. This is actually a fun thing to do because random stamping is fun!

I just stamped one of the wreaths in the Cottage Wreaths Stamp Set randomly on the computer paper. I happened to use three different colors of green ink for fun – Granny Apple Green, Soft Succulent, and Pear Pizzazz. Then I stamped the bows on the wreaths in different colors, too – Real Red, Gorgeous Grape, Bermuda Bay, and Daffodil Delight. For the finishing touch, I stamped the “Merry Christmas” greeting in the stamp set in between some of the wreaths. I think it turned out pretty cute! You could make your own gift wrap with almost any of your stamp sets, even words, actually.

I was going to wrap an empty box just to show what my new wrapping paper looked like, but then I thought, I have a ton of family gifts to wrap, I should wrap a REAL gift! So this is a real gift going to my daughter with my homemade gift wrap. I tied on some Real Red Ribbon in a bow and now I have one gift wrapped! I could actually make a tag out of a stamped or diecut wreath that would be cute also.

Cottage Wreath Stamped Gift Wrapped Package

Whether or not you need wrapping paper, just for fun stamp a sheet of your own gift wrap! It’s good for the soul! Make it for Christmas, a birthday, or something crazy! It’s a good way to get even more uses out of your stamps!

Chocolate Christmas Candy Treat Holders

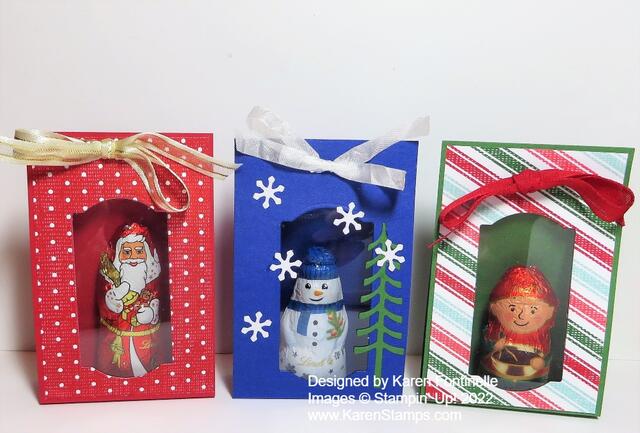
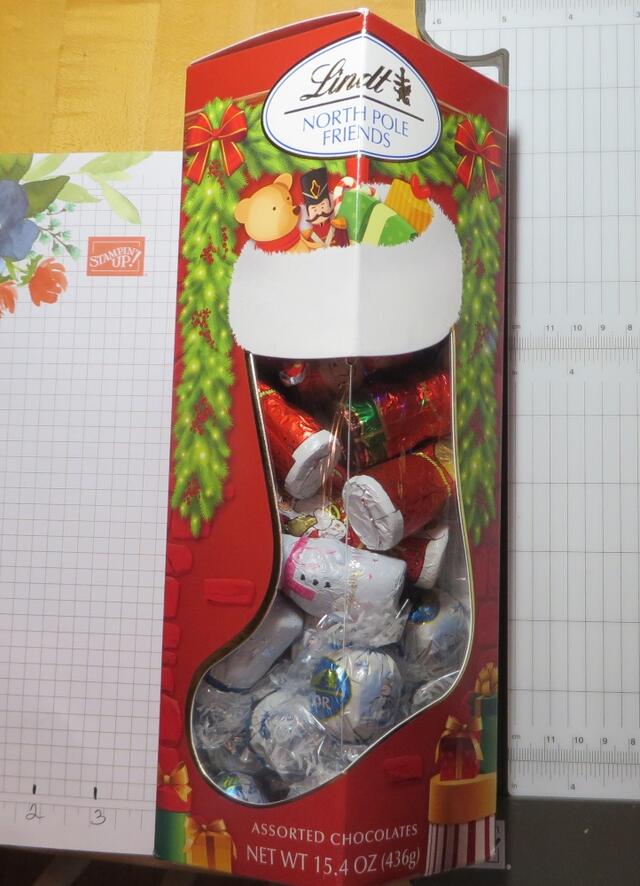
These are the cutest little candy holders that you can make for stocking stuffers or table decorations! And they are easy to make, too! Check out the Christmas candy at the grocery store and see what you can find. I bought this box with these Christmas figures probably at Costco. I knew it might come in handy for “craft supplies”!

To make these, just cut a strip of cardstock at 2 1/2″ x 8 1/2″. Depending on your candy, you might need to vary that measurement but it worked fine for my little candies! Then score at 3 3/4″ and 4 3/4″, or just score 3 3/4″ from one end, turn the paper, and score at 3 3/4″ from the other end. That leaves space inside the treat holder about one inch wide to hold the candy. Instead of these candy figures, you could use a small cello bag of assorted candies and in that instance, maybe you need to make that inside space a bit wider.

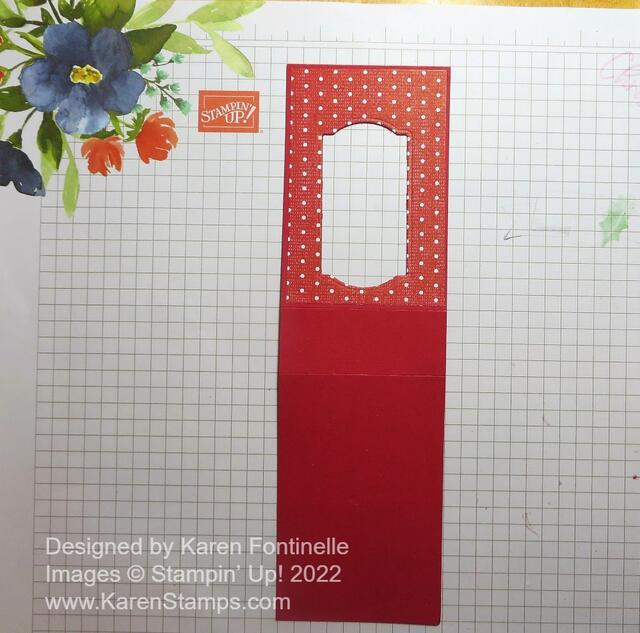
If you want to make a window on the front, (Of course you do!!) just choose a punch or die that will fit your project. For mine, I used one of the Painted Labels Dies. You could also use a punch of some kind. Just make sure that your candy will show through the hole as you like. If you want to decorate with designer paper, as I did with the Sweetest Candy Designer Series Paper, cut that to fit on the treat holder front BEFORE you cut the hole in the cardstock. If you adhere the DSP first, then you don’t have to worry about matching the two openings.

Chocolate Christmas Candy Treat Holder

It might be helpful to adhere a window sheet on the inside to keep the candy safe inside. You may have “official” Window Sheets in your stash or you may find a piece of scrap plastic around the house. I just cut it large enough to cover that window and applied Stampin’ Seal around the edges of the opening. I think the window sheet makes it look quite professional!


Put the candy inside, and to hold it in place, use a few Glue Dots but be very careful not to get any glue in contact with the chocolate. No one wants to eat a Glue dot! I stuck about two or three on the back of the candy figures, but you could also use one on the bottom of the figure.

Once the candy is in place, hold the top together and punch two holes for the ribbon with whatever punch you have. Use your favorite ribbon to tie it closed.

For the snowman treat holder, I added some die-cut snowflakes using the Snowman Dies. Since I had a scrap of White Glimmer Paper I used that for the snowflakes. When I spotted the tree in the die set I cut one out of a scrap of green cardstock I had and adhered that on the side of the snowman. You can decorate these little things however you like! You could add a small greeting or add some jewels or sequins for some bling!

Here are some Easter treats I made almost the same way.

These little Chocolate Christmas Candy Treat Holders are quick and easy to make and will make a fun gift or treat or decoration for everyone!

Candy Cane Christmas Gift Bag

Candy Cane Christmas Gift Bag

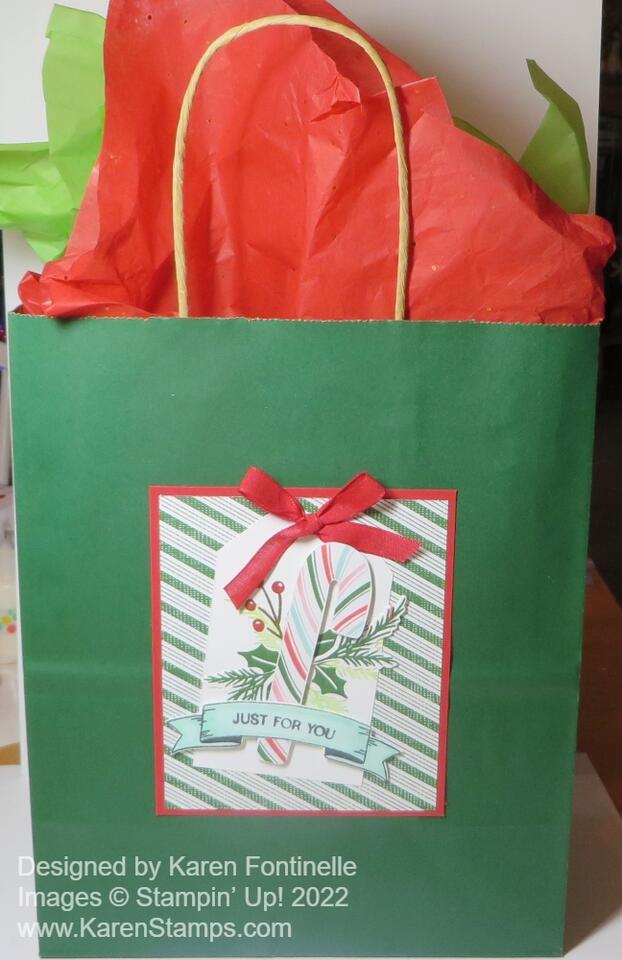
One of my favorite papercrafting things is decorating the front of a bag I may have picked up while shopping and turning it into a gift bag like this Candy Cane Christmas Gift Bag! It’s so easy to do and you can quickly increase your stash of gift bags that are ready for the holidays or other occasions throughout the year! Basically, it is like making a card to put on the front of the bag!

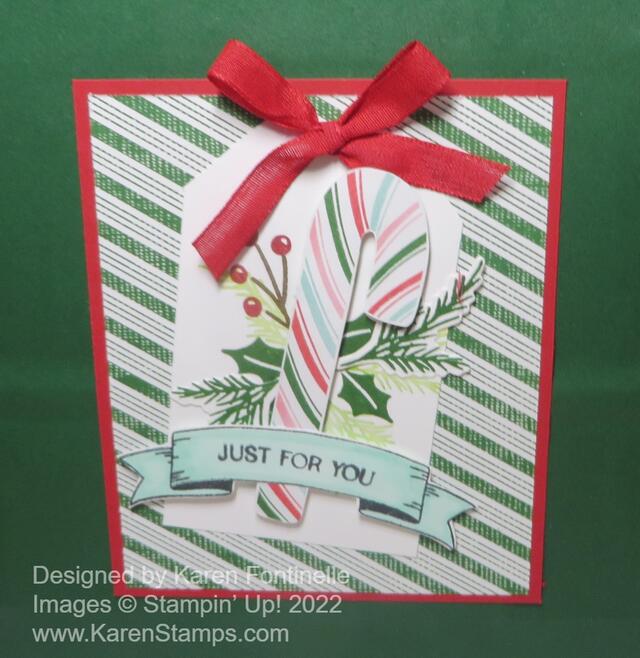
Since this bag was green, I thought I would use the Sweetest Christmas paper. I copied (pretty much) a sample in the Holiday Mini Catalog on page 11. My cute Sweetest Christmas Designer Series Paper is almost gone so my bag looks a little different than the sample in the catalog. Also, they made stamped and diecut leaves but I just stamped the holly and other leaves.

The leave, berries, and banner are from the Christmas Banners Stamp Set. The candy cane I just hand-cut from designer paper but I could have used a die in the Candy Canes Dies. I’m not sure how they made the banner on the card in the catalog, but I stamped mine with Memento Ink and then colored it with Pool Party Stampin’ Blends. Instead of the red ribbon behind the banner, I just tied a bow at the top of the tag shape that is the background for the candy cane and leaves.

Look at your stash of grocery sacks and shopping bags and see what you can find! If you don’t have one of these special bags, you can purchase them at a craft store.

Have fun decorating some Christmas gift bags!

Candy Cane Christmas Gift Bag Closeup

Join Paper Pumpkin For the December Kit!

Paper Pumpkin Kit December 2022 Good Things

JOIN PAPER PUMPKIN BY DECEMBER 10th TO GET THIS CUTE KIT!

Create fun gift card holders to help you celebrate your special occasions all year long! Personalize each gift with these reversible boxes and paper bands for a unique design every time. This kit comes with enough supplies for you to make 16 different gift card holders2 each of 8 designs. It also has an all-occasion stamp set and enough paper pieces to make your craft really pop! No matter what the occasion or who the recipient is, this is a coordinated paper craft that everyone will love and appreciate!

Plus, this month you can take your crafting even further with a special add-on! Give a gift card and a personalized card with the Good Things Cards & Envelopes add-on. You get 20 cards (5 each of 4 designs) and 20 coordinating envelopes. Add-ons are live during the subscription period but will only be available while supplies last, so don’t wait!

I’m guessing that these cute little boxes would hold a small gift or treat instead of a gift card so you might find them handy for other things. Or make a few for yourself to keep for storing little things!

I always say this is a gift you give yourself! Be surprised each month when the Paper Pumpkin Kit shows up in your mailbox and it’s just for you! No supplies needed, no designing by you needed…just sit down and craft! It’s all in the box! You can order extras too if you want to invite a friend or relative over to craft with you!

**********************

ABOUT THE KIT

Name: Good Things Come in Small Packages

This kit includes:

  • Good Things Come in Small Packages Photopolymer Stamp Set
  • Garden Green Classic Stampin’ Spot
  • 16 gift card holders: 2 each of 8 reversible designs
  • Precut paper pieces, twine, and belly bands to customize all your crafts.
  • Enough adhesive for each project!

Finished box size: 3-5/8″ x 2-1/2″ x 1/2″ (9.2 x 6.4 x 1.3 cm)

Coordinating Stampin’ Up! colors: Balmy Blue, Basic Gray, Blushing Bride, Calypso Coral, Crushed Curry, Garden Green, Tahitian Tide

**********************

Stampin’ Up! guarantees all kits and you may skip a month or cancel with no risk.

**Please Note: Our instructions included in each kit don’t show where to place the label on the inside of the box. The unboxing video does demonstrate this step, which is a great resource to use for a more detailed kit assembly.

Just remember, you must be signed up by next Saturday, December 10th to get this month’s kit. And once you are a subscriber, you can purchase any past kits or refills that are available in the Online Store.

JOIN PAPER PUMPKIN TODAY!

Rudolph the Reindeer Gift Bag

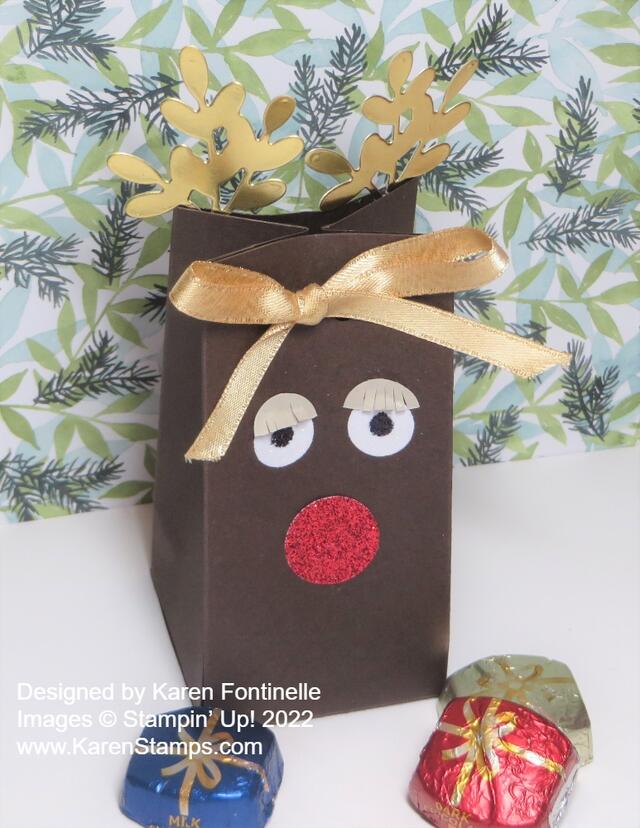
I think every year I make some kind of Rudolph Gift Bag so here is one for 2022. It’s so quick and easy to make, not to mention fun to see Rudolph develop right before your eyes!

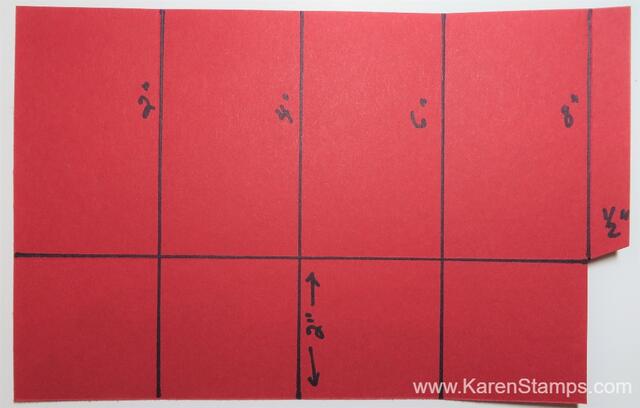
This is a typical 2-4-6-8 bag (or box, however you want it to end up!) that we all know how to make. I used a piece of Early Espresso Cardstock since in previous years I usually use Soft Suede. This reindeer has darker fur! Start with a piece of cardstock cut at 6″ x 8 1/2″. Score at 2″, 4″, 6″, and 8″, then turn the paper lengthwise and score at 2″. Cut on the score lines of those small squares which will be the bottom of the bag, up to the 2″ score line. Cut off the tiny 1/2″ piece in the bottom corner. See diagram below.

2-4-6-8 Treat Bag Diagram

Apply adhesive to that 1/2″ flap and fold over to adhere to opposite side. Fold in the bottom flaps and use adhesive to hold them closed. Pinch the sides and the top of the bag to close. Before closing the bag for good, adhere the gold foil diecut antlers to the inside of the bag . I used a leafy die in the Christmas Banners Dies. I thought this reindeer should be spiffy with golden antlers!

For the eyes, use any white paper, but since I had scraps of the Real Red & White Glimmer Paper handy, I thought Rudolph might look good with glimmery eyes! I colored in the center of the eye with a Sharpie. I used a retired 1/2″ Circle Punch to make the eyes but you could just cut them out by hand.

Rudolph’s red nose is the Red Glimmer Paper. If you don’t have red glimmer paper, color some other glimmer paper with a red marker or red ink. I used a retired 3/4″ Circle Punch for his nose.

I thought maybe Rudolph, for something different, should have some fancy eyelashes! To make them show up, I used Sahara Sand cardstock and punched half circles with the 1/2″ Circle Punch and cut the little lashes by hand. Not sure I think they look that great but maybe it’s ok! Gotta try new things!

If you want to close up the top of the box, just punch a couple of holes and thread some ribbon through to tie a bow. I used the Gold Shimmer Ribbon to match the gold antlers.

Use the gift bag for a small gift or candy or anything that will fit! Modify the measurements if you want it a little taller or shorter. It’s such an easy thing to make, but you might not know that until you make one!

Check out the Last Chance Sale in the Stampin’ Up! store plus the Clearance Rack! Some items went fast yesterday!

Last Minute Thanksgiving Ideas To Make For 2022

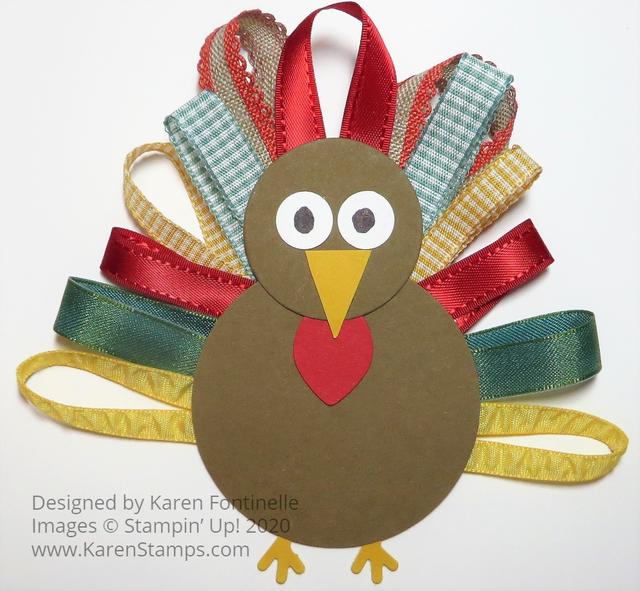
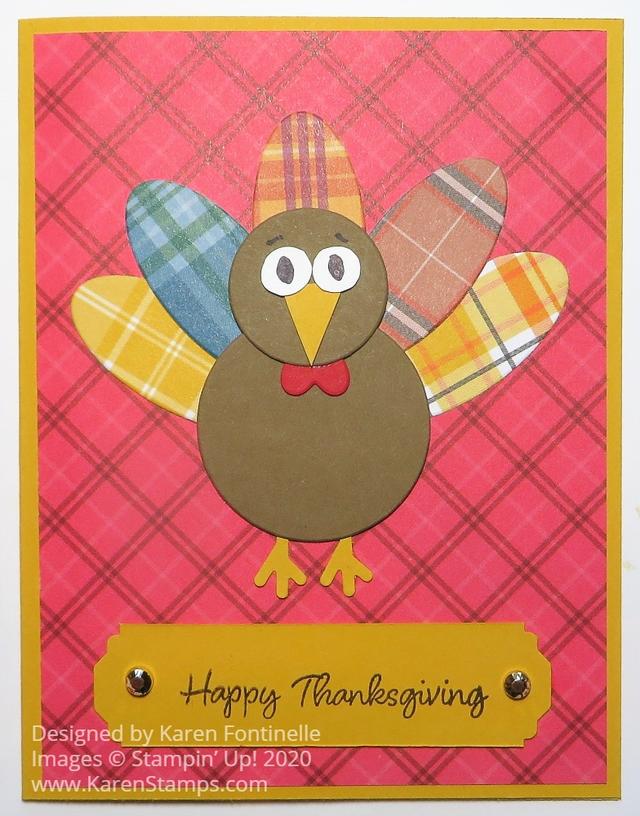
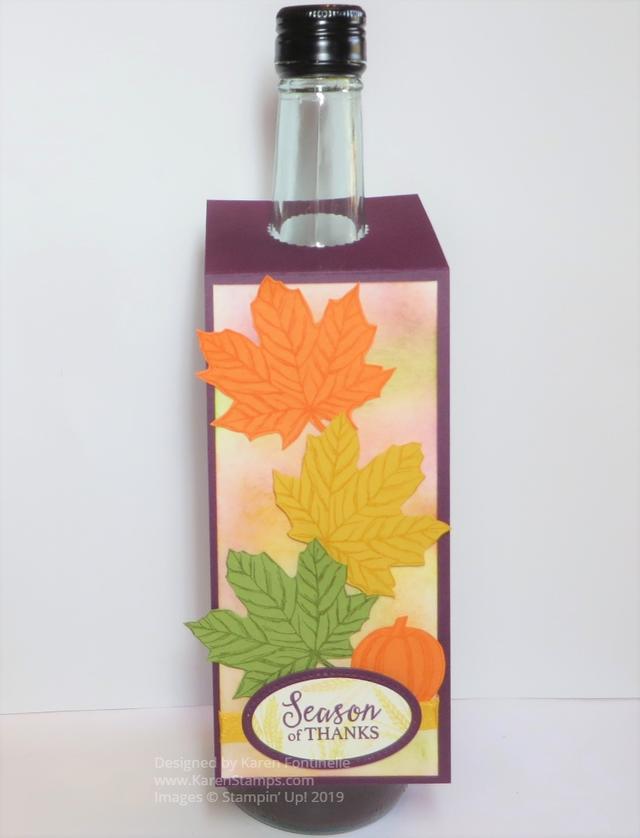
If you are looking for some last-minute Thanksgiving ideas, here are a few you can copy or use as inspiration! Click the title above each photo to go straight to my post with the information!

Make a Ribbon Turkey For a Favor or Decoration!

Ribbon Turkey For Thanksgiving

Plaid Tidings Turkey Thanksgiving Card

Plaid Tidings Turkey Thanksgiving Card

Make a Gather Together Fall Wine Bottle Tag

Gather Together Fall Wine Bottle Tag Display

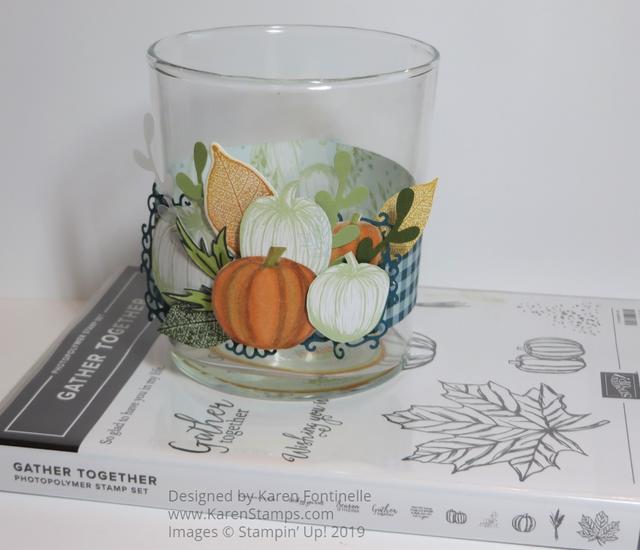
Gather Together Fall Votive Holder

Gather Together Fall Votive

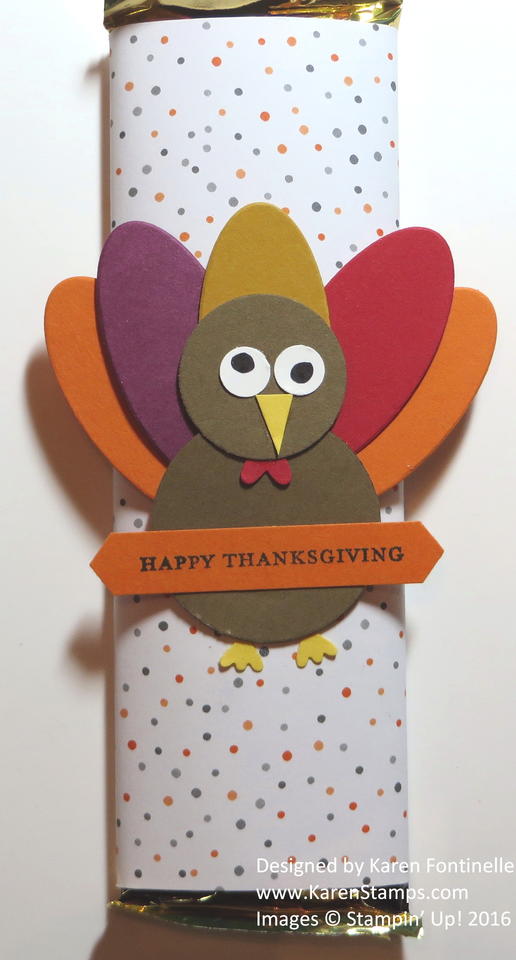
Thanksgiving Punch Art Turkey Candy Bar Wrapper

Thanksgiving Punch Art Turkey Candy Bar Wrapper

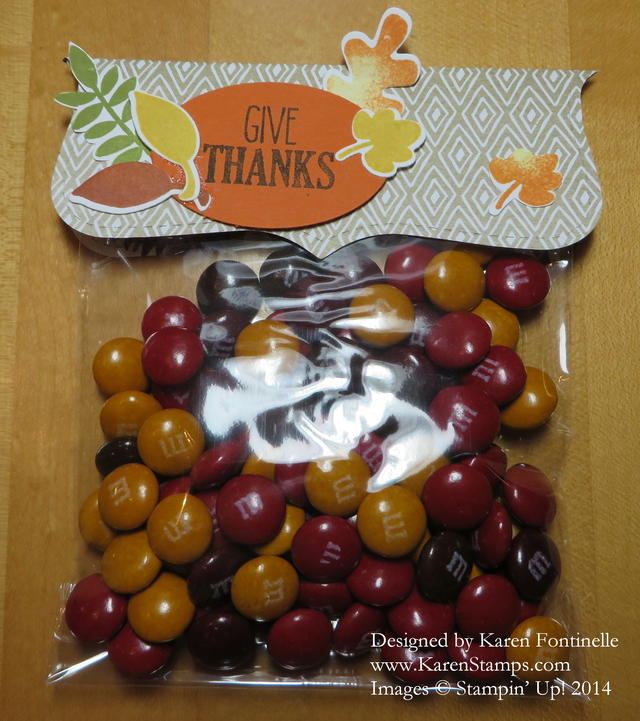
Top Note Thanksgiving Cello Bag Treat

Top Note Thanksgiving Cello Bag Treat

I hope these ideas, some very old!, will give you some ideas that are helpful!

HAPPY THANKSGIVING!!

Make Christmas Tags With Paper Pumpkin!

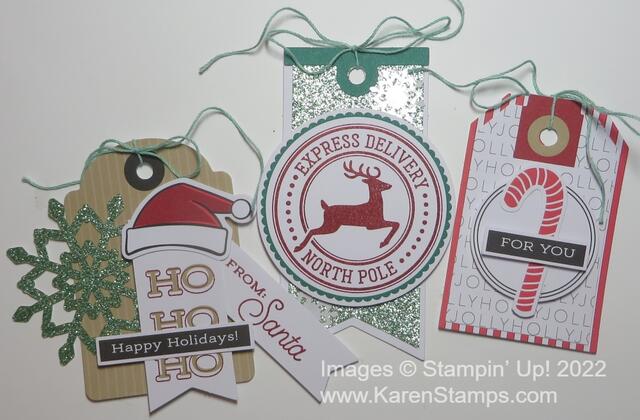
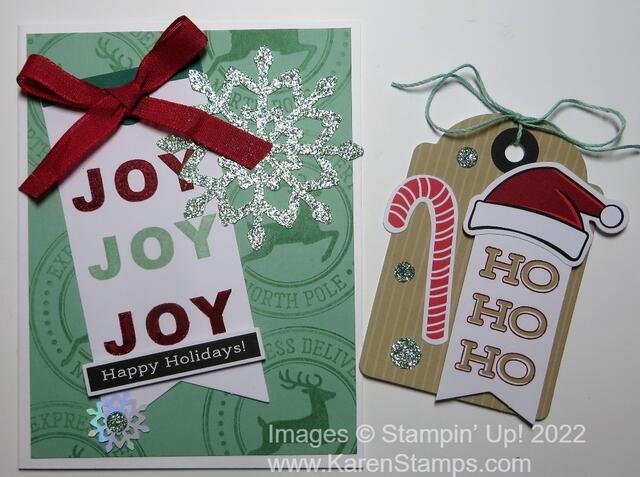
I don’t know what went wrong, but the post office seemed to deliver my November Paper Pumpkin Kit in a normal amount of time! Usually, it seems to sit in one place for a few days or it goes on a little trip to some other city first! But this time, I got it right away! And since Saturday was a very rainy, cold, chilly, dreary day, it was the perfect day to stay inside and work on my November Paper Pumpkin Kit, “From the North Pole”. In this kit were supplies to make three different kinds of Christmas gift tags, four of each design. I always like to start a Paper Pumpkin Kit by making what is designed so I made the three Christmas gift tags in the photo above!

This kit was extra-special because it had Mint Macaron glimmer paper! We’ve never known that to exist before! But there it was, in the Paper Pumpkin kit, sparkling away! It is very pretty.

These three tag designs were all very easy to make. Of course, visual directions are included plus a video you can watch on YouTube. I like to watch the video and see how they suggest making the project.

After I made the tags as designed, I made two things on my own, just to play. You can use the supplies any way you like! They are yours, so if you don’t need tags, just make cards. Or make the tags, but adhere them to cards. Of decorate a notebook and put the tag on the front of the notebook. Whatever you like.

I made these two alternative ideas, as they say:

I really liked how the Mint Macaron card turned out, even though it wasn’t looking too great in the beginning. I stamped the “Joy” in Cherry Cobbler and in Mint Macaron on one of the tags and added the greeting plus snowflakes and ribbon. The background of the card is stamped with the largest stamp in the set, the big round stamp with a reindeer That really made the card come alive.

The other little tag I made was almost the same, but I’d used the big snowflake on that card so I was short one. Instead, I used some Mint Macaron glimmer paper dots from the holes in the banner for one of the other tags to be an embellishment. I ran out of those so I just punched my own with a retired punch.

But in the end, I decided I really did like making those Christmas tags with my Paper Pumpkin Kit so I went back and made the rest. Of course, I was missing a few pieces since I’d made the two extra projects, but I just worked around it.

That’s the fun of Paper Pumpkin Kits that come in the mail each month! It’s so fun opening up the box to see what supplies are inside and think about what you can make with them. Paper Pumpkin projects just keep getting better and better over time!

If you would like to get your own Paper Pumpkin Kit, subscribe now so you don’t forget by December 10th!

JOIN PAPER PUMPKIN!

Get on My List For the Remaining “12 Weeks of Christmas”!

12 Weeks of Christmas 2022 frame

Time is flying by and there are only 8 weeks left of my 12 Weeks of Christmas holiday emails! Every week for 12 weeks I send you a free holiday project idea that you can use to make your holidays brighter! The only people who receive these free projects are the people who are on my Stamping With Karen Mailing List! This is my way of thanking my mailing list subscribers for following me, so if you would like to receive these special holiday emails, please sign up!

You have already missed the first four emails but there are eight more to come, starting this afternoon at 1:00 PM Central Time! Sign up right now and here’s how: If you are on my blog, sign up in the red box in the top right sidebar. If you are on your phone, you may have to scroll way down. OR go to my sign-up page HERE and sign up in the red Mailing List box! We’d love to have you!

Besides these holiday emails, I also send out a weekly newsletter on Tuesdays with the latest Stampin’ Up! news and new product information plus a stamping project or two or maybe some papercrafting tips!

Please join us!

Fitting Florets Collection Available TODAY!

Fitting Florets Banner

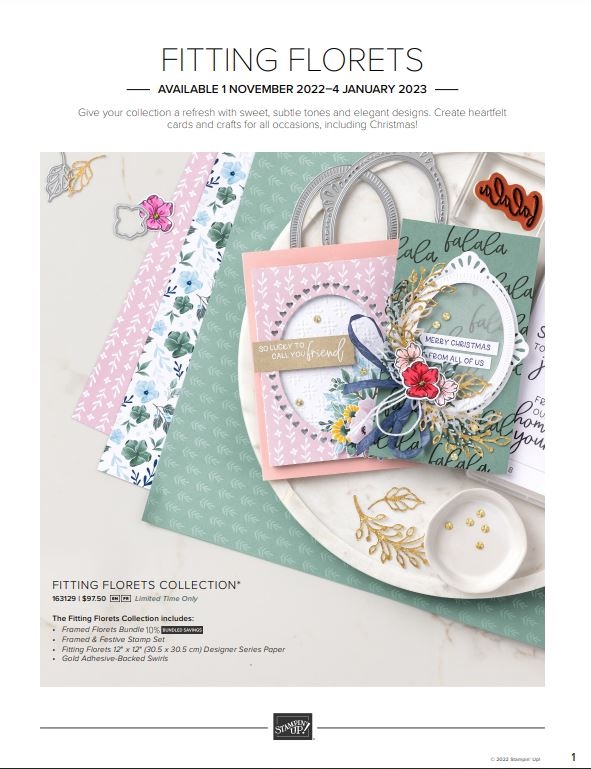
Today is the first day you can purchase the Fitting Florets Collection in the Stampin’ Up! Online Store! “Add just the right touch of elegance to any occasion, including Christmas and seasonal celebrations, with the sweet Fitting Florets Collection. From color schemes to sentiments and embellishments to dies, these unique products blend together so that your cards and crafts fit whatever occasion you might need. Send birthday wishes, express your gratitude, or spread Christmas cheer—with so many options to mix and match you’ll be set no matter the celebration all year!”

This is an interesting Collection because all of it is available now through January 4th (while supplies last), but the Framed Florets Bundle (stamp set and dies, all of the same name!) will continue on and be in the January-June 2023 Spring Mini Catalog! (I know we can’t comprehend a Spring catalog when we just finished Halloween!)

The best way to get an idea about this whole beautiful Collection is to watch this Stampin’ Up! video!

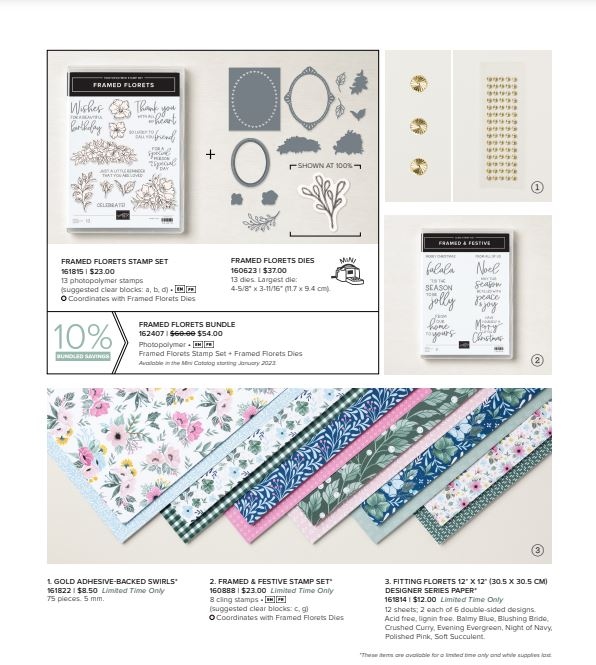
Click the photos below to read the Flyer.

This is a beautiful set of new products! Use them exactly as is or, as the designer did, turn some into a Christmas presentation. The Framed & Festive Stamp Set has really fun greetings to use right now for our Christmas cards and projects.

Check it all out and let me know if you have any questions! The Framed & Festive Stamp Set, the Gold embellishments, and the designer paper will only be available until January 4th or while supplies last before that. The Framed Florets stamps and dies are available now and will be in the Spring Mini Catalog! It’s all pretty! You’ll like it! Get it all in the Collection or pick and choose what you want!

SHOP STAMPIN’ UP!

Last Minute Halloween Treat Ideas!

These Halloween treat ideas may be from years past, but they still work! Use your current paper and things or use your old retired things you are hoarding! 🙂 The trick or treaters won’t care!

Halloween Candy Bars

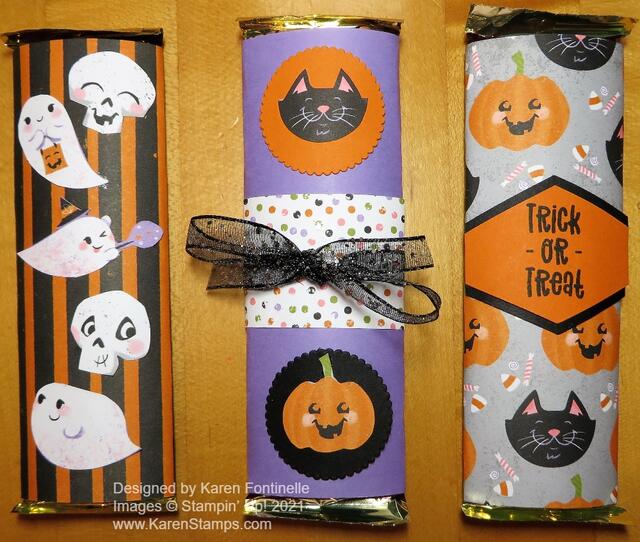
This is one of my favorite ideas and simple enough to do. Just wrap a chocolate bar in designer paper! Maybe add some ribbon or a tag if you are making it for someone special. You can use any size of candy bar!

Triangle Halloween Treat Box WIth Ghosts

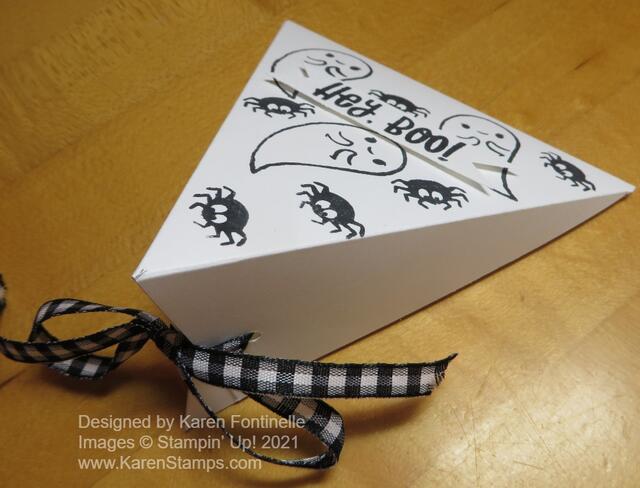
These triangle boxes are so easy to make and I have made them for lots of occasions! Read my blog post HERE with directions.

Cute Halloween Treats

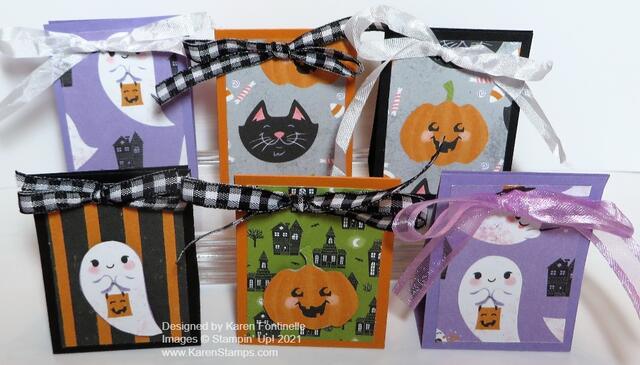
I always love making treats with chocolate nuggets! Just cut a strip of cardstock at 1 3/4″ x 5 1/2″. Score the paper at 2 1/4″ and 3 1/4″. This makes a little space so it will sit flat and so it will hold a nugget inside. OR just cover nuggets with strips of designer paper and put in a bag or box! A 1″ x 3″ strip should do it!

Witch's Boot with Candy

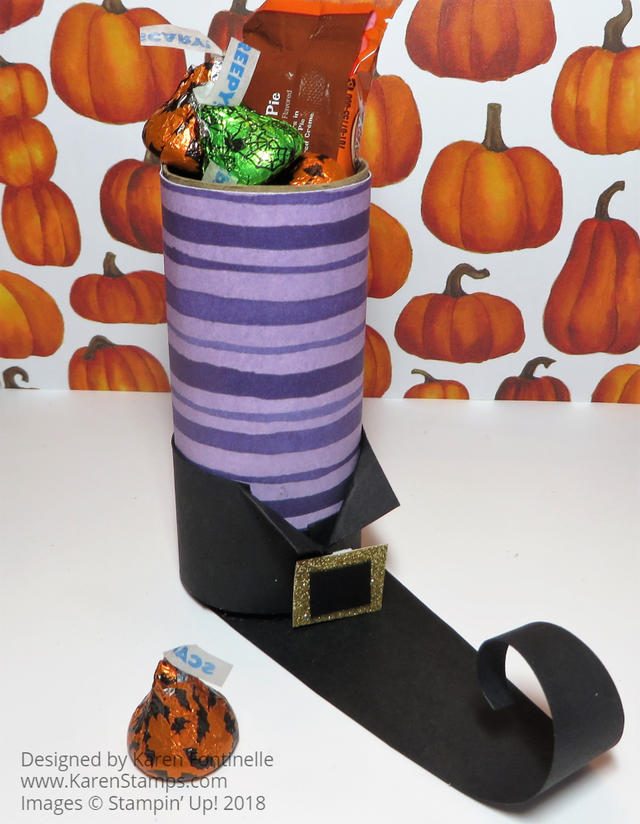
This witch’s book has been quite a favorite! Save a toilet paper roll or a paper towel roll and cut it down, wrap with designer paper, and add the triangular boot bottom! It’s easier than it looks. Directions on this blog post HERE.

Halloween Witch Trick or Treat Candy Treat Box

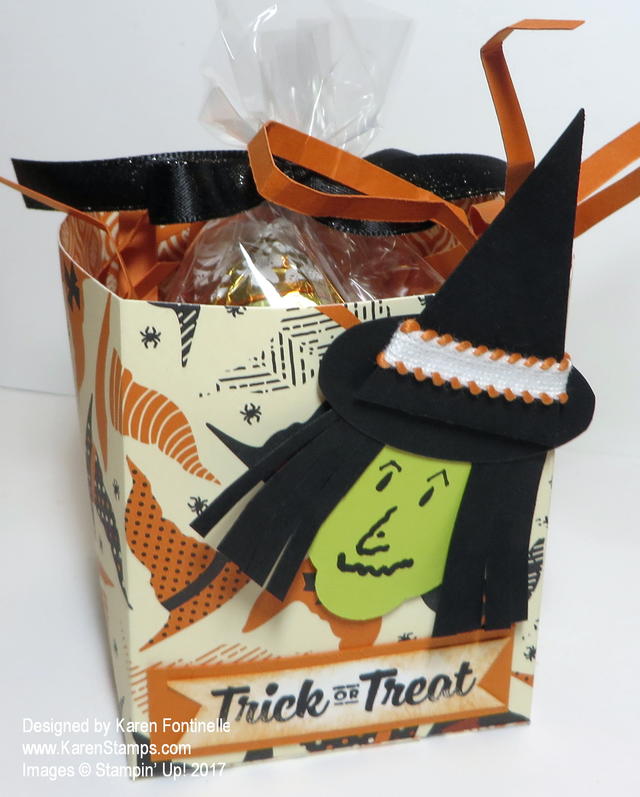
Nothing wrong with just making a little box or bag out of designer paper or cardstock and decorating it for Halloween! This one is from five years ago but you can update it easily! Read the blog post HERE.

Those are just a few ideas to spark your creativity for parties or trick or treaters Monday night! Have fun!

Witchy Home Decor

Witchy Home Decor

It’s time for some Witchy Home Decor! ‘Tis the season for decorating your home! Only 10 more days until Halloween! If you need a cute little decoration for your home or a little gift for someone, you’ve got to make something like this votive candle holder! It’s easy and you can make one in any style you like!

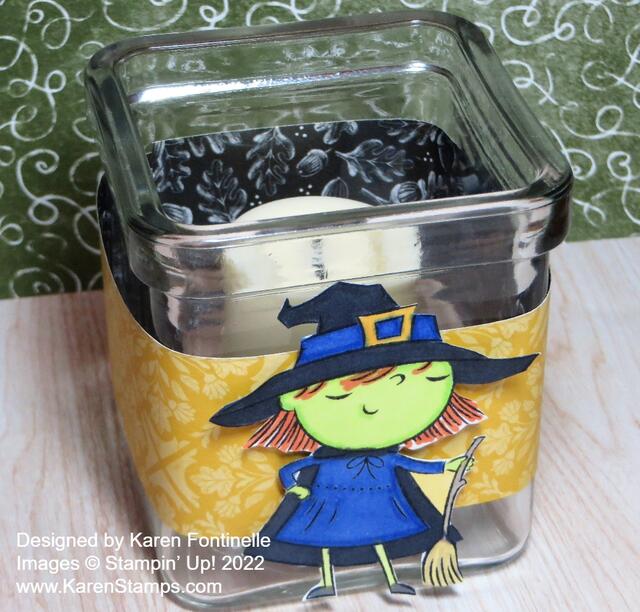
Look around your house and find a small votive holder that you almost certainly have in your house somewhere. If you don’t have an official votive holder, maybe you have a glass jar or a small glass vase. Then decide on what kind of decoration you want on the front of it.

I used the Best Witches Stamp Set, which I love for Halloween. I stamped the witch and her broom with Memento ink on Basic White cardstock and colored her in with Stampin’ Blends alcohol markers. You can choose whatever witchy colors you like! Or if you don’t have or don’t want a witch, use a pumpkin or black cat or whatever you have. Wrap a piece of designer series around the votive. Make it whatever width you want. Either you can join the ends in the back or you can join the ends in the front and then cover it with your main image. The witch I had to cut out by hand with Paper Snips because this stamp set has no dies.

Here’s one I made last year with the Cute Halloween Designer Paper. I just wrapped a ribbon around the glass votive holder instead of designer paper and I decorated each side. So easy and so much fun!

When your creation is finished just put a small candle inside, or better yet, a flameless votive for safety. You can change out the decorations on your votive holder for every season!

New Paper Pumpkin Kit For November!

Paper Pumpkin Banner 3 Nov 2022

This November, Paper Pumpkin delivers this and more with its one-of-a-kind, holiday-themed crafting experience. This festive kit includes 12 fun, sparkly gift tags and (as always!) an exclusive stamp set—plus everything you need for a successful holiday crafting experience. 

This kit includes:

  • This month’s kit contains enough elements to create 12 tags—4 each of 3 designs. This all-inclusive kit includes printed die-cut paper pieces, twine, adhesive, and more!
  • Includes a Cherry Cobbler Classic Stampin’ Spot!
  • You’ll love decorating your gift tags with snowflakes and banner die-cut pieces on our Mint Macaron glitter specialty paper (a Paper Pumpkin exclusive).
  • Create festive gift tags for all your packaging needs this holiday season with classic Christmas colors and designs.
  • Finished gift tag size: 2″ x 3″ (5.1 x 7.6 cm)

Coordinating Stampin’ Up! colors: Basic Black, Cherry Cobbler, Crumb Cake, Mint Macaron, Shaded Spruce, Sweet Sorbet

If you need unique Christmas packaging to round out your gifting, you will be able to purchase these exclusive North Pole Sacks add-ons in the Online Store under Paper Pumpkin Past Kits, for subscribers only. Available now.

Join Paper Pumpkin by November 10th to receive this kit!

SUBSCRIBE NOW!

Painted Christmas 2-4-6-8 Gift Bag

Painted Christmas Gift Bag

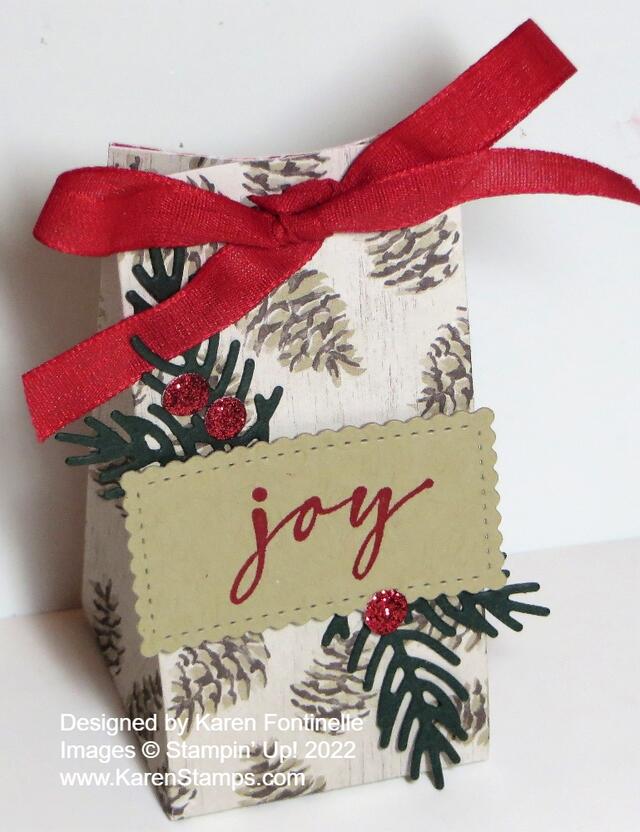
I was inspired to make something different than a card so I looked through my designer paper and this pinecone paper is what jumped out at me! I thought it would be perfect for an easy little gift bag for the holidays, like this Painted Christmas 2-4-6-8 Gift Bag. You know the holidays will be here before we know it!

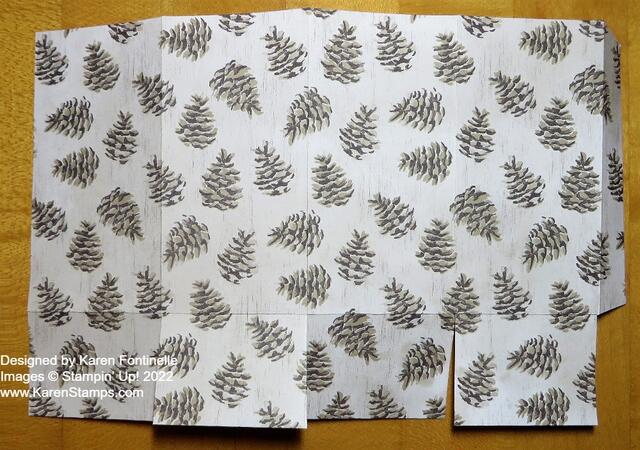
There’s almost nothing easier to make than a 2-4-6-8 gift bag! And so versatile! you can leave the top open or you can pinch it closed, as I did. Make a lid if you like. All this one takes is a piece of paper – cardstock or designer series paper – cut at 5 1/2″ x 8 1/2″. I used the Painted Christmas Designer Series Paper which was around last year and has returned this year in the Holiday Mini Catalog so you may have some! Put it in your Paper Trimmer or Simply Scored board to score at 2″, 4″, 6″, and 8″. Make sure you pay attention if there is a pattern so you have the design going the right way and not upside down or something. Then turn the paper lengthwise and score at 1 1/2″ or 2″ to make the bottom flaps of the bag. You can vary the height of the bag if you make it wider than 5 1/2″. Then cut those score lines for the flaps up to the horizontal score line. Also, cut off the tiny little 1/2″ piece at the end. Check out the paper below.

Painted Christmas 2-4-6-8 Gift Bag

To assemble, crease all the score lines with a Bone Folder for a good fold, and then see how the bag is going to go together. Apply adhesive (Multipurpose Liquid Glue gives you some wiggle room to get the paper lined up but Tear & Tape or Stampin’ Seal+ is good, too!) to that narrow 1/2″ piece on the end. You don’t really have to hold the bag up in the air to adhere the other side to that 1/2″ side. Just lay it flat on the table and carefully fold over the opposite side to adhere to that 1/2″ side. Then just fold in the flaps, trying to not have seams showing on the front side of the bag. Apply some adhesive to the flaps and always stick your Bone Folder or something down inside the bag to put pressure on all those flaps and make sure they have fully adhered together. If you want the top of the bag closed AFTER you put your gift or treat inside, just pinch in on the sides and then close the top with ribbon through some punched holes, a staple, or some kind of clip. Whatever you like!

To decorate the bag, I used a little diecut rectangle out of Crumb Cake Cardstock and die-cut some evergreen branches out of Evening Evergreen Cardstock using the Christmas Banner Dies. I had a scrap of the Real Red Glimmer Paper in the 6″ x 6″ Pack so I diecut some red berries just in case I wanted to use them. The “joy” is stamped in Real Red ink from the Brightest Glow Stamp Set. You can purchase the whole Brightest Glow Bundle with the stamp set and some fancy dies, but if you just need some more or some Christmas greetings, you can just get the stamp set.

This little Painted Christmas 2-4-6-8 Gift Bag started out with some not real exciting pinecone paper and got turned into a real Christmasy bag for a small gift or treat! Time to get ready for the holidays!