Tag Archives: Easter card

Welcome Spring Bunny Card

Welcome Spring Bunny Card

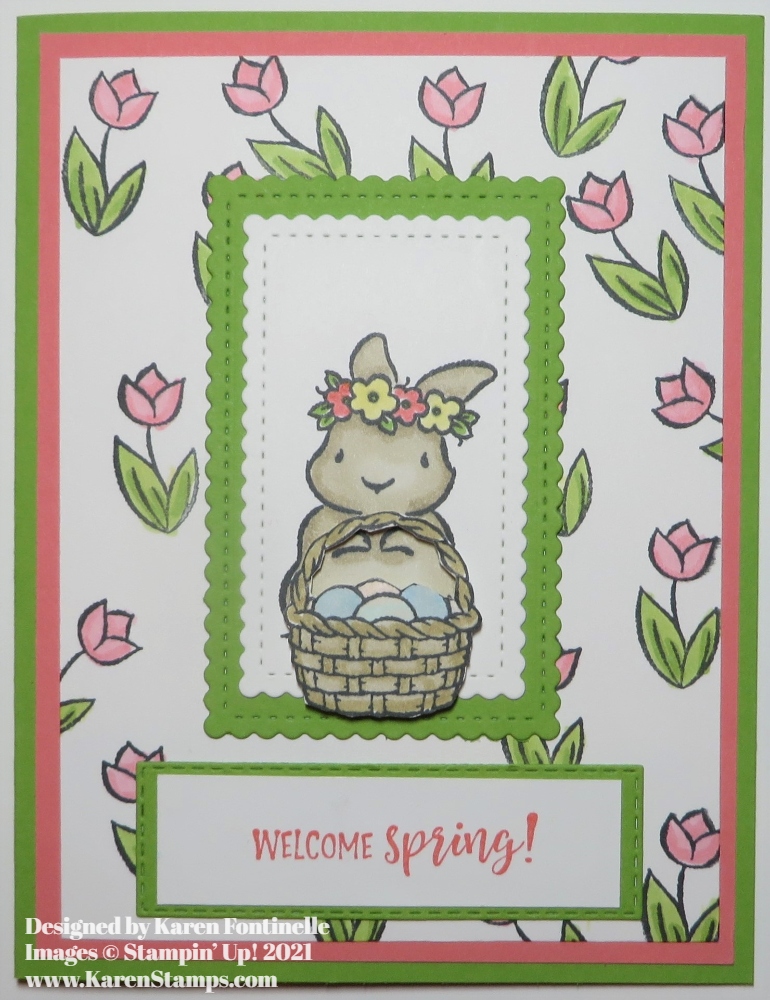
With all the snow, ice, and cold weather, not just in Texas but all over the country, I thought it was time to think about spring! Tulips, bunnies, and a basket of eggs – that says spring quite well, I think!

I pulled out the Springtime Joy Stamp Set which is in the Spring Mini Catalog. It’s not part of a Bundle or anything, just a simple stamp set, so don’t miss it! It’s perfect for spring and Easter and other occasions.

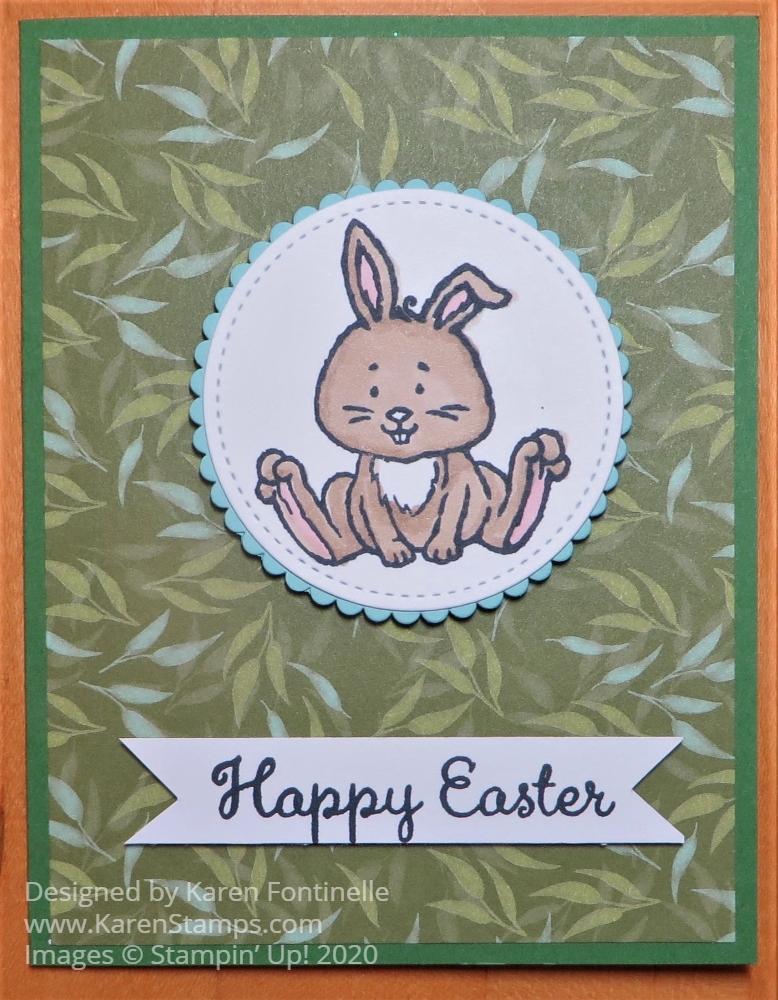
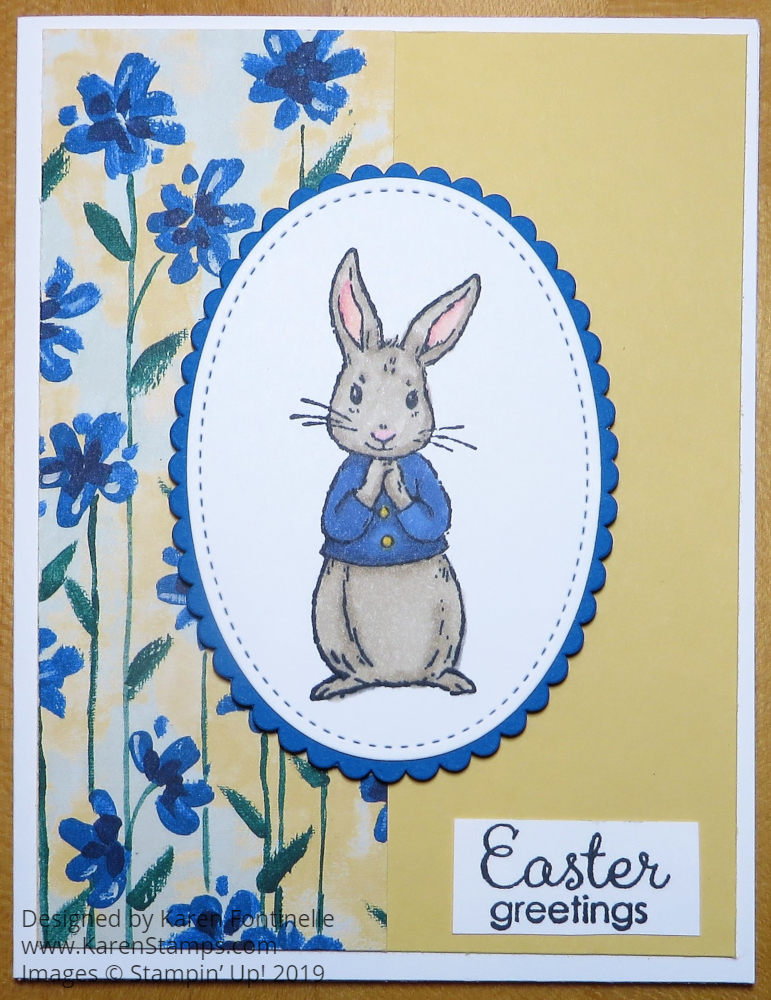
I often like to stamp randomly on the cardstock to make a background myself rather than use designer paper so I stamped all over the background with the tulip stamp in Memento Ink and then colored in the tulips with Stampin’ Blends. I used Flirty Flamingo and Granny Apple Green for the tulips with a bit of Daffodil Delight on the green leaves.

The card base is Granny Apple Green with a Flirty Flamingo layer. The way I made this big color decision was when I pulled out the cardstock, these two colors were right next to each other! I thought it looked springy and bright so used them!

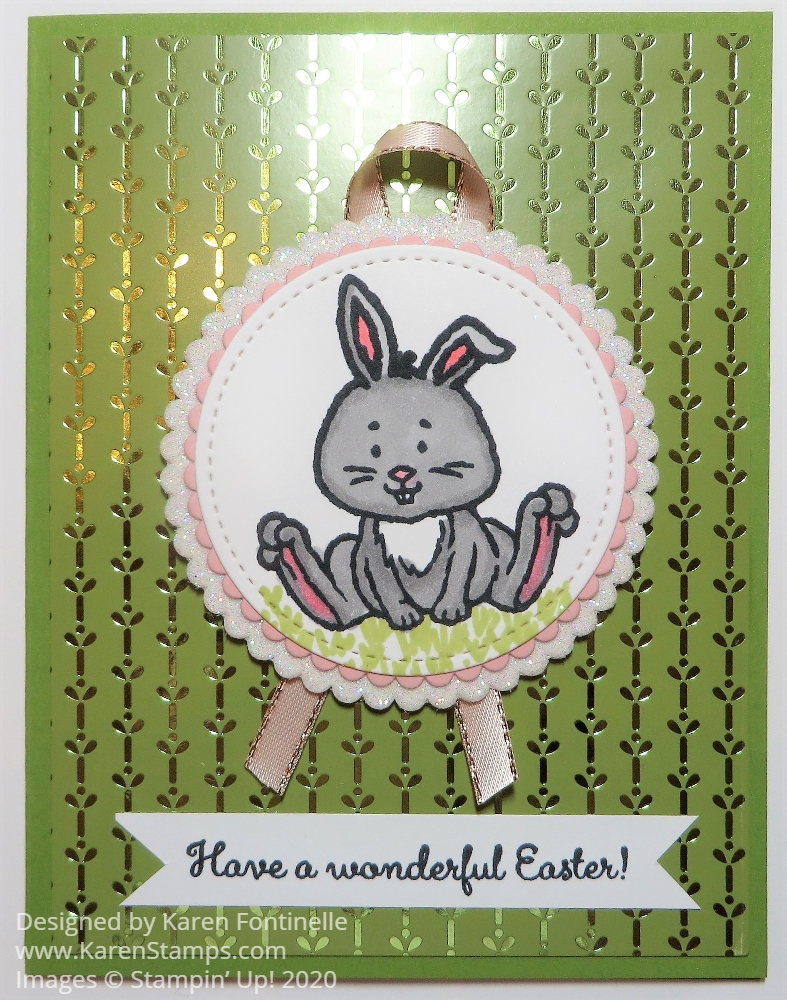
The bunny and the basket were stamped on a piece of Basic White Cardstock. I played around with various dies until I found something that fit around the bunny and could have a layer behind it. I chose these rectangles in the Stitched So Sweetly Dies to cut out the bunny and then to make a Granny Apple Green layer. I cut the basket of eggs out separately with my Paper Snips and popped it up like the bunny is holding the basket. The eggs were colored with Pool Party, Balmy Blue, and a bit of light pink.

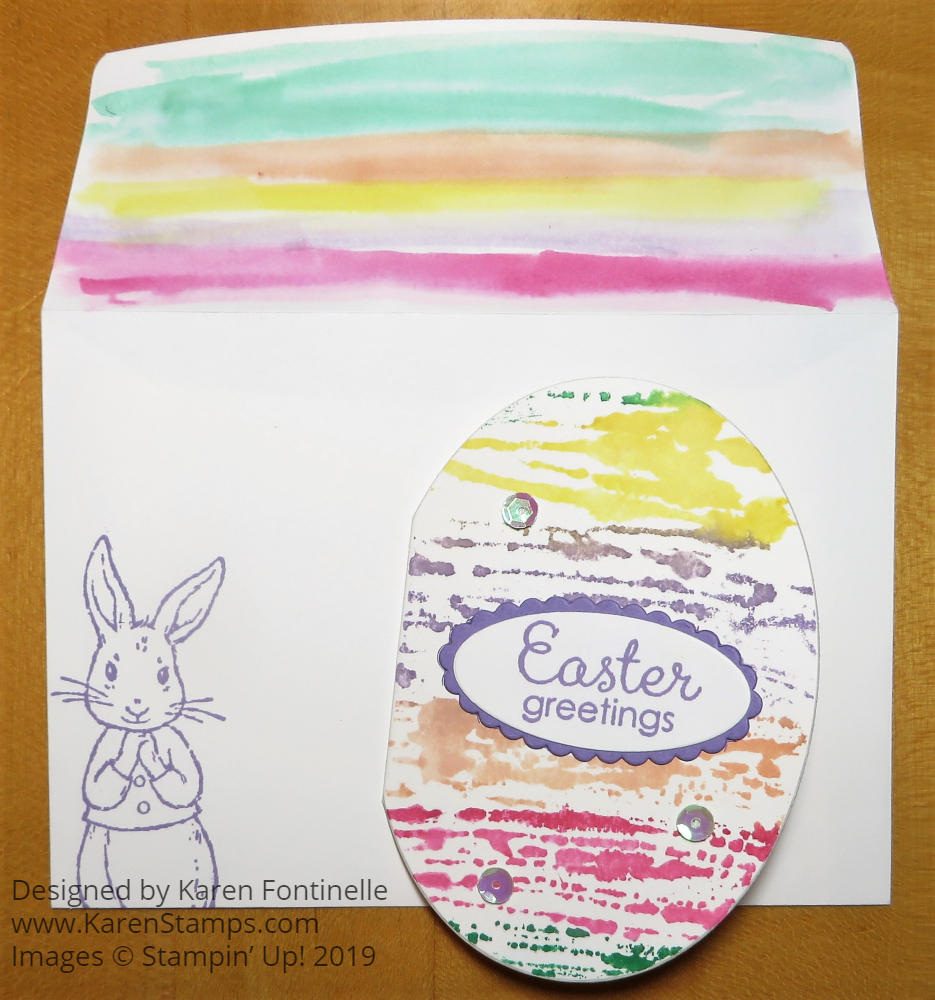
The greeting is stamped with the spring sentiment in the Springtime Joy Stamp Set and then layered on a die-cut piece of Granny Apple Green. Here is another way I used the bunny in this stamp set by placing it on a gift bag.

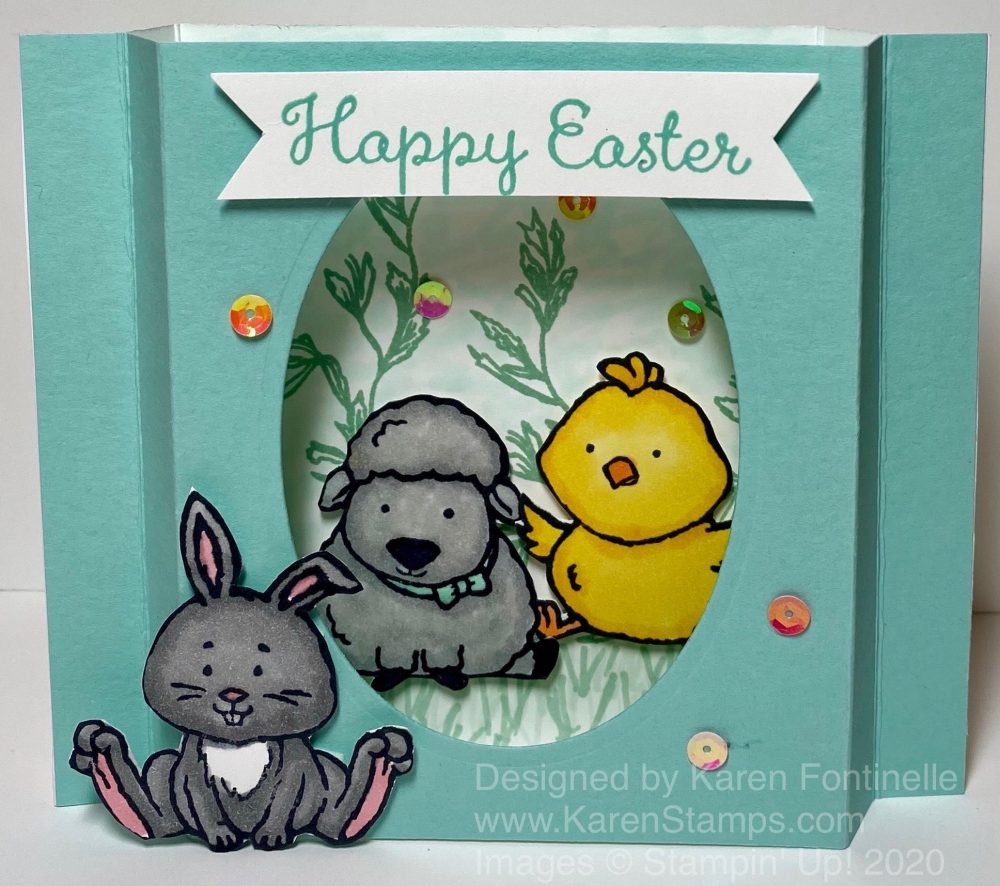
If you purchase this stamp set early, you will have time to use it for spring and Easter, but the darling bunny and lamb could be used for baby cards and projects, also.

Although I found the winter weather we finally had in Houston after several years to be a little exciting and I’m always happy to see snow as long as my family and I are at home, I think we are all reaching our limit with this winter storm with power outages and such low water pressure you barely have water! Usually winter in Houston lasts one day but this one is something else! Time to think about spring! If you are snowed in, maybe it is time to make something for spring similar to this Welcome Spring Bunny Card.

SHOP STAMPIN’ UP! ONLINE HERE!

Garden Lane Easter Bunny Card

Garden Lane Easter Bunny Card

Today I needed to make an Easter card for my son that was a little less frilly than the ones I already made and I had something in mind, but not this Garden Lane Easter Bunny Card. But once I started looking at my designer papers for the one I was going to use, I saw this Garden Lane Designer Series Paper and I thought that leafy pattern would go well with a bunny!

The card base is Garden Green but there are other greens that go with the paper. For the scalloped Layering Circle Die underneath the bunny, I chose Pool Party because it looked like it matched the bluish leaves a little bit.

The bunny from the Welcome Easter Stamp Set is stamped in Memento Ink and die cut with the Stitched Shapes Die. Then I had fun coloring him in with Crumb Cake Stampin’ Blends.

The Easter greeting is from the same Welcome Easter Stamp Set and is just stamped on a strip of Whisper White. The bunny and the greeting are both popped up on Stampin’ Dimensionals.

That’s all there is to this card! The Garden Lane Easter Bunny Card is an easy and fun card to make!

Easter Diorama Card With Welcome Easter

Easter Diorama Card With Welcome Easter

It’s been a long time since I have made a diorama card but it was fun to make this Easter Diorama Card With Welcome Easter. Diorama cards can be made in different ways, even fancier than this one. A diorama card is a 3D card with an opening on the front layer that lets you see a scene of any kind on the inside. Sometimes there is even a middle layer. But let’s start with this one!

You just need two pieces of cardstock, each piece 4 1/4″ x 5 1/2″. I chose Pool Party for my front piece and Whisper White for the back. On each piece, score 1/2″ and 1″ from each end.

Diorama Easter card diagram

Then you will crease those score lines so that your card front pushes out and the back piece pushes back. You can see which way these score lines go from this top view of the diorama card.

Diorama Card Top View

Now you will stamp or decorate that back piece before you assemble the card. But when you are ready to adhere the two pieces of the card together, use something like Tear & Tape Adhesive or Multipurpose Liquid Glue. All you have to do is adhere that end 1/2″ on the front and the back piece together.

For my Easter diorama card, I used the Welcome Easter Stamp Set. I stamped the three little characters, colored them with Stampin’ Blends, and cut them out with my Paper Snips. I also used the Happy Easter greeting stamped in Pool Party from the Welcome Easter Stamp Set.

On the front of the card in the center area, I die cut with a Layering Ovals die. You could use a circle die, punch, square, whatever you like. I played around with the placement of the bunny, chick, and lamb before adhering the two pieces together. You want to make sure that you can see what you want to see well enough.

You want to think about the background. I stamped a few leafy boughs from the Path of Petals Stamp Set. I didn’t want the rest of the background to just be white so I colored in lightly, just with kind of a scribble motion with a Pool Party Stampin’ Blend marker. And I drew in some sprigs of grass at the bottom.

The lamb and the chick are popped up on Stampin’ Dimensionals to give a little dimension inside the card. The bunny is also popped up on a dimensional on the front corner. I still thought the card needed a little something so I used some Iridescent Sequins on the inside and even the outside. Once I added the sequins, I was happy with the card!

Now the amazing part of this card is that you can fold it flat and it is the size of a normal card! It will fit in an envelope and can be mailed!

As I’ve said before, you can use the Welcome Easter Stamp Set to make baby cards with these cute images! You could change the greeting on this Easter card and make it one for a baby, like one that comes in the stamp set.

Here is another example of a diorama card that I made years ago, an oldie but goodie!

Easter is coming soon so try your hand at this Easter Diorama Card With Welcome Easter because it is easy enough to make and will the recipient feel like someone special!

Welcome Easter Bunny on Peacock Foil Paper

Welcome Easter Bunny on Peacock Foil

This Welcome Easter Bunny on Peacock Foil Paper is one of those cards for which I didn’t really have a design in mind until I made it but I knew what kind of paper I wanted to use. After it all came together I really loved it! I think I will make some more cards just like this one to send for Easter. And Easter isn’t far off!

I was seeing the Noble Peacock Specialty Designer Series Paper being used on some cards and it jogged my memory about having that paper! I have barely used it even though it is beautiful paper! I think products in the Annual Catalog get forgotten sometimes when we are mostly looking at the Mini Catalogs!

One of the coordinating colors with the Noble Peacock paper is Old Olive so I chose that for my card base. Then I just adhered the designer paper on the card base.

The bunny is from the Welcome Easter Stamp Set and is stamped in Memento Ink. Then I colored him with my Smoky Slate Stampin’ Blends and a little bit of Flirty Flamingo for his ears, nose, and bottom of his feet. I even drew in some sprigs of grass with Old Olive.

The bunny was die cut with one of my favorite dies of all time, the Stitched Shapes Dies. Then in deciding what color and size scalloped circle to use as a layer under the bunny, I die cut one in Petal Pink Cardstock and one in White Glimmer Paper. As I layered them to see what size I wanted, I saw that both layers looked good together! I love the little bit of pink around the edge and the pretty glimmer paper bringing another texture.

Since I had just received some back-ordered ribbon, the Petal Pink 1/4″Metallic Edge Ribbon, I used that underneath the bunny and popped it all up on Stampin’ Dimensionals. The greeting was stamped on a narrow scrap I had of Whisper White and I just cut the flagged ends.

Such a simple card, fun to make, and beautiful! Here is a similar card but with a monochromatic design for Easter. Try your hand at either one of these cards and send them out for Easter or just for spring or to say hello. If you have it, dig in your stash for the fancy-looking Noble Foil Paper to make this Welcome Easter Bunny on Peacock Foil Paper.

Welcome Easter Yellow Chick Card

Welcome Easter Yellow Chick Card and Stamp Set

I just ordered the Welcome Easter Stamp Set recently and it is so adorable I had to make this Welcome Easter Yellow Chick Card. It’s actually a great stamp set that is not just for Easter, as you can see from the stamp set photo! It’s even got a greeting in the stamp set for a new baby and a friend. You could certainly make a lot of cute baby cards and projects with this stamp set, so don’t look at it as only for Easter.

In making this card, I wanted to use the new, beautiful vellum paper, available FREE during these last few weeks of Sale-A-Bration! It’s one of the new products available as the 2nd release during Sale-A-Bration. It is called the So Very Vellum Specialty Designer Series Paper. It comes in three colors: Pool Party, Purple Posy, and Soft Sea Foam.

I just used a card base of Whisper White and added a layer of the Pool Party vellum, sponging it on the back with Multipurpose Liquid Glue so the adhesive wouldn’t show through.

The chick is stamped in Memento Ink and colored in with Daffodil Delight Stampin’ Blends Markers and the beak and feet in Pumpkin Pie markers. It’s so fun to color with these Stampin’ Blends Markers! I just love to do it! I also colored in some green grass just for fun using the Granny Apple Green markers.

The chick was then cut out with the Stitched Shapes Dies and layered on a scalloped circle die-cut in Daffodil Delight. Then I thought it would be fun to use the Whisper White 5/8″ Polka Dot Tulle Ribbon placed back and forth on the back. I popped this piece up with Stampin’ Dimensionals.

The greeting is stamped and then layered on a Stitched Rectangle Die in Daffodil Delight. It is just glued on with Multipurpose Liquid Glue or you can use Snail Adhesive.

That’s as easy as it is to make this Welcome Easter Card with the cute yellow chick on the front! Try your hand at making this simple card!

Remember, Sale-A-Bration ends March 31 so what with all the health news out there, don’t forget if you want to treat yourself to a Sale-A-Bration product!

Shop Stampin’ Up! Online!

Welcome Easter Yellow Chick Card

Monochromatic Fable Friends Bunny Easter Card

Monochromatic Fable Friends Bunny Easter Card

Even though this Botanical Butterfly Designer Paper is no longer available since Sale-A-Bration ended, but I’ve had this Monochromatic Fable Friends Bunny Easter Card in my mind for a awhile and I imagine a lot of you have this paper from your Sale-A-Bration order.

Easter is only a week away, so if you are pressed for time to make some cards and get them sent out, you might want to make something easy like this card.

The card base is Highland Heather Cardstock, one of the new colors from the current catalog. This is one of the coordinating colors of the Botanical Butterflies paper and we have a whole sheet of this floral Highland Heather all in one color. It was a paper that I could use with the bunny from the Fable Friends Stamp Set. I just trimmed about a 1 1/4″ strip of the floral paper and a layer of Whisper White and adhered the paper to the Whisper White. I tied a ribbon and bow around the strip with the Whisper White 1/8″ Sheer Ribbon. The bunny is stamped in Highland Heather Ink on the Whisper White as is the greeting in the same stamp set of Fable Friends.

Not one to leave things alone, I risked messing up the whole card by coloring in the bunny’s jacket with a Blender Pen and a tiny bit of Highland Heather Ink. I just touched the Blender Pen to the ink pad, wiped it a little bit on my Grid Paper to make it lighter and then colored in the jacket. I even added a bit of the color to the inside of his ears. I think it helps set off the bunny a little bit.

If you really like to color, I would highly recommend coloring in the bunny with whatever method you like…..but if you want to make a super easy, quick card try this monochromatic method. It also works well on the smaller Notecards & Envelopes.

For a quick card, try making something that you can just stamp in one ink color with maybe a coordinating piece of designer paper or ribbon like this Monochromatic Fable Friends Bunny Easter Card.

PS: Remember! The Stampin’ Up! Retiring List comes out tomorrow afternoon, April 15, at 1:00 PM (MT). Also, the Stampin’ Up! OnStage events were held over the weekend so if you look around online, you will find photos of the new catalog cover and some of the new stamp sets, new In Colors, and more!

Fable Friends Bunny Garden Impressions Easter Card

Fable Friends Bunny Garden Impressions Easter Card

Once you start using the Fable Friends Stamp Set you can hardly stop using this cute bunny for Easter cards! You can make this Fable Friends Bunny Garden Impressions Easter Card or you can change the greeting and have it be a baby card, birthday card, or other occasions. And what a relaxing way to spend some time coloring in this cute bunny!

I decided to show a little love to my package of the Garden Impressions 6″ x 6″ Designer Series Paper. I placed a strip of 2″ x 5 1/4″ blue floral pattern on the layer of So Saffron Cardstock. This is all layered on a Whisper White card base. The bunny is colored in to match the flowers on the Garden Impressions paper and I just LOVE how the bunny looks – a little like Peter Rabbit I think! While I first thought the blue color was Night of Navy, some of it is, but some is Pacific Point. I chose to use Pacific Point as the scalloped oval color and the color of the bunny’s jacket. The Night of Navy was too dark but the Pacific Point was perfect!

After coloring in the Fable Friends bunny with Stampin’ Blends markers, I die cut the bunny with the Stitched Shapes Framelits Dies. He is then layered on a scalloped oval in the Layering Ovals Framelits Dies. You can glue the bunny down flat on the card or pop him up on Stampin’ Dimensionals.® I chose the Easter greeting in the Fable Friends Stamp Set but you could make the same card with another greeting. You could add some ribbon as well, but I was keeping it simple.

Go check out the Fable Friends Stamp Set for making Easter cards and treats! You will find it in the Stampin’ Up! Online Store from the Occasions Catalog!

Watercolored Easter Egg Notecard

Watercolored Easter Egg Notecard

The other day I saw on Facebook a Stampin’ Up! post of a stamping technique that a French Demonstrator, on the Artisan Design Team, had used on a card using the acrylic blocks. I had already been reminded of an Easter card I made of an oval shape and decorated like an Easter egg, so I used her technique to make a Watercolored Easter Egg Notecard.

You can use the largest oval framelit in the Layering Ovals Framelits Dies to make this card although it is a little small. If you want a larger card you will need some kind of template. I just used a notecard in the Note Card & Envelopes since the egg will be small anyway. Fold the note card and position the largest oval die over the note card (closed) but having it off the card a bit over the fold. In other words, you do not want to cut a portion of the fold. If you do, you will have two ovals cut out of the Note Card but they won’t be connected by the fold. Just slide the oval off to the left a little bit so you will still have a fold.

You can see how I made an Easter egg-shaped card HERE a few years ago. The die will cut through the two layers of the card and still have a fold as long as you move the die to the left of the fold.

This is how I colored my egg card. I used a larger acrylic block that the egg could fit on. Then I chose several colors of ink pads and picked up ink from each color with my Aqua Painter one at a time and colored it onto the acrylic block. Instead of picking up the block and stamping it on the card, I placed the front of the egg card down onto the acrylic block loaded with stripes of colors of watery ink. Just press and then lift up carefully.

Depending on how much ink and how much water from your Aqua Painter (or brush) that you use and how you lay down the colors, you will get a different look on your card each time you make one. It’s really fun to do a technique where each time the final look will be a surprise! You could also color directly on the card, but Whisper White cardstock doesn’t hold up really well to very much water. I would recommend using Shimmery White Cardstock.

To decorate my Easter card, I used the Easter greeting from the Fable Friends Stamp Set. It is stamped in Highland Heather ink and layered on Highland Heather Cardstock, both die cut from the Layering Ovals Framelits Dies. For a little bling, I added some self-adhesive Basic Sequins.

As I was getting an envelope for the note card, I decided to color the envelope flap to match. It doesn’t match exactly because I didn’t use an acrylic block, I just colored directly onto the envelope flap. This does make the flap a little “warpy” and the glue on the flap inside gets a little damp so make sure the flap is open. And finally I stamped the bunny from the Fable Friends Stamp Set in Highland Heather on the front of the envelope.

This is a pretty small little Easter egg card but very cute and fun! You can try this technique or you can make one like the one I linked to from three years ago. Of course you can use this ink-on-the-acrylic-block technique to make lots of different kinds of cards, even just stamping the block onto cardstock and leaving a rectangular stamped shape as the Artisan team member did. Get out some ink and an acrylic block and experiment for yourself in making whatever cards you like or one for Easter like my Watercolored Easter Egg Notecard.

SALE-A-BRATION ENDS SUNDAY, MARCH 31! DON’T MISS IT!

Fable Friends Bunny Easter Card

Fable Friends Bunny Easter Card

It’s time to start making Easter cards like this Fable Friends Bunny Easter Card. Isn’t that bunny the cutest thing?! This is an easy card to make so you could make multiples and make lots of people happy to receive a card from you during the Easter season. The Fable Friends Stamp Set is great for Easter but you can also use it for other cards, like for a baby.

The card base is Lovely Lipstick with a layer of Whisper White under the designer paper which is from the All My Love Designer Series Paper. Don’t tell anybody, but I stamped the bunny on the middle part of the Whisper White paper, die cut it and then used that piece as the layer. Nobody will ever know that there is an oval hole in the Whisper White layer unless they take the card apart! You can save a little bit of paper this way although I don’t always think of doing that little trick.

The bunny is stamped in Memento Black Ink. This is the ink that works with the Stampin’ Blends alcohol markers. I love to color with these markers! Just pick out whatever colors you like. The bunny is easy to color! This oval piece is layered on a scalloped oval Lovely Lipstick piece.

The ribbon is the Crumb Cake 3/8″ Classic Weave Ribbon . This ribbon has a very nice soft feel to it. I just tied a knot to keep it simple and popped the bunny up on Stampin’ Dimensionals.

The greeting is from the same Fable Friends Stamp Set and layered on a piece of Lovely Lipstick.

That’s it! That’s all there is to this easy Easter card using the Fable Friends stamp set. Easter is a month away so you have time to order this stamp set, add a few things, and reach $50 so you can take advantage of Sale-A-Bration! Get a free product with each $50 you spend. Don’t miss it!

Shop Stampin’ Up! Online!