Author Archives: Karen Fontinelle

Notes of Spring Birthday Wishes Card

Notes of Spring Birthday Wishes Card

This Notes of Spring Stamp Set is one of the Product of the Month choices Stampin’ Up! has released the past few months. It is still available if you would like to choose it with your $75 minimum order, although there is a new Product of the Month, a beautiful die, out for April. The Notes of Spring Stamp Set has three cute little woodland animals in it, plus some river plants and even gree/tings. Definitely a lovely stamp set to own.

The card base is Crumb Cake cardstock. The designer paper as the background layer is that Easter paper, Easter Joy Specialty Designer Series Paper. Except, Easter is over, but here is a way to use the leftover paper for other cards besides Easter! This pattern goes well with the Crumb Cake cardstock.

For the focal part of the card, I cut a piece using the Branching Out Dies. These dies are on the Last Chance list so if you want them be sure to order them soon. It’s a nice set of dies. I stamped the little deer on the lower part of the diecut label. It is two-step stamping to fill in the deer with color. The greeting is also in the stamp set Notes of Spring. In keeping with the monochromatic look of the card, I used some Linen Thread to tie a double bow and attached it to the top of the label after wrapping some thread around the piece about three times. This whole label piece is then popped up on Stampin’ Dimensionals.

I’m really happy with the way this card turned out! I guess the colors and simplicity feel calming to me. In any case, it’s an idea of how to use up some of that Easter Joy Designer Series Paper in case you still have some left and don’t like to hoard it. Oh, never mind! We all like to hoard our paper! But if you do want to use it, get out those non-holiday patterns and see what you can do!

The Painted Skies Kit For Cardmaking

Painted Skies Kit Kits Collection Apr 2026

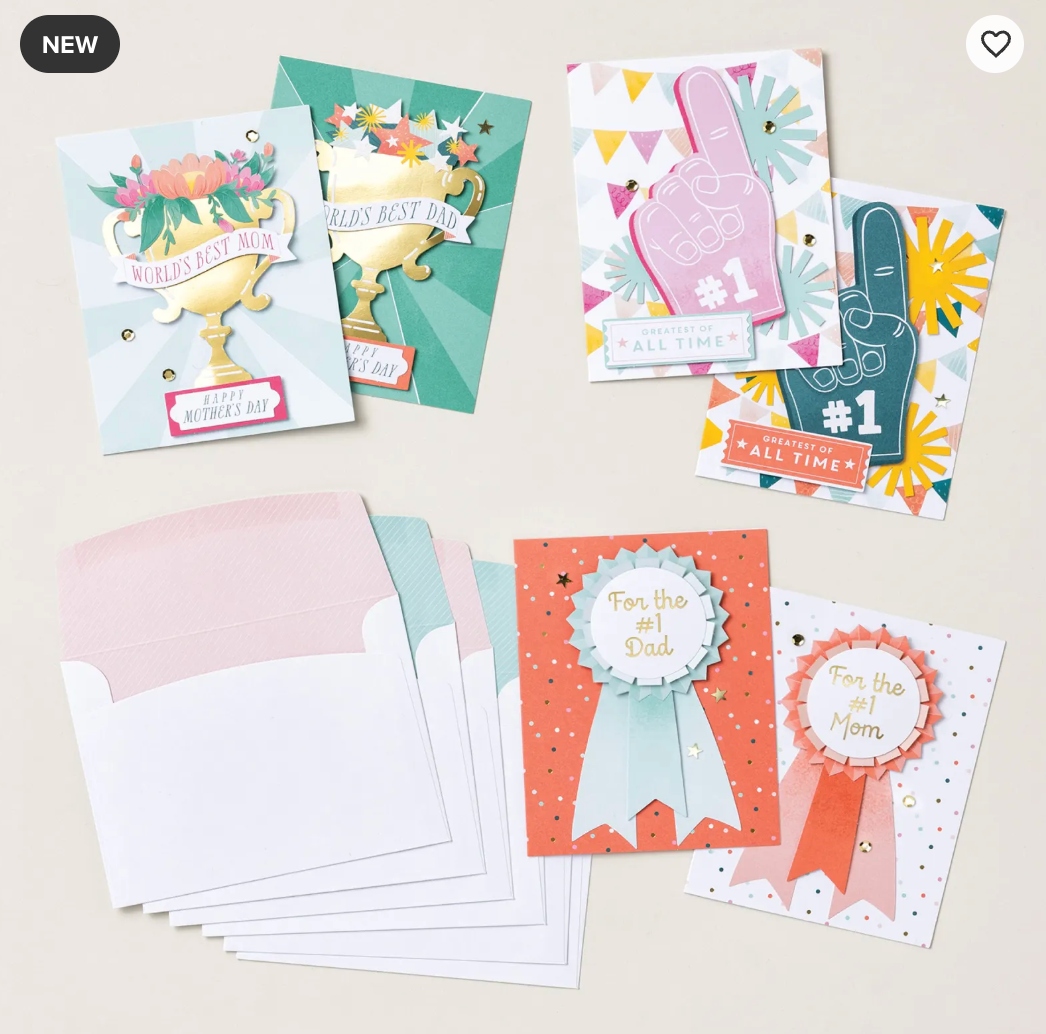
Wow! If you want to make some colorful cards, this Painted Skies Kit is for you!! Don’t we all hope we get to see colorful skies like those pictured on these cards? These cards feature rolling waves, palm trees, and lighthouses with the beautiful sunset as a background. In thinking about a vacation out on the water somewhere, you might often be able to catch a beautiful sunset like these pictured on these cards. If you preferred, you could turn these cards into scrapbook elements one way or another, I imagine! Think of the card front only being placed on a scrapbook page about your exotic trip, cruise, or beach vacation. After all, a scrapbook page is often just like a large card! Add the included sentiments and your card will be ready to send off to someone or even keep it for yourself! You might choose one to put in a picture frame for a home decor piece.

DETAILS
– Makes 9 cards: 3 each of 3 designs
– Folded card size: 4-1/4″ x 5-1/2″ (10.8 x 14 cm)
– Colors: Balmy Blue, Blueberry Bushel, Crushed Curry, Flirty Flamingo, Gorgeous Grape, Highland Heather, Hydrangea Hue, Melon Mambo, Night of Navy, Petal Pink, Poppy Parade, Pumpkin Pie, Real Red, Strawberry Slush, white
– Sentiments printed in Dutch, English, French, and German

Kit includes the items listed below.
– Step-by-step instructions
– 9 printed envelopes
– Precut paper pieces, printed labels
– Sequins
– Adhesive

Wow! Sequins!! I love when they put embellishments in the Kit! Just think what adding sequins to these cards will do!

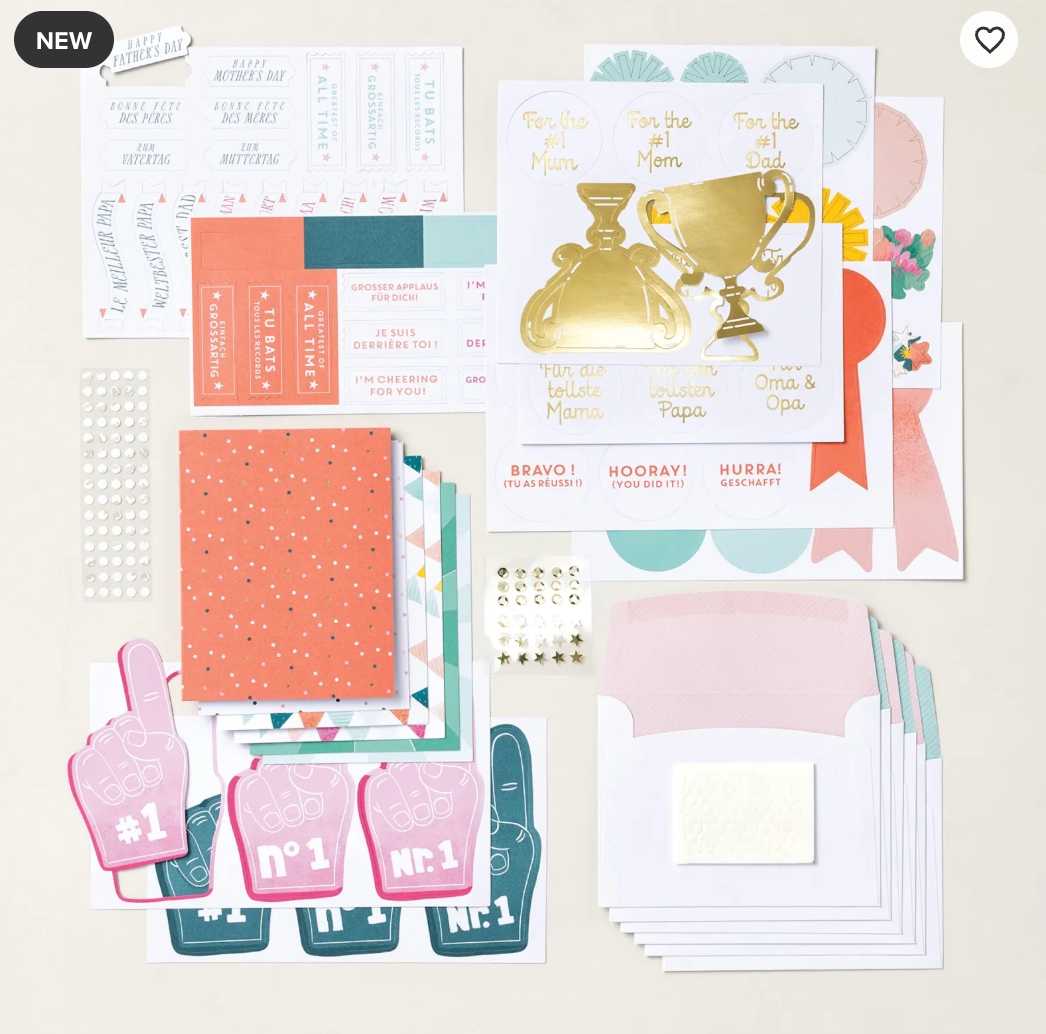
Here are the contents of the Kit. One of my favorite parts of opening a Kit is seeing what all is inside! These Kits are designed for anyone to make – new crafters or experienced crafters who enjoy making a project that is already designed for them. Of course, once you have the Kit, you can modify the project any way you like.

Painted Skies Kit Contents Apr 2026

One of the things I like about Stampin’ Up! Kits is that envelopes are often decorated in some way to go with the cards. Although we say, as stampers, we should stamp something on the envelope or do something special with the flap, we are usually in a rush to get the card in the mail and don’t take that step with the envelope.

No stamping is even involved with this Kit. The sentiments are already printed and ready to be punched out and adhered to the card. So if you wonder if YOU could make this Kit, no worries! Just follow the directions and pictures. The Kit is designed for everyone to be able to make the cards.

SHOP THE KITS COLLECTION!

Last Minute Easter Ideas!

Here are some easy and fun ideas you can make for Easter at the last minute! And it’s really the last minute today, isn’t it?! Just click on the title below each photo to go to the blog post with directions!
Three Easy Paper Easter Baskets

Three Fun Little Easter Baskets To Make

This has always been a popular post because these little baskets are so easy to make! Just use a square piece of cardstock or designer series paper. You can see one is cardstock with stamping, one is just designer series paper, and one is cardstock with designer paper layers decorating it. Everyone needs an Easter basket, even a little one! Use them for party favors/decorations at your Easter dinner table.

Diorama Excellent Eggs Easter Card Full View

Diorama Excellent Eggs Easter Card

This is a cute Easter card, but it could also be a home decor item, sitting out on a table! It’s easier to make than you would think. It is two layers of cardstock with the center cut out of the top layer and a little scene of any kind made in the background. The sides are scored and folded, then adhered so the card will stand up and you can see inside…..kind of like those old-fashioned sugar eggs with a hole to peek inside! Did you have one? I did and still have it!

Triangle Box Easter Bunny Treat

Triangle Box Easter Bunny Treat

If you have followed me for quite awhile you may know that I like to make these triangle boxes for treats or small gifts. They are easy to make and you can make them smaller or larger. This one is cute for Easter! Diagram and directions in my blog post.If you have followed me for quite awhile you may know that I like to make these triangle boxes for treats or small gifts. They are easy to make and you can make them smaller or larger. This one is cute for Easter! Diagram and directions in my blog post.

And if you still need more ideas or ideas for Easter cards, just go to the side (or bottom if you’re on your phone) and find the Category box. Type in Easter and lots of Easter posts, new and old, should come up!

Chocolate Bunny Easter Joke

My favorite chocolate Easter Bunny joke! Do you bite the ears off first or the tail?

Stampin’ Up! Last Chance List Refresh!

Last Chance Products Apr 2026 Sq Info

A lot of us who have been around for awhile are used to retirement lists when a catalog was ending, and certain products would no longer be sold, even if they were still in stock. Then Stampin’ Up! started a Clearance Rack and brought back some retired products and gave us a discounted price. For awhile now, we have had the “Last Chance Products” category. As demand for a product changes, Stampin’ Up! moves products to the Last Chance Products category in the online store and that begins the retiring process to make room for new products. The Last Chance Products will be an ongoing offer, so we can all shop this category at any time throughout the year! On April 1st, Stampin’ Up!

CLICK HERE to SHOP the LAST CHANCE PRODUCTS!

Easter Joy Candy Treat With Bunny

Easter Joy Candy Treat WIth Bunny

It’s time to make some candy treats for Easter, like this Easter Joy Candy Treat With Bunny. This is an easy little treat to make, and you can change it up for any occasion or celebration. For Easter, you can’t make a project any easier than to use the Easter Joy Specialty Designer Series Paper! Not every paper pattern is exclusively for Easter, but some are. Even the ones that are not “Easter” are just so pretty with bright colors with a bit of a shiny look to the paper. You can use this paper even after Easter.

Candy Treat Holder Diagram

To make this little treat box, start with a piece of cardstock 5 1/2″ x 7″. Once you know how to make it, I’m sure you could modify the size. Putting the 7″ top of the paper at the top of the Paper Trimmer or Scoring Tool, score at 3″, turn and score at 3″ on the other side. Or you could say, score at 3″ and 4″, giving you a 1″ space in the center for the box that will hold the candy. Turn the paper to the 5 1/2″ side and score at 1″ on both sides in the same way. Crease and fold on all the score lines. From the top and from the bottom, cut on the 1″ score lines up to the center 3″ score lines. This will make the flaps that will form the candy box inside.

Candy Treat Holder inside folding

In the photo above, you can see how those side flaps fold inward and make the little inside box to hold the candy. I adhered the flaps together to make the box, being careful where one side was shorter than the other, not to get glue past where it will be exposed. OR you can glue these flaps to the front and back sides of the treat box. I did it the way I did it, but realized I could have done it the other way, too. You will see when you assemble it!

Candy Treat Holder inside folding

Then decorate the front at least, maybe the back, too, if you like. I added a piece of the Easter Joy DSP with tulips and daffodils. The sides are 3 1/2″ wide x 3″ tall, so I cut the DSP at 3 1/4″ x 2 3/4″. The bunny is stamped with Memento ink on Basic White using the Easter Basket Stamp Set. The carrot is also stamped and colored with Watercolor Pencils (simply because my husband was in the way of my Stampin’ Blends!). I cut it out and had the bunny hold it in his paws!

At the top, I punched a small hole through both the front and back and ran a ribbon through. It’s the Garden Green 1/8″ Chevron Ribbon. Instead of tying it in a bow right there, I left the ends loose, and tied another piece of ribbon around in a box to hold those loose ends. I don’t very often think about doing ribbon like this, but I think it is a cute way to do it. Before you tie it up, though, remember to put your candy treat inside! Or a small gift! Have fun making your treat box!

Easter Joy Candy Treat With Bunny side

What a Great Product of the Month For April!

POM April 2026 Eyelet Blooms Yellow Ad

No, it’s not an April Fool’s joke! Stampin’ Up! started this new promotion back in December 2025, offering a Product of the Month for only $5.00 with a minimum $75 order, while supplies last! In the past four months we have had two stamp sets and two packages of designer series paper. For April, the offer is the Eyelet Blooms Die! When can you buy a die like this one for only $5?

“The Eyelet Blooms Die is the finishing touch you didn’t know you needed. Whether you’re crafting a card or creating a scrapbook page, it transforms the space with soft texture and refined detail. Its intricate pattern creates a full background that fills large areas beautifully for a polished, handcrafted look in one easy cut.”

You will be able to use this die lots of ways! You can diecut a piece of cardstock the same size as this die and use it that way or cut it into smaller pieces. Use just the little flowers. There will be many creative things to do with it! This is one of those dies, I think, that doesn’t cut out individual pieces, but you can use the entire thing as a background, or as I said, cut up smaller if you like. I suppose it looks a bit like quilting and there certainly are a lot of stampers also into quilting.

When you order and use any Rewards you have earned, remember those will be subtracted from your product amount, and you need to stay at or above $75 to be eligible to purchase the Product of the Month. Something will pop up on your screen when you hit the correct amount. So, depending on your order, maybe save your Rewards for a different order when you are not trying to get the Product of the Month.

Here are some details:

  • You MUST have a Stampin’ Up! account. If you need help setting up an account, you can ask me or contact Stampin’ Up! at 1-800-STAMP-UP.
  • Your cart total MUST be $75 USD or more at checkout to qualify.
  • The Product of the Month is limited to one month’s product per Stampin’ Up! account. They are only available while supplies last.
  • The only way you can qualify for Product of the Month is with a single order that reaches the qualifying amount, not several separate orders.

I could be wrong, but I think this die might be very popular for only $5 so if you really want it, better order early!

SHOP STAMPIN’ UP!

Slimline Easter Joy Easter Eggs and Bunny Card

Easter Joy Easter Eggs and Bunny Card

Here’s another Easter card, the Slimline Easter Joy Easter Eggs and Bunny Card, made with scraps! Scraps of what? When you diecut the basket in the Easter Basket Dies, the part that pops out inside the handle is a scrap. But you can use it for an Easter egg! Especially when you use the Easter Joy Specialty Designer Series Paper, which has such pretty colors and designs. If I wanted to be perfect, I could have trimmed the edges of the “eggs” to remove the slight scalloped edges, but they are barely noticeable.

This is a slimline card which means it is long and narrow compared to what we usually make. I like to make slimline cards 3″ x 6″ so that they fit into regular small envelopes (not the business size) that you probably have around the house. I started with a 6″ x 6″ piece of Soft Sea Foam cardstock, scored and folded at 3″.

I cut a strip of Shy Shamrock cardstock for the grass and snipped it from the top to make it 3D grass. You can make it as high or short as you like. The diecut “eggs” from the basket are “hidden” in the grass. I fit in four, made with the Easter Joy DSP. You can use either side of the paper, or you can use plain or stamped cardstock, whatever you like.

The greeting is stamped on a strip of Basic White with Shy Shamrock ink. The Easter bunny is stamped in Memento ink with a little light pink inside the ears and nose. The little Easter eggs scattered on the front of the grass are cut out from the Easter Joy DSP except for the yellow one, which is diecut from the Pastels Shimmer Paper. When you are cutting or die-cutting certain things, if you make extras and save them, then they are handy to add to future cards or projects when you just want a little something more.

If you look in the Online Store at the Easter Joy Designer Series Paper and scroll through the photos of the paper and sample ideas, if you go to the very end, you will see the idea with an egg carton and these Easter eggs along the back in the “grass” and an Easter tag greeting with a bunny. It’s very cute! Save your egg carton, and you can make one too!

Flowers Fair Lovely Day Card

Flowers Fair Lovely Day Card

I knew it wouldn’t be long until I tried out stamping and coloring all these flowers on this new stamp “set” I recently got! This Flowers Fair Lovely Day Card is how a card might look if you inked up the whole stamp and then had fun coloring in the various flowers. The coloring actually goes pretty easily and quickly, so don’t get scared about it!

If you do not want to do a lot of coloring, check out my monochromatic card using this stamp set HERE.

First, I chose the colors I was going to use to color the flowers, and then I used a couple of the same colors for the card itself. The card base is Melon Mambo with a Peach Pie layer. I had cut the Basic White cardstock to the usual 4″ x 5 1/4″ when I stamped it with the Flowers Fair Stamp Set, which really isn’t a set, it is one large stamp! We used to call these a background stamp. When I decided to add the Peach Pie cardstock layer, I just trimmed down the stamped piece to 3 3/4″ x 5″.

The flowers are colored with Stampin’ Blends alcohol markers, but you could use Watercolor Pencils, Pastels, ink and a Water Painter...whatever you like! In this case, the flowers are stamped with Memento Ink, but you could use Stazon if that suited your coloring better. However, we will be getting a new Hybrid black ink pad in the new May catalog! The flower colors are Melon Mambo, Peach Pie, and Pretty In Pink. First I used the Light Stampin’ Blend color, then used the Dark to add some shading. You can also add another color to the flower, you don’t have to stick with only the light and dark markers of one color. The leaves were colored with Soft Sea Foam Stampin’ Blends and maybe a little Granny Apple Green.

The greeting is stamped in Memento ink on Basic White and diecut with one of the circle dies in Spotlight On Nature. You will find the greeting in the Paradise Garden Stamp Set. I love this little pattern that cuts out around the edge. To help those little designs stand out, I cut a piece of Melon Mambo with a plain Stylish Shapes Die right behind it. I didn’t want to cover up any more flowers than necessary, so I didn’t want to make a larger layer. I just added it to show behind the greeting. This is popped up with Stampin’ Dimensionals right over the White With Gold 3/8″ Ribbon, which just goes across the lower part of the card, so it would be centered with the greeting. I also added a few Iridescent Foil Gems, which I love! These go with almost anything.

If you want to get this Flowers Fair Stamp Set, you will find it in the Online Exclusives. The Paradise Garden Stamp Set is there, also!

Have fun working with these pretty flowers here in Spring!

SHOP STAMPIN’ UP! ONLINE HERE!

Monochromatic Flowers Fair Big Hugs Card

Monochromatic Flowers Fair Big Hugs Card

I just got this Flowers Fair Stamp Set, and I was inspired to make a monochromatic card with it to keep things simple! I haven’t really used this In Color, Darling Duckling very much, even though it’s been around for a year. I wasn’t sure how this color, on a monochromatic card, would look, but I think I like it! This Monochromatic Flowers Fair Big Hugs Card was certainly quick and easy to make.

The card base is Darling Duckling yellow. The fold is at the top because I cut the full sheet of paper lengthwise at 4 1/4″, then scored at 5 1/2″ for the fold. The bunch of flowers, from the one big Flowers Fair Stamp Set, is really just one big stamp! It will fit on the largest Clear Block F. You can either stamp down on the Basic White paper, or you can lay the cardstock on top of the inked stamp, rub your hand all over the paper to make sure it inks well, then pull the paper off. If you are concerned about getting ink on your fingers, just place a piece of computer paper or pull your Grid Paper over on top of the stamp and rub your hand over the whole thing.

I chose a greeting from the Delicate Framing Stamp Set, which you will find on the Last Chance list, even discounted a little bit! I love the font and the sentiments in this stamp set. I stamped it in Darling Duckling ink on Basic White cardstock and cut it out with one of the small rectangular dies in the Nested Essentials Dies. For a little pizzazz, I die cut a piece of Darling Duckling cardstock into a small banner. I cut the banner in half and used each half on the sides of the greeting. No one can tell I only cut a small banner and cut it in half to get a longer length out of it. It’s my secret! I popped this whole thing up with Stampin’ Dimensionals. I tried adding some Darling Duckling Ribbon but I didn’t have enough space. Instead, I added three pearls from the 2025-2027 In Color Flat Pearls in Darling Duckling. I really like that addition on this card.

This one big Flowers Fair Stamp Set stamp can also be stamped in Memento ink and colored with whatever medium you like. I’ll be making some cards with Stampin’ Blends soon, I’m sure!

Easy-To-Make Paper Easter Baskets

Easy Paper Easter Baskets

These Easy-to-Make Paper Easter Baskets are not new ideas, but with new paper and stamps, it’s always fun to make new baskets for Easter! Nothing could be easier to make than these little baskets which will hold some “grass” and candy treats! They can be made larger or smaller depending on what you need. Just start with a square piece of paper!

Easter Basket Scored and Cut

This is a 6″ x 6″ square of Fresh Freesia cardstock. You can use designer series paper as well, as I did on the other basket. The cardstock is scored at 2″ and 4″, then turned and scored at 2″ and 4″ so it looks like a tic-tac-toe board. Fold and crease all the score lines. Cut vertically on the bottom score lines up to the first horizontal score line, then from the top down the same way. This makes the center sections, top and bottom, cut so that everything can be folded to make the basket. If you want to, round the corners with a corner rounder punch or just with your scissors. Also, cut a handle to match about 8″ or 8 1/2″ long and about 1/2″ or 3/4″ wide.

Fresh Freesia Easter Basket Layout

You can use the cardstock or designer paper as is after it is scored and creased, or you can use cardstock for the base of the basket and add designer series paper (or stamped images) to the sides to decorate. For this piece of Fresh Freesia cardstock, cut at 6″ x 6″, each square is 2″ x 2″, so to decorate, the designer paper is cut at 1 7/8″ x 1 7/8″ and glued on the four corners. The paper I used is the Lovely & Beautiful Specialty Designer Series Paper. This paper has gorgeous, large flowers primarily on the pages with gold foil accents, but I also loved this paper with the very small flowers. I think it is perfect for an Easter basket!

Fold the sides in to form the basket. Be careful where you apply adhesive (I preferred the Multipurpose Liquid Glue for those seconds when you can move the pieces into place, but you can use Stampin’ Seal if you like) so that you don’t get glue where it will show or be exposed. If you think ahead, try to insert the handle ends between the flaps on each side. If you forget, it is okay; it won’t be noticeable once you put the treats inside.

Decorate the basket however you like. I stamped bunnies from the Easter Basket Stamp Set and cut them out with dies in the Easter Basket Dies. They are colored or shaded with Stampin’ Blends alcohol markers. For the background behind the bunnies, I diecut circles from the Stylish Shapes Dies on one, and the Spotlight on Nature on the other basket. I stopped there to keep it simple, but you could stamp and diecut other Easter images with the Easter Basket Stamp Set to go with the bunny, cut out carrots, flowers, or eggs from the Easter Joy Designer Series Paper. You could also add a ribbon and bow to the handle. Do whatever you like! Put some Easter grass or paper “shred” in the basket or even make your own by cutting up cardstock into very thin strips, crimping with a crimper or crushing in your hands.

Fresh Freesia Easter Basket

You can also make the basket just out of designer series paper, as I did with this basket. These gold foil flowers are the other side of the Fresh Freesia print flowers on the first basket. The basket is usually a little stronger made with cardstock, but you can use either. These baskets are cute for little gifts, party favors, or maybe table decorations at each place setting at your Easter dinner. Change the decoration and make these baskets for any occasion for little treat or gift holders.

Lovely & Beautiful Gold Easter Basket

Here is a link to other baskets I have made and posted on my blog in other years. They are still favorites! And a couple of baskets from last year! These are all fun to make and go together quickly, especially after you make the first one and see how they go together. You can even just make one or more for your own home decor! Bet you can’t make just one!

April’s Paper Pumpkin Kit! Join Now!

Paper Pumpkin Lakeside Retreat April 2026 (1)

Here’s the new Paper Pumpkin Kit, coming to subscribers’ mailboxes mid-April! Be sure to jump in and subscribe to get your fun box in the mail and have an easy project to make with all the supplies included in the box! Nothing to design, the ideas are all there for you! There is even a video you can watch if you want to see the assembly step by step. Or use the supplies in the box and do your own thing if you want.

Show your appreciation for the men in your life with cards inspired by tranquil
waterside scenes.

  • Makes 9 cards: 3 each of 3 designs with 9 coordinating envelopes
  • Precut paper pieces and enamel pebble embellishments
  • Stamp set tailored to male recipients
  • Coordinating colors: Balmy Blue, Misty Moonlight, Old Olive,
    Peaceful Pine (Classic Stampin’ Spot), Pecan Pie, Pool Party

That’s a new 2026-28 In Color in there (if you didn’t notice!)!! (Peaceful Pine!)

Paper Pumpkin is a monthly subscription kit, usually for making cards but sometimes for other projects like tags, home decor, small albums, and more! No risk, no obligation to continue for any length of time. Skip a month when you need to. It’s a gift you give yourself….or maybe a gift for someone else, too!

And once you are a subscriber, you may purchase any past kits or refills (no stamp set or ink spot) that are available in the Online Store! Try it! You’ll enjoy it!

JOIN PAPER PUMPKIN TODAY!

Coming Soon! Stampin’ Up! Virtual Album Retreat

Virtual Album Retreat 2026 Flyer

Today is the first day that you can purchase this Virtual Album Retreat Kit, the Happiness Is Here Kit, and be part of the event and presentation by Stampin’ Up! staff. The event will be held in a live stream in a private Facebook group. If you cannot attend part or all of the live event, it will be recorded, and you can watch it at your convenience.

What is this event? It will be a live presentation by Stampin’ Up! employees at the Riverton, UT home office for crafters who are interested in scrapbooking. It will be for experienced scrapbookers who would like to pick up some tips and get ideas, and also for beginners who want to get started or inspired in memory-keeping. Just purchase this kit in the Online Store, and you don’t have to do anything else. Closer to the time, you will receive an email giving you more information on how to access the retreat in the Facebook group. If you are not on Facebook, maybe you could create a Facebook account only for this and future virtual retreats so that you can participate. You wouldn’t need to use Facebook for anything else.

This virtual retreat is for three days, April 29 – May 1, and begins at 2:00 pm MT each day. You will create a 10-spread scrapbook album (the album itself is not included) alongside the presenters. From my experience watching other Stampin’ Up! virtual events, I can tell you that you will hear new tips and techniques that you can use. And maybe even more important, you will have FUN!

Virtual Album Retreat April 2026 Photo & Info

Click on the above graphic for more information plus go to this link to read all about it! Let me know if you have any questions after you check it out!

Stampin’ Up! Happiness Is Here Kit & Information

St. Patrick’s Day Green & Gold Card

Green & Gold Good Luck Card

If you are celebrating St. Patrick’s Day today, this St. Patrick’s Day Green & Gold Card is for you! It turned out looking a little less traditional than I was expecting to make, but it certainly has lots of green! And there is gold and shamrocks, so I think it qualifies as a St. Patrick’s Day card.

The card base is Shaded Spruce cardstock. The green layer is the beautiful “other side” of the Garden Poetry Designer Series Paper. You will find this paper and Suite Collection in the March 2026 Online Exclusives. I love the different shades of color in this section of the paper. It makes for quite a striking background for this card, I think. This paper is layered on Gold Foil.

The rest of the card uses several different products to make the design. It wasn’t anything I imagined in my mind when I started, but piece by piece, I came up with this! The gold frame around the center is part of the Foiled Frames & Labels Ephemera Pack. The gold piece in the center of the frame is in the Beautifully Adorned Ephemera Pack. In another ephemera pack, Time For Celebration, I found this large shamrock, plus the two little ones lower on the card. The greeting is in the Greetings For All Ephemera Pack.

I love having all these ephemera packs to choose from when I am looking for a quick greeting or a fun image. They often make life easier when you are trying to make a card in a hurry!

Easter Card With Basket of Eggs

Easter Card With Basket of Eggs

This Easter Card With Basket of Eggs was fun to make and has a slightly different design just to make life interesting! You may notice that the top flap of the card does not come all the way to the bottom of the card. That just makes it a little more fun to open up this card for Easter!

The card base is Pretty In Pink (although in the photo it almost looks like Melon Mambo or some darker pink). Cut the full sheet of cardstock in half vertically at 4 1/4″, then score at 5 1/2″. That will give you either a side fold or a top fold. This card design will have the fold at the top, although you could really do the same type of design with a side fold.

On the front flap of the card, cut off whatever measurement you would like to shorten it. I cut off 1 1/4″ from the bottom of just the front of the card. That leaves space showing from the inside of the card on the outside on which you can add decorative paper, stamping, or a greeting. Stamp the greeting either right in that empty space or stamp it on another paper and adhere it, as I did.

The background layer for the card front is just a whimsical design in the Easter Joy Specialty Designer Series Paper. It has many colors, so you can choose any for your card base. I chose Pretty In Pink. This is a retiring In Color soon, so if you need more, perhaps you should stock up! This piece of DSP is cut at 4″ x 4″.

The Easter basket is cut from one of the papers with a basket weave look and color to it. Then I added a Crumb Cake scalloped edge to the basket. The Shy Shamrock green grass in the basket is also diecut. All of these dies are part of the Easter Basket Dies, which are currently unavailable. Hopefully, you have these dies already. I also diecut some Easter eggs out of the Pastels Shimmer Paper and put those in the Easter basket! At the top of the basket handle, I added a double bow tied with the Bubble Bath 1/8″ Faux Linen Ribbon. I love this ribbon even though it is not an exact color match. It is often just the right size to use when you don’t have space for wider ribbon.

On the inside of the card, I added a 4″ x 4″ Basic White cardstock piece. To the bottom of that, I added a piece of the Easter Joy designer paper in green, added a stamped, diecut, and colored tulip plus stamped a bunny right on the paper. He has a little color and shading with Stampin’ Blends.

Easter Card With Basket of Eggs Inside

At the bottom of the card, I added a “Happy Easter” greeting on a scrap strip of Basic White, which is adhered in that space. This is stamped with the Easter Basket Stamp Set in Pretty In Pink ink. It would also be pretty to stamp the greeting directly on the Pretty In Pink with Pretty In Pink ink plus some little image, too.

This is an example of how just one simple thing, making the front flap of the card shorter, makes for an unexpected, extra-special card design!