Monthly Archives: July 2019

Daisy Lane Floral Friend Card

Daisy Lane Floral Friend Card

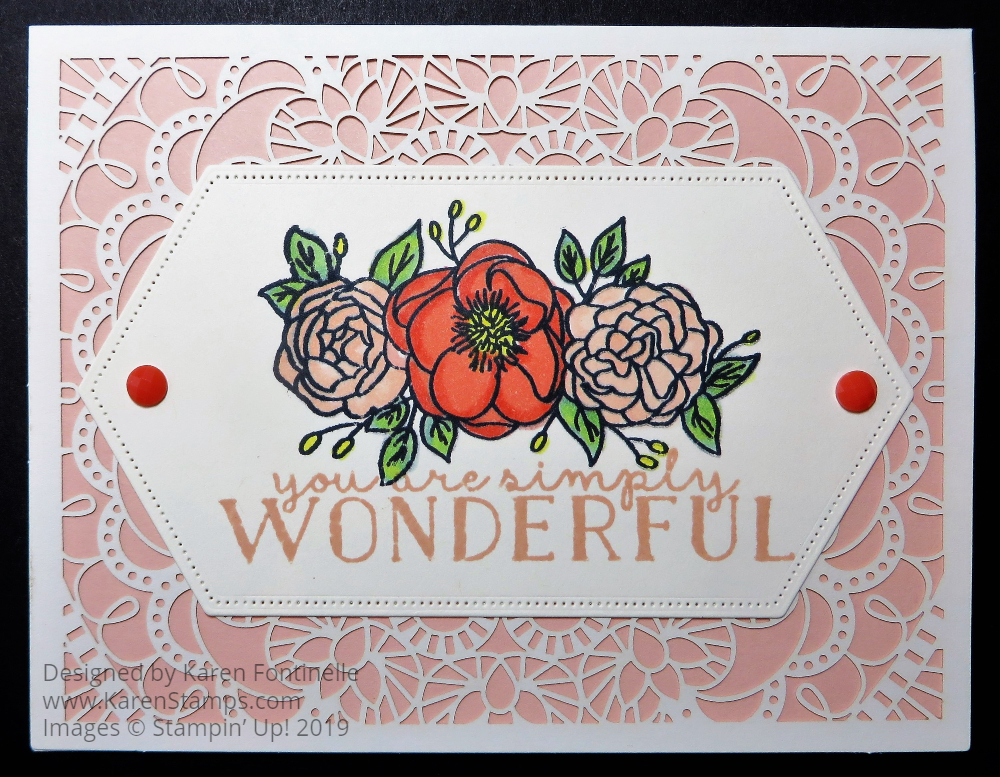
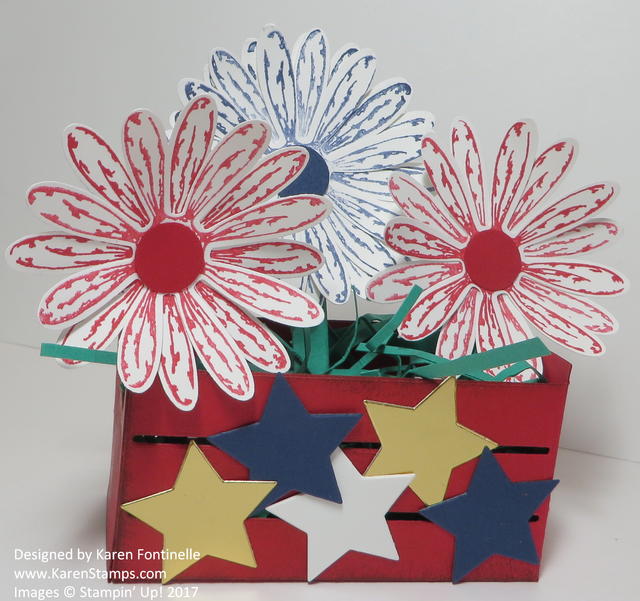
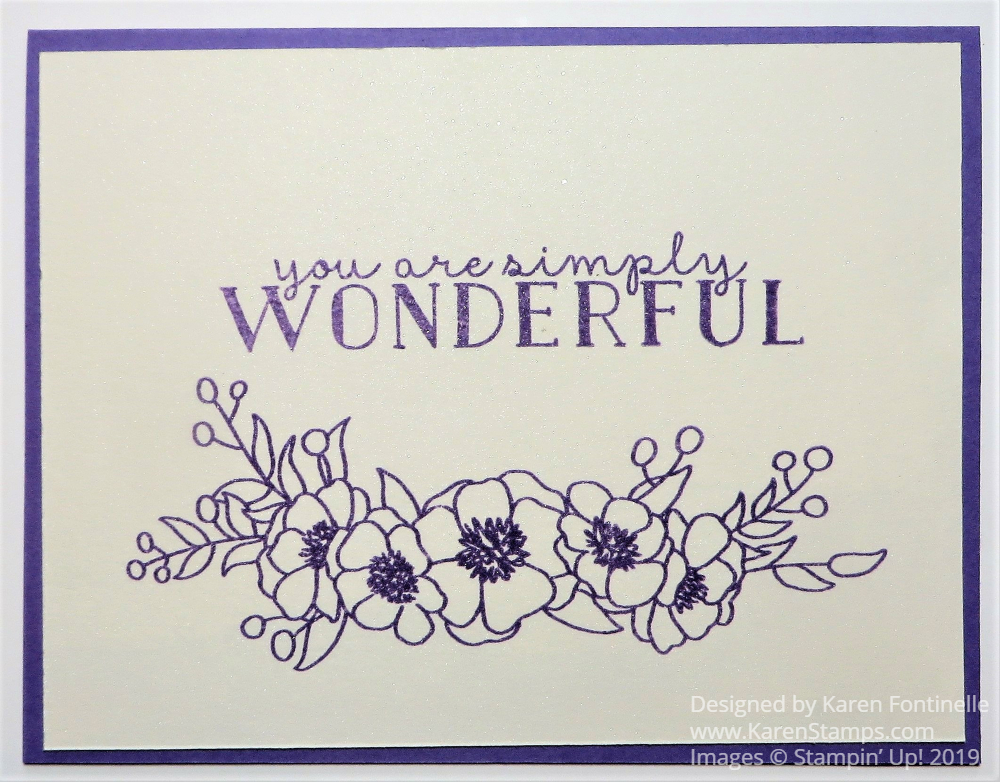
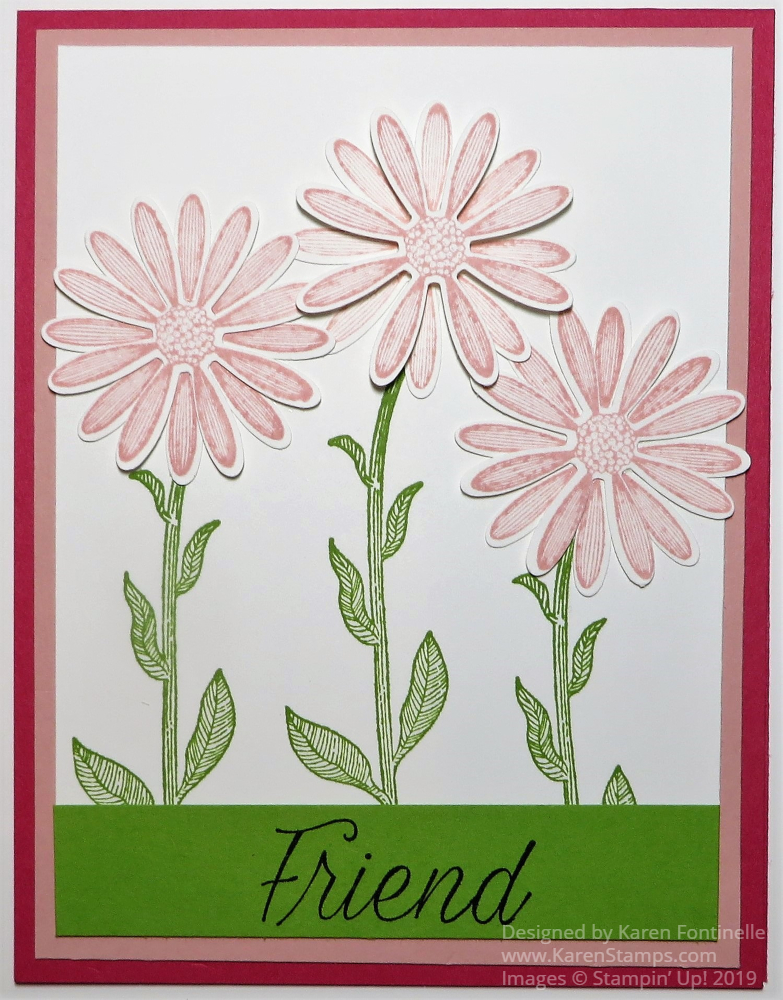
This new Daisy Lane Stamp Set is easy and fun to use to make a card, like this Daisy Lane Floral Friend Card. I kept forgetting to order this new stamp set and smaller Medium Daisy Punch. As you can imagine it pairs with the Daisy Punch we have already had that has been quite popular.

Since this was my first card with this stamp set and punch, I wasn’t too sure what I was going to make. I chose Melon Mambo for the card base since I thought about it but didn’t choose it the other day for a card! For a layer I used Blushing Bride. The top layer is Whisper White.

First I stamped the flower stems with Granny Apple Green Ink. I just stamped them and thought what else I would do. Then I stamped six daisies with Blushing Bride Ink and punched them out so I could have a double layer of daisies to make a fuller flower. It seemed like those three daisies were going to look fine on the card. Two of them I glued together in the center with my Multipurpose Liquid Glue and the center one I popped up the top daisy on a Mini Stampin’ Dimensional. All three daisies are glued to the card with the Multipurpose Liquid Glue.

Now the question was where to put the greeting! I wanted to use one in the Daisy Lane Stamp Set so I just cut a strip of Granny Apple Green Cardstock to match the ink and just stamped the word “Friend” on it and adhered to the bottom of the Whisper White. This covered up my uneven placement of the stems and provided a place for the greeting! At this point, I thought the card looked fine and I stopped! Sometimes you have to know when to stop!

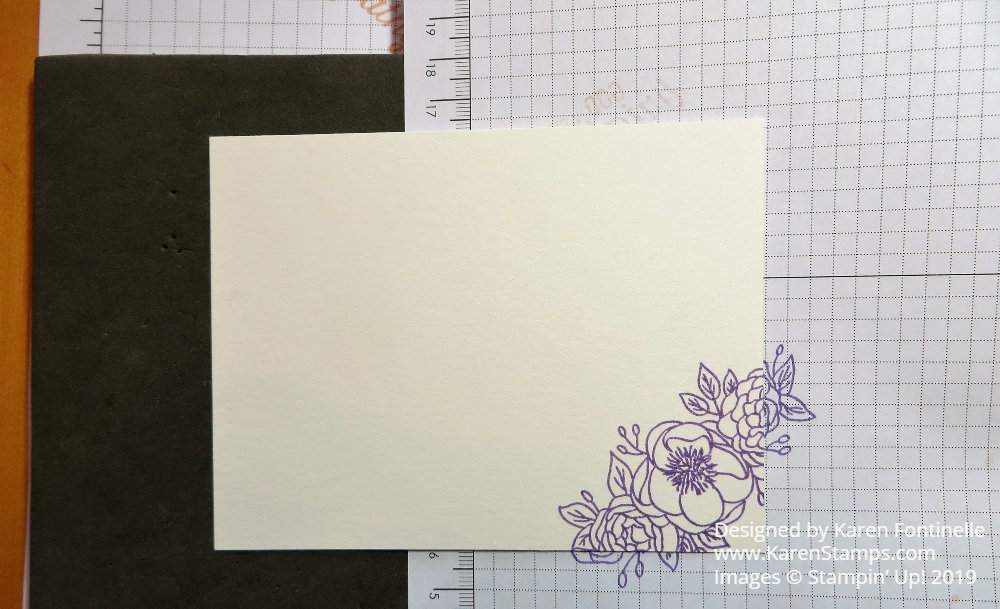
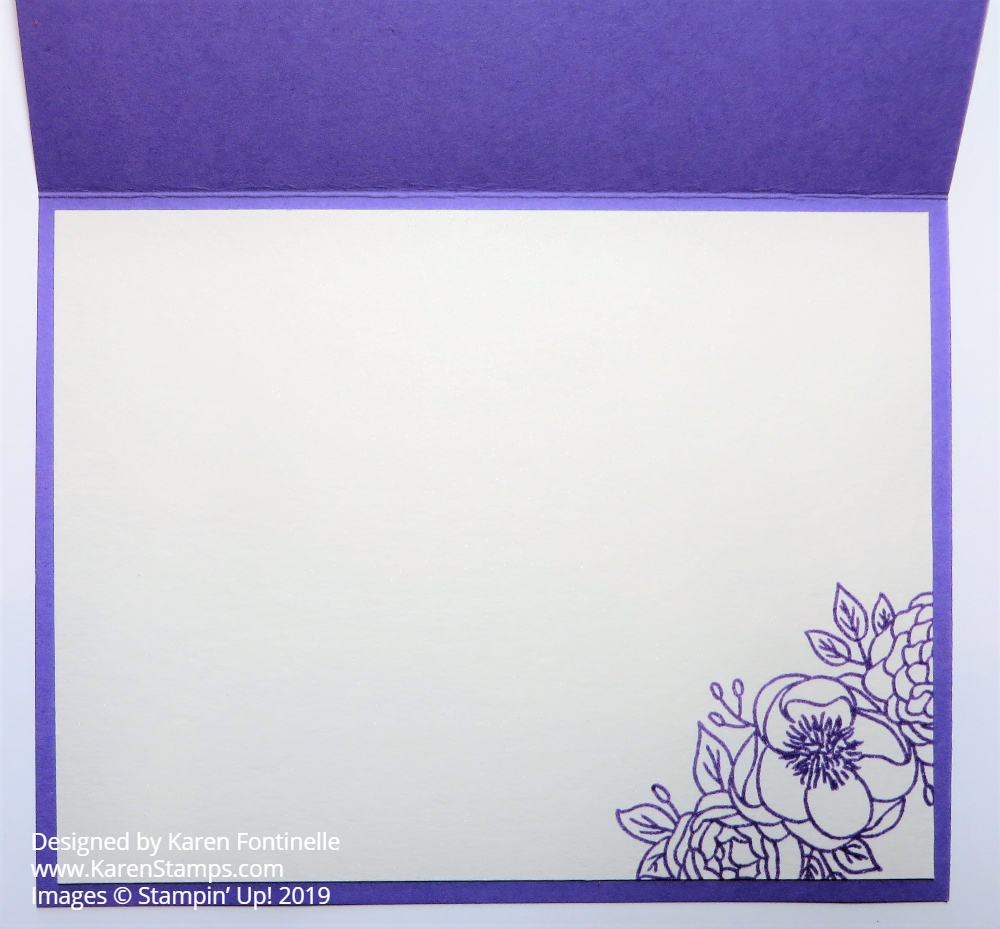
For the inside of the card, I cut a layer of Whisper White and stamped a Blushing Bride daisy in the corner since the Melon Mambo would be a little dark to write on.

 You can purchase the stamp set or punch separately or you can save 10% by buying them in the Daisy Lane Bundle. And if you really like daisies, you will also want the Daisy Delight Stamp Set and Daisy Punch that we have had in a catalog before.  This Daisy Lane Floral Friend Card is an easy one to make with just stamping and some daisy punching!

Paper Pumpkin Fall Kit Coming in August….with a Twist!

Sign me up for THIS Paper Pumpkin Kit for sure!!! (Of course, I am already signed up!) For one thing, when the kit arrives at my house it will be so ungodly hot in the middle of August here in Houston, Texas that I will be thrilled to think about fall! Just don’t miss the deadline of August 10th to sign up, the sooner the better. This may be a really popular kit since there are clues and looks like lots of cuteness, so please sign up early if you can.

JOIN PAPER PUMPKIN HERE!

If you want some clues, keep reading! Then decide to subscribe (or order a Prepaid Subscription in the Online Store!) Watch this video to find out a little about the kit! Or cover your eyes if you want to be surprised!

Did you catch the new twist to the August Paper Pumpkin Kit? There will be an “Add-on” that can be purchased beginning August 1st in the Stampin’ Up! Online Store!

August Kit Information

  • Makes 6 fall-themed gift bags
  • Makes 12 fall-themed gift tags
  • Coordinating colors: Blackberry Bliss, Calypso Coral, Crumb Cake, Crushed Curry, Merry Merlot, Mint Macaron, Old Olive, Pretty Peacock, and Soft Suede

Add-On Information

Gift of Fall Add-On Bundle (item 152885)
Price: $10.00

  • Includes 24 card bases of 2 different designs with coordinating envelopes (notecard size)
  • Available August 1, while supplies last.
  • Purchase at Stampin’ Up! Online Store.
  • Not included with an August Paper Pumpkin subscription
  • Important note: The Gift of Fall Add-On Bundle is not needed to complete the August kit projects.

If you like fall, especially after, or during, a hot summer, you will really enjoy this kit, looking forward to colored leaves and cooler temperatures!

Join Paper Pumpkin!

Free As a Bird Notecard & Envelope

Free As a Bird Notecard & Envelope

Even though I posted a card with the Bird Ballad Designer Paper yesterday, I think that whole suite is so pretty I had to do something else with it for today, the Free As a Bird Notecard & Envelope. My original idea was to just stamp directly on the front of the Notecard, but since I was going to use my Stampin’ Blends to color in the stamped image, I didn’t want to have the coloring show through to the other side. I’m not positive it would since the notecard paper seems fairly heavy, but no point in taking a chance! I even decided to add a Petal Pink layer with a narrow margin behind the stamped layer.

Free As a Bird coloring
Back side of Whisper White

I absolutely love coloring with the Stampin’ Blends alcohol markers! Don’t be intimidated to use them, thinking about “blending”. Just color! I usually use the light color first and then maybe color the edges or highlighted areas on the stamped image with the darker color. Then maybe I even go back and color over again with the lighter marker to blend any rough lines. Just play and do whatever you want. I can almost guarantee you will be satisfied with the result with these markers.

Since I originally thought I was going to stamp the birds directly on the notecard, I knew I just had that one chance to get it right so I pulled out my Stamparatus®! In order to see how everything lined up, I put down a piece of clear Window Sheet on top of the notecard so I could stamp the image on the window sheet and see if anything was crooked (usually the words). Be sure to use the gridlines on the Stamparatus plate to see if you have your stamp or words straight if that is what you want. I could also put two stamps on the Stamparatus at one time and get everything spaced just right!

Free As a Bird & Stamparatus

When you have everything where you want it, remove the window sheet, make sure the cardstock is still in the corner or wherever you stamped it with the window sheet and have your magnets holding down the paper. Then stamp! If the image doesn’t come out fully stamped, just ink up the stamp again without moving anything and stamp again (or again if necessary) until you have a good image. That’s one of the most important benefits of the Stamparatus.

As I have said before, the Note Cards & Envelopes are just handy to have on hand always. When you want to do some quick stamping and write a short note, they are perfect. AND they come with their own mailable envelopes! To fancy up the envelope a little bit, I used a piece of the Bird Ballad Designer Paper on the back flap! You could put the paper inside as a liner if you wanted instead. I put the adhesive on the envelope flap, then glue on a larger than needed piece of paper. Then I trim off the excess with scissors. So easy and so pretty!

Always remember to be careful with the magnets because they really like to jump together and then they are difficult to pull apart. These magnets are very strong, which is good, until they get stuck together! Watch out for your fingers, too! I like to put the magnets on opposite sides of the table if I don’t have then in use so that they are FAR apart!

Check out all these great products in the Stampin’ Up! Online Store…..the Bird Ballad Suite, the Note Cards & Envelopes, the Stampin’ Blends Markers, and the Stamparatus. Stampin’ Up! has the best products! Have fun stamping something today!

Easy Bird Ballad Thank You Card

Easy Bird Ballad Thank You Card

This Easy Bird Ballad Thank You Card is just that – easy! I didn’t even know what I was going to make until I pulled out the Bird Ballad Designer Series Paper. This beautiful pattern appealed to me. It is gorgeous. Such a soft background with a watercolor look and flowers and birds that look like they were colored with Stampin’ Blends markers…..which they were in the creation of this paper by the concept artist at Stampin’ Up! so that WE stampers could then color in stamped images and they would match the paper!

To make this card, I just chose colors listed on the back of the designer paper package. I always write the color names with a marker on the back large enough so I can read them without squinting. Stampin’ Up! must have tiny printing machines!! The card base is Pool Party and a layer of Petal Pink.

The die-cut piece was already in my bag of cardstock so I used it! It is from the Stitched Labels Dies. I also had that Petal Pink circle as a scrap so I die cut a Whisper White circle with the Stitched Shapes Dies. The greeting is from the Free As a Bird Stamp Set. Then I added two Artisan Pearls (retired).

This is an easy card to make with cardstock and designer paper plus a greeting. You could use this card for many occasions. If you don’t already own this Bird Ballad paper, whether you are a fan of birds or not, be sure to put it on your next order!

SHOP STAMPIN’ UP! ONLINE TODAY!

Join Paper Pumpkin!

Paper Pumpkin Sail Away Small Banner July 2019

Don’t Miss Out!

It’s time to sign up for Paper Pumpkin if you want to get the July 2019 Kit! Deadline is July 10th!

Stampin’ Up! has begun coordinating Paper Pumpkin kits with product suites in the new Stampin’ Up! Catalog. This July Kit coordinates with not one, but THREE product suites that you can mix and match with the kit!

Here is what you will be making (don’t read if you want to be surprised!):

  • Makes 9 mailable cards with envelopes (3 each of 3 designs)
  • Coordinating colors: Gold, Kraft, Mossy Meadow, Old Olive, Pear Pizzazz, Pretty Peacock, Sahara Sand, Seaside Spray, and Terracotta Tile

I’m sure you will have fun with your Paper Pumpkin Kit! Just don’t miss out on the original shipment because they often don’t have many extra kits later! The cost is only $22/month and that includes shipping plus everything you need in your kit. With your first kit, you even receive a special acrylic block to use with the stamp set inside.

Paper Pumpkin Kit July 2019 Sailing

JOIN PAPER PUMPKIN HERE! DON’T MISS OUT!

Beautiful Friendship Floral Card

Beautiful Friendship Floral Card

Here’s my first go with the Beautiful Friendship Stamp Set, this Beautiful Friendship Floral Card. It was a stamp set that I kind of missed at first, then when I noticed it, I ordered it right away.

I did the easiest thing……just stamped to play with the stamps. Remember to put a little cushion underneath these photopolymer stamps for the best image. I used the Stampin’ Pierce Mat and of course, using the Stamparatus is always a good idea so you can re-stamp if you don’t get a good impression at first.

When I went to get my paper out, I thought I would use Melon Mambo, one of my favorite colors but I haven’t used it much recently. However, when I saw Poppy Parade on top, I just chose that and grabbed some Daffodil Delight for a layer behind the Whisper White. See! You don’t always have to have everything planned out when you make a card!

The flowers are stamped in Poppy Parade with Granny Apple Green leaves. Then I thought I would add some extra flowers with Highland Heather and Daffodil Delight. When I was finished, I realized probably some of those stamps were really meant to stamp the inside of the flowers, but I was finished and happy with my card so I didn’t go back! I’ll have to try to make them more authentic next time!

Since I didn’t leave myself much room for a greeting, I used one from my other new stamp set, Modern Heart. I have to play with that stamp set, too! Sometimes it is nice to “just stamp” and not die-cut or embellish or color in or whatever. Just simple! I think this Beautiful Friendship Stamp Set will produce lots of gorgeous cards and has very nice sentiments as well!

SHOP STAMPIN’ UP! ONLINE TODAY!

Bloom & Grow Bird Ballad Laser-Cut Card

Bloom & Grow Bird Ballad Laser-Cut Card

If you want to get an easy start to cardmaking, start with the Bird Ballad Laser-Cut Cards & Tin and add a focal point using the Bloom & Grow Stamp Set. These beautiful laser-cut cards come in a nice tin that you can use for a gift with the cards or separately. You could even just add a simple greeting and let the laser-cut design stand on its own, or you can some other card layers and designs to the front.

I first made THIS CARD with the laser-cut cards, but today’s card is slightly different. On my first card, I adhered the colored cardstock to the inside of the card so the recipient could see the laser design easily when they opened the card. But on today’s card, I carefully adhered the pink cardstock to the back of the laser-cut design carefully, with tiny drops of the Multipurpose Liquid Glue. This has the advantage of covering up the look of the layer placed on the front of the card.

The design on the front of the card is stamped with a floral stamp in the Bloom & Grow Stamp Set in Memento Ink and colored in with Stampin’ Blends Markers. Then it is die cut with the largest of the Stitched Nested Label Dies.

For extra embellishment, I used two of the 2019-2021 In Color Faceted Dots on each end. There are also coordinating dies for the Bloom & Grow Stamp Set, which you might like, and which you can buy in a Bundle with the stamp set and save 10%.

Be sure to check out the Bird Ballad Laser-Cut Cards & Tin and the Bloom & Grow Stamp Set (plus dies) because both are beautiful products and will help you make very creative and beautiful cards!

SHOP STAMPIN’ UP! ONLINE HERE!

NEW-STYLE 3D EMBOSSING FOLDERS NOW AVAILABLE

You may or may not have noticed that Stampin’ Up! had introduced new 3D Embossing Folders from a new supplier, but not all of our previous “Dynamic” embossing folders had been changed over.  But now, these six 3D Embossing Folders, in the new style (a little bit thinner) are available in the Stampin’ Up! Online Store!  More are on the way!
As we talked about before in THIS POST, you may need to use an extra shim, very thin, to make your folders work with your die-cutting machine. Each machine will be different.  To remedy this problem, Stampin’ Up! introduced the new 3D Embossing Folder Plate. I have so far forgotten to order one, but I have heard it works well.
Watch this video with George from Stampin’ Up! for tips on using the new style dies, 3D embossing Folders and 3D embossing folder plate.  And be sure to listen to his advice at the end!!!

These new 3D Embossing Folders are carryover ones from previous catalogs. The brand new designs in the new catalog were already in this 3D format.

If you have any questions, just ask!  If you read the link I posted in this article, you will read about the sandwich that I found that works with my machine, until I remember to order the new 3D Embossing Folder Plate!

Remember, Bonus Days are going on this month of July at Stampin’ Up!  For every $50 you spend, Stampin’ Up! will email you a $5 coupon to use in August!

Easy, Fun 4th of July Papercrafting Ideas

Uncle Sam 4th of July Patriotic Favor

Uncle Sam 4th of July Patriotic Favor

Use a paper towel roll or something similar, maybe a tall round tin, and decorate like Uncle Sam for the 4th of July. Fill it with candies for a party favor or hostess gift!

4th of July Fireworks Card

Happy 4th of July! Happy Independence Day!

You might not have these exact stamps, but you have something you can use! I know you do! Find some odd stamp image that will resemble fireworks!

4th of July Patriotic Crate With Daisies

4th of July Patriotic Crate of Daisies

If you have the Wood Crate Dies, you can make this easily and use the Daisy Punch, too! If you don’t own the Wood Crate Dies, just make a little box or use a little box you have. Make some patriotic flowers (and maybe add some candy!) and you are set!

4th of July Candy Treat Pouch

4th of July Candy Treat Pouch

These are really easy to make! You can make a small one with a piece of 6″ x 6″ piece of paper or a larger one with a 9″ square piece of paper. Decorate for a patriotic treat and add candy. You can easily change this up for any occasion!

4th of July Wood Crate Candy Treat Holder

4th of July Wood Crate Candy Treat Holder

Another crate but you could also just do a cello bag of candy or some other treat! Fill it with some red, white, and blue candies, tie on a ribbon and maybe add a 4th of July tag!

I hope these past projects give you some ideas for whatever 4th of July projects you would like to make for decorations or treats!

Easy Monochromatic Bloom & Grow Card

Easy Monochromatic Bloom & Grow Card

I thought maybe for people who don’t like to do a lot of coloring with outline images such as this, I would try a monochromatic method of stamping and making a card as in this Easy Monochromatic Bloom & Grow Card.

This card is stamped with Highland Heather Ink on Shimmery White Cardstock. I love this cardstock! It has the slightest shimmer to it and works for watercoloring which you can’t do very well with Whisper White Cardstock. The flowers are from the Bloom & Grow Stamp Set. I think if you stamp any of the flower stamps in a color, it is fine and you don’t have to color in all the flowers, leaves, and buds. I personally like to color, especially with the Stampin’ Blends Markers, but this is a quick and easy way to make a card! The greeting is also from the same stamp set.

So just stamp the flowers and the greeting and adhere to a card base and you’re done! The card base for this card is Highland Heather. Couldn’t be easier!

Since the card base color is not white, you might like to add a layer of Shimmery White Cardstock on the inside of the card to add your personal note or greeting. To decorate this inside layer, you might like to stamp something on it. I chose one of the other flower stamps and wanted to stamp just the corner of the cardstock. As we know, it is helpful to stamp photopolymer stamps on top of something with a little cushion. I used the Stampin’ Pierce Mat, but I didn’t want to get ink on it. Either grab a piece of scrap paper or just fold over your Grid Paper (which is SO handy to use underneath your stamping project!) to protect your Pierce Mat.

Easy Monochromatic Bloom & Grow Card Inside Stamping
Easy Monochromatic Bloom & Grow Card Inside

Now, if you like a simple card, but you want just a little bit of bling, add a few sequins! I used the Basic Adhesive-Backed Sequins just to add a little bit of something to the card front even though I was keeping it quick and easy.

Easy Monochromatic Bloom & Grow Card With Sequins

If you want to make some quick and easy cards, look through your stamps and see what you could use stamping in just one color and keeping it simple and monochromatic.

SHOP STAMPIN’ UP! ONLINE!

Bonus Days! For every $50 you spend in July, get a $5 coupon by email to spend in August!

Colorful Seasons 4th of July Card

Colorful Seasons 4th of July Card

It’s time for fireworks so here is a Colorful Seasons 4th of July Card all ready to inspire you to make some kind of fun card for the 4th of July! Can you believe it is July 1st already?!

I don’t have a “4th of July” stamp set so I had to use what I had. I looked through some stamp sets looking for something I could use for fireworks. I noticed these little stamps in the Colorful Seasons Stamp Set that I stamped in Real Red and Night of Navy Inks. I used the stamp that was half that image but stamped it on both sides to make the firework, but I also see in the stamp set there is one stamp that would have made a full image! Oh well. I think mine came out all right! The Crushed Curry fireworks are actually the tops of palm trees from the Waterfront Stamp Set!

The chairs are stamped from the Colorful Seasons Stamp Set. Originally I was going to die cut the Adirondack style chairs in the set of Seasonal Layers Dies but then I changed my mind and stamped these cloth folding chairs, something more like we will take to watch fireworks Thursday night.

The background on the card is stamped with images from the Waterfront Stamp Set for the grass and some blue sky. I used my Aqua Painter to soften the ink a little bit, although you can’t use much water on Whisper White Cardstock. You could also just sponge on some ink for a background. I do love that Waterfront Stamp Set after ignoring it when it first came out!

I didn’t add a greeting, mainly because there wasn’t any good space to put one! Maybe I will add one later or just stamp something on Whisper White cardstock inside the card.

And Stampin’ Up! has a July special! BONUS DAYS!

Bonus Days Ad 2019 w Info

For every $50 you spend (before shipping and tax, of course!) you will receive a coupon for $5 to spend on merchandise in August! Your coupon will arrive by email after you place your order. Make sure you hang on to that code! It’s best to print out the email, write down the code somewhere or put it under lock and key in case of a computer crash or natural disaster! No limit to the codes you can earn.

_______________________________________________________

So I think our July is off to a good start! Shop for Stampin’ Up! products in July, spending $50 or more or in increments on one or more orders, and receive a Bonus Coupon to use on an order in August!

Make a card or something for the 4th of July and get in the spirit of the holiday! It’s a short week! Happy 4th!