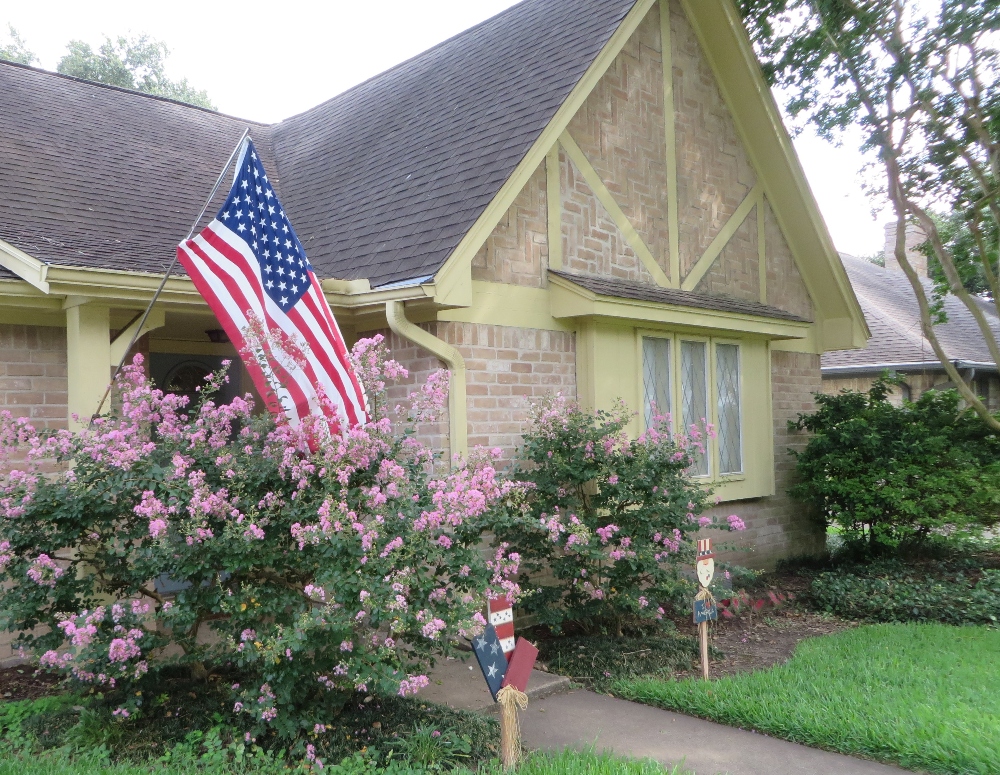
Celebrate our Independence Day! Fly your flag!
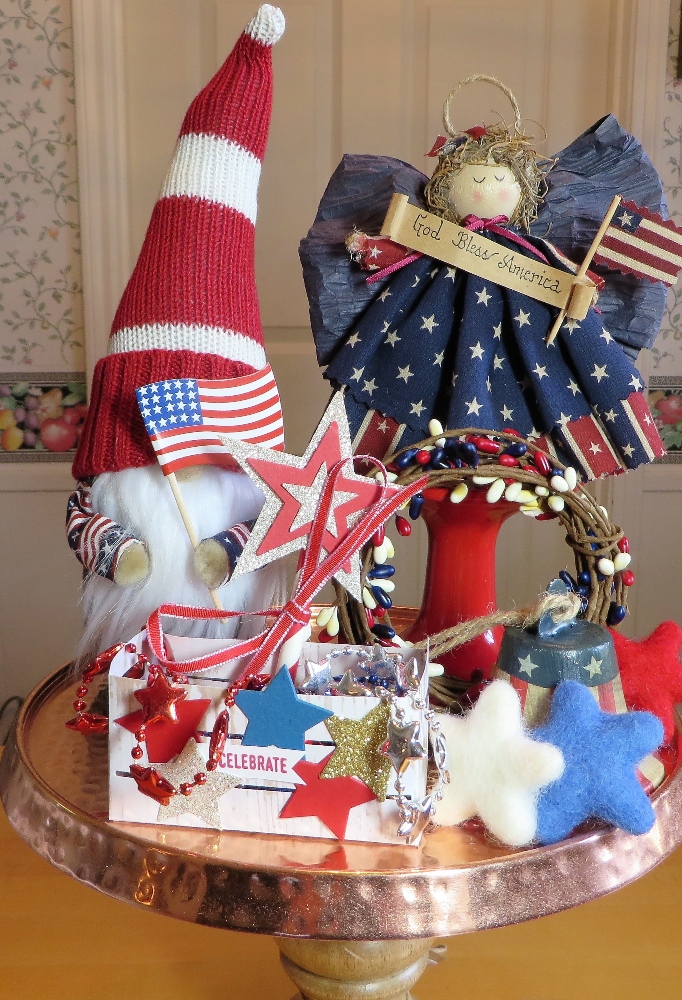
A few decorations for the 4th of July!
A few more decorations! Some old, some new! Always something made with Stampin’ Up! kits or supplies!
Have a safe, happy, and fun 4th of July! (With no rain!)

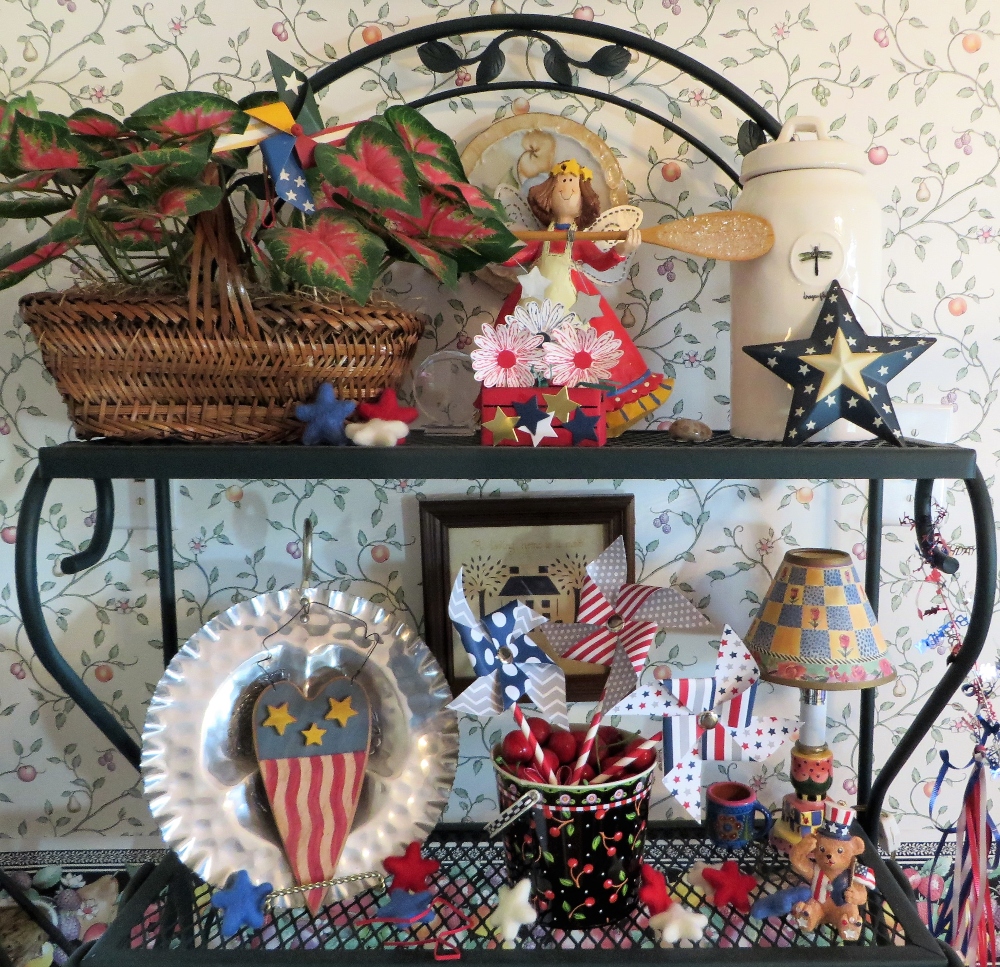
Celebrate our Independence Day! Fly your flag!
A few decorations for the 4th of July!
A few more decorations! Some old, some new! Always something made with Stampin’ Up! kits or supplies!
Have a safe, happy, and fun 4th of July! (With no rain!)
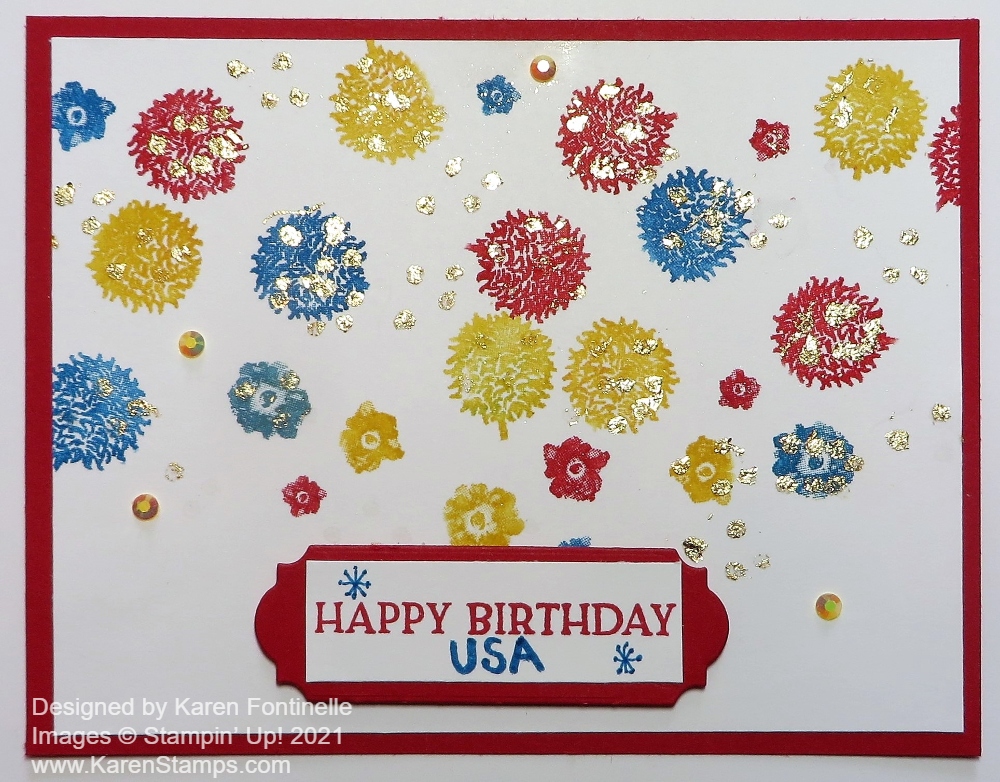
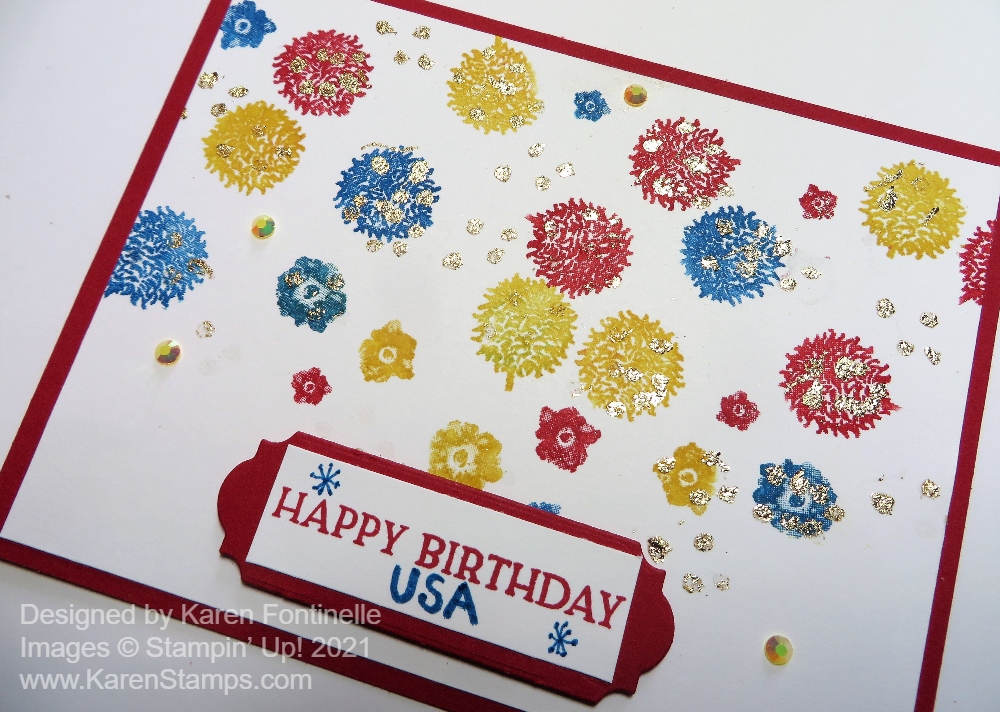
This 4th of July Fireworks USA Birthday Card was made in a rather odd way! The other day I was trying to think what stamp set or dies could be made to look like fireworks on a card for the 4th of July. Then I saw an idea online to use one of the seed pods or whatever it is in the Enjoy The Moment Stamp Set! I got out a piece of scrap paper and experimented! I thought it would work along with some smaller stamps in other stamp sets! And I ended up with a fireworks card for the 4th of July that was fun to make!
The card base is Real Red Cardstock with a Basic White layer. The “balls” on the card are the seed pod. There are two together on the stamp so I colored the stamp with Real Red on one, Pacific Point blue on another, and sometimes Daffodil Delight. I used my Stampin’ Write Markers to do this. Then I found some little flowers on one stamp in the Artistically Inked Stamp Set. Since they have that kind of watercolor look to them, I thought they didn’t necessarily look like flowers, they could look like little fireworks! I colored those with red, blue, and yellow markers.
After I had all the fireworks stamped, I used the tiny dots in the Artistically Inked Stamp Set to stamp on top of the stamped fireworks and even just randomly in the background with Versamark Ink. Next, I dumped on some Heat & Stick Powder and shook off the excess, then heated with my Heat Tool. After that, I dumped the stamped piece into the Gilded Leafing. It had been a while since I had used this technique so I wasn’t sure I remembered how to do it. I rubbed off the excess leafing with my hands and then with a piece of sponge, although I think before I had used an old stencil brush. Whatever is gentle on the leafing that works for you is okay. That gave my fireworks some gold glimmer!
Here is another card I made using some kind of snowflake stamps to look like fireworks! Look through your stamps, old and new, and see what you can use. Don’t forget stars – stars are great for any celebration!
The greeting is in the Blossoms In Bloom Stamp Set. I used Real Red for the diecut from the Ornate Frames Dies as a layer under the greeting. I originally planned to use the Playful Alphabet Dies to spell out USA but I ran out of room. I just used a Pacific Point Stampin’ Write Marker and wrote in USA at the bottom of the greeting plus added some little blue stars! And for extra bling, besides the Gilded Leafing, I added some In Color Jewels randomly on the card.
I won’t be sending this card since the 4th is tomorrow, but I will set it out somewhere with some 4th of July decorations! I like my little fireworks with the Gilded Leafing to spiff it up!
Have a Happy 4th of July tomorrow and this weekend to celebrate our wonderful country! Hope you get to see some fireworks or stamp your own on a card like my 4th of July Fireworks USA Birthday Card.
Yesterday, July 1st, was the first day of the Stampin’ Up! Designer Series Paper Sale! Have you checked out the nine select papers yet that are on sale? This is a great time to choose some papers that you haven’t purchased yet from the new Annual Catalog or ones that you put off but now you can get them at a 15% discount! Maybe you need to “stock up” on the papers you like the best so you don’t run out if you actually use some of the paper! Don’t we all like to hoard our beautiful paper “just in case”?!
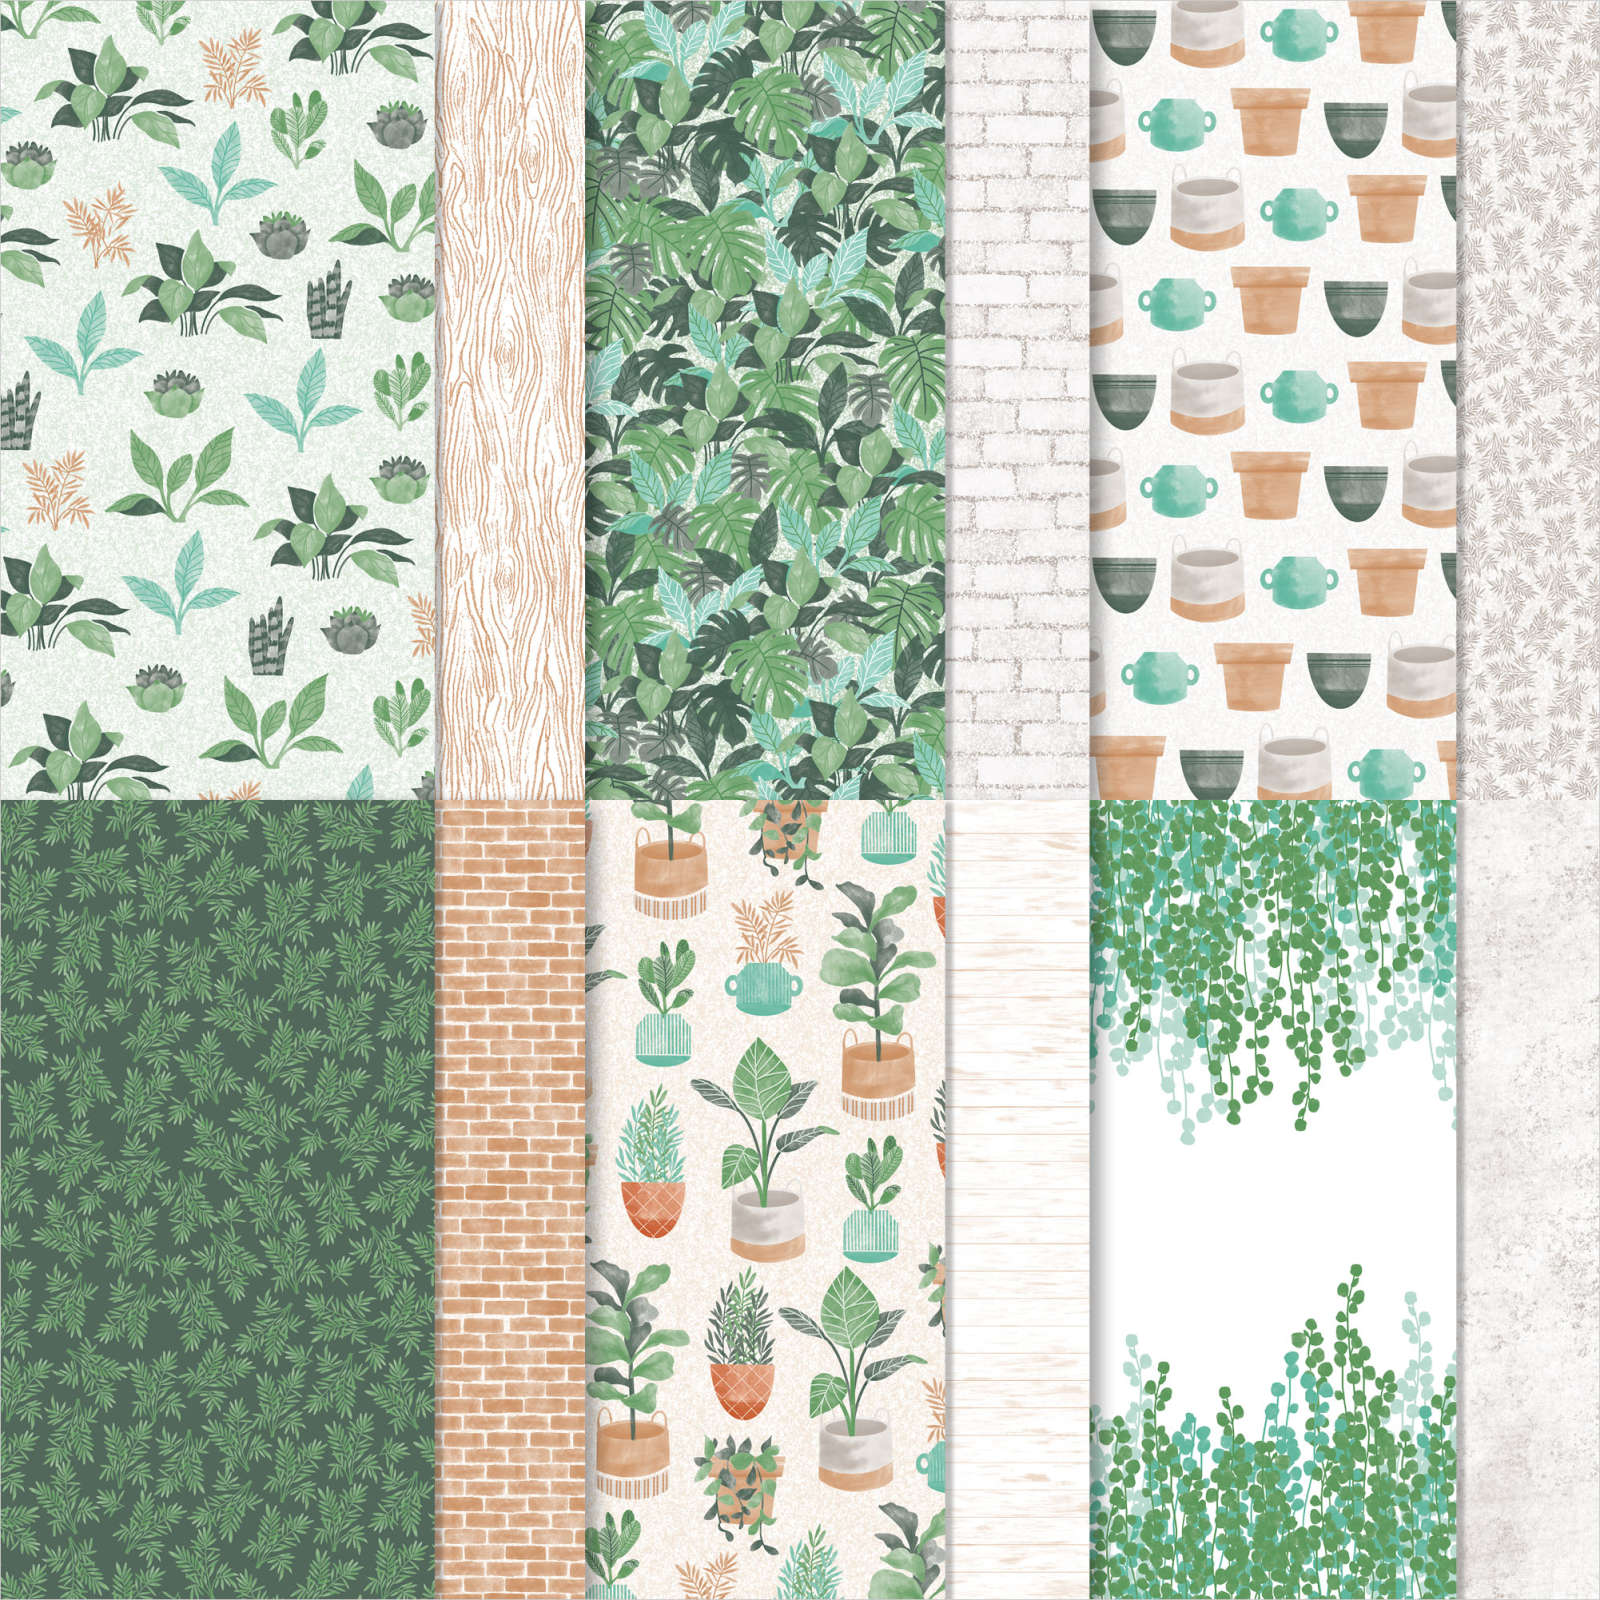
Here are the papers that are discounted this month, through August 2.
These papers selling for $11.50 will be priced at $9.78 and the one large package of In Good Taste Designer Series Paper at the regular price of $21.00 will be on sale for $17.85.
There is no limit to how many packages of Designer Series Paper may be purchased during this promotion.
Remember, any paper that you choose will be even more gorgeous in person than you think from the photos!
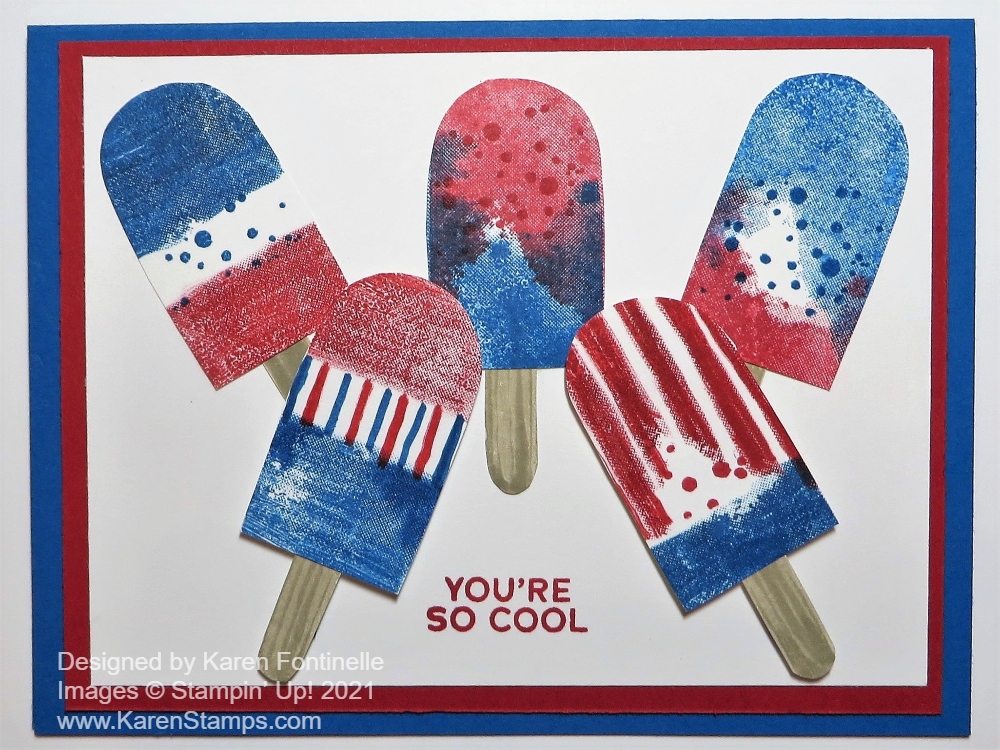
Finally, I got to play with the Sweet Ice Cream Stamp Set and since it’s so close to the holiday, I made them into Sweet Ice Cream 4th of July Bars! I got the idea from a t-shirt design I saw online! You never know where inspiration will come from! As I played around with stamping the ice cream bars, I ended up with five of them and by golly, I was determined to use all five on this card!
The card base is Pacific Point Cardstock. You could certainly use another color of blue. The layer is, of course, Real Red. The ice cream bars were stamped on Basic White and then cut out by hand and adhered to the top Basic White layer of the card.
The Sweet Ice Cream Stamp Set comes with ice cream bar shapes, ice cream cones, and scoops of ice cream, sprinkles, and wonderful greetings to use for many occasions. The ice cream bars have a kind of a textured look to the stamp and are actually two-step stamping as you put the top and bottom of the ice cream bar (or popsicle) together. I tried to leave some white area on the bars so I would have red, white, and blue. Even on these bars, it was good to put a few sprinkles with red or blue for some added interest.
To ink up these stamps, I used regular ink pads and sometimes also Stampin’ Write Markers in Real Red and Pacific Point. These markers are good for coloring right on the stamp however you like to put the color where you want it. I even colored on my own stripes using these markers, just drawing them in after I stamped the ice cream bar. The little popsicle sticks are stamped by coloring the edge with the Crumb Cake Stampin’ Write Marker and then coloring in with the same color. I just glued the sticks to the back of the ice cream with a dot of Multipurpose Liquid Glue.
The three background ice cream bars are adhered right to the card. The two front ice cream bars are popped up on Stampin’ Dimensionals. The greeting is in the stamp set and is stamped in Real Red Ink. I love the greeting on this card!
And that’s it! Now you have a patriotic card in red, white, and blue for the 4th of July holiday! Here’s another card I made YEARS AGO for July 4th!
Remember, the Designer Series Paper Sale begins today and runs through July until August 2 on select papers at 15% off!
If you have the Sweet Ice Cream Stamp Set, you can make a patriotic card for the 4th of July with red, white, and blue ice cream like this card with Sweet Ice Cream 4th of July Bars!
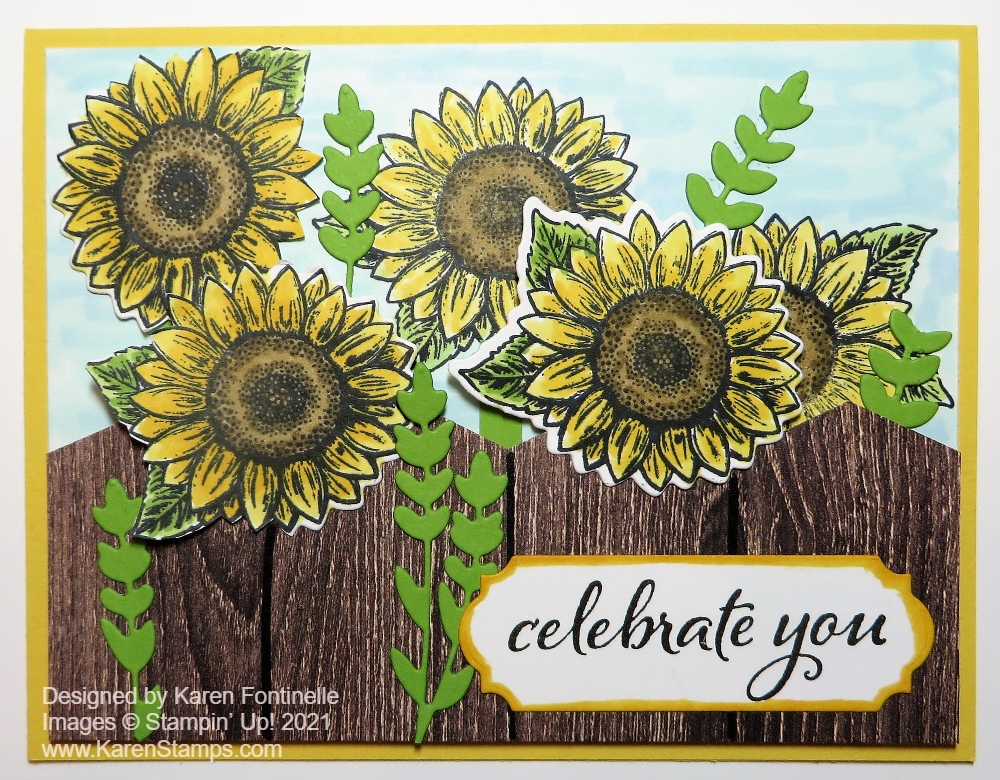
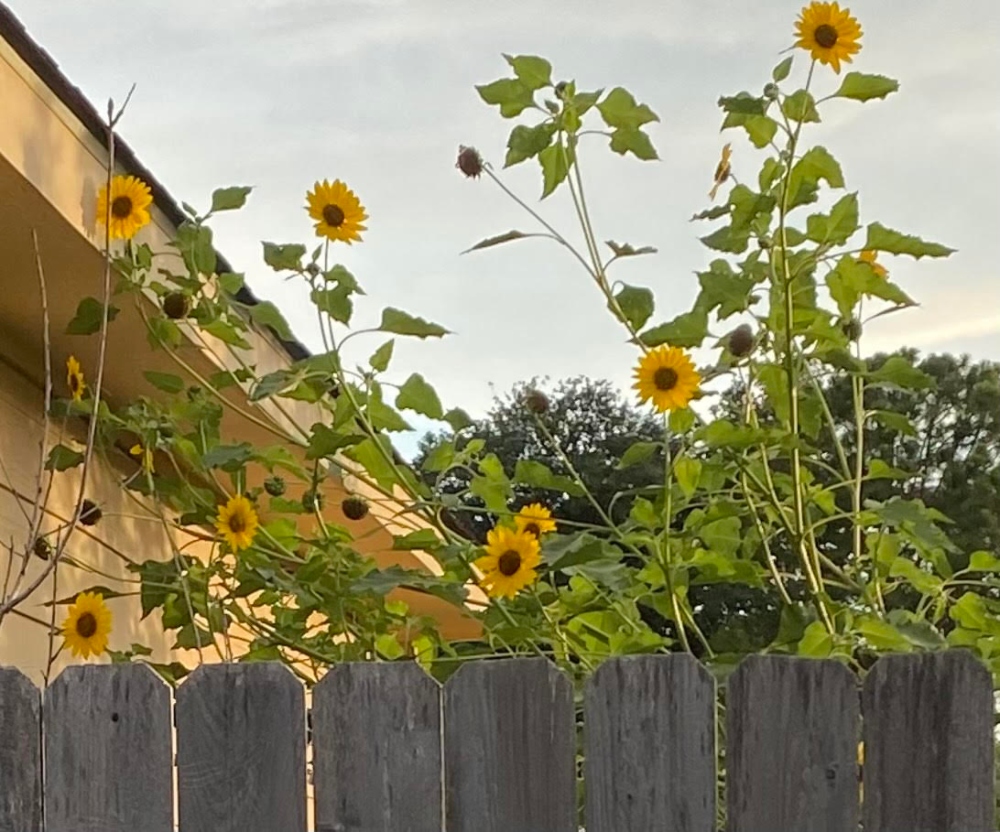
One evening my husband and I were out for a walk and I noticed a yard from the side along the sidewalk that had a bunch of blooming sunflowers peeking out over the top of the wood fence. These wooden privacy fences are everywhere here in Houston. Sometimes I think it would be better not to have them and see our neighbors, but they are standard it seems like. Since we have the Celebrate Sunflowers Stamp Set, I felt I should make a card inspired by the sunflowers we saw!
For my sunflower card, I started with Daffodil Delight Cardstock for the card base. For the look of the wood fence, I used a wood pattern from the In Good Taste Designer Series Paper. Although the top of my fence doesn’t show very much, I notched the top of the planks with the point of the Tailored Tag Punch and then drew in black lines to make the paper look like fence boards with a marker.
The sunflowers are the smaller ones in the stamp set, stamped in Memento Ink and colored with Stampin’ Blends alcohol markers. I used Daffodil Delight for the flowers, Soft Suede for the centers, and Granny Apple Green for the leaves, both the light and dark colors. I stamped a couple of flowers, the smaller ones, on the Basic White for the background and stamped three on scrap cardstock and then die-cut those. In the background for the look of sky I simply scribbled with the Light Balmy Blue and Light Pool Party Stampin’ Blends in the background.
The fence is popped up on Stampin’ Dimensionals® as are the die-cut sunflowers. I also die-cut some greenery with the same Sunflowers Dies and placed it here and there. The greeting is included in the stamp set although I only inked up the words you see to shorten it a little to fit on the card. I used Early Espresso Ink and die cut with the Ornate Frames Die. To help it stand out a little, I used my Dark Daffodil Delight Stampin’ Blend to just run around the edge of the die cut.
Here is a blog post from last year where I also stamped these smaller sunflowers in the set to make a card.
My card today certainly is a very summery card with the sunflowers! I really enjoyed seeing the real sunflowers in the neighbor’s yard! Remember, tomorrow is the first day of select designer papers being on sale for 15% off, and the In Good Taste Designer Paper is one of them! This is a very large package of paper with many images of backgrounds and textures you can use for cards and projects. Wait until tomorrow, July 1, to start your order so that the sale prices show up. This sale will run through August 2.
Sunflowers are one of the things that just say “Summer” so if you are ready to celebrate summer like this Sunflowers In the Neighborhood card, pick up the Celebrate Sunflowers Stamp Set on your next order plus some designer paper on sale!
The January-June 2021 Mini Catalog is coming to an end! I like to call it the Spring Mini Catalog! It’s always a joy to start ordering from the spring catalog right after the holidays to see and use fresh new products to start the new year! But as all good things must come to an end, this catalog’s last day will be tomorrow, Wednesday, June 30. It’s the last day to order from the January-June 2021 Mini Catalog!! Some of the products carried over to the new Annual Catalog and some products are already sold out. If a product doesn’t come up in the Online Store, then it probably is sold out. If you search for a product and it doesn’t come up, put the item number in the search box, just in case the search terms aren’t working, or use the drop-down list on the left of the store website under Shop Products.

I came across this photo of this Expressions in Ink Pale Papaya Thank You Card on my phone and I don’t think I ever posted it. I may have copied it from someone but since it was back in May, I don’t really remember! If I find it, I will add it.
This whole Expressions In Ink Suite Collection has been one of the prettiest groups of products ever, in my opinion. And proof of that is that various components have been out of stock, but the Expressions In Ink Designer Series Paper should be back in stock this week, as I write this.
There’s a lot going on with this card, but it starts with a Pale Papaya card base. Then the layer of designer paper with Pale Papaya flowers is cut into three strips and adhered to the card base. Next comes the floral die-cut in the Artistic Dies. The tiny little pink flowers are also stamped and die-cut.
The word “thanks” is stamped on Basic White and then die cut with a die in the Tasteful Labels Dies. It overlays a piece of gold foil striped designer paper in the Expressions In Ink Designer Paper. Underneath the whole greeting is a piece of Gold 1/4″ Shimmer Ribbon. There’s even a couple of pieces of gold foil leaves, found in the Expressions In Ink Ephemera Pack. And no fancy card would be finished without a few sequins, right?!
Just watch the Stampin’ Up! Online Store. If any of these products are “Unorderable” because of a long backorder, they won’t come up until they are available again, but just check back or ask me if there is a date. Right now the Expressions in Ink Specialty Designer Series Paper should be back in stock this week but the entire Suite will not be available until mid-July. But it’s almost July!
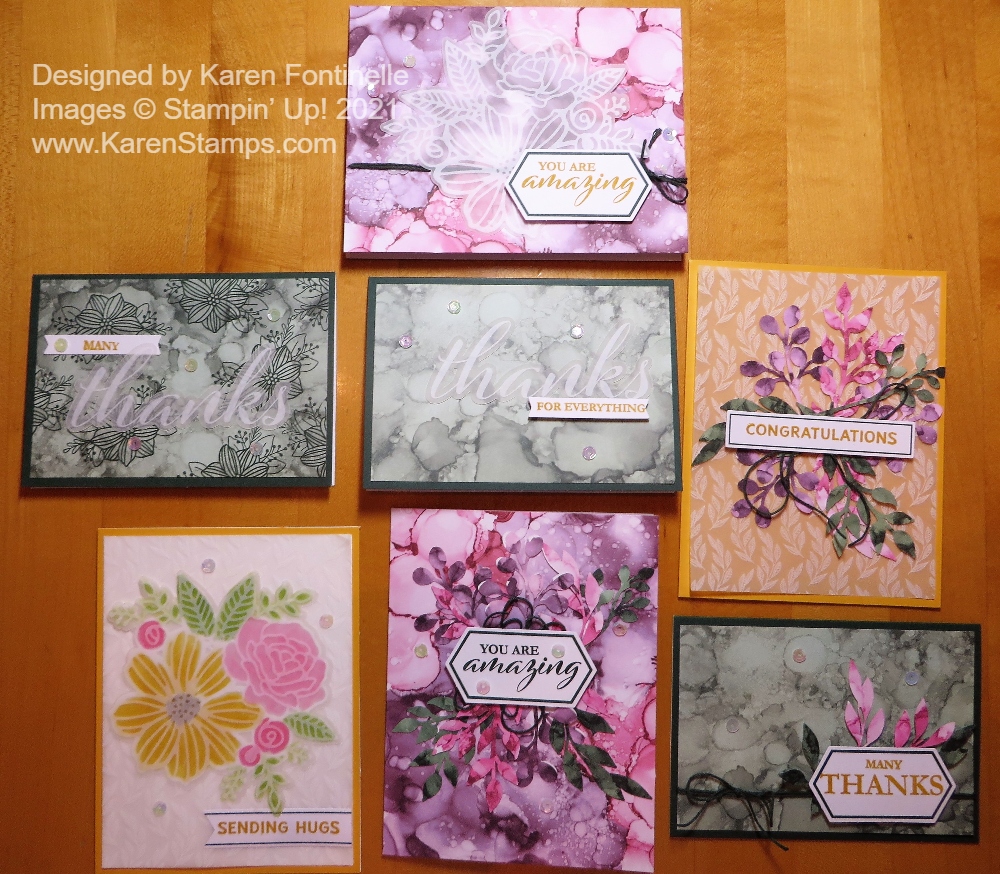
The post office didn’t seem to hang on to my Paper Pumpkin Kit this month like it normally seems like they do, so I got it in a reasonable time to make these Paper Pumpkin June 2021 Cards. Some of the these are designed how the kit instructions say and some I did something different. That’s the great thing about Paper Pumpkin Kits! The project is already designed for you so you don’t need any “mojo” to come up with your own design, but if you want to, you can use the supplies in the kit to change the design however you like or make absolutely anything! You can cut the card bases apart, even into little pieces and use them for a scrapbook page or for adding your own cardstock and making many more similar cards. You can do anything!
In this photo, the top card, the middle card, and the yellow card to the right are all made according to the directions (except for not noticing the stamping I should have done on the green card first!) in the kit. There is always also a video to watch if that is helpful for you. I always watch them just for fun!
This kit coordinated with the “in the catalog” Expressions in Ink Suite, especially the printed designs on the card base. Then there were vellum pieces (words and a background) to use, plus pretty iridescent sequins, and some Evening Evergreen twine.
For an alternate card to make with the kit materials, I used the floral vellum piece. The die in the Artistic Dies in the Suite actually matches the floral vellum piece! Isn’t that cool? I turned that vellum piece over to the backside and used my Stampin’ Blends to color in the flowers and leaves. That gives a soft look on the front and is really easy to do. You can check on the front to see how the colors are looking but you don’t really have to be exact because of the printed white lines on the vellum.
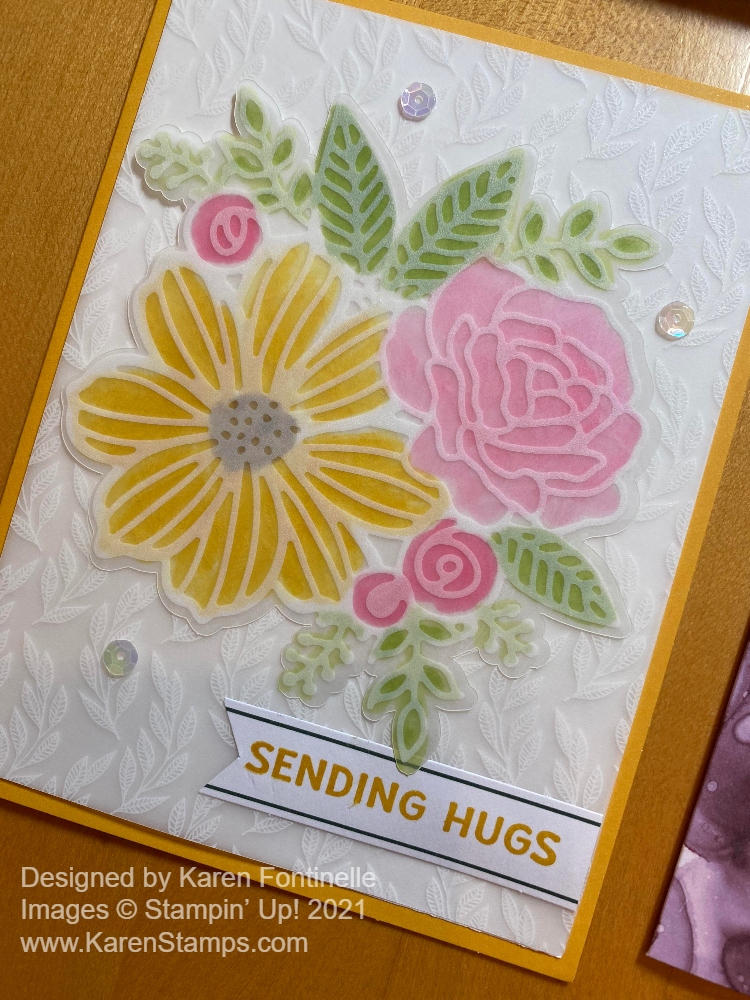
To make this card, I used the Bumblebee yellow card base that came in the kit, but I also put a piece of Basic White cardstock behind the leafy vellum layer. This gave a more interesting background than just the plain white behind the colored vellum. Then I stamped a greeting from the kit but altered the tag a little bit. And of course the sequins add so much to a card!
The colorful flower and leaf die-cut pieces that come in the kit can be used whole as is or on my alternate cards, I cut them into smaller pieces so I could just stick a few behind a greeting. For the rest of the cards, I just played around making alternate designs with the supplies in the kit! And that’s what you can do, too!
Be sure to sign up by July 10th for the July Kit if you are interested! Each month is a surprise although Stampin’ Up! has started giving some basic clues about the kit so people have an idea of what they are getting. It’s a no-risk subscription because you can skip a month now and then if you want to or cancel any time. It’s always a treat to get the kit in your mailbox! I always say it’s a treat I give myself! And who doesn’t need a treat for themselves or others every month these days?!
If you are working on your Paper Pumpkin Kit, just remember you can change anything up or add pieces from your own craft supplies! Just have fun with it as I did with these Paper Pumpkin June 2021 Cards.

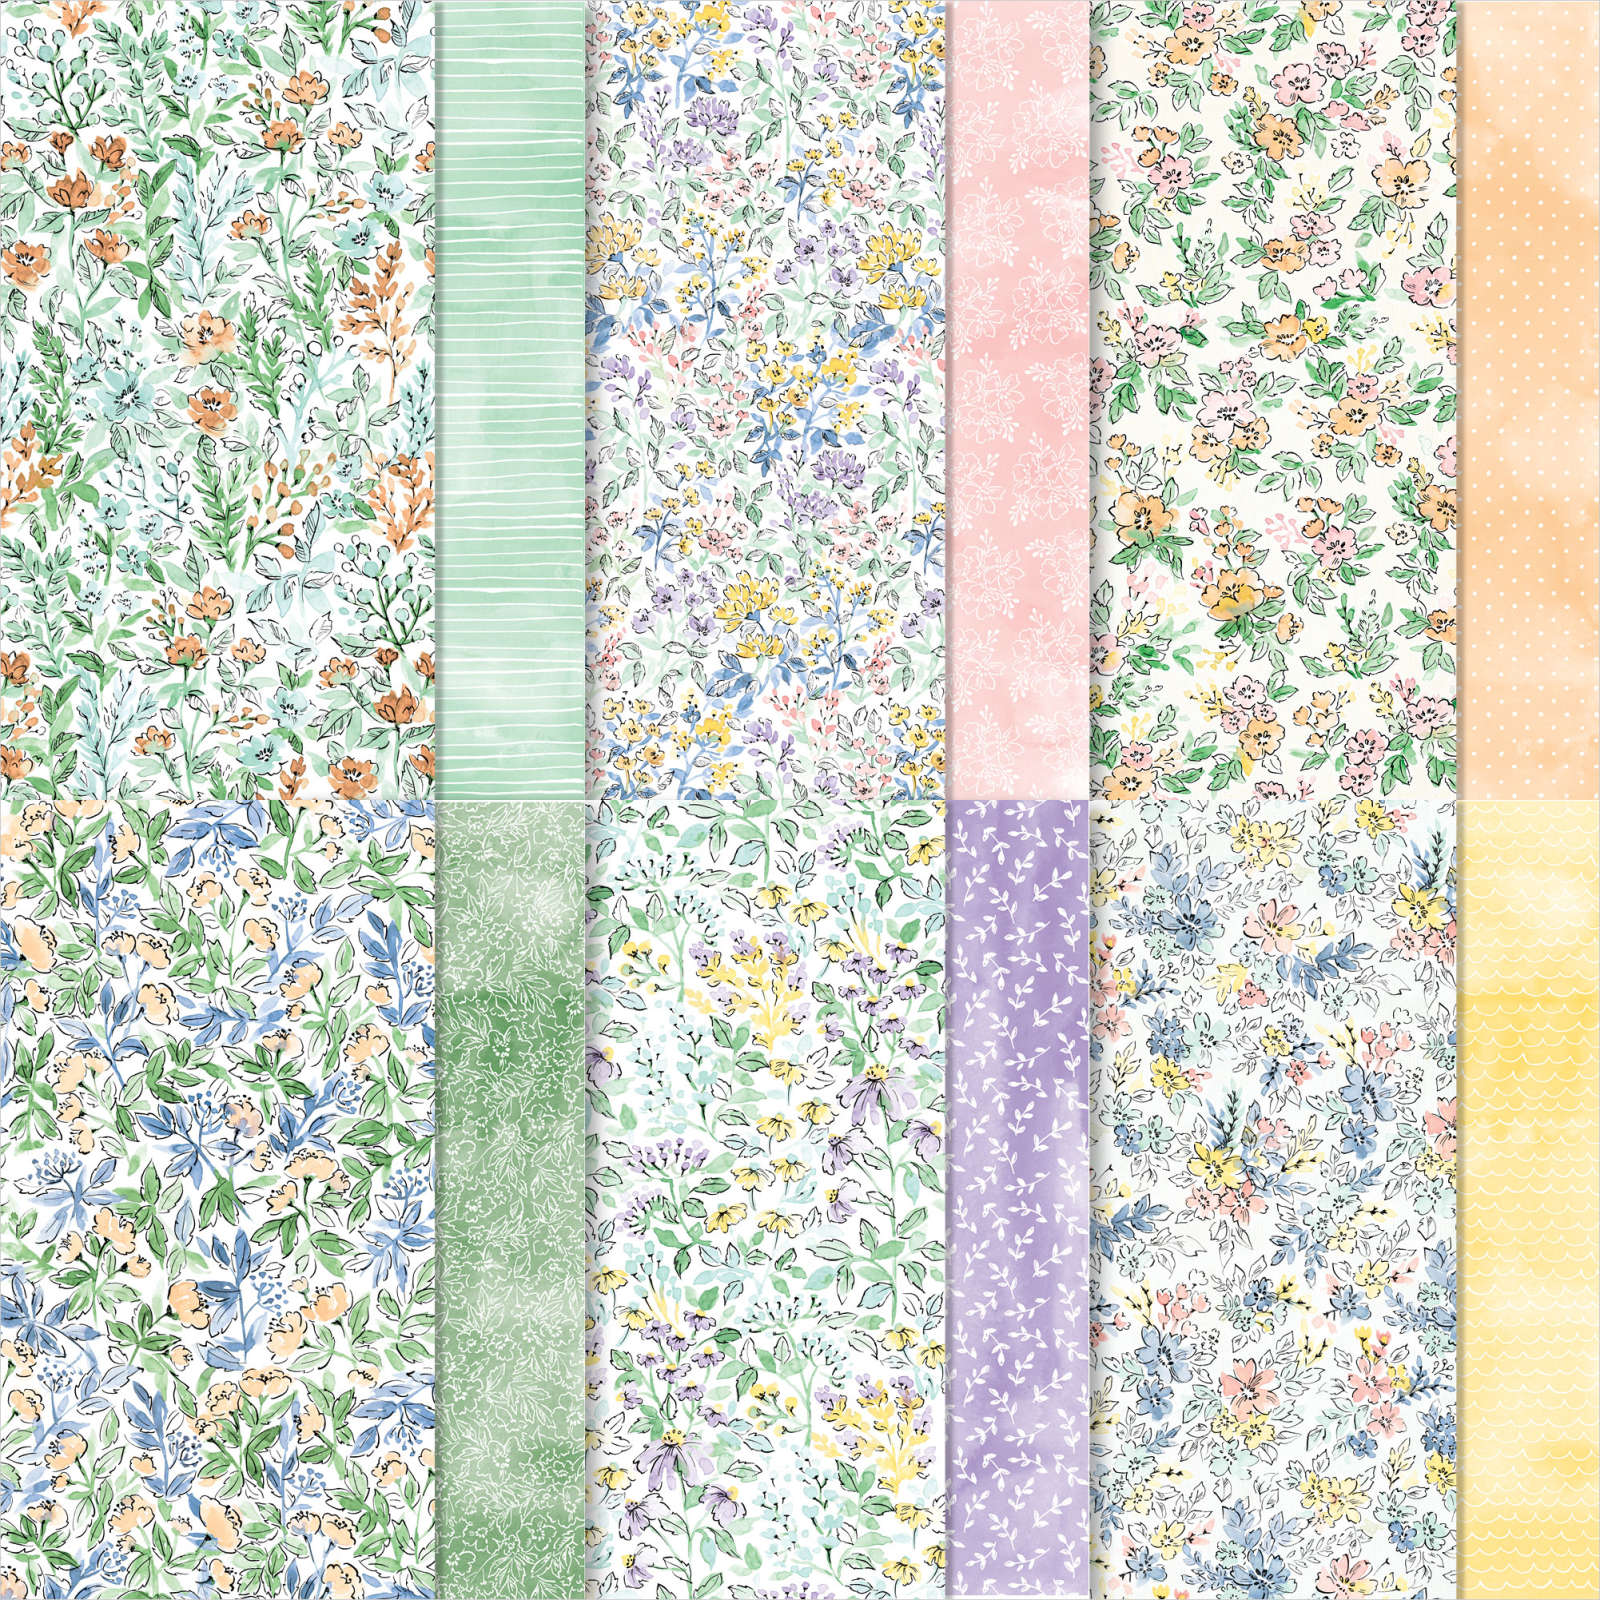
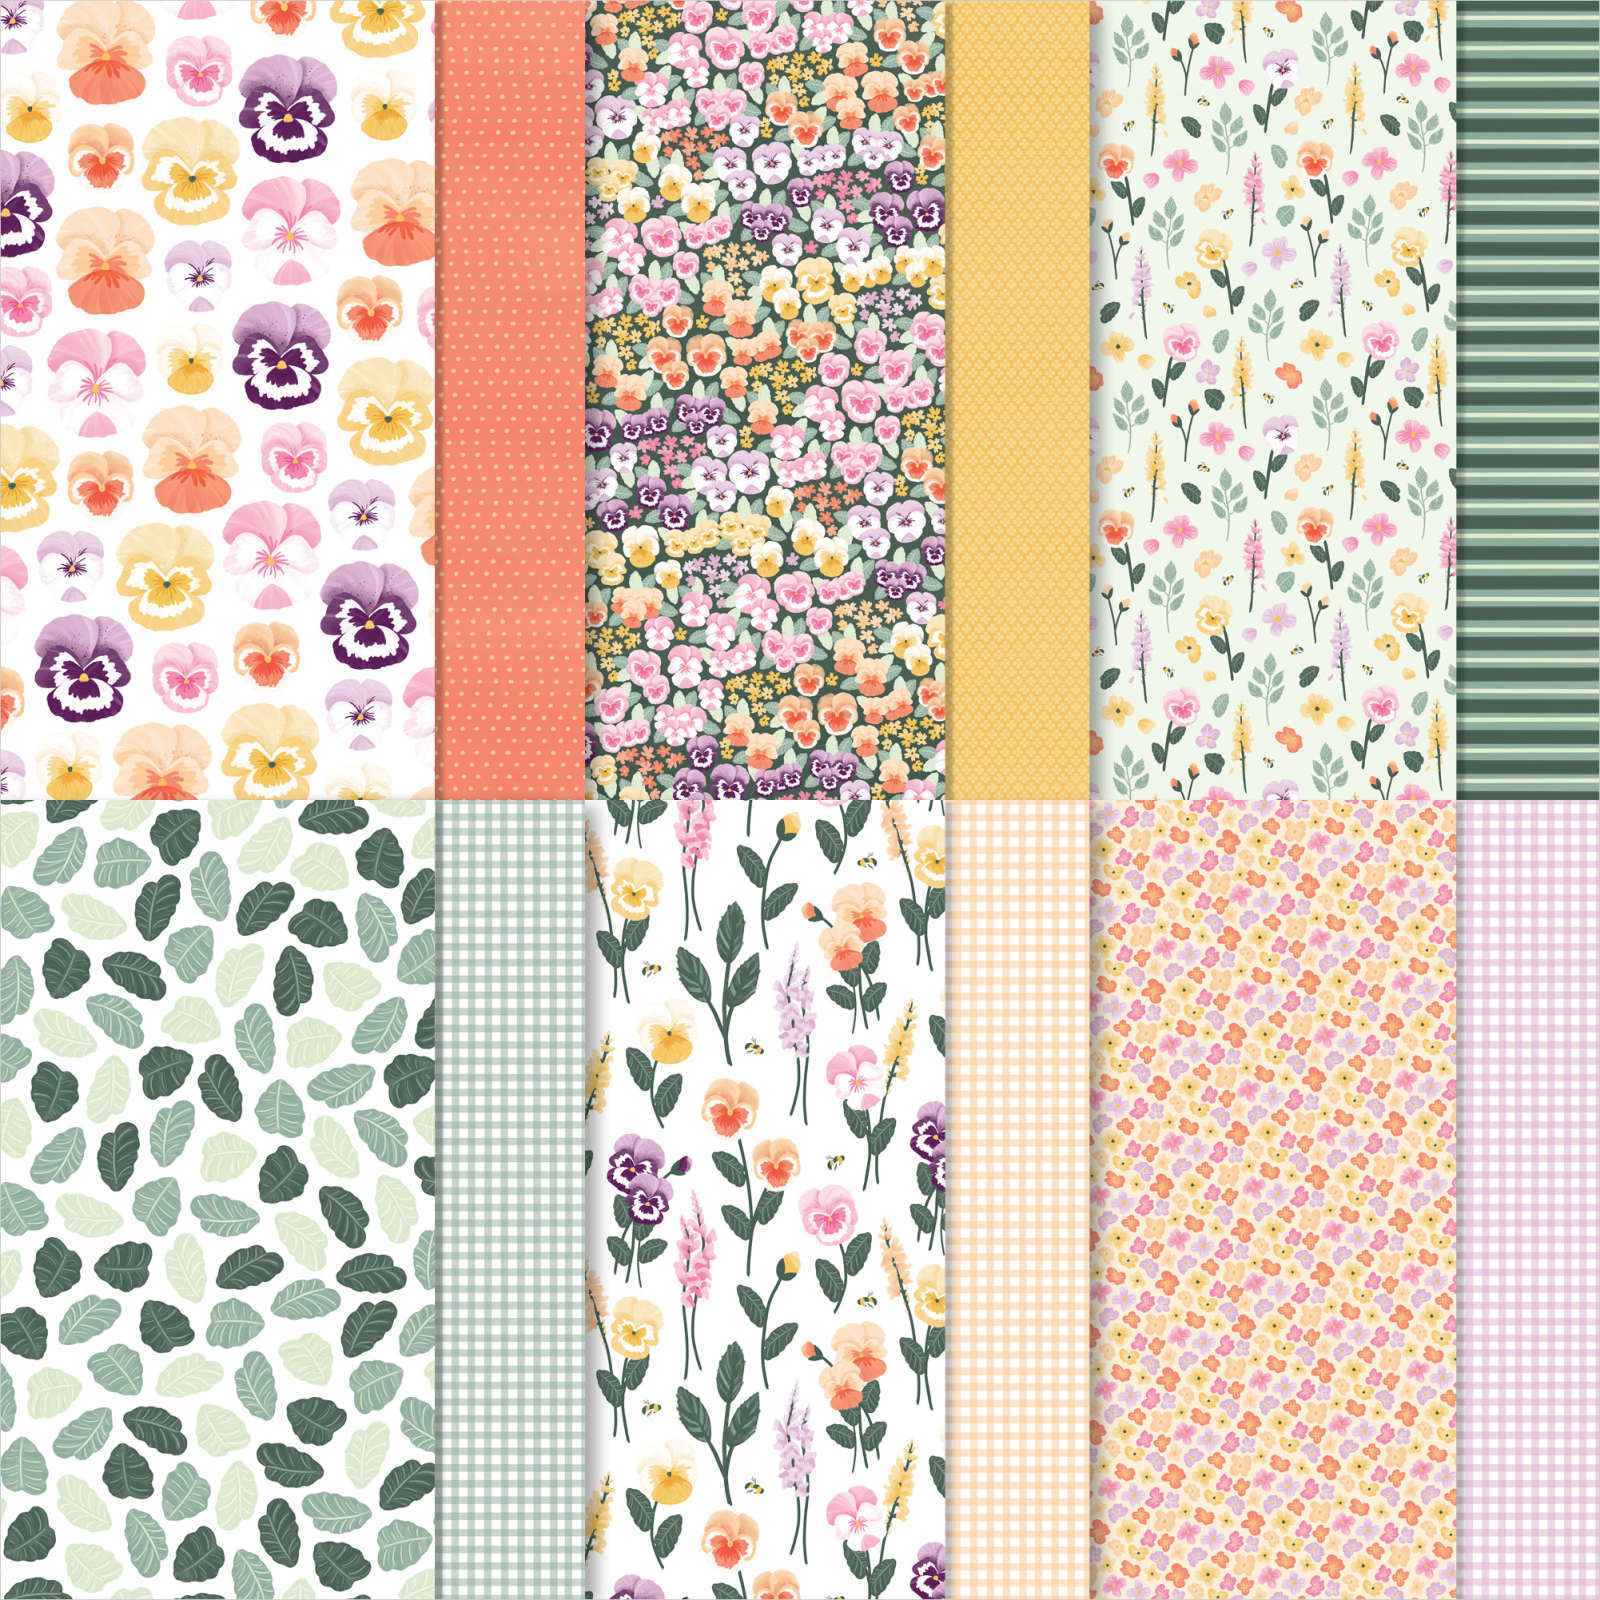
If you like to hoard, I mean, stock up on the beautiful designer series papers that Stampin’ Up! sells, get excited because the Designer Series Paper Sale is coming July 1 through August 2! Select papers will be 15% off. You can see the patterns that will be available during the sale below.
This will be a great time at 15% off to choose some papers that you hadn’t bought yet or hadn’t really noticed before. The sale starts Thursday, July 1st, but you can start looking at the choices today! Don’t add them to your order until July 1st to make sure you get the sale price. Remember, any paper that you choose will be even more gorgeous in person than you think from the photos!
Yes, today is that rare, exceptional, fun day when you can order anything you want, $50 or more total, at Stampin’ Up! and not have to pay shipping! And we always love to not pay shipping anywhere we order! You can order any Stampin’ Up! products but they must total $50 before tax to be eligible for free shipping! Buy some great new products from the new Stampin’ Up! Annual Catalog or stock up on the necessities – cardstock, ink refills, embellishments, ribbon, and more! Try out one of the new kits in the Kit Collection! Treat yourself to the new Stampin’ Cut & Emboss Machine or the little Mini Cut & Emboss Machine! Check out the Last Chance products and sales from the Spring Mini. You know you will find things you want!
This offer is good TODAY ONLY!
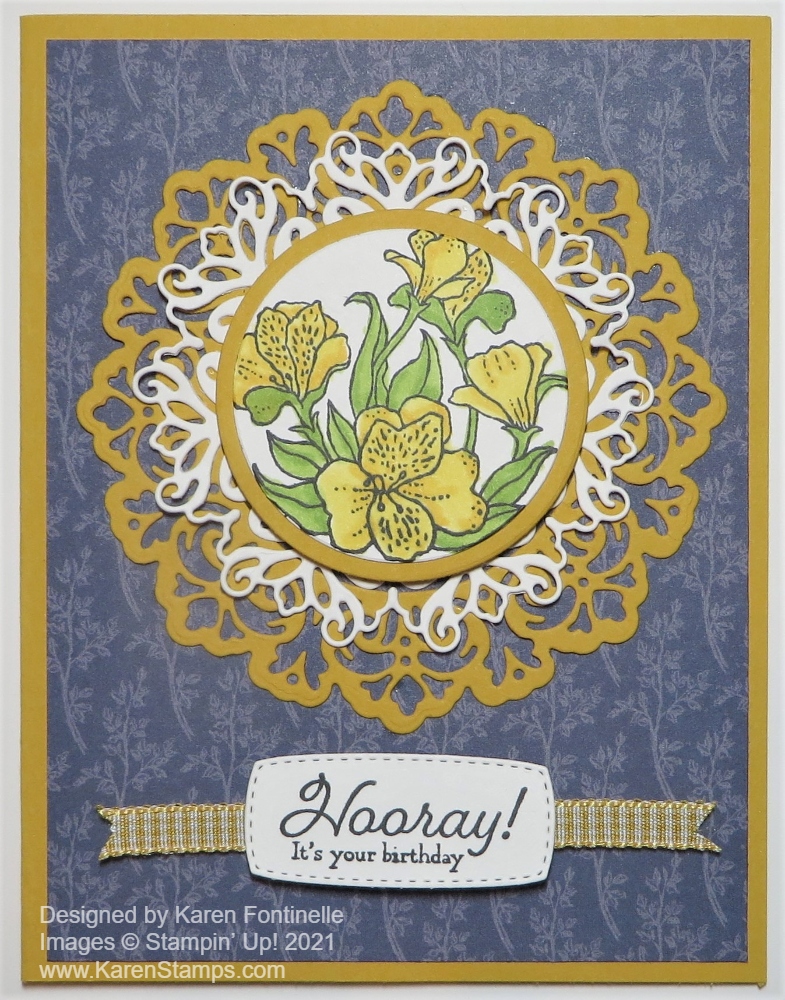
Somewhere recently I saw a card made with the colors blue and yellow or maybe it was blue and orange. I don’t remember, but it popped up in my head when I went to make this Encircled in Friendship Birthday Card. After looking through my designer papers, I chose this Misty Moonlight blue print in the Pattern Party Host Designer Series Paper. I also knew I wanted to use the Encircled in Friendship Bundle with its beautiful dies!
I chose Bumblebee Cardstock, one of last year’s In Colors, for the card base. I could have used another yellow but I’ve been on a Bumblebee kick recently. I used a couple of the dies in the Encircled in Beauty Dies to cut out a large Bumblebee outer die, which also produced the circle I used under the stamped image. I also die cut the white layer and die cut a Basic White circle with the Layering Circles Dies. For my design inspiration (and help!) I was copying my own card from a little while ago which you can see here.
On the white circle, I stamped the flowers in the Encircled in Friendship Stamp Set with Memento Black Ink. It would have been better to stamp first, then die cut, but I got lucky and got the stamp placed just fine! The flowers just barely fit. Then I colored them with Stampin’ Blends. Since we don’t have a Bumblebee color, I used Daffodil Delight for the flowers and Granny Apple Green for the leaves. Even though it is not an exact color match, it is close enough and maybe the Daffodil Delight even provides a little brighter color to the card.
I intended to wrap the Bumblebee Gingham Ribbon around the Misty Moonlight piece of designer paper, but I forgot and glued down the paper to the Bumblebee card base first! It happens! For the greeting, I chose one I had already stamped and die-cut with the Many Messages Bundle. To add some ribbon for embellishment, I just cut a strip and adhered it underneath the greeting, and snipped the ends. Very quick and easy!
The die cut sort of doily-like layers would be easier to adhere to the card if you remembered to use Adhesive Sheets first but I seldom remember! However, I can usually make teeny tiny dots work (and I mean teeny tiny!) of Multipurpose Liquid Glue on the biggest spaces I can find and even the smaller ones on the back of the die-cuts. Just be very careful and squirt out some glue on a piece of scrap paper to avoid an explosion of a blob on your tiny die-cut area!
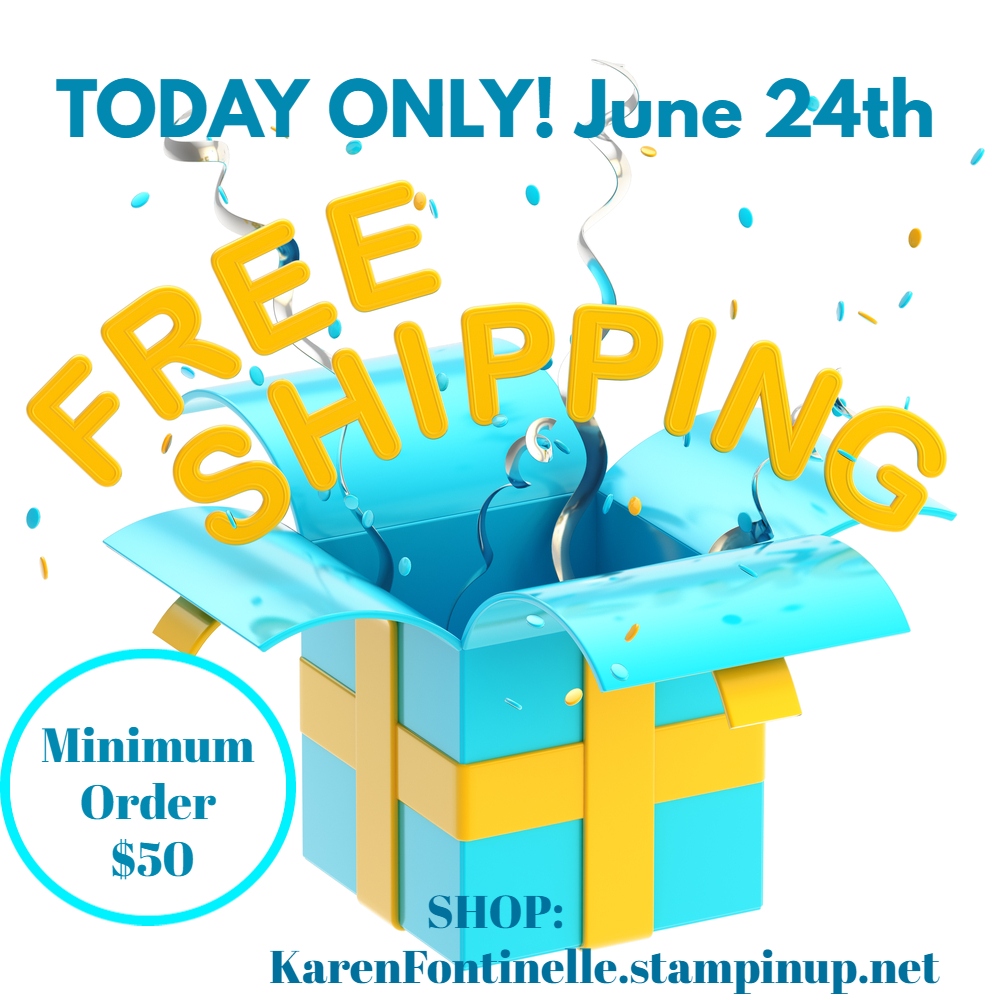
Don’t forget! Tomorrow, June 24th is FREE SHIPPING at Stampin’ Up! so if you would like this Encircled in Friendship Bundle to make a card like this one, you can save the money you would normally spend on shipping! You must have a $50 order to be eligible for free shipping, and don’t start putting in your order until tomorrow so the computer will take it. Double-check to make sure you don’t get charged for shipping.
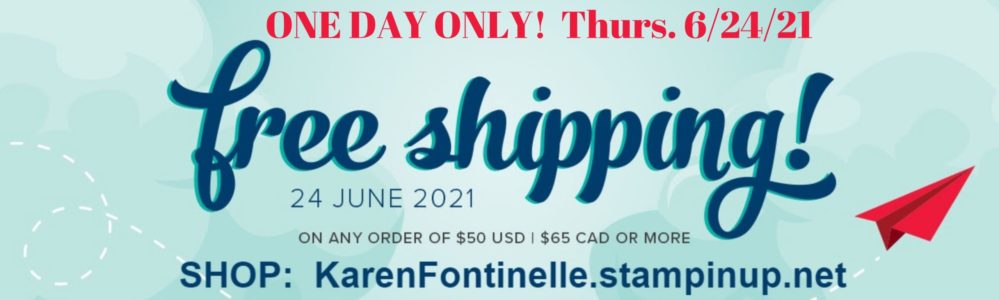
Time to stock up and save on your favorite products from Stampin’ Up!
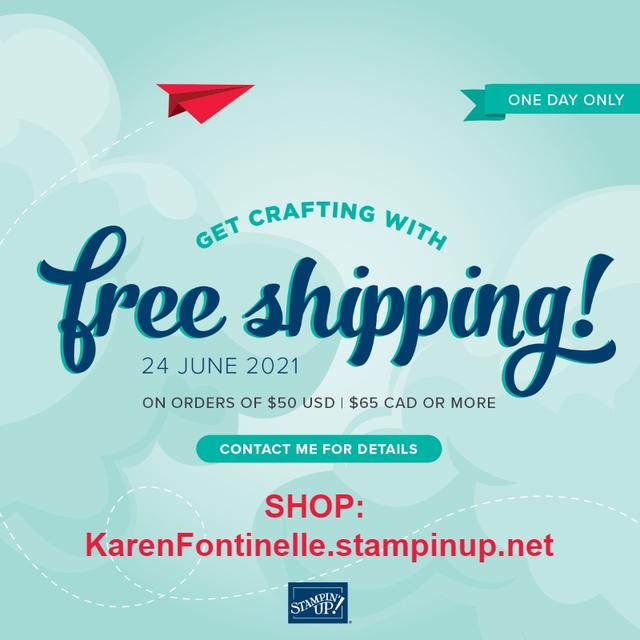
ONE DAY ONLY, Thursday, June 24th (this Thursday!!) with an order of $50 or more in merchandise, you will get FREE SHIPPING!! This is a rare occurrence so enjoy it while you can!
(If you happen to be using a coupon, that will subtract from your total so you still need to reach $50.)
If you already have all the new products you want in the new Annual Catalog (ha! ha! ha!), maybe you want to stock up on basics like adhesive and cardstock. And get everything you want from the January-June Mini Catalog that is retiring this month!
Get whatever you want, it’s all FREE SHIPPING! But only on Thursday!! All day!! June 24th!! With a $50 or more order!
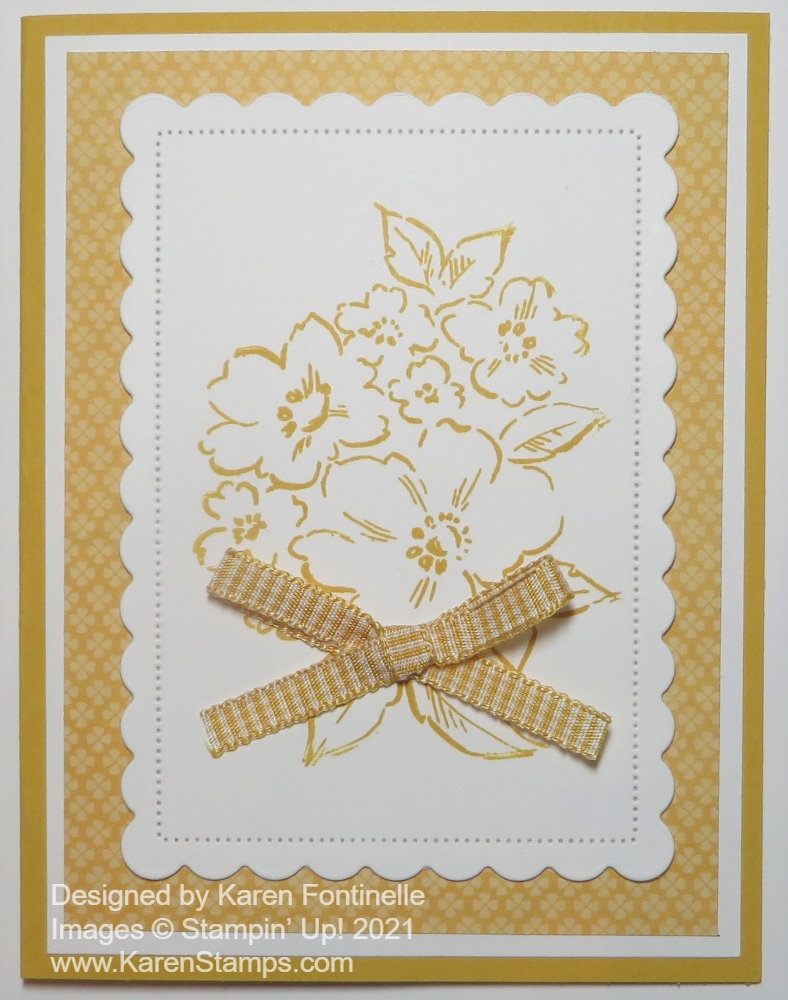
I didn’t have much mojo left when it was time to make a card so I knew I had to come up with something simple, and when you’re in that situation, sometimes a monochromatic card makes it all easy! This Hand-Penned Petals Monochromatic Bumblebee Card was just the perfect card to make after a busy day and evening.
The card base is Bumblebee Cardstock. Have you ever thought about how this color name is the only one that is just one word? Just “Bumblebee”. I looked through some of my designer paper for inspiration even though I was thinking about a monochromatic card. When I saw this Bumblebee-colored designer paper in the Pansy Petals Designer Series Paper, I knew what I was going to do.
I could have had just a layer of the designer paper on the card front, but I thought a bit of white underneath would help it stand out a little. For the front of the card, I stamped the floral bouquet from the Hand-Penned Petals Stamp Set in Bumblebee Ink on Basic White Cardstock, then cut it out with the Scalloped Contours Dies. These are some of the best dies we’ve ever had, in my current opinion! I love them! For an embellishment, I tied a bow out of the Bumblebee 1/4″ Gingham Ribbon. I planned to stamp a greeting on the card, but we don’t ALWAYS have to have a greeting on the front of the card! Sometimes it can just be plain and you can stamp something inside or write a note. Or add a greeting when you are ready to send the card, if you are just making cards for fun, and then decide which greeting would be appropriate.
I also thought about putting some jewel embellishments on the card to look like they matched the yellow of the Bumblebee, but I just said to myself, “Stop!” The card was fine as it was, simple but nice enough, with a small bow for an embellishment, not to mention the very nice scalloped rectangle die complete with the stitched look. It was fine and sometimes you just have to know when to stop!
The days are winding down for the January-June 2021 Mini Catalog so be sure you are looking through the catalog another few times and getting everything you want. Some things carried over to the new Annual Catalog so we don’t have to say goodbye to those products! And some retiring products are reduced in price for the Last Chance Sale so see if you can find any bargains you “need”.

Don’t think you are on the wrong year on my blog! It IS 2021! But this paper is not! I was going through my stash of retired Stampin’ Up! designer series paper recently and came across this single sheet! I’m sure there was another sheet just like this but I don’t know how I used it. I guess I made tags, but I don’t remember. I don’t know the name of this paper or what year it is from. All I know is that when I came across it, instead of sticking it back in the pile, I just thought I should keep it out and actually make some gift tags out of it right away!
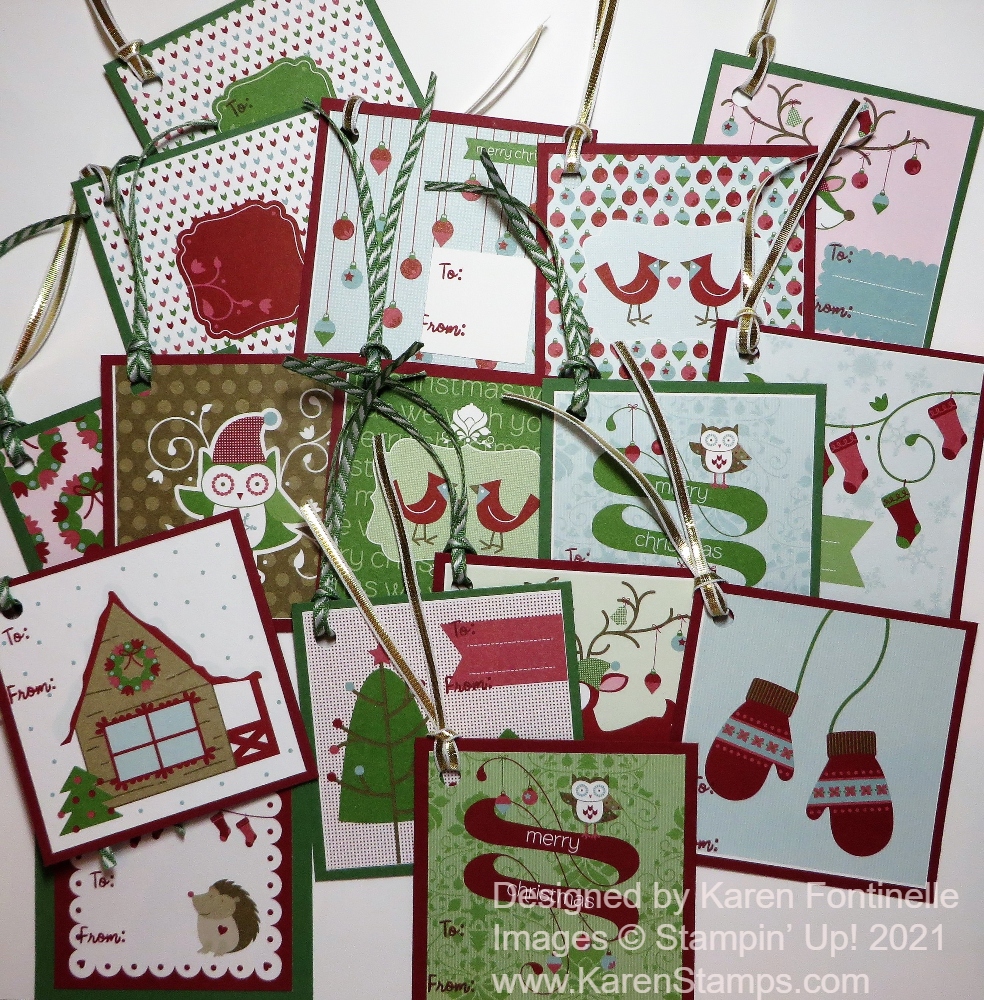
Of course, all that really had to be done was cut the squares apart! Then I chose the matching colors of Cherry Cobbler and Garden Green and cut those for the back layer of the tags. The tags mostly don’t have a good place to put the “To:” and “From” so they needed to be layered on cardstock. The opposite side of the paper was a diagonal stripe in Christmas colors so no place to write and the paper needed a cardstock layer anyway.
As it turned out, I found a To & From in the Snowman Season Stamp Set so I used that and mostly stamped somewhere right on the front of the tag. For the tags with no good place to stamp it, I used a retired Square Punch and punched out several white squares and stamped on those, then glued to the back of the tag.
With a hole punch, I punched a hole in the corner of the tag and tied on some retired ribbon to match. That’s all there was to it! They will just be tags for our own gifts so they don’t need to be fancy. And having these on hand just might save a last minute trip to the store for more gift tags at Christmas time!
It is so hot here that I figured having a day of making cute, easy Christmas tags would cool me off! You might like looking through your old designer papers and see what you can find to make on a hot summer day!

When you need a big wish for someone, use the Biggest Wish Stamp Set and make something like this Biggest Wish Hello Card For a Friend. This will be a fun stamp set to play with since there are so many possibilities and something a little bit different.
To make this card, I just did random stamping by hand. I didn’t use the Stamparatus, just hoped I lined things up reasonably straight and in a decent place! This is my first attempt and I made others, but eventually decided this stamped card front was the best of the bunch!
I wanted to add the word “friend” at the bottom but found that stamping it on a tag or label did not fit very well on the card. It could be done but you probably need to start stamping at the very tip-top of the card. Or start stamping a little lower down and don’t stamp near the bottom of the card. I just stamped it at the bottom right on the card front, and it fit just fine there.
I used all the new In Colors on this card. The card base is Polished Pink. I used four of the In Colors on the “Hello” and then used Evening Evergreen for the word “friend”. The extra little tiny stamped images are also in the In Colors. If I had stamped the word “friend” before adding the little “pluses”, I wouldn’t have had to stamp over those! For some extra embellishment, I added some of the 2021-23 In Color Jewels. They sold out for a while but are back in stock now!
Use the Biggest Wish Stamp Set when you want to send a Big Wish! There are big words of Thanks, Birthday, Happy, and Friend plus Hello, of course, and then smaller cursive words the same words plus the little “pluses” images. You will have fun making projects with this stamp set!