How About a Safari? It’s the New Paper Pumpkin Kit!

Paper Pumpkin Feb 2022 Safari Banner
Image © Stampin’ Up! 2022

Did you see that? It’s a mischievous monkey swinging from tree to tree! What about that elephant marching through the mud? Can you catch an antelope galloping in the grass? Grab your binoculars, buckle up, and hop into our off-road truck—there’s so much to see on this safari!

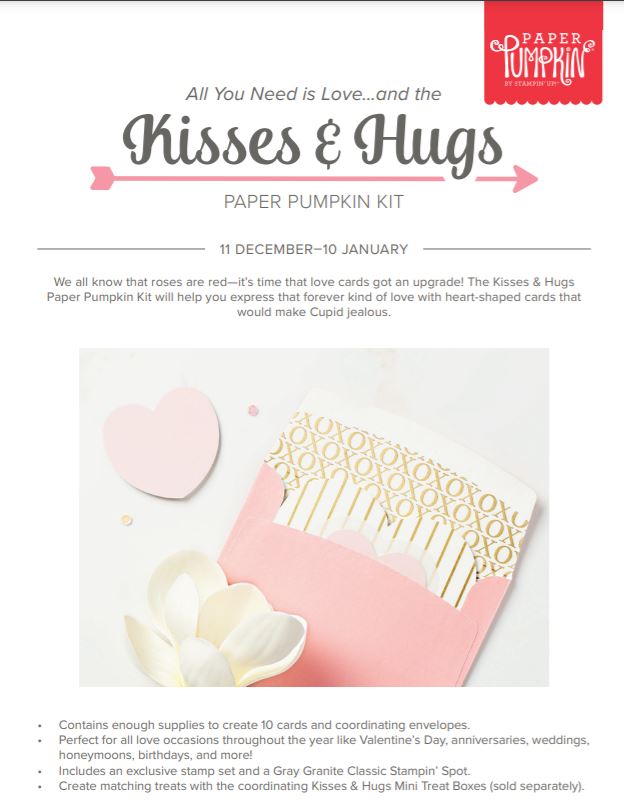
Answer the call of the wild—and your creativity—with the Safari Celebration Paper Pumpkin Kit. This playful, party-themed kit includes all the goodies and gear you need to create nine cards and coordinating envelopes in safari-inspired shapes and patterns you’ll go wild for! Make every occasion a celebration with this month’s amusing animals, beautiful botanicals, and celebratory sentiments.

Don’t monkey around and miss this amazing adventure! Unleash your creativity with February’s wildly fun kit.

Paper Pumpkin Feb 2022 Safari
Image © Stampin’ Up! 2022

It’s always exciting to see what the next new Paper Pumpkin Kit is! This one I think is a little different than others we have had and of course, will be fun to work with! Make the cards as designed or use the supplies in your own creative way! It’s amazing what other Paper Pumpkin subscribers come up with using all or some of their supplies in their own alternative ways! You can always find more ideas online after people receive their kits in the mail and start creating!

I doubt many of us will be going on a safari, but you can get a taste with these whimsical animals as you make cards and whatever projects you like!

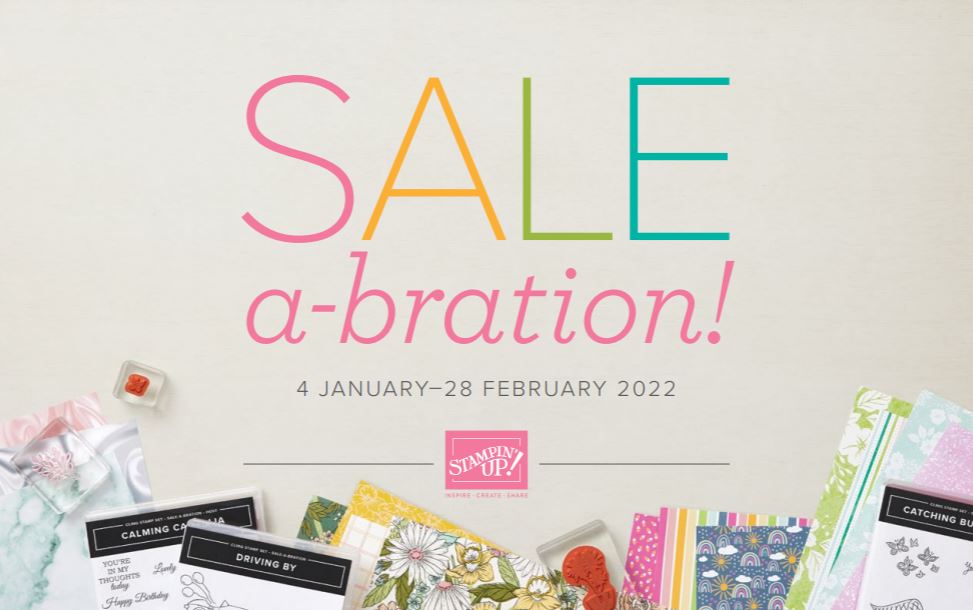
Subscribe for the monthly kit OR purchase a Prepaid Subscription in the Stampin’ Up! Online Store and right now, during Sale-A-Bration, a 3-month Prepaid Subscription will meet the $50 you need to earn a FREE Sale-A-Bration product. I suggest adding a few other items to your order (or add the Prepaid Subscription to your regular order!) so that you don’t pay shipping just on your free product. You can get longer Prepaid Subscriptions if you like for more benefits.

No risk, no obligation! Subscribe and try it out! If you don’t care for it just cancel or skip a month now and then if you need to. Stampin’ Up! stands behind their Paper Pumpkin Kits.

Join by February 10th to receive this Paper Pumpkin Kit.

JOIN PAPER PUMPKIN HERE!

(This is my personalized link so you won’t have to look up my name as your Demonstrator!)

Last Day: Kisses and Hugs Paper Pumpkin Kit

Last Day Today to Subscribe to Paper Pumpkin For This

January 2022 Kisses & Hugs Kit!

We all know that roses are red and violets are blue—it’s time that love-themed cards got an upgrade! The Kisses & Hugs Paper Pumpkin Kit will help you express that forever kind of love with heart-shaped cards that would make Cupid jealous.

The Kisses & Hugs kit is not bound to just Valentine’s Day, it works for all love occasions year-round like anniversaries, weddings, birthdays, or those “just because” days.

Last day to sign up:  January 10, 2022.

ABOUT THE KIT
Name: Kisses & Hugs (160148)

Details:

  • Kit contains enough supplies to create 10 cards—5 each of 2 designs—and 10 coordinating envelopes
  • Kit features an exclusive Two-Step photopolymer stamp set
  • Kit includes a Gray Granite Classic Stampin’ Spot
  • Card size: 4-1/2″ x 4-1/4″ (11.4 x 10.8 cm) heart-shaped cards; folded
  • Coordinating colors: Blushing Bride, Flirty Flamingo, Gray Granite, Very Vanilla

ADD-ON
Name: Kisses & Hugs Mini Treat Boxes (160147) $10.00 USD

Details:

  • Contains 20 mini treat boxes and 20 heart tags
  • Gold cord: 10-1/2″ yards (9.6 m)
  • Finished size: 1-3/4″ x 1-3/4″ x 1-3/4″ (4.4 x 4.4 x 4.4 cm)
  • Printed with gold foil
  • These coordinated treat boxes are not included in this month’s kit and are only available for purchase separately as an add-on online starting 25 January. You must be a Paper Pumpkin subscriber to purchase and they are only available while supplies last.

NOTE: Unfortunately, the ongoing international shipping issues and delays have impacted our January Paper Pumpkin kit and some of the components needed to finalize assembly are not going to arrive on time. They are in transit, and we’ve done what we can to help the components ship and arrive faster. Despite our efforts, billing and shipping for the January kit will be delayed. We anticipate that we’ll be able to ship the kits out before the end of the month and still in plenty of time to prepare your projects for Valentine’s Day as anticipated.

SIGN UP FOR PAPER PUMPKIN NOW!

Awesome Otters Hello Card

Awesome Otters Hello Card

These Awesome Otters are going to be a fun stamp set for you to stamp with! You can even earn it as a free product during Sale-A-Bration this month and next with a $50 purchase! You get three otters doing different things. like this one doing a little swimming! On my Awesome Otters Hello Card he is swimming with the foliage around the pond! And wait until you see what you can get to go with the otters!

I wanted to use the swimming otter but I didn’t have quite the right thing to look like water so I placed him in the center of this Heart & Home Doily. Then I embossed some foliage on the Basic White to look like the weeds and grass around his swimming hole!

The card base is Misty Moonlight to match the blue doily. The doilies are part of the Heart & Home Suite and come in three colors (Basic Gray, Cinnamon Cider, and Misty Moonlight) plus white on the back of all of them! It also has a layer of Crumb Cake cardstock underneath the Basic White card front.

The swimming otter in the Awesome Otters Stamp Set is just stamped on a scrap of Basic White cardstock with Memento Ink. The otter and the water are colored in with Stampin’ Blends. I couldn’t leave the background just plain white so I went for an interesting sky! I think I scribbled in a bit of Pale Papaya and then colored over lightly with Pool Party. You can play and experiment with colors you like or leave it plain! I added a double bow of Linen thread.

The Basic White cardstock is embossed with one of the Greenery Embossing Folders. Then I colored lightly over the leaves and berries with Stampin’ Blend markers. I adhered that layer to the front of the card on top of the Crumb Cake cardstock, then popped up the doily on Dimensionals. The greeting “Hello” is in the Inspired Thoughts Stamp Set and stamped with Misty Moonlight ink on a strip of Basic White. It seems like just the right size to go with the otter! Then I added two white dots of the new Classic Matte Dots on each side of the greeting.

Remember, you can get the Awesome Otters Stamp Set FREE during Sale-A-Bration with a $50 purchase! And if you want to, you can purchase some Otter postage stamps at the post office! I ordered mine online and they came the other day! These are the Otters In Snow Stamps!

Make some Awesome Otters cards and then use an Otter Stamp on your envelope! How fun is that!

SHOP STAMPIN’ UP! ONLINE!

Blessings of Home Floral Birthday Card

Blessings_of_Home_Floral_Birthday_Card

The Blessings of Home Stamp Set in the new January-June 2022 Mini Catalog has this beautiful bouquet stamp in it. You might think it would be too involved to color in this Blessings of Home Floral Birthday Card, but I found that I was done before I knew it.

This time I started with the stamp set, Blessings of Home, with the largest bouquet. I would decide later what color the card base would be, etc. I stamped the bouquet on a piece of Basic White Cardstock and die-cut it with the Flowers of Home Dies. You can purchase both the stamp set and dies in the Blessings of Home Bundle and save 10% over buying them separately.

I stamped the bouquet in Memento Ink so I could color it with my Stampin’ Blends alcohol markers. I looked at the colors that coordinate with the Heart & Home 12″ x 12″ Designer Series Paper but mostly I just wanted a soft look to the flowers. I started with Pale Papaya for the big center flower with a Delightful Daffodil center, with maybe a touch of Mango Melody to darken it. The other flowers are Calypso Coral, Highland Heather, and Pool Party. The leaves are mostly Granny Apple Green. Just use whatever colors you are in the mood for!

I decided on Cinnamon Cider for a card base with a Pale Papaya layer. Then I cut two pieces of the Heart & Home Designer paper to use for angled layers. They are 3″ x 4 3/4″. I actually mixed them up by accident! I intended for the wood pattern one to go behind the flowers since it is plainer, but I think it works okay the way I made it. The busy flower pattern is behind the bouquet but I think it still looks good. You probably can’t go wrong with the pretty designer paper and this floral stamp! The floral bouquet is popped up on Stampin’ Dimensionals®.

The birthday greeting is in the Blessings of Home Stamp Set. I simply stamped it in Memento Ink on a scrap strip of Basic White and cut it down to the right length. I put a strip of Basic Black behind it to help it stand out. I could have used Cinnamon Cider perhaps or one of the other colors in the flowers instead. Since it goes across the popped up bouquet, I put Mini Dimensionals on each end and a bit of Stampin’ Seal in the center to adhere to the card over the bouquet.

It really didn’t take me long to color the flowers. Besides, coloring is good for our mental health and relaxation so we should take the time and not feel rushed! But if you don’t have time or really don’t like to color, just stamp the bouquet in a color. HERE is a card I made earlier with the smaller bouquet and just stamped it in Cinnamon Cider.

There are many beautiful and fun stamp sets and products in the new January-June 2022 Mini Catalog or Spring Mini, so take your time and make out your shopping list! Don’t delay too long though for things you really want because you know what can happen sometimes! And don’t forget about Sale-A-Bration! With every $50 purchase, you earn a FREE Sale-A-Bration product!

HAPPY SHOPPING!

Double the Fun With New Spring Mini and Sale-A-Bration 2022!

Click photo to view catalog!

Shop the new January-June Mini Catalog!

Click photo to view catalog!

Yes! Today is the day we have been waiting for! The new January-June 2022 Mini Catalog went live this morning (I like to call it the Spring Mini Catalog for short!) AND it is the first day of Sale-A-Bration!!

During Sale-A-Bration, with every $50 you spend on Stampin’ Up! products, you earn a FREE Sale-A-Bration product in the Sale-A-Bration Brochure (pictured above). No limits! There are even two special products you can choose from with a $100 purchase (or stick with two free products) and a special Host set with a $300 order, whether yours alone or combined with friends.

Sale-A-Bration runs from today, January 4 through February 28, 2022.

The Spring Mini Catalog runs from today, January 4 through June 30, 2022.

It’s a great time to be a stamper! Go shop (think in $50 increments if you want to earn free products) and enjoy the day!

SHOP STAMPIN’ UP! TODAY!

Sunshine & Rainbows Birthday Wishes Card

Sunshine & Rainbows Birthday Wishes Card

Here’s a bright and happy card to start the New Year, this Sunshine & Rainbows Birthday Wishes Card. With things still disorganized at my house from moving things around for Christmas, I don’t even know what new products I have or where they are! I found one little pile and this paper was in it!

Beginning Tuesday, January 4 (yes, tomorrow!) the new Stampin’ Up! Spring Mini Catalog goes live plus our Sale-A-Bration promotion! Spend $50, get one free Sale-A-Bration product! This is everyone’s favorite promotion because who doesn’t like free product! This paper is used on this card is a Sale-A-Bration product that you can earn for free with a $50 purchase! It’s the Sunshine & Rainbows 6″ x 6″ Designer Series Paper and it coordinates with the Rainbow of Happiness Bundle in the Spring Mini Catalog. Some images coordinate with the dies and the new punch.

I was surprised to find this polka dot paper in the package, I was thinking it was all going to be rainbows on the “front” side of the paper, but when I saw this colorful polka dot, I had to use it! The bottom striped portion is the opposite side of the polka dots side!

The card base is Magenta Madness. I cut one of the pieces of designer paper a little longer so that they could overlap and not just meet, although that would have worked out okay, I didn’t know which ribbon I was using at first. The striped bottom piece is 5 1/4″ x 1 3/4″ and the polka dot pattern is 5 1/4″ x 2 1/2″ so the two papers can overlap by about 1/4″. The ribbon I used is the White 3/4″ Frayed Ribbon in the Spring Mini.

The greeting is found in the Little Delights Stamp Set, stamped in Magenta Madness ink on Basic White cardstock, and die cut with a die in the Painted Labels Dies. Then the greeting is layered on one of the Stitched So Sweetly Dies in Magenta Madness. It is popped up on Stampin’ Dimensionals over the wide ribbon. This stamp set is retiring from the Holiday Mini so TODAY is the LAST DAY for the great stamp set! Get it while you can!

To finish off this card, since the die cut behind the greeting was rather large, I felt like I should add something. Of course, that something was some jewels! I used the new Iridescent Rhinestone Jewels and a couple of the Gilded Gems from the Annual Catalog on each side of the Magenta Madness die cut. I’m not sure I love the placement of the gems, I didn’t feel like I was getting it right, but it’s right enough, so I decided to leave well enough alone! Sometimes you have to know when to stop!

*** Remember: Today is the last day for the LAST CHANCE PRODUCTS, the products retiring from the July-December 2021 Holiday Mini Catalog! Take a final look at your list and especially check in the Online Store to see what is still available! Check the Clearance Rack, too, as long as you are looking! There are a few things you could even use for making Valentine projects soon, plus punches, embossing folders, great dies, Gold Mini Pizza Boxes (great for treats, little 3″ x 3″ cards, small gift)

One more day until the new January-June 2022 Spring Mini Catalog AND Sale-A-Bration! Sleep well so you are bright-eyed and bushy-tailed tomorrow!! Happy New Year and Shopping!

Spring Mini & Sale-A-Bration 2022 Coming SOON!

Doesn’t it feel good, once Christmas is over, to be refreshed with new spring products to start the new year? And to make stamping life even better, the first Sale-A-Bration promotion of the year will also begin! Spend $50 and earn a FREE Sale-A-Bration product! The new Spring Mini (January – June 2022) and Sale-A-Bration both begin on Tuesday, January 4th! THIS WEEK!! Put away your Christmas products (unless you want to make some holiday thank you cards!) and get ready for Spring!

Sale-A-Bration is a favorite promotion of Stampin’ Up! and has gone on since nearly the beginning of the company. I can tell you from all the years I have been a customer and then a Demonstrator that Sale-A-Bration has really improved over the years. What I remember is only a choice of about four or maybe six stamp set choices for Sale-A-Bration with your $50 purchase. That was it! Now we have four stamp set choices with a $50 purchase, one stamp set choice with a $100 purchase and one along with designer paper with a $100 purchase, plus three sets of designer paper with a $50 purchase, AND one lovely stamp set with your own personal order or an order combined with friends of $300 or more. And this is just the first Sale-A-Bration of the year! Sale-A-Bration lasts two months, but don’t delay!

It all starts Tuesday, January 4th so dig your catalogs out of your Christmas mail and start making your list! Remember, it doesn’t start until Tuesday! And think in terms of $50 increments so you can earn one or more Sale-A-Bration products. All of these products will be in the Online Store on Tuesday and links to the catalogs will be online on Tuesday.

If you do not already have a Demonstrator you are working with, I would be happy to be yours for however little or much assistance that you need, and send you complimentary catalogs if you are interested in purchasing Stampin’ Up! products. Just email me at Karen@Karenstamps.com with your contact information.

And don’t forget the Last Chance Products!! These are retiring products from the Holiday Mini so Monday will be the last day for those. It’s easiest to look in the Online Store to see what is still available. Don’t forget the Clearance Rack, too, for great bargains!!

Last Chance Holiday Mini 2021

HAPPY SHOPPING!!

Wine Tag To Celebrate the New Year 2022

New Year 2022 Wine Tag on Bottle

If you are going to a party or just celebrating at home, you might have fun making something like this Wine Tag To Celebrate the New Year 2022. It is so easy to make and if you are taking a gift of a bottle of bubbly, really any time, to take to a host, you can decorate it with a tag like this one. It is as easy as can be!

For this one, the base is Basic Black, cut at 9″ x 3″. The gold striped paper is one of the patterns in the Expressions In Ink Specialty Designer Series Paper in the Stampin’ Up! Annual Catalog. I cut the designer paper at 8 3/4″ x 2 3/4″ to fit on the Basic Black. After adhering the designer paper, score the top at 2 1/2″. Then punch or die cut a hole in the top to go over the bottle. I used a Layering Circles Die that was about 1 3/8″ wide. In THIS POST where I made a Thanksgiving bottle tag, I pulled out my retired 1 3/8″ Circle Punch.

To decorate the front, I die cut a piece of Basic Black with one of the Tasteful Labels Dies. I cut out letters and numbers from Gold Foil with the Playful Alphabet Dies. I admit I didn’t get the letters and numbers placed very well on the die cut piece! But I balanced it out a little bit by putting some gems on the “empty” side! I should have looked for my glasses before glueing!

The die cut piece is popped up on Stampin’ Dimensionals®. I adhered a piece of Gold 3/8″ Shimmer Ribbon because you can’t have too much gold or shimmer for New Year’s Eve and New Year’s Day!

New Year 2022 Wine Tag

That’s it! These tags that hang on bottles (could be water bottles, too!) are so easy to make, you have to try one! It’s a quick little project unless you make a super fancy decoration on the front of the tag! Since people often take a bottle of wine (or something!) as a host gift to a party or dinner, this is a fun way to put your own personal touch on the gift!

Have a Safe, Healthy, and Happy New Year!!

Sign Up Today For My Stamping With Karen Mailing List

Join Our Stamping With Karen Mailing List

It’s time to be a part of the Stamping With Karen Mailing List since we will have the new January-June 2022 Mini Catalog very soon (I call it the Spring Mini!) plus it will be Sale-A-Bration, the big Stampin’ Up! promotion during which you can earn free products with every $50 or $100 purchase! These catalogs, along with the Stampin’ Up! Annual Catalog, give you lots of products you will be excited about, want to learn about, and want to see all the ideas for cards and projects possible!

Keep up with news about the new Paper Pumpkin Kit every month and subscribe if you want to join in the fun of having a project already planned and prepped for you in the cute Paper Pumpkin box! Always sign up or skip a month if you want by the 10th of any month.

If you are on my blog, you will see a red sign-up box in the top right corner where you can simply put your name (or first name) and best email. If you are on your phone, you probably need to scroll way down to get to the sidebar things. OR you can go to my sign-up page HERE.

You will receive an email with a link to your free gift from me.

I send out a weekly email every Tuesday afternoon with the latest Stampin’ Up! news and offers plus stamping ideas with a supply list and directions. Even if you never make the project, maybe just seeing ideas will do your crafty heart good! I know it does mine! I’m all about the ideas!!

Let’s stay connected and in touch with each other over our favorite thing to talk about…..stamping with Stampin’ Up!

Whimsy & Wonder Christmas Thank You Cards

Whimsy & Wonder Christmas Thank You Cards

Christmas is over and now it is time to write those thank you notes like these Whimsy & Wonder Christmas Thank You Cards. It may be an old-fashioned thing and email or texting is faster, but a real thank you note is always best! Here are three quick examples!

To keep it simple, I chose the Basic White Note Cards but you could use a regular size card as well. Then I just decorated the cards using the Whimsy & Wonder Specialty Designer Series Paper. This is your chance to use the “other side” of the fancy paper, although I still cut out some images from the fancy side! You could even just use a strip of the designer paper if you wanted to use up your tiny scraps.

These note cards are 3 1/2″ x 5″, which is a mailable size and they come with envelopes. Therefore, I cut my layer of designer paper at 3 1/4″ x 4 3/4″. The “Thank You” is in the Peaceful Moments Stamp Set. I stamped it with Polished Pink ink just to keep it simple. Then I used different punches for the sentiment.

The first note card uses a pink “other side” of the paper. I cut out some of the packages on another pattern and adhered those to the front of the card, some popped up with Stampin’ Dimensionals, some flat on the card. Then the “Thank You” was stamped and punched out using the Lovely Labels Pick A Punch.

The middle note card is the simplest of all! I just used the striped pattern in the Whimsy & Wonder DSP and added a stamped “Thank You”, punched out with the Tailored Tag Punch. I added a couple of jewels just for a little extra something.

The note card on the right uses a light green layer, plus a few cut out trees from the paper. The Thank You is stamped in Polished Pink and punched out with the Everyday Label Punch. I do have the dies for the trees, but since I had to clean up and put away my die-cutting machine, dies, and mess for Christmas dinner, it was easier to just cut the trees out by hand! Your recipient won’t know, “Gee, she could have die cut these and she didn’t!!” I added a little White Crinkled Seam Binding Ribbon behind the sentiment, just the back and forth underneath the label.

Since these Basic White Note Cards are smaller, they are not necessarily meant to be super-fussy cards so you can go a lot simpler and quicker with these! If you made just one style of Christmas card, it might be fun to use that same paper, even if you only used a strip, to continue with the theme of your Christmas cards! Whatever you do, the gift-giver will appreciate a little note (and the handmade note card!) from you! Or just write a note to those who know your family or couldn’t be with you and tell them about your Christmas, just a post-holiday note! It will ease the withdrawal from Christmas cards in the mail and no Amazon packages at the door! LOL!

And if you used up every bit of your paper and embellishments from the Holiday Mini Catalog, be sure to check out the Last Chance List, ending January 3rd, and the Clearance Rack where you might find some bargains to use now or to save for next year! Be old-fashioned and send a few thank you notes like these easy Whimsy & Wonder Christmas Thank You Cards with whatever paper you have left!

SHOP STAMPIN’ UP!

SHOP THE HOLIDAY MINI LAST CHANCE PRODUCTS!

SHOP THE CLEARANCE RACK!

Chocolate Santa in the Chimney

Chocolate Santa in the Chimney

I made this Chocolate Santa in the Chimney late last night but couldn’t resist posting it today in case anyone sees it and can use it over the holiday! My friend I texted last night said it was “too cute”! I copied it from Melanie, @sternenglanzpapierzauber, a Demonstrator (I assume) in Germany. She didn’t have directions but I figured it out! All you have to do is make (or use) a box and stick a chocolate Santa inside!

My Santa is a Lindt chocolate Santa and a decent size, not really small. You could use a smaller Santa, just make the box smaller.

I started with Real Red cardstock 5 1/2″ x 10 1/2″. Score at 3″, 5″, 8″ and 10″. Turn the paper longways to score the bottom flaps at 1 3/4″. Just like we do on most boxes and bags, cut those flaps on the score lines up to the score line going across. Cut off the tiniest 1/2″ section. Crease well, see how it goes together, then glue that 1/2″ flap to the other side. Fold in the flaps and apply adhesive. I like to stick my bone folder inside and rub to really adhere the bottom flaps together.

For the white fur part at the top, I cut a 2″ x 11″ strip of Basic White and then just cut it curvy freehand! You may have a die to use as Melanie did on hers. The only thing is you want the ends to match in width so that when you get to the back of the chimney where they meet up, you don’t want one narrow and one wider (If you want it perfect!). I applied adhesive and placed the middle of the strip in the center of the chimney on the front and wrapped the ends around the sides and to the back. Since I was copying, I just punched out a Gold Foil star with a retired punch (you can use a die) and adhered that to the white.

For the belt, I cut a 3/4″ x 11″ strip of Basic Black and adhered it the same way as the white above. Just use your fingers to crease on the edges to make a tight fit rather than trying to score and having it not fit right.

For the belt buckle, I cut a 1″ x 1″ piece of Gold Foil, adhered that, then adhered a 3/4″ x 3/4″ piece of Basic Black in the center to look like the belt going through the buckle.

It’s just that easy! I suppose you could even emboss the Real Red cardstock to look like brick or some other texture. You could even omit the white fur and belt and make it look really like a chimney and maybe add a greeting to the front. Whatever you like!

Growing up, Christmas Eve was really my favorite day because my family opened presents at our house on Christmas Eve with my grandparents and maybe other visiting relatives, maybe going to church before or after. Then on Christmas Day we would go to my grandma’s house, who hadn’t hauled her presents to our house, and have Christmas dinner at her house then open presents from her. Of course, Santa came to our house on Christmas morning! What is better than being a young child and having Santa come??!!! My mother would often”apologize” on Christmas Eve that my parents couldn’t buy us more than one or two gifts on Christmas Eve because they didn’t have the money! But Santa always came through!! LOL!

I hope you have a wonderful Christmas Eve!

Last Minute Stamping Christmas Ideas

We’re here! Tomorrow is Christmas Eve so depending on your celebration schedule, today might be the last day you are trying to get things done and tie up loose ends for your holiday celebration! Here are some past ideas I think you can use, maybe with retired products but ones that you can substitute with current products or dig out your old products that you may still have in your stash!

Tiny Christmas Treat Box With Trees

This little Tiny Christmas Treat Box With Trees uses the retired little acetate box, but you can use any box. Just punch out or die-cut three little trees out of cardstock or designer paper plus a little ribbon and maybe some gems to decorate! Fill with candy or a small gift! So easy!

Gold Mini Pizza Box With Christmas Poinsettia

This Gold Mini Pizza Box With Christmas Poinsettia uses the still-current Poinsettia Dies so you can decorate any box with a beautiful poinsettia!

Christmas Fudge Candy Wrapper Poem

Pick up one of those giant chocolate bars on your last trip to the grocery store or drugstore and print out this poem! It’s the Christmas Fudge Candy Wrapper Poem! It’s an oldie but goodie and easy to make for a funny gift!

Rudolph the Red Nosed Reindeer Gift Bag

This Rudolph the Red-Nosed Reindeer Gift Bag has been a real favorite! So easy to make and so fun for a gift bag! Or decorate the top of a package like this!

Snowman Gift Bag

Want to decorate a gift bag? This Snowman Gift Bag will easily cover up any printing of the store name on the front of the bag! And again, you could decorate the front of a package in a similar way! Just takes a few minutes!

Toile Tidings Christmas Red Gift Card Holder

I heard on the news the other night the high number of gift cards that are given at Christmas! Make yours special with your own gift card holder like this one! Of course, use any paper you have or something current! Probably you have scraps that will be put to good use!

These are just a few of my older blog posts with Christmas ideas. If you want more, just use the Category drop-down box on the right to search Christmas or #3D Gifts & Things! It’s fun to look back at the older ideas because we still can use them!

Merry Christmas!

A Stamper’s Christmas Card Poem

Christmas_cards_2021

The Week Before Christmas (In a Stamper’s House)

‘Twas the week before Christmas, and the house was a hush
Save the stamping of rubber in a last-minute rush.
The cardstock was cut with precision and care
In hopes that a greeting would soon be stamped there.

The children were tucked in their beds around eight,
But now it’s ten-thirty… How’d it get so late?
And I in my PJs with bleary red eyes
Had finally arranged all the stamping supplies.

It started out simple. (It does every year.)
Just make a few cards for friends who are dear.
I pressed ink to paper. (It looked crisp and clean.)
A sprinkle of powder, heat to a sheen.

When what on my green Christmas card should appear?
Why, a tiny gold Santa with sleigh and reindeer.
On pigment! On powder! On heat from a gun!
Now ribbon and glitter! Can I make eighty-one?

“I can do it!” I said with all of my might
And looked at the clock – ’twas well past midnight.
I went straight to stamping out card after card.
“This might take all night, but at least it’s not hard.”

But after I finished, they looked a bit lame.
I didn’t want fancy, but these were too plain.
And then in a twinkling, a thought came to mind.
“I’ll just dress them up, and then they’ll be fine.”

So I went to my craft room and looked all around,
Then back to the table with all that I’d found.
My Fiskars I brandished (I wasn’t a quitter),
And soon I was covered in EP and glitter.

The cap of a marker I held in my teeth.
I’d lay in some color or maybe gold leaf.
My broad little face was all beaded with sweat,
But I wouldn’t give up – well, not at least yet.

There was glue on the table and ink on the floor.
I laughed at the sight though my fingers were sore.
I did not complain, just kept up my work.
When more things went wrong, I did not go berserk.

When finally finished, one card about six,
It looked pretty good after all of my tricks.
I’m keeping this one. My work on it shows.”
So clutching my card, up the stairs I arose.

I crawled into bed at the crack of dawn,
Creativity all spent motivation all gone.
But make no mistake, I promise one thing:
You’ll all get your cards, but not ’til next spring!

–Author Unknown