Tag Archives: Last-Chance Products

Checking Out New Stampin’ Up! Products

Testing Markers

It’s so much fun receiving an order of new Stampin’ Up! products! As a Demonstrator, I got to preorder certain products from the new Stampin’ Up! catalog this month. One of the products I got were all the Stampin’ Blends Markers in the new In Colors. They are not all pictured in the photo above, but I did get all five new In Colors.

Here’s a tip when you get new Stampin’ Up! products! Check them over! After receiving the Stampin’ Blends alcohol markers, I sat down with a scrap of Basic White cardstock and tried out each color, brush end and tip end. You want to do this to make sure you don’t have a defective marker that maybe is dried out. I have rarely had this happen, but you know, stuff happens sometimes. I think sometimes there is a batch of a certain product that isn’t perfect. I just try out each marker, just scribbled a little test scribble. I suggest coloring on Basic White so you can see the true color of the marker. I have done it just on my grid paper but it’s not the same. You might find out if the markers all work properly, but scribbling on white cardstock lets you see the color. And that’s something you want to know with a new marker color!

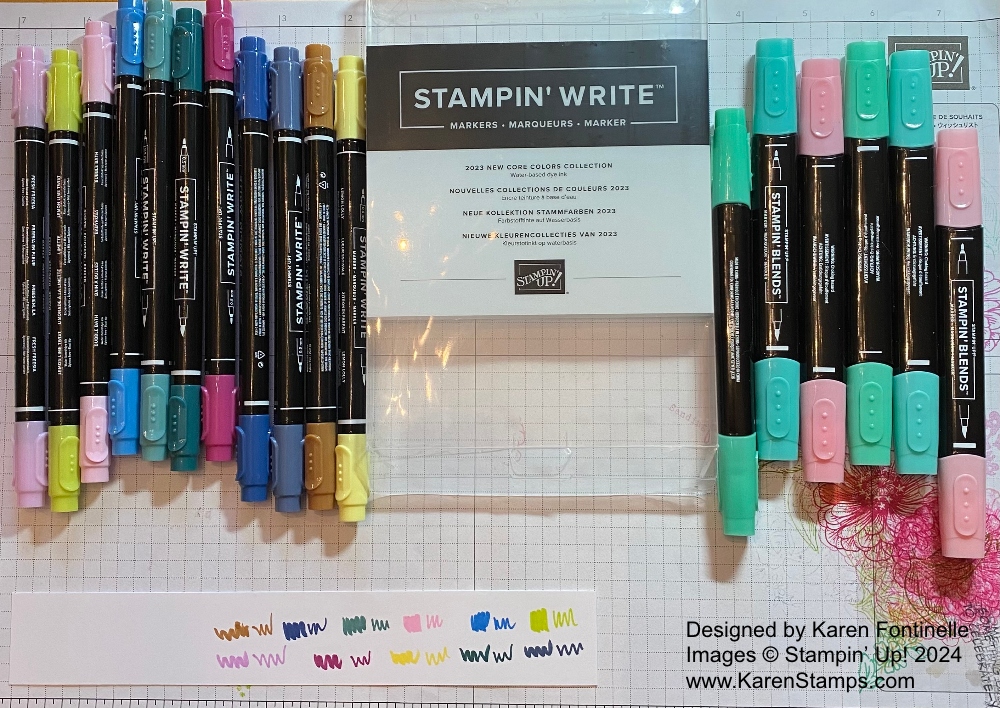
Naturally, I forgot to order a few things on my first preorder so I had to place another order, like for the new Basic Beige cardstock and ink pad, plus the retiring Stampin’ Write Core Colors markers. These markers came out last year when we had the big color refresh to fill in the colors we already had. When I saw that these markers were on a good discount at 50% off I thought it was a great deal to get them!

As I said about the Stampin’ Blends markers, I sat down with a scrap of Basic White cardstock to test out all the Stampin’ Write Markers and make sure they were all working fine. They were! What I didn’t think about at first is that these are the new design of Stampin’ Write Markers! I realized they felt thinner than the markers I had plus the tip end had a new design! I really liked the new tip end! How do we get so excited about such things?! That’s why we are papercrafters I guess!

These Stampin’ Write Core Color Markers are 50% off!! So if you need to fill in these colors, or even most of them, it’s time to order them before they disappear. Actually, I thought they were sold out but more must have come in! The colors are Azure Afternoon, Berry Burst, Blueberry Bushel, Bubble Bath, Fresh Freesia, Lemon Lime Twist, Lemon Lolly, Lost Lagoon, Misty Moonlight, Pecan Pie, and Pretty Peacock.

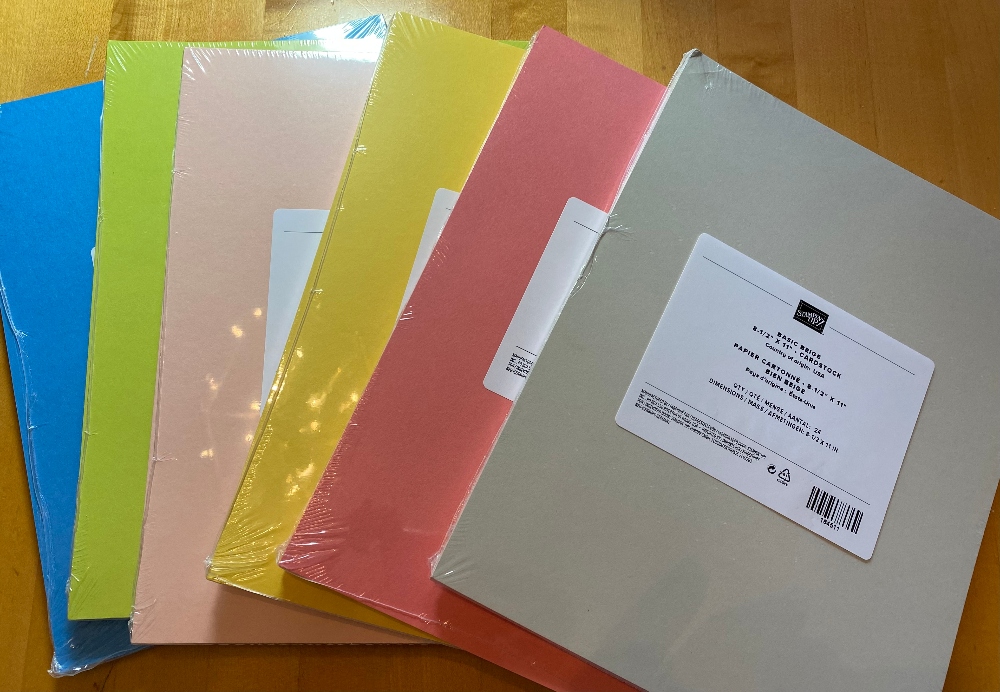
And while we are talking about Stampin’ Up! colors, here are cardstock colors I stocked up on that I needed before prices go up. But when I held the packages together, I just thought “How pretty all these colors are!” So I had to take a photo to show you! One of the best things about Stampin’ Up! is how pretty their colors are and how the products all coordinate. You won’t get a red ink that doesn’t quite match the paper.

Stampin' Up! Colors

There are six days left of the Stampin’ Up! 2023-2024 Annual Catalog and the January-April 2024 Mini Catalog (the Spring Mini) and the discounts on the Last Chance List! Don’t miss out!

SHOP THE LAST CHANCE PRODUCTS!

SHOP THE CLEARANCE RACK!

Easy Share What You Love Card

Easy Share What You Love Card

One of the Stampin’ Up! products I hate to see retire very soon is the Share What You Love Specialty Designer Series Paper that I used in this Easy Share What You Love Card. The paper is so pretty, you get a double amount of sheets than in the usual package of designer paper, the designs are handpainted, and some of the sheets have a translucent pearlized finish. It is paper that can be used for a variety of projects, especially being heavyweight designer paper.

One of my favorite patterns in this Share What You Love package of paper is this floral paper with the white background. It is so bright and fresh. The opposite side of the paper has this ombre striped design, so I chose to use both on this card!

The card base is Rich Razzleberry Cardstock. The floral paper is the full size for the layer and then I adhered the striped pattern over the bottom portion. If you really wanted to save paper, you could cut each piece to the exact size you want and then the ribbon would cover the line where they meet. Or you could add a strip of paper over it.

The ribbon is the Rich Razzleberry 1/4″ Velvet Ribbon. I just cut one strip a little longer than the width of the card and adhered it on the back of the card layer, then tied a separate little piece of the ribbon in a knot around the ribbon across the card. This saves a few inches of ribbon that wouldn’t show on the back and saves some bulk.

The greeting is stamped in Rich Razzleberry Ink and is from the Flourishing Phrases Stamp Set. I’m so glad this stamp set is carrying over to the new catalog along with the Flourish Dies. This stamp set has that pretty stem of flowers plus some great sayings to use and very pretty dies.

The greeting is die cut with the Layering Circles Dies and layered on a scalloped circle in the same die set. I popped it up on two Stampin’ Dimensionals since the ribbon is thick. I was going to just add some pearls or rhinestones to the greeting but then I saw the Frosted Flower Embellishments in my drawer. It looked like one of those flowers would be perfect and I think it is! The color is actually Fresh Fig but I think it is close enough to match. For a finishing touch, I added a tiny Artisan Pearl to the center of the flower. To mail, I will probably place a piece of paper towel or crimped computer paper over the card front in the envelope to protect it from the machines sorting the mail.

This is a very easy card to make, especially when you just use the opposite sides of one sheet of designer paper. Then just add a greeting and maybe a ribbon and you have a perfectly fine card to give someone. It only takes minutes to make.

In fact, using this basic plan, you could make an assortment of cards with one package of designer paper. Either make different greetings or save the greeting for when you need to card. This way you have a stash of cards ready to go for when you want to send a card but don’t have time to pull everything out and make a card.

Here is another card made with a full card front of one design from the Share What You Love DSP, using a greeting and the same Rich Razzleberry Velvet Ribbon.

You can make either one of these cards with any designer series paper, so be sure to check the Last-Chance products in the Stampin’ Up! Online Store to see if there are any papers you want to stock up on before they go away. And after you choose your paper, take a look at the ribbons that would coordinate or that you want to replace or stock up on. Take a few minutes to make some cards like my Easy Share What You Love Card.

Stampin’ Up!
Last-Chance Products!

Make an Easy Celebration Card

Make an Easy Celebration Card

Make an easy celebration card for someone very quickly with this basic card design! It’s always simple to make a card with a card base, a layer and a greeting and from there you can embellish a little bit or a lot depending on your style and the occasion for the card!

This card starts with a Lemon Lime Twist card base. What will we do without Lemon Lime Twist when this In Color retires?! If you want any of the 2017-2019 In Colors – ink, refills, cardstock, papers, embellishments – be sure you get them before they retire on June 3, 2019.

I chose the Broadway Bound Specialty Designer Series Paper for this card. I like this balloon pattern because it can be for any happy occasion! This card could be for a birthday, graduation, or simply any congratulatory note. This package of paper has a party design on one side and gold foil designs on the other so you can be as festive as you like!

To set off the designer paper from the Lemon Lime Twist card base, I added a layer of Lovely Lipstick, one of the current In Colors that are sticking around another year. And since I had this narrow Lovely Lipstick 1/8″ Grosgrain Ribbon I added that for some embellishment.

The greeting is from the Happy Birthday Gorgeous Stamp Set. It is stamped in Lovely Lipstick and die cut with an oval die, layered on a scalloped oval die, both from the Layering Ovals Framelits Dies.

Here are three cards I made with the Broadway Bound Paper that might give you some other ideas!

Whether you use this paper or some other designer paper, you can use this card layout and design for either a simple card or as a base for something fancier.

Be sure to check out the Last-Chance List of retiring products to see what is available and what you can’t live without! If you have any questions about things that might be in the new catalog, feel free to ask! I don’t have the new hard copy yet but I can look online!

Also, don’t forget the Clearance Rack if you didn’t get to shop the other day!

SHOP STAMPIN’ UP! ONLINE HERE!