Category Archives: Valentine

Trio of Hearts Valentine Card

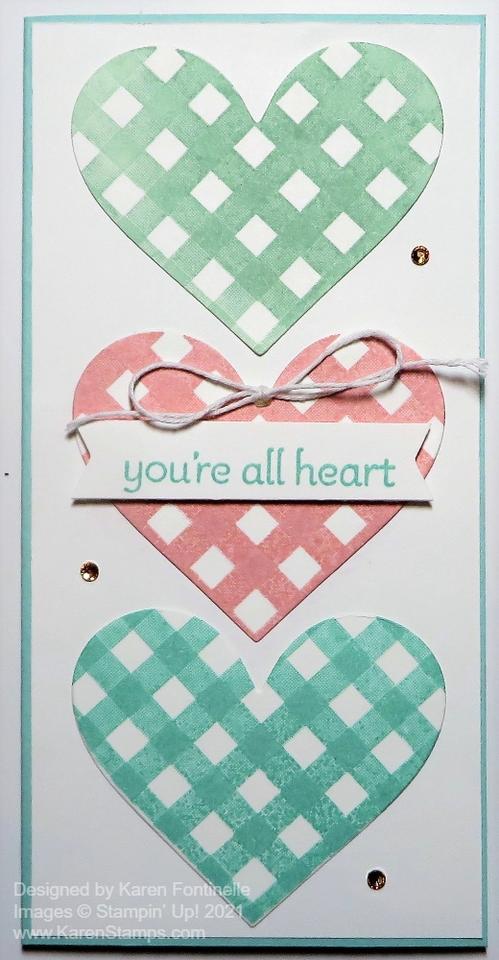
You get lots of hearts in the stamp set and dies I used to make this easy slim card, Trio of Hearts Valentine Card, for Valentine’s Day or really any time! These hearts are pretty big but they still fit perfectly on this slimline card.

I just got the Lots of Heart Bundle, which has the Lots of Heart Stamp Set and the Many Hearts Dies. And there really are many heart dies in that set! In fact, I recommend making a copy of the sheet with all the dies still adhered with your printer and keep it with your dies so you can see clearly what you are supposed to have! There are 15 different dies in the set!

To make this card, I decided to make pastel-colored hearts so I started with a card base of Pool Party Cardstock. I cut the paper 6″ x 6″ so that when I folded it in half, it would be 3″ x 6″ for a slimline card. The Whisper White layer is just a tiny bit narrower than the card base, 2 7/8″ x 5 7/8″.

I stamped the hearts on another piece of Whisper White and then die cut with one of the heart dies. This heart die also cuts a narrow outline of the heart, which I didn’t notice at first so the excess paper was getting left in the die. If you have this set, make sure you check the underside of your heart die because if you cut several times, that paper still stuck in the die will prevent getting a complete cut after awhile!

The hearts are stamped in Blushing Bride, Mint Macaron, and Pool Party ink. Since the photopolymer stamps are new, even though I wiped them on my Shammy a couple of times, the ink still beaded up a tiny bit when I stamped, but I don’t think it’s anything that’s bad enough to jump out. I adhered the hearts flat on the white card layer, but I could have popped them up on Stampin’ Dimensionals. Either way is fine. I did stamp the greeting in Pool Party Ink and then popped that up on Dimensionals. The greeting is in the Lots of Heart Stamp Set.

I almost left it as is at that point, but I decided to add some Champagne Rhinestone Basic Jewels. Who can resist a few rhinestones?! And for a final touch, I just used a piece of white twine I had to make a little bow on the center heart, adhered with a rolled-up Mini Glue Dot.

This is one example of how you can make an easy Valentine using three hearts in the Lots of Heart Stamp Set in the January-June 2021 Mini Catalog on page 15.

SHOP STAMPIN’ UP! ONLINE HERE!

Sweet Little Valentines Cards & More

Sweet Little Valentines Cards & More Kit

Here is something you might miss in the new January-June 2021 Mini Catalog – the Sweet Valentines Cards & More! I almost forget I put it on my first pre-order before Christmas and I guess it got lost in the shuffle a little bit. But don’t overlook it because I think you will enjoy making some cards with this little kit. It’s not even officially a kit, just a package of card bases, card fronts, and envelopes but there is so much possibility with these colorful pieces!

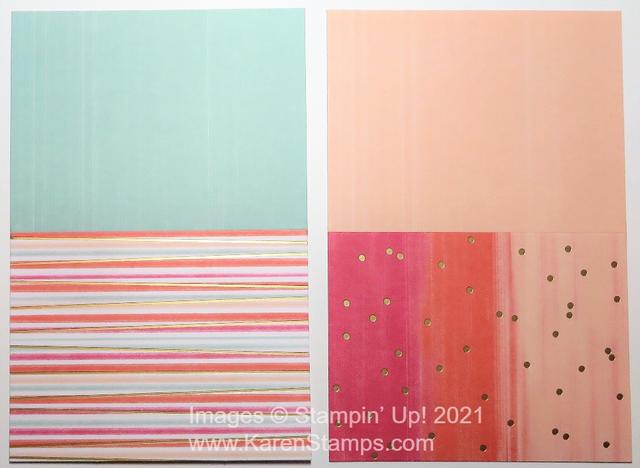
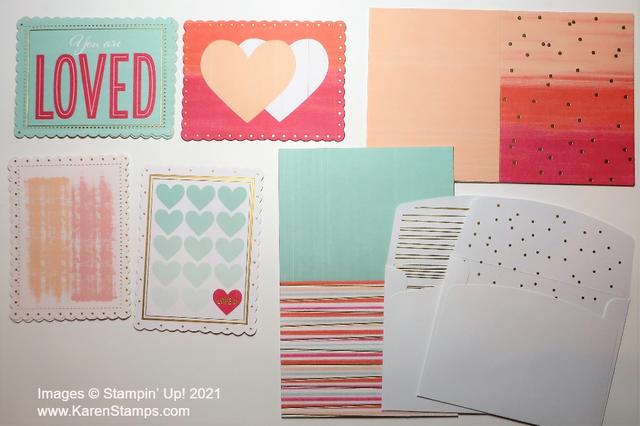
As you can see in the photo below, You get two kinds of card bases, printed on both sides front and back so you can choose whichever side you want to be the front. Or even cut them apart and adhere to your own card base for a colorful background. Make twice as many cards that way!

Sweet Little Valentines Cards & More Card Bases

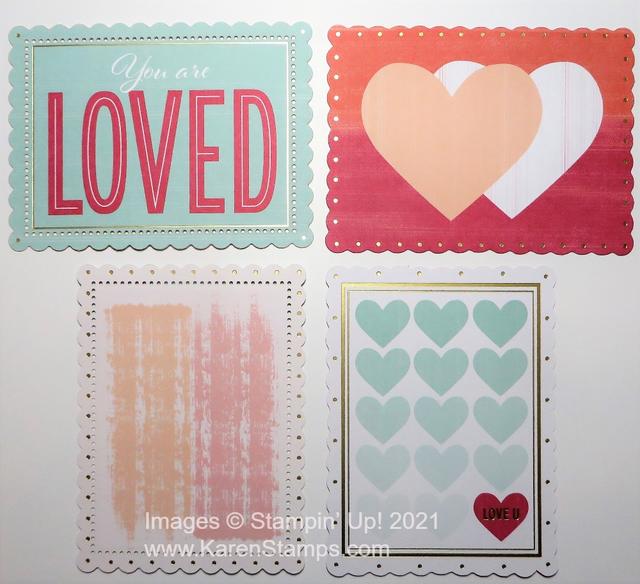
To make the cards, you also get the card fronts. These are pieces almost as large as the card base itself so it’s a little bit of a shame to cover up the cute card base! But then when you look at the card fronts, there are two sides, both cute! You will hate to put glue on one side, like we do with designer paper! They also have gold foil accents!

Sweet Little Valentines Cards & More Card Fronts

Now really, if you adhere the card front with the blue hearts and one red heart onto a card base, you are DONE! You don’t need a greeting! If you wanted to, you could embellish either one with a bit of ribbon or whatever you wanted to use, whatever you have in your “stash”. And of course, the “You Are Loved” card really doesn’t need anything else! The blue hearts are the opposite side of the “You Are Loved” card and the big hearts card front has that kind of brushed look on the other side. You can add a greeting to these two plainer card fronts.

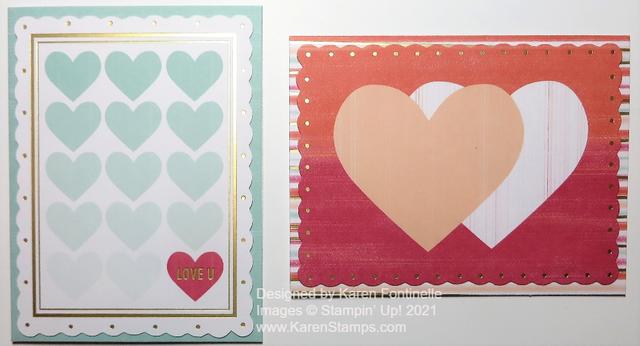
Sweet Little Valentines Cards & More Cards

Here are my first two cards, made, seriously, in like 30 seconds! I just adhered the card fronts to a card base. That’s all I made upon just opening the package, but I want to “play” with all the pieces more and make some alternative cards as well.

You might even want to order two packages of these and you will be set for Valentine’s Day or even just any occasion notecards to send. Hearts and love is good any time, not just February 14th!. Envelopes are included. The only thing, I’m not sure the envelopes are the proper size for mailing, but you can put your card in a regular size envelope and save these for something else…..like a little envelope album! I think envelopes have to be 3 1/2″ x 5″ to mail, the size of our Notecards & Envelopes.

Sweet Little Valentines Cards & More (154287) on page 16 of the Spring Mini.

Makes 10 cards
* Includes 10 scored card bases, 10 double-sided card fronts, and 10 envelopes
* 4 designed card fronts give you options
* Folded card size: 4-1/4″ x 3-1/4″(10.8 x 8.3 cm)
* Card front size: 3″ x 4″ (7.6 x 10.2 cm)

Put this on your next order! The set is only $10 and you will have fun making little love notes to have on hand or to send right away! Play with all the pieces and come up with your own creations!

Shop Stampin’ Up! Online HERE!

LAST DAY! Get the January 2021 Paper Pumpkin Kit!

January 2021 Paper Pumpkin Kit

Love is in the air! Send a little love to someone special with the Sending Hearts Paper Pumpkin Kit. From heaps of heart-shaped elements to paper pieces in red and pink, this month’s kit has everything you need to create eight adorable cards—with coordinating envelopes—for Valentine’s Day, anniversaries, and every celebration of love in between!

Sign Up for Paper Pumpkin HERE to get the January 2021 Kit!

With the add-on to January’s sweet and sentimental kit, there’s even more love to share! The add-on—called Little Love Boxes—includes 20 tiny, printed boxes and 24 die-cut, heart-shelled snails and sentiment labels. When combined with the remaining components from the Sending Hearts kit, you can create treat packaging, additional cards, and so much more! Order the Add-On from the Stampin’ Up! Online Store after becoming a Paper Pumpkin subscriber.

Who doesn’t love making Valentines and sending them? I think Valentine’s Day takes us back to our childhood, to elementary school, when we would decorate shoeboxes or lunch sacks in which to receive our valentines from our classmates!

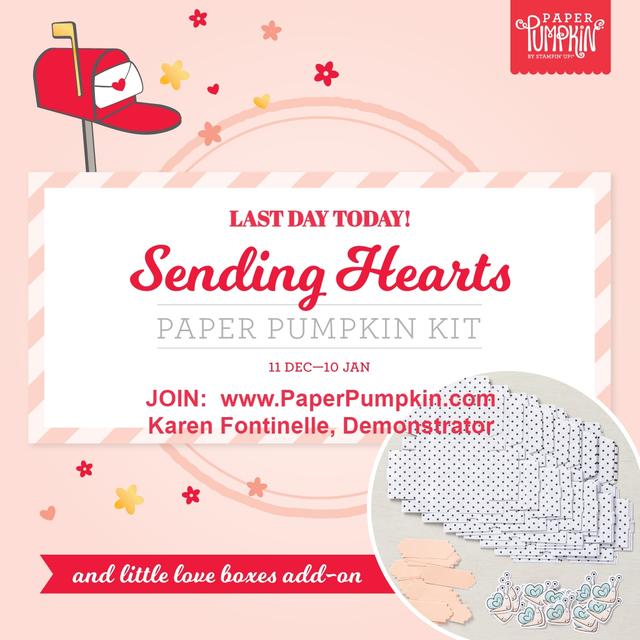
Today is the LAST DAY to sign up for the January 2021 Paper Pumpkin Kit, Sending Hearts! Sign up TODAY or reactivate your account so you will receive this kit mid-January!

JOIN PAPER PUMPKIN TODAY!

Sign Up For the Paper Pumpkin Sending Hearts Kit

Paper Pumpkin Sending Hearts Feb 2020

Love is in the air! Send a little love to someone special with the Sending Hearts Paper Pumpkin Kit. From heaps of heart-shaped elements to paper pieces in red and pink, this month’s kit has everything you need to create eight adorable cards—with coordinating envelopes—for Valentine’s Day, anniversaries, and every celebration of love in between!

With the add-on to January’s sweet and sentimental kit, there’s even more love to share! The add-on—called Little Love Boxes—includes 20 tiny, printed boxes and 24 die-cut, heart-shelled snails and sentiment labels. When combined with the remaining components from the Sending Hearts kit, you can create treat packaging, additional cards, and so much more!

Who doesn’t love making Valentines and sending them? I think Valentine’s Day takes us back to our childhood, to elementary school, when we would decorate shoeboxes or lunch sacks in which to receive our valentines from our classmates!

Sign up time is open now for the January 2021 Paper Pumpkin Kit, Sending Hearts! Sign up now or reactivate your account so you will receive this kit mid-January!

JOIN PAPER PUMPKIN TODAY!

Quick and Easy Valentine Card

Quick and Easy Valentine Card

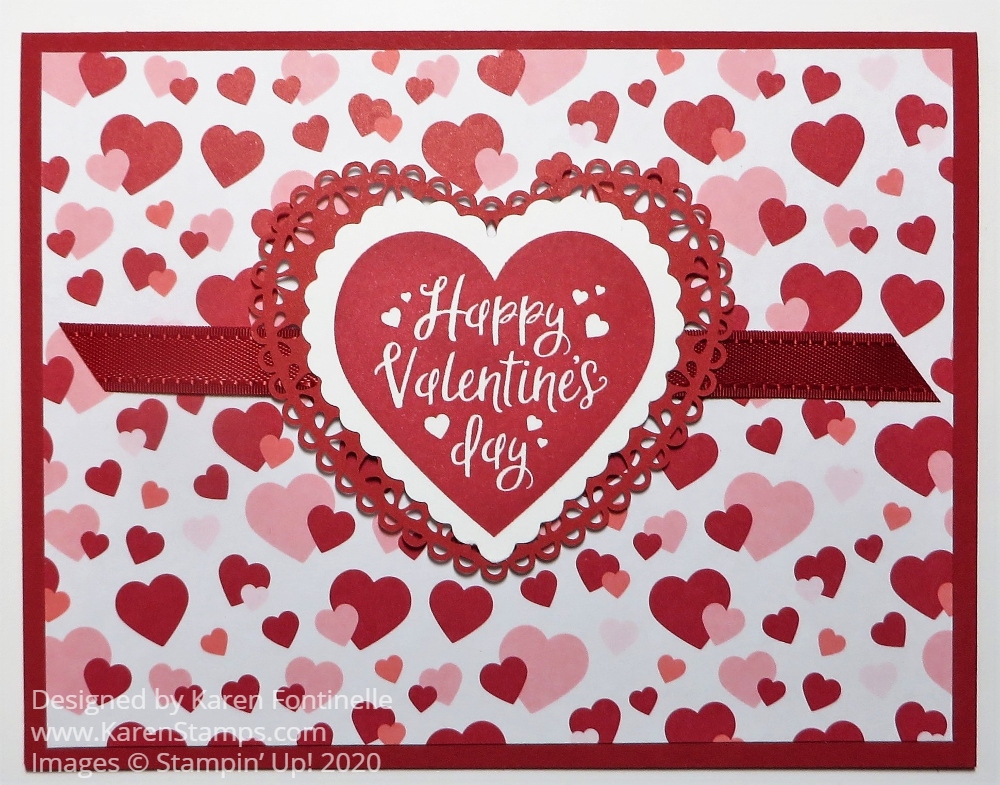
Yes, I know Valentine’s Day is over, but who knows, maybe you need one more valentine for someone today! I didn’t get around to posting this one and it’s one I like because it is a quick and easy valentine! And who doesn’t like quick and easy!

Even if you don’t need another valentine, think of the basic design of this card and think about how you could easily change it into a card for any other occasion.

This valentine has a card base of Real Red (of course!) with a layer of the From My Heart Designer Series Paper. I thought this particular pattern looked really cute on this card! For the focal point, I just have two hearts. The frilly background heart is die-cut with the Be Mine Stitched Dies in the Stampin’ Up! Annual Catalog. The heart on the front is stamped on Whisper White with a stamp in the Heartfelt Stamp Set in Real Red Ink. Then it is punched out with the scallop-edge heart punch in the Heart Punch Pack.

Just for a little something-something, before I adhered the hearts, I used a little Snail Adhesive to hold down a strip of Real Red 3/8″ Double-Stitched Satin Ribbon, just in the center. You can either pop up the hearts with Stampin’ Dimensionals or adhere the hearts flat on the card.

Now if you don’t need a valentine today, all you need to do is change out the hearts to some other focal point whether it be an image or a greeting. You can still use designer paper as a layer and you can still add a strip of ribbon behind the center image. Just keep it simple, whatever you make!

Happy Day-After Valentine’s Day!

A Valentine Card For a Husband

A Valentine Card For a Husband

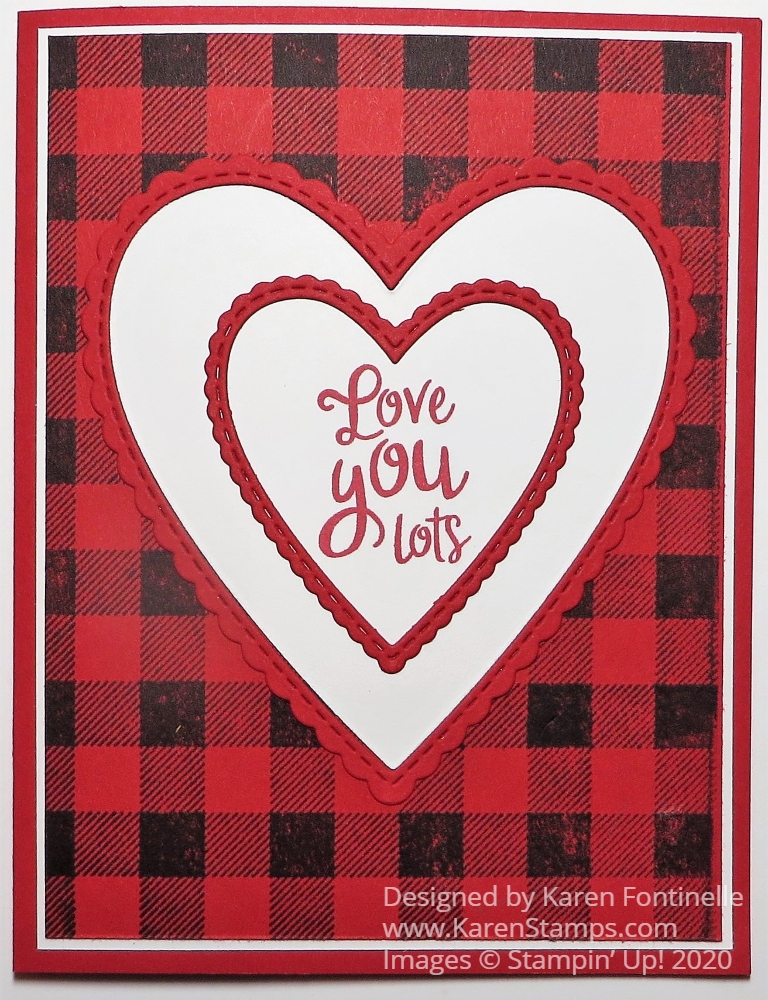
Today is Valentine’s Day and you might be needing a card for, of all people, your husband! I’ve made other valentines, but now at the last minute, it’s time for a valentine for a husband! This one could certainly be for other people as well, but this one is going to my husband!

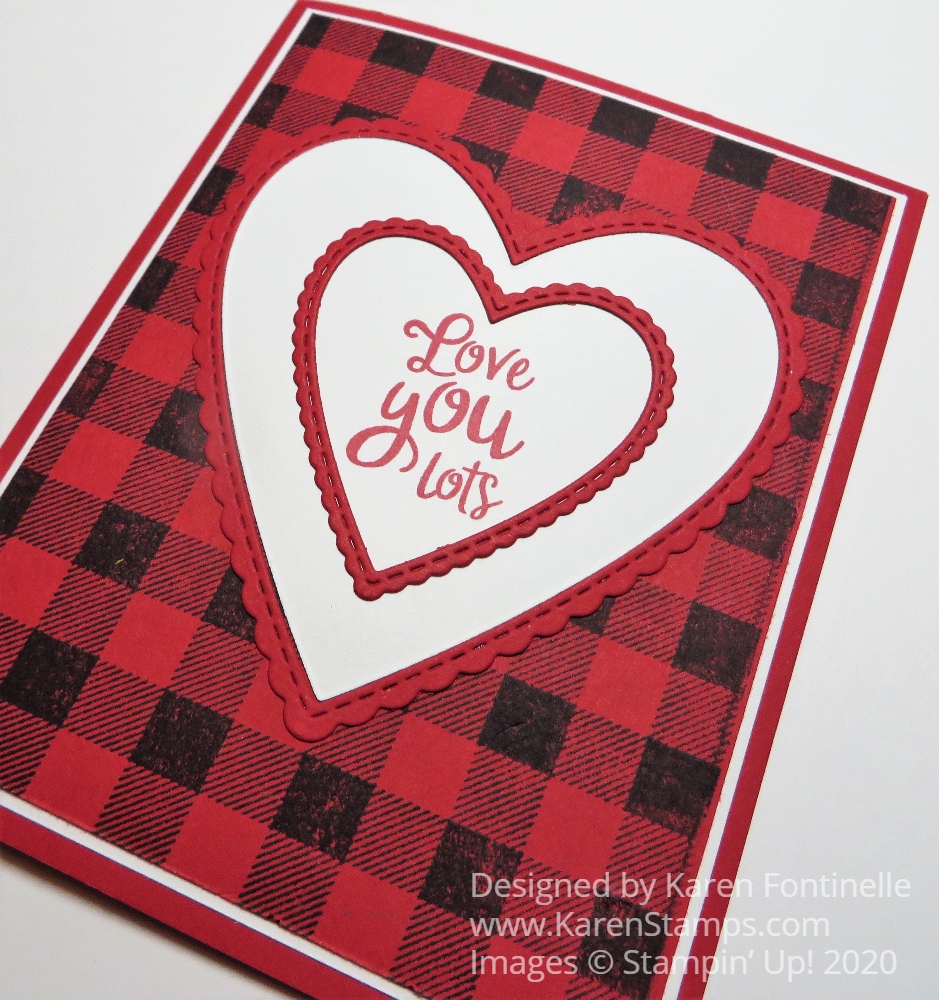
I’ve seen some valentines using black and white or red and black checks and really like the look, so that’s where I started with this card. I love the Buffalo Check Stamp so I used that with Memento Black Ink on Real Red Cardstock. I also used my Stamparatus because this is actually a large background stamp and sometimes difficult to get it to stamp thoroughly. I was glad I did because I didn’t get full coverage the first time! The Stamparatus saves you in cases when this happens so you can just stamp again in the exact stamp spot!

I added a very narrow margin of Whisper White under the Buffalo Check layer just to help it stand out a little from the Real Red card base since I knew I’d be using Whisper White on the front of the card.

After playing around with some different hearts, labels and designs, I settled on these die-cut hearts from the Stitched Be Mine Dies. The greeting is from the Heartfelt Stamp Set in the Occasions Catalog.

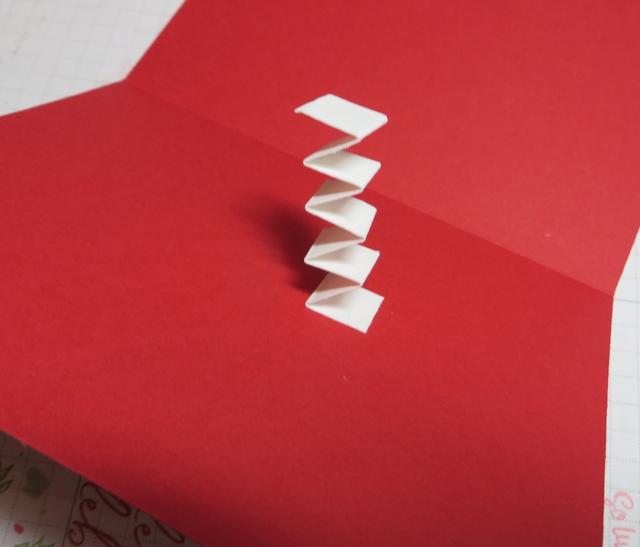
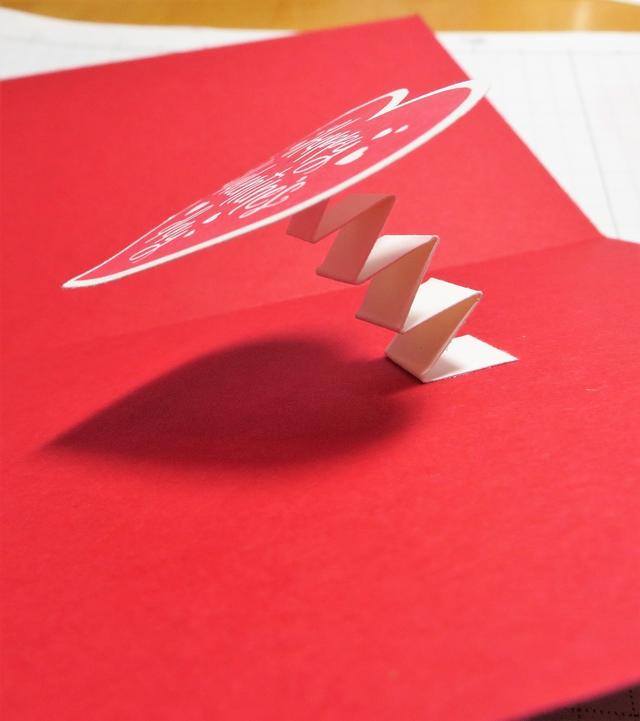
And when I went to stamp something on the inside of the card, this idea “popped” into my head! I don’t know why! It could probably be fancier or better or whatever, but my husband is only going to look at it once and put the card down on his table so it really doesn’t have to be fantastic!

Valentine Pop up Inside

I already had a stamped and punched “Happy Valentine’s Day” heart from the Heartfelt Stamp Set, so I just glued that on top of the accordion-folded strip of Whisper White.

Valentine Popup

I didn’t measure or do anything, just pulled out a strip of Whisper White scrap I saw laying on the table! Hopefully after being trapped in an envelope all day, it will pop up when my husband opens his card!

A Valentine Card For a Husband closeup

Now get off your computer and go make a Valentine for your husband…or boyfriend…or whomever! Here’s another Valentine made with the Be Mine Dies I used on this card if you’d like some more ideas!

Paper Pumpkin January 2020 Valentine Treat Envelopes

Paper Pumpkin January 2020 Valentine Treat Holders
Images © Stampin’ Up! 2020

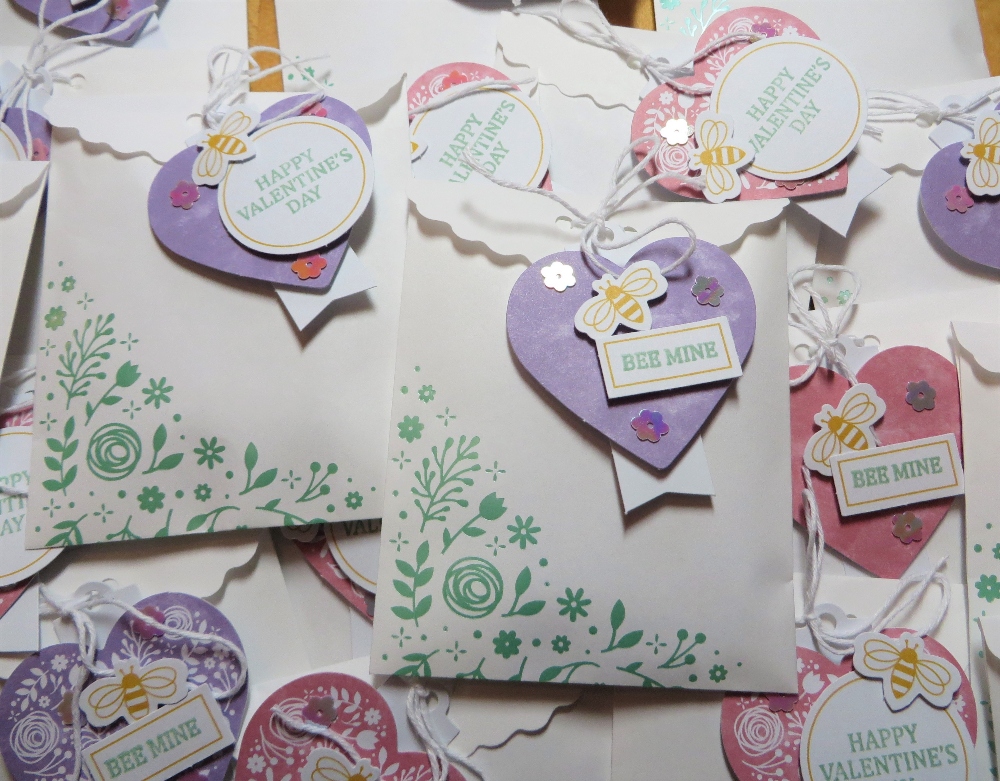
Yesterday when I unexpectedly got an appointment I wanted for that very afternoon, I remembered I hadn’t made the Valentine treat packages in my January 2020 Paper Pumpkin Kit. Since this office group enjoys my occasional holiday treats, I hurried and made up the kit! With 20 treat bags and even 10 mini cards and envelopes, I had plenty for everyone.

The envelopes came already printed with a design in the bottom corner, front and back, so that was done. I just had to make the tags to tie on to the envelope flap and stamp and decorate the front of the mini cards. The greetings were easy to stamp, and the hearts, bees and tags were all die cuts in the kit. It was fun putting on the sequins. Everything is included in these Paper Pumpkin kits!

We are past the time for ordering this kit. However, if you are or become a Paper Pumpkin subscriber, you could order the Refill for this kit in the Stampin’ Up! Online Store. You wouldn’t get the stamp set or ink spot, but you would get all the materials and you would have to substitute some other stamps for the greetings.

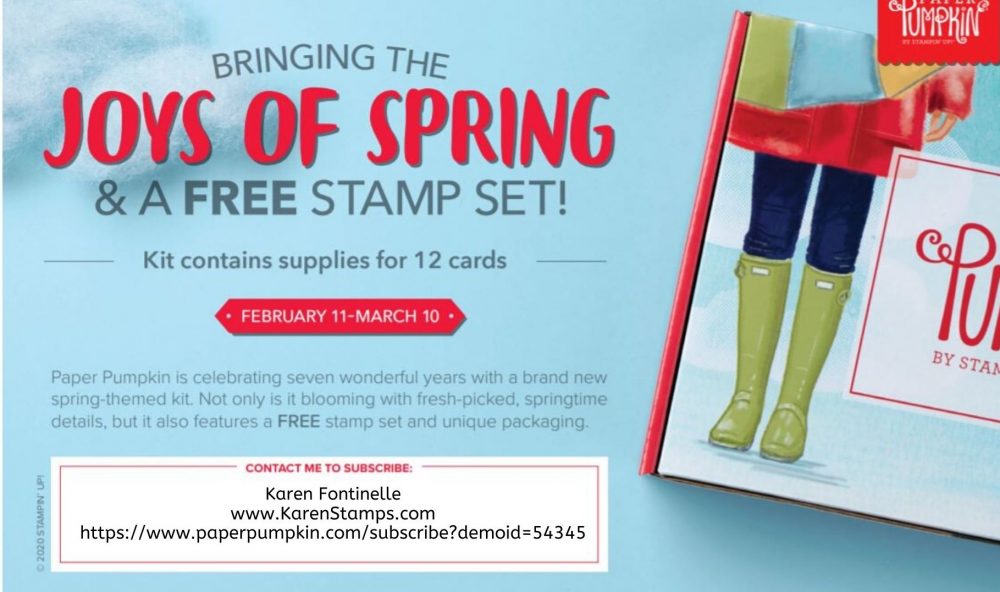
Better yet, sign up for the March 2020 Paper Pumpkin Kit by at least March 10th, if not sooner. It’s going to be a cute one! I can tell from the ad and the box! Yes, that is the actual box on the right side of this ad! I just love the colors!

Paper Pumpkin Flyer March 2020 my info

If you are putting in a Stampin’ Up! order, you can add a Prepaid Subscription and possibly earn a FREE Sale-A-Bration product. Otherwise, you can just sign up for the monthly subscription. If you are already a subscriber and want to get the benefits of a Prepaid subscription, just purchase the Prepaid and add the code that they send you to your account. Paper Pumpkin will keep track of things and send out the kits you prepaid for and then resume your monthly subscription. It really does work out fine! I’ve done it!

Give yourself the gift of Paper Pumpkin! Tomorrow is Valentine’s Day, so there’s your reason!! Not that you need a reason, but I believe in “self-care” (and self-presents on holidays! LOL!).

No risk, no obligation! Get one kit and stop….pause your subscription for a month or two if life gets too busy…or cancel at any time. Just make changes before the 10th of any month in your account. Try Paper Pumpkin!

A Recycled & Decorated Shopping Bag For Valentine’s Day

A Recycled & Decorated Shopping Bag For Valentine's Day

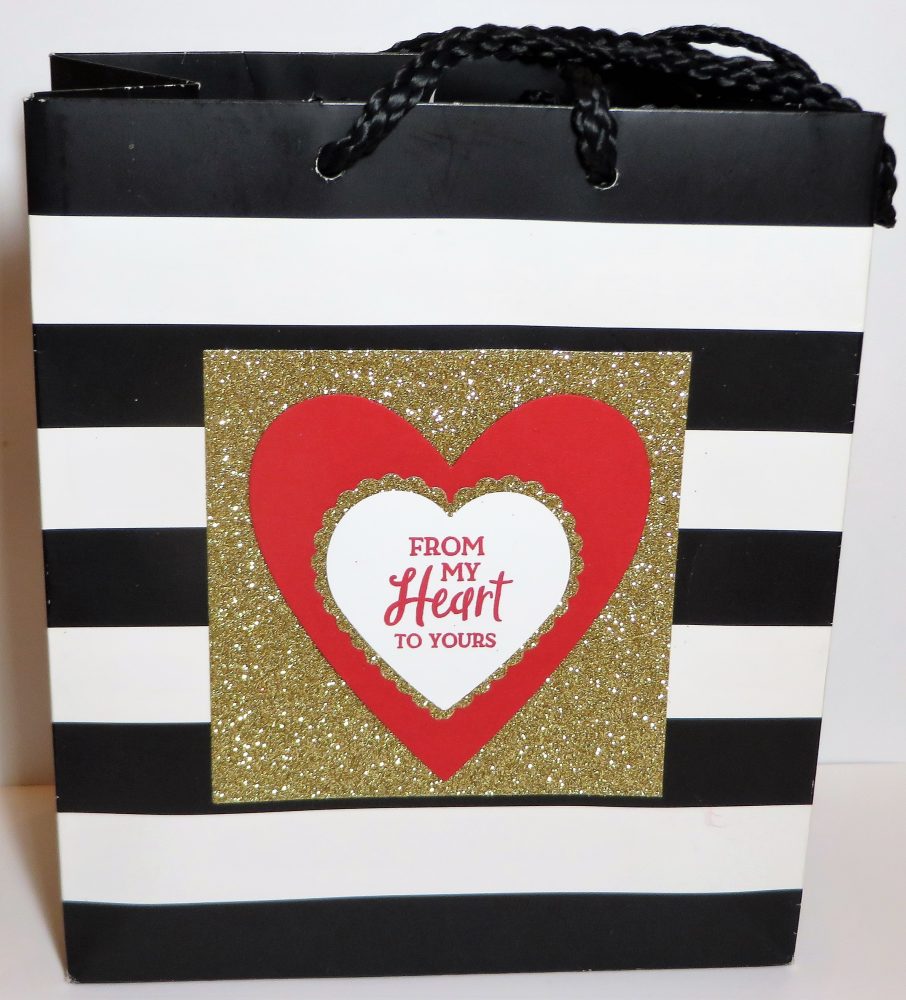
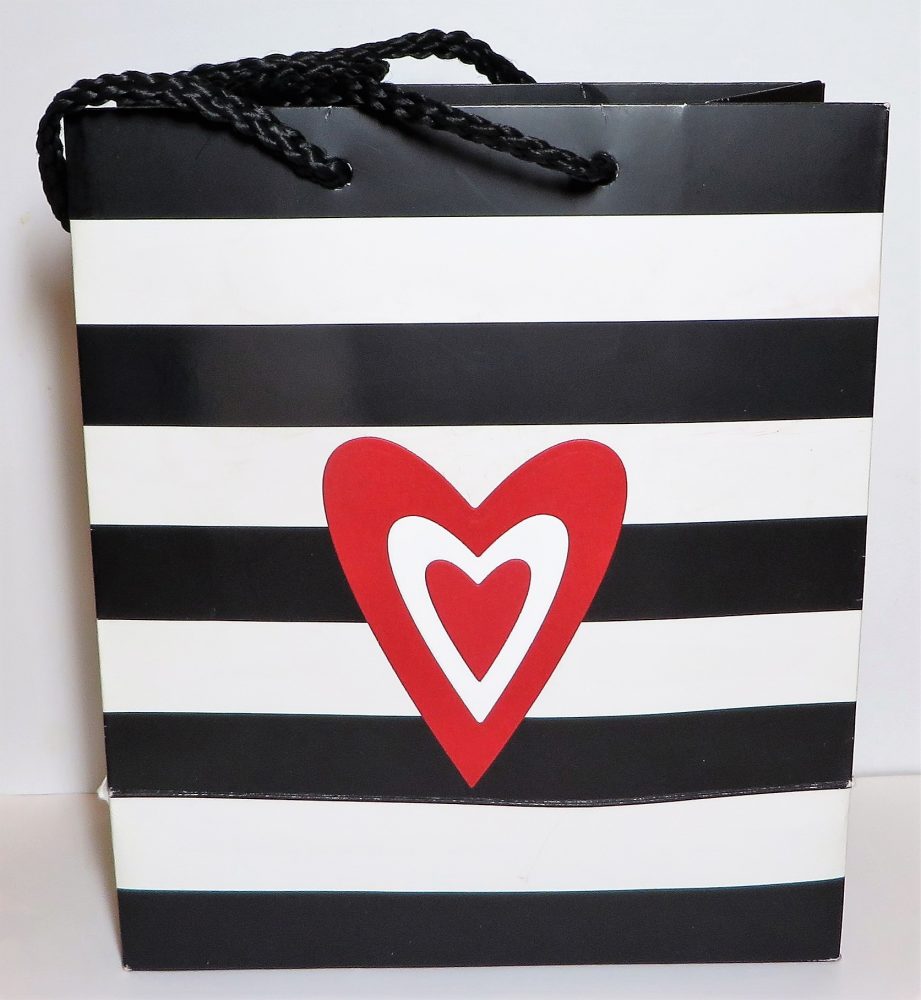
Now and then good things come from cleaning and organizing like this Recycled & Decorated Shopping Bag For Valentine’s Day. As I went through my overflowing “bag of bags” the other day, I found this cute black and white striped shopping bag from Sephora. It has the printed name on the front and the back so I needed to decorate both sides. I love to do this with any decent small shopping bags that I get at a store, but you can also buy kraft or colored bags at any craft store. I think it is fun to decorate and embellish a shopping bag and turn it into a personalized gift bag!

Here is a bag I changed into a birthday gift bag with some stamping and die cuts! The possibilities are endless!

Since Valentine’s Day is coming up, you might have a gift you need a gift bag for so perhaps this will give you some ideas. You, too, can look through your stash of bags and see what you find! Remember, hearts can be for any time so you can use this idea past Valentine’s Day!

To decorate this bag, I simply used a piece of Gold Glimmer Paper for the background and die cut a Real Red heart with one of the hearts in the Stitched Be Mine Dies in the Stampin’ Up! Annual Catalog.

The two center hearts are punched with the Heart Punch Pack. I stamped a greeting from the Heartfelt Stamp Set on Whisper White and punched with the plain-edge heart, then layered it on a Gold Glimmer scalloped-edge heart. You get both punches in the Heart Punch Pack. I usually find it’s best to use the Multipurpose Liquid Glue when adhering something to the glimmer paper.

A Recycled & Decorated Shopping Bag For Valentine's Day on Back

For the back of the bag, I just die-cut three different sized hearts using the same Stitched Be Mine Dies. I just adhered them together and then adhered them to the bag.

It’s so easy to make your own gift bags by recycling bags you probably already have in your home! Go find one and make a gift bag out of it! Make the gift extra-special by doing something creative with the bag!

Easy Valentine Hearts and Ribbon Card

Valentine Hearts and Ribbon

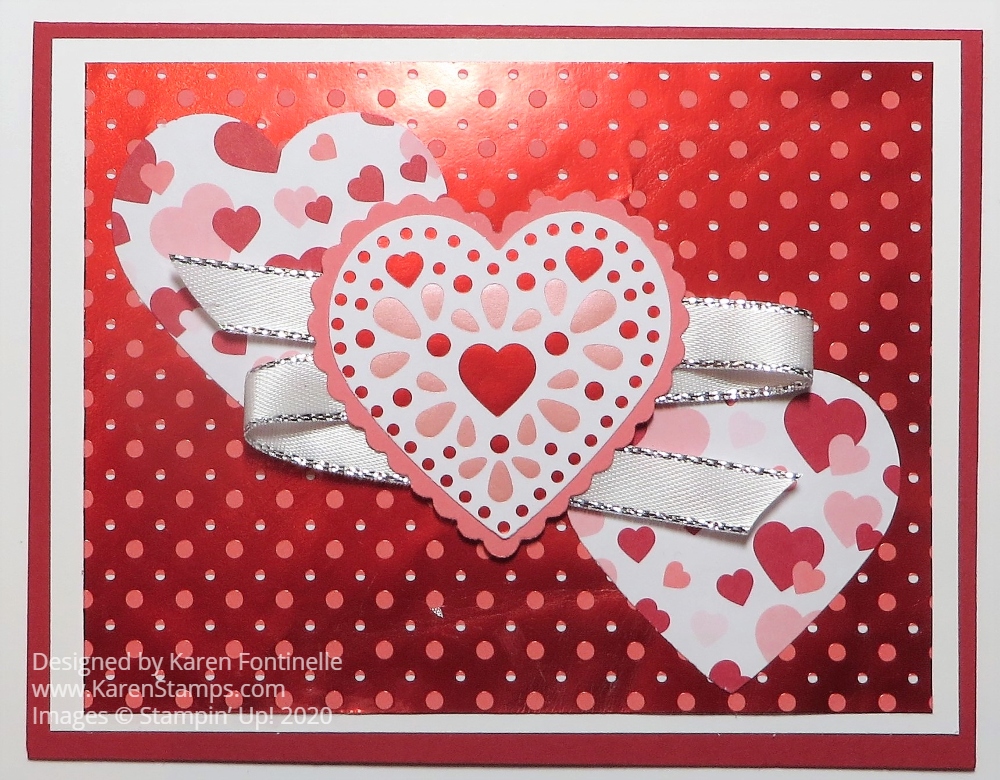
Valentine’s Day is coming up at the end of this week so if you need more valentine ideas, here is an Easy Valentine Hearts and Ribbon Card you can try!

The card base is Real Red with a layer of Whisper White to help the designer paper stand out a little bit. This dotted foil layer is in the From My Heart Specialty Designer Series Paper. It really caught my eye when I was making this card!

The next step is to simply punch two hearts from another design of the From My Heart DSP. I chose the paper with the scattered hearts. I thought it stood out well against the foil DSP.

The center heart is punched from the sheet of foil hearts and then layered on a punched scallop heart from Flirty Flamingo Cardstock. You can get both these plain-edge heart punch and the scalloped edge heart punch in the Heart Punch Pack. And if you want the Heartfelt Stamp Set, too, you can purchase it with the heart punches and save 10% in the Heartfelt Bundle.

After those two hearts were layered together, I put more adhesive on the back with Snail Adhesive so I could stick the ribbon going back and forth behind the heart. Then it is popped up on Stampin’ Dimensionals® and centered on the card between the other two hearts.

Even though there is no sentiment on the front of the card, I think it is pretty enough on its own so you can just stamp a greeting inside the card on a Whisper White layer.

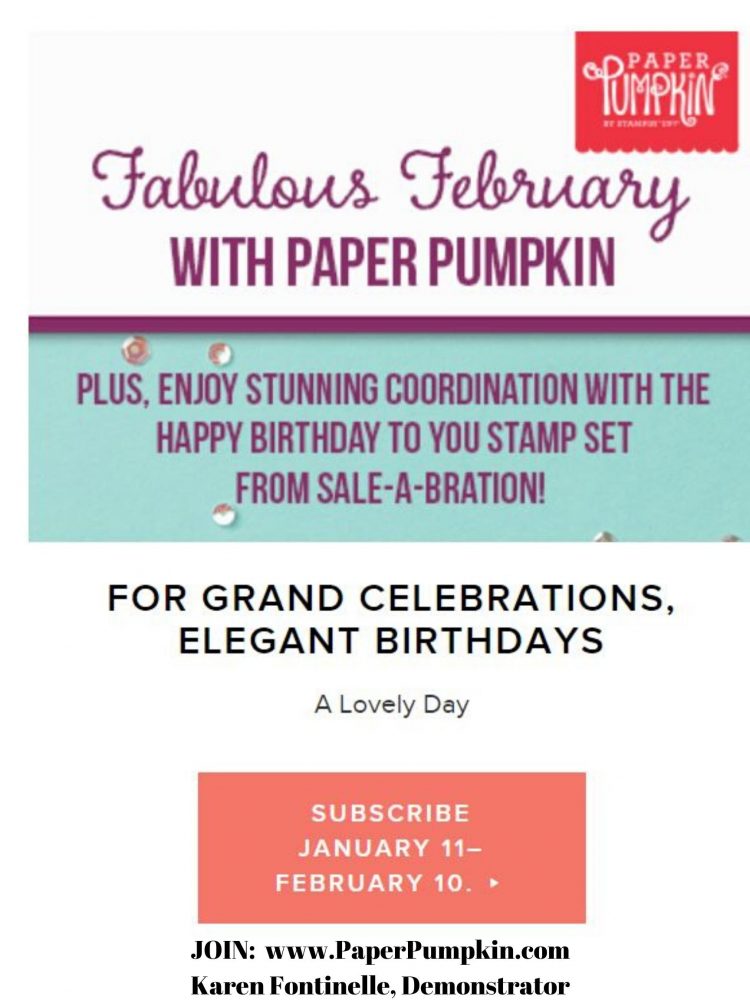
Don’t forget! Today is the last day to join Paper Pumpkin and get the February Kit in just a few days! You could also purchase a Prepaid Subscription in the Online Store and just add it to your Stampin’ Up! order! That way it might help you earn a free Sale-A-Bration item or reach Hostess Rewards!

Paper Pumpkin Banner Feb 2020

This kit will make nine cards that will help you make cards for birthdays and other special occasions. It also coordinates with the Happy Birthday To You Sale-A-Bration stamp set!

SIGN UP TODAY FOR PAPER PUMPKIN!

From My Heart Valentine With Hearts

From My Heart Valentine With Hearts

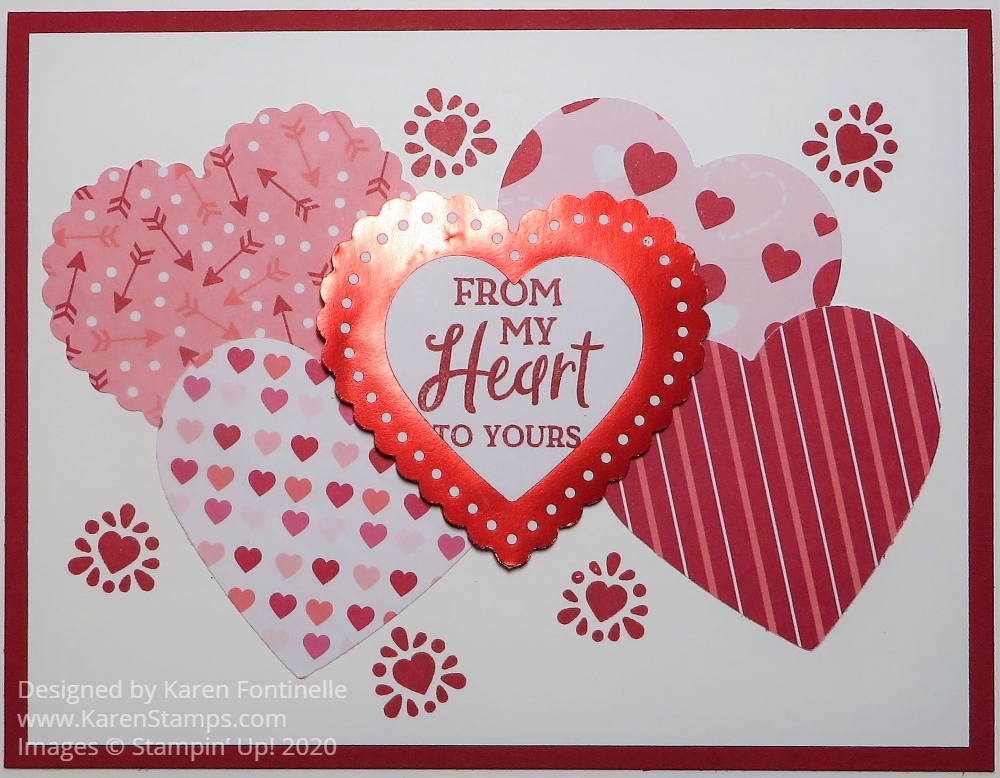
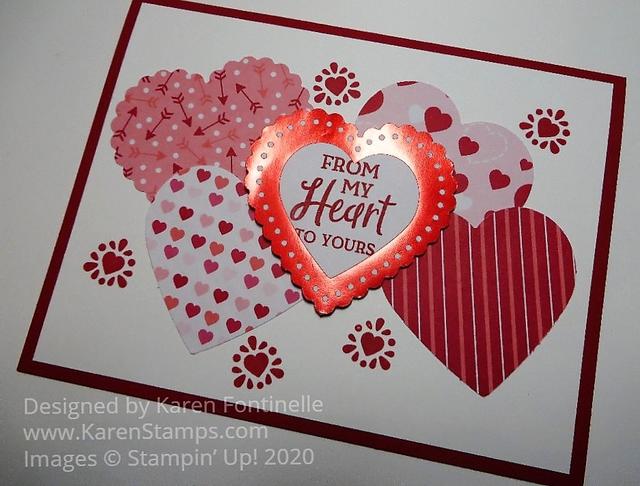
You can make this quick and easy From My Heart Valentine With Hearts by just punching out some hearts! And add a little stamping!

The card base is Real Red, although with these hearts you could use any colors, like Flirty Flamingo or a light pink, that go with the designs in the From My Heart Specialty Designer Series Paper. On a layer of Whisper White, just add a grouping of hearts punched with the Heart Punch Pack. You can even punch two hearts out of the same sheet of designer paper and use one side of one and the one side of the other design! Just check the other side of the paper to see if one side goes in a certain direction or not, if you want to use both sides. You can punch some hearts with the scalloped heart punch and some with the plain edge.

I chose one of the foil accented hearts for the focal point on my card. I punched it out with the scalloped punch, which is a perfect fit! Then I stamped a greeting from the Heartfelt Stamp Set in the center of the heart. After all the other hearts were glued down, I popped this foil heart up with Stampin’ Dimensionals® in the center of the card. Then I stamped a few hearts from the same stamp set around the paper hearts.

You could jazz up this same card a little more if you wanted to. I thought about putting a piece of ribbon behind the foil heart that went back and forth behind the heart with the loops sticking out on each side. I could have added some rhinestones or other jewels.

If you want a quick and easy card, just keep it simple and just punch out lots of hearts and see what you come up with!

From My Heart Valentine With Hearts Closeup

Decorated Heart Foil Tins For Valentine’s Day

Decorated Heart Foil Tins

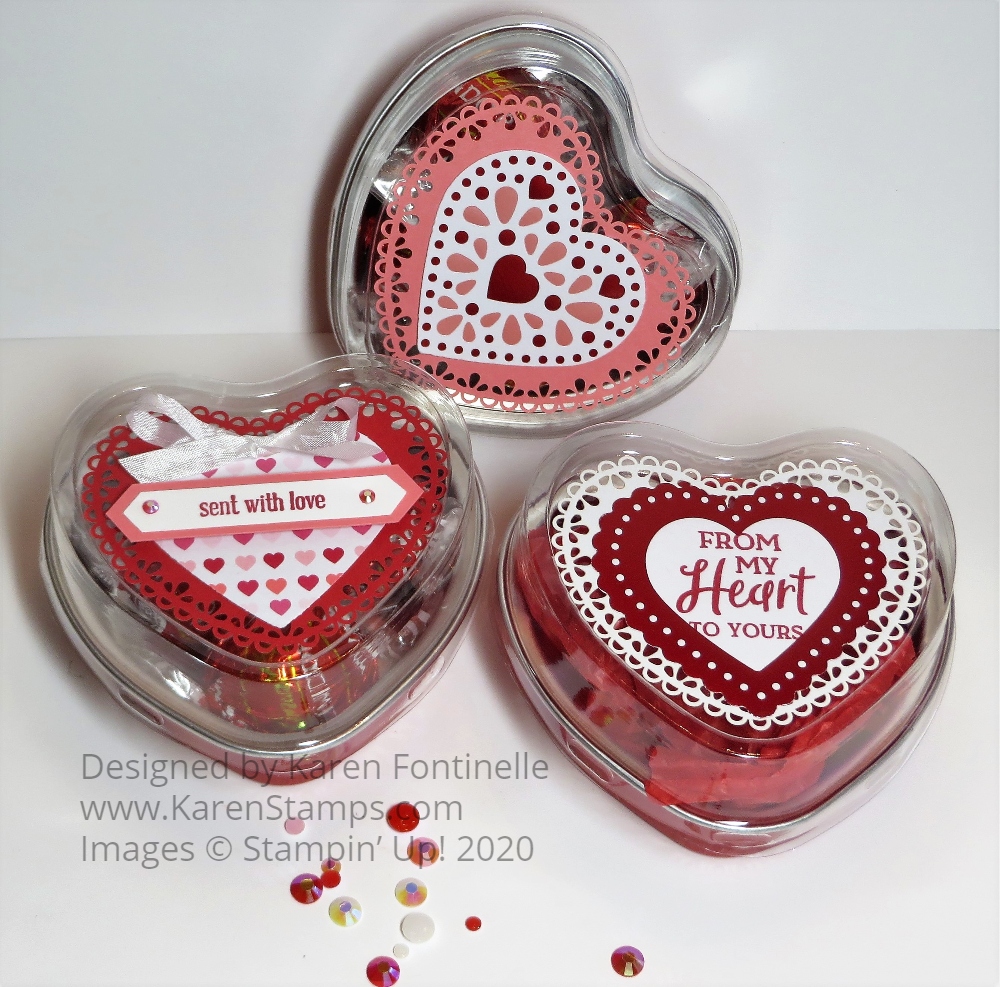
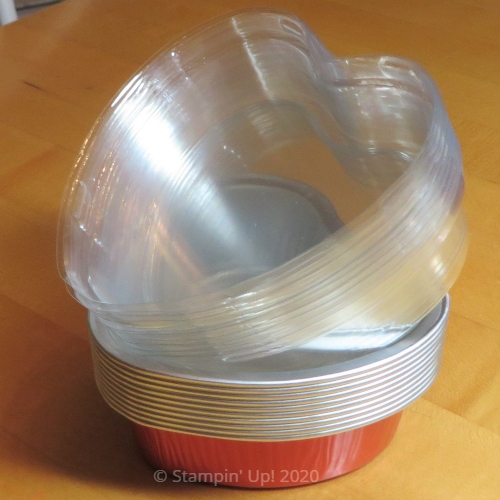
Try these Decorated Heart Foil Tins For Valentine’s Day if you want to make some quick treats! You can really decorate these heart foil tins in just a minute unless you want to add more embellishments! And if you want to really do it up right, you can bake something INSIDE the tin!

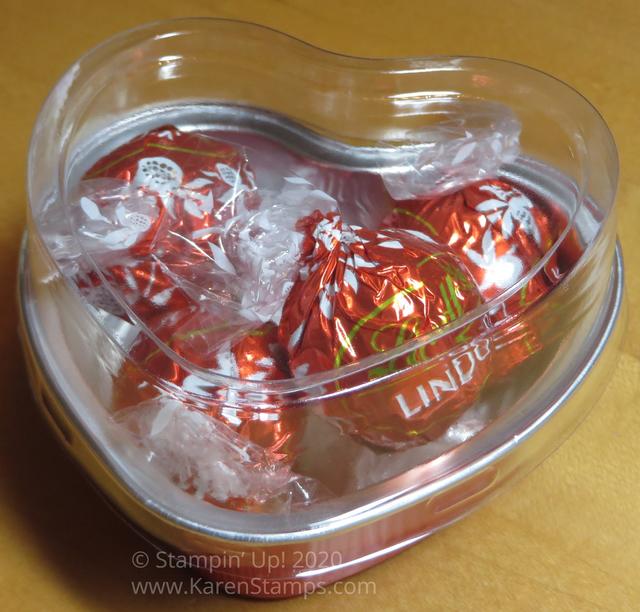
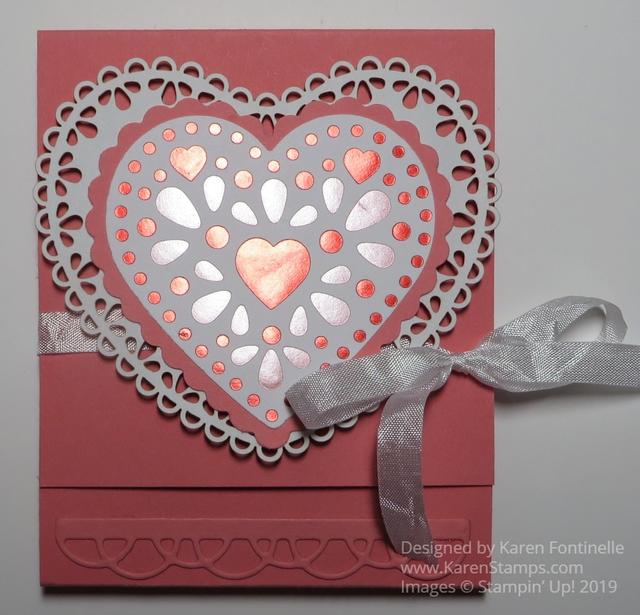
I started with the top heart tin in the photo. I just put in four chocolate candy truffles and snapped on the plastic lid. For decoration I just adhered a Flirty Flamingo Heart Doily and then punched a heart with the plain edge heart punch in the Heart Punch Pack from the From My Heart Specialty Designer Series Paper and adhered that. Done! So cute even with just gluing on two hearts! What could be easier!

Next I decorated the heart tin on the bottom right. This one was almost the same except I turned the colored heart doily over to show the white side! Did you know you could do that?! This time I used the scalloped edge heart punch to put a heart out of the same designer paper and stamped a greeting from the Heartfelt Stamp Set. You can buy both this stamp set and the Heart Punch Pack in the Heartfelt Bundle and save 10%. Just stamp a greeting on a heart, layer it on another heart and adhere to the cover of the heart tin! How easy is that?!

For the last heart tin, the bottom left one, I did the same thing with a doily and punched heart from the designer paper, then added a small bow with the Whisper White 1/4″ Crinkled Seam Binding Ribbon. I stamped a greeting from the Itty Bitty Greetings Stamp Set and punched it out with the Classic Label Punch. Then I layered that on a piece of Flirty Flamingo cut wider than the punched piece and cut off the ends to match. It is popped up with the Mini Stampin’ Dimensionals. Then I added two of the From My Heart Faceted Gems. (These are backordered as I write this.)

There you have three ideas for these fun Heart Foil Tins to decorate for Valentine’s Day, but you can really decorate them for any occasion. Think how cute these would be for a birthday party for kids with the Bonanza Buddies Stamp Set characters or lots of other choices! You might want to stock up on these tins to have on hand for other fun occasions!

Heart Foil Tins
Heart Foil Tin With Candy

Get your Heart Foil Tins at Stampin’ Up! Online HERE!

Get In On the Paper Pumpkin Fun!

Paper Pumpkin Long Ad Feb 2020 PP Link Name

It’s time to get in on the fun of Paper Pumpkin, the papercrafting kit from Stampin’ Up! that comes in the mail once a month! Treat yourself to some crafting time every month! You deserve it!

Find the cute red box in your mailbox. Open it up and see the pretty blue tissue paper wrapping up the contents. You’ll find an exclusive stamp set for that month, a small ink spot (great to save for travel or for the Stamparatus!), and all the supplies, even adhesives, that you need to make whatever surprise project is inside! Usually, it is cards but sometimes it is some other project. For your first kit, you will receive a special acrylic block on which to mount the stamps.

No risk, no obligation. You can cancel any time you want to if Paper Pumpkin is not for you. If you just want to skip a month or two now and then, just go into your account and select that choice.

JOIN PAPER PUMPKIN HERE TODAY!

Paper Pumpkin is great for non-stampers who don’t have supplies and materials. Everything you need is in the box! And if you are an expert stamper, here is one project you don’t have to think up yourself! Just open the box and enjoy the project! Or use the materials to make alternate projects. You will always find ideas online.

To get an idea about Paper Pumpkin, here is the Stampin’ Up! video showing how to assemble the January Kit. Mine just came! Looks like fun!

Another way you can subscribe to Paper Pumpkin is to add it to your regular Stampin’ Up! order! If you like FREE stuff, add a 3-month, 6-month, or 12-month subscription to your order and earn free Sale-A-Bration products. It might even help you reach Stampin’ Rewards! These are called Prepaid Subscriptions.

When you order, Stampin’ Up! will send you an email explaining how to set up your account and add your prepaid subscription. Even if you have a monthly subscription already, you can purchase a prepaid subscription and add it to your account. The account will use the prepaid subscription first, then go back to your monthly kits.

You must subscribe by February 10th so you still have time to think about it, but go ahead and do it today and then you’re all set!

JOIN PAPER PUMPKIN HERE FOR MONTHLY KITS

JOIN PAPER PUMPKIN HERE WITH PREPAID KITS

Easy to Make Valentine Ghirardelli Candy Treat Holders

Valentine Ghirardelli Candy Holders

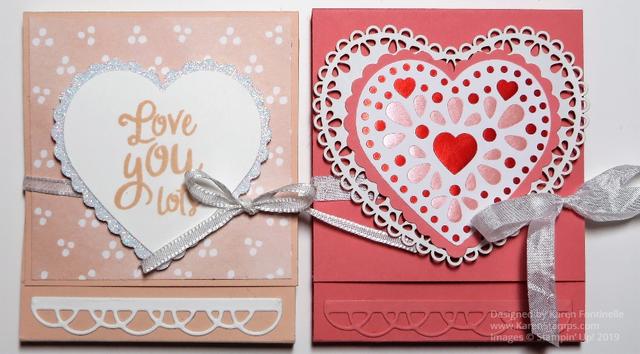
Try these Easy to Make Valentine Ghirardelli Candy Holders for Valentine’s Day or any occasion for a little gift or favor. Once you have the measurements and the piece of candy, you are ready to make a special treat!

This is basically just a strip of cardstock, scored to that it will fold over a piece of chocolate candy, like a Ghirardelli chocolate (yum!). Then you just decorate the front for whatever occasion you have.

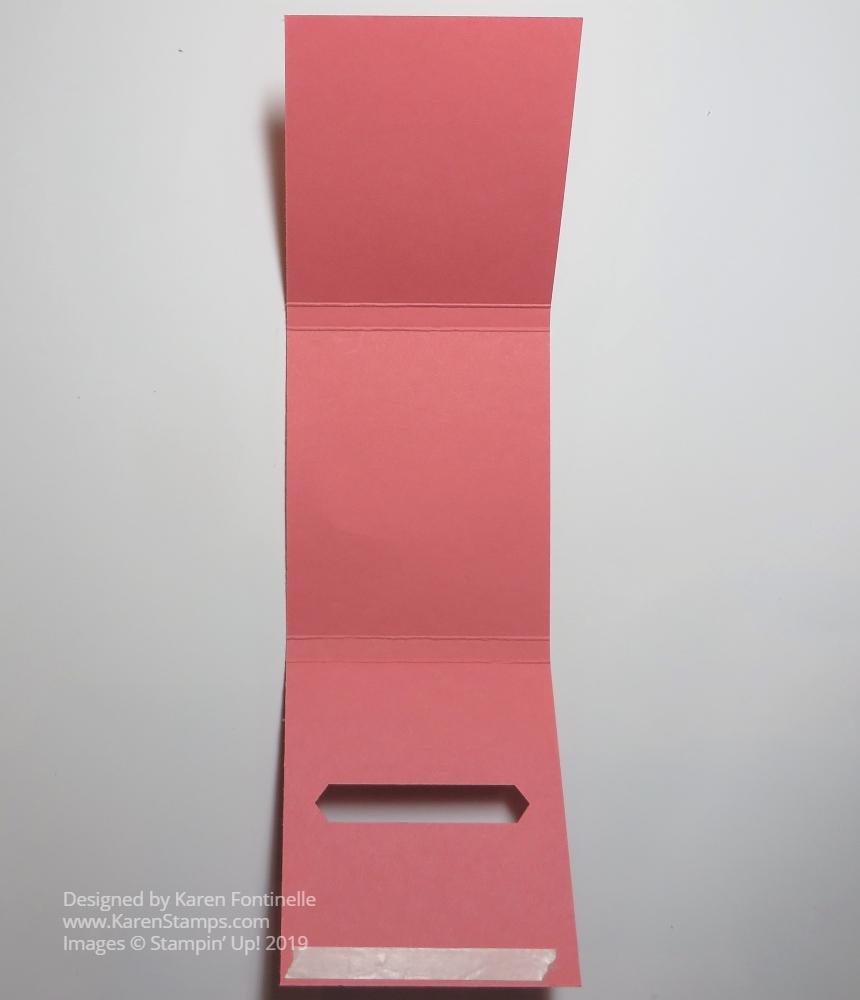
Start with a strip of cardstock cut at 9 5/8″ x 2 3/4″. Score at 2 3/4″ and 3″; 6 1/4″ and 6 1/2″. With these measurements, you could get three strips out of one sheet of cardstock. Fold and crease on the scored lines. Open the strip back up and you will see above and below the score lines, one section is shorter than the other.  You want the longer section to be the one that folds up to the inside.

Once you have identified the longer section, use the Classic Label Punch on that flap, inserting as far as you can, centered, to punch the opening for the chocolate. Put a piece of Tear & Tape as you see in the photo so you can fold up that flap and adhere to the inside, not quite up to the score line. You will want to stand the candy holder on the table making sure the bottom is flat as you adhere that flap.

Valentine Ghirardelli Candy Holder Base

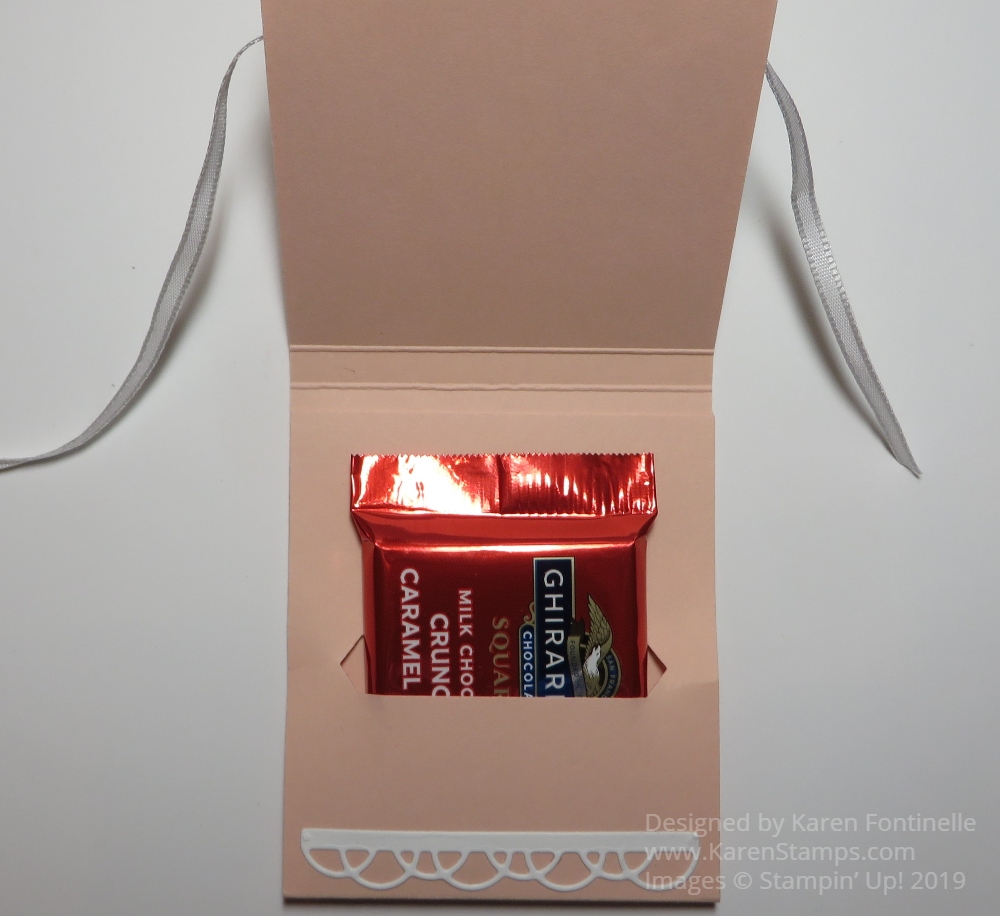
Insert the chocolate candy piece to make sure everything fits right! If you do not have the Classic Label Punch, you can cut hand cut a slit or use the retired Word Window Punch.

Valentine Ghirardelli Candy Holder Petal Pink Inside

Now you can proceed to decorating the front of the candy holder and even that little area at the bottom, where you see I put a die-cut piece.

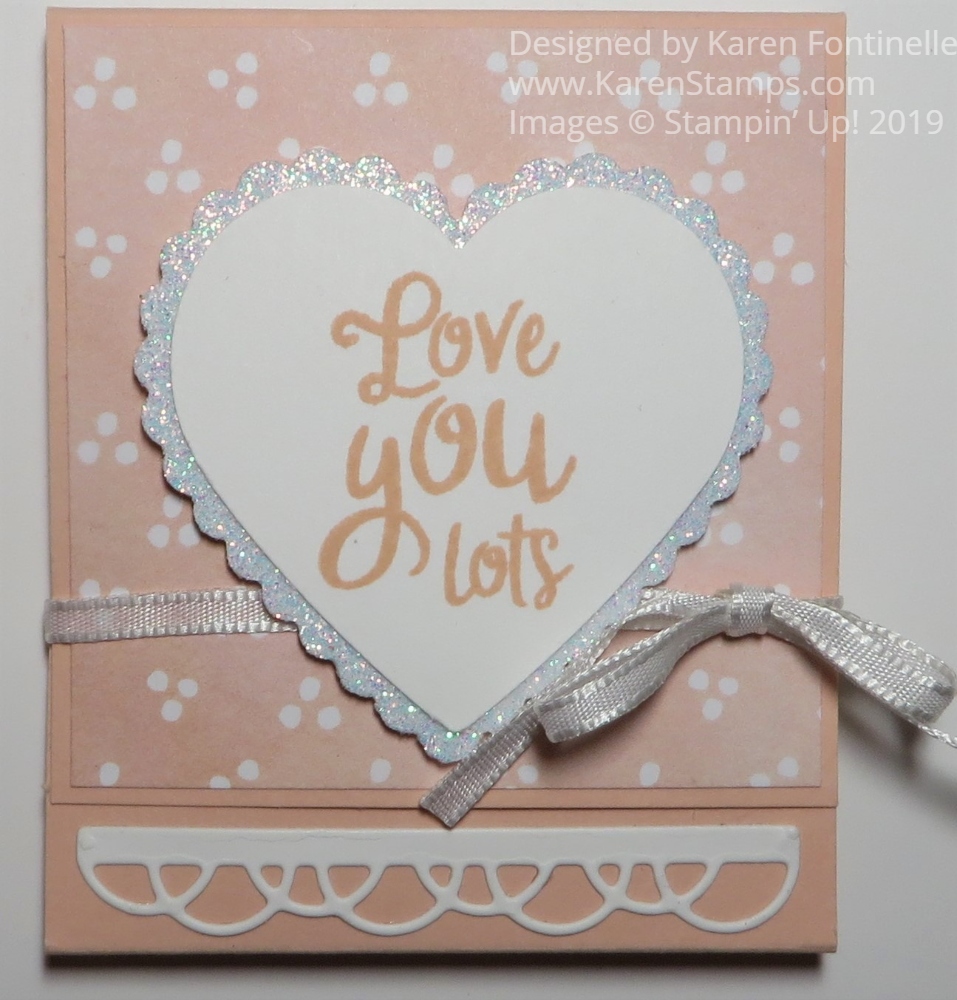
Valentine Ghirardelli Candy Holder Petal Pink

For this candy holder, I used Petal Pink Cardstock for the base. Even though it is for Valentine’s Day, I used a piece of designer paper in the Best Dressed Designer Series Paper! It had this polka dot piece of Petal Pink designer paper so it was perfect for a little background layer. I stamped a heart with the Heartfelt Stamp Set and punched it out with the plain heart in the Heart Punch Pack. You can buy the stamp set and two punches together in a Bundle and save 10% if you wish. The plain heart is layered on a piece of Sparkle Glimmer Paper punched out with the scalloped heart punch in the punch pack. You could also use Silver Glimmer Paper. The little piece at the bottom is a die-cut from the Painted Labels Dies in the Peaceful Poppies Suite.

The hearts are popped up on Dimensionals so that I could run a piece of scrap ribbon underneath just to hold the flap closed on the candy holder.

Valentine Ghirardelli Candy Holder Heart & Doily

This Valentine Ghirardelli Candy Treat Holder is made with the Flirty Flamingo Cardstock. The heart with foil accents is punched right out of the From My Heart Specialty Designer Series Paper and layered on a scalloped punched Flirty Flamingo heart. Then these were layered on a Heart Doily. But the doilies come in Real Red and Flirty Flamingo…..so just turn them over and you’ll have white! The ribbon tied around this candy holder is a new one in the Occasions Mini Catalog, the Whisper White 1/4″ Crinkled Seam Binding Ribbon. One of the great things about this white ribbon is you can dye it any color you want with ink or Stampin’ Blends markers.

These Valentine Ghirardelli Candy Holders will be fun to make if you want to take some favors to the people in your office or a little treat for your family or neighbors or friends.

SHOP THE OCCASIONS MINI CATALOG AT STAMPIN’ UP!

From My Heart Valentine With Paper Strips

From My Heart Valentine With Paper Strips

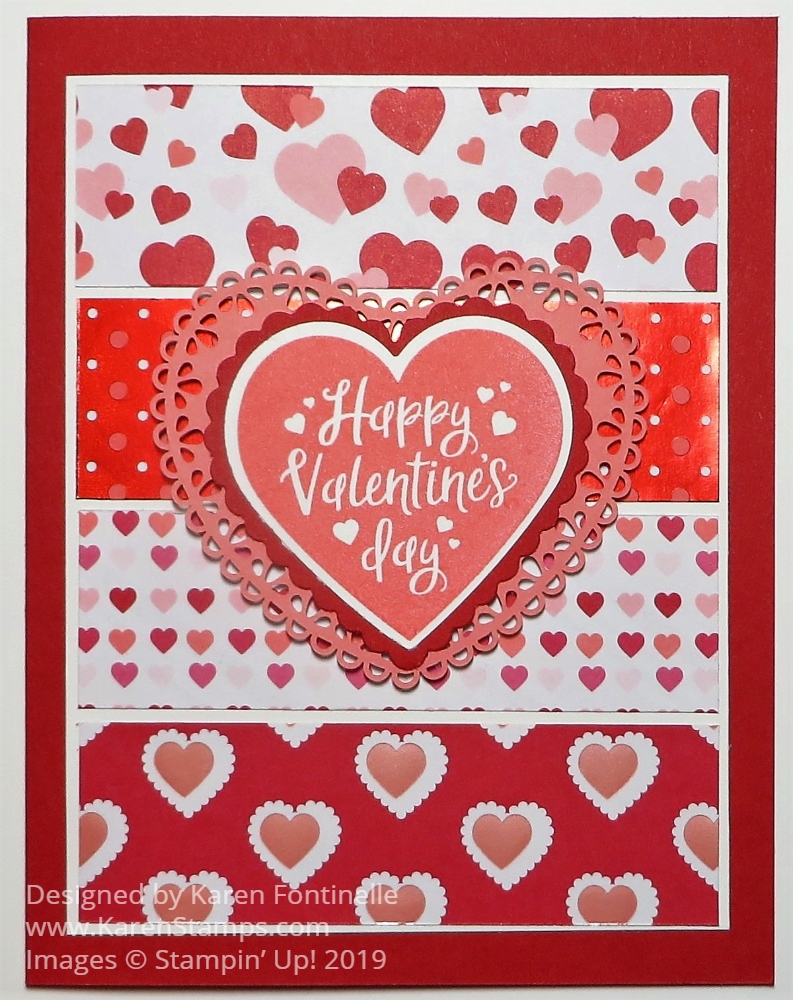
Doesn’t making valentines like this From My Heart Valentine With Paper Strips just take you back to your childhood?! Maybe it’s the doily because who of us did not use that white paste and doilies to make our valentines in elementary school?

I love this new From My Heart Specialty Designer Series Paper in the new Occasions Mini Catalog on page 9. Some of the papers have foil accents which makes them especially pretty! You can’t really tell from my photo above, but the second and fourth strips on my card have the foil accents. As usual, it’s so pretty you hate to cut into the paper, but cut you must in order to make these pretty cards and projects!

This is how this valentine came about! I got out the paper, saw a rectangle scrap in the package and it popped into my head to use several paper strips for the background of the valentine. Often cardmaking ideas just pop into your head or come about after working on your idea and then changing it when something else sparks your creativity.

The card base is Real Red. Real Red has probably always been my favorite Stampin’ Up! color because they have captured such a perfect red. With the switching around of the colors in the Color Families, it seemed like I wasn’t using it as much and that was sad! With Valentine’s Day approaching, how can you not be using Real Red again?

Now I should have gotten out my calculator or pencil and paper and did the math to figure out what size the strips should be and the size paper they are mounted on. But I didn’t! I just made the card, trimmed things down once or twice and when I still had a bigger margin at the bottom of the Whisper White, I simply trimmed that off. The card looks fine to me. If it is not mathematically perfect on the strips and margins, it’s just a valentine….it doesn’t have to be perfect.

If you want some measurements, the Whisper White layer on which I adhered the paper strips is 3 3/4″ wide and 4 7/8″ long. The designer paper strips are each 1 1/8″ wide and 3 5/8″ long with about a 1/16″ space in between the layers. And there is about the same 1/16″ margin around the edge, but you could also not have any margins and totally cover the Whisper White piece. Please don’t go crazy trying to make everything exact and fit perfectly. Just get it as balanced as you can and it will be fine.

The greeting is stamped in Flirty Flamingo Ink with a heart in the Heartfelt Stamp Set in the Suite. Then that stamped heart and the Real Red heart on which it is layered were punched out with the two punches in the Heart Punch Pack. You can purchase the stamp set and punches together in the Heartfelt Bundle and save 10%. These two hearts are then adhered to the Flirty Flamingo doily in the Heart Doilies Package. This large heart is then popped up with Stampin’ Dimensionals®.

If you want EVERYTHING in this From My Heart Suite (as I did, because who wouldn’t?!), just put the number #153931 on your order and you will get the coordinating selection of products on pages 8-10 without having to put in all the individual numbers. This won’t all only be good for Valentine’s Day, you will be able to use hearts on lots of occasions, the punches, the stamp set, etc.

Overall, this From My Heart Valentine With Paper Strips is fairly easy to make so give it a try with the beautiful From My Heart DSP and the Heart Punch Pack!

SHOP STAMPIN’ UP! ONLINE HERE!

From My Heart Valentine’s Day Card

From My Heart Valentine's Day Card

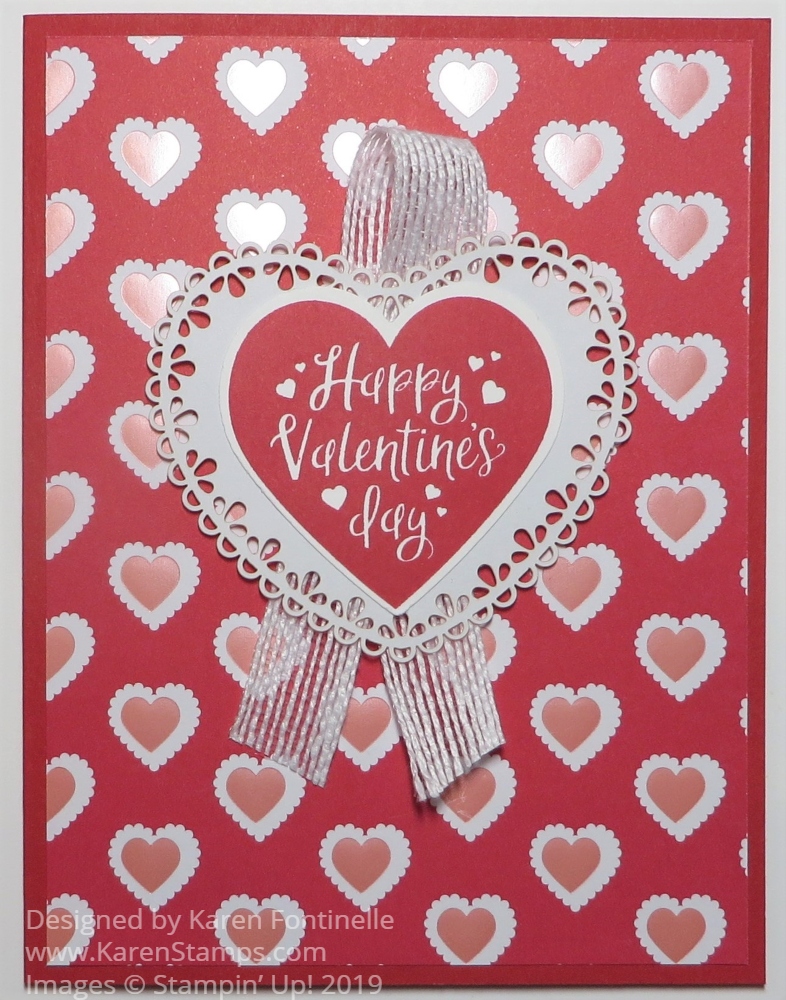
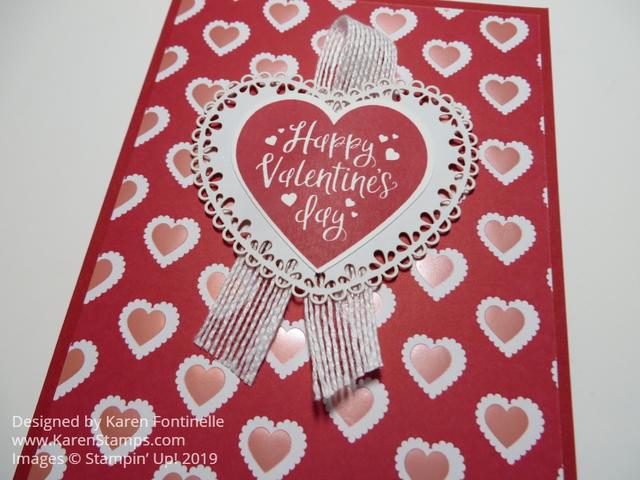
You “might” be able to tell on this From My Heart Valentine’s Day Card that the designer paper has a few pink foil accents. Can you see the shine on the little pink hearts in this photo? There was something about this particular design in the package that really caught my eye!

The card base is Real Red with a layer from the From My Heart Specialty Designer Series Paper. Next, all you have to do is make the heart focal point!

The doily comes in the package of Heart Doilies. The doilies are Real Red and Flirty Flamingo, but if you flip them over to the back, they are white, which you can also use! So you really get three colors of doilies.

I flipped my doily over to the white side and added the “Happy Valentine’s Day” greeting. That is a stamp in the Heartfelt Stamp Set. It is punched out with one of the heart punches in the Heart Punch Pack. You can buy both the Heart Punch Pack and the Heartfelt Stamp Set in the Heartfelt Bundle and save 10%! The punched heart doesn’t really fit inside the Heart Doily but it looks okay I think.

For an added embellishment, I took a piece of Whisper White 5/8″ Flax Ribbon and just adhered it underneath the doily with a little twist at the top and the tails hanging below the doily. Then I popped up the whole thing with Stampin’ Dimensionals.

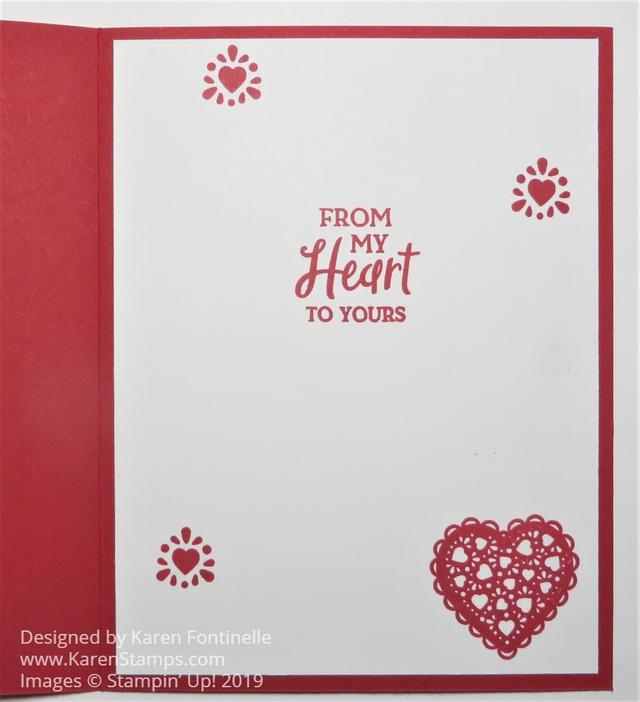
I needed a layer inside the card since the Real Red is rather dark. I stamped a greeting from the same stamp set on a piece of Whisper White and added a heart in the bottom corner. Somewhere along the line, I got a tiny ink smudge on the other side of the card, so I stamped another little heart over it to cover the smudge. But to balance that out, I had to stamp a few more little hearts so you can see the hearts are maybe a bit overdone!

From My Heart Valentine's Day Card Inside

This was really an easy valentine card to make! It’s going to be fun to play with all the hearts and other products in the Suite to make all kinds of valentines! Of course, hearts aren’t just for valentines, so you can use the hearts for other occasions throughout the year!

From My Heart Valentine's Day Card Closeup

Shop Stampin’ Up! Online and Remember Sale-A-Bration!