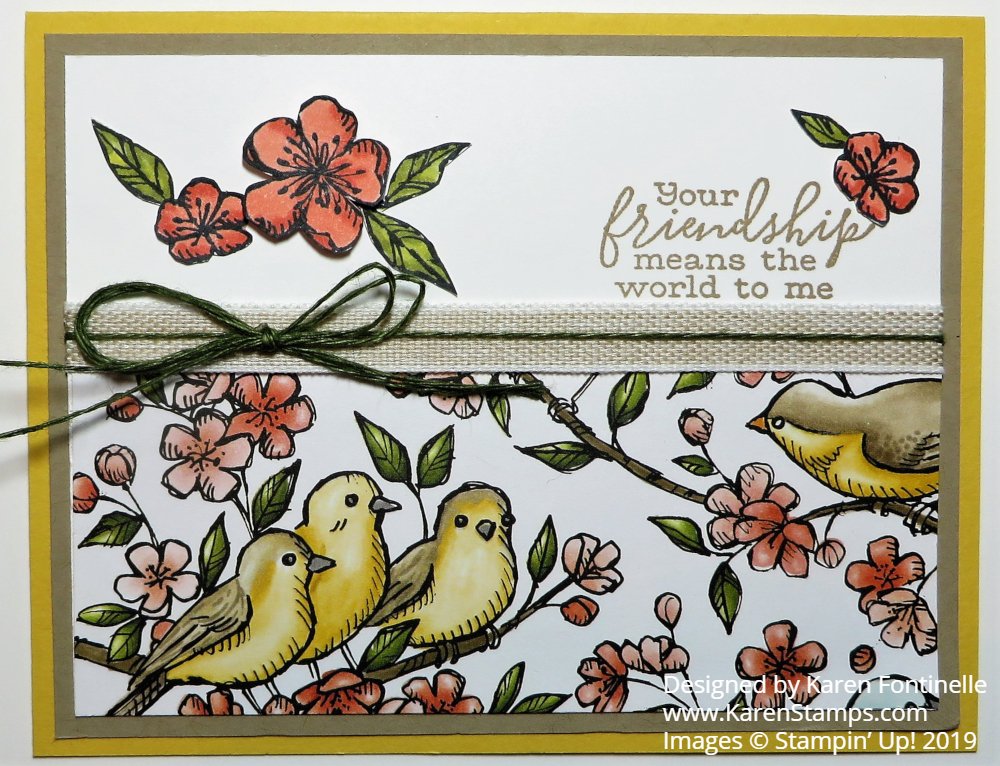
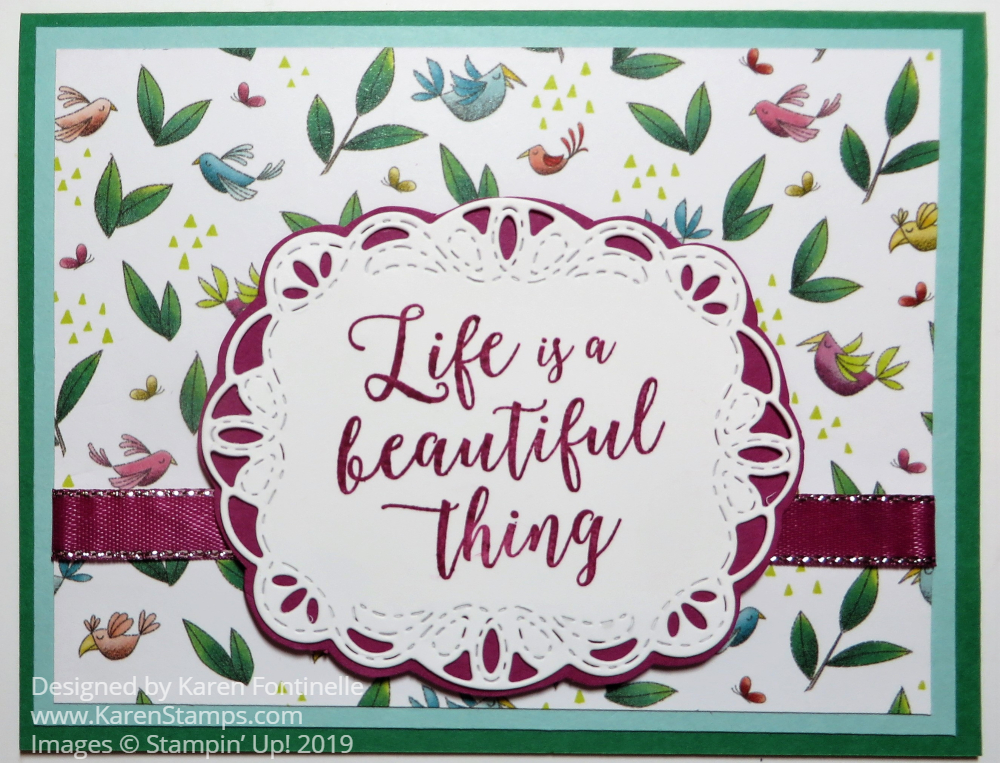
Here’s my first card with new catalog product, the Free As A Bird Friendship Card. There are a lot of pretty designer papers coming in the new Stampin’ Up! Annual Catalog, but I think this Bird Ballad Designer Series Paper is one of the nicest. This new catalog has larger photos of the designer paper this year, but I still think you won’t know how beautiful the papers are until you see them in person!
I decided to use this card design with just half the card front being covered with designer paper so when I looked at the designer paper, I saw this grouping of yellow birds right near the bottom of the sheet so it was perfect! I chose Daffodil Delight Cardstock for the card base. First I planned to use one of the gray coordinating colors for a layer, but the birds seemed to have more brown in them so I switched to Crumb Cake Cardstock for a layer.
On a layer of Whisper White, I adhered the piece of Free As A Bird DSP with the yellow birds. I used a piece of the new Linen Ribbon with white edges along with the Mossy Meadow Linen Thread, both included in the Magnolia Lane Ribbon Combo Pack. I think the green linen thread is a nice accent on top of the linen ribbon. I doubled a separate piece of the green linen thread so I had two strands and made a bow with that, adhered with a Mini Glue Dot.
The greeting is included in the Free As A Bird Stamp Set, as are some other very nice, usable greetings. I stamped it in Crumb Cake Ink. I could have also used Black. The flowers from the stamp set are stamped in Memento Ink and colored with Stampin’ Blends, the Calypso Coral Light and Dark colors. I cut out the flowers with Paper Snips and adhered them to the card, one popped up with Stampin’ Dimensionals. I stamped one stem of leaves, colored with Old Olive Stampin’ Blends, and cut it apart to add to the flowers.
Again, the illustrations on the paper are just gorgeous! This piece I used looks like someone painted it or colored it by hand.
When June 4th rolls around, you might really want to add some of the products in this Bird Ballad Suite to your new catalog order! Especially the paper!
A stamp set on the Last-Chance List with a cute bird and flowers is called Petal Palette, so if you like birds you might want to check out this stamp set before it retires! Here is a card I made with the flowers in this stamp set.
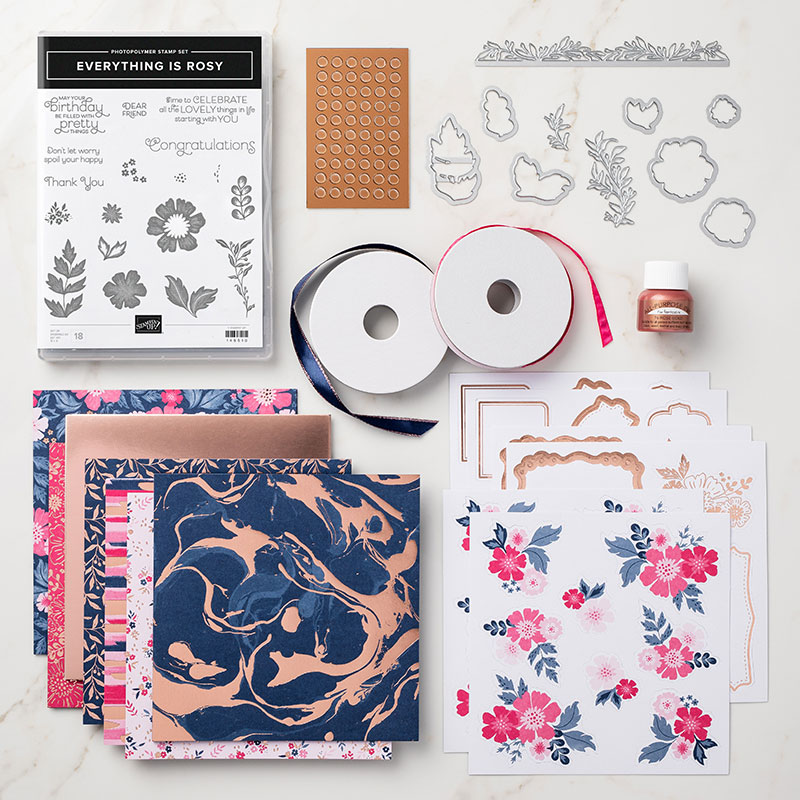
Remember, the Everything Is Rosy Product Medley is available only during the month of May, while supplies last. This is a whole collection of coordinating products, which is one of Stampin’ Up!’s strong points in their product lines. It’s also exclusive, as you won’t find these products anywhere else. It comes with Rose Gold accents and Shimmer Paint. Have you noticed how much Rose Gold jewelry is out in stores now? It’s the new trend. Rose Gold is a mixture of gold and copper to produce that pinkish look.
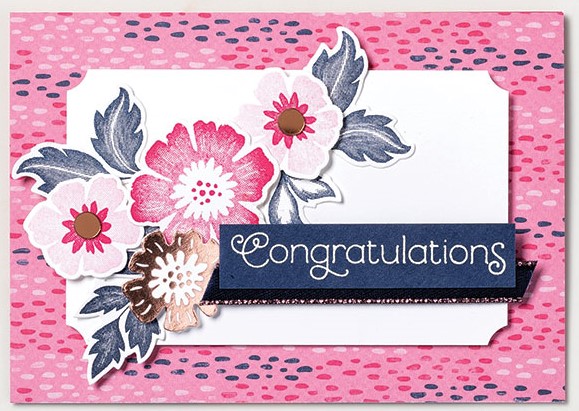
Here are a couple samples by Stampin’ Up to show what you can do with all these products in this collection.
This card is made with the designer paper, die cut flowers, rose gold foil, and more. With the congratulations greeting it would be perfect for graduation!
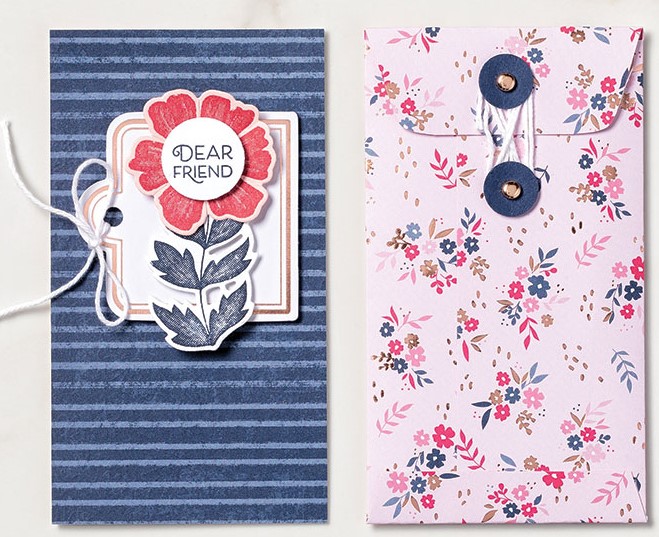
This fun card is made with the Whisper White Narrow Note Cards and Envelopes. The card is decorated with die-cut stamped flowers and an already die cut tag. Wouldn’t you love to get this card with such a cute decorated envelope?!
This Everything is Rosy Product Medley is only available during May so don’t delay if you really want this product. I know you will be able to make gorgeous cards and projects with all these products. It may look pricey but consider all that you are getting for that price. Everything you need in one box to start creating! All you have to do is enter this one number on your order! #150059 It can be a belated Mother’s Day gift for yourself! Why not?!
I was lucky enough to receive my Stampin’ Up! preorder, available to Stampin’ Up! Demonstrators during May, on Friday high and dry! With all the rain we were having since Tuesday, I was worried that my box of beautiful new catalog products could be getting wet and damaged one way or another before it arrived on my porch! But fortunately, it wasn’t pouring down rain when the box arrived and all is well!
However, with all the weekend hoopla with rain and Mother’s Day, I haven’t gotten to play with anything yet, but I did get these photos taken. The lighting isn’t great but they will give you an idea of how lovely some of these new designer papers are.
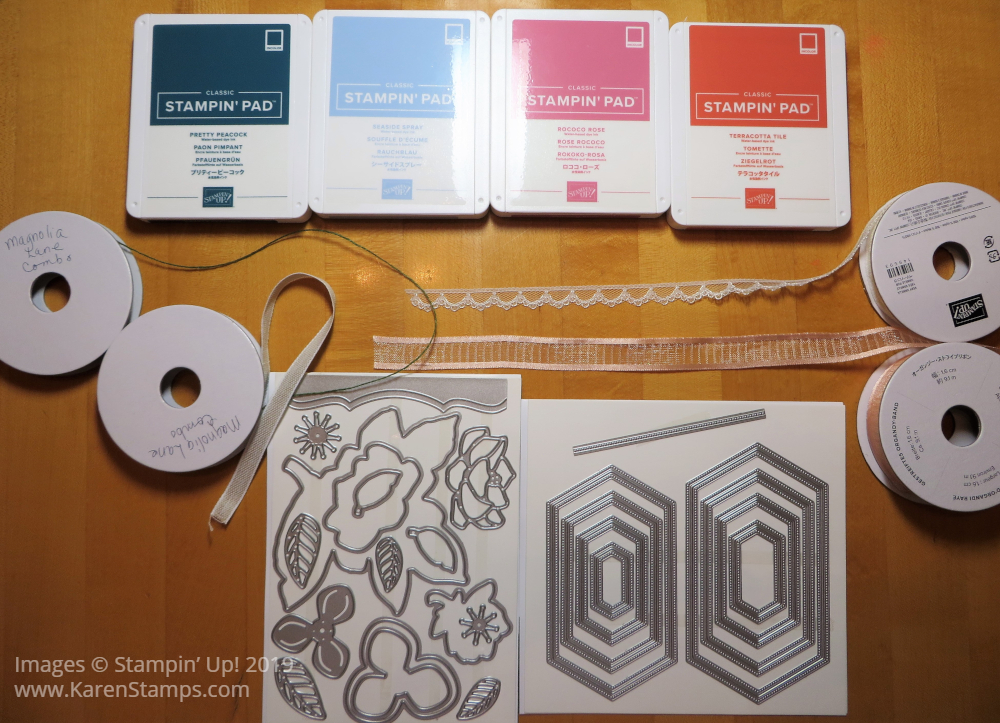
The top photo shows the new In Color ink pads. You might notice one color is missing. There is a quality control issue with the Purple Posy ink so that one is delayed right now. Hopefully, they will get it all corrected soon. The new In Colors 2019-2021 are Pretty Peacock, Seaside Spray, Rococo Rose, and Terracotta Tile as I have them lined up in the photo. I also got the Magnolia Lane Ribbon Combo Pack of Mossy Meadow Linen Thread and 3/8″ Linen Ribbon with white edges. Over on the right side is beautiful 3/8″ Scalloped Lace Trim in Very Vanilla and below it the beautiful 5/8″ Organdy Striped Ribbon in Petal Pink. The dies on the left are the Magnolia Memory Dies. On the right are the Stitched Nested Labels.
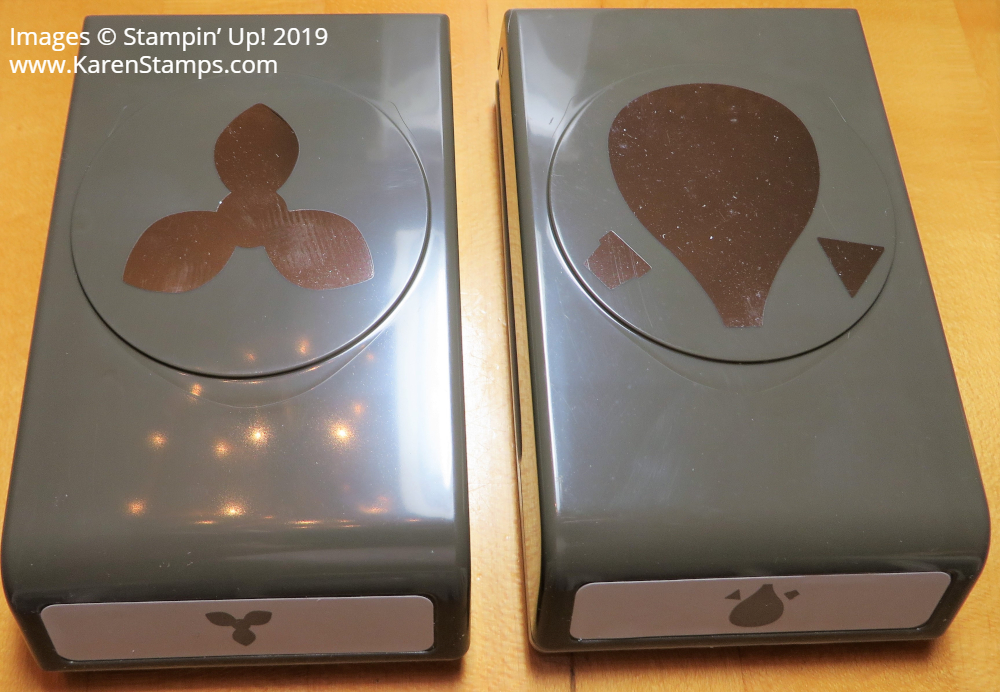
I chose these two punches (to start with!). The one on the left is the Perennial Flower Punch that goes with the Floral Essence Stamp Set. You can punch several of these petals and stack them to make a 3D flower. The one on the right is the Hot Air Balloon Punch which I bought because I’ve seen samples of magnolia flowers made with the punch (rather than a hot air balloon!).
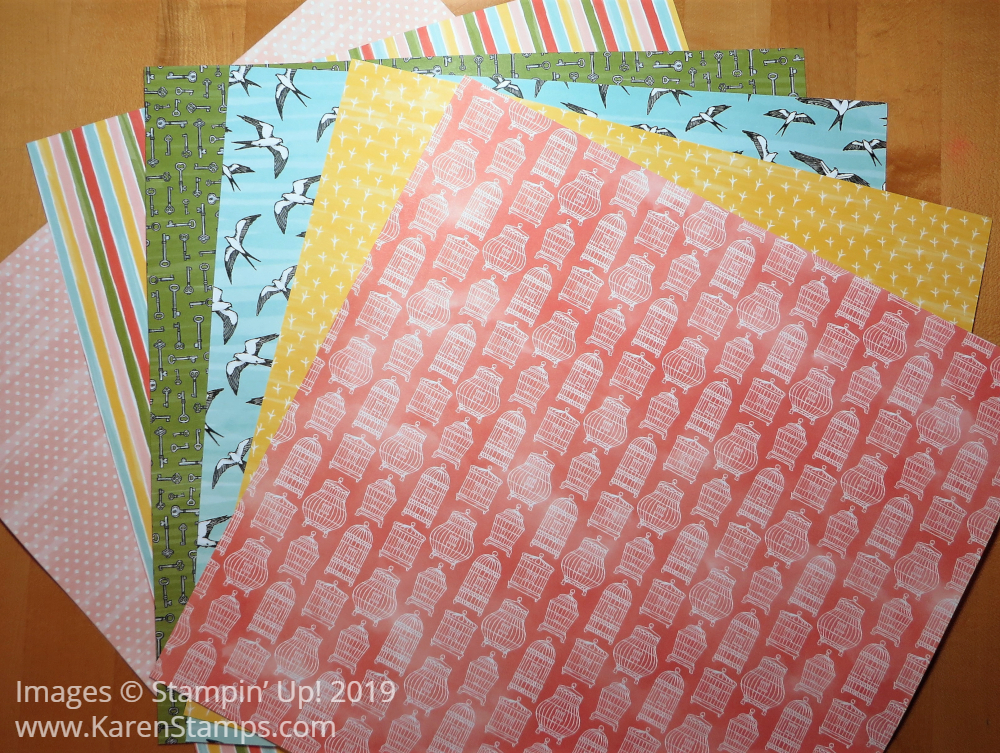
This is the Bird Ballad Designer Series Paper, and even though I am not into birds, I love this paper! The images are so cute and pretty. It goes with the Bird Ballad Suite and Free As a Bird Stamp Set.
This is the other side of the Bird Ballad papers.
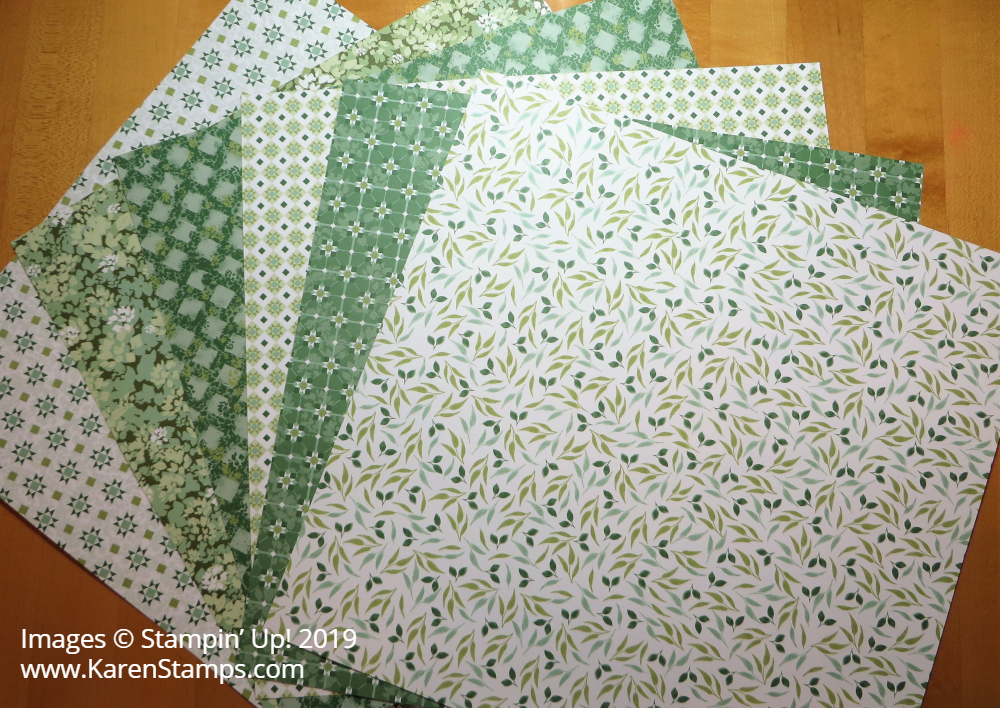
This paper (lighting not very good!) is the Garden Lane Designer Series Paper. It’s very pretty so I couldn’t pass it up!
This is the other side of the Garden Lane Designer Paper. So pretty!
This paper is in the Magnolia Lane Suite, the Magnolia Lane Designer Series Paper. I bet this suite is going to be one of the most popular products
Here is the opposite side of the Magnolia Lane papers. Also pretty!
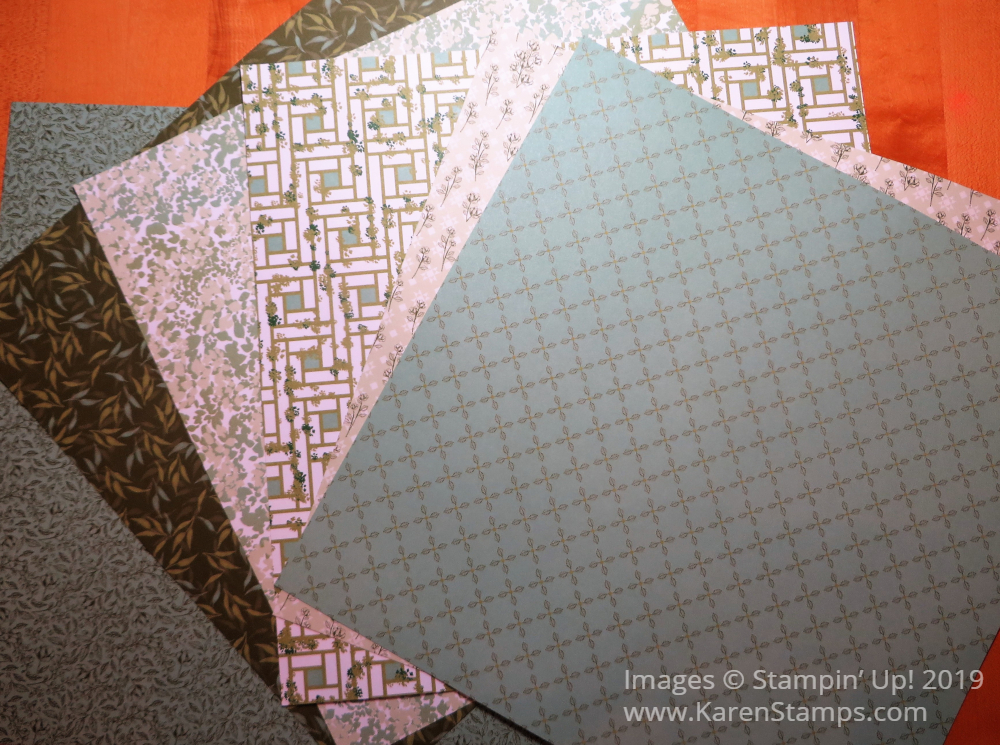
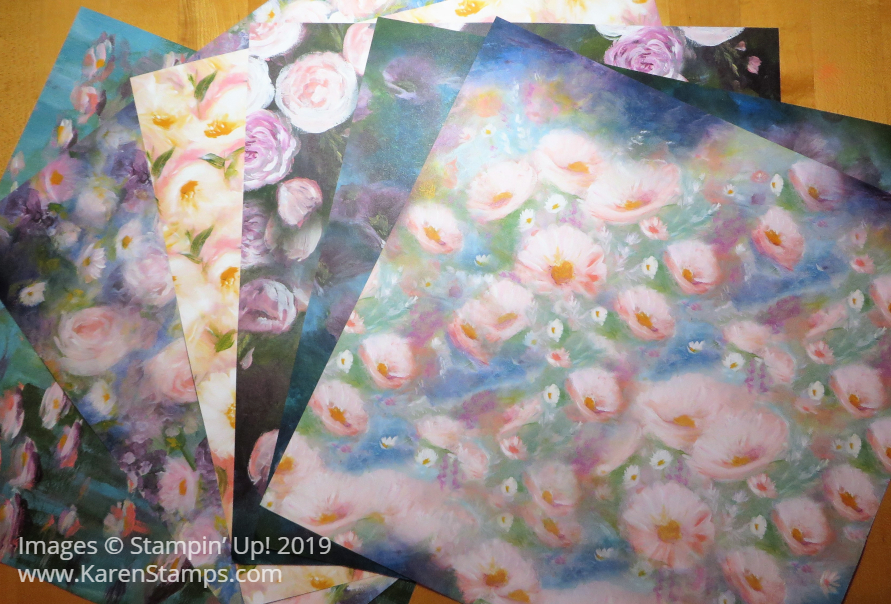
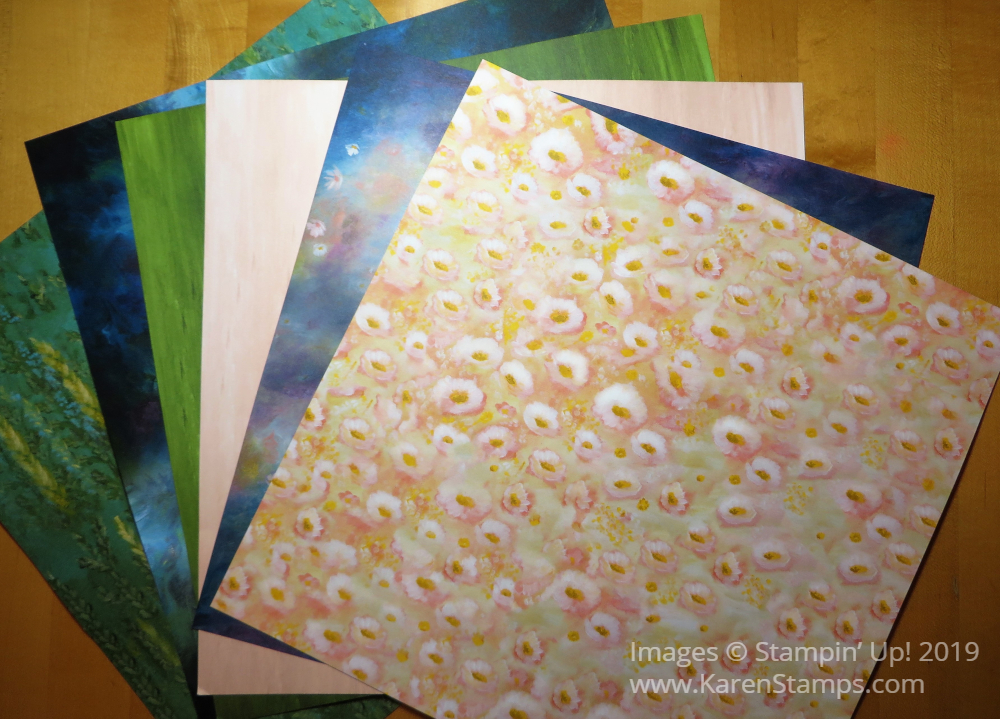
THIS PAPER! The Perennial Essence Designer Series Paper is hand-painted impressionistic imagery in rich colors, the catalog says. This photo doesn’t do it justice and I’m not sure it is a paper most people would just pick out on their own. But I’ve seen some gorgeous samples using this paper so I had to have it.
This is the opposite side of the Perennial Essence Designer Paper. Also beautiful.
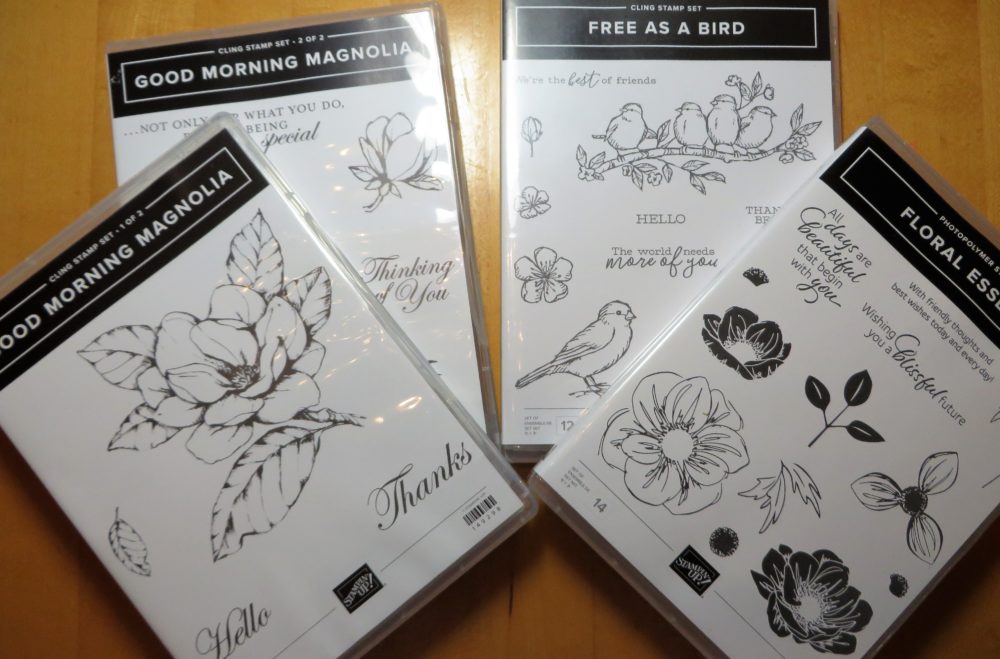
Here are the stamp sets I chose just to start in my pre-order! Just couldn’t have everything at once!
I also bought a package of the new In Colors cardstock but forgot to photograph it. We only had select products to choose from in our pre-order, not the whole catalog. Probably just as well because it was hard enough to choose from the pre-order! If I was super-rich, I would want it all, of course!
The new catalog goes live on June 4th. Even if you don’t have a copy, you will be able to see it online. If you are interested in Stampin’ Up! products and do not have a Stampin’ Up! Demonstrator you are working with, email me at Karen@Karenstamps.com with your contact information. Let me know if you are a new stamper or experienced and what you are most interested in making. If you would like a copy of the new catalog I would be happy to mail you a complimentary copy and be your Demonstrator.
In the meantime, be sure to shop the Last-Chance List of retiring products. It’s best to go to the Online Store and see what is available rather than read through the list. Also, for some fun bargains, don’t miss the Clearance Rack!
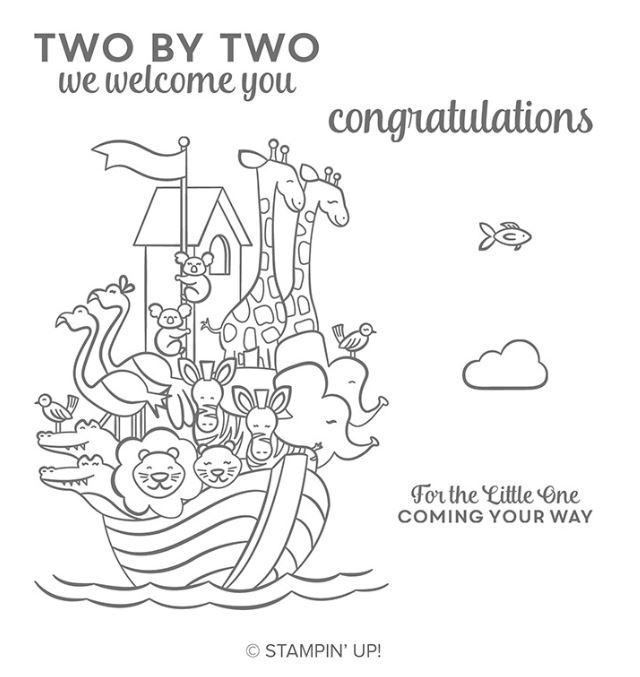
This Perfectly Paired Cling Stamp Set is the perfect Noah’s Ark Stamp For Rainy Houston. I wish I owned this stamp right now because we are having rainy weather in Houston……for days! No, it’s not a hurricane but there have been flooded roads, bayous, cars, and even houses just from heavy rainstorms. Luckily, we have been high and dry at our house!
All this rain was forecast ahead of time, but I don’t think it was forecast to be as bad as it was on Tuesday. I was expecting scattered showers and maybe a few thunderstorms so when it started on Tuesday afternoon I didn’t think much of it. I even texted my daughter and said we were getting a lot of thunder. By the time I had to pick up my husband at the bus, I was hoping I could drive two miles down the road and through the parking lot to get him. That worked fine but as we ate dinner, the sky REALLY opened up and the lightning and thunder were crazy….all night and during the night!
By then the news was showing the typical Houston flood scenes, cars stranded on highways and feeder roads, Good Samaritans pushing stalled cars out of the street (even a man in a new Mercedes!), and stories of kids stranded at school who were fed and were going to spend the night there! (What a bummer!) Way back when, two of my kids were stranded at school, I think Kindergarten and 4th grade, and were fed sandwiches and sent home on a school bus. While we waited anxiously for them to get home, they were having a great adventure on the bus watching the waves of water wash up into yards as the bus drove down the streets!
It continued to rain heavily all evening and through part of the night. We got at least 5″ in our backyard. Then the rain held off all day Wednesday until late evening when it all started up again. The people who were at the Astros baseball game got rained on inside because the heavy rain came through the cracks of the moveable roof! We got another 2 1/2″.
On Thursday morning as I was driving around my “Low Tire Pressure” light came on so I had to get the tire checked. Sure enough, there was a nail in it, so I had to get it patched. They were predicting rain by 1:00 pm so I just wanted this all to be done so I could get home before it flooded again!
Luckily I had grabbed my new Stampin’ Up! catalog that just came the day before to read in case I had to sit around and wait. Just before my car was done, two ladies sat down near me and I heard one say, “Do you do Stampin’ Up!?” When someone asks you that, you know they are familiar with Stampin’ Up! or they would have no idea! They saw my bag I had grabbed for my catalog and magazines with a Stampin’ Up! logo on it. Always fun to meet other stampers! Before we could talk long, my car was ready. That night it didn’t rain much at our house but other parts of town got the deluge!
No rain yesterday somehow, but it is forecast again for today. So far we have had the Seattle-like drizzle (can’t really see it but you can feel the fine mist on your face!) but could get storms this afternoon. Unless it goes south of us. We seem to be on the edge. But who knows. For all these years we have been lucky at our house on our street in the middle of the block, but I never rule out the possibility of something floody happening! You’d think if we made it through 35″ of rain during Hurricane Harvey we would never have to worry. But Tuesday night people’s houses in other neighborhoods flooded that had never flooded before.
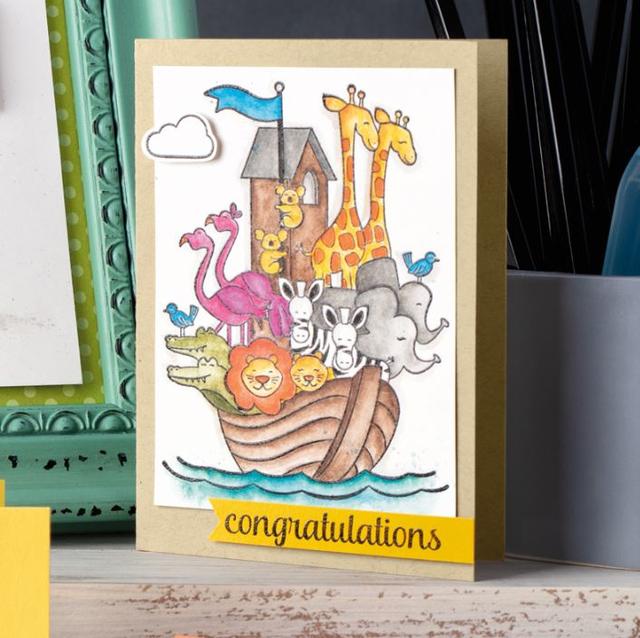
So if I had the Perfectly Paired Stamp Set, I might make a card like this one, a Stampin’ Up! sample, for days when we get too much rain. My husband even said, since we have had the Memorial Day Night Flood, the Tax Day Flood, and the 4th of July Flood, that if it continued to rain this weekend they would call it the Mother’s Day Flood! This stamp set is designed for a new baby so it would also be appropriate for Mother’s Day! It’s on the Last-Chance List so be sure to order it if you need a Flood Day stamp set!
It’s getting close to mid-May so you only have a couple more weeks of the Last-Chance List before those products retire. And don’t forget to check the Clearance Rack for some bargains as long as you are ordering!
And the Everything is Rosy Medley Collection is available only in May (and while supplies last). If you love Rose Gold, this is the collection for you. It’s the hottest trend right now! It looks pricey at first glance, but you have to consider you get the stamps, the dies, the papers, the accessories, and embellishments. AND you only have to enter one number #150059 to get it all! That’s what this collection is designed for…..the person who wants it all and can start creating with everything that coordinates!
Stamping is a good past time for rainy days and I know Houston is not the only place that has had tons of rain recently. It’s almost as good as baking cookies! So stock up now on any retiring sets and accessories you need before they are gone.
Also, keep in mind tomorrow is Mother’s Day so feel free to choose your own Mother’s Day gift at Stampin’ Up! That’s what you really want anyway, right?!
Give the Perfect Mother’s Day Gift! The Paper Pumpkin Kit “Hugs From Shelli” Kit! Give it to yourself for Mother’s Day just in case that breakfast in bed or cards and flowers don’t quite materialize (or even if they do!) And while you are at it, give one to your mother, daughter, sister, niece, friend, neighbor, whoever! You deserve something extra special that you will enjoy and will be relaxing and pretty!
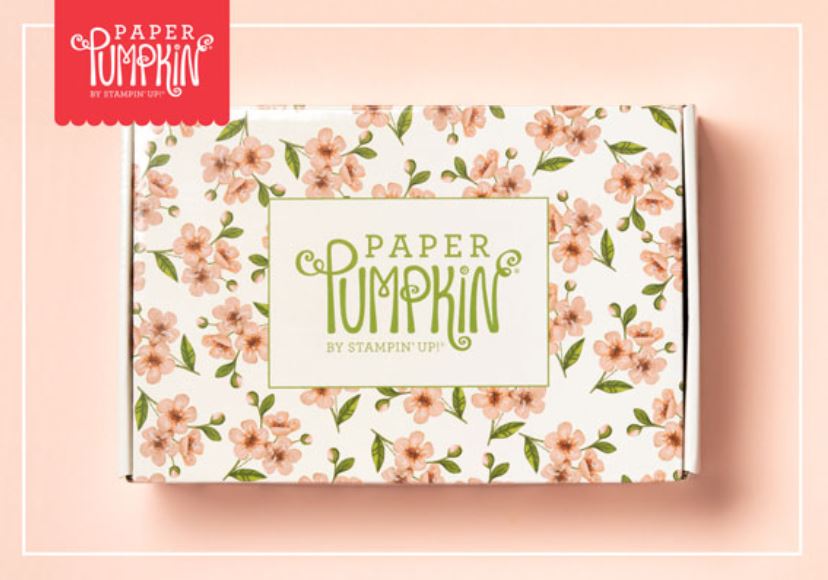
I mean, C’mon! Who does not want this Paper Pumpkin box to show up in their mail?! Not that the box itself REALLY matters because it is the papercrafting kit inside that is the important thing BUT if “it’s all in the presentation” then you’ve got to love this box!
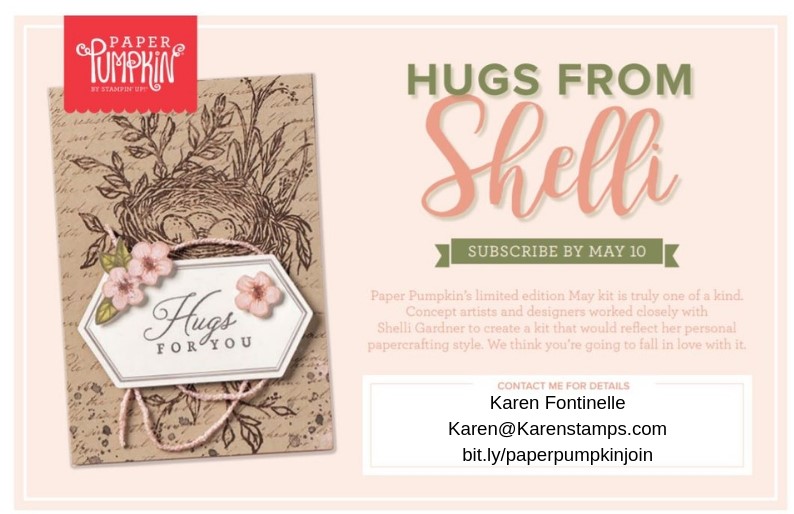
This is the May Paper Pumpkin Kit and will be in your mailbox in about a week or so IF you are already a subscriber or if you sign up to be one TODAY! Today, May 10th is the last day to subscribe to Paper Pumpkin and get this May kit.
What is the big deal about this May Paper Pumpkin Kit? Shelli Gardner, along with her sister, was the founder of Stampin’ Up! Shelli Gardner worked closely with designers and concept artists to create a Paper Pumpkin kit that is uniquely hers. It includes an exclusive photopolymer stamp set, paper, and crafting materials to create 12 cards (3 cards of 4 unique designs), 12 exclusive, coordinating envelopes, and a Classic Stampin’ Spot (small little ink pad!). (These, by the way, are great to save and use with the Stamparatus and they can be reinked.)
Coordinating colors are Crumb Cake, Early Espresso, Old Olive, Petal Pink, Pool Party, Pretty Peacock, Soft Suede, and Very Vanilla. One of those is a new In Color so you get an early view!
If anyone could help design beautiful cards, don’t you think it would be Shelli Gardner?! I can’t wait to get this kit!
Read Here in the Online Store about your Paper Pumpkin choices…..subscribe monthly or put a Prepaid subscription on your Stampin’ Up! order. Even if you have a monthly subscription right now, you can always purchase a Prepaid subscription to boost your Stampin’ Up! order, perhaps, to reach Stampin’ Rewards ($150+). The monthly subscription will stop, the prepaid months will kick in, and then go back to your monthly subscription and you don’t have to do anything except put in that Prepaid code you will get by email when your order goes in.
No risk, no obligation to stay on for any certain length of time. Skip a month if you are too busy or traveling or whatever. Cancel if it is not for you. I personally love getting the kit in the mail, like a gift just for me! You can make the project in the kit or make part of it as designed and use the materials to make your own creations. The kit is yours and you can make whatever you want! The beauty of the kit is you don’t have to design or gather supplies…it’s all ready to go when you open the box! Plus you can always view a video online from Stampin’ Up! And after a little while, you can check out alternative ideas for the kit online that other stampers have made.
Just click the button below to sign up with me as your Demonstrator!
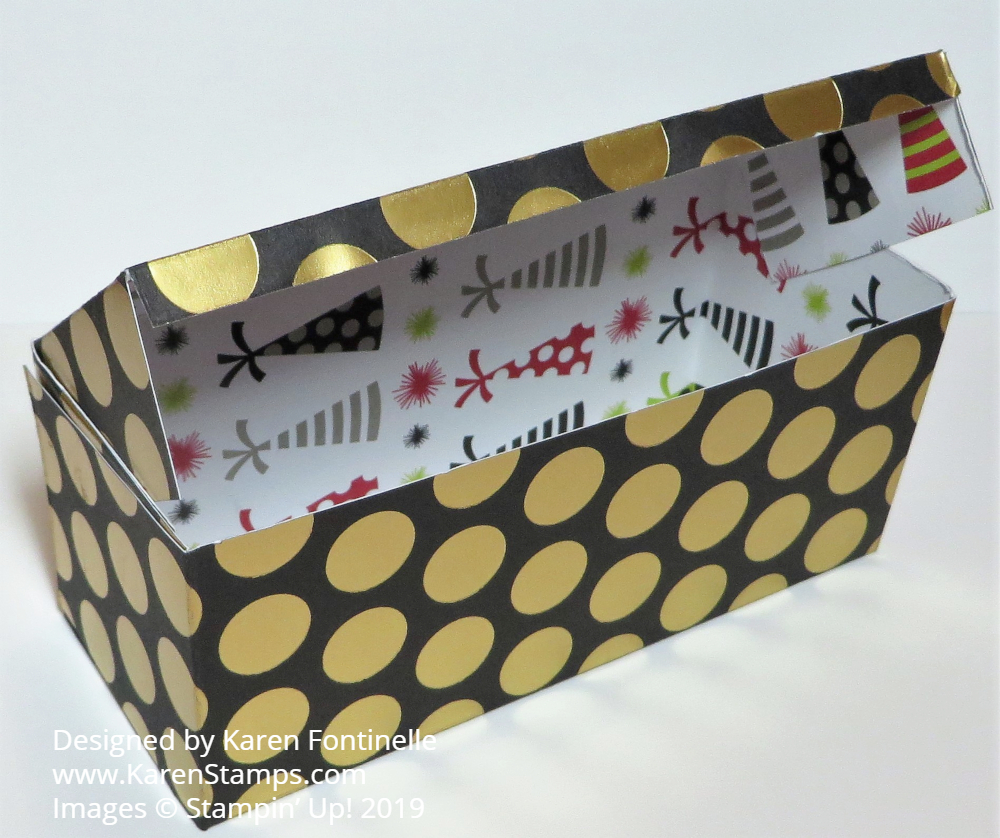
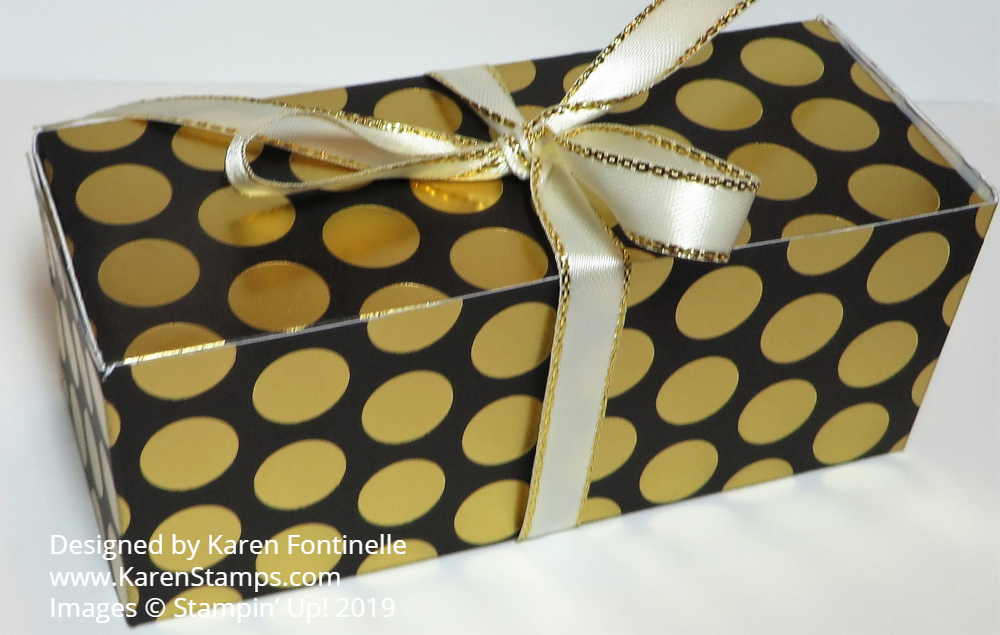
We’re entering a season of when you might have a lot of gift-giving occasions what with graduations, teacher gifts, engagements, and weddings so here is an easy Broadway Bound Handmade Gift Box. This designer paper is especially good to use because it is a heavier designer paper so it can stand up to be a box. It’s on the Last-Chance List so if you want some festive paper in your collection, be sure to pick this up! It’s the Broadway Bound Specialty Designer Series Paper which has party designs on one side and gold foil designs on the other.
This box is easy to make. This is a lesson is watching your patterns, as you can see on the inside of the box. The outside didn’t matter but the party hats are going sideways! Not that it is a huge problem, but you want to try to have your patterns going in the correct direction! So I should have turned my paper the other way when I scored it.
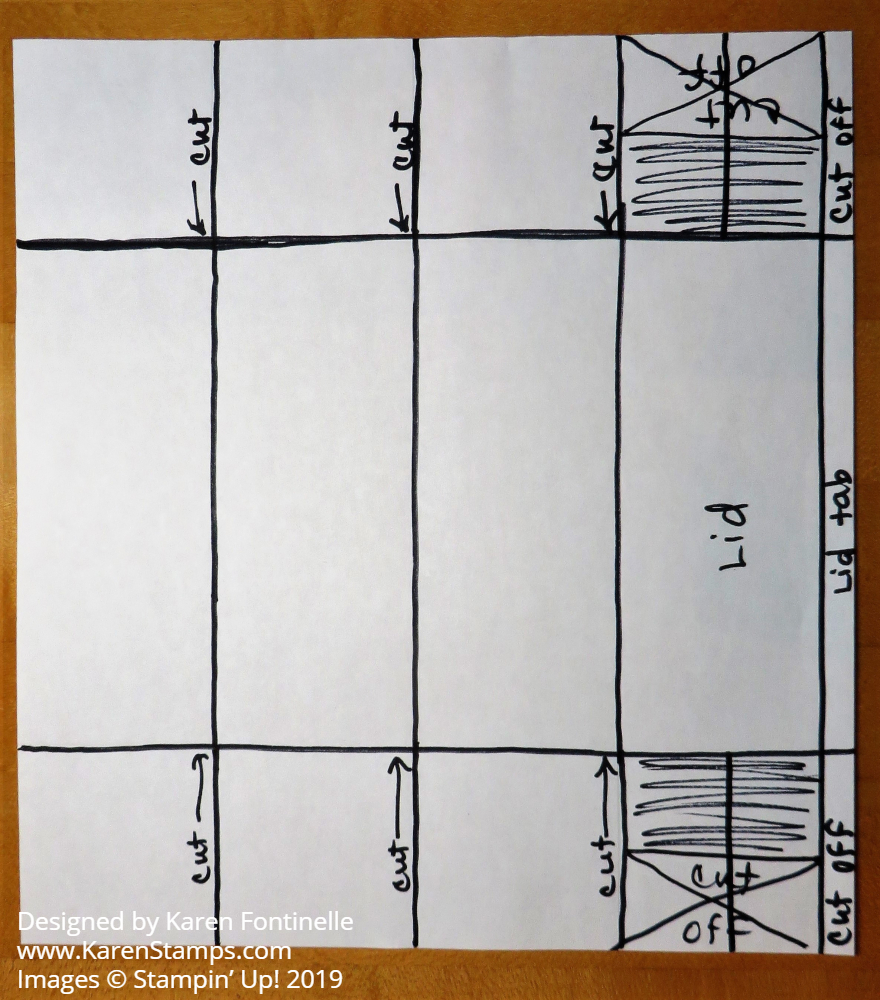
Here are the dimensions. Start with paper, whether cardstock or designer paper, 9″ x 8 1/4″ Score the long side at 2″ and 7″. Score the short side at 2″, 4″, 6″ and 8″. So essentially it is a 2-4-6-8 box, just on its side!
Here is a diagram. Start with the 9″ side up at the top of the Stampin’ Trimmer or the Simply Scored Scoring Tool. Score down at 2″ and 7″. Then turn the paper so the 8 1/4″ is at the top and score at 2″, 4″, 6″, and 8″. That will leave the 1/4″ edge. Cut off that little narrow corner. Cut up on both sides of the paper the score lines to the 2″ and 7″ score lines. Now that first tab next to the 1/4″ edge…..cut off half of that on each…..just eyeball it. That makes the tabs to close the box. Crease and fold on all the lines and assemble the box. You’ll see how it goes once you start folding. Use some strong adhesive on the ends to hold close.
That’s how easy it is to make a little gift box. Much quicker and easier than running out to the store for one! If you use plain cardstock, you can add layers of designer paper or stamp it first if you want to jazz it up. No matter what paper you use, you can make a small gift box like this Broadway Bound Handmade Gift Box.
We’re getting close to the deadline (May 10) for getting the Hugs From Shelli Paper Pumpkin Kit so sign up for Paper Pumpkin and don’t miss out!
What is Paper Pumpkin? It’s a special box that comes to you in the mail with a complete stamping and papercrafting project inside. Everything you need is inside – an exclusive stamp set, a little ink pad, adhesives, and all the materials you need for the project. Often times the project is cards but in the past projects have also included party favors, specialty cards, mini albums, calendars, treat bags, holiday favors, and more.
Why is this kit called the Shelli Kit? Shelli Gardner, the co-founder of Stampin’ Up!, helped design the kit, and that’s a good thing! From the sneak peek they have given us, the card is exactly Shelli’s style so I’m sure the kit is going to be one of the really wonderful ones. And if you don’t care for the projects in any of the kits, you can use the materials to make different projects. Shortly after the kits go out, stampers often post online alternative ideas for using the materials in the kit.
All this for only $19.95 which includes shipping! You can keep and use the stamp set in future stamping and sometimes there are extra pieces in the kit you can use on other projects.
No risk, no obligation! Try Paper Pumpkin one month or several, and if you feel it is not for you, just cancel your subscription. If you are too busy one month, just go into your account and “skip” that month. If you are truly unhappy, contact Stampin’ Up! as they guarantee each kit and they will try to make it right for you.
Now the Paper Pumpkin price will go up June 1st so go ahead and get the May kit for $19.95 (which includes shipping). The price increase will be $2.05 per month so not bad considering all the goodies you get in each kit! Just the exclusive stamp set alone is worth almost the price of the kit itself.
You can also choose Prepaid Kits in the Online Store, especially if you are already ordering other Stampin’ Up! products. They can help you reach Stampin’ Rewards and if you get a long-term subscription you can save money that way. Check it out HERE.
Watch the video below by Shelli and get more information and a sneak peek of the May Kit!
Mother’s Day is coming and you deserve to order Paper Pumpkin as your special treat! Or maybe you need a special gift for YOUR mother, daughter, aunt, grandmother, cousin! It makes the perfect gift for someone who wants to do a little crafting or an experienced crafter who just wants to sit down and make something without designing the project themselves and gathering supplies!
The deadline is Friday, May 10th but it is better to not wait until the last minute!
All kits are guaranteed by Stampin’ Up! No risk, no obligation. You can cancel or skip a month any time. You should go ahead and try Paper Pumpkin!
(This is my personalized link to make it easy for you, but if you have a Demonstrator you are working with, go to www.paperpumpkin.com and choose their name.)
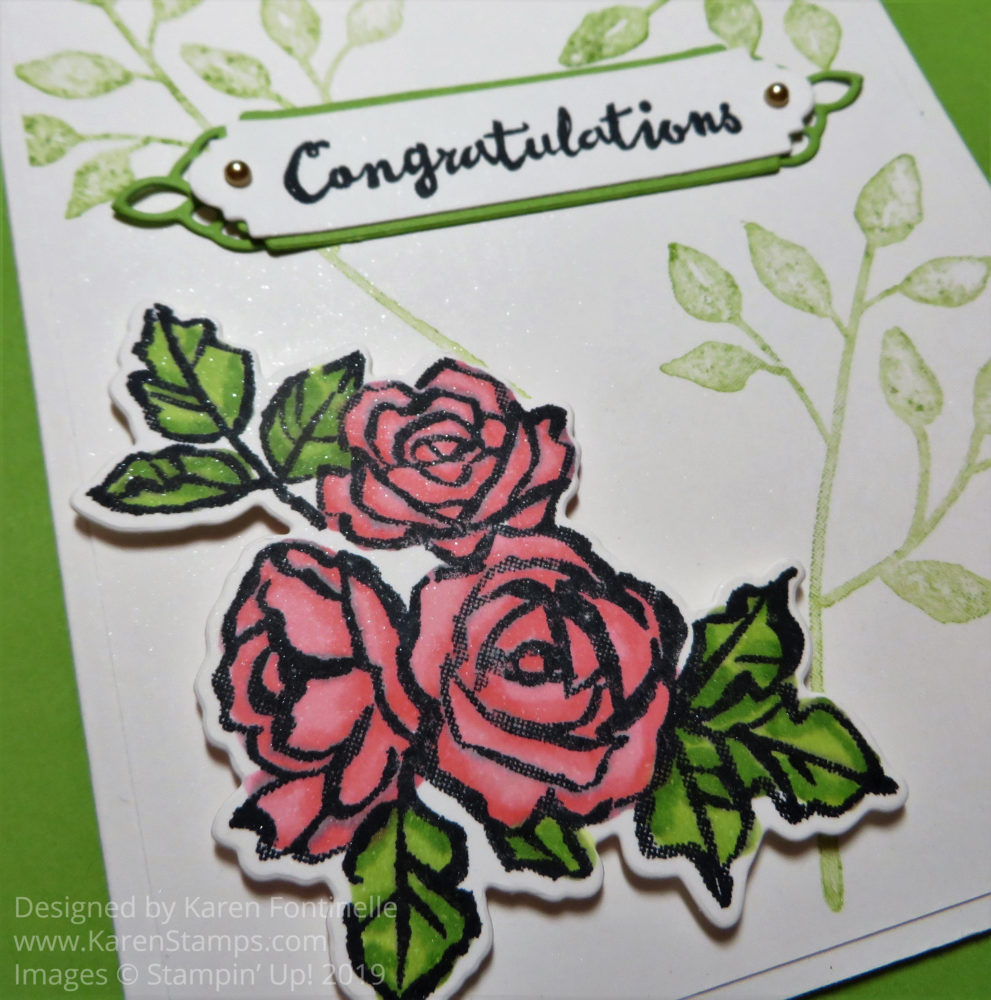
This Petal Palette Graduation Congratulations Card is perfect for this time of year when graduations are just beginning! But this card wouldn’t have to be for a graduation. It could be for any congratulatory occasion….or change the greeting to birthday, anniversary even sympathy.
The card actually has a card base of Shimmery White Cardstock and a layer of Shimmery White Cardstock as well. It is laying on a sheet of Granny Apple Green Cardstock and looks like that is the card base, but it is not. However, it does look pretty so you could use a green card base to match the ink in your leaves.
The flowers are stamped in Memento Ink and colored with Stampin’ Blends in Calypso Coral, but you could use other coloring mediums as well. Then they are die cut with one of the Petals & More Dies.
The leaves are stamped with Granny Apple Green Ink, but I stamped off on my Grid Paper first and then stamped on the card because I wanted them to be light. The greeting also comes from the stamp set and is die cut with one of the dies.
Even though I began by thinking about a card for graduation, I’m sure you can see how this could be a generic card for many occasions. Check out this card, rather similar, but with the flowers just stamped on the card. Try your hand at a card similar to this Petal Palette Graduation Congratulations Card but remember to check the Last-Chance List and the Clearance Rack!
Today is May 4th, otherwise known as Star Wars Day..…..“May the Fourth Be With You!” Get it? If you want to make some card for your Star Wars friends, here are several have made in the past. Mostly I have used various punches but you can be creative and use whatever you have!
The above card is a punch art R2D2 card, a little bit involved with all the small pieces! You can see it in my blog post HERE.
This might have been my first Star Wars card I made with Darth Vader and Yoda! I know I found some kind of “Yoda Language Generator” site where you could type in your message and they would translate it into how Yoda would say it! Here is the blog post about this card.
This card was fun with the BB8 character! You can read about the making of this card HERE.
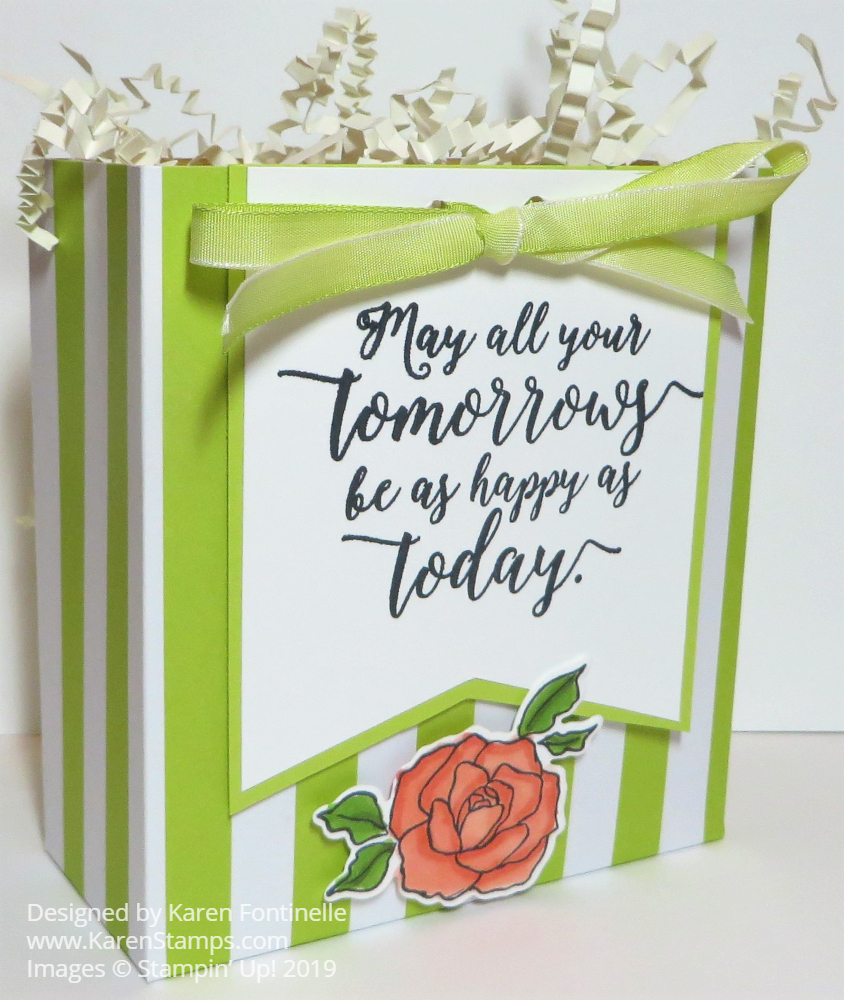
Today I am showing you this Broadway Bound Gift Bag For Graduation. Of course, it could be for any gift-giving occasion, but graduations are coming up soon! Since sometimes graduation gifts are smaller in size, maybe a gift card, maybe some jewelry or cash, this small gift bag would be perfect. You can pinch in the sides and pull the top sides together to close the bag. Lots of variations.
This gift bag is mostly like the 2-4-6-8 box we all make a lot, but the dimensions are a little different just to make it wider. This happens to be the striped pattern in the Broadway Bound Specialty Designer Series Paper. This paper is on the Stampin’ Up! Last-Chance List so get it before it is gone! Make sure any pattern on any paper is going in the direction you want it to go on your project when you cut your paper and when you score, depending on the project.
Start with a 6″ x 12″ piece of paper. Score at 4″, 5 3/4″, 9 3/4″, and 11 1/2″. Turn the paper so the short edge is at the top and score at 1 3/4″. This will make the bottom flaps of the bag. Cut those short bottom tabs up to the 1 3/4″ score line. Cut off the little 1/2″ tab on the bottom. Fold on all the score lines and crease well with the Bone Folder. Adhere the tab on the end to the other side to assemble the bag. Then adhere the flaps on the bottom. I used the Tear & Tape Adhesive.
You can decorate these little bags in many ways. I liked the sentiment in the Colorful Seasons Stamp Set so I stamped that and cut the piece to make a banner. It is layered on a piece of Lemon Lime Twist to match the bag. The bow is Lemon Lime Twist 1/4″ Ombre Ribbon. At this point, I thought about adding some sequins to the banner, but since I had this flower already colored and cut out from the Tea Together Stamp Set, I used it as an embellishment on the bag!
The bag is all ready for a gift! Very easy to make and no rushed trips to the store for a gift bag! It’s a great way to use some of your hoarded designer series paper! Think about making your own little gift bag like this Broadway Bound Gift Bag For Graduation.
It’s May so it is time to sign up for Paper Pumpkin and get the Paper Pumpkin Shelli Kit! You don’t want to miss out! The deadline is May 10th.
What is Paper Pumpkin? It’s a special box that comes to you in the mail with a complete stamping and papercrafting project inside. Everything you need is inside – an exclusive stamp set, a little ink pad, adhesives, and all the materials you need for the project. Often times the project is cards but in the past projects have also included party favors, specialty cards, mini albums, calendars, treat bags, holiday favors, and more.
All this for only $19.95 which includes shipping! You can keep and use the stamp set in future stamping and sometimes there are extra pieces in the kit you can use on other projects.
Why is this kit called the Shelli Kit? Shelli Gardner, the founder of Stampin’ Up!, helped design the kit, and that’s a good thing! From the sneak peek they have given us, the card is exactly Shelli’s style so I’m sure the kit is going to be one of the really wonderful ones. And if you don’t care for the projects in any of the kits, you can use the materials to make different projects. Shortly after the kits go out, stampers often post online alternative ideas for using the materials in the kit.
No risk, no obligation! Try Paper Pumpkin one month or several, and if you feel it is not for you, just cancel your subscription. If you are too busy one month, just go into your account and “skip” that month. If you are truly unhappy, contact Stampin’ Up! as they guarantee each kit and they will try to make it right for you.
Watch the video below by Shelli and get more information and a sneak peek!
The deadline for signing up for Paper Pumpkin or for changing anything in your account is the 10th of any month. Don’t delay! Join today so you won’t miss out on this extra-special Paper Pumpkin Kit.
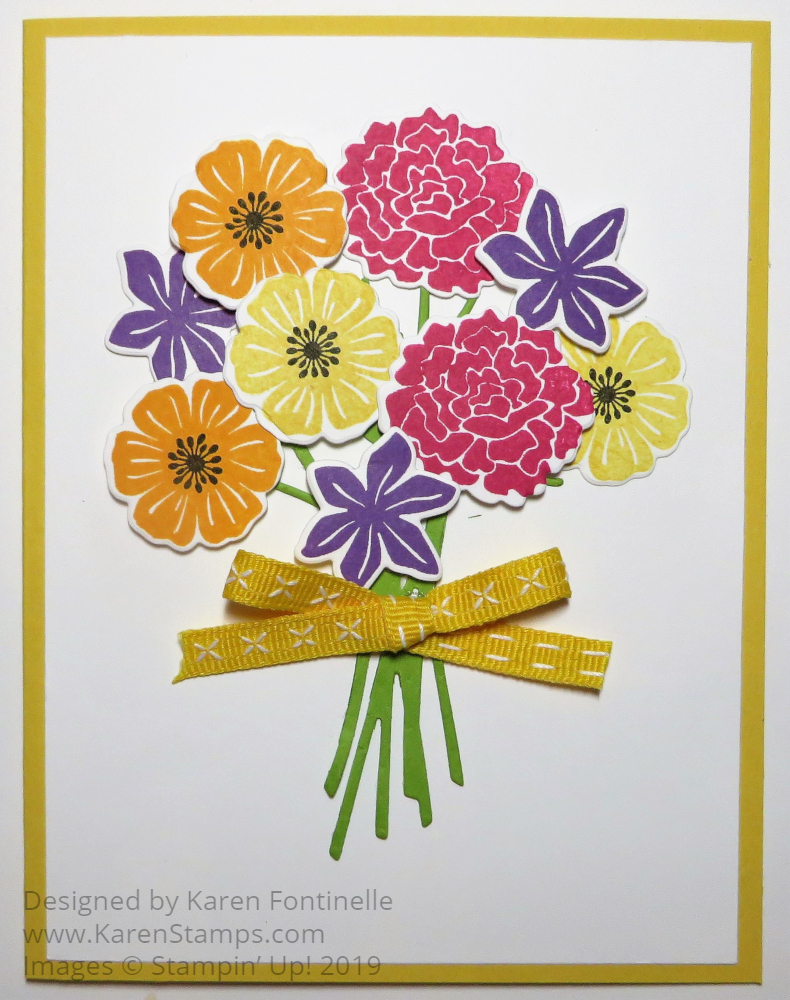
Happy May Day! It’s May 1st and here is a Beautiful Bouquet May Day Card to celebrate! Back in the “olden days” May Day was celebrated by gathering a bouquet of flowers and making a little basket with which to hang them on a neighbor’s or friend’s door. There used to also be a Maypole, a tall wooden pole decorated with flowers with long ribbons attached at the top that people would hold onto and dance around the maypole. Sounds like a lovely tradition somehow!
In honor of May Day, I made this card with the Beautiful Bouquet Stamp Set and the Bouquet Bunch Framelits Dies. It was very easy. I just stamped several flowers of each kind in different colors and then die cut them with Beautiful Bunch dies. Some are adhered flat on the card front and some are popped up with Stampin’ Dimensionals. The flower stems are one die cut out of Granny Apple Green Cardstock. I added a bow made with the Daffodil Delight 1/4″ Double-Stitched Ribbon. I didn’t add a greeting yet because I could use this card for many occasions and will add a greeting later.
The card base is Daffodil Delight Cardstock. The flowers are stamped in Melon Mambo, Mango Melody, Daffodil Delight, and Gorgeous Grape. I just chose four colors from the Brights Family for the flowers. Quick and easy!
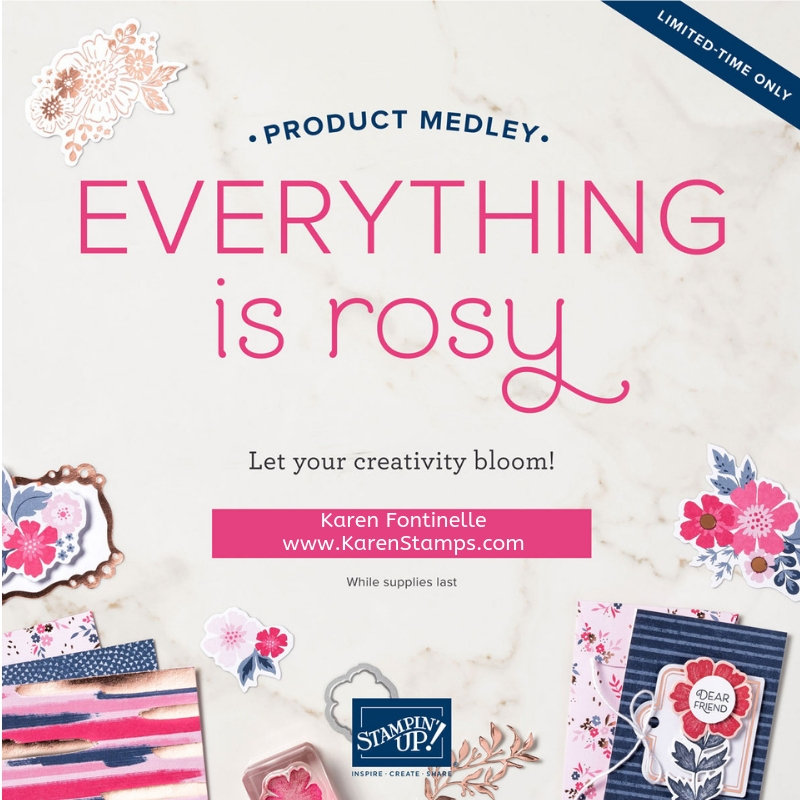
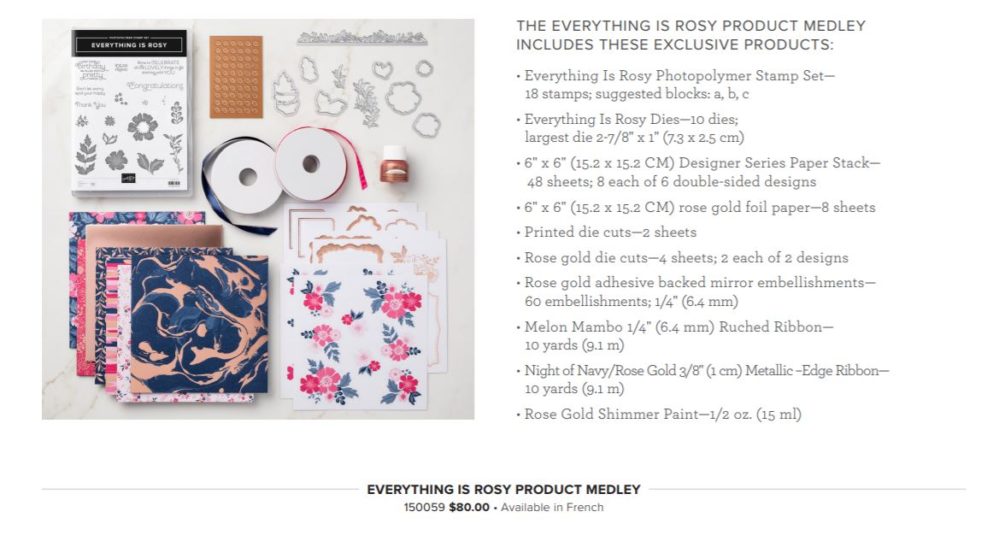
If you love flowers and like making floral cards, you might be interested in the brand new Everything Is Rosy Product Medley. This product is available TODAY, May 1 through May 31, WHILE SUPPLIES LAST! It may seem a bit pricey, but this product is designed for the crafter who wants “all the stuff” right away, in one package, ready to go, so they have everything they need to start creating as soon as they open the box. The products include stamps, dies, papers, ribbons, die cuts, Rose Gold foil, even Rose Gold Shimmer Paint. Below you will see a list of the products included:
• Everything Is Rosy Photopolymer Stamp Set— 18 stamps; suggested blocks: a, b, c • Everything Is Rosy Dies—10 dies; largest die 2-7/8″ x 1″ (7.3 x 2.5 cm) • 6″ x 6″ (15.2 x 15.2 CM) Designer Series Paper Stack— 48 sheets; 8 each of 6 double-sided designs • 6″ x 6″ (15.2 x 15.2 CM) rose gold foil paper—8 sheets • Printed die cuts—2 sheets • Rose gold die cuts—4 sheets; 2 each of 2 designs • Rose gold adhesive backed mirror embellishments— 60 embellishments; 1/4″ (6.4 mm) • Melon Mambo 1/4″ (6.4 mm) Ruched Ribbon— 10 yards (9.1 m) • Night of Navy/Rose Gold 3/8″ (1 cm) Metallic –Edge Ribbon— 10 yards (9.1 m) • Rose Gold Shimmer Paint—1/2 oz. (15 ml)
Watch the video below to see for yourself how you can use the collection.
If you are interested in this Everything Is Rosy Medley Collection it might be wise to order it as soon as you can as it is available only while supplies last during the month of May. You can add it to anything else on an order.
I’m a big advocate for “taking care of yourself” on birthdays and special days, so I give you permission to order this kit for yourself (or for someone else as a gift!) for Mother’s Day! Why not treat yourself?! And no one else has to know!
You might not believe this all-occasion card is made with paper called Animal Expedition! This designer series paper is on the Last-Chance List so be sure to pick some up if you like it.
The focus of the Animal Expedition Designer Series Paper is of course animals, very cute, whimsical animals. You might think this paper would only be for children or babies, but it’s for everyone for lots of happy cards and occasions! I didn’t think I had a need for it at first, but then I saw lots of cute samples and of course, had to have it! If you want it all, get the Animal Outing Bundle with the coordinating stamp set and dies. Remember, the Bundle saves you 10%. Although the stamp set is carrying over to the new Stampin’ Up! Catalog in June along with the Animal Friends Dies, you won’t be able to buy them in a Bundle saving 10%. So get them now!
As I looked through the papers before making this card, I almost picked the hippo paper but then this generic paper with just leaves and little birds looked so pretty I had to work with it first! You could use this paper for any pretty card or project, it doesn’t have to have anything to do with animals!
My card base is Call Me Clover Cardstock with a layer of Pool Party and then the designer paper. To match the little birds, I chose the Berry Burst 3/8″ Metallic-Edge Ribbon to embellish the card. For the greeting, I chose a sentiment in the Colorful Seasons Stamp Set. This stamp set will also be in the new catalog! I cut it out with a die in the Stitched Labels Framelits Dies. I wanted to set this piece off a little bit, but there is no layer to match…..so I made my own! I simply put a layer of Berry Burst underneath the fancy die cut and trimmed around the edge. I did this not even wearing my glasses and it turned out fine! I think it adds a good contrast!
Always look through your designer papers, even after you’ve had them a long time and see what is in there that you may have forgotten! Sometimes you will find a generic pattern in a pack that doesn’t have anything to do with the theme of the other papers. Or you will have forgotten what all the paper designs are and you might find something that is perfect for your project!
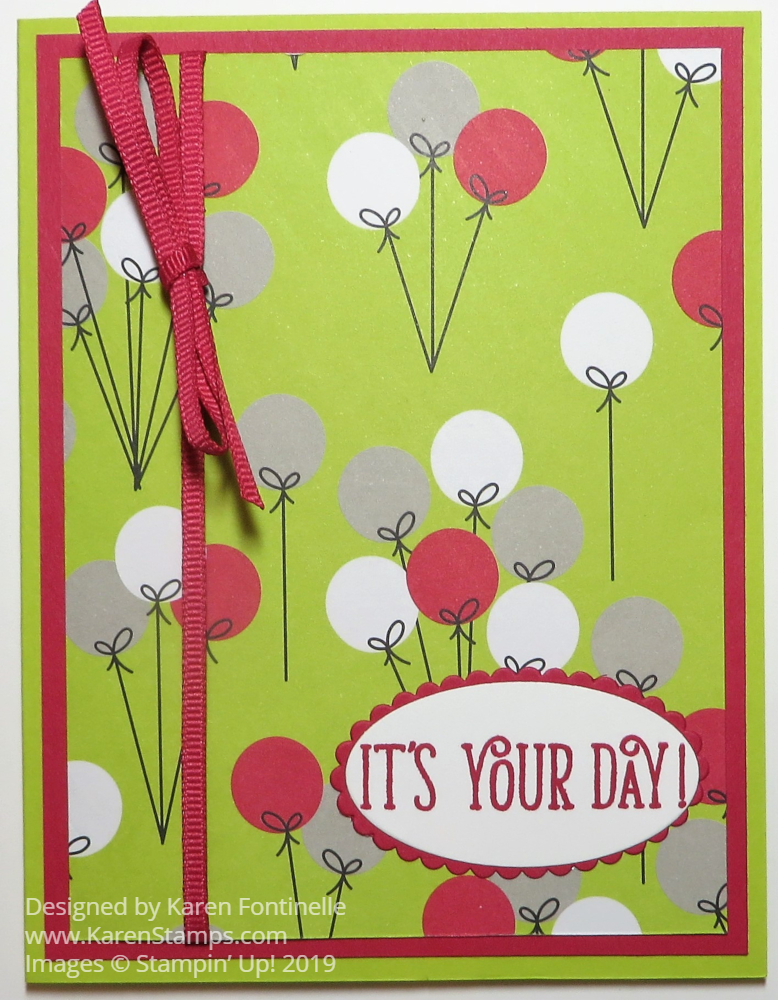
Make an easy celebration card for someone very quickly with this basic card design! It’s always simple to make a card with a card base, a layer and a greeting and from there you can embellish a little bit or a lot depending on your style and the occasion for the card!
This card starts with a Lemon Lime Twist card base. What will we do without Lemon Lime Twist when this In Color retires?! If you want any of the 2017-2019 In Colors – ink, refills, cardstock, papers, embellishments – be sure you get them before they retire on June 3, 2019.
I chose the Broadway Bound Specialty Designer Series Paper for this card. I like this balloon pattern because it can be for any happy occasion! This card could be for a birthday, graduation, or simply any congratulatory note. This package of paper has a party design on one side and gold foil designs on the other so you can be as festive as you like!
To set off the designer paper from the Lemon Lime Twist card base, I added a layer of Lovely Lipstick, one of the current In Colors that are sticking around another year. And since I had this narrow Lovely Lipstick 1/8″ Grosgrain Ribbon I added that for some embellishment.
Here are three cards I made with the Broadway Bound Paper that might give you some other ideas!
Whether you use this paper or some other designer paper, you can use this card layout and design for either a simple card or as a base for something fancier.
Be sure to check out the Last-Chance List of retiring products to see what is available and what you can’t live without! If you have any questions about things that might be in the new catalog, feel free to ask! I don’t have the new hard copy yet but I can look online!
Also, don’t forget the Clearance Rack if you didn’t get to shop the other day!
A new product coming soon! The Everything is Rosy Medley of products! You don’t have to wait until June for something new, this new collection of products will be available starting May 1st, while supplies last, through the month of May. In one fell swoop, you get this entire set of products that coordinate and you will be all set to start creating with everything you need!
This Everything is Rosy Product Medley is designed for the crafter who wants it all, in one package, everything you need to make some beautiful cards and projects from stamps, paper, dies, and gorgeous embellishments, but don’t delay if you would love to own this product, order right away to avoid disappointment, beginning May 1st!