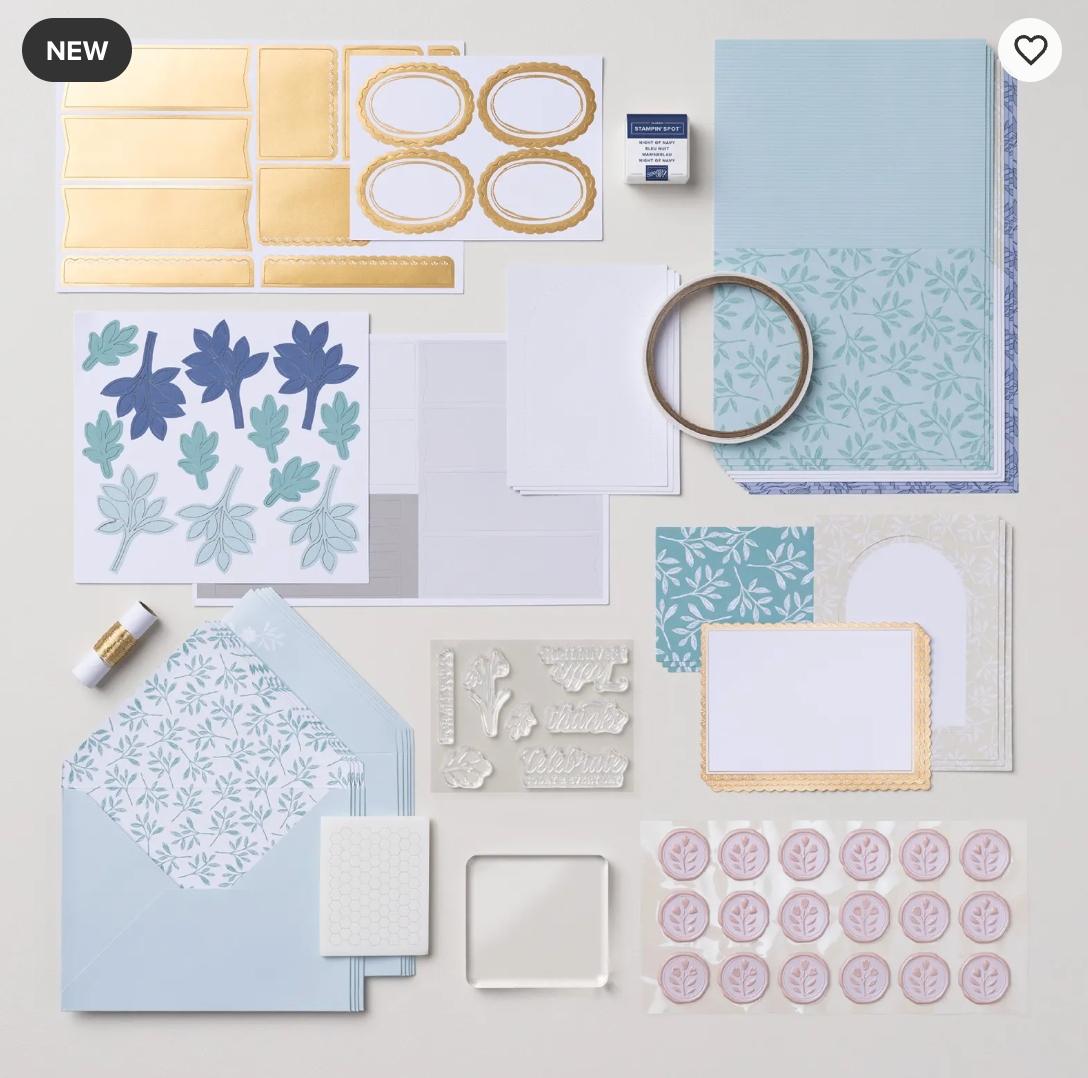
It’s November and two new Kits in the Stampin’ Up! Kits Collection were added! It’s always fun to see what new Kits will arrive each month! The first one is the Everyday Beauty Kit, which does look like a beautiful kit for making some all-occasion cards with very pretty botanical images, even on the envelopes.
Stampin’ Up! says:
“Create the perfect card for any occasion using the all-inclusive Everyday Beauty Kit. This kit comes with everything you need to make three unique card designs: printed card bases and coordinating envelopes with lovely botanical patterns, precut paper pieces, timeless faux wax seals, shimmering metallic thread, and a versatile stamp set that you can use on countless other projects.”
DETAILS
– Makes 9 cards: 3 each of 3 designs
– Folded card size: 5-1/2″ x 4-1/4″ (14 x 10.8 cm)
– Colors: Basic Beige, gold, Gray Granite, Lost Lagoon, Night of Navy, Petal Pink
– Also available in French
Kit includes one of each item listed below.
– Everyday Beauty Photopolymer Stamp Set
– Clear stamp block
– Night of Navy Classic Stampin’ Spot
– Step-by-step instructions
– 9 printed envelopes
– Faux wax seal stickers
– Metallic thread
– Adhesive
Here are all the pieces you get in the Kit to make the nine cards. And if you choose, you can make your own creations with the supplies if you want to make different designs. It’s all right there for you to play with! Just open the box!
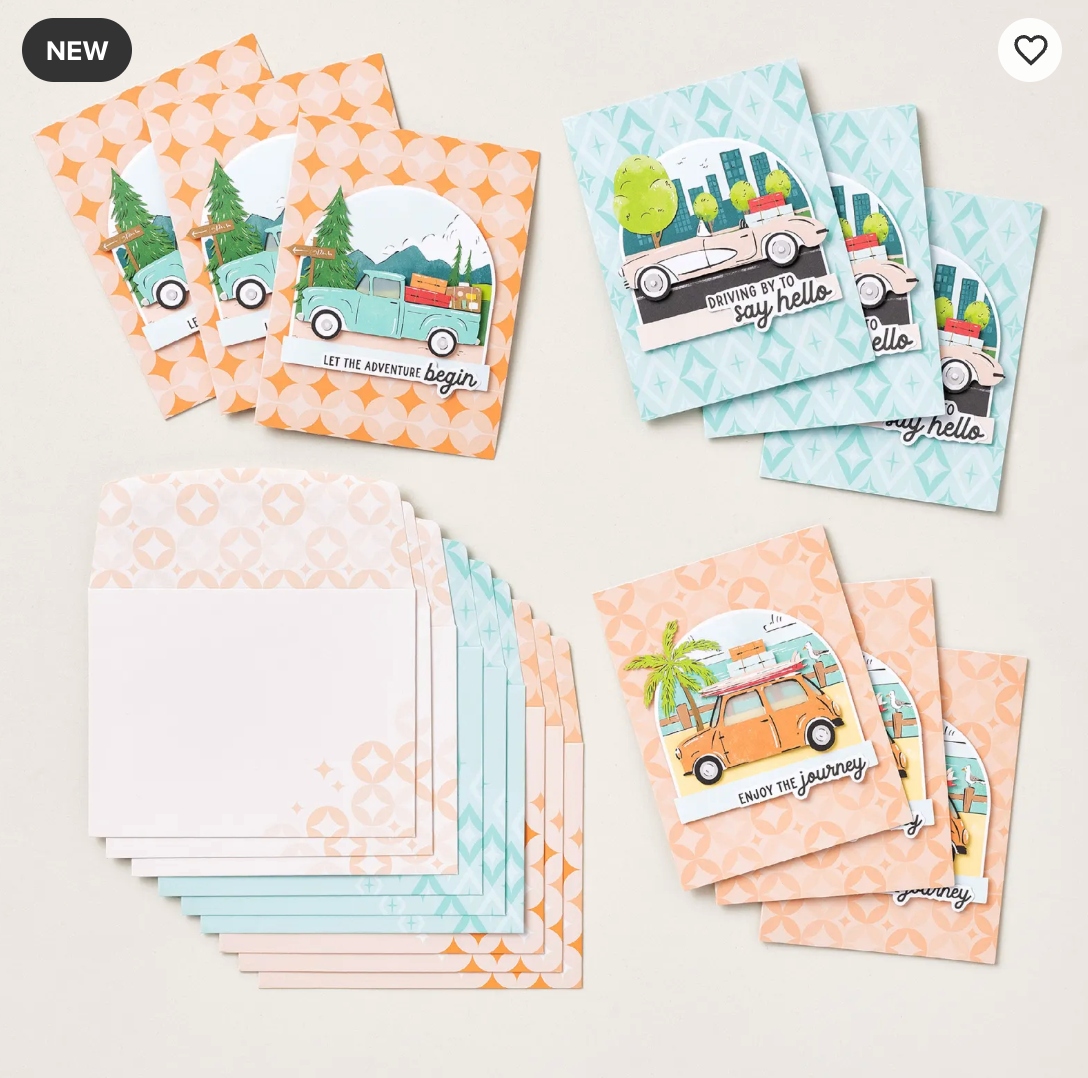
The second new Kit for November, is the Adventure Awaits Kit. This looks like a fun set of cards to send to just the right person!
Stampin’ Up! says”
“Let your creativity take the driver’s seat with the Adventure Awaits Kit. Coast in the retro colours and hand-drawn artwork that can be either feminine or masculine. With printed sentiments, precut paper, and vellum details, this kit comes with everything you need to make nine cute cards.”
DETAILS
– Makes 9 cards: 3 each of 3 designs
– Folded card size: 5-1/2″ x 4-1/4″ (14 x 10.8 cm)
– Colors: Basic Black, Coastal Cabana, Crushed Curry, Garden Green, Granny Apple Green, Pecan Pie, Petal Pink, Poppy Parade, Pretty Peacock, Timid Tiger
– Sentiments printed in English, French, and German
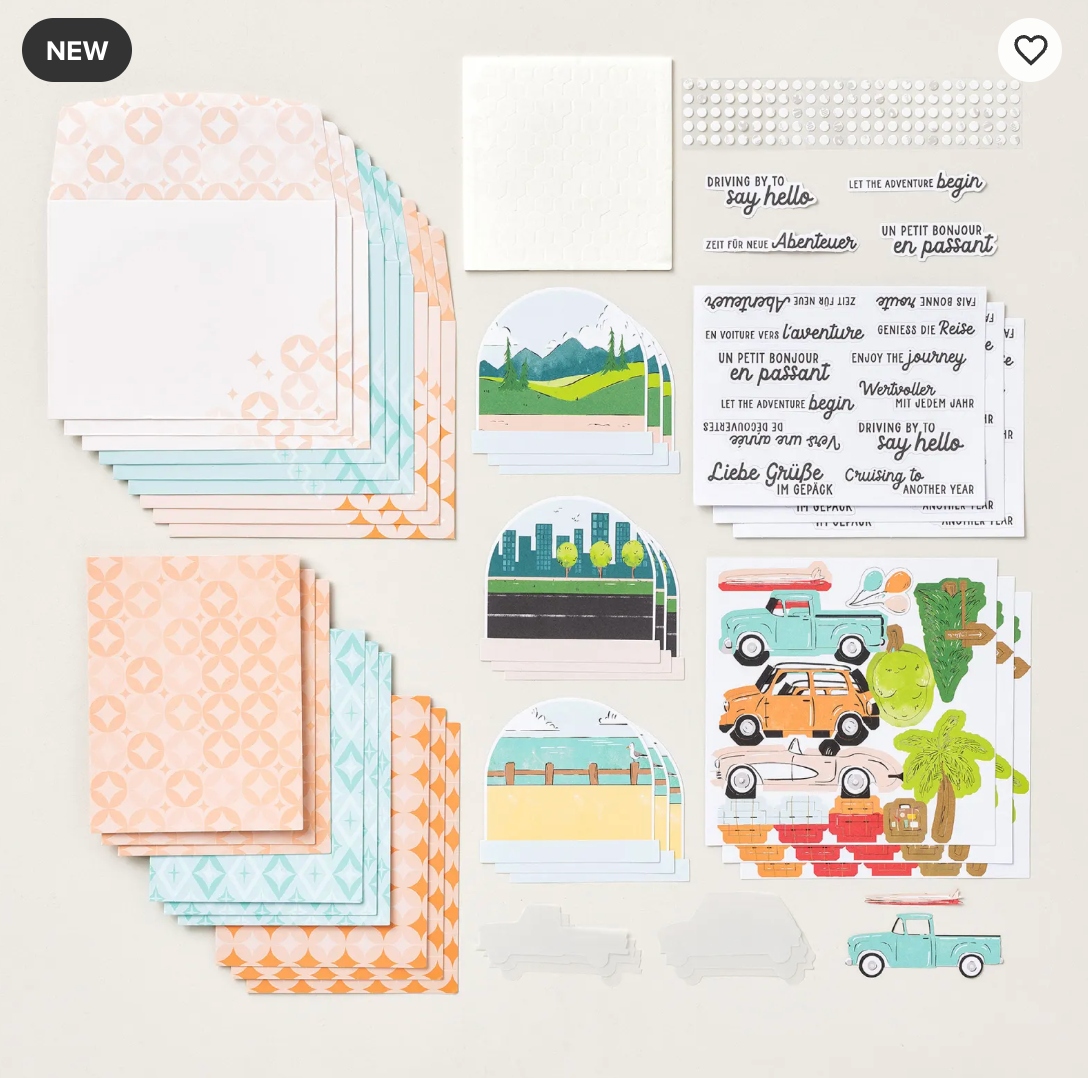
Kit includes one of each item listed below.
– Step-by-step instructions
– 9 printed envelopes
– Vellum
– Adhesive
Here are all the components of this Adventure Awaits Kit! Each Kit includes an exclusive stamp set that you won’t see anywhere else.
If you are new to papercrafting, be assured you can make these Kits! Just follow the directions and/or watch the video specific for each Kit! Experienced stampers/papercrafters will find enjoyment in just opening the box and finding a cute project ready to make without having to design anything or hunt for all the needed supplies! They are all in the box except for possibly a scissors!
Check out these two new Kits and previous ones in the Stampin’ Up! Online Store!