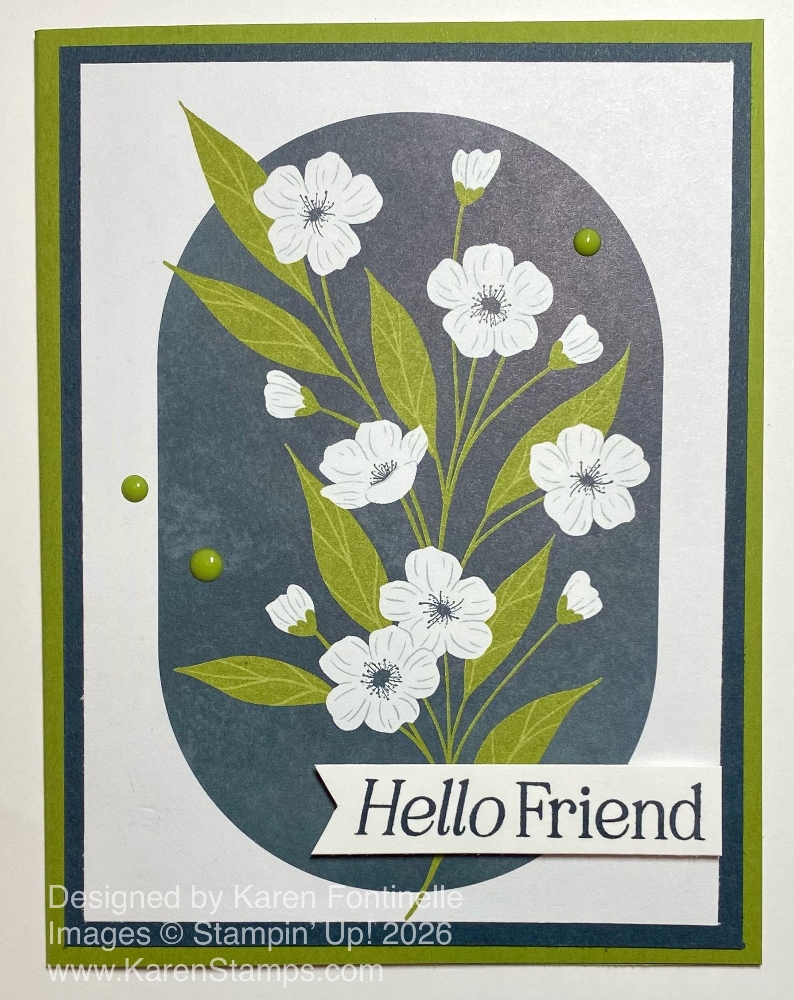
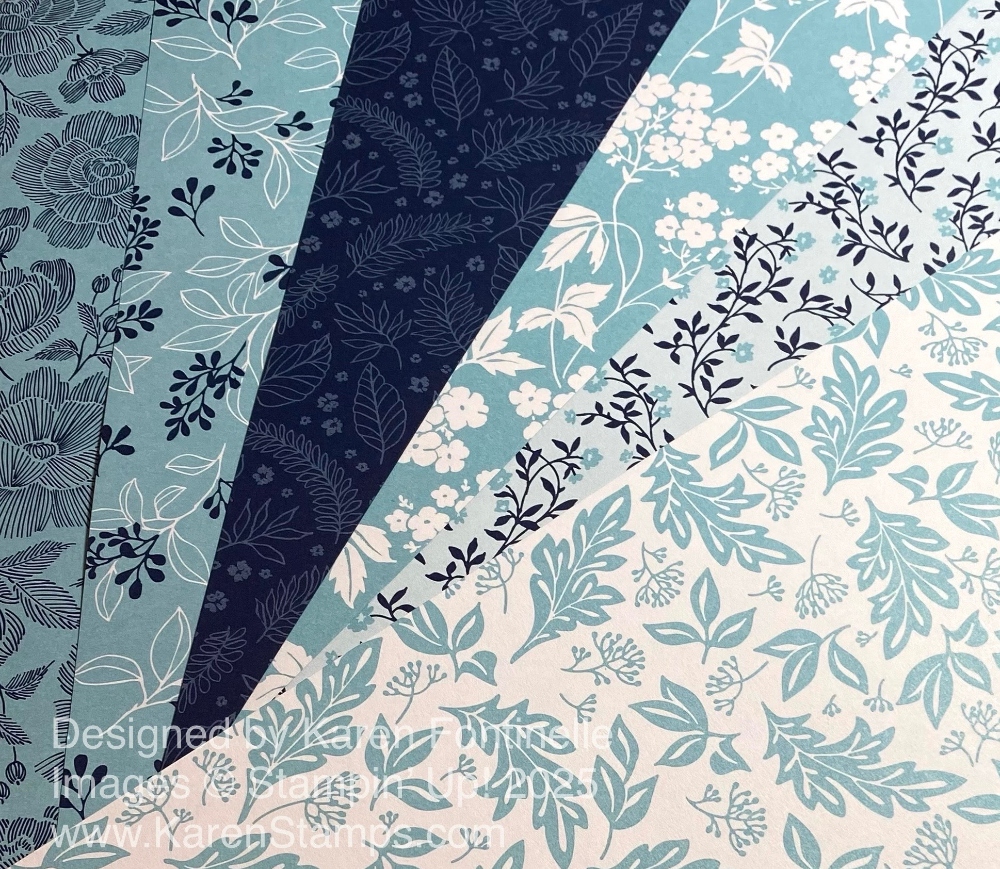
This Lovely Blossoms Hello Friend Card is a very easy card to make, and the artwork makes it beautiful. If you have seen other designer papers with “cut-apart” images, like the Love Notes 6″ x 6″ Designer Series Paper, this is some of the same. This Lovely Blooms Designer Series Paper has images of lots of white blooms and a palette of colors of light pink, green and navy. Navy is really Secret Sea, a color I haven’t used much, so I’m glad to have some papers with which I can use more of it. The smaller images on several sheets can be cut apart, trimmed down to whatever size you want or left as is for your cardmaking and scrapbooking projects.
For this card, I used a base of Old Olive with a layer of Secret Sea. I chose the section of the designer paper with the white flowers on the Secret Sea background but I trimmed it down to fit on the card. The Secret Sea layer is 4″ x 5 1/4″ and the floral layer is 3 3/4″ x 5″.
For the greeting, I stamped “Hello Friend” in the Lovely Arrangements Stamp Set in Secret Sea ink on a scrap strip of Basic White cardstock. I cut a little flagged end on the left side and lined up the right side with the edge of the designer paper. It is popped up with Stampin’ Dimensionals.
Also a part of this Lovely Blossoms Suite Collection in the Online Exclusives is a pack of Moody Palette Glossy Dots. I used three of the Old Olive Dots on the front of the card. This is the nice part of a Suite. You know exactly what things go well with what!
Right now the Lovely Arrangements Bundle (stamp set and dies) is out of stock but is expected back the week of January 26th. You can buy the other items separately without waiting to buy the whole Suite. If you are interested in that Bundle or the separate items, go to their listing in the Online Store and sign up for the email that will alert you that it is back in stock.
It’s time for a new Paper Pumpkin Kit! The January Kits are being sent out now for those people who subscribed by January 10th, so now we have the February Paper Pumpkin Kit! It’s early, but if you’d like to receive this card kit in your mailbox mid-February, go ahead and sign up now! Paper Pumpkin is a monthly subscription from Stampin’ Up! and I say is a treat you give yourself….or even someone special! It is a kit with all the supplies included that you will need, including an exclusive stamp set, ink spot, and even adhesive. There is no risk or obligation. Skip a month or cancel your subscription any time before the 10th of any month.
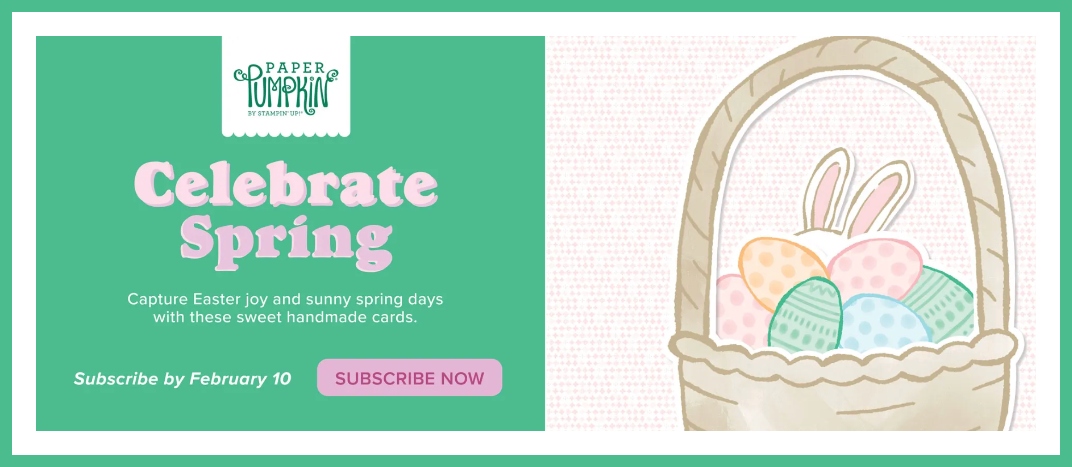
Here are the details about the February Paper Pumpkin Kit!
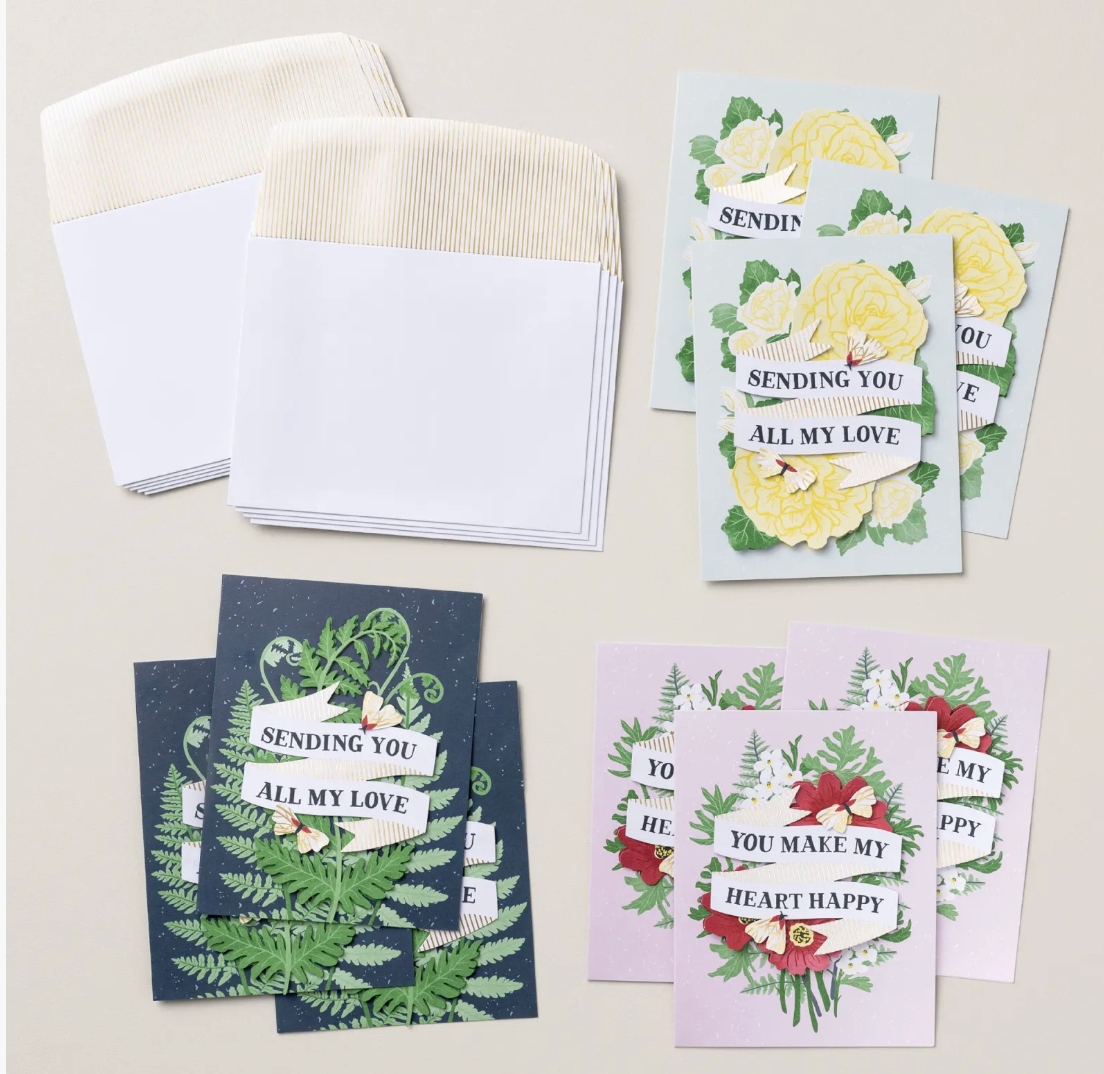
FEBRUARY: Celebrate Spring Subscribe January 11–February 10 Craft whimsical handmade cards that celebrate Easter and sweet spring days. • Makes 9 cards: 3 each of 3 designs with 9 coordinating envelopes • Precut paper pieces and pink baker’s twine • Iridescent pink and yellow sequins • Coordinating colors: Balmy Blue, Crumb Cake, Lemon Lolly, Peach Pie, Pretty in Pink, Shy Shamrock (Classic Stampin’ Spot)
Paper Pumpkin is for anyone, even non-crafters or beginning crafters. Directions are included, of course, and there is always a video online, too. And if you are an experienced, avid crafter, maybe once in a while you’d like to not have to design a project on your own – just open the Paper Pumpkin box and start creating! You can even create different designs than are presented in the kit. They are your supplies and you can cut things differently, make different designs. Just have fun with your kit!
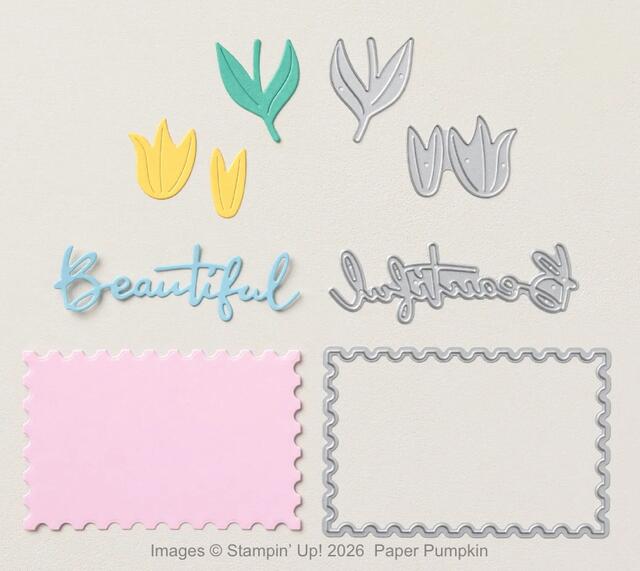
If you like, Paper Pumpkin also offers a few Add-On Dies that you can use with the three Paper Pumpkin Kits for that quarter. Right now, you can “add-on” these little dies to go with the January, February, and March Paper Pumpkin Kits. Of course, you can also use these dies with your other Stampin’ Up! projects, too.
These are the Beautiful Blooms Dies (168666) that you can purchase in the Paper Pumpkin menu in the Online Store. Or just click the link!
Go to that link, read about Paper Pumpkin, and scroll all the way to the bottom to see some videos of past kits. Also, once you are a subscriber, you can purchase any past kits or refills (no stamp set or ink spot), and add-on dies that are available.
Today is one of those days we stampers, papercrafters, and scrapbookers love with SO many brand-new Stampin’ Up! products going LIVE! We have a new Stampin’ Up! January – April 2026 Spring Mini Catalog, three new Kits in the Kits Collection, new Online Exclusives, a new Product of the Month, AND it’s BONUS DAYS! It’s like Christmas all over again except it’s all for us!
Before you start shopping, though, let me tell you about Bonus Days! From Jan. 6 – Feb. 2, with each order of $50 or more you earn a $5 coupon code that will be emailed to you soon after you place your order. If your order has multiples of $50 (such as $100 or $150) (before shipping, tax, and after any Rewards are applied), you will earn a coupon code for each $50 increment. You will receive one email with two, three, or however many coupon codes. With each $50 order, you will receive an email with one coupon code.
It is up to YOU to save these coupon codes. I suggest printing out the email(s) so you have a hard copy in case anything happens to your computer or email. Then during the redemption period in February, you will enter the coupon code(s) you earned on your order. We can talk about that part later. So as you shop, think about $50 increments in a large order or reaching $50 in one order. Then save those coupon code emails!
***********************
The Spring Mini Catalog (as I like to call it!) is filled with beautiful. new colors and designs for Valentine’s Day, Easter, florals, and all kinds of things. It’s always a refreshing change after all the holidays we have been crafting for during the past three months!
Here are the links you need if you don’t have a copy of the catalog in your hands.
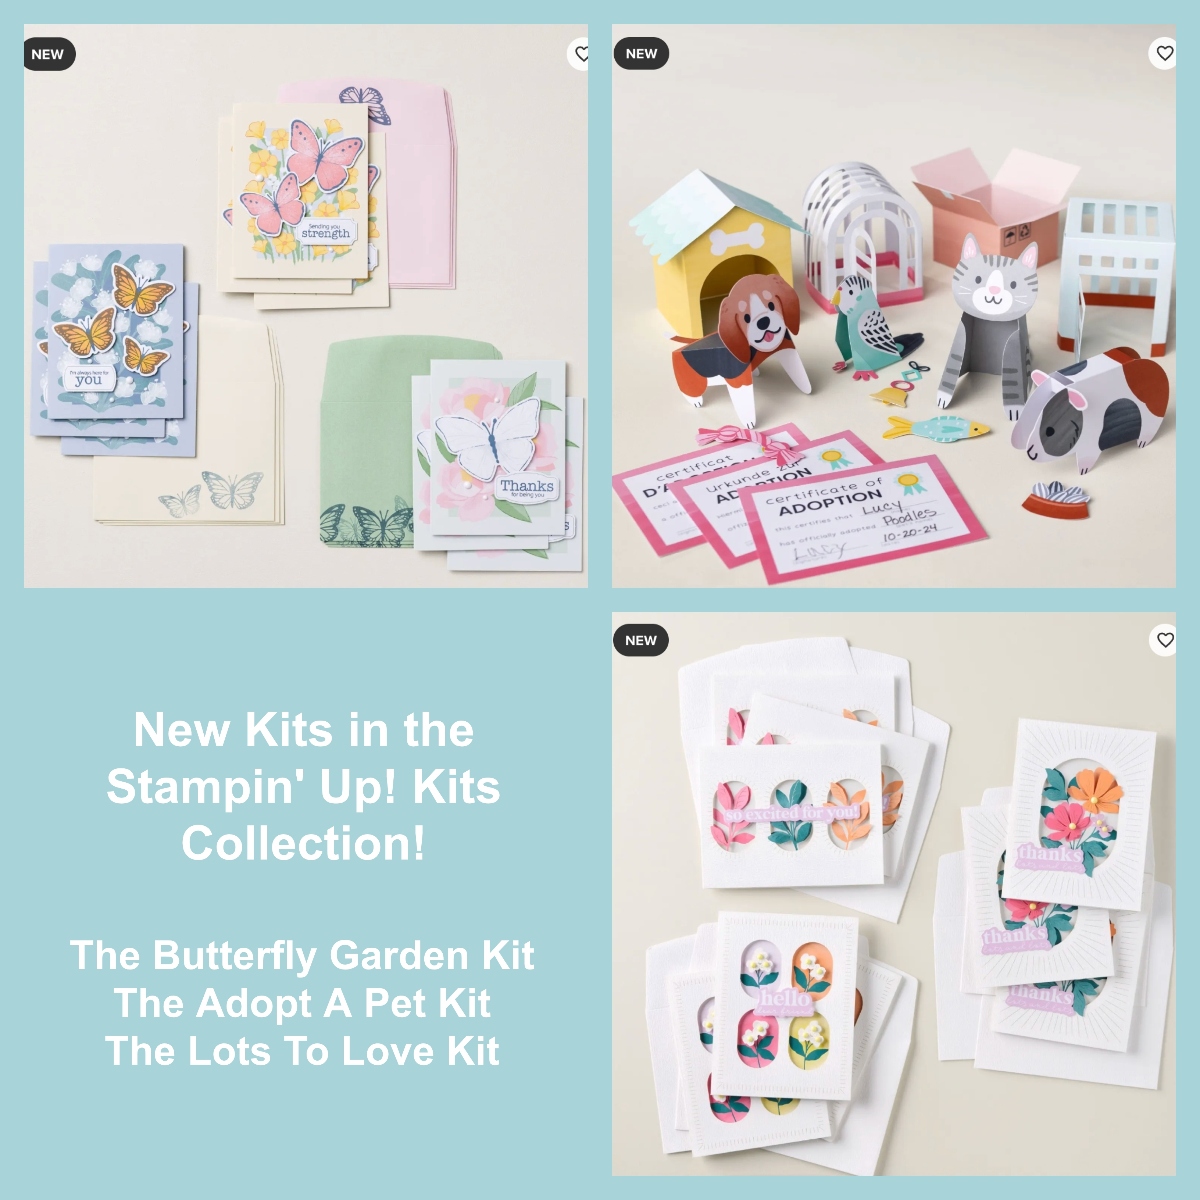
This month of January we are treated to THREE new Kits in the Kits Collection in the Online Store! These all-inclusive kits were designed for beginning crafters or those looking for a quick creative fix! These are great kits for those who do not have a lot of supplies or like the idea of just opening a box and having all the supplies and design ready to go! Check these out and all the other Kits already in the Kits Collection!
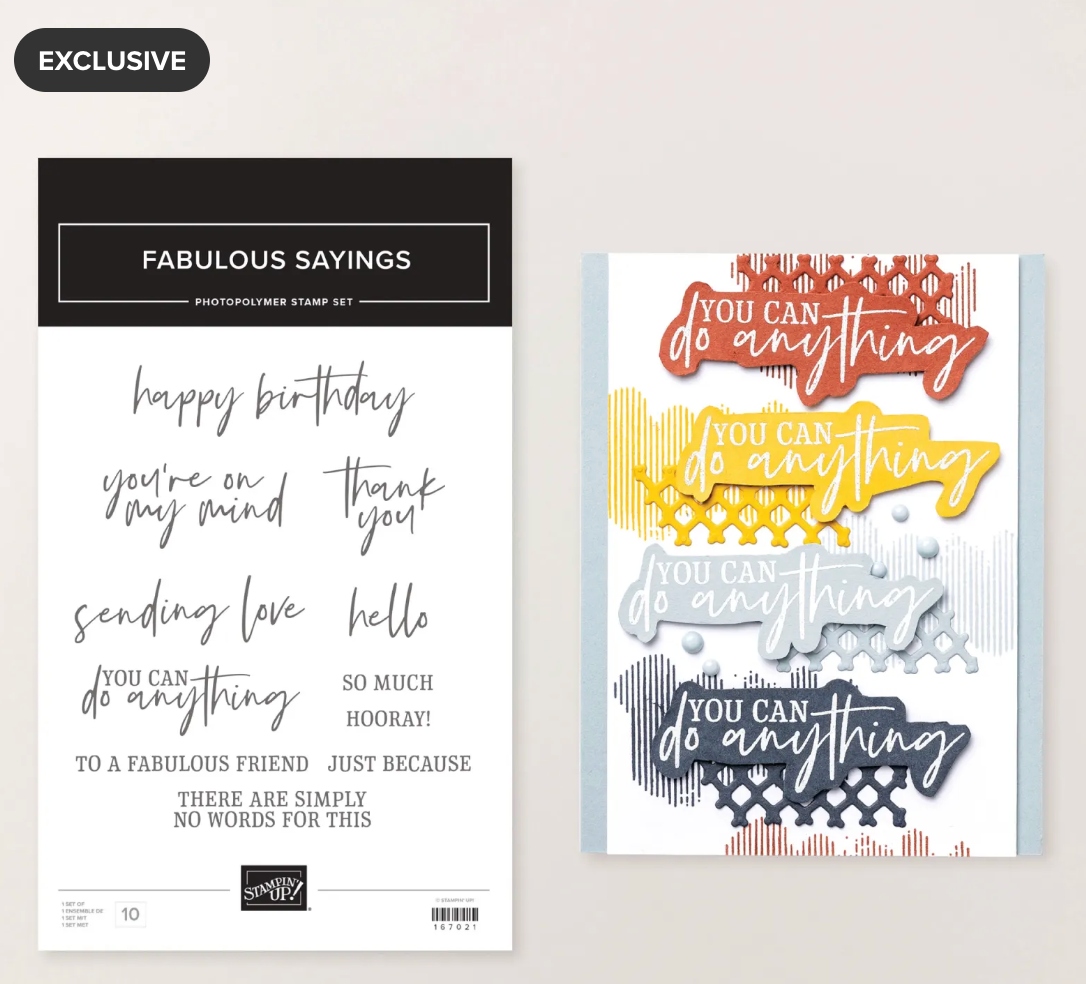
The Product of the Month is a new special promotion Stampin’ Up! started last month in December. The Product of the Month items are specially designed to be some of the best items Stampin’ Up! has to offer that aren’t available in any of our catalogs or our Online Exclusives. Every month they will release a new item that is only available for purchase once per account. These items will be limited quantity and are likely to sell out quickly—once they’re sold out, they’re gone for good! Spend $75 and purchase the Product of the Month (POM) for only $5.00!
The January 2026 Product of the Month is this Fabulous Sayings Stamp Set! Looks like a good one to have to me! We always want more sentiments to use! Or while it is still available, you could choose the December POM, the True Blue Florals Designer Series Paperinstead if you don’t already have it.
I hope you enjoy all these fun new products! It makes a long blog post but it sure is fun to have so many new Stampin’ Up! products to dream about owning!
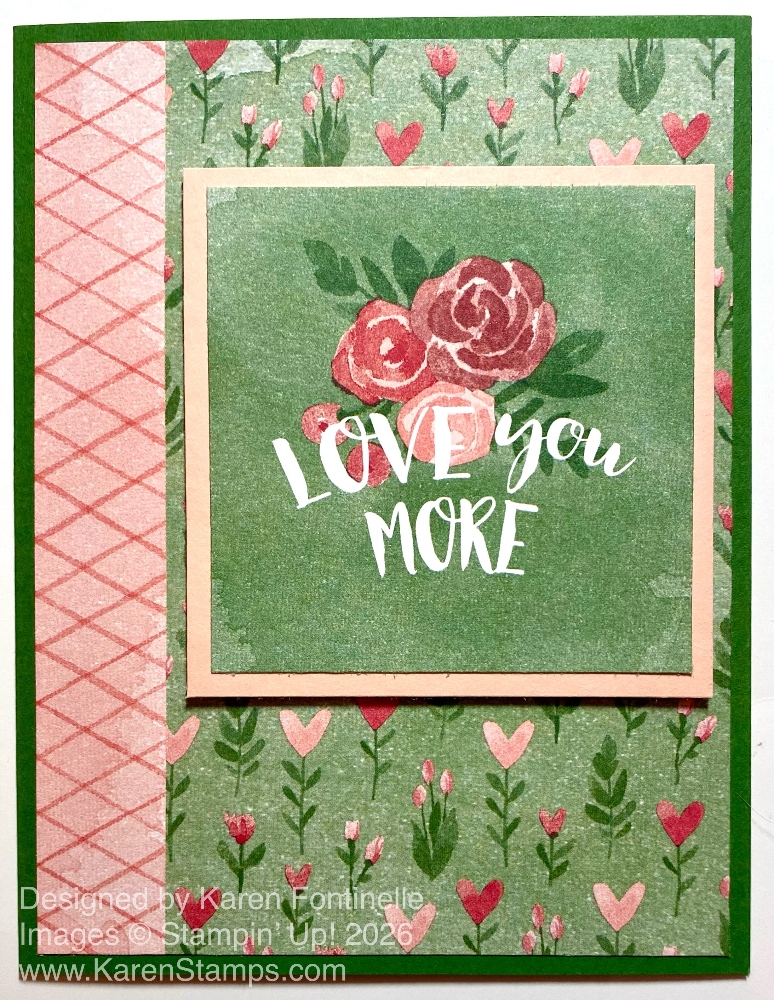
I’m here to tell you that if you like to make easy Valentines or a lot of Valentines, this Love Notes 6″ x 6″ Designer Series Paper is for you! Put it on your order right away! If I didn’t already own this package of paper, but I saw this pattern with the little heart flowers, I would buy it just for this sheet of paper! This Love Notes pack of paper has 8 sheets of each of 6 double-sided designs, so that’s a lot of paper you can use making multiples. Some papers are 6″ x 6″ full sheets, but lots are cut-apart designs to be used for making Valentines, tags, scrapbook pages, cards, or whatever you are making. Just trim down the designs you want to use. You can make them smaller than the design on the paper if you like or use part of the design or fussy-cut it for something different. Once you start playing you might not be able to stop!
This photo above gives you an idea of what the papers are like. You can easily cut out one of these square designs or the other larger and smaller designs to make whatever design you want on your card or project.
My sample card today has a card base of Garden Green cardstock. The designer paper layer on the card is exactly what the 6″ x 6″ paper looks like except that I trimmed it down for my card. It comes with that diagonal design on the left side of the heart flower garden. I trimmed it down so the side design was only 3/4″ of an inch wide, and of course trimmed down the whole sheet to 4″ x 5 1/4″ to fit on the card front. I didn’t have to add the extra diagonal piece on the side because it was already part of the paper!
The center focal point is one of the square designs on one of the cut-apart papers. It is 2 3/4″ x 2 3/4″. I layered it on a square 3″ x 3″ piece of Petal Pink cardstock and popped it up on Stampin’ Dimensionals.
Now this is one of the rare cards that I did not embellish! No ribbon, no sequins, no gems, no sparkle! I wanted to show you how EASY this card was to make and yet it is still very pretty even without any extra things or work!
On the inside of the card, I added a Basic White layer for a stamped or handwritten message or greeting and I added one of the scrap strips from the heart-flowered paper to the side of the white layer for a little decoration inside the card.
While a lot of this paper is Valentine-themed, you can still use a lot of it for other occasions. So if you need some paper for Valentines and wonder what you will do with the rest, I’m sure you will be able to use it beyond (or before!) Valentine’s Day.
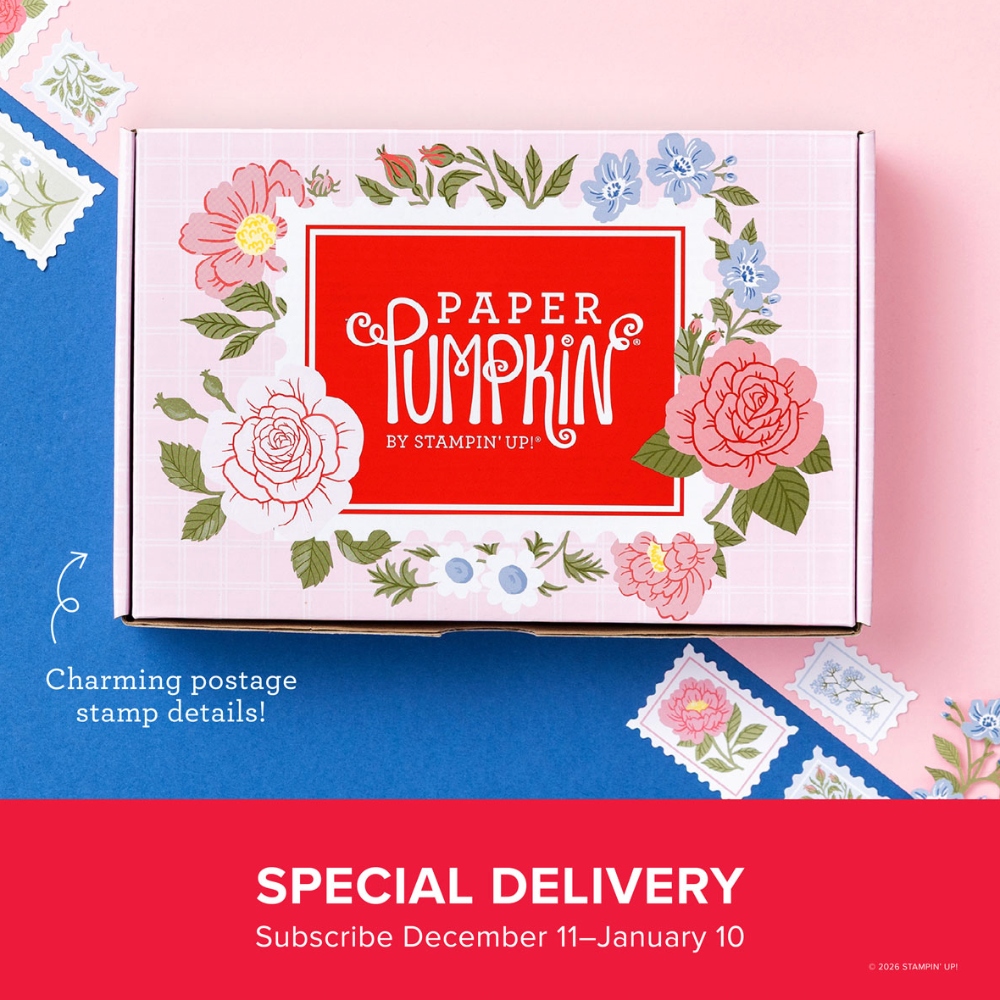
Here is the new Paper Pumpkin Kit for January 2026! This Special Delivery Paper Pumpkin Kit will help us start the year off right! Personally, I don’t even have to see what is in the box, I want THE BOX! Look at how pretty it is! This is a box you will likely want to save for storage or gifts or anything after you make the kit.
This Paper Pumpkin Kit will arrive in time for making valentines with sweet postage stamp designs and sentiments for love and friendship. But what is Paper Pumpkin? It’s a complete papercrafting kit that arrives in your mailbox every month after the 10th unless you skip a month or cancel. All the supplies you need except scissors are included in the kit, even adhesive. Plus an exclusive stamp set and an ink spot, like a tiny ink pad for this project. You can follow the directions and photos on the brochure included and also watch a video! The kit is fine for beginning crafters and people who don’t have supplies to make cards and other projects. All you need comes in the box! You can also look online at what other people make sometimes with alternate ideas with the supplies in the kit. So if you want to change up the project sent to you, you are free to do so! It’s your kit!
• Makes 9 cards: 3 each of 3 designs • 3 different coordinating envelope designs • Precut paper pieces with gold foil accents • Coordinating colors: Blueberry Bushel, Bubble Bath, Darling Duckling, Garden Green, Mossy Meadow, Poppy Parade (Classic Stampin’ Spot
I think this is going to be a Paper Pumpkin Kit we will love, and we probably will be able to use these cards not just for Valentine’s Day but for other occasions as well!
You must subscribe to Paper Pumpkin by January 10th to get this kit and that is less than a week away!
Go ahead and subscribe to Paper Pumpkin right now so you won’t forget! And once you are a subscriber, if you see a past kit or refill (no stamp set or ink spot) you like, you can purchase it. If you already have a subscription, you don’t need to do anything. If you skipped the December Kit, be sure to go into your account and make it active for January.
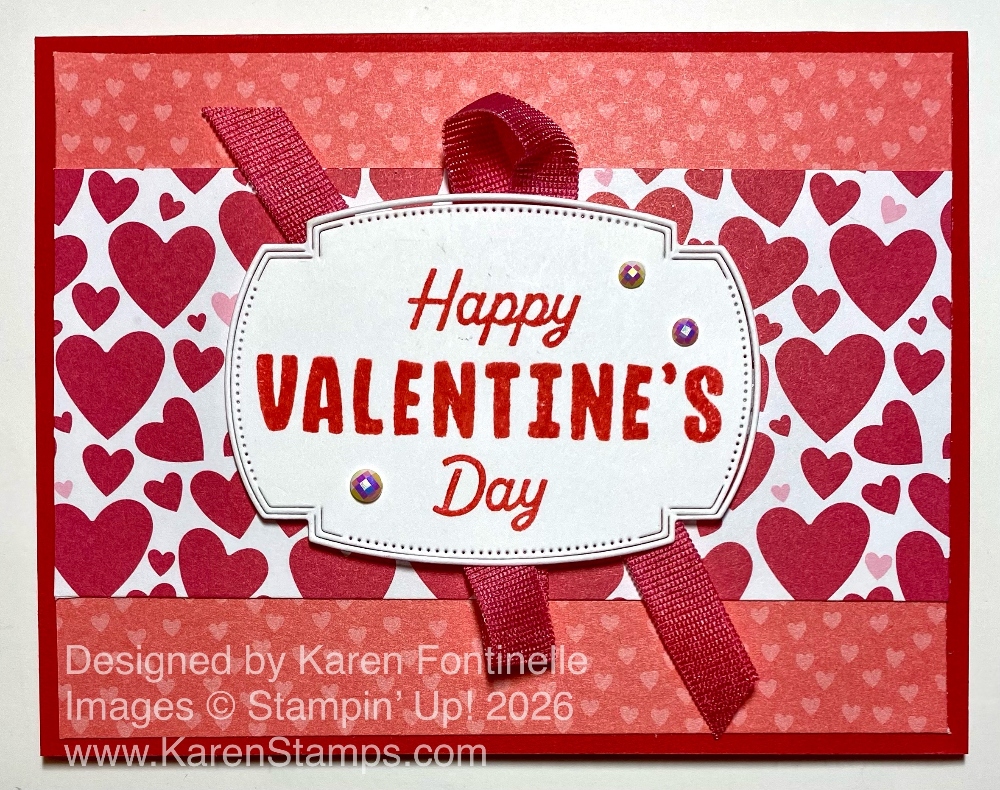
I know some people are not ready to see Valentine’s cards, but we are crafters, and we have to get a head start! I saw a funny post on Instagram before Christmas by a dad who posts jokes , who said he was shopping too late, his family was going to get Valentine gifts for Christmas! I haven’t been out in the stores yet since Christmas, but I imagine it’s all Valentine’s now! So here is my first Made With Love Valentine’s Day Card.
You’ll find this Made With Love Designer Series Paper in the upcoming January-April Mini Catalog 2026, going live on Tuesday, January 6th. It is part of the Made WIth Love Suite Collection which also includes the Endless Love Stamp Set that I used for the greeting. There are also the Endless Love Dies,which you can buy in a Bundle along with the stamp set. Those weren’t used on this card.
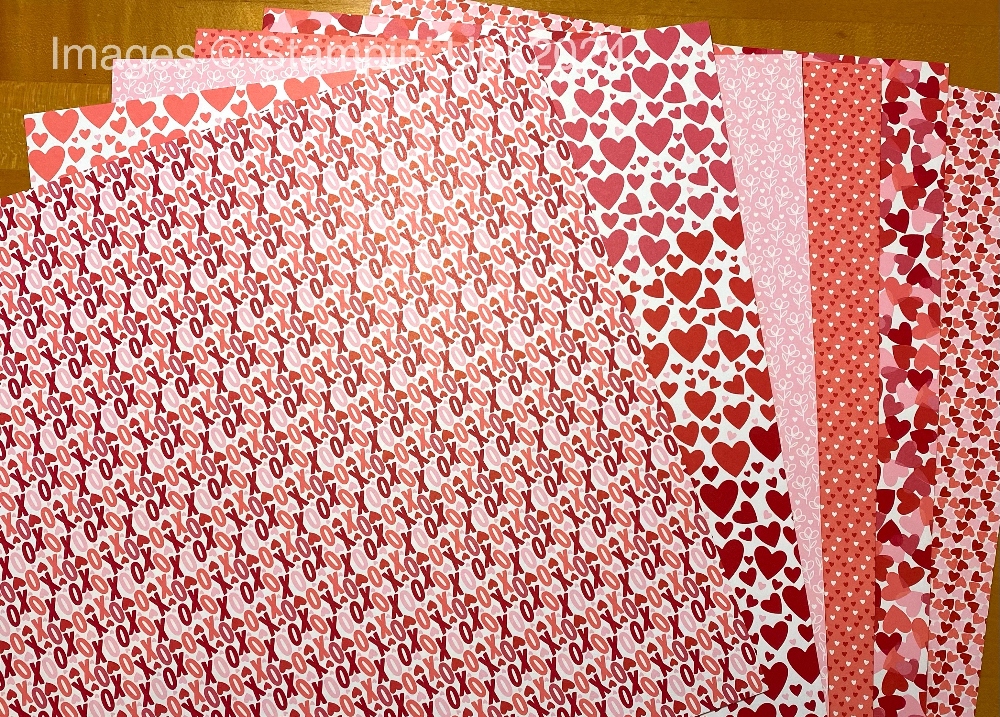
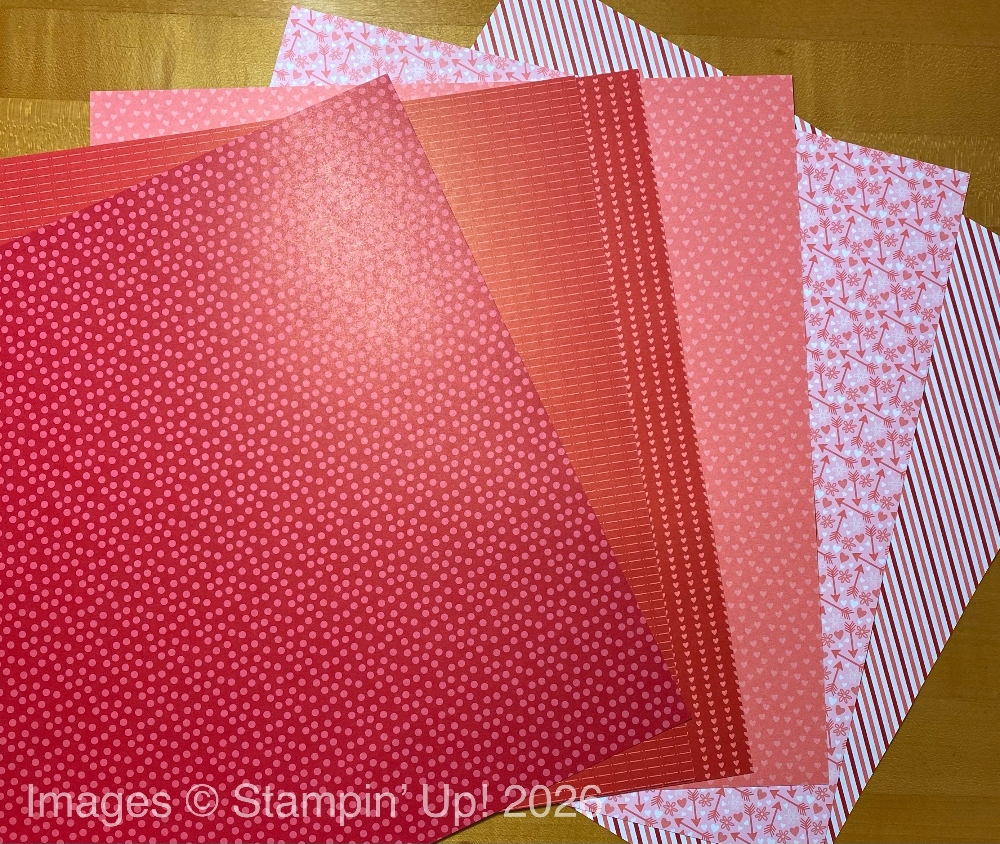
The card base is Poppy Parade, a color I haven’t used very much recently. For some contrast, and to try out the new papers, I chose two different papers for this card. I first cut a piece with all the hearts at 4″ x 5 1/4″, but later I cut it down to 2 1/2″ x 5 1/4″. I was trying to get a mixture of lighter and darker hearts, an ombre effect on the paper, so I trimmed some off the top and some off the bottom to get the middle. I saved those two 3/4″ x 5 1/4″ strips and added those top and bottom on to the Basic White layer I put inside the card so it would be ready for a stamped or written message. I think the first card I made with this paper had more of a distinction of the colors of the hearts. Whatever you end up with is fine, though! All the hearts are pretty! Then at the top and bottom I adhered 1″ x 5 1/4″ of the tiny hearts paper to the card, and then the big hearts panel right in the center.
The greeting is stamped in Flirty Flamingo ink on Basic White and then diecut with one of the labels in the Traditional Labels Dies. These are on the Last Chance list and discounted a tiny bit right now. I hate to see these dies go. I have used them a lot.
For some embellishments, I used Strawberry Slush 3/8″ Faux Linen Ribbon behind the sentiment. I like to apply some Stampin’ Seal Adhesive to the back and get the ribbon placed how I like it with the help of that adhesive. Then I also used Stampin’ Dimensionals to help hold down the ribbon and also pop up the greeting. I also tried out the new Pearlized Faceted Circles. They have several different shades in the package so they will go with a lot of colors. You will find these in the Spring Mini in the Lovely & Beautiful Suite Collection. But they will also go well with any Valentine projects and lots of other things.
View the papers in the Made With Love Designer Series Paper.
BONUS DAYS COMING JANUARY 6! With every multiple of $50 you spend, you will receive a $5 coupon code to use on an order in February. You must have your own Stampin’ Up! account and correct email address to be eligible to receive the coupon code.
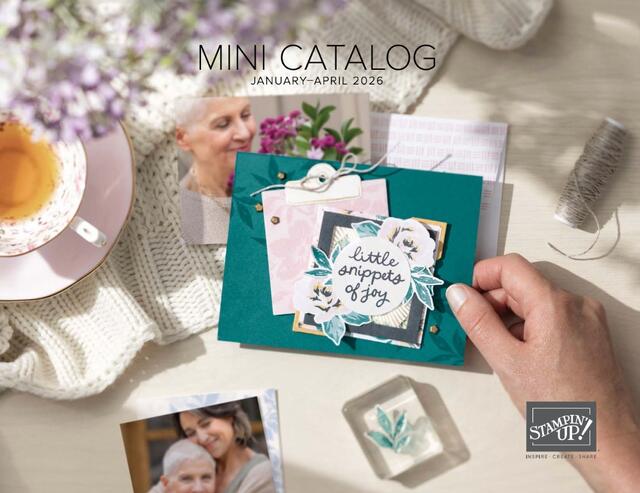
NEW SPRING JANUARY – APRIL 2026 MINI CATALOG LIVE Tuesday, Jan. 6th.
NEW ONLINE EXCLUSIVES on Jan. 6th.
NEW KITS on Jan. 6th!
Mark your calendar for Tuesday!! It’s a big day at Stampin’ Up!
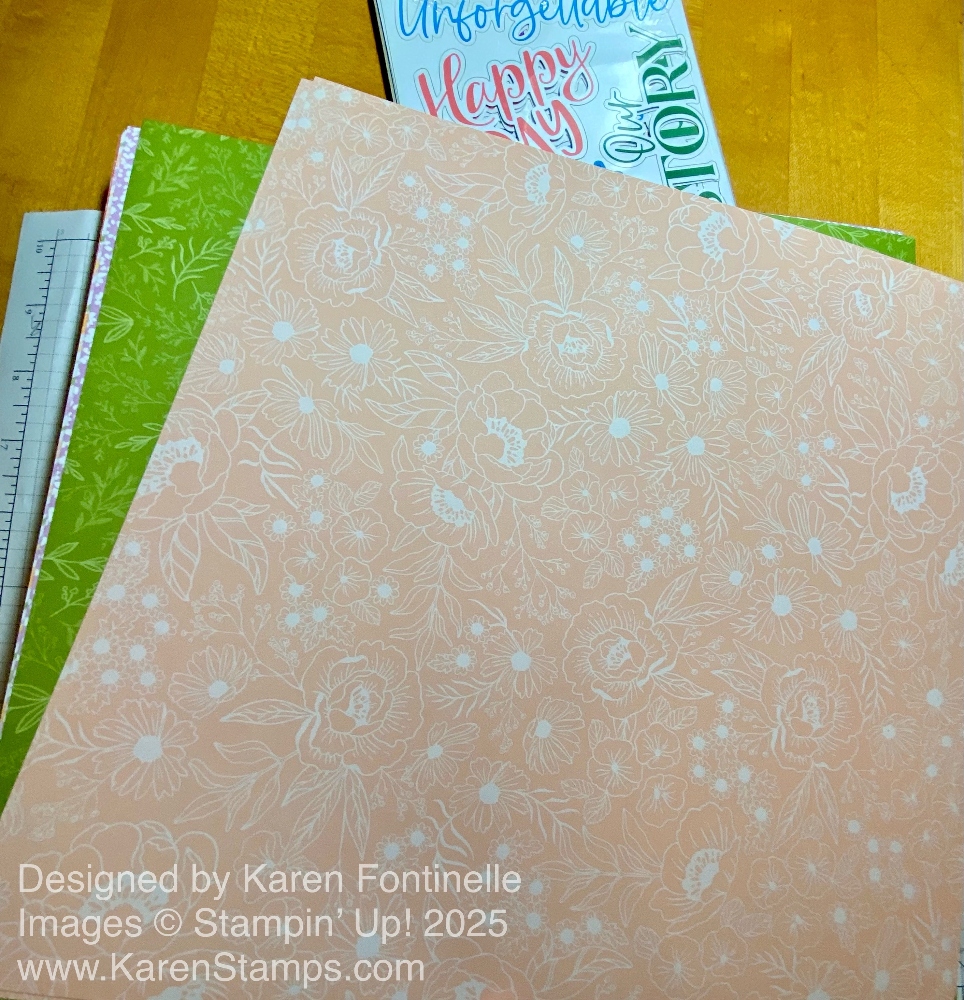
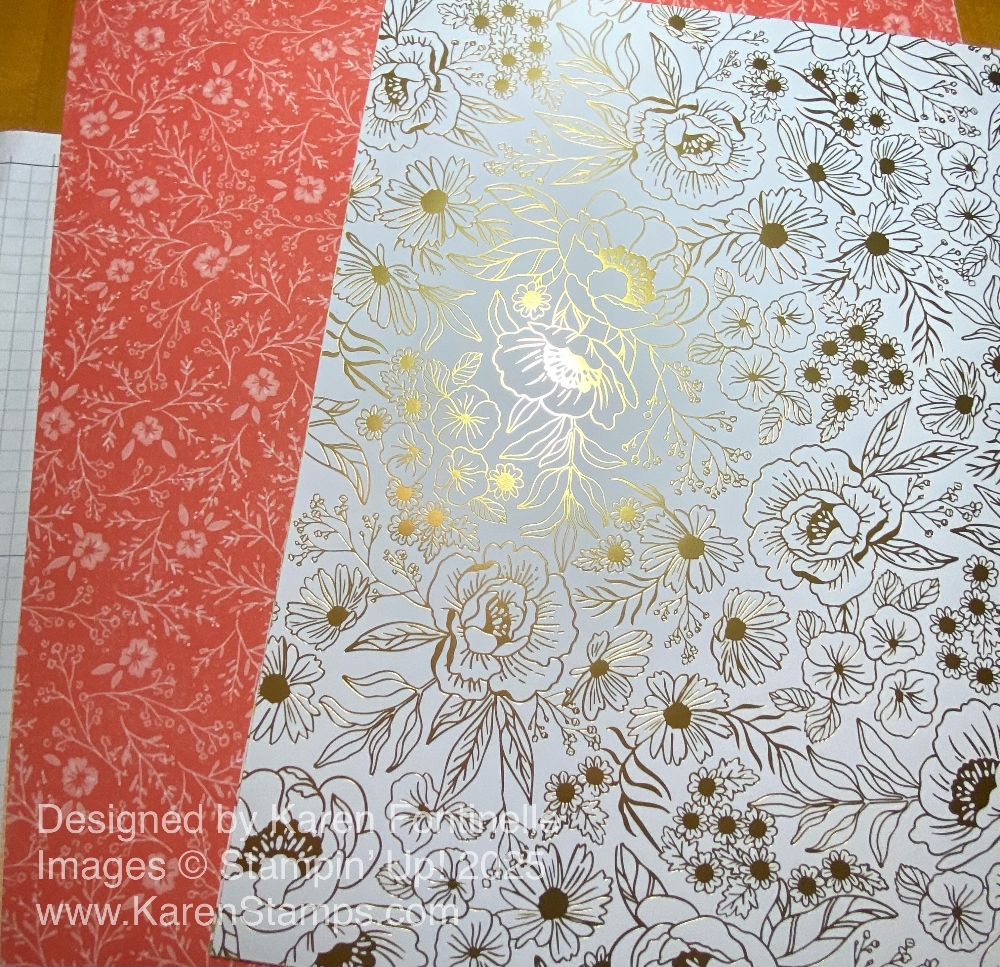
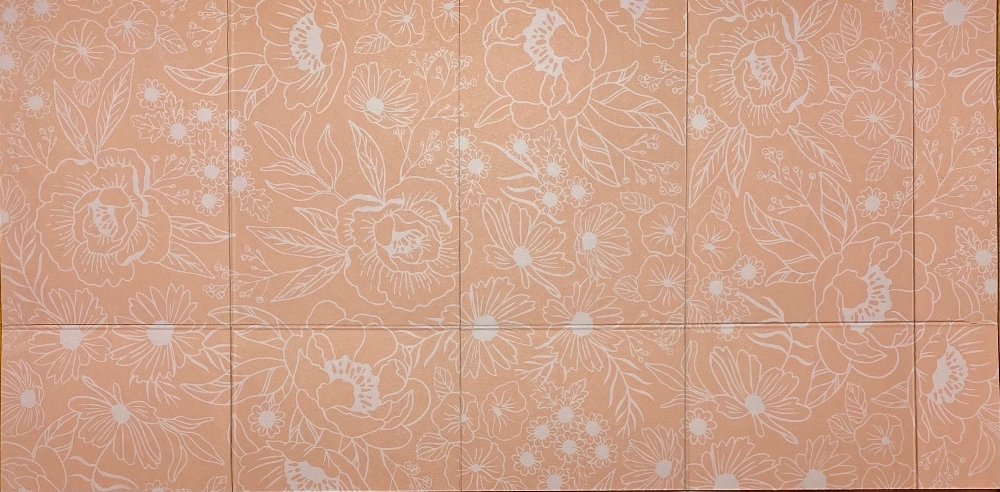
Yesterday I opened up the package of the Lovely & Beautiful Specialty Designer Series Paper, one of the new papers coming next week in the new Stampin’ Up! Spring Mini Catalog.
These are the first two papers I saw in the package when I pulled them out. Pretty.
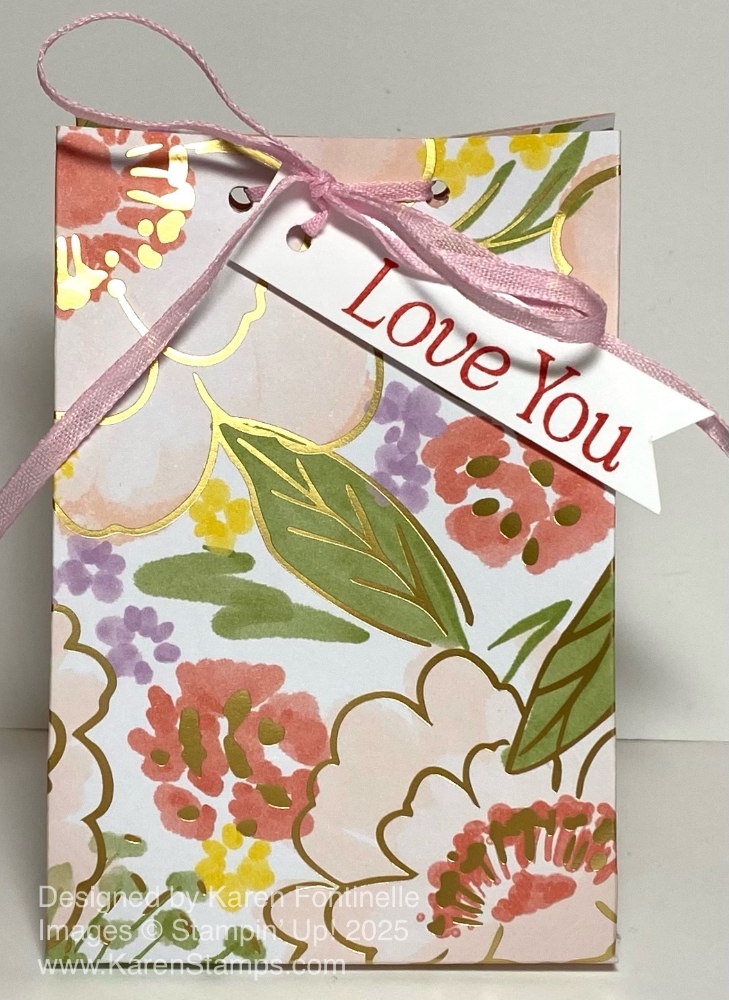
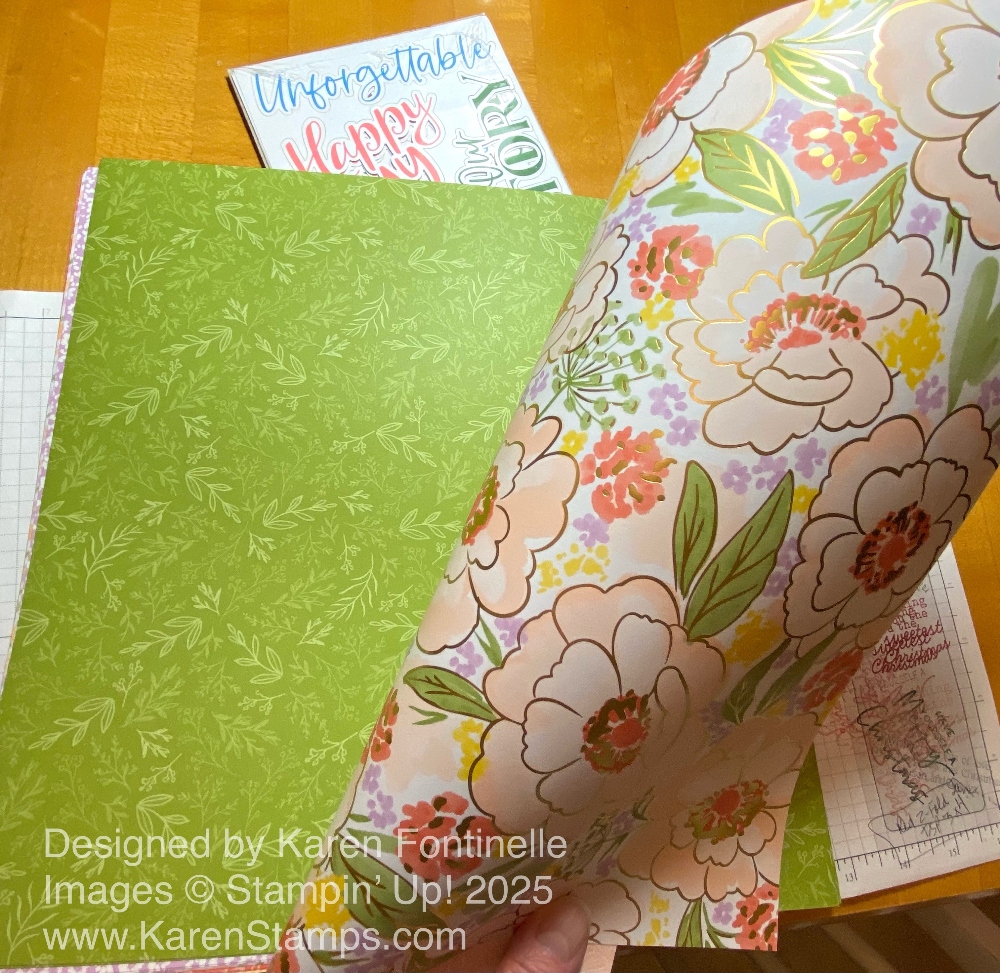
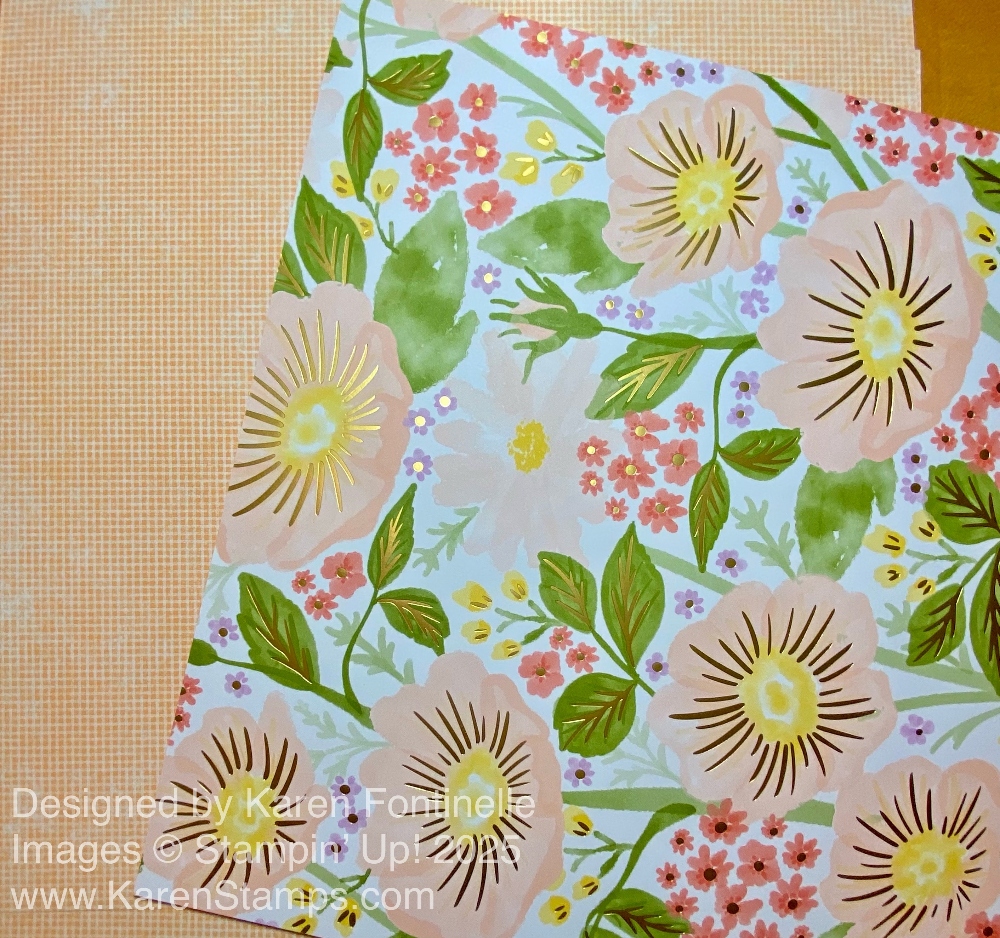
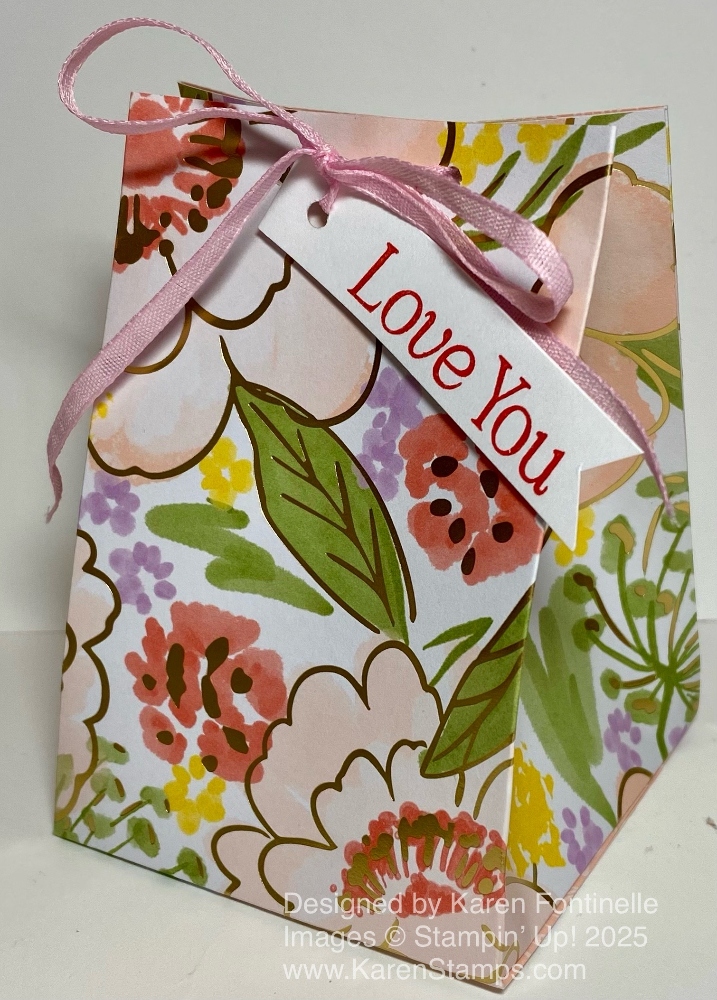
Then I turned back the top paper to see the design on the other side, and I actually exclaimed out loud, “Oh My Gosh!!” Those big flowers with gold foil outlines just took my breath away! From there I knew I was going to use this floral paper for my first card of the New Year. But I ended up making a small gift bag with it.
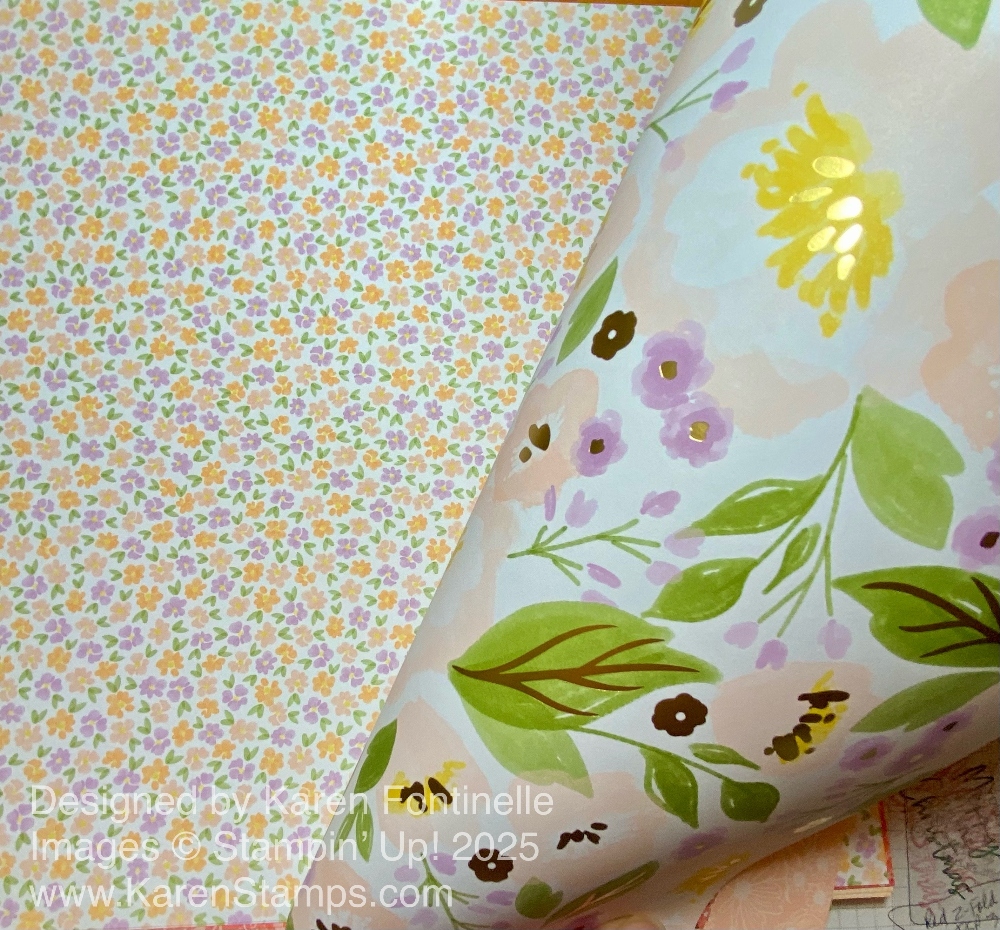
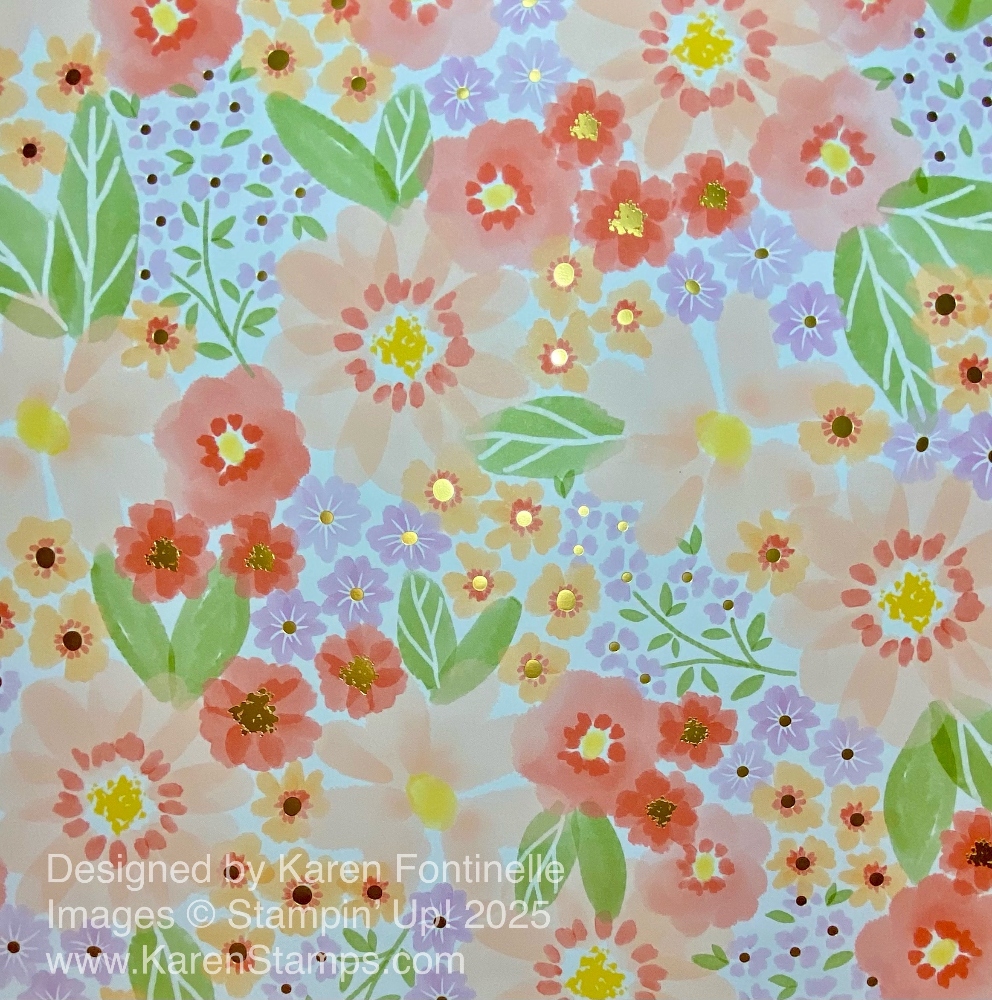
Before I started working, though, I paged through the designer series paper to see all of the designs. Each one was gorgeous!
If you think these papers look nice in these photos, wait until you see them in person with the beautiful gold foil accents!
To make this little gift bag, cut the paper at 6″ x 12″. Score at 1″, 3 3/4″, 6 1/2″, and 9 1/4″. Then turn and score at 2″. Pay attention to the direction of the pattern if it is necessary for your paper. The part scored at 2″ will be the bottom of the bag and those score lines will be cut up to the horizontal score lines. See the diagram below. I drew pencil lines on the score lines.
Fold and crease all the score lines. That tiny little 2″ x 1″ piece will be cut out. The piece above that is where you will put adhesive to glue to the other side to assemble the box. Just crease and fold everything to see how it goes together. Adhere that side together, then do the flaps. If you want to close the top of the bag, you can punch holes for ribbon as I did, or you can just use some type of clip. Or you can leave the bag open!
I stamped a little sentiment on Basic White with Calypso Coral ink from the Lovely Arrangements Stamp Set, coming in the January Online Exclusives. It is just tied on with the ribbon with a little Stampin’ Dimensional on the back to hold it in place.
This is just a simple little project where the gorgeous paper does all the work! If you like florals at all, I would definitely get this Lovely & Beautiful Specialty Designer Series Paper.
Remember, Bonus Days are coming on Tuesday, January 6th, which is the day of all new things! Unless you are in a hurry for particular products, hold off until Tuesday or after when you can earn $5 coupons for every $50 you spend IF YOU HAVE YOUR OWN ACCOUNT WITH AN EMAIL ADDRESS! Check your account for an accurate email address because that is how you will receive the $5 coupon codes to use in February. If you don’t have a Stampin’ Up! account, this is a good time to make one – and be SURE to opt in for Rewards and for Marketing so that I can mail catalogs to you from Stampin’ Up!
May your New Year be filled with inspiration and creativity!
Here’s to 365 days of creativity ahead—cards to make, scrapbook pages to create, fun projects to try, and lots of new stamps, paper, ink, and dazzling embellishments!
Stampin’ Up! will soon hold one of its favorite promotions—BONUS DAYS! Because a great deal is getting rewarded for all the crafting supplies you’re already going to buy! When you shop between January 6 and February 2 and spend $50 USD, you will earn a $5 USD coupon! Make sure you save all your coupons because you can redeem them (and we mean ALL of them) between February 3 and 28. And don’t forget—each purchase earns you Stampin’ Rewards, so that’s even more bang for your buck! There’s no limit to how many coupons you can earn! Bonus Days will be here and gone before you know it.
Details:
Earn a $5 USD coupon for every $50 USD spent (before shipping and tax).
All coupon codes will be emailed right after a qualifying purchase has been made. Customers must have a customer account with a valid email address to earn coupons when they shop. If you do not have your own account, you can create one in the Online Store.
If you earn multiple codes from a single order, you will receive one email with multiple codes. If you earn multiple codes from multiple orders, you will receive separate emails for each code earned.
All order types qualify for this promotion. Phone and email orders still require an email address.
Orders started before the promotion begins will not count toward earning coupon codes. Be sure to start your order on January 6 or after. You must add items to your cart and complete your purchase during the earning period.
There is no limit to the number of coupon codes participants can earn per order or throughout the duration of the earning period.
Coupon codes can only be earned on commissionable items. Non-commissionable items (such as catalogs) do not count towards coupon earnings.
Redemption Details:
There is no limit to the number of coupon codes you can redeem on an order during the redemption period. If you’re redeeming multiple codes, you must put a space between each code.
You may only redeem coupon codes one time. You cannot redeem them after February 28.
You can redeem Bonus Days coupon codes for month-to-month Paper Pumpkin subscriptions and new prepaid subscriptions.
Coupon codes will reduce the commissionable amount of an order.
Some restrictions apply. Coupons can’t be redeemed towards Starter Kits and you cannot use them on exchanges.
January 6, 2026 at Stampin’ Up! is going to be a BIG DAY at Stampin’ Up! Not only will there be a new Spring Mini Catalog and new Online Exclusives plus new Kits in the Kits Collection, but with every $50 you spend you will earn a Bonus Days coupon to use on a future order! Plus you will earn your usual Rewards. However, you must have your OWN Stampin’ Up! account to earn the Bonus Coupons. Let me know if you need help setting up your own account or have any other questions!
And not just the January-April 2026 Spring Mini Catalog will be available, but also new January Online Exclusives beginning January 6th! PLUS a new Product of the Month and three new Kits in the Kits Collection! Now that’s a day worth circling in red on your calendar! It’s all coming in the New Year on January 6th! At the same time, the Holiday Mini Catalog will end on January 5th, but now we have this new system of some carryover products being shown in the Online Exclusives and retiring products going in the Last Chance Category. I think I have that right, anyway!
Here are some sneak peeks of the new Mini Catalog and Online Exclusives products that I ordered before Christmas and barely got to look at until now.
These stamp sets are all in the new Spring Mini except for the Lovely Arrangements Stamp Set is an Online Exclusive in the Lovely Blossoms Suite Collection. The Easter Basket Dies (part of the Easter Basket Bundle which includes the stamp set and dies) is next to the stamp set and says “Stampin’ Cut & Emboss” at the top with the name of the dies in tiny print above the images. Remember, these are all in the new packaging of the plastic sleeves rather than the cases for the stamp sets so if you want to, you can slide the dies in with the stamp set. I haven’t thought about yet how I will organize these sets with the new packaging.
Three new Spring Mini ephemera packs, the bottom one being vellum with gold foil. I have been loving using the ephemera packs for “quick and easy” cardmaking or other projects!
I didn’t open the packages, but here are the new designer series papers I ordered! Some floral, some Valentine’s, some Easter, and BUGS! Living in Houston, I’m not one to make any cards with bugs on them because we see too many of the real creatures in our daily lives living here in the tropics! But this Cute As A Bug Suite Collection is pretty cute so I did get some bug stamps and bug paper! However, the Cute As A Bug paper isn’t all bugs – it has strawberries and mushrooms on separate sheets as well so I can tolerate that! But these bugs are CUTE!
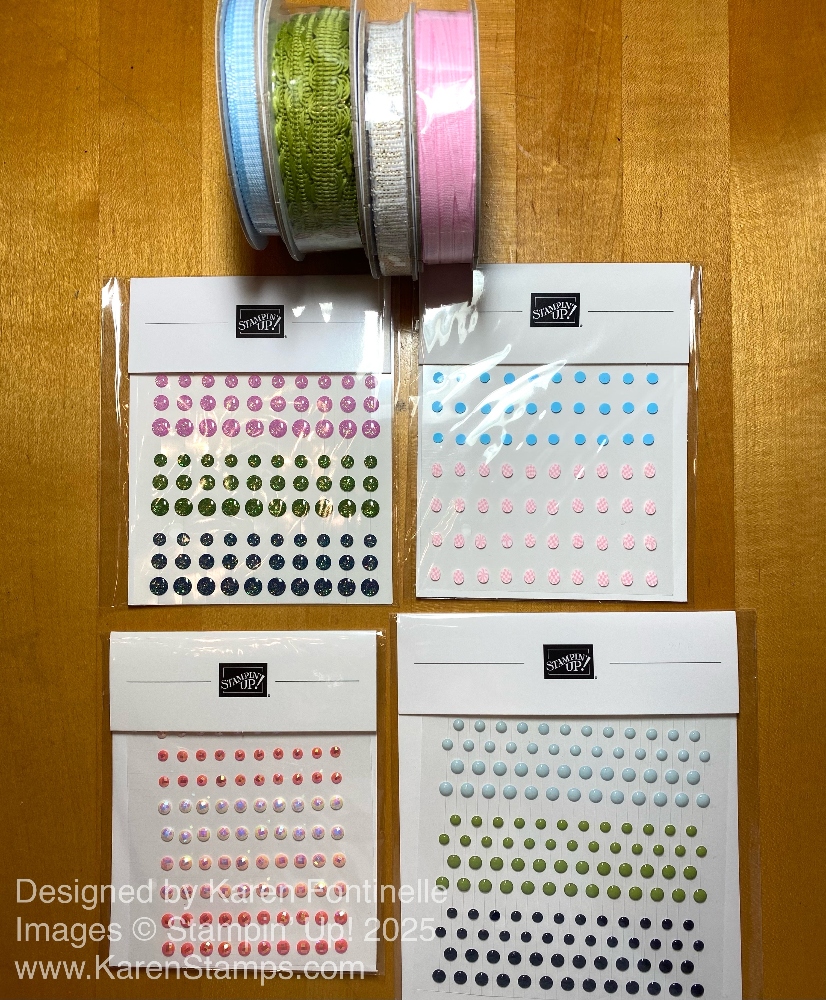
Some new ribbon and embellishments for all our fun projects!
The Product of the Month for December, True Blue Florals Designer Series Paper, is still available as I write this and can be purchased with a minimum order, after any Rewards or coupons, of $75. When the January POM comes out, if the December POM is still available, you can choose either one with your $75 order. One to a customer.
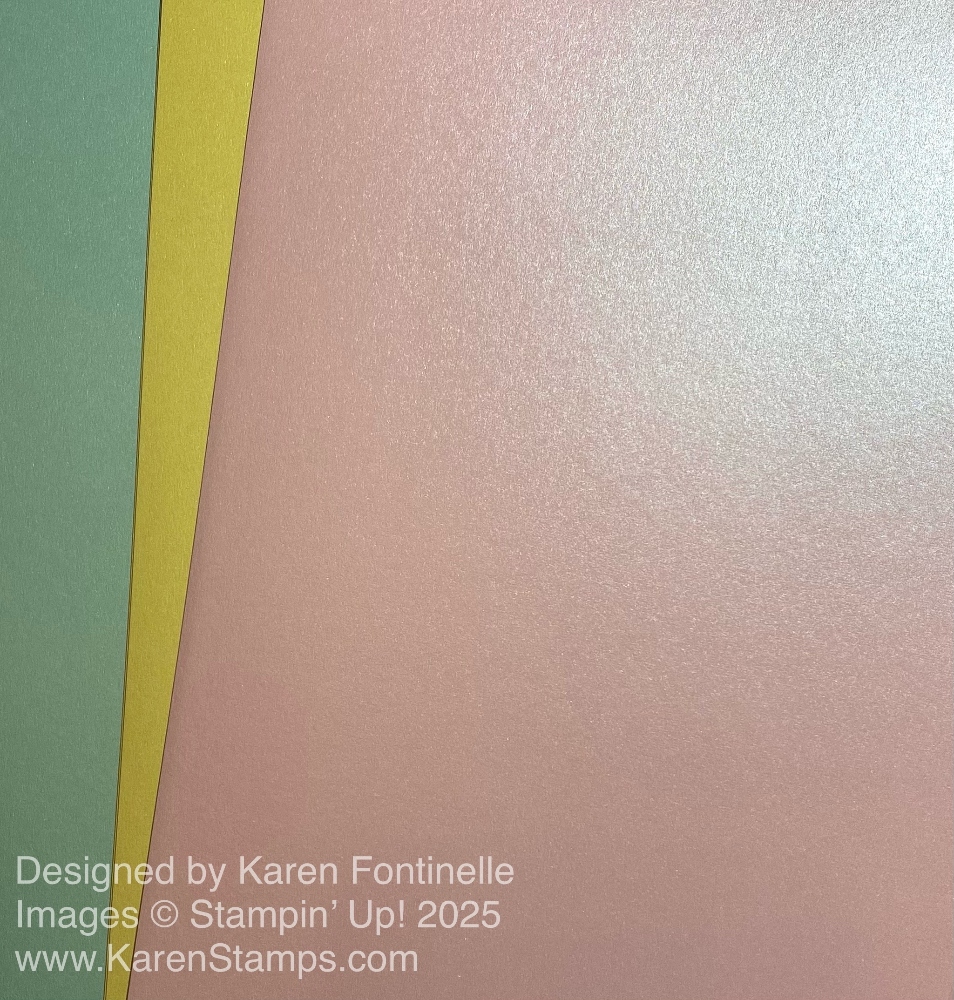
Beautiful Pastels Shimmer 12″ x 12″ Specialty Paper, perfect for springtime and Easter cards and projects! The colors are Bubble Bath, Lemon Lolly, and Pool Party.
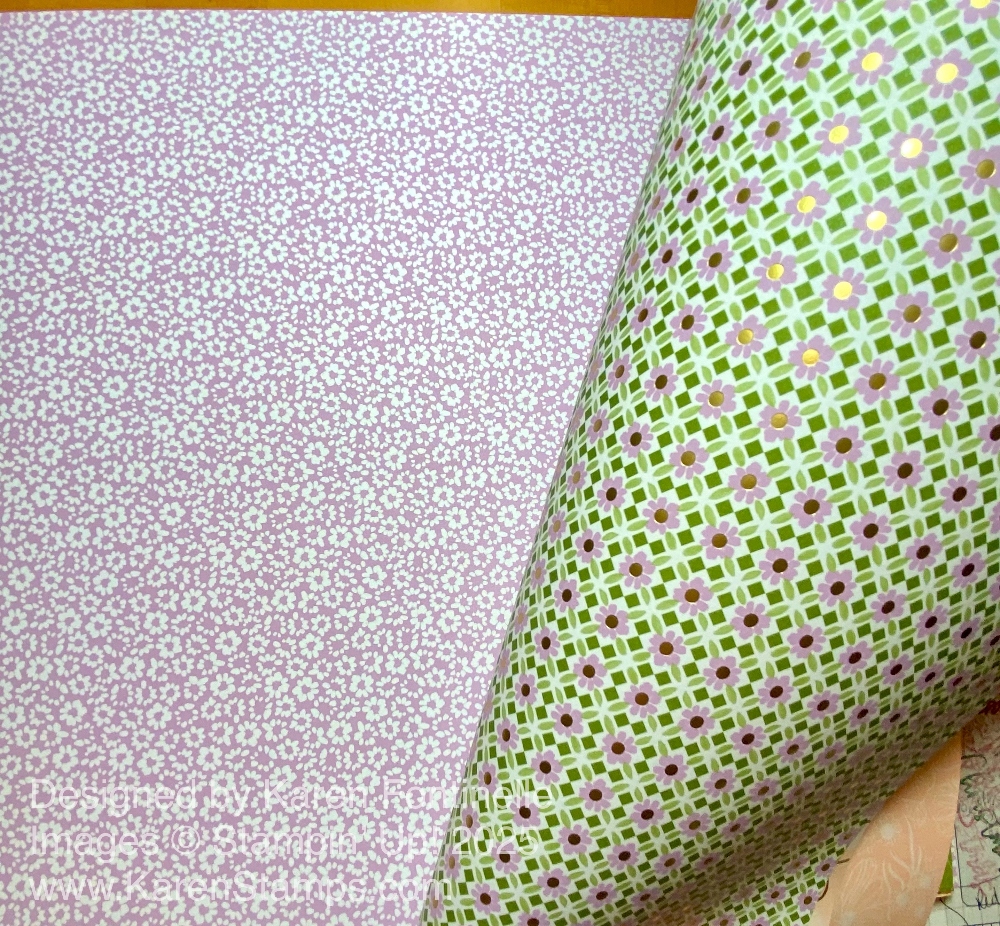
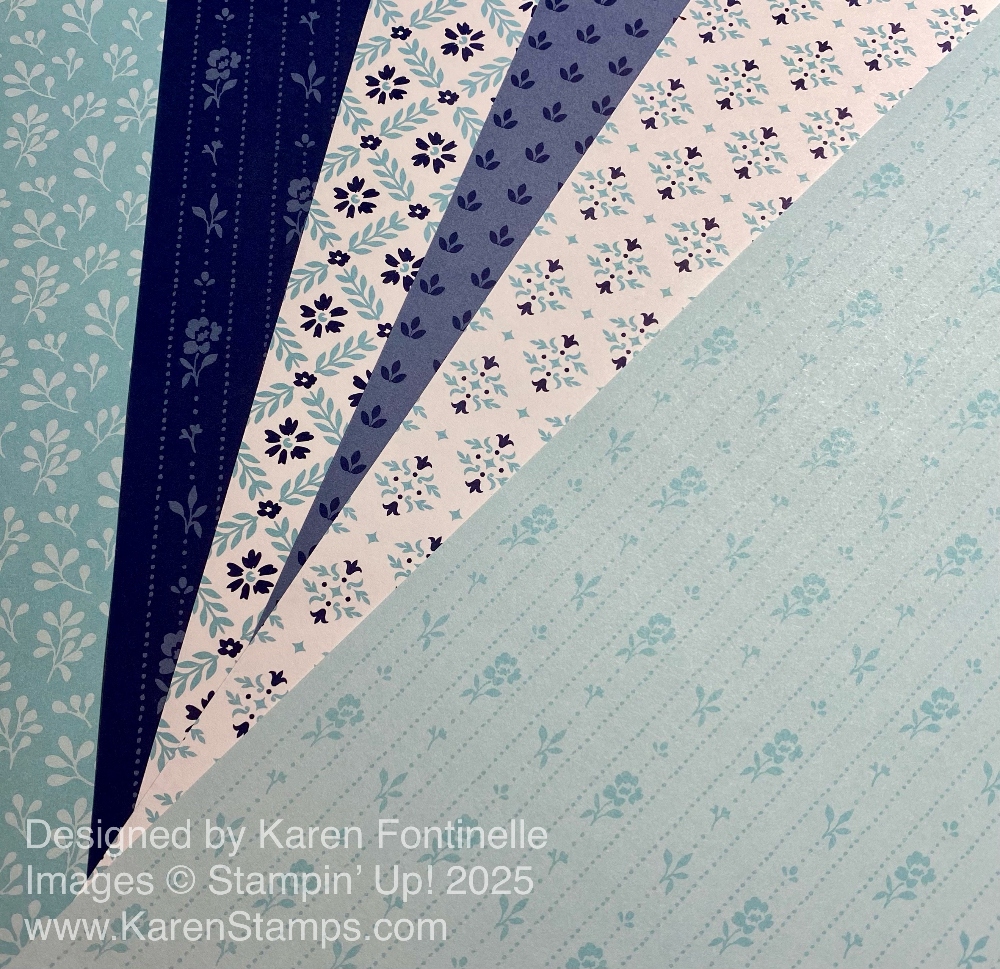
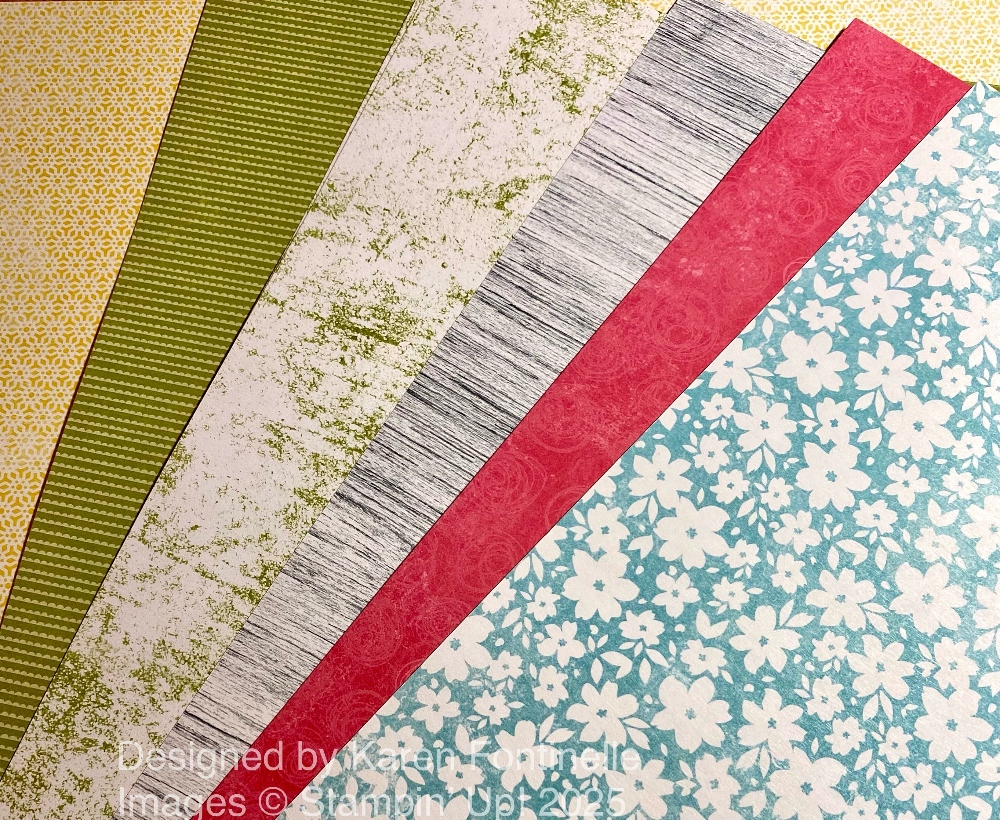
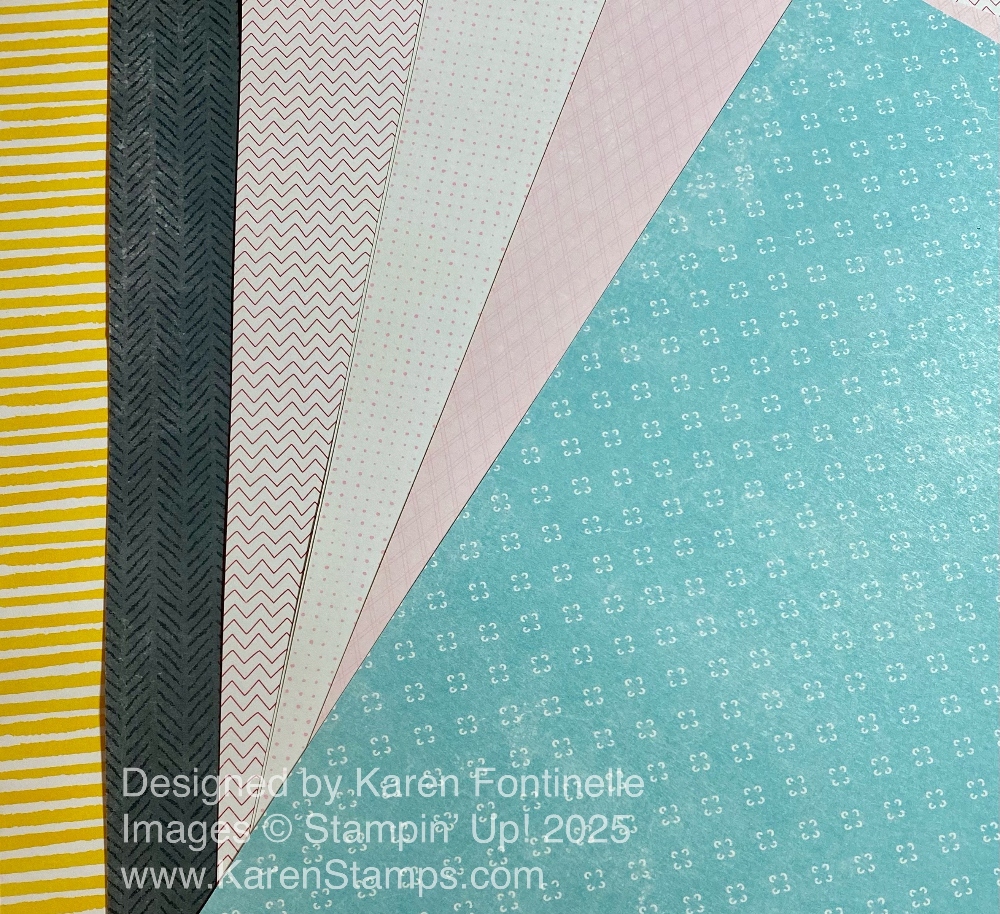
The two photos above show both sides of the new Mixed Up Patterns 12″ x 12″ Designer Series Paper. This paper coordinates with Suites and products in the new Spring Mini.
If Christmas is over, Valentine’s Day is not far behind! This cute Love Notes 6″ x 6″ Designer Series Paper in the Spring Mini is much like other paper we have had with cut-apart smaller images to use as parts of your cards or other projects and scrapbook pages. But other sheets are regular 6″ x 6″ designer series paper so you get both in one pack!
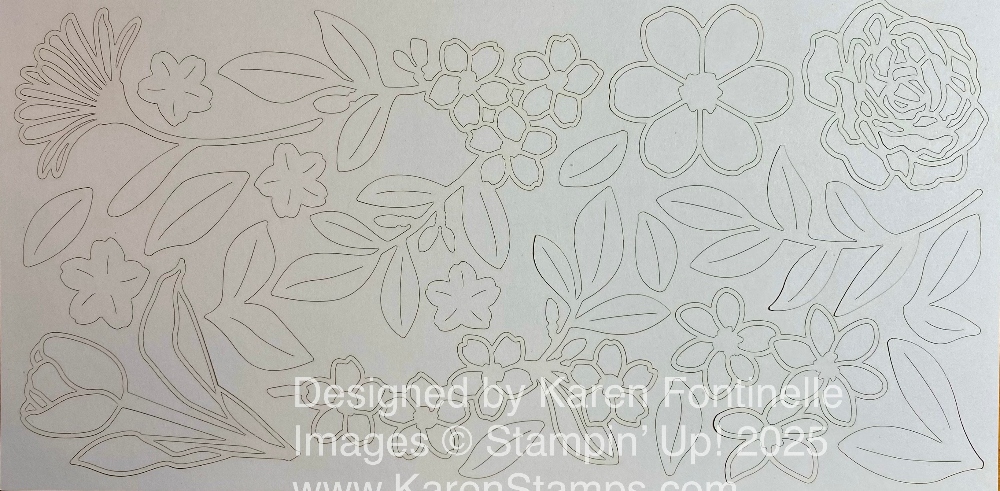
This may be a little difficult to see, but it is one sheet of diecut flowers and foliage. This is the Covered In Flowers Accents. The whole sheet is white so you can use as is or color the pieces as you see fit. It is called “paperboard” and is thicker than designer series paper. I used it on a card my newsletter subscribers will see tomorrow (so sign up in the red box if you want to receive my newsletters on Tuesdays!) and I liked using the flower very much. They are diecut so you just poke out the pieces you want. For that card I just left my flower as is. Another time I will try coloring and see how it turns out. The only thing is, as I said, it is just one sheet, so you may want multiples.
So this gives you a little peek into what is coming next week, January 6th, in the new Spring Mini and the Online Exclusives for January. Plus there will be three new Kits in the Kits Collection and new Product of the Month (POM). Always remember to check the Last Chance list as well before you place your order and try to find a bargain!
I hope Santa is good to you and leaves lots of goodies in your Christmas stocking!
Thank you for being my Stampin’ Up! customer, my stamping friend, my follower on social media, or my newsletter subscriber! I appreciate all of you and hope you are having a wonderful holiday!
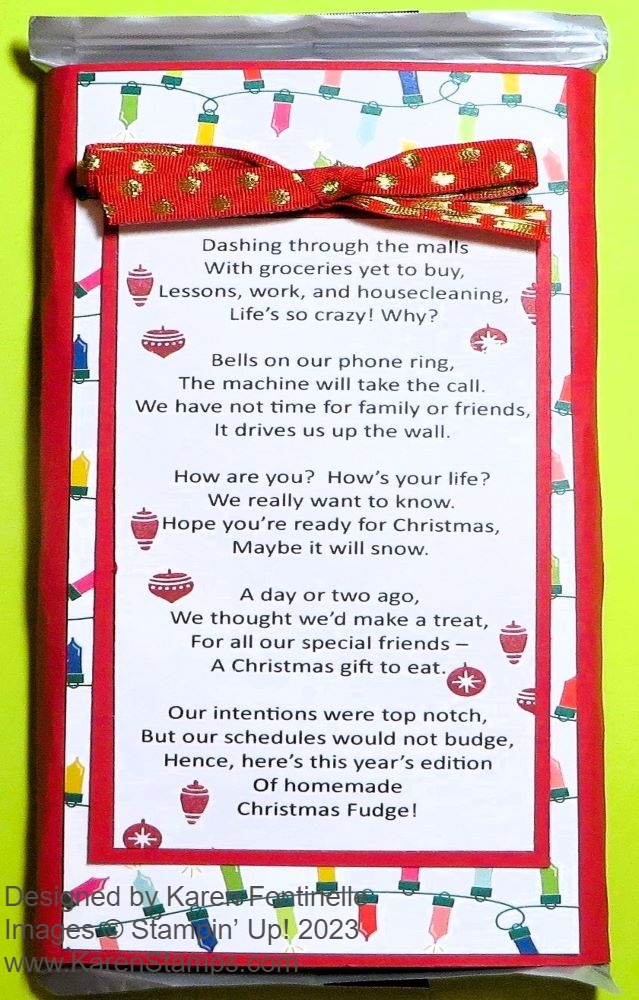
Here’s an idea that’s been around a long time! Buy one of those giant chocolate bars and print out this poem!
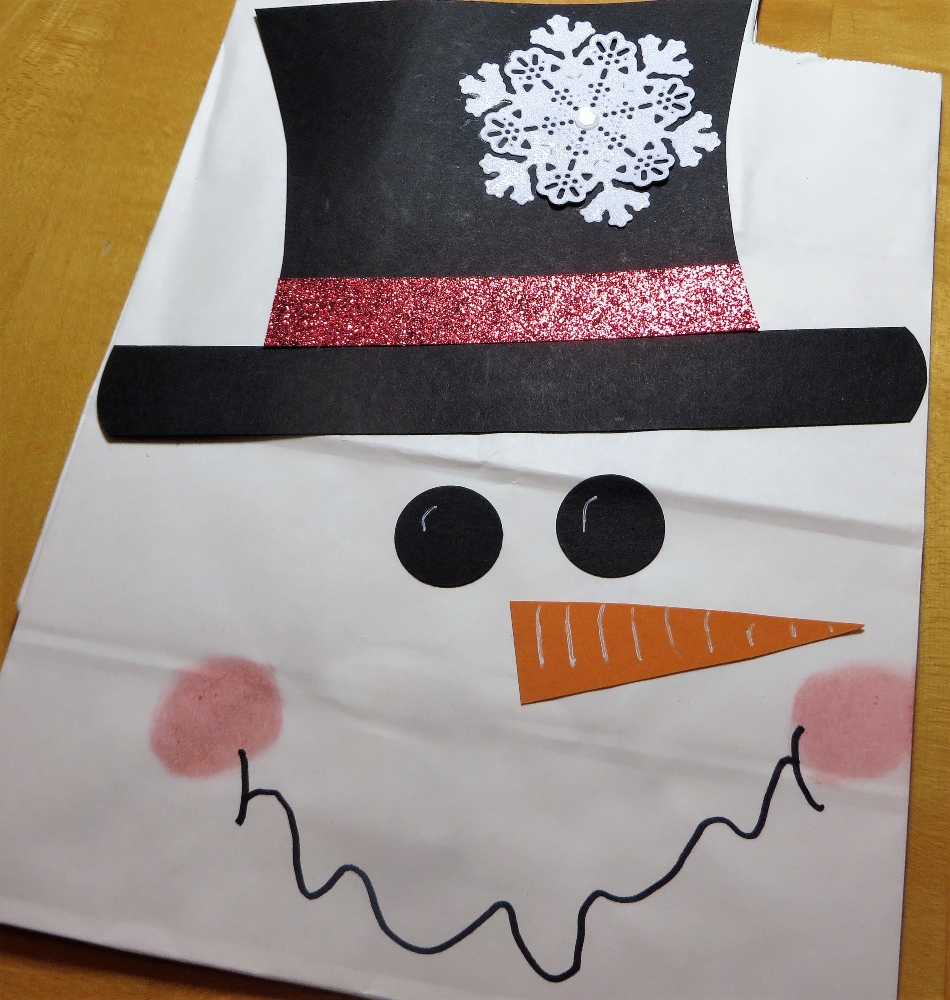
Need a gift bag? Decorate to look like a snowman! Don’t have a white bag? Make this design or similar on a piece of white cardstock and stick it on the front of a bag!
One of my favorite votives of all time! I think it was the black and white gingham paper with the greenery and red berries. Dress up any votive holder or little jar you have and decorate however you like. Put a tea light inside. Of if it is a jar, fill it with candies or little cookies for a gift!
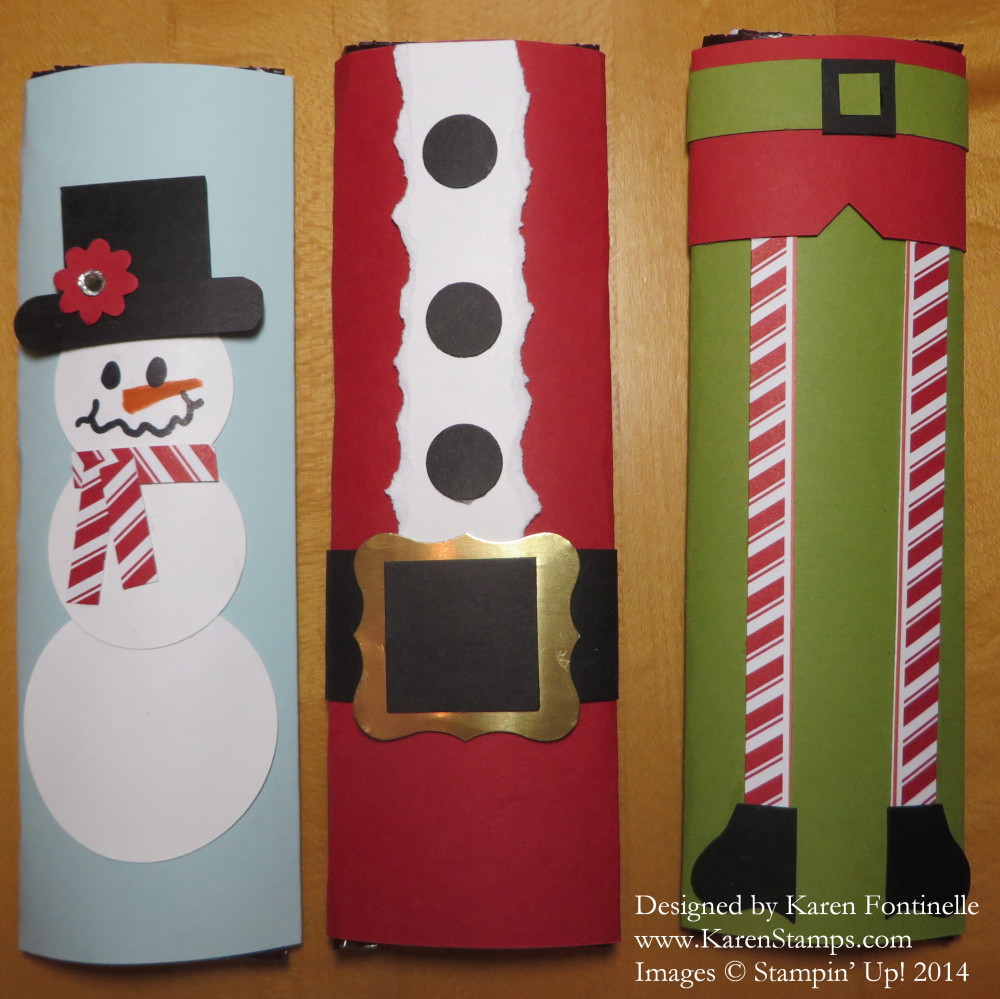
Here’s an oldie, but wow! Still just as cute eleven years later, if I do say so! Just cover a chocolate candy bar with designer paper or in this case, cardstock, and decorate or stamp or print a holiday greeting. Who wouldn’t enjoy a cute candy bar for Christmas? It’s a good stocking stuffer!
And of course, gift card holders are always great at the last minute. Or put in cash! Or write an IOU for that gift that didn’t arrive yet! Here’s the link with directions. And there are two styles on that post!
I’m reposting this from last year, as I came across it for a Quick and Easy Gift Card Holder. I’m thinking that at this late date, a lot of us might be looking for simple gift card (or cash!) holders. Of course you can use any cardstock and designer series paper you have.
Start with a 4″ x 12″ strip of cardstock. You could make it taller if you wanted to. Score this strip of paper at 4″ and 8″, basically in thirds, since the paper is 12″ long. Then on the end section, cut from the score line down to the corner on a diagonal. This can be on either end of the card.
Put a strip of Tear & Tape Adhesive or other strong adhesive on the bottom of that section with the diagonal cut. Then fold that diagonal piece over to the inside panel next to it.
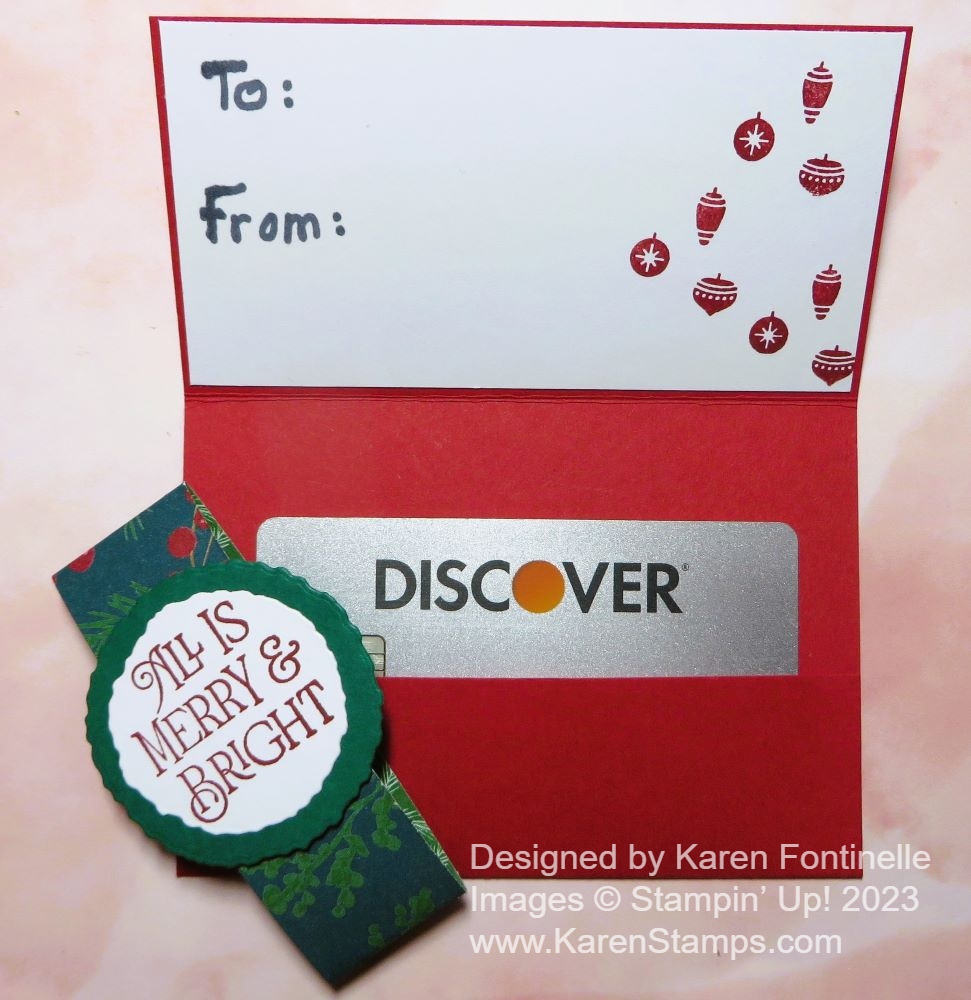
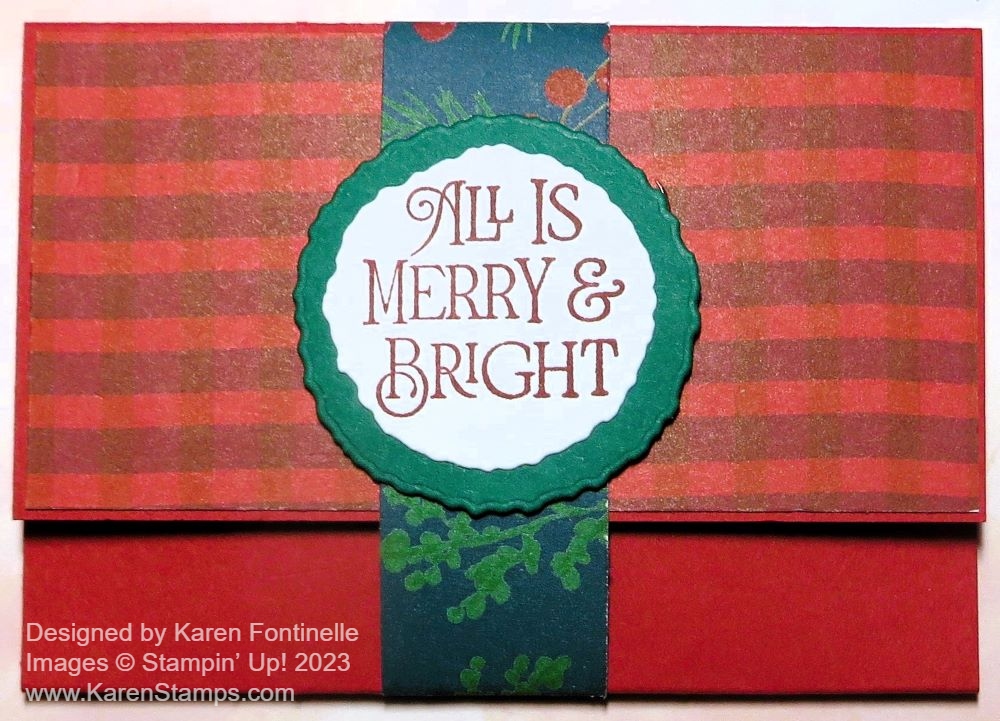
My sample is a card base of Real Red, and I used the Reindeer Days Designer Series Paper and Sticker Sheet to decorate the holder. On the front, I cut a piece of designer paper with the packages at 3 3/4″ x 3 3/4″. The tree and strip of holly leaves behind it are stickers from the Reindeer Days Sticker Sheet.
You can decorate the inside however you like or leave it plain. I put another paper behind the diagonal piece and a diagonally cut piece of designer paper on that diagonal corner. Just cut a square of 3 3/4″ x 3 3/4″ and cut diagonally from one corner to the other. Just make sure you have the pattern going the right way and that you cut to and from the correct corners. You can write a message on the inside left of the holder or add a piece of Basic White on which to write or stamp something.
Put your gift card or cash in the pocket. Decorate the front a little more with some bling, like these Iridescent Faceted Gems on the tree. If you prefer, make a belly band to go around the gift card holder to keep it closed. These are so quick and easy, I bet you can’t make just one!
Something different and wonderful to create for your own child or to make as a gift!
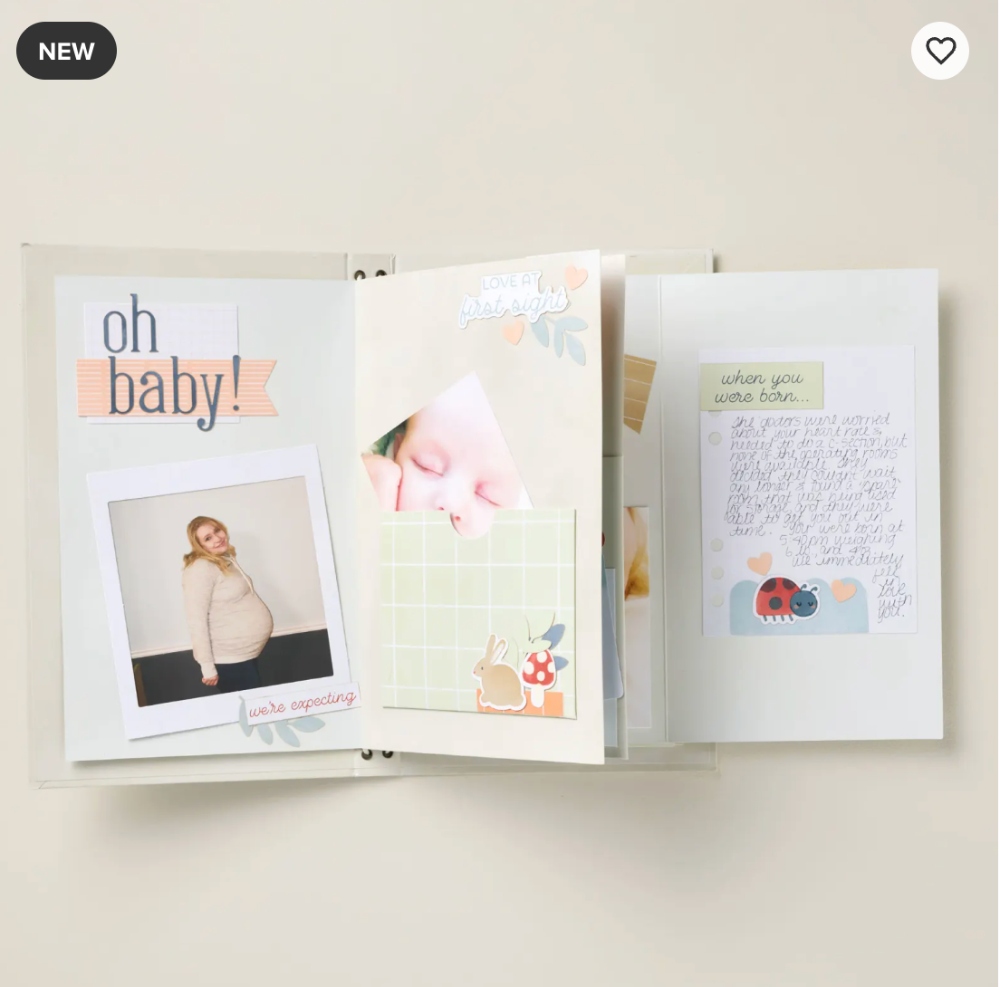
Create an adorable album to capture baby’s first year with the As You Grow Kit. This all-inclusive kit has everything you need to document sweet memories each month. With plenty of letter and number stickers and pockets for holding extra treasures, personalizing the album is a breeze! From baby’s first moments to first birthday, keep track of every unforgettable milestone with this kit!
DETAILS – Makes 1 album – Album size: 5-3/4″ x 9-1/4″ x 7/8″ – Colors: Basic Beige, Cajun Craze, Cloud Cover, Crumb Cake, Daffodil Delight, Pecan Pie, Petal Pink, Secret Sea, Soft Sea Foam, Timid Tiger – Sentiments printed in English, French, and German
Kit includes one of each item listed below. – Hard paper-wrapped album cover with elastics – 2 fold-out pages – 2 pages with pockets – 3 precut printed journal pieces – 12 sticker sheets: 3 sheets of sentiments (1 per language), 9 sheets of images, numbers, letters, and more – Project suggestions (Feel free to get creative—follow the project suggestions or assemble any way you like) – Adhesive
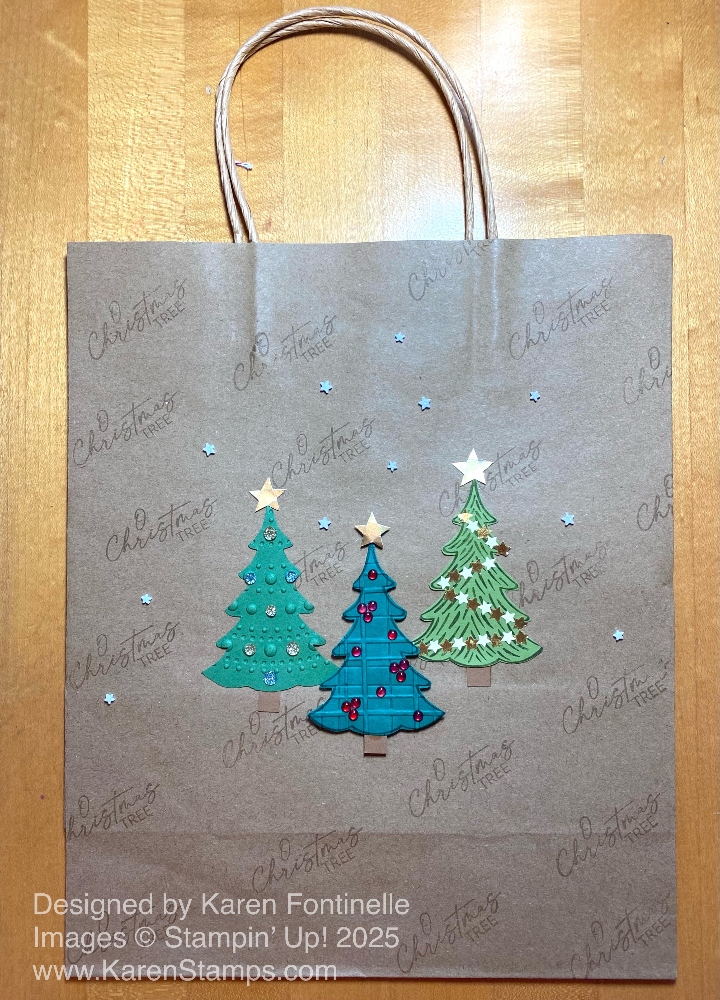
I guess it’s time to be wrapping holiday gifts, if you’ve done your shopping, that is! One of my favorite things to do is create decorative gift bags for any occasion, such as this Decorative Trees Gift Bag, perfect for a Christmas gift.
You may have shopping bags like this kraft one from shopping at certain stores, usually nice gift shops. Even if they have the store name on the front, you can usually cover that up with your decorating. You can also buy a pack of gift bags in various sizes like this one, or sometimes in white or colors, at a craft store. It’s just like making a card except on a larger canvas! Creativity knows no ends!
This gift bag is actually the third version of my original idea. Actually, it’s not even close to my first idea except for involving Christmas trees, but creativity often evolves as you work on your project. I saw the Decorative Trees Stamp Set on my shelf and it is still current, on the Last Chance List discounted 50%! When I looked it up in the Stampin’ Up! Online Store, I saw a cute idea for a card which I just translated to a bag. Perhaps you have this stamp set from last year or whenever it came out.
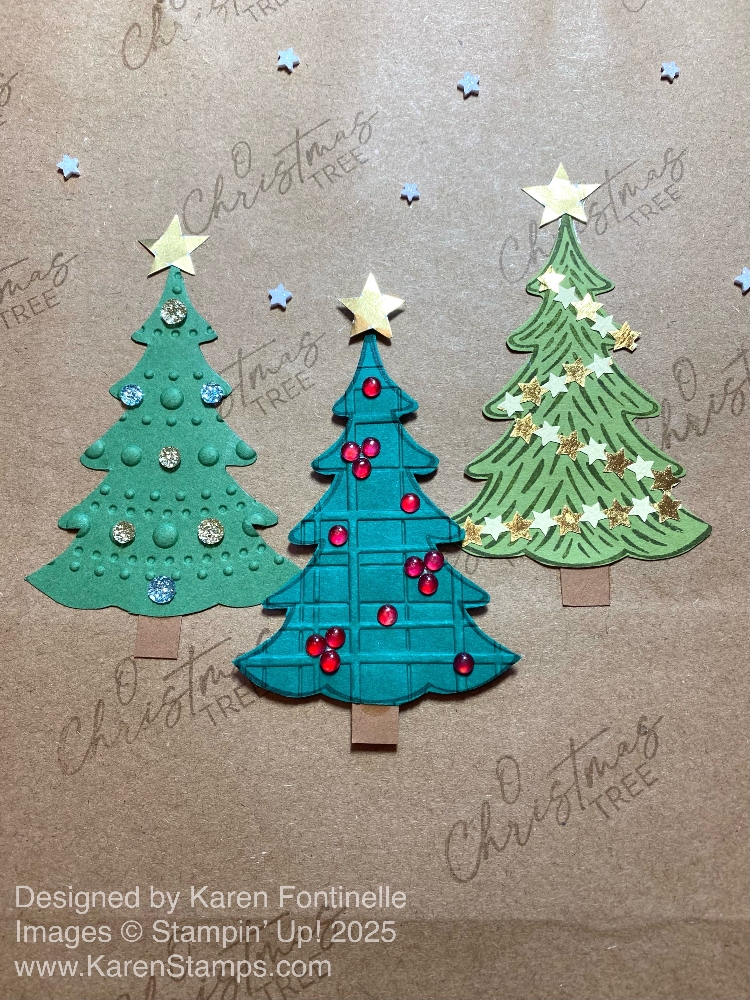
For the background on this bag, I stamped the greeting “O Christmas Tree” in the stamp set diagonally across the bag in Crumb Cake ink. Then I stamped three different colors of trees, just the outline, in Garden Green, Shaded Spruce, and Old Olive. I didn’t want to look for the dies, but there are some although not available at Stampin’ Up!, so I just cut them out by hand. The first two are embossed and the third on has stamping on the inside. The first one is embossed with the Dotted CIrcles Embossing Folder. The second one is embossed with the Forever Plaid folder. I added a little Pecan Pie trunk to each tree. The center tree is popped up with Stampin’ Dimensionals.
If you don’t have tree stamps or dies, just cut some out by hand! We’ve all drawn Christmas trees by hand at least when we were kids, so just channel your inner child! If nothing else, just draw a triangle!
Then the fun began! Decorative the trees and bag with embellishments! Use whatever you have! The first tree has current Traditional Sparkling Sequins in gold and Pool Party (which almost looks like silver). The middle tree has retired Cherry Cobbler and Clear Berries gems (some name like that). I colored the clear ones with a Dark Cherry Cobbler Stampin’ Blend marker to look like berries. Some are in sets of three, some single. The third tree has adhesive gold stars in a strand that a special friend brought me all the way from Japan! They fit perfectly on this tree! And because I came across them, I used the small white stars in the Shimmer Star Foam Stickers to look like little stars or even represent little snowflakes.
Even though my first idea was to use a white paint pen and form a tree shape by drawing small snowflakes on the kraft bag, I thought I should make something that other stampers could copy. But if you wanted that look, you could use white craft ink and a snowflake stamp. There’s always a work-around for ideas!
You probably have a bag of bags in your house somewhere so check it out and personalize a bag or even gift wrapping. If you run out of fancy wrapping paper, use the kraft-colored grocery paper bags or plain wrapping paper. You can always decorate these things with your stamping and scrapbooking supplies!