Today is June 1st, which in Houston, Texas, means it’s the first day of hurricane season and we will be hearing how to prepare, what supplies to have on hand, what to do, where to go, etc. etc. Luckily we probably don’t have to worry too much about hurricanes until about August and September.
I predict these next three days will be like a hurricane – for us, the last days to buy retiring Stampin’ Up! products will go by so fast and we’ll be making sure we have the stamp sets we can’t live without and making sure we get our orders in! For Stampin’ Up!, it will probably be like a hurricane with a deluge of orders coming in at the last minute for retiring products and then on June 4th with a deluge of orders coming in for the new catalog!
The other dayStampin’ Up! discounted select products from the Annual Catalog and the Occasions Catalog. Discounts range from 10% off to 30% off. We all like ANY sale, especially on Stampin’ Up! products, so make sure you check it out. Products are only available while supplies last (of course!).
It’s really best just to look in the Stampin’ Up! Online Store under ‘Last-Chance Products” and then under “Discounted”. You can download the lists I posted a few days ago, but they won’t be up-to-date with what’s still available if anything sold out.
Of course, you can also check the Clearance Rack and any other products you want to order, retiring or not.
All orders must be in by Monday, June 3 at 11:50 pm MT!
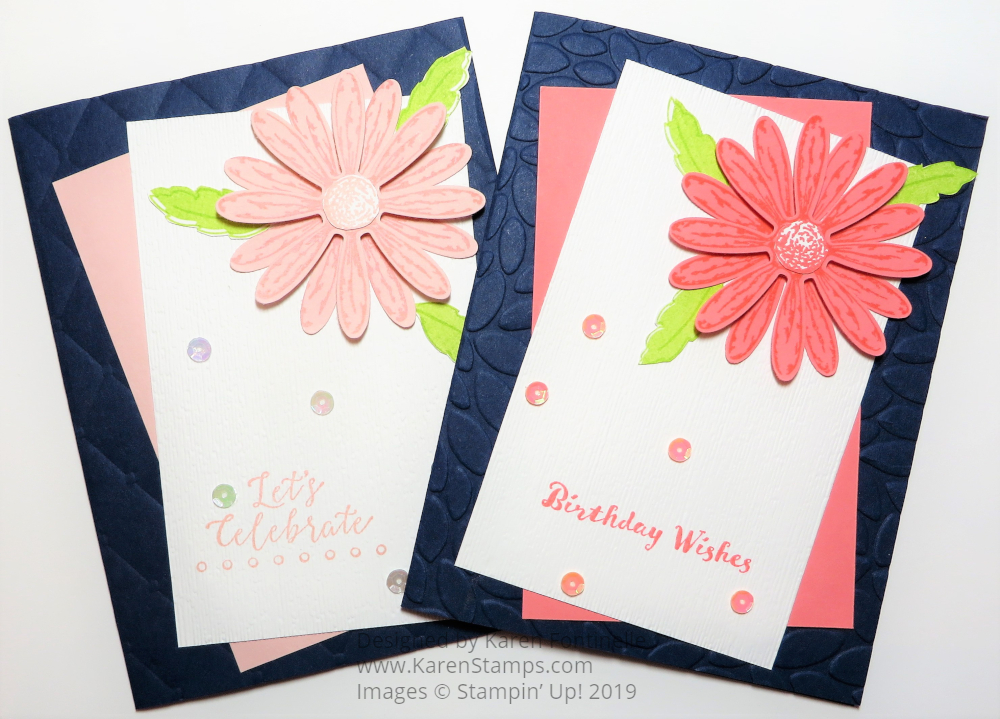
If these two cards, my Delightful Daisy Twin Birthday Cards, look a lot alike, it’s because they were meant to since they were going to my twin nieces! I usually make their birthday cards almost the same but slightly different! I got the idea for this card from someone on Instagram, @leannecreates. I don’t know her but we both seem to like each other’s cards on Instagram! She really liked the look of the pink and navy together on her card and I have to agree. I made the second card with a slightly different color.
To make my cards a little bit differently, I embossed both Night of Navy card bases with an embossing folder. The card with the Powder Pink daisy is embossed with the Tufted Dynamic Embossing Folder. The card with the Flirty Flamingo daisy is embossed with the Petal Burst Embossing Folder. The colored layer on each card is plain, then the Whisper White Cardstock is embossed with the Subtle Dynamic Embossing Folder.
The daisies were both stamped with the Daisy Delight Stamp Set and then punched out with the Daisy Punch. I punched two daisies for each card so the flower would look fuller. The leaves are also stamped from that set and cut out. Luckily, the Daisy Punch is carrying over to the new catalog plus there is a new Medium Daisy Punch! I also stamped the flower center and cut out by hand with my Paper Snips. (If you don’t own a pair of these scissors, you should order them as soon as possible as they are so good for cutting out small pieces and lots of other things!)
The birthday sentiment on the pink daisy card is from the Detailed With Love Stamp Set and on the Flirty Flamingo card it is from the another stamp set that I can’t remember! It really doesn’t matter! You can use any birthday greeting or any greeting for another occasion. This style of card can be used for most any occasion. If you left off the sequins, you could even use it for a sympathy card with some subtle colors and the appropriate greeting. I added some sequins for a little pizzazz. You could also use pearls or rhinestones, whatever you like.
Consider making this kind of card for your next occasion. Change the greeting, change the colors, maybe even use a piece of designer series paper as the layer. Use different flowers or some other image. Lots of possibilities with this card design.
Sale begins at 1:00 PM CT on Thursday, May 30! Discounts up to 30% off!
This sale will run through June 3rd, but products are only available while supplies last. You know what that means! The early bird gets the worm! No telling what may or may not sell out (except, of course, the things you want!) so if you see something you want, get it as soon as you can.
Click here to see the list of items that will be discounted from the 2018-19 Annual Catalog retiring list.
Click here to see the list of items that will be discounted from the 2019 Occasions Catalog retiring list.
(This is odd…..the prices must not have fit going across the page for the Occasions Catalog so scroll down to page 2 and you will see the chart that should be at the end of the rows!)
Probably easiest to just go look online at the Stampin’ Up! store!
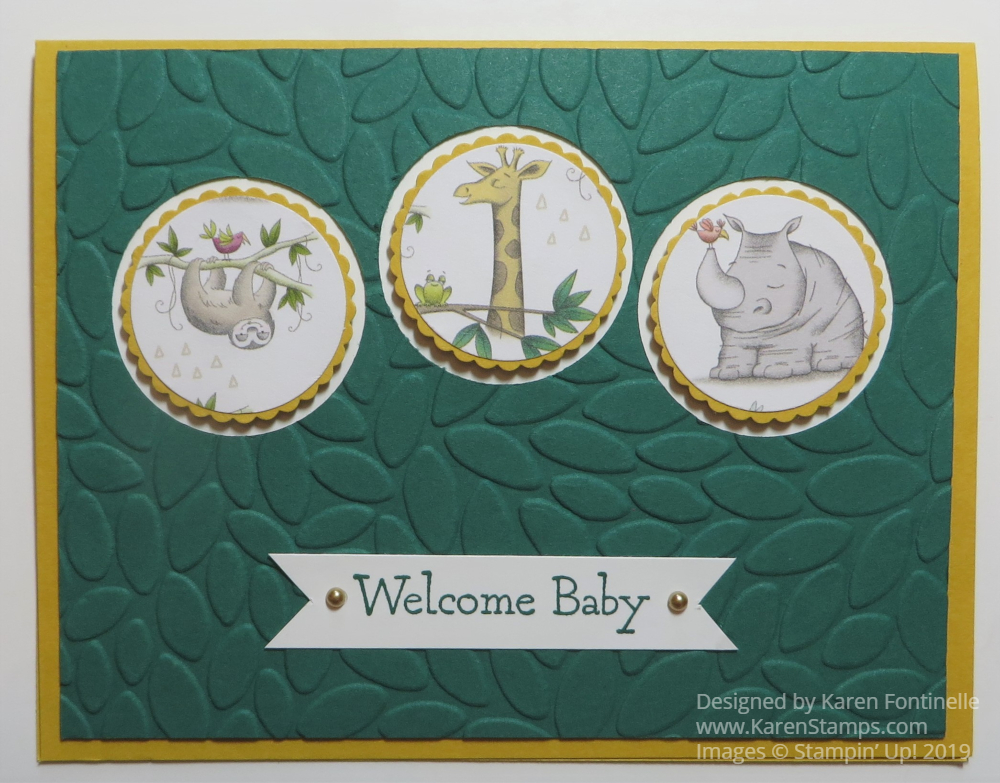
This Animal Expedition Circles Baby Card shows one of the many ways this cute Animal Expedition Designer Series Paper could be used. You might have overlooked the Animal Expedition Paper as I did because I thought it was for children, babies and maybe animal lovers. But after I saw some cute samples I liked, I had to get the paper and I’m so glad I did!
This paper is retiring in less than a week so if you are interested, be sure to get it! I found that I could make fun cards with it that weren’t only about babies or children. It could be for adults too!
Here are a couple cards I made just for fun!
The card I made today I decided to make for a baby. I could have put just about any greeting on the card and it would be fine, except maybe “Sympathy”. I punched out three of the animals from the paper with the 1 1/4″ Circle Punch, then layered each on a Crushed Curry punched 1 3/8″ Scalloped Circle. I should have used circle dies to punch out the card front to look through to the inside of the card, but I had punches ready to go so I could only do a layer for the front of the card.
I initially was going to use the back side (generic) pattern of the paper as a front layer, but then I changed to using the Petal Burst Embossing Folder to look like leaves in the jungle! The card base is Crushed Curry. The greeting is from the Special Celebrations Stamp Set, which is in the new catalog.
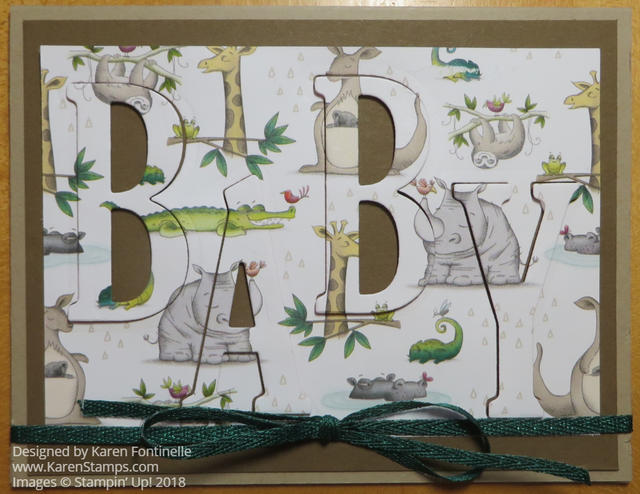
And here is a baby card I made using the Animal Expedition Paper and the Large Letters Dies using the Eclipse Technique.
As you can see, this Animal Expedition Designer Series Paper is really fun to make cards and other projects with. I even used a paper with only leaves and tiny birds on it to make an all-occasion card that really has nothing to do with animals. I hate to see this paper go, but the stamp set Animal Outing and the coordinating dies, Animal Friends will be in the new catalog. If you want them in the Bundle, be sure to order now to save 10% because they will not be in a Bundle in the next catalog.
Memorial Day seems to signal the beginning of summer, even though the official date isn’t until later this month, but I thought a bright Daisy Delight Thank You Card was in order today!
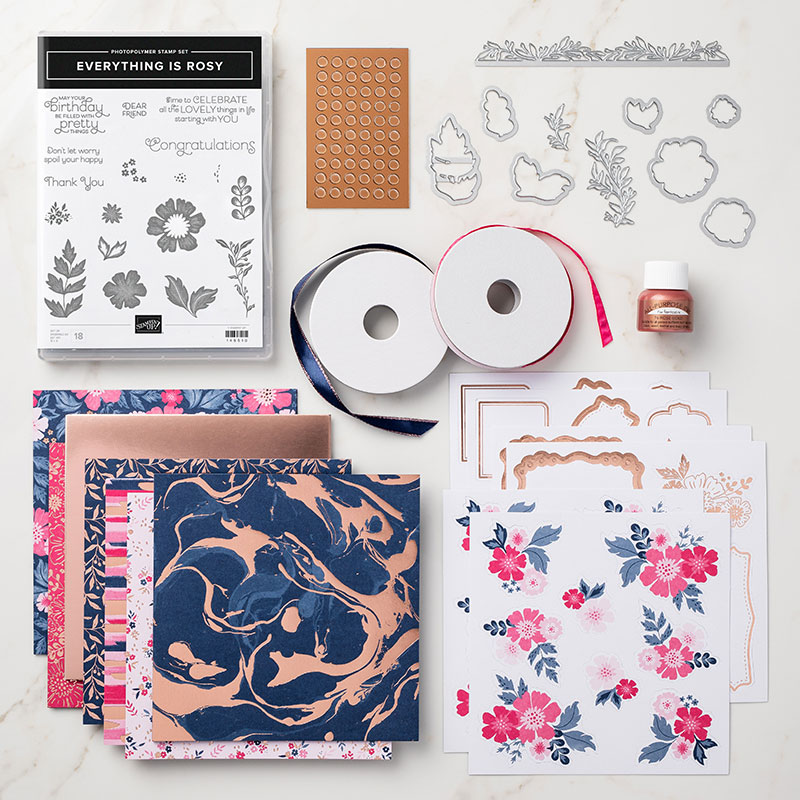
This is the last week of the current Stampin’ Up! catalog and all the Last-Chance products. Remember, it is not just the Annual Catalog retiring but also the Occasions Catalog. Also, the Everything is Rosy Product Medley ends on May 31 so grab that if you want it!
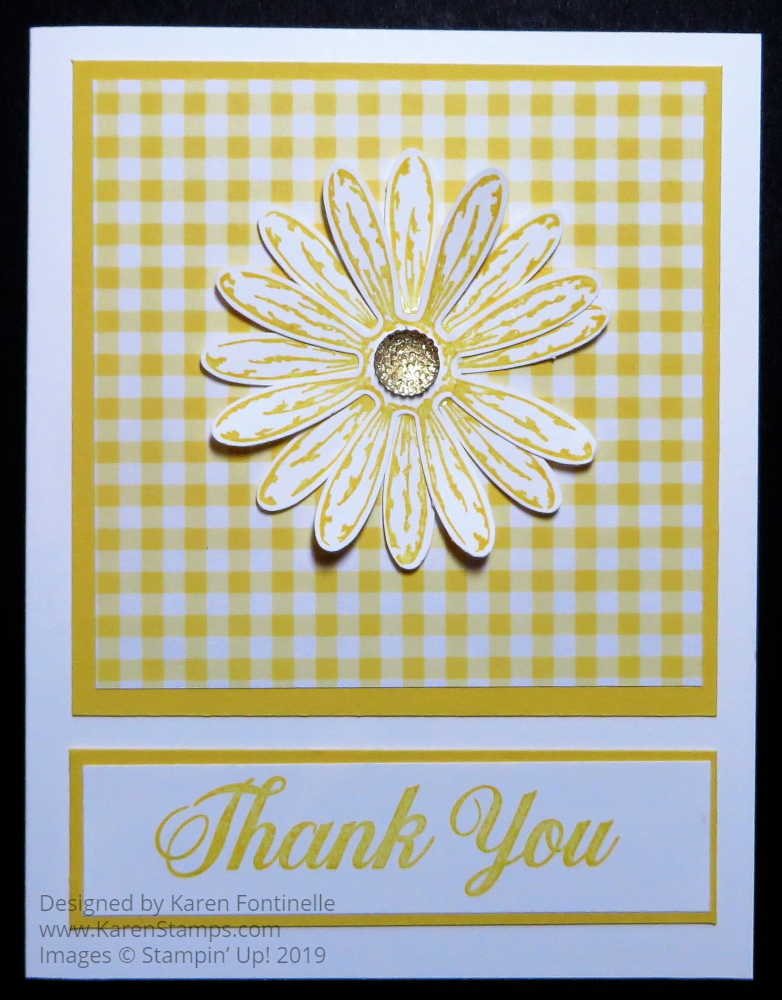
With the warm weather and sunny days, I thought about the Daisy Delight Stamp Set and the Gingham Gala Designer Paper. The Gingham Gala 6″ x 6″ paper has been very popular and sold out a few times, so I’m really surprised it is still available, as I write this. It is such “happy” paper! I’m glad the Daisy Delight Stamp Set and coordinating Daisy Punch are carrying over to the new catalog along with a new smaller Medium Daisy Punch that will be fun to use! Keep your eye out for that on page 187.
To make this card I just used a card base of Whisper White Cardstock and added a 3 3/4″ x 3 3/4″ layer of Daffodil Delight Cardstock. The Gingham Gala layer is 3 1/2″ x 3 1/2″. The two daisies are stamped and then punched out with the Dasy Punch and adhered to the gingham layer. I added a Gold Faceted Gem to the center of the daisy. I’m happy to say these are also carrying over to the new catalog!
I used the “Thank You” that comes in the Daisy Delight Stamp Set and stamped in Daffodil Delight on Whisper White, layered on Daffodil Delight Cardstock. These layers match up with the daisy piece above. Here is another card I made two years ago that is very similar but gives you a slightly different idea.
This Daisy Delight Thank You Card is sure to brighten someone’s day with it’s bright colors and pretty 3D daisy! Make one today!
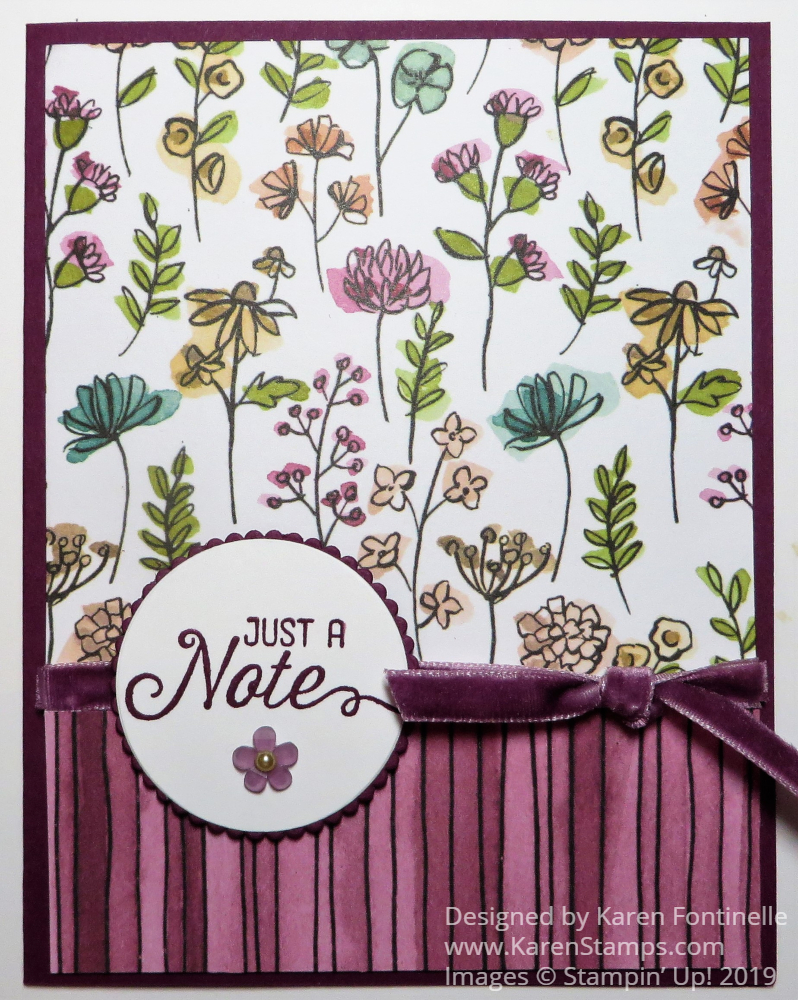
One of the Stampin’ Up! products I hate to see retire very soon is the Share What You Love Specialty Designer Series Paper that I used in this Easy Share What You Love Card. The paper is so pretty, you get a double amount of sheets than in the usual package of designer paper, the designs are handpainted, and some of the sheets have a translucent pearlized finish. It is paper that can be used for a variety of projects, especially being heavyweight designer paper.
One of my favorite patterns in this Share What You Love package of paper is this floral paper with the white background. It is so bright and fresh. The opposite side of the paper has this ombre striped design, so I chose to use both on this card!
The card base is Rich Razzleberry Cardstock. The floral paper is the full size for the layer and then I adhered the striped pattern over the bottom portion. If you really wanted to save paper, you could cut each piece to the exact size you want and then the ribbon would cover the line where they meet. Or you could add a strip of paper over it.
The ribbon is the Rich Razzleberry 1/4″ Velvet Ribbon. I just cut one strip a little longer than the width of the card and adhered it on the back of the card layer, then tied a separate little piece of the ribbon in a knot around the ribbon across the card. This saves a few inches of ribbon that wouldn’t show on the back and saves some bulk.
The greeting is stamped in Rich Razzleberry Ink and is from the Flourishing Phrases Stamp Set. I’m so glad this stamp set is carrying over to the new catalog along with the Flourish Dies. This stamp set has that pretty stem of flowers plus some great sayings to use and very pretty dies.
The greeting is die cut with the Layering Circles Dies and layered on a scalloped circle in the same die set. I popped it up on two Stampin’ Dimensionals since the ribbon is thick. I was going to just add some pearls or rhinestones to the greeting but then I saw the Frosted Flower Embellishments in my drawer. It looked like one of those flowers would be perfect and I think it is! The color is actually Fresh Fig but I think it is close enough to match. For a finishing touch, I added a tiny Artisan Pearl to the center of the flower. To mail, I will probably place a piece of paper towel or crimped computer paper over the card front in the envelope to protect it from the machines sorting the mail.
This is a very easy card to make, especially when you just use the opposite sides of one sheet of designer paper. Then just add a greeting and maybe a ribbon and you have a perfectly fine card to give someone. It only takes minutes to make.
In fact, using this basic plan, you could make an assortment of cards with one package of designer paper. Either make different greetings or save the greeting for when you need to card. This way you have a stash of cards ready to go for when you want to send a card but don’t have time to pull everything out and make a card.
Here is another card made with a full card front of one design from the Share What You Love DSP, using a greeting and the same Rich Razzleberry Velvet Ribbon.
You can make either one of these cards with any designer series paper, so be sure to check the Last-Chance products in the Stampin’ Up! Online Store to see if there are any papers you want to stock up on before they go away. And after you choose your paper, take a look at the ribbons that would coordinate or that you want to replace or stock up on. Take a few minutes to make some cards like my Easy Share What You Love Card.
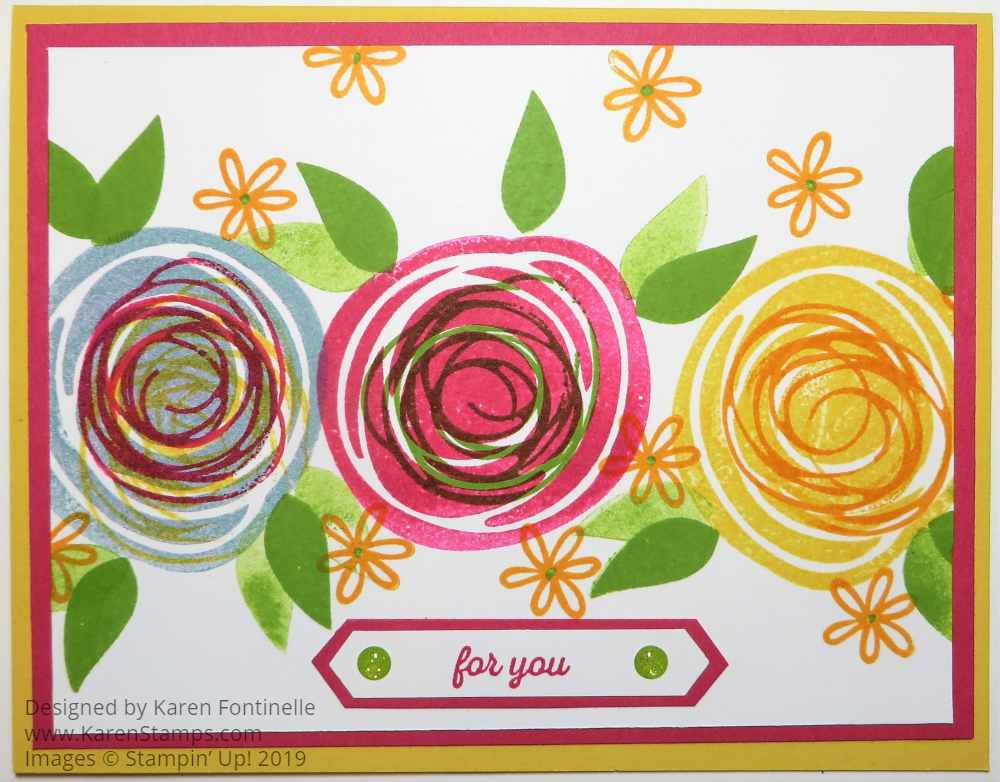
Today’s card is just a totally stamped card except for the little embellishments on the greeting, the Swirly Bird Stamped Flower Card. I really had kind of a feeling of going back to the “olden days” when I finished it before we had dies. It’s JUST stamping! Nothing fancy, just playing around with the Swirly Bird Stamp Set.
The card base is Delightful Daffodil with a layer of Melon Mambo. The flowers are stamped on Whisper White Cardstock. I just chose all “Brights” colors for this card! The flowers are stamped in Coastal Cabana, Melon Mambo, and Daffodil Delight and then overstamped with different colors. The leaves are stamped with Granny Apple Green, sometimes stamped off. The little flowers are stamped in Mango Melody. The little green centers are filled in with the Granny Apple Green Stampin’ Write Marker in the Brights Stampin’ Write Markers.
The greeting is from Itty Bitty Greetings and stamped in Melon Mambo. I punched it out with the Classic Label Punch then layered it on a piece of Melon Mambo that I just cut a little larger than the punch. I couldn’t resist adding two Glitter Enamel Dots in Granny Apple Green.
We are past the deadline now for any stamp sets that sell out. Stampin’ Up! will not make more of the retiring stamps. It’s hard to believe that this month is going by so fast! Soon the new Stampin’ Up! catalog will be out!!
If you are interested in Stampin’ Up! products and do not have a Demonstrator with whom you are working, I’d be happy to help you and send you a complimentary catalog if you want/need one. Just email me with your contact information.
Sometimes it is fun to just do some basic stamping. Just stamping! Try it! Get out one of your stamp sets you haven’t used in awhile and just do some #simplestamping like this Swirly Bird card.
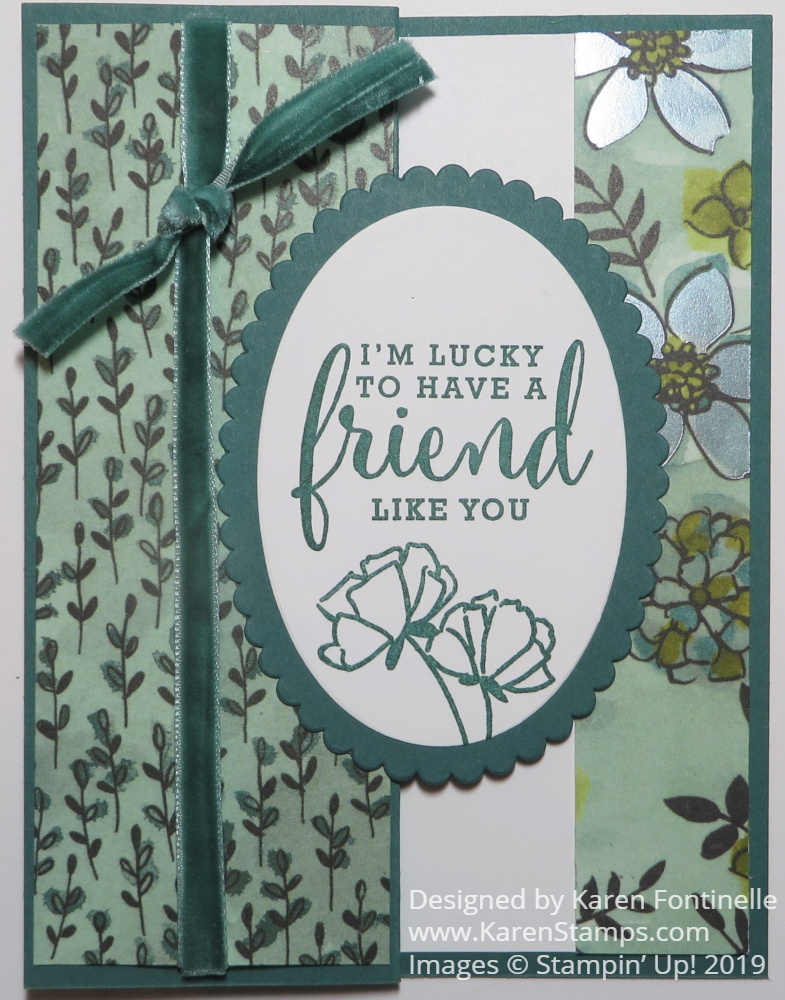
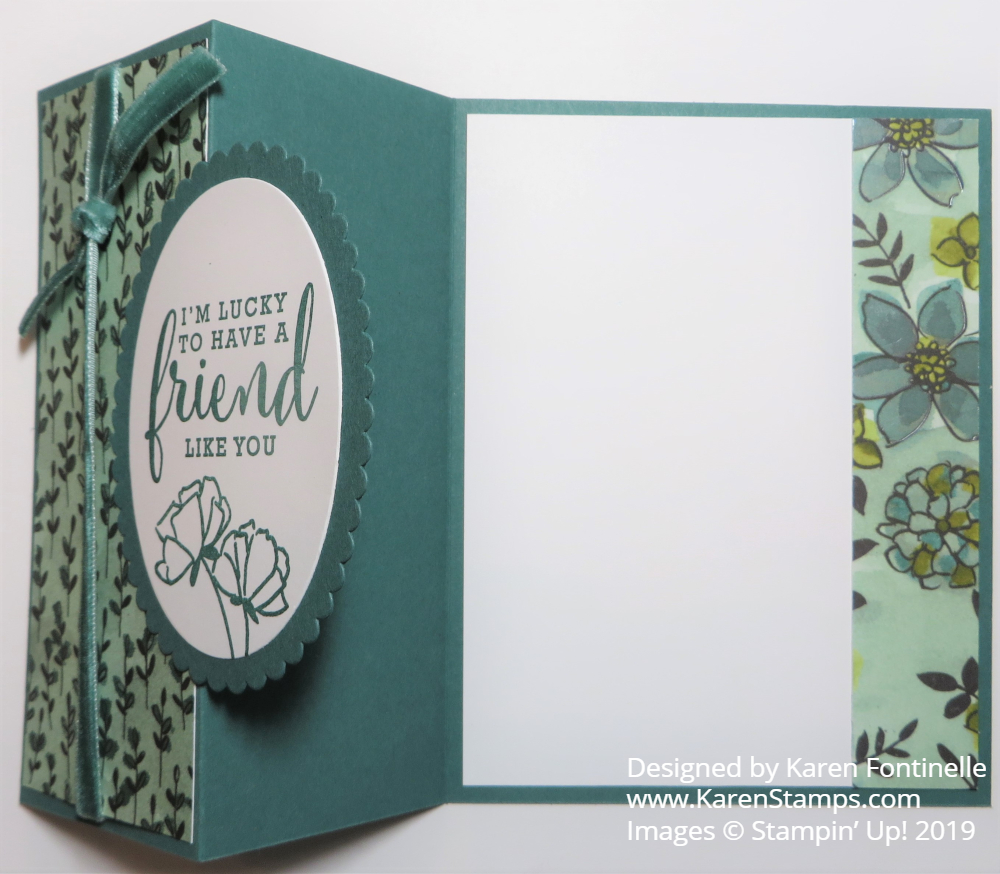
If you want to change it up a bit, try this Share What You Love Z-Fold Card For a Friend. Z-Fold cards are very easy to make – just fold back half of the front of the card!
I chose the Share What You Love Specialty Designer Paper because it will be retiring soon. I love this paper and I wish it was staying around. It’s nice heavy paper and so pretty in so many ways! I also love the stamp set Love What You Do that coordinates with the paper.
To make this card, make the card base and fold. Then score the front of what will be the card in half, which would be 2 1/8″. Fold that back on the other half of the card front and decorate with designer paper and ribbon. Cut a 1 7/8″ x 5 1/4″ piece of designer paper and wrap a piece of ribbon around. I used the Tranquil Tide Velvet Ribbon but I think it is sold out. There is another Tranquil Tide Ruffled Ribbon that is available.
I put a strip of another pattern of the designer paper inside on the Whisper White layer. I could also have put it on the inside of the white layer. There are so many variations of this type of card.
The greeting is from the Love What You Do Stamp Set with some stamped flowers. This is die cut with the Layering Ovals Dies. Then I used one of the scalloped ovals to die cut the Tranquil Tide layer. Be careful to only put adhesive on the portion of the greeting to stick on the front fold of the card. Make sure it’s not going to stick to the inside of your card!
This is an easy, fun card to make and a fun way to use some of your pretty designer paper. Here is another z-fold card that you can get an idea from!
Check out the Last-Chance List of retiring Stampin’ Up! products. Time is running out! The Last-Chance List only lasts until June 3rd! Then go make yourself a card like this Share What You Love Z-Fold Card For a Friend.
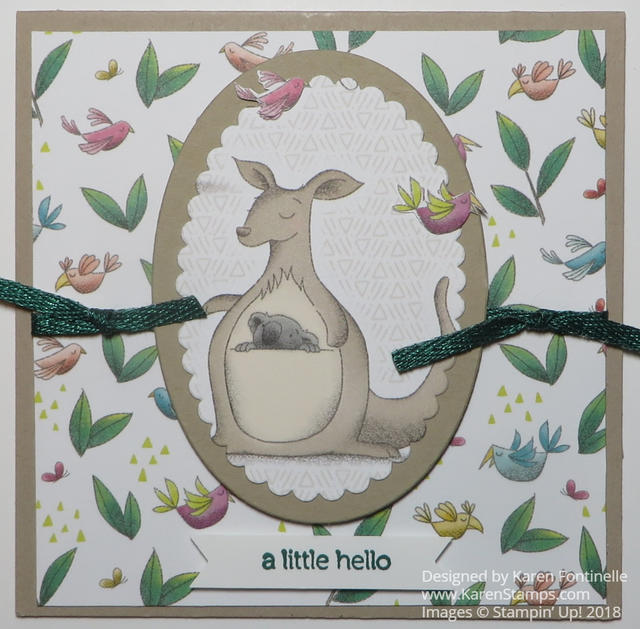
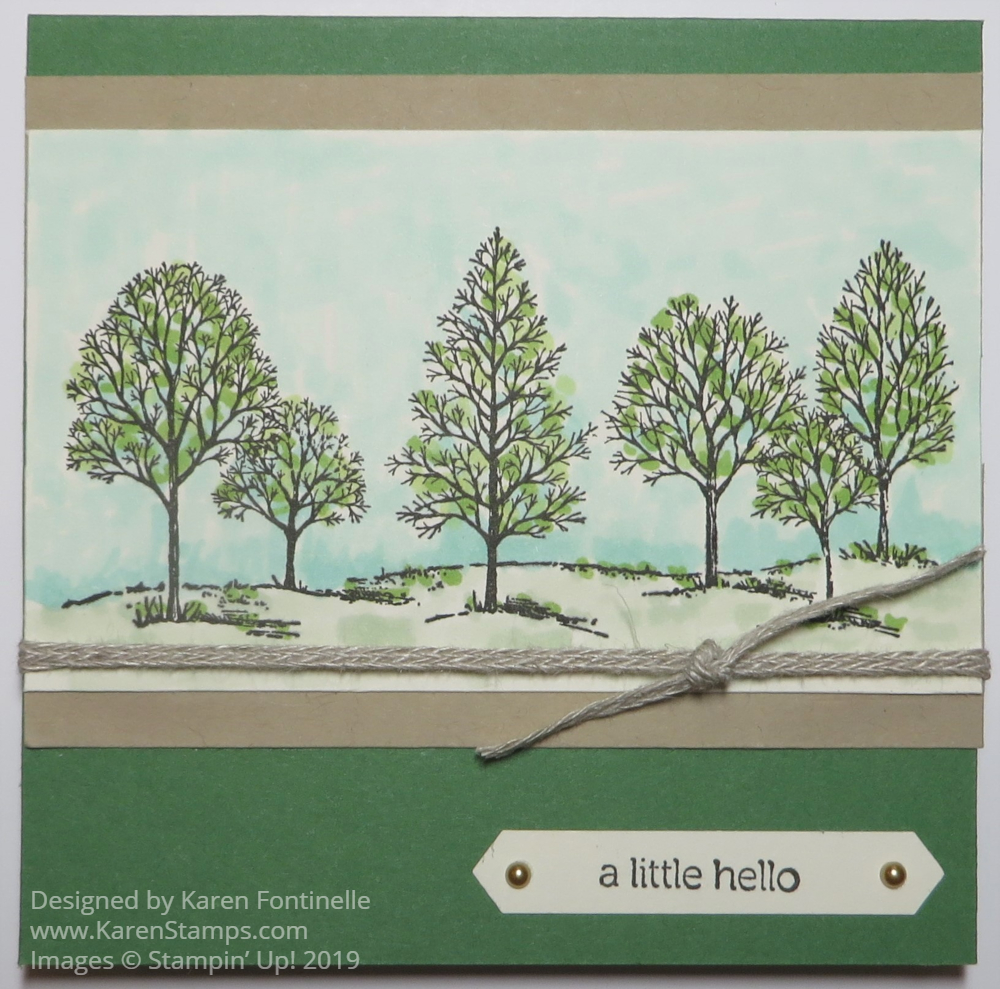
I cannot believe that Stampin’ Up! is retiring the classic stamp set Lovely As A Tree, so I made this Lovely As A Tree A Little Hello Card to enjoy my stamp set before it goes away. Not that it will ever really go away because it will always be in my stamp collection and I’m sure will get used in the future. I personally don’t think Rooted In Nature is a real replacement, but I suppose we must move forward with newer and more modern trees!
This card is just 4 1/4″ x 4 1/4″ in size, kind of a nice size to work with for something different. The card base is Garden Green. The trees from Lovely As a Tree are stamped on Very Vanilla in Early Espresso Ink. Even though Memento ink is what we are supposed to use with Stampin’ Blends Markers, I let the Early Espresso Ink dry and tried not to color right on it at first with the grass and sky. Then I did dab some green markers on the trees for some leaves. Luckily nothing smeared so it worked just fine! I love coloring with the Stampin’ Blends!
I layered the tree piece on some Crumb Cake cardstock and also added a strand of the Braided Linen Trim to add a little more earthiness to the card. I love this Braided Linen.
If you don’t already own Lovely As a Tree (hard to imagine that not every stamper has it!) you might want to get it before it’s gone! It will be a real treasure! Last day for the current Stampin’ Up! Catalog is June 3rd!
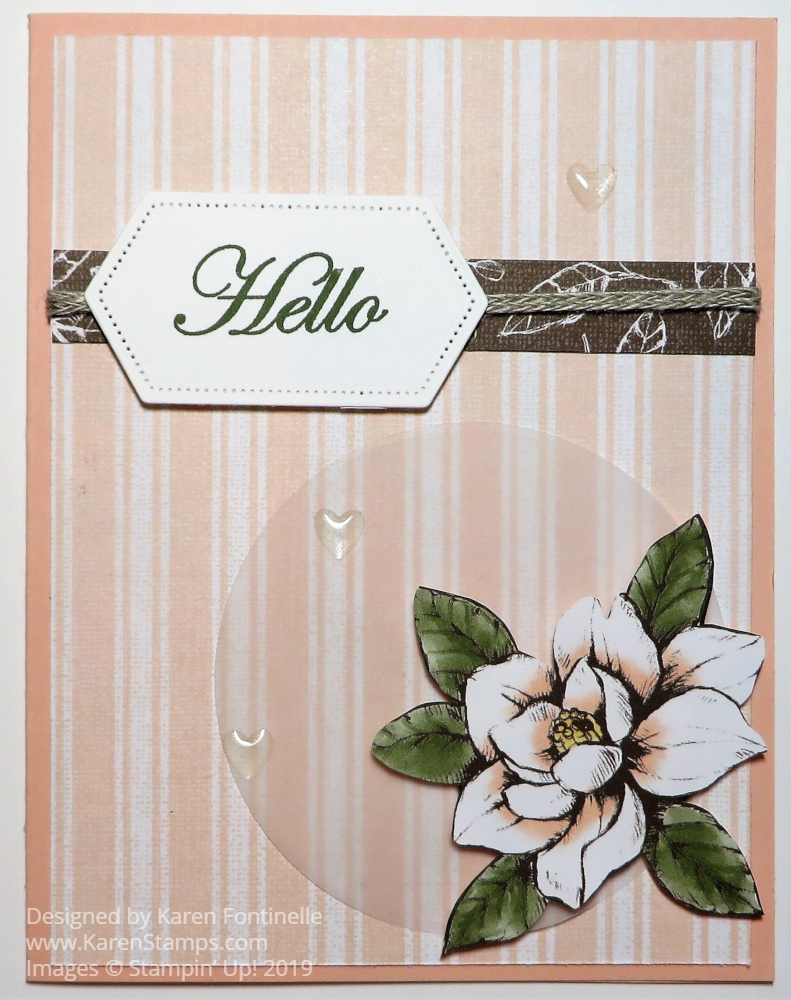
Here is a “Hello” card made with Magnolia Lane paper and a stamp! Wouldn’t someone you know love to receive this card in the mail?!
This is a sneak peek of a couple of the new products coming in the new Stampin’ Up! Annual Catalog on June 4, 2019. I used the Magnolia Lane Designer Series Paper and a greeting in the Good Morning Magnolia Stamp Set.
The card base is Petal Pink Cardstock layered with a striped pattern from the Magnolia Lane DSP. I also used a little strip of the brown pattern with leaves as a little layer for interest near the top of the card under the greeting. The greeting is stamped and then die cut with one of the new Stitched Nested Labels Dies. I wrapped a piece of the Braided Linen Trim around this brown piece.
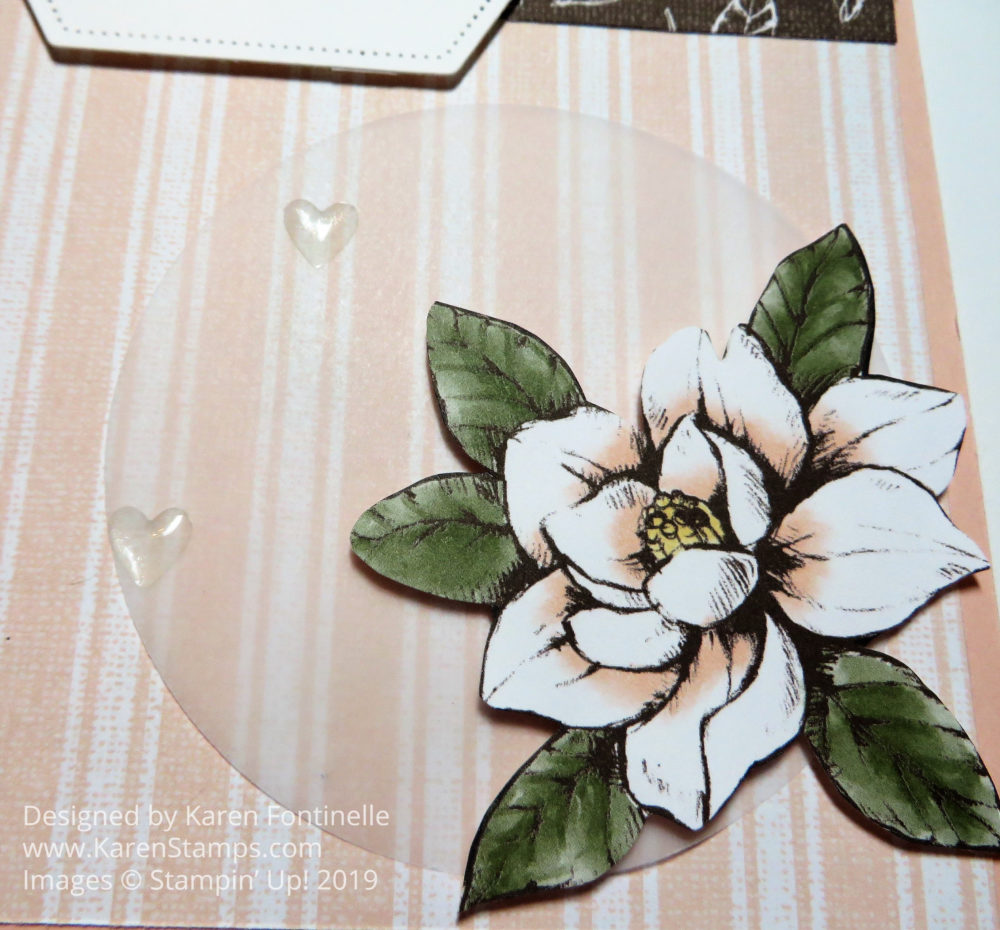
For the focal point of the card, I just cut out a flower from the designer paper and popped it up with Stampin’ Dimensionals. Paper Snips are great for this kind of cutting. We don’t always have a die for everything so you need a good pair of scissors! Before I adhered it to the card, however, I die cut a large Vellum Cardstock circle to place underneath the flower. For this, I used one of the Layering Circles Dies. I could have stopped at this point, but I added some of the Heart Epoxy Droplets to the card. You don’t have to have them, I just thought I wanted to fill up a little space with them.
You might not guess but I got inspiration for this card from the cover of the new catalog. Actually the card I was sort of copying was a smaller one, not this regular size. But I like my card just fine!
I think this Magnolia Lane Suite of products is going to go like hotcakes when the catalog goes live so I would urge you to order right away if you like the main items in this Suite. There are also dies in a Bundle with the stamp set to save 10%. All will become known on June 4th at Noon MT! Just a day over two weeks away! Get ready!
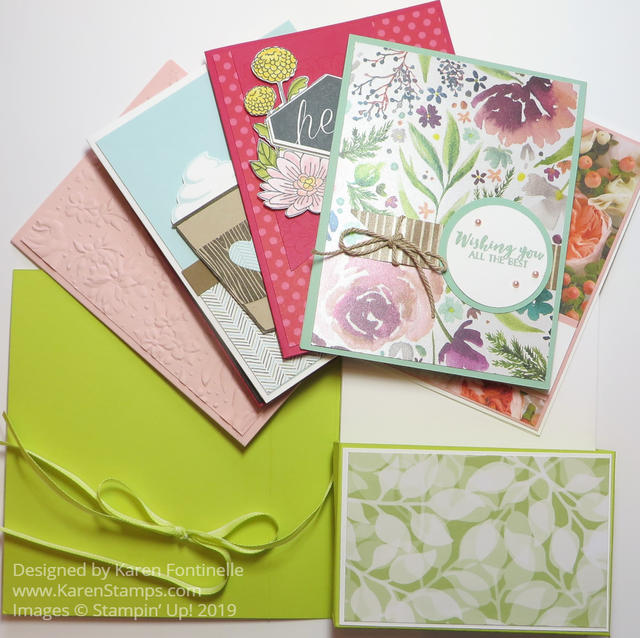
If you are giving an assortment of your stamped greeting cards to someone, a nice way to present them would be to Make an Easy Card Box For a Gift. It’s just a little box inside to hold the cards and is simple to make.
Just follow this scoring and cutting diagram and instructions.
For the card box cover, start with a piece of cardstock 6″ x 10 1/4″. Score this at 4 1/2″ and 5 5/8″.
To make the box, cut a piece of cardstock 4″ x 11″. Score this at 2 1/4″, 3 1/4″, 7 3/4″ and 8 3/4″. Turn and score the long side at 1″. Then cut up to the scoreline as you see in the photo above.
Crease and fold all the score lines. Assemble the box with the two pieces coming together in the back. Adhere to the inside back of the cover. Adhere a piece of designer paper to the front of this box.
Decorate the front of the cover (best to do this before adhering the box inside!). Tie a ribbon around to tie and close or make a belly band to match.
A gift of cards is always going to be welcome so make the presentation nice! You could put them in a cello bag and tie with a pretty ribbon and tag, or just as easy, make a card holder like this one to give your gift!
If this isn’t a stack of “Happy Mail”, I don’t know what is! All these lucky customers will be getting their new Stampin’ Up! Annual Catalogs in the mail soon! I just took these to the post office and have more to send out now that I have more mailing envelopes!
There are some great new Suites of products in this catalog. I daresay Stampin’ Up! has outdone themselves this year with some of these! (Or do I say that every year?) What is more exciting than a Stampin’ Up! Catalog?!
If you are interested in Stampin’ Up! products and do not have a Demonstrator you are working with, please email me at Karen@Karenstamps.com if you would like a catalog. Send me your contact information so I can get a catalog out to you. If you have a Demonstrator, check and make sure they have a catalog for you!
Before the new catalog goes live, though, make sure you have everything that is retiring in the current catalog that you need. Remember, Bundles that save you 10% will be taken apart for the products being carried over to the new catalog and you won’t save that 10% anymore. Any retiring In Colors things you want, be sure to get those. It’s best to go to the Online Store and look at the Last-Chance products there so you know what is still available.
Lemon Lime Twist Cardstock is gone but you can get a few sheets in the Animal Expedition Cardstock Pack. If you want more of the darling Gingham Gala 6″ x 6″ Designer Series Paper be sure to grab that. It sold out a couple of times after appearing in the Occasions Catalog! I still remember making my first card after the holidays with that gingham paper and feeling so “fresh” after all the holiday designs!
The new catalog goes live around Noon (MT) on June 4th. The current catalog AND Occasions Catalog ends June 3rd. If you are one of my regular customers who gets a catalog from me, be sure to keep an eye on your mail and let me know when your catalog arrives in a few days. If you are new to me and would like a spectacular Stampin’ Up! catalog in your Happy Mail, send me your information.
Every Tuesday I send out a newsletter with one or more stamping projects (usually more!) and the latest Stampin’ Up! news. As Demonstrators, we get a Weekly Update every Tuesday morning from Stampin’ Up! which is perfect because I can pass along any news to you in my weekly newsletter.
With the Last-Chance retirement list out now and the new Stampin’ Up! Catalog about to go live, now is the perfect time to make sure you are connected with a Demonstrator to keep you up to date on Stampin’ Up! news, new product information and ideas for using those new stamps and accessories!
An extra bonus is that at Christmas time I send out my “12 Weeks of Christmas” holiday emails to all my subscribers. These are extra, separate emails with one holiday project per week to inspire you to start working on your holiday cards, gifts and finally, packaging! You can copy the project exactly, get an idea for something to make on your own, or simply enjoy seeing a new project. I’m almost as happy seeing stamping ideas as I am doing the stamping! I just love new inspiration!
When you sign up for my Mailing List you will get a FREE GIFT, a list of gift-wrapping ideas to save a trip running out to the store for wrapping paper or gift bags. Just use whatever supplies you have. The ideas are timeless, you don’t have to have the exact paper or stamps.
I would love to have you join my mailing list because I love sharing Stampin’ Up! with others, not to mention talking about stamping ideas! Do it today and you will be set for some of the most important dates of the stamping year!
Click the button below or sign up in the red box on the right on my blog.
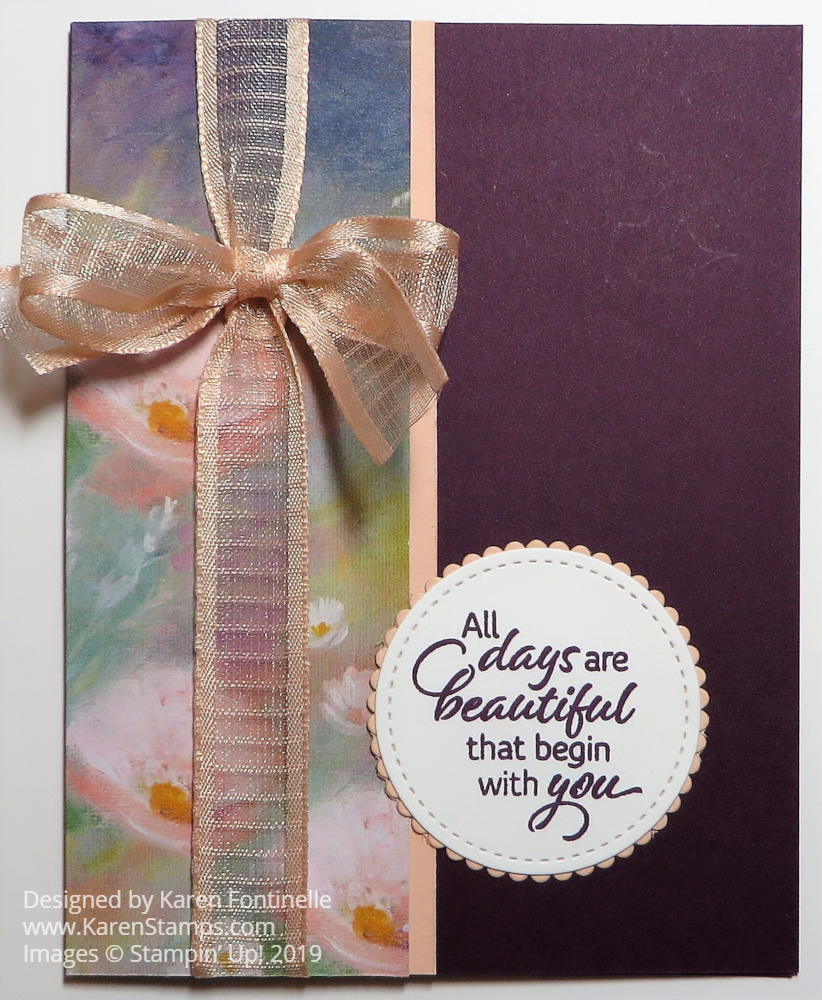
This Perennial Essence Designer Series Paper will be in the new Stampin’ Up! Catalog on June 4th and it is gorgeous! The patterns are handpainted images made into this lovely paper! I don’t know if we have ever had anything quite like this designer paper before at Stampin’ Up!
This card is an easy design using just a strip of the designer paper, coordinating cardstock colors, a greeting from the Floral Essence Stamp Set and this new beautiful ribbon, 5/8″ Organdy Striped Ribbon.
The card base is Blackberry Bliss. I originally thought I was going to use Petal Pink and I had trimmed off this little strip of paper. When I changed to the Blackberry Bliss, I decided to just use that strip of pink next to the designer paper. I adhered a strip of the ribbon around the designer paper and tied on a bow. This ribbon is so pretty, but it also allows the designer paper to show through a bit.
The greeting is from the coordinating stamp set, Floral Essence. This stamp set has flowers and sentiments and also a coordinating punch, the Perennial Flower Punch. It fits one of the 3-petal stamp images so you can stamp and punch a couple and make a layered flower!
This is a very simple card. You could do some watermark-type stamping on the Blackberry Bliss with the flower stamps if you wanted to add more. You could add some rhinestones or little embellishments on the greeting or even a few scatted on the card base instead of the stamping. You can almost always make a card very simple or jazz it up in several ways.
Try this Perennial Essence Simple All-Occasion Card when you get the Perennial Essence Designer Series Paper or make some simple cards with whatever paper you have now.