Monthly Archives: May 2021

Exciting Paper Pumpkin Kit For June!

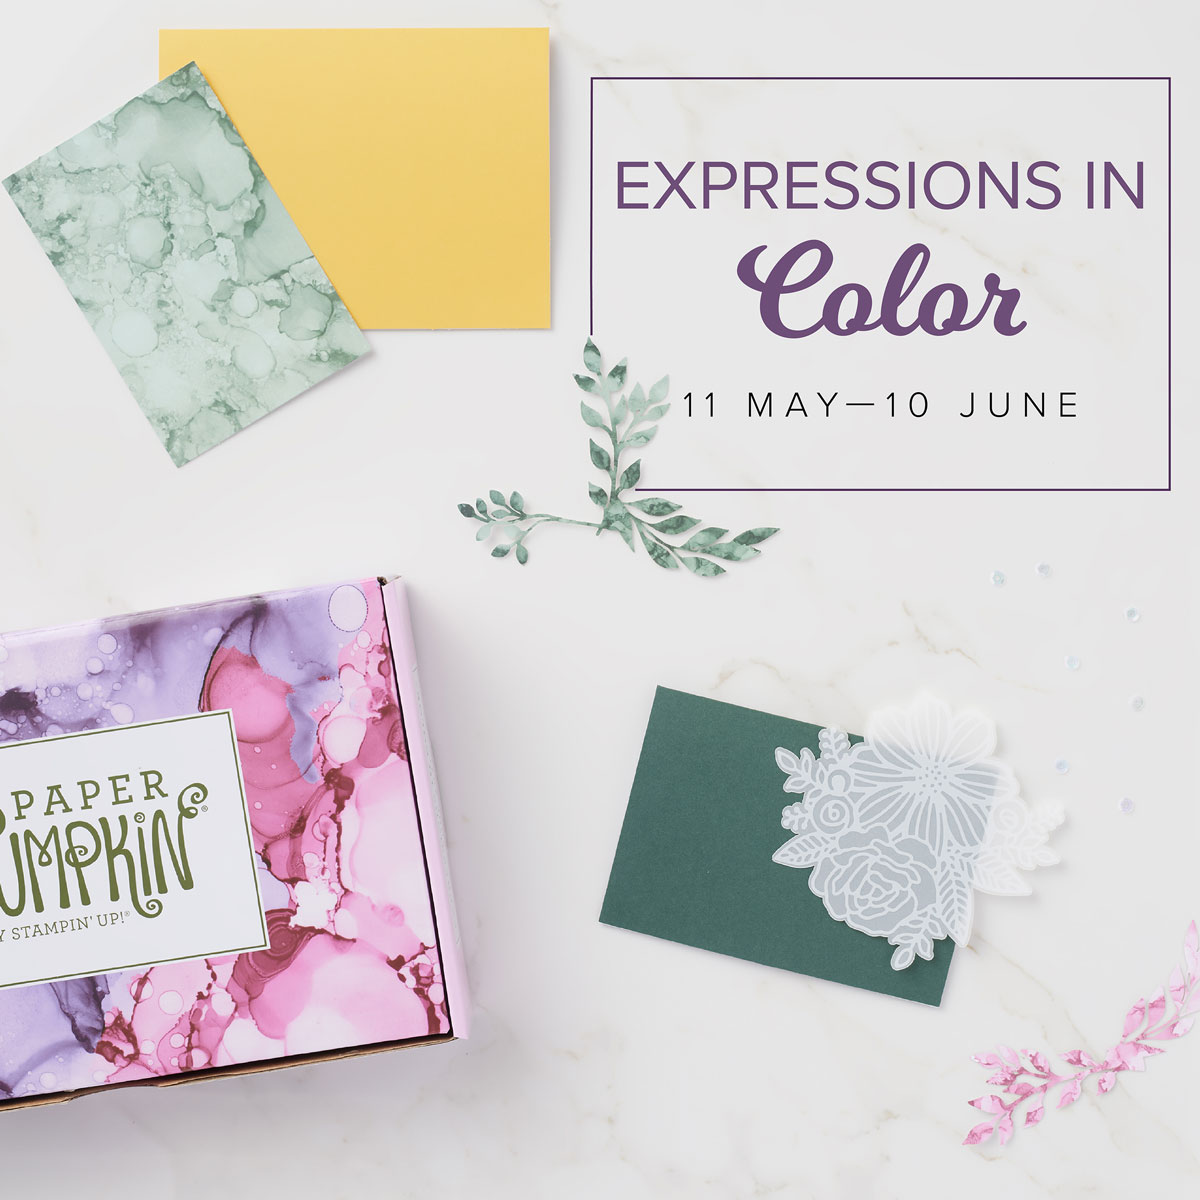
Paper Pumpkin always looks fun, but this upcoming kit for June really got me excited for it! Paper Pumpkin is the monthly papercrafting kit that comes to you in the mail from Stampin’ Up! and this kit for June is extra-special! It will introduce you to the new 2021-23 In Color collection, and you’ll also find a familiar shade from the 2020-22 In Color Collection.

The In Color Collections are new colors introduced that are new, fresh, and trendy, but they only stick around for two years! So every year it is important to get the In Colors to add to your ink, marker, and paper collection!

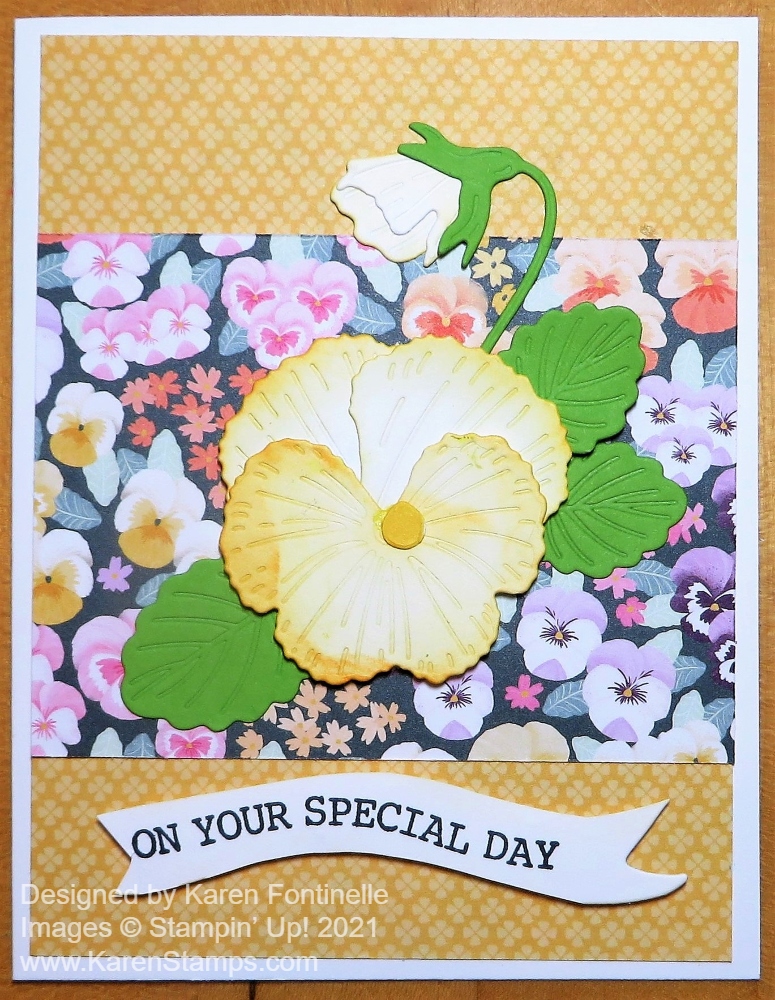
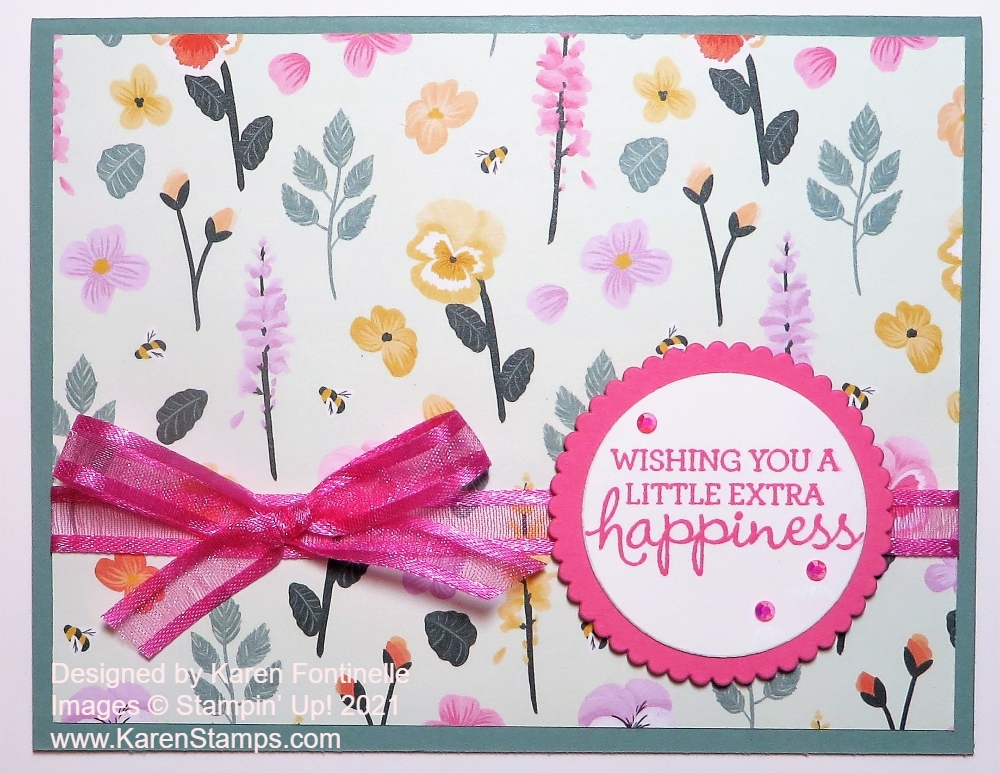
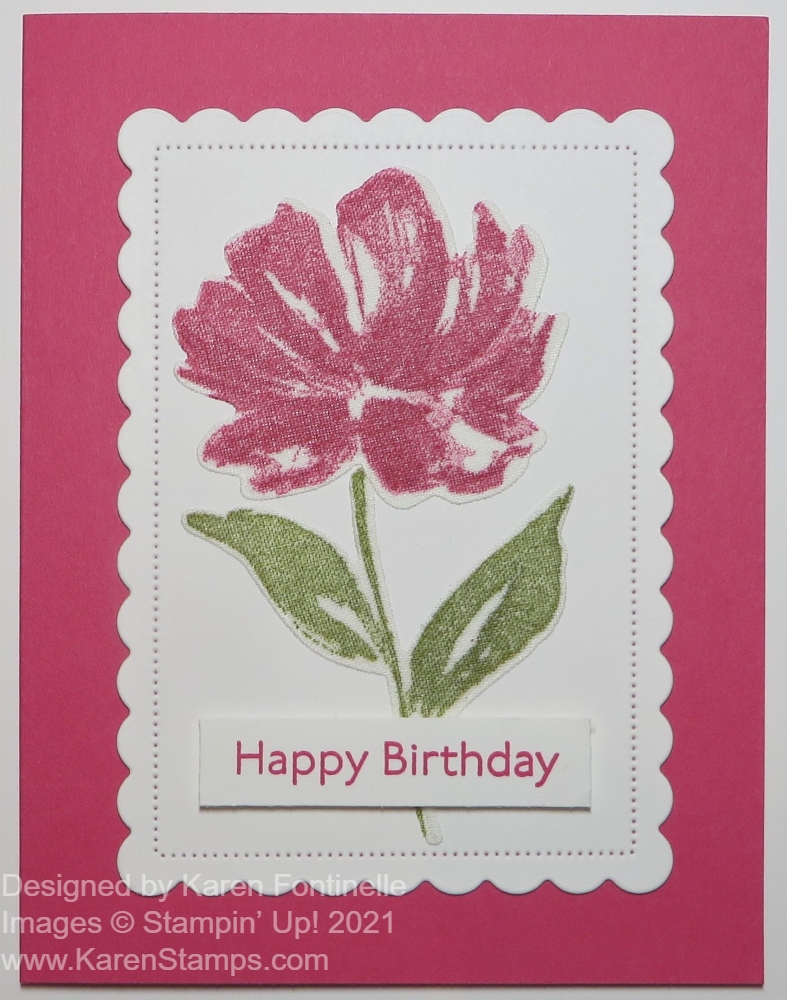
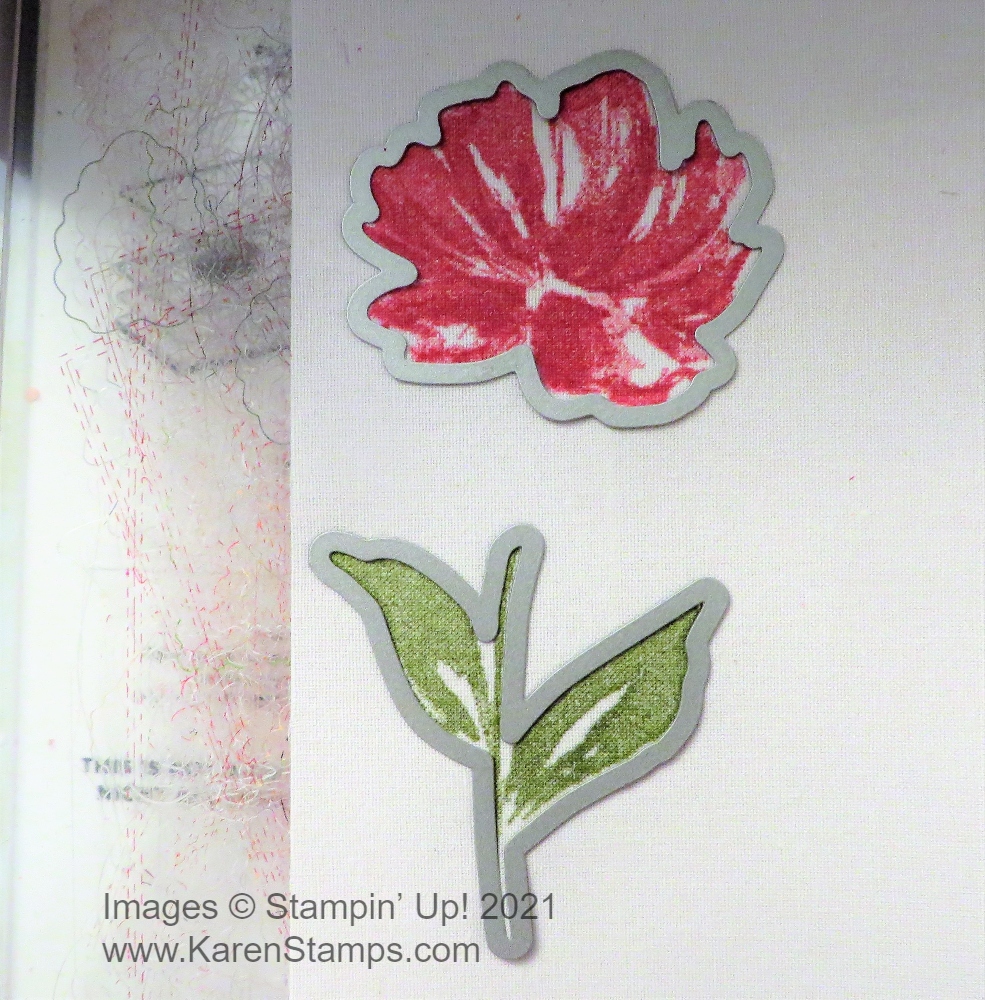
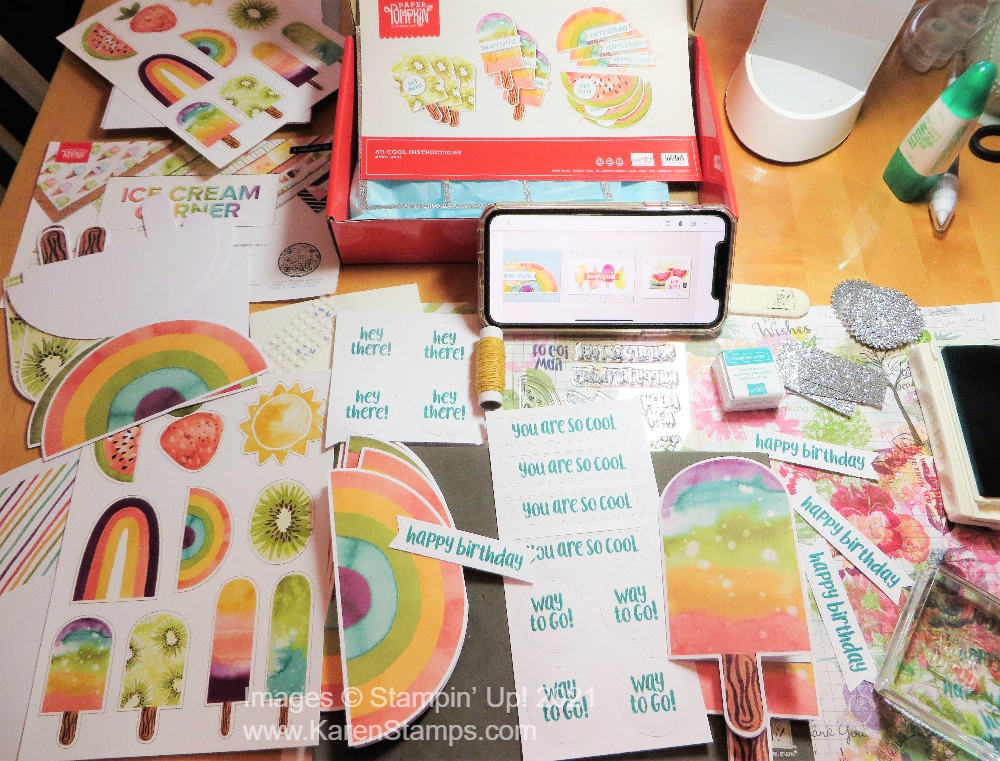
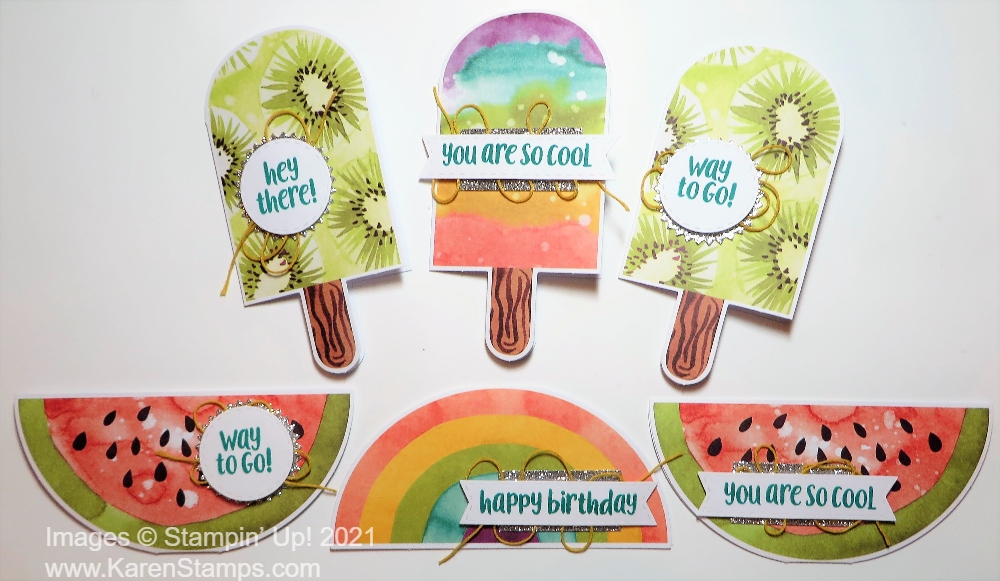
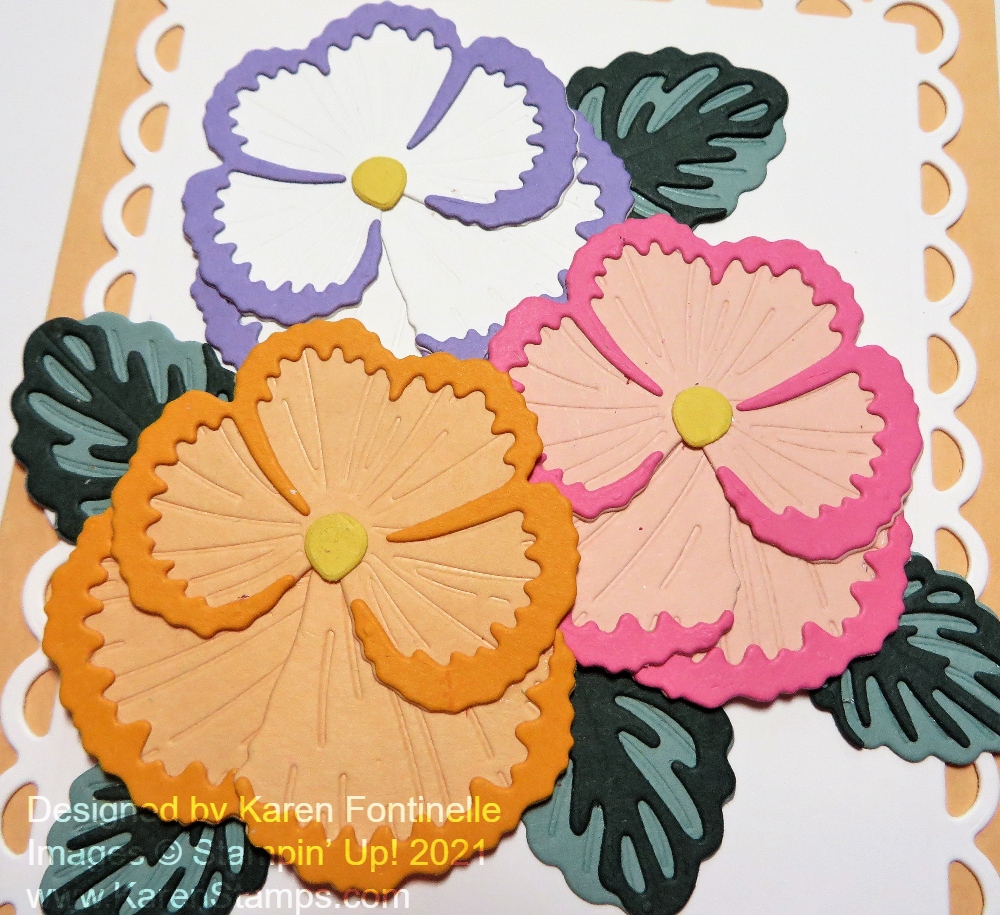
This Paper Pumpkin Kit will have all the supplies you need to make 9 cards, 3 each of 3 designs plus coordinating envelopes! And by coordinating, they mean “not plain white”. You will receive printed card bases, die-cut paper pieces, embellishments, adhesive, and more! The coordinating colors in June are Bumblebee, Evening Evergreen, Fresh Freesia, and Polished Pink.

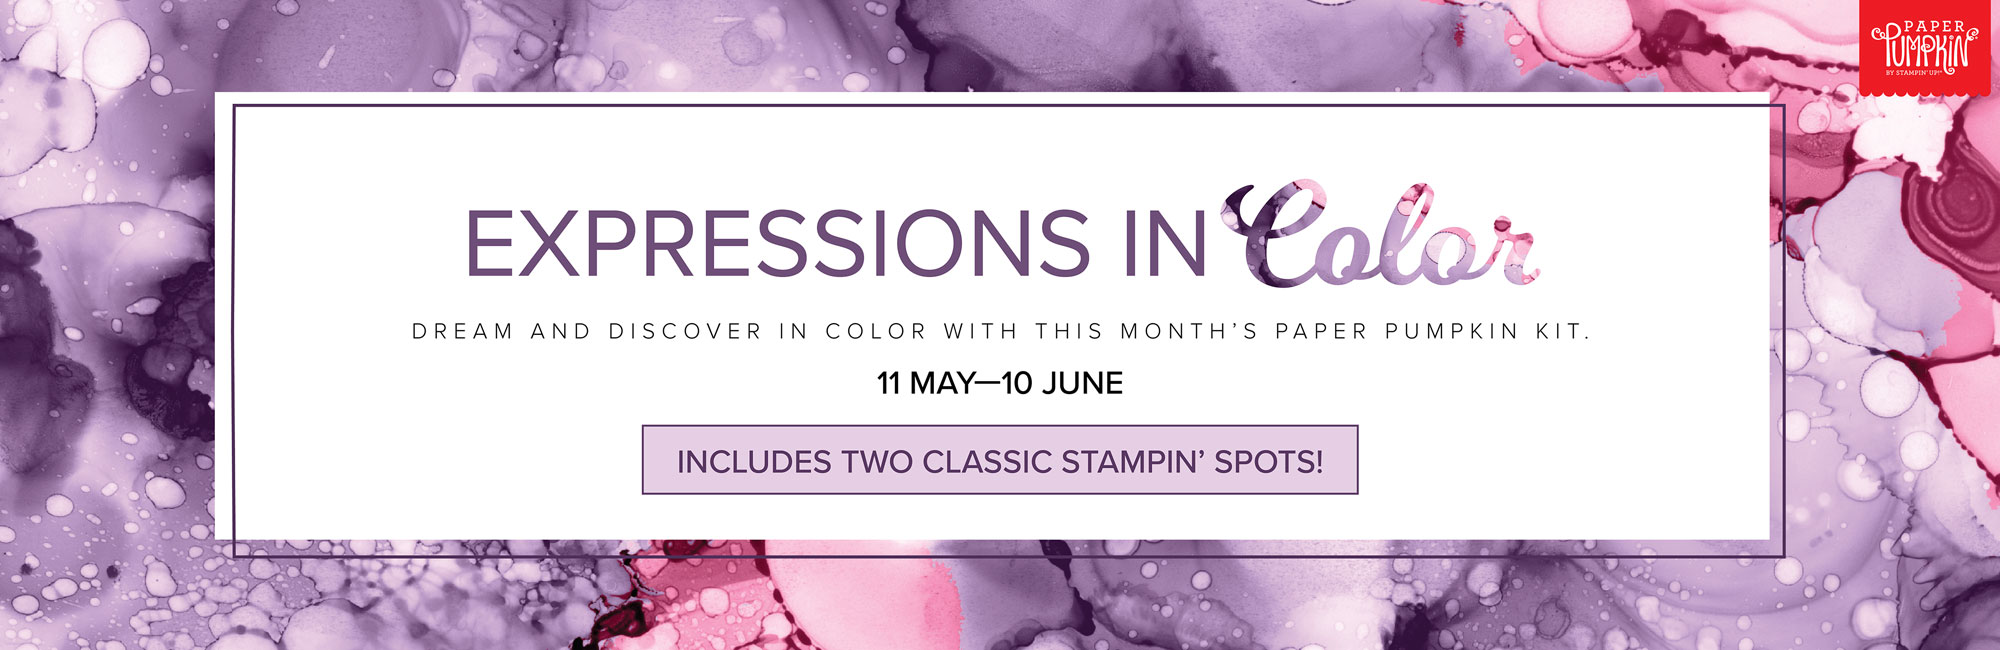
As always, this month’s kit features an exclusive stamp set. But, this month’s kit also includes not one, but two Classic Stampin’ Spots! (Little ink pads!) And to top it all off, the kit comes in a cute, colorful, and collectible box.

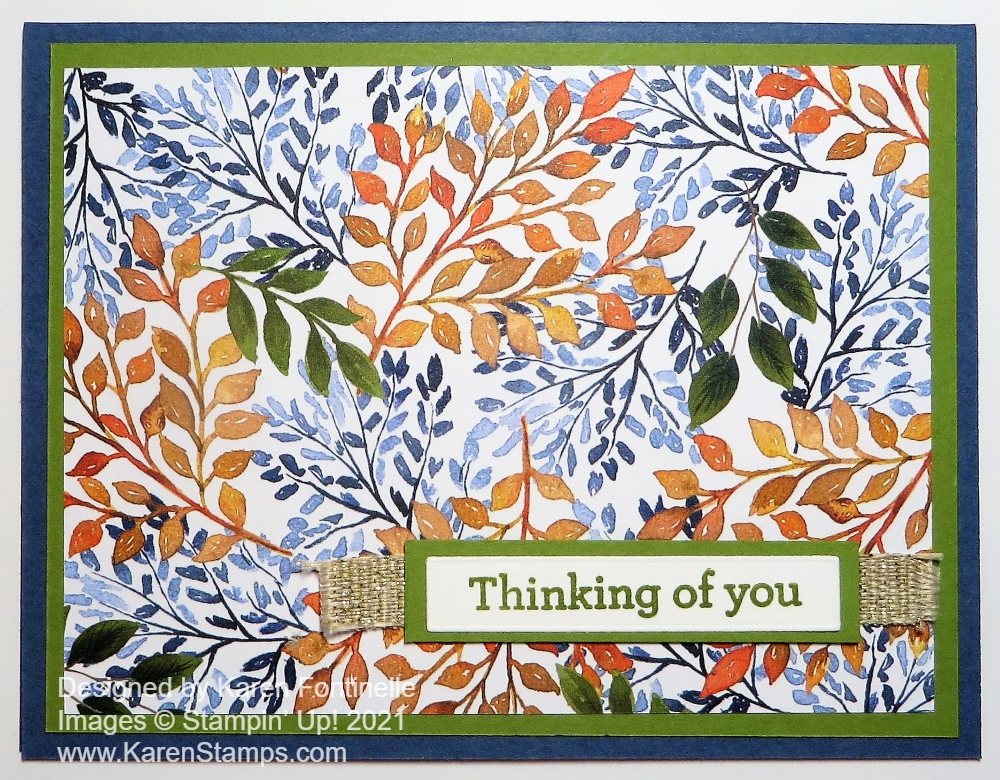
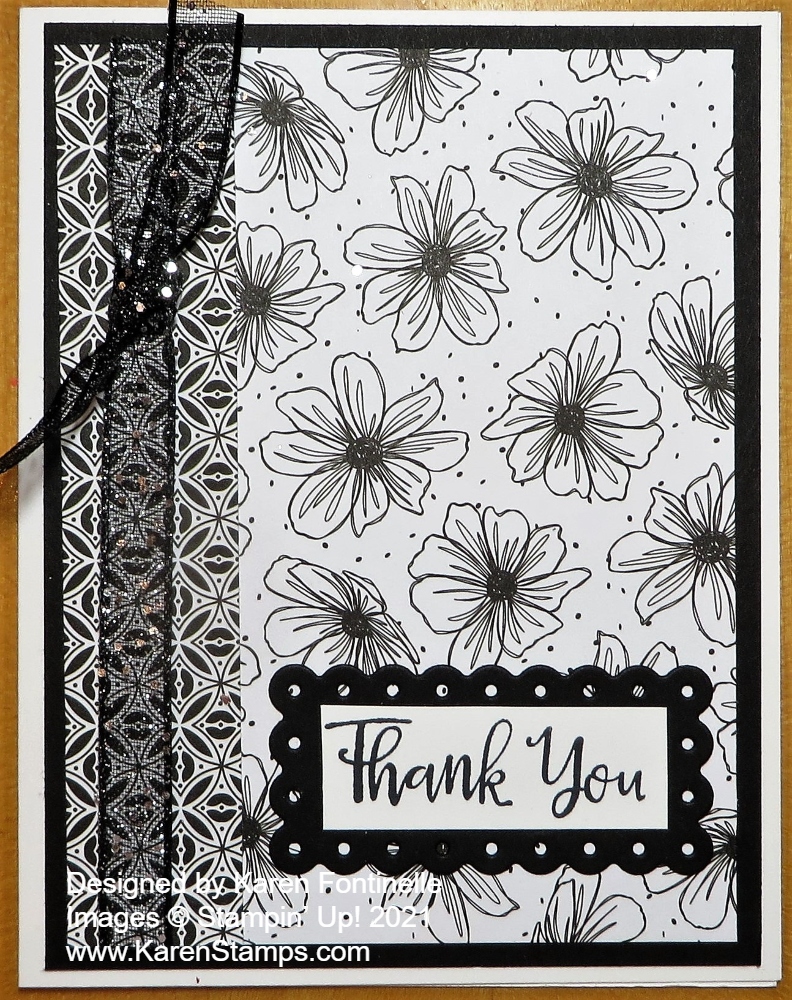
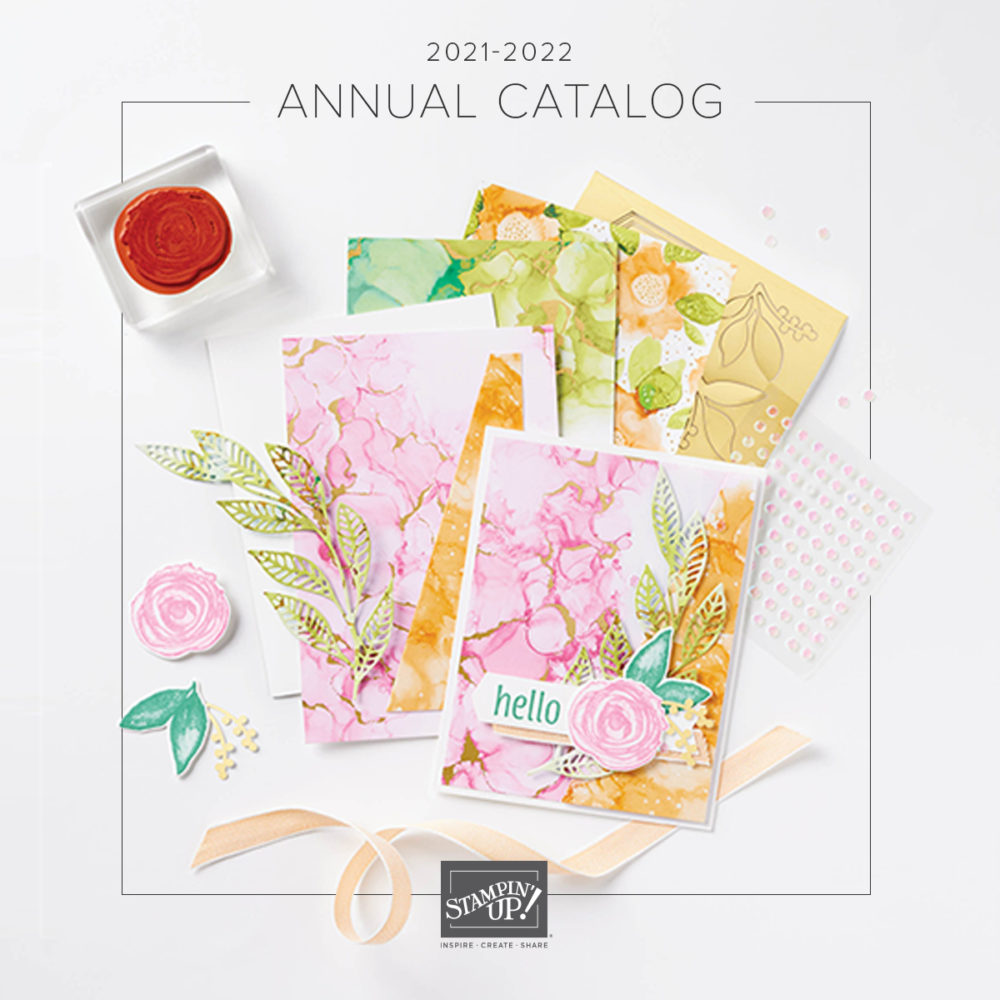
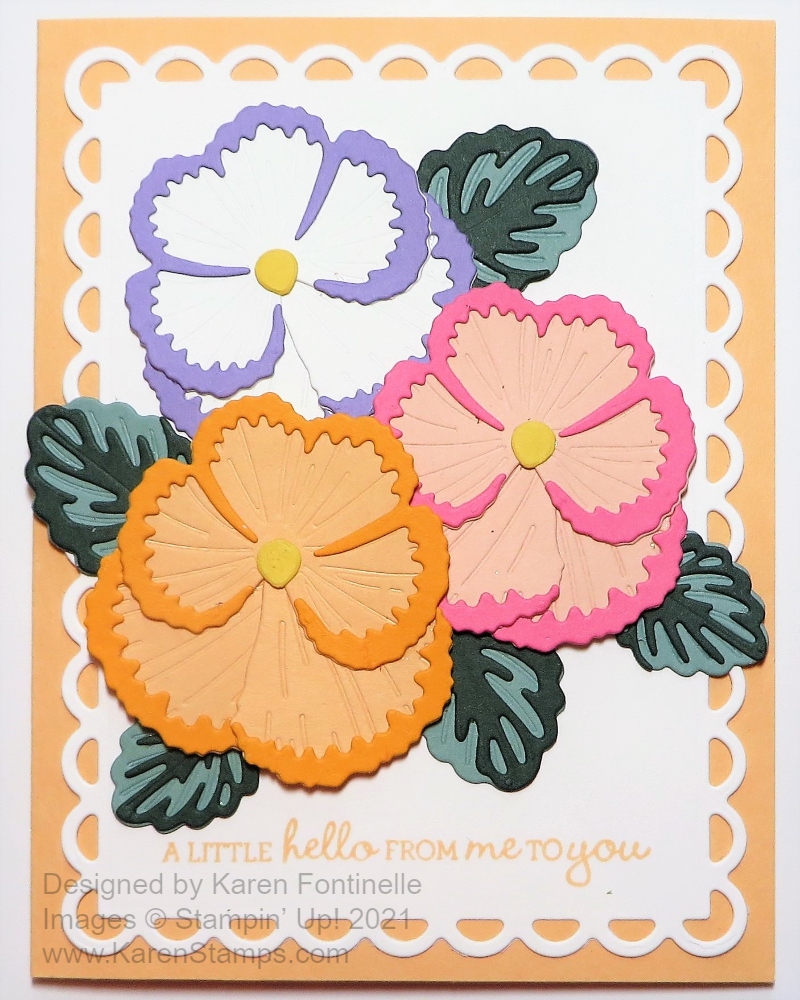
An extra bonus is that this kit coordinates with products from the Expressions in Ink Suite (item #155459) in the new Stampin’ Up! Catalog. You will find this Suite on pages 96-97. It is also featured on the front of the new catalog! This Suite jumped right off the page at me and I can’t wait for it to arrive in my order this week!! That makes the Paper Pumpkin Kit extra exciting! And if you are not ready for the whole Suite yet, you can get a taste with the Paper Pumpkin Kit!

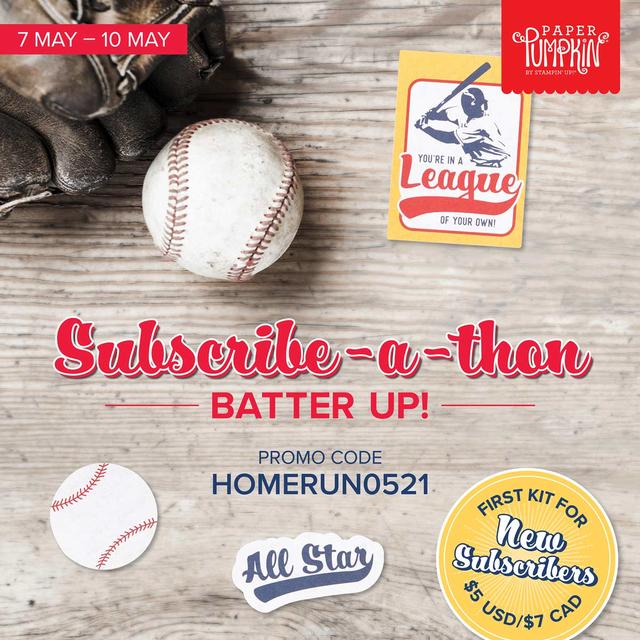
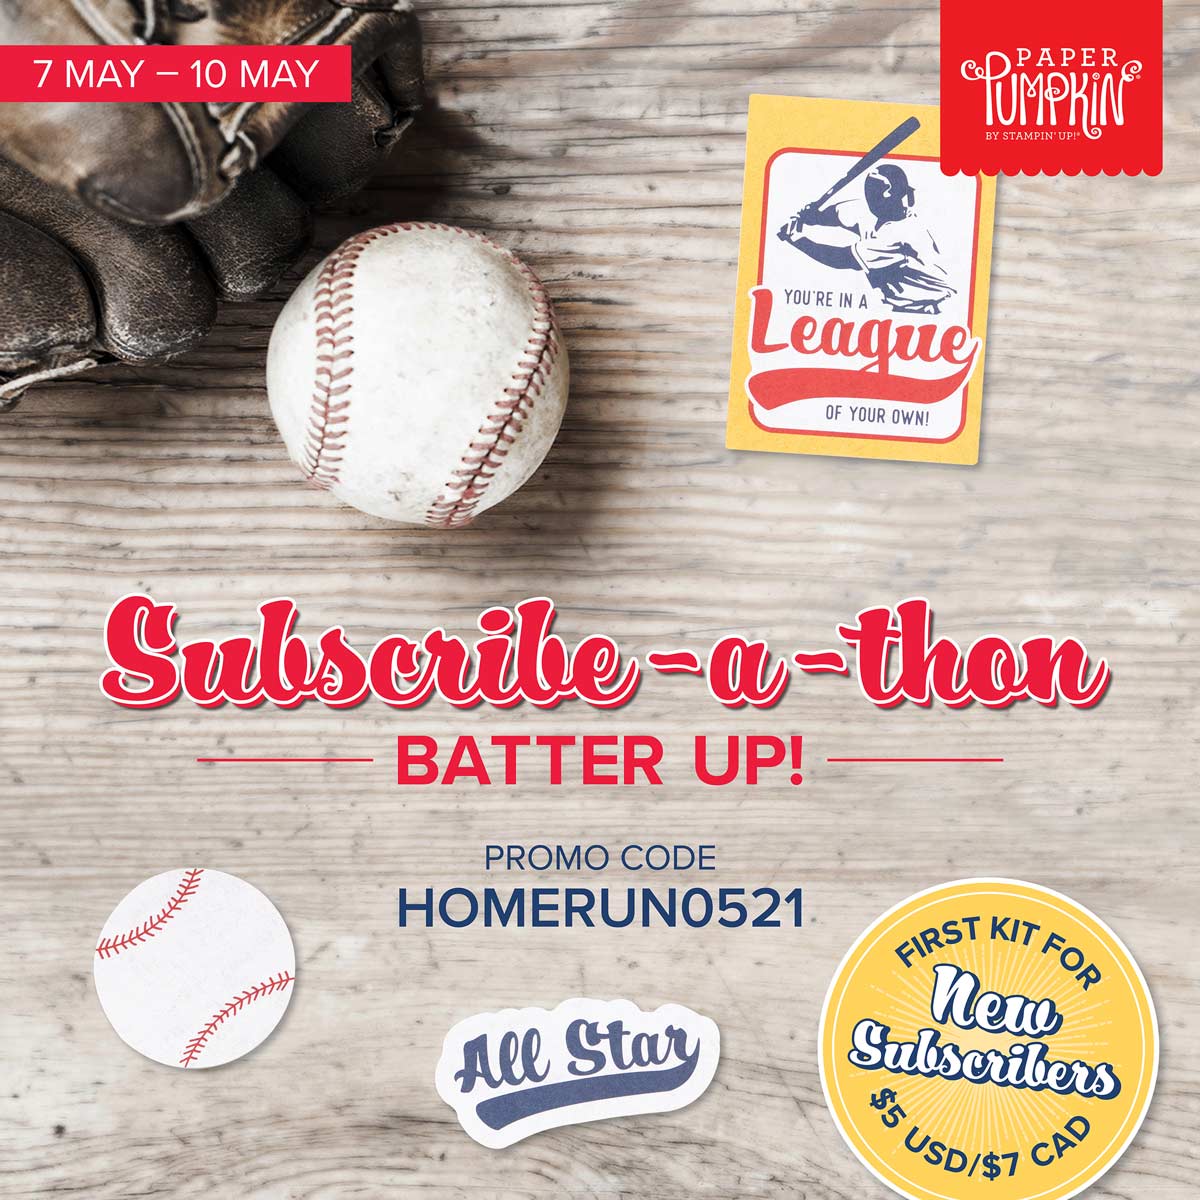
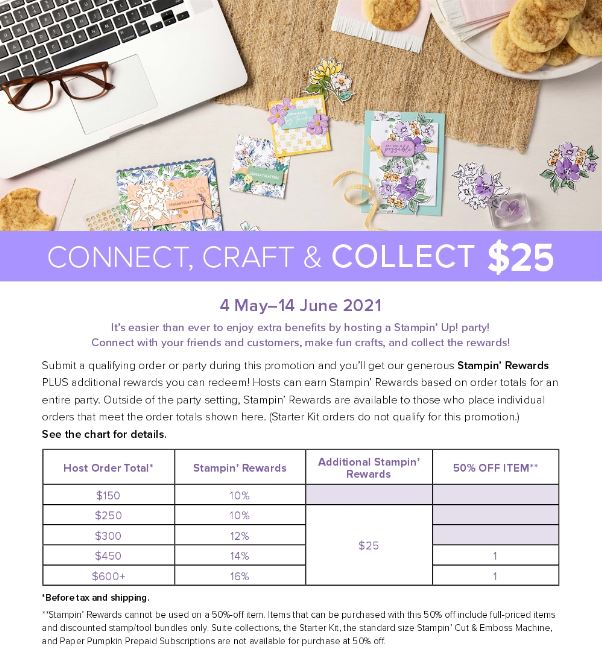
Get a taste of the new In Colors as well as coordination with the new Expressions In Ink Suite in the new catalog! Join Paper Pumpkin today and be assured your name is on the list for June’s Paper Pumpkin! OR add a Prepaid Kit or several months to your regular Stampin’ Up! order. Maybe it will help you reach Stampin’ Rewards!

JOIN PAPER PUMPKIN HERE AT MY LINK!

Paper Pumpkin Kit June 2021 Ad

Beauty of the Earth Thinking of You Card

Beauty of the Earth Thinking of You Card

There are many different designs in this designer paper, but this Beauty of the Earth Thinking of You Card with the bluish leaves and branches in it really caught my eye. You might think it has colors for fall, but I think it can be for any time. I just really love these colors all together!

I have trees on my mind because yesterday on our walk, we saw a tree at someone’s house that had broken off from the trunk and fell toward the street. Luckily it didn’t fall on their house or hurt someone walking by! Apparently it is a kind of tree that was past its age limit and should have been cut down way earlier. Since we had the big freeze in February, a lot of plants and trees have come back, surprisingly, but the advice was to wait awhile and see what would come back in the spring rather than just cut down everything that looked dead from the spring. But this big tree needed to go sooner!

This designer paper, Beauty of the Earth, has very different patterns in it and many colors! Many will be beautiful when we think of fall trees, but many you can use any time. You can use the dies to cut out the patterned paper to be the leaves on the trees. So many possibilities!

The card base is Misty Moonlight, with a layer of Old Olive Cardstock. I thought about adding one of the tree images one way or another on the front of the card, but I loved the paper so much I didn’t want to cover it up in any way.

The greeting is stamped in Old Olive and is in the Beauty of Friendship Stamp Set on Basic White Cardstock, then die-cut with a rectangle in the Beautiful Trees Dies. There are some nice sentiments in this stamp set which is always good! The greeting is layered on a piece of Old Olive and underneath I added a strip of the 3/8″ Fine Art Ribbon and frayed the ends just a little bit! This is a beautiful ribbon and I think it added a little something to the front of this card.

Save money and purchase the Beauty of Friendship Bundle with the stamp set and dies together for a 10% discount! And if you want to get “everything” – the Bundle, the Designer Series Paper, and the Bark 3D Embossing Folder, just order the whole Beauty of the Earth Suite (155843). The Bundle price is included in that.

Since the inside of the card, Misty Moonlight Cardstock, is dark, I added a Basic White layer and just stamped a tree off to the side to decorate the inside a bit and still leave room to write a message! I don’t always think to do that when I am making a card and then when I go to use the card, I have to pull out the paper and everything to add it later! Just do it when you make the card if you want a decorated inside or if the cardstock is too dark to write or stamp on.

If you like this Beauty of the Earth Thinking of You Card, be sure to check out the Beauty of the Earth Suite in the new Stampin’ Up! Annual Catalog!

SHOP STAMPIN’ UP! ONLINE HERE!

Black and White Pattern Party Thank You Card

Black and White Pattern Party Thank You Card

This Black and White Pattern Party Thank You Card is NOT the card I was planning to make AT ALL! It just happened! So when you start to stamp, you don’t really know what you are going to end up making! Even when you think you know!

I was planning to make a card with the Art Gallery Stamp Set, stamped on our new Linen Paper, and was looking for designer paper to go with the card, possibly. When I caught a glimpse of these two black and white patterns together in the package, that was it! I’ll do the Art Gallery card another time!

The card base is Basic White Cardstock with a layer of Basic Black. Then I just layered the two patterns of the Pattern Play black and white paper, one a narrow strip. I added a strip of the Black 3/8″ Glittered Organdy Ribbon and tied a knot with a smaller piece. I think it dresses up the card and makes it fun! I tried a bow but that seemed like too much with the glittery ribbon. It’s not a “fancy” card, just a fun one with the ribbon!

The “Thank You” greeting is stamped from the Peaceful Moments Stamp Set, one carried over into the new catalog. I die-cut it with the same die as the black layer underneath from the Scalloped Contours Dies. I could have measured the empty space in the middle of the black piece and then cut the white greeting piece down, but I cut the white die-cut and then used the little lines from the die-cut to cut the white piece.

I want you to know about the Pattern Party Designer Series Paper. It is a Host item which means you can only purchase it when you have a order of $150 or more. We often don’t pay that much attention to the Host items, there are also a few stamp sets, and these products are available to Hosts (or for your individual order) as Rewards at a reduced price from their value. This Pattern Party DSP is a package of 48 sheets of paper, 4 each of 12 double-sided designs. Lots of different coordinating colors and will be lots of fun to use! Just remember this package when you are placing a “Hostess” order of $150 or more. This term comes from when we had more home parties and the person holding the stamping party with her friends was the Hostess and got free merchandise based on the total for the party. Now with people ordering individually online, it also works for your own orders of $150 to choose Stampin’ Rewards. You will find this paper in the back of the catalog on page 171. You will love it!

This Black and White Pattern Party Thank You Card is easy to make but so striking with just the black and white design. You could use a plainer black or white ribbon on the side too. It would also be fun to color in the white flowers on another card! It reminds me of the True Love Designer Paper in the Spring Mini Catalog that is all black and white as on this card. Be sure to check out the Pattern Play DSP to see all the colors and patterns next time you have a large order or combine orders with friends!

Today is the LAST DAY to get the May Paper Pumpkin Kit in your mailbox with enough supplies to make 9 cards for ONLY $5.00, including shipping!! It’s a real “steal” with the baseball-themed cards so don’t “strike out” by missing it! If you have subscribed before but would like to try Paper Pumpkin again, the same email address may not work again but you could use another one. Use Promo Code HOMERUN0521.

Paper Pumpkin Batter Up Kit

JOIN PAPER PUMPKIN TODAY HERE WITH MY LINK!

Pansy Patch Card For a Special Day

Pansy Patch Card For a Special Day

This card is an easy way to make pansies if you don’t want to bother with the smaller die-cut pieces, and this Pansy Patch Card For a Special Day is perfect for Mother’s Day! Add whatever greeting you like or need for the card and it will be perfect for almost any occasion.

To make the pansy, just use the Pansy Dies to cut out the one large and two smaller pansy petals in Basic White. You could also use light colors of cardstock and still do what I did also. I used the Blending Brush along the edges of the pansy petals to color just/mostly the edges and then assembled them. I happened to use Mango Melody, but it is very light so it almost matches the paper in the background that is another color. The leaves and flower stem for the bud are Granny Apple Green. Even the two pieces of the flower bud are Basic White with just a bit of ink blended on them. If you don’t have the new Blending Brushes (so soft!) use a piece of a Stamping Sponge that you probably already have or a Sponge Dauber.

Actually, I was undecided on how I wanted to use one of the pretty Pansy Petals Designer Paper on the card. The design I have just kind of accidentally happened! I used the Bumblebee pattern for the main layer on the card and was going to die-cut a rectangle piece out of some colored cardstock. But I also wondered about the opposite side of the paper which had all these small pansies. I laid a scrap of it down on the card just to place the die-cut pansy on top and see how it would look with it but not necessarily behind it and I liked the look as it was! The pansy still stood out well enough against the print, especially when I popped it up with Stampin’ Dimensionals.

The greeting is stamped with part of the stamp in the Hand-Drawn Blooms Stamp Set and then die-cut with just the middle portion of the Banner Blooms Die where the greeting would go. Then I just trimmed the stamped banner piece away from the rest of the bouquet die-cut and flagged the plain end.

This is actually a pretty easy card to make for Mother’s Day or to send on any day!

Don’t forget about the Paper Pumpkin special going on today and tomorrow only! Get the May Kit with a baseball theme for only $5 for new subscribers (shipping included!). A great gift to give a mother who is a baseball fan!! Be sure to use the promo code HOMERUN0521 to get the $5 price!

Go to my personalized link HERE and use Promo Code HOMERUN0521.

It’s A Steal! The May Paper Pumpkin Kit For $5!

New Subscribers! Get This Kit for Only $5 plus tax!

How it Works

Paper Pumpkin has a LIMITED SUPPLY of Batter Up! kits to offer at this special SUBSCRIBE-A-THON rate.

  • The SUBSCRIBE-A-THON will start on 7 May 2021 at 12:01 AM (MT).
  • The SUBSCRIBE-A-THON promotion price for new subscribers is only $5.00 USD! (shipping included).
  • The sale will continue until all allocated kits are sold out, or until the May subscription period ends on 10 May—whichever comes first. If the allocated kits are sold out prior to the subscription period, the sale will end and the subscription price will return to normal.
  • Enter the code HOMERUN0521 before the sale ends to receive this special introductory price!
  • This promotion price will only apply to new month-to-month subscriptions; prepaid subscriptions are not eligible for the discount.

Let me know if you have any questions! Be sure to enter the code: HOMERUN0521

Here is my link to make it easy for you! Click HERE!

***********************************************

“Step up to the plate, take a swing, and knock it out of the park! With the Batter Up! Paper Pumpkin Kit, it’s your turn to go to bat for all the people who’ve gone to bat for you. This month’s timeless kit with a “throwback” theme contains enough grand slam supplies to create nine cards—and coordinating envelopes—featuring classic colors, pinwheel and pinstripe patterns, and vintage-washed paper pieces. There’s no “batter” way to root, root, root for your home team and honor the all-stars in your life!

A beloved baseball-themed kit would be incomplete without the sport’s signature, sticky snack—the official bubble gum of the MLB! A favorite in the field, the Batter Up! Paper Pumpkin Kit contains a couple sticks of the chewy staple; chew while you craft, slide a piece into a card, or save it for later.

Send a seventh-inning stretch in a classic card with all-star stripes, a nostalgic nod, and a stamp set fit for an MVP! But, before you give it all you’ve got, give this month’s promotional video a watch.”

JOIN PAPER PUMPKIN FOR ONLY $5 FOR THE MAY 2021 Kit! No risk! No obligation!

JOIN HERE!!!

Pansy Petals Happiness Card

Pansy Petals Happiness Card

Sometimes you just want to make an easy card or just let the designer paper be the main focus as in this Pansy Petals Happiness Card. Just a card base, a layer of designer paper, a greeting and some embellishment and you’re done…yet you still made a pretty card!

The Pansy Petals Designer Series Paper has beautiful patterned paper, including some ginghams and other designs on the “back” of the florals. This particular pattern with the smaller floral images really caught my eye! The card base is Soft Succulent, one of the new In Colors. Here’s another card using a different pattern of pansies paper.

I used the Polished Pink 3/8″ Open Weave Ribbon to wrap around the front of the designer paper. The bow is tied separately and adhered with Mini Glue Dots. This ribbon is just gorgeous, I think, and comes in all the In Colors. I love it!

The greeting is stamped in Polished Pink. It is one of the greetings in the Pansy Patch Stamp Set but I omitted part of the greeting. This is when sticky notes come in handy! I carefully placed the notes over the part of the stamp I did not want to use and then stamped in the ink pad. Be sure to remove the sticky note before stamping on your cardstock! Luckily I did remember! This way I could stamp just the part of the stamp I wanted.

The greeting is die-cut with just one of the Layering Circle Dies and layered on one of the scalloped circle dies. It is popped up on Stampin’ Dimensionals over the ribbon. Of course, I had to add some Polished Pink In Color Jewels to the greeting. These are already so popular they are back-ordered! But you must get them as soon as they are back in stock!

Remember, you don’t always have to make a super-fancy card. Sometimes quick and easy cards like this Pansy Petals Happiness Card are just fine!

SHOP STAMPIN’ UP! ONLINE!

When Does the New Stampin’ Up! Catalog Begin? Today!!

Catalog Cover 2021-22 Square

When Does the New Stampin’ Up! Catalog Begin?

TODAY! May 4th!!

It may be Star Wars Day (May the 4th Be With You!), but I doubt many of us care about that when we have a new Stampin’ Up! Catalog to look at and order from! You can order right now in the Online Store or contact me if you would prefer me to put in your order for you. Ask if you have any questions! Hopefully the website will run smoothly but when more and more people get on, there may be glitches but just keep trying because maybe in a few seconds you will get through.

VIEW THE CATALOG ONLINE!

Be sure to check the specials below, too!

SHOP STAMPIN’ UP! ONLINE HERE!

If you are putting in a large order yourself, remember at $150 you get to choose 10% of your total in Stampin’ Rewards, so $15 in any other merchandise you want to choose for free!

During “Connect, Craft & Collect $25”, May 4 – June 14, if you have an order of $250 or more, you can choose an ADDITIONAL $25 in free merchandise plus the Stampin’ Rewards you are already entitled to! What a deal!! Especially with a new catalog when we want so many things!

Join+ Image Info 2021

JOIN STAMPIN’ UP! AND JOIN THE FUN!

If you would like to have your own stamping business, this is a great time to join Stampin’ Up! as a Demonstrator! All you have to do is purchase the Starter Kit. Choose the products you want in your kit plus Stampin’ Up! will add business supplies, catalogs, and a Paper Pumpkin Kit. Normally you choose $125 in products and pay only $99, but during this special during May, you get to choose $155 ($30 more!) in products for only $99!

Click the link above and read about joining Stampin’ Up! and look over the form to join, but if you have any questions just ask! I’m happy to help! If you want a Demonstrator local to you, then check the Demonstrator Locator to find someone or call Stampin’ Up! and ask them to refer you to someone. Lots of us, though, have team members around the country, not just local, and we can still help you.

******************************

I hope you love this new catalog! Believe it or not, years ago when I joined Stampin’ Up! the first time anyone saw the new catalog was at the Stampin’ Up! Convention in the summer! As soon as we checked in and got our bag of stuff, we would sit down and look through the catalog! Everyone else had to wait to hear from those Demos and wait for their catalog to be mailed later. I think we have a better system now, but whatever the system or situation, a new Stampin’ Up! catalog of any kind is always so fun and exciting! Enjoy the day!

Art Gallery Linen Flower Birthday Card

Art Gallery Linen Flower Birthday Card

Something new in the Stampin’ Up! Annual Catalog 2021-22 is the Linen Paper that I used on this Art Gallery Linen Flower Birthday Card. Does this card have a different look to it than regular stamping? I think we all have lots of experimenting to do with this new product! I didn’t know such a think existed! And wait until you hear one of the features of this special paper!

The Linen Specialty Paper (155681) is on page 136, the first of the photos of products on that page. It’s easy to miss! So far I know you can stamp on it, die cut it, and blend ink on it. We will have to experiment with different colors, maybe using the Stamparatus so you can repeat the stamping to make it darker maybe, see what colors look good on the linen or not and more!

To make this card, I was pretty sure the ink color was going to turn out lighter than on regular paper. It doesn’t stamp quite as heavily as on paper, because this is fabric paper! The texture is going to keep the ink from being really smooth. I used Melon Mambo ink for the flower in the Art Gallery Stamp Set and Old Olive for the stem and leaves thinking these would be dark enough to show up well. I think the Melon Mambo stamped a little shade darker than it would have on paper. Just a different look! Then just die-cut it with the coordinating Floral Gallery Dies. The Linen Paper die-cuts just as nicely as paper, at least this first time!

Art Gallery Linen Flower Die Cut

The background I chose to put the flower on is Basic White die-cut with the Scalloped Contours Dies. These new dies will be very popular. And I didn’t even have to glue down the linen flower! The Linen Specialty Paper comes with adhesive on the back! After die-cutting, just carefully peel off the backing and you can adhere your die-cut linen piece wherever you want it! You probably should lay it out it out first to see exactly where you want to adhere it. If parts of your pieces are very thin, like this flower stem, just handle it carefully and try to place the larger parts where you want them first and then the skinnier areas.

The card base is Melon Mambo to match the flower, although, as I said, the stamped color looks slightly different than the cardstock. But it’s very close. Maybe it looked darker when I first stamped it than later on. The greeting is in the Art Gallery Stamp Set. In the end I decided to just keep the whole card simple, to focus on the linen flower. I tried all kinds and colors of designer paper as a layer under the die-cut scalloped piece and nothing looked right. I thought about added some jewels or embellishments and that didn’t seem right either! So in the end, I just left the card simple! Sometimes you have to know when to stop!

Here is a close-up of my card so you can see the Linen Specialty Paper better.

Art Gallery Linen Flower Birthday Card Closeup

How many more days until the new Stampin’ Up! Annual Catalog goes live? One!!! Tomorrow, May 4th is the day! Supposedly there will be no down time so if you want to order in the middle of the night you may be able to. However, on a new launch like this, LOTS of people like to order right away and the website will probably be a little wonky! If it crashes on you or the little thing just spins and spins, just keep trying until you catch it at the right moment….or come back a little later! It will likely be a busy day!

Today is the last day for the Last-Chance Products that are retiring! Check those out today!!

Tomorrow is the big day! Shop the NEW catalog!

SHOP STAMPIN’ UP! ONLINE HERE EVERYDAY!

Paper Pumpkin Cards So Cool Kit April 2021

A Day For Paper Pumpkin April 2021

It’s been a rainy weekend in Houston so it was a perfect day for Paper Pumpkin! I stopped everything else and opened up my new Paper Pumpkin Kit called “So Cool” for April 2021. This is the kit that was designed for children to have a fun papercrafting experience with you! But it was really just as much fun without any little ones around! It is a very cute, colorful kit! And so many alternative ideas if you want to make other designs.

With every Paper Pumpkin Kit you have the option to make the project as designed or use the supplies to make whatever you want to come up with! The kit comes to you in your mailbox each month unless you skip a month. You can cancel with no risk or obligation.

This particular kit seems to have lots of alternative ideas that other stampers have come up with. Often I like to make a few of the cards as designed for the kit and then make something different with the rest. Today I only made these cards as designed and then it was time to clear off the kitchen table for dinner! Ugh!

Each Paper Pumpkin kit costs $22.00 plus tax but includes shipping.

Sign up HERE at my personalized link. If you are looking for another Demonstrator, just go HERE to Paperpumpkin.com.

You must sign up or change your subscription by the 10th of any month.

You can also purchase a prepaid subscription to Paper Pumpkin on your regular Stampin’ Up! order! Perhaps it will help you earn Stampin’ Rewards if your order reaches $150 or more. Once you are a subscriber, you can go back and order any extra past kits or refills if you want more pieces to make with a kit you have!

Each month you get a new kit, usually cards, but it could be any number of other projects! You get a little bit of information about each kit as soon as ordering is available, but not everything about the kit until later!

Here are the cards I made with the cute “So Cool” Paper Pumpkin Kit for April.

Paper Pumpkin Cards So Cool Kit April 2021

Next up for May! The “Batter Up Paper Pumpkin Kit”! (But if you are new, wait a few days!) (Just in case!)

Die-Cut Pansies For May Day

Die-Cut Pansies For May Day

It’s May 1st and this Die-Cut Pansies For May Day Card is perfect to celebrate the day! If I went outside and walked up and down the street, I would see loads of pansies planted in neighbors’ landscaping. They won’t last in the hot weather, but so far the weather is tolerable for them. Just today I had a memory of being a little girl in Sunday School and planting or just bringing home a pansy planted in a milk carton to my mother for Mother’s Day.

As I discovered the other day, I need to play with the new Pansy Patch Stamp Set and the Pansy Dies in the new Stampin’ Up! Annual Catalog coming out on Tuesday, May 4th a little more to learn how to effectively make a pretty pansy. I’m sure it is not difficult, but I was a little unsure. Maybe I need to take photos of some of our neighbor’s pansies so I know exactly how the petals are placed!

For this card, I wanted to just experiment with the Pansy Dies and not worry about making an amazing card. I just wanted to make pansies. I decided to just die-cut a bunch of pieces and then see how they all fit together. I planned with two different shades of similar colors for each pansy, like Petal Pink and Polished Pink, Pale Papaya and Mango Melody and even just Basic White and Highland Heather for the contrasting parts of the flowers. The leaves are Soft Succulent for the solid leaf (really very pretty on it’s own because the die embosses it) and Evening Evergreen for the outline piece.

After cutting out an assortment of pieces for the pansies, I just glued, with tiny dots of Multipurpose Liquid Glue, the outline edge to the corresponding color. Each pansy flower has three pieces (at least mine do!). The top part has kind of the three areas and then the two bottom pieces are each like one petal with an outline piece along the bottom edge. I glued those two pieces together, then added the top piece. I think you want them close enough so the outlines kind of line up. There also is a die that cuts out three flower centers at once, so I used Daffodil Delight cardstock for the centers.

The leaves, of course, are simple. Just glue on the outline color…..or don’t. You could easily leave the leaves plain.

To make the card I used a base of Pale Papaya Cardstock and die cut a Basic White scalloped rectangle with the new Scalloped Contours Dies. I am really liking these dies! They go with the Color & Contour Stamp Set and you can buy the stamps and dies together in the Color & Contour Bundle and save 10%.

Then I just placed the pansies and leaves on the rectangle to see how they would fit. Since the pansies (at least mine) turned out a little large, they took up most of the room on the rectangle. There was just enough space at the bottom to stamp a greeting from the Pansy Patch Stamp Set in Pale Papaya Ink. I probably should have used a darker color as this one doesn’t show up that well with the pansies grabbing all the attention!

My advice when you get the Pansy Patch Bundle is just to get out your Stampin’ Cut & Emboss Machine and cardstock and cut out all the pieces and just play. Don’t worry about making anything, except flowers. Just play! And soon we will all be learning good tips and tricks of the best way to use this stamp set and dies I’m sure!

HAPPY MAY DAY With the DIE-CUT PANSIES!

Die-Cut Pansies For May Day Closeup