Category Archives: Cards

Butterfly Kisses Trio Thank You Card

Butterfly Kisses Trio Thank You Card

Sometimes you just want to make a quick and simple card and that’s how this Butterfly Kisses Trio Thank You Card came about. The basic card design is quick and simple. Just add a layer of designer paper to a card base, add some ribbon and a greeting, and the card is done. With this particular card, there was some fussy-cutting and die-cutting involved so some might not call that so quick and simple! But it was fun to create!

I hadn’t used the Butterfly Kisses 6″ x 6″ Designer Series Paper in a while. I always worry that we forget about the great products and ideas in the Stampin’ Up! Annual Catalog as soon as the new mini catalog comes out, whether Holiday or Spring. It’s still summer (don’t remind me!) so butterflies are still very much in style!

The card base is Fresh Freesia and I chose this happy print in the Butterfly Kisses DSP to be the background. I wrapped around a piece of Fresh Freesia 3/8″ Open Weave Ribbon before adhering the designer paper to the card base. I tied a separate bow and adhered it with Mini Glue Dots. This is an easy way to tie a good bow and not have it be crooked.

If you have the Best Butterflies Bundle or the Build a Butterfly Dies you can stamp and die-cut or die-cut certain butterflies from the designer paper. Otherwise, you can fussy-cut any of the butterflies you like from the many designer papers in the package. That’s what I did because I don’t own the dies. The butterflies are fairly easy to cut out. Some people don’t like fussy cutting, but while you concentrate on cutting out the image, it takes your mind off everything else and that is good!

The greeting is from the Celebrate You Stamp Set. I needed something small like we used to have in the retired “Itty Bitty” stamp sets! Then I die cut two banners in the Stylish Shapes Dies, one in Basic White with the greeting, and one in Fresh Freesia. I trimmed down the Basic White piece, cutting off the stitched edges so I could layer it on the Fresh Freesia banner. For a finishing touch, I added two Iridescent Rhinestones Basic Jewels to each end of the greeting.

Here is another card I made using the Butterfly Kisses Designer Series Paper.

So there you have a relatively quick and simple card to make if you don’t mind a little die-cutting or fussy cutting! I think this Butterfly Kisses Trio Thank You Card is a happy card with its pretty colors to brighten someone’s day.

SHOP STAMPIN’ UP! TODAY!

Butterfly Kisses Trio Thank You Card Closeup

Rustic Harvest Colored Leaves Card

Rustic Harvest Colored Leaves Card

I was thinking I saw this black and white leaves designer paper in the Perfectly Penciled Designer Series Paper in the Annual Catalog but it turns out it is in the Rustic Harvest beautiful pack of designer paper! When I found it I colored in the leaves and made this Rustic Harvest Colored Leaves Card! If you don’t really like coloring in papers like this, this is the technique for you! I should have timed myself but I know it probably only took me two minutes at most to color in all these leaves, even with multiple colors! So fun!

The card base is Mossy Meadow cardstock with a layer of Crushed Curry. Those are coordinating colors for the Rustic Harvest DSP. I simply used the Sponge Daubers to apply ink to the leaves…and with no worry about staying in the lines since the background is black. It would be impossible to stay within the lines with Sponge Daubers anyway, unless you were really careful. And I didn’t worry if every single area was colored. You can see some tiny white areas or places where not as much ink got applied.

Rustic Harvest Colored Leaves Card Coloring Technique

I just chose several ink colors for fall leaves and I think they worked well together. I used Mossy Meadow, Granny Apple Green, Crushed Curry, Pumpkin Pie, and a touch of Mint Macaron. I wanted some yellow and orange for my fall leaves. Sponge Daubers are easy to use. Either just hold them or stick your finger inside to use them. You can just wash out the ink after rubbing off the excess on scrap or Grid Paper. I labeled a lot of mine but you wouldn’t have to have one for each color as long as you get off as much ink (or pastels) as you can.

I used the green ribbon in the Real Red & Garden Green 3/8″ Ribbon Combo Pack. Even though it wasn’t one of the greens I used, I liked it just fine on this card. I wrapped a piece around to the back and adhered it, then used another piece of ribbon to tie on the bow. You can use a Mini Glue Dot to hold the ribbon and bow in place. After the ribbon was adhered, I adhered that piece to the card.

The greeting is stamped in Mossy Meadow on Basic White and originally cut out with the label die in the Meadow Dies. I love that scalloped label die! Since I wanted to layer it on a colored piece, I cut it by hand to make it fit on the die-cut Crushed Curry. Then as I looked through my embellishments, I chose two of the small black dots in the Classic Matte Dots to go with the black background. But I think I wish I’d picked something else! But these are fine!

I have to say after I colored the leaves on this card, I was thrilled with how they turned out!! Try it and see how it goes! Or use your Stampin’ Blends, Watercolor Pencils, ink and Blender Pen, whatever you like! So many ways to color!

Shop Stampin’ Up! Online HERE!

New Kit in the Kits Collection! Cozy & Bright!

Cozy & Bright Kit square ad

Today you will find a new kit in the Stampin’ Up! Kits Collection – the Cozy & Bright Kit! Celebrate the season with a card kit that has everything you need to wish those you love a Merry Christmas and a joyous New Year. Don’t let the holidays overwhelm you–get your all-inclusive kit and make quick multiples everyone will love!

Cozy and Bright Kit in Kits Collection

DETAILS
Kit Includes:

  • Cozy & Bright Photopolymer Stamp Set
  • Acrylic Stamp Block
  • Classic Stampin’ Spot: Poppy Parade
  • Predesigned projects 
  • Step-by-step instructions
  • Precut pieces (No prep work! Get right to crafting). Including printed die-cut sheets: sticker adhesive sheets & non-adhesive sheets
  • Makes 12 cards of 1 design
  • Gold foil accents
  • Folded card size: 5-1/2″ x 4-1/4″ (14 x 10.8 cm)
  • 12 preprinted envelopes
  • Enough adhesive to complete projects
  • Linen thread
  • A 9-7/8″ x 6-1/2″ x 2-3/4″ (25.1 x 16.5 x 7 cm) printed designer box for storage or crafting on the go

Product colors: Cajun Craze, Early Espresso, Evening Evergreen, Garden Green, Poppy Parade, Pumpkin Pie 

Cozy & Bright Kit #160338  $23 USD   $32 CAD

SHOP ALL THE KITS!

New Sale-A-Bration Choices For You!

Click Photo Above to View!

August is the second and final month of Sale-A-Bration and Stampin’ Up! has added these additional products you can choose with a $50 or more purchase! You may know that some of the items in the Sale-A-Bration brochure have sold out but here are some catalog items to give you additional choices for your FREE Sale-A-Bration item. Notice that some are at the $50 Level and some at the $100 Level.

CLICK HERE TO VIEW FLYER!

ALSO:

These two Sale-A-Bration products are BACK IN STOCK!!

RINGS OF LOVE DESIGNER SERIES PAPER

WONDERFUL WORLD BUNDLE

SHOP SALE-A-BRATION HERE!

$50 Level Products

$100 Level Products

Stylish Sketches Fox Card

Stylish Sketches Fox Card

Happy August! August means one more month of Sale-A-Bration at Stampin’ Up! so I thought I would post this Stylish Sketches Fox Card made with a FREE Sale-A-Bration stamp set. There are a few things sold out in Sale-A-Bration choices but I expect to hear something about that today or tomorrow so stay tuned.

I wasn’t quite sure what to do with this fox, but I know my son likes foxes so I’m sure I can send this card to him! I initially thought there isn’t much to this Stylish Sketches Stamp Set, so maybe I should make the stamped area a little smaller. This stamp set has “sketches” of the fox, two geese, leaves, and if you happen to notice, some tiny dots that are good for texture for the ground, perhaps.

The card base is Cajun Craze and after working on the card for a while, and noticing those tiny dots, I decided to stamp those around the border on the card base. The front of the card is stamped on Basic White and layered on Granny Apple Green cardstock.

The Basic White piece is 4 1/4″ x 3″. The Granny Apple Green layer is 4 1/2″ x 3 1/4″. That makes for a smaller stamped area for the fox and a wider border on the card base. The fox is stamped in Memento ink and colored in with Light and Dark Cajun Craze Stampin’ Blends. The grass on the stamp plus the area underneath is all colored with Light and Dark Granny Apple Green Blends, plus stamped with those little dots in green also. I colored around the fox with Light Pool Party Blend marker to resemble the sky. There is nothing artistic about it, I just scribbled back and forth! It matches the “sketchiness” of the way the fox was drawn! I felt it still needed something, so I stamped the bundle of leaves in Granny Apple Green ink and colored it very lightly with ink and a Blender pen. I wanted the leaves up there in the corner to add a little something to the picture but be very subtle.

For a greeting, I decided to tie around a piece of Linen Thread underneath the fox, two times around the Basic White piece, and tied on a greeting. Obviously, I needed a small greeting and I found one in the Cup of Tea Stamp Set. I stamped the little tag shape and the greeting, then just cut around the tag rather than diecut it. I put a Stampin’ Dimensional underneath it to hold it in place and face up.

Sale-A-Bration runs through the end of August! With every $50 purchase, you can choose a FREE Sale-A-Bration item and with a $100 purchase, you can choose two $50 level items or one $100 level item. With a $150 order, you can choose Stampin’ Rewards of 10% PLUS Sale-A-Bration items!

SHOP STAMPIN’ UP! ONLINE HERE!

Christmas Wishes Banner Card

I wanted to make another Christmas card sample so I copied a design in the Holiday Mini Catalog on page 11. I found just the Real Red card base and the striped paper already cut so I just started with that even though the sample design uses a green stripe paper. I was happy with my Christmas Wishes Banner Card when I finished. That red glimmer paper really adds some pizzazz!

The green paper in the background is just another of the Sweetest Christmas Designer Series Paper designs that I put under my card for the photograph, but I kind of like it if I wanted to make a card with that as the layer if I made the center part smaller!

As I said the card base is Real Red with a striped layer of the Sweetest Christmas DSP. The center piece is Basic White cardstock, stamped with leaves, with a die-cut banner overlaid, and some glimmer paper on the top and bottom.

Here are the details! The Basic White piece is 4 1/2″ x 2 3/4″. I stamped various leaves and stems in the Christmas Banners Stamp Set. I used Garden Green, Soft Sea Foam, and Mint Macaron in for the greenery and Soft Suede and Real Red for the stems of berries. I love how those turned out! The berries and stem are two different stamps so you don’t have to color directly on the stamp to get two colors. As I stamped the greenery and berries, I just imagined the banner going across the middle so I didn’t have to worry about how it looked underneath. You can see in the photo below how I stamped all of that.

Christmas Banner Card Stamping

The banner is stamped in Garden Green ink with the greeting words stamped in Real Red. The banner was diecut with the Christmas Banner Dies. You could just place the banner over the center of that stamping, but I noticed the catalog sample looked like it had ribbon underneath it. I used the green ribbon in the Real Red & Garden Green 3/8″ Ribbon Combo Pack. It just goes across and back and then back to the other side so that you can see a loop at each end of the banner. I added some Stampin’ Seal on the back of the banner so I could adhere the ribbon going back and forth and back, then popped up the whole banner with Stampin’ Dimensionals.

Before adhering the piece to the front of the card, I added two scrap pieces of red glimmer paper from the Real Red & White 6″ x 6″ Glimmer Paper to the top and bottom of the center piece. I cut the glimmer paper at 4″ x 5/8″ and adhered to the white cardstock, then adhered the whole thing to the card front.

The sample in the catalog has a little bow tied with one of the Flat Jingle Bell Trinkets. You could also add some jewels if you wanted to, such as the Red Rhinestone Basic Jewels.

Even if you copied this sample, there are ways you could change things up a little if you wanted. It at least helps you to get going to copy something!

Shop Stampin’ Up! Online HERE!

Slimline Painted Christmas Banner Card

Slimline Painted Christmas Banner Card

I remembered that one of the Christmas papers in the Holiday Mini Catalog is a returning one, Painted Christmas! And I have it from last year so I was anxious to try it out again! After pulling out all the papers and some coordinating colors of cardstock, I came up with this Slimline Painted Christmas Banner Card, much to my surprise!

I say “much to my surprise” because I didn’t imagine I would be making a slimline Christmas card! But you never know what you may come up with! As it turned out, from the pieces of designer paper and scraps of cardstock, it just seemed like they would fit well as a slimline card! This is even a fairly large one that could be used if you wanted a lot of people to sign the card!

The card base is 8 1/2″ x 7″, folded in half so the width is 3 1/2″. I used Pear Pizzazz cardstock. The layer of Painted Christmas Designer Series Paper is 3 1/4″ x 8 1/4″.

For the greeting, I decided to use the Christmas Banners Stamp Set. I stamped the banner in Real Red ink, diecut it with the Christmas Banner Dies, then stamped the words. You could do all the stamping before die-cutting. The stamp set and dies can be purchased together as the Christmas Banners Bundle so you can save 10%. I thought the banner might need a background to stand out better so I used Real Red cardstock to die cut a Stitched Rectangle. You might notice it is longer than the actual die. I used that technique to partially cut the rectangle, then stop and move the die down longer, lining it up with the already cut die-cut lines. You will feel it fit in there. But don’t roll that end of the die through the Stampin’ Cut & Emboss. Start it farther down and then roll the platform past the longer end. If you try it, you will figure it out! It always takes me a minute to remember how it works, but it’s a good technique when you want a longer die.

Next, I stamped and diecut lots of the leaves and stems in the Bundle to decorate around the greeting. I even found a scrap of gold foil in my little pile so I used that for a little gleam on the card. The banner greeting is popped up on Stampin’ Dimensionals® and the stems can be slid a tiny bit underneath the banner around the sides. Just lay around with the pieces that you have and see what looks good. For a finishing touch, I added some Red Rhinestone Basic Jewels.

This card will fit into one of those long business envelopes or you can use the Slimline Envelopes in the Annual Catalog. Here is another slimline card, but much smaller, in this post. That one is 3″ x 6″ but I think that’s a good size too. Just make your cards to fit the envelope you have! We are past July 25th so it is LESS THAN five months until Christmas! I hope this Slimline Painted Christmas Banner Card offers you some inspiration for a holiday card!

SHOP STAMPIN’ UP! ONLINE HERE!

True Beauty Flowers on Rings of Love Paper Card

True Beauty Flowers on Rings of Love Paper

I was surprised to find the background of this card was the design on the back of the paper I used to make the gift bag on yesterday’s post. That side of the paper looks so “fallish” and this side of the paper is light and “springish”! But it caught my eye and I thought it would make a pretty card! And that’s how this True Beauty Flowers on Rings of Love Paper Card began!

I chose Petal Pink for the card base as it is one of the coordinating colors for the Rings of Love Designer Series Paper. This paper is one that is FREE during Sale-A-Bration with a $50 purchase of any Stampin’ Up! products. There’s only a little more than a month left of Sale-A-Bration! I chose Pear Pizzazz cardstock for a layer under the designer paper. This pattern of the designer paper has a soft background of pink and yellow with printed leaves and stems scattered around. While I was trying out some ribbons to use on the card, I came across a stack of already stamped and die-cut flowers and leaves from the True Beauty Stamp Set. I played around with those on the card and came up with this design! Some of the flowers and leaves are popped up on Stampin’ Dimensionals and some are adhered flat on the card.

The greeting is stamped from the Celebrating You Stamp Set (a fantastic one for sentiments!) in Pear Pizzazz Ink. I used the die in the Meadows Dies to cut out the greeting. It is popped up on Stampin’ Dimensionals also.

For the finishing touch, I looked through all my embellishments and decided on the 2021-23 In Color Opal Rounds. I just chose colors that didn’t match the flowers for the flower centers and a little bling. I also love the Brushed Brass Butterflies and had to stick one on the card by the flowers!

Sometimes it is a surprise what goes together when you make a card or what you come up with that is unexpected! If you have trouble coming up with a design just look through your designer papers or samples in the Stampin’ Up! catalogs to copy or to wake up your inspiration!

SHOP STAMPIN’ UP! ONLINE HERE!

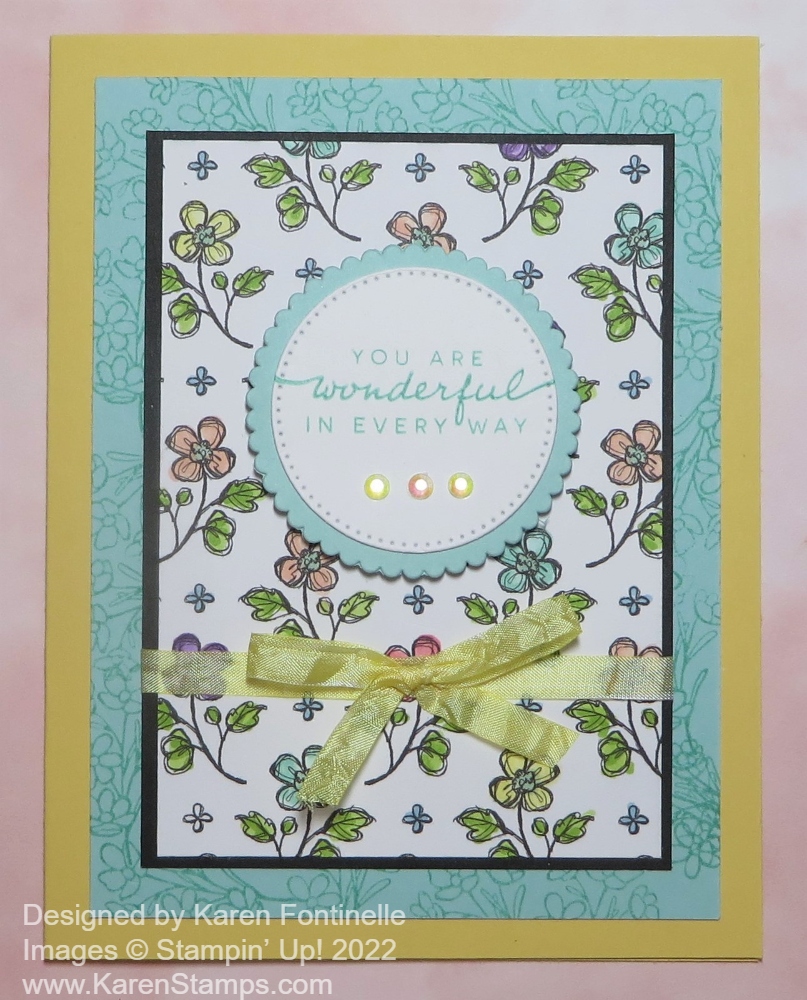
Rings of Love You Are Wonderful Card

Rings of Love You Are Wonderful Card

If you want some pretty fall paper with which to make a card like this Rings of Love You Are Wonderful Card, then browse through the current Stampin’ Up! Sale-A-Bration brochure and check out this designer paper! You can earn it FREE with a $50 Stampin’ Up! purchase! You’ll find it on pages 6-7. It’s the Rings of Love 12″ x 12″ Designer Series Paper and has so many usable patterns. There are images of cottages, mushrooms, acorns, birds, tree rings, and flowers. So interesting and so pretty!

This card is so quick and easy to make! You could use almost any of the patterns in the designer paper package and use this card design. You could make the card fold any way you like, but I put the fold at the top for a change. Cut the sheet of cardstock in half lengthwise at 4 1/4″ (half of 8 1/2″, the width of the cardstock) and score at 5 1/2″ for the fold.

The card base is Parakeet Party, which is really a BRIGHT color! I used a layer of Poppy Parade underneath the Rings of Love Designer Paper. The Poppy Parade color is on the designer paper. I just love this sheet of designer paper! Such pretty designs with mushrooms, berries, and leaves plus a butterfly!

For the greeting, I used a strip of Basic White cardstock about 3/4″ x 3 3/4″. The stamped greeting is in the Celebrating You Stamp Set. It is stamped in Poppy Parade ink and off to the right side a little bit. Then it was layered on a wider strip of Poppy Parade.

For a final touch, I added some of the Adhesive-Backed Seasonal Sequins. They are Sweet Sorbet in color but they still look good on the card!

One interesting this about this Sale-A-Bration paper besides being free with a $50 purchase, is that it coordinates with the Ringed With Nature Bundle in the July-December 2022 Mini Catalog (Holiday Mini Catalog) on page 62. So if you purchase that Bundle that comes with the Hybrid Embossing Folder and 16 dies, you can choose this Rings of Love Designer Series Paper FREE and make all kinds of cards and projects with all these coordinating products!

SHOP STAMPIN’ UP! ONLINE HERE!

Watch the Sale-A-Bration Videos!

Sale-A-Bration Cover July-Dec 2022

We are already three weeks into Stampin’ Up! Sale-A-Bration 2022, the second one of the year! Sale-A-Bration is probably the oldest promotion Stampin’ Up! has, continually improving since the beginning when there were less choices than we have now! Sale-A-Bration is an opportunity to earn FREE products in the Sale-A-Bration brochure with every $50 purchase (before shipping and tax). No limits! With every increment of $50 on your order, you can choose a free product. You can choose a few special ones with a $100 order instead of two $50 level ones. With a $150 order, you also earn Stampin’ Rewards starting at 10% PLUS Sale-A-Bration products! With a $300 order, you receive the Perfect Pomegranate Stamp Set FREE.

Here are some videos you may watch to learn more about the Sale-A-Bration options!

ENJOY!

Hippest Hippos Ballerina Card

Hippest Hippos Ballerina Card

The Hippest Hippos Stamp Set in the Sale-A-Bration brochure is one of the fun stamp sets available! If you are looking for something cute and whimsical, animals usually fill the bill. I picked this hippo with her tutu to be my first card using this set, the Hippest Hippos Ballerina Card. You can use one hippo at a time or all three of them at once.

This card has Pool Party for a card base and a layer of Basic White underneath the designer paper just to help set it off. The designer paper is in the Design a Daydream 12″ x 12″ Designer Series Paper. You can find this paper at the very tip top of page 179 in the Stampin’ Up! Annual Catalog as a Host Reward you can choose with a $150 or more order. There was one like it in last year’s Annual Catalog…a giant package of designer paper, 48 sheets, 4 each of 12 designs! The catalog says 12 sheets but that is incorrect, you do get 48 sheets of 12″ x 12″ paper!! Just think of the projects you can make! I liked this dotted circle design in the package, but it was difficult to choose!

The ballet hippo is stamped in Memento ink on Basic White cardstock and colored in with Stampin’ Blends. Then I diecut the hippo with one of the circles in the Stylish Shapes Dies and cut the next largest circle out of Petal Pink. If you layer any of these circles on top of each other the margin is a little big so I decided to just offset the Hippo circle to the side. After adhering the Basic White layer and the designer paper to the card base, I popped up the hippo focal point with Stampin’ Dimensionals.

For the greeting I used one in the Hippest Hippos Stamp Set to go with the ballerina! It is stamped on Basic White with Memento ink and the die cut with one of the small Stylish Shapes Dies circles. I put Dimensionals on the back of it but off to the lower right side since it would overlap the larger circles with the hippo. To make it stand out a little bit without a layer, I just used the brush tip of my Light Pool Party Stampin’ Blends Marker to make a colored edge around it very lightly and carefully.

To finish the card, I had to give the ballerina a little rhinestone necklace and a few rhinestones scattered on the card. On the inside, I added a layer of Basic White on which to stamp or write a message. I had just a very narrow scrap of designer paper so I adhered that to the left side of the white insert. Even just that little bit of paper added something!

Remember, Sale-A-Bration runs through the end of August. With every order of $50 or more in merchandise, you get to choose a free product in the Sale-A-Bration brochure! No limits! Check out the Sale-A-Bration brochure HERE.

There are lots of good choices during Sale-A-Bration! Maybe you will choose the Hippest Hippo Stamp Set. There are also Hippo Dies available if you can get both the stamp set and dies with your order amount.

SHOP STAMPIN’ UP! DURING SALE-A-BRATION! GET FREE STUFF!

Creativity Now Splendid Thoughts New Life Together Card

Creativity Now Splendid Thoughts New Life Together Card

Last month Stampin’ Up! offered a virtual event for Demonstrators called “Creativity Now”. It was all stamping, no business, as they said. Just a gathering of Demonstrators from all over, stamping together following different presenters making several cards plus a couple of interviews with designers talking about the Splendid Day Suite and the Sweetest Christmas Suite. I always love “behind the scenes” information! I didn’t get to watch and stamp live last month but I did get to catch up and watch the recording and make most of the cards. This card, Creativity Now Splendid Thoughts New Life Together Card, is the first one that was shown.

This card sort of fits into “Watercolor Month”. Although it’s not really watercolored, it has that look in the background made with Stampin’ Blends markers rather than true watercoloring. The card base is Soft Sea Foam cardstock with a layer of Basic White cardstock and a piece of the Splendid Day Specialty Designer Series Paper. We started with the Basic White piece on which we “scribbled” light and dark colors of Pool Party and Fresh Freesia Stampin’ Blends markers. The top half of the Basic White is colored with the Light Pool Party and the bottom half (not quite out to all the edges) with Light Fresh Freesia. Then halfway down the Light Pool Party, it is colored with Dark Pool Party down to the Fresh Freesia. Likewise, the Light Fresh Freesia is half-colored with Dark Fresh Freesia. We were told just to scribble back and forth and you could do this as solidly or less solidly as you liked. If you wanted to, you could have used water and ink to achieve the same look. Just be cautious on Basic White so that you don’t get too much water.

After coloring the bands of color on the Basic White piece, we stamped the bee in the stamp set a couple of times, randomly, in upper and lower halves both in Pool Party ink and Fresh Freesia ink.

The greeting is stamped with one from the Splendid Thoughts Stamp Set in Fresh Freesia ink on a piece of Basic White, then the ends were “flagged” with Paper Snips. On the back of this sentiment piece, an 8″ piece of Soft Sea Foam Ribbon is folded in half and adhered to the back with a loop on the left side and the ribbon tails hanging out on the right side. The ribbon can be secured with Stampin’ Dimensionals.

We also used the Splendid Stems Dies to die cut two of the leafy stems in Soft Sea Foam. These are adhered to the back of the greeting, top and bottom, using Mini Glue Dots. This greeting piece is adhered to the center of the Basic White piece. Then this Basic White piece is adhered, at an angle, to a piece of the Splendid Day Specialty Designer Series Paper. We used the Fresh Freesia print side of one of the patterns, not the foil side. Then this layered piece is adhered to the card base popped up on Stampin’ Dimensionals. It is adhered at an angle. The presenter said she tried to place it so that the Basic White top piece is straight and then the designer paper underneath is angled slightly. You can do that or have it all straight as we usually do it.

You can take this idea and change it up a bit. Add a different greeting, different diecuts, color in the background with true watercoloring or different colors or even blocks of cardstock, stamp a random design on the card base, add some bling! So many possibilities, yet this card is soft and beautiful just as it is. It could be an engagement or wedding card or change the greeting for another occasion. This design idea is very versatile.

I think this Splendid Day Suite is kind of a sleeper in the Holiday Mini Catalog that might be overlooked. The designer paper is just gorgeous and the coordinating colors make for soft, colorful, and even relaxing impressions. There are lots of choices in the stamps and dies for leafy stems or stamped images. Be sure to check out the Splendid Thoughts Bundle for a savings of 10% if you want both the stamp set and dies. If you also want the designer paper and embellishments of Soft Sea Foam Ribbon and Open Leaf Trinkets, then just order the whole Suite!

Shop Stampin’ Up! Here!

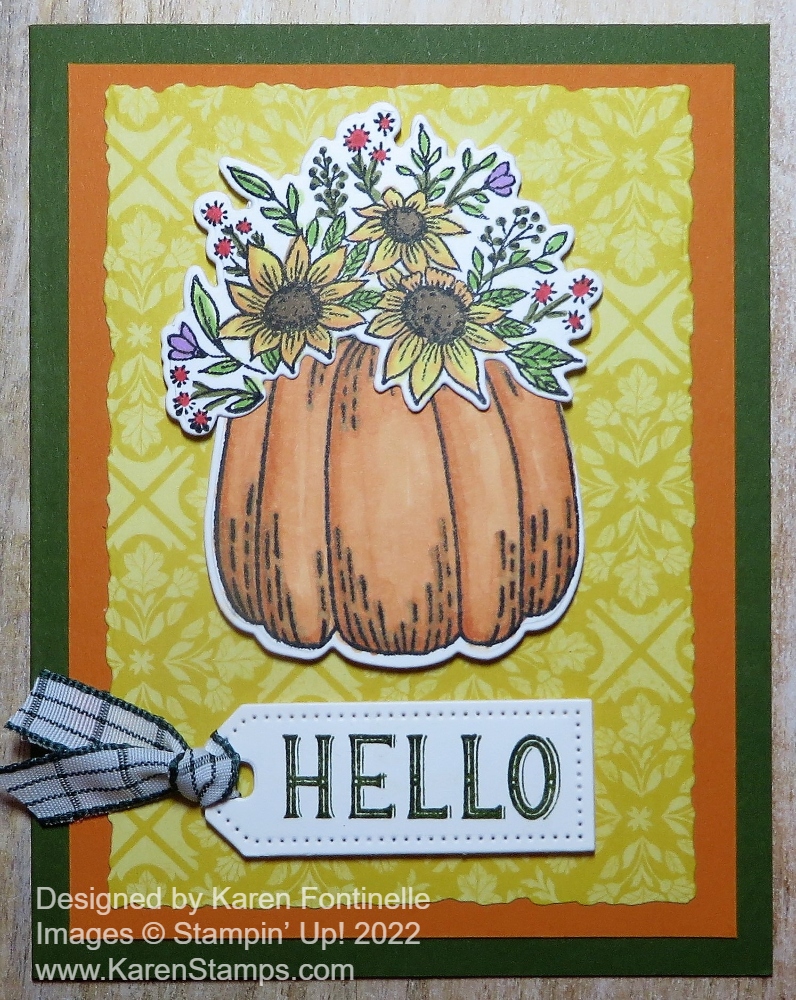
Hello Harvest Pumpkins Card

Hello Harvest Pumpkins Card

This Hello Harvest Bundle in the new Holiday Mini Catalog is right up my alley because I love fall, pumpkins, and Halloween! This Hello Harvest Pumpkins Card is not for Halloween necessarily but you could make it look that way. For now, this is just a pretty fall card that you could send anytime during the fall for a birthday or just a “thinking of you” kind of card and certainly for Thanksgiving. Not to mention using the pretty pumpkins for fall or Thanksgiving treats and favors if you like to make those!

This card has a card base of Early Espresso cardstock and a Very Vanilla layer. I don’t use Very Vanilla that often but this card idea seemed to call for it. I stamped two of the pumpkins directly on the Very Vanilla card front and spaced them apart a little bit. If I had spaced things a little better on this card, I would have stamped the pumpkins a little lower on the card to allow more space for the greeting at the top. But it is still okay as is.

The middle pumpkin is stamped on a Very Vanilla scrap and die cut using the Rustic Pumpkin Dies. I colored the pumpkins with Light and Dark Pumpkin Pie Stampin’ Blends and the middle one with a bit of Cajun Craze. Then the middle pumpkin is popped up on Stampin’ Dimensionals®. I also die-cut the little curly-cue stems in Old Olive cardstock and adhered those to the pumpkins plus a little flower that is in the stamp set.

The greeting is stamped from the Hello Harvest Stamp Set. There are some nice greetings in that set. It is stamped in Early Espresso ink on Very Vanilla then diecut with the little banner piece in the Scalloped Contours Dies. Next, I trimmed off the scalloped edges and die-cut another banner piece in Old Olive and layered the greeting on that. It is also popped up on Stampin’ Dimensionals.

For a little grounding for the pumpkins, I very lightly scribbled in some Light Soft Sea Foam Stampin’ Blends under the pumpkins across the bottom of the card. It is literally scribbled lightly, not heavy-handed coloring. On the inside of the card I would suggest putting a layer of Very Vanilla maybe stamped with a little something from the stamp set since the Early Espresso is too dark of a color on which to write.

If you like fall, you will really like this Hello Harvest Bundle and maybe even the entire Rustic Harvest Suite Collection!

Check it out in the Stampin’ Up! Online Store HERE!

Splendid Thoughts Sale-A-Bration Card and Envelope

Splendid Thoughts Sale-A-Bration Card and Envelope

Just as I had made this card using the Sale-A-Bration Pool Party & Soft Sea Foam Cards & Envelopes I saw that Stampin’ Up! had an update that this product was SOLD OUT! Ugh!! It was a great product to have a package of card bases and decorated envelopes ready to go….for FREE! However, we can still make something similar on our own with designer paper, half a sheet of cardstock, and an envelope!

Although I used one of those card bases, you can simply use a very light designer paper background or stamp your own background on Soft Sea Foam cardstock.

I used the Splendid Thoughts Bundle in the Holiday Mini Catalog to decorate this card. The die-cut flower pot is the Texture Chic Specialty Designer Series Paper. I thought it looked fancy with the gold foil design on it plus has a little distressed look to it like a flower pot might have. The rest of the plants are all die cut with the Splendid Stems Dies. There are more dies for stems and leaves than there are stamps in the Splendid Thoughts Stamp Set so you get a lot extra with the dies! In fact, if you needed to save money, you could just purchase the dies to make the stems and leaves and cut out cardstock or do your own coloring. Be aware that the stamps that you would think would color the leaves and flowers(?) of the other stem do not line up with the outline and that’s how they are supposed to be! Maybe a more modern look? It’s fine, but just know that your stamp is not defective or that you’re not crazy!

I popped up the pot on Stampin’ Dimensionals just at the bottom so I could stick in the plants wherever I wanted from the top. I had two that I stamped and overstamped with the “coloring in” stamp and the others were simply diecut from cardstock. I cut quite a few extras so I could play and arrange them in different ways. With this set, as long as you are diecutting some of the plants, do extras and keep them on hand! Some of the stems I cut shorter to fit properly.

I already had the second half-circle die cut in my cardstock in Soft Sea Foam cardstock so I copied a sample in the catalog and stamped a greeting on it. There are very nice sentiments in this Splendid Thoughts Stamp Set. Then I used Stampin’ Dimensionals on the right side of the piece so it could overlap the flower pot and be even. I also added some Iridescent Rhinestone Basic Jewels for a little bling!

If you wanted to decorate the inside of the envelope, just stick a piece of designer paper inside and then you’ll have to trim by hand the top portion to follow the line of the envelope flap but below the glue portion….or cover the flap entirely and add your own glue to mail the envelope. Or easier, adhere the designer paper to the outside of the flap and then trim around the flap to cut off the excess designer paper. A friend I sent a card to the other day noticed and asked about the flap of the envelope I had decorated in that way!

These card bases and envelopes may not still be available during Sale-A-Bration, but you can still make cards in Soft Sea Foam and Pool Party for sure! Remember to shop in increments of $50 if you can during Sale-A-Bration so you can earn the products you want in the Sale-A-Bration Brochure! If you have a large enough order, you may be able to choose $100 level products or mix in some $50 level and a $100 level! Nice choices!

SHOP STAMPIN’ UP! TODAY!

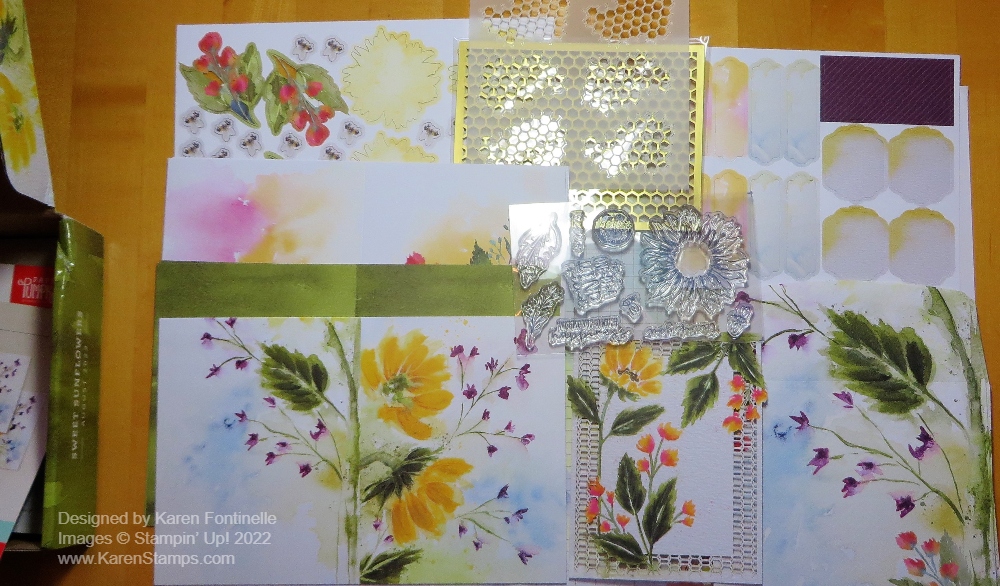
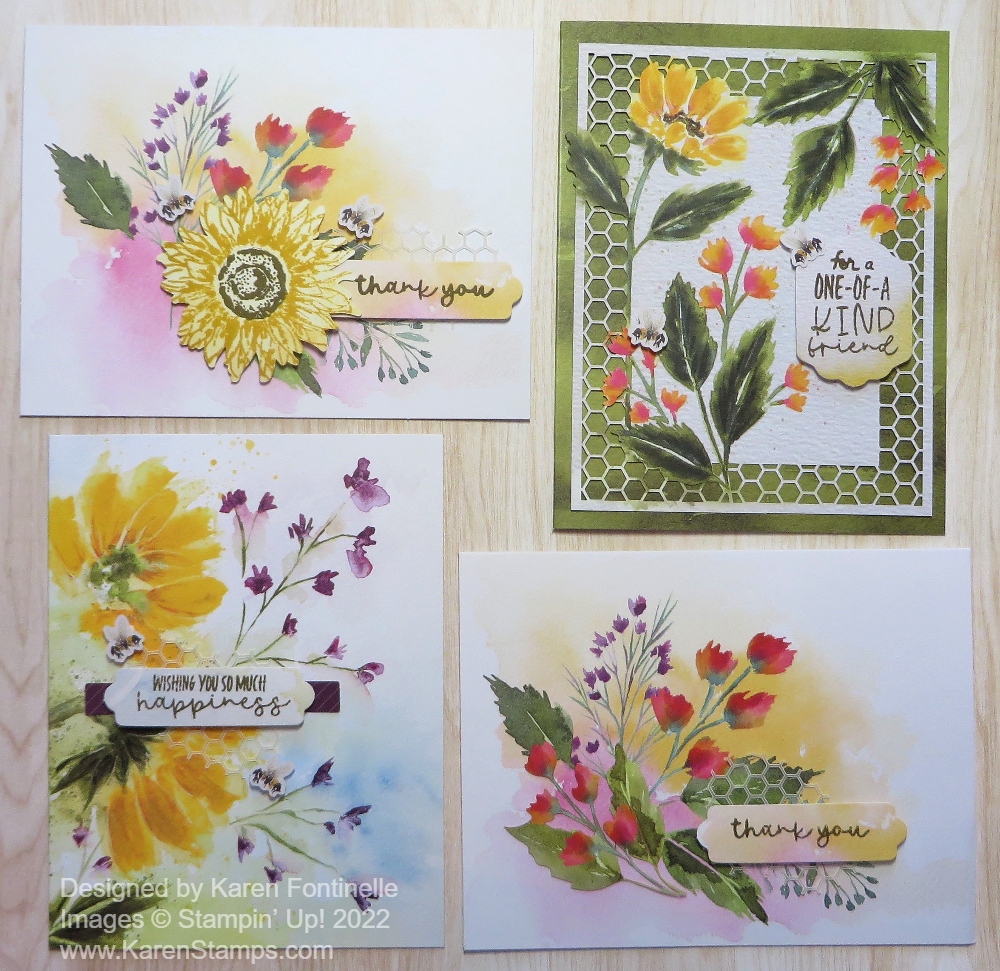
Sweet Sunflowers Paper Pumpkin Kit For August

Paper Pumpkin Kit August 2022 Sweet Sunflowers

Get the Sweet Sunflowers Paper Pumpkin Kit for a crafting experience you won’t forget! This month’s kit includes watercolor designs inspired by nature, two Classic Stampin’ Spots for a Two-Step stamping experience, and an all-new twist technique. As a bonus, this month’s kit includes a FREE gift that will add the perfect golden accent to any of your projects. Time to make smiles bloom!

ABOUT THE KIT
Name: Sweet SunflowersItem Number: 161120


This kit includes:

  • All the supplies you need to create 9 cards: 3 each of 3 designs; and coordinating envelopes.
  • An all-occasion stamp set to express words of gratitude, friendship, greetings, and beautiful wildflower-designed images.
  • Specialty Vellum honeycomb shape pre-cut pieces.
  • 2 Classic Stampin’ Spots (Crushed Curry and Soft Suede) for a Two-Step stamping experience with a twist!
  • Paper pieces and embellishments with watercolor designs and images.
  • Mini Stampin’ Dimensionals.
  • FREE GIFT: 8 Gold Foil Honeycomb Sheets

Completed card size: 5-1/2″ x 4-1/4″ 

Coordinating Stampin’ Up! colors: Blackberry Bliss, Crushed Curry, Evening Evergreen, Melon Mambo, Mossy Meadow, Night of Navy, Pumpkin Pie, Soft Suede


SUBSCRIPTION INFORMATION
Subscribe to the July Paper Pumpkin Kit between July 11 and August 10 at www.paperpumpkin.com! Note: Supplies may be limited toward the end of the subscription period.

This looks like a kit I can’t wait to get!! Even the box is so pretty!


JOIN PAPER PUMPKIN HERE!