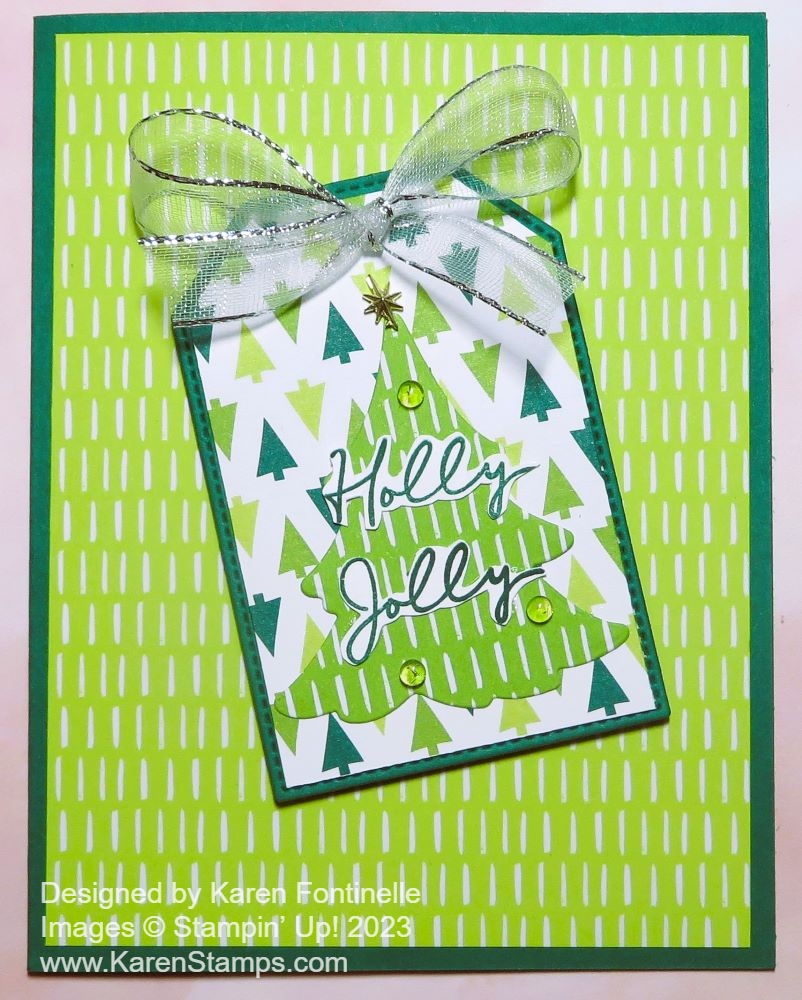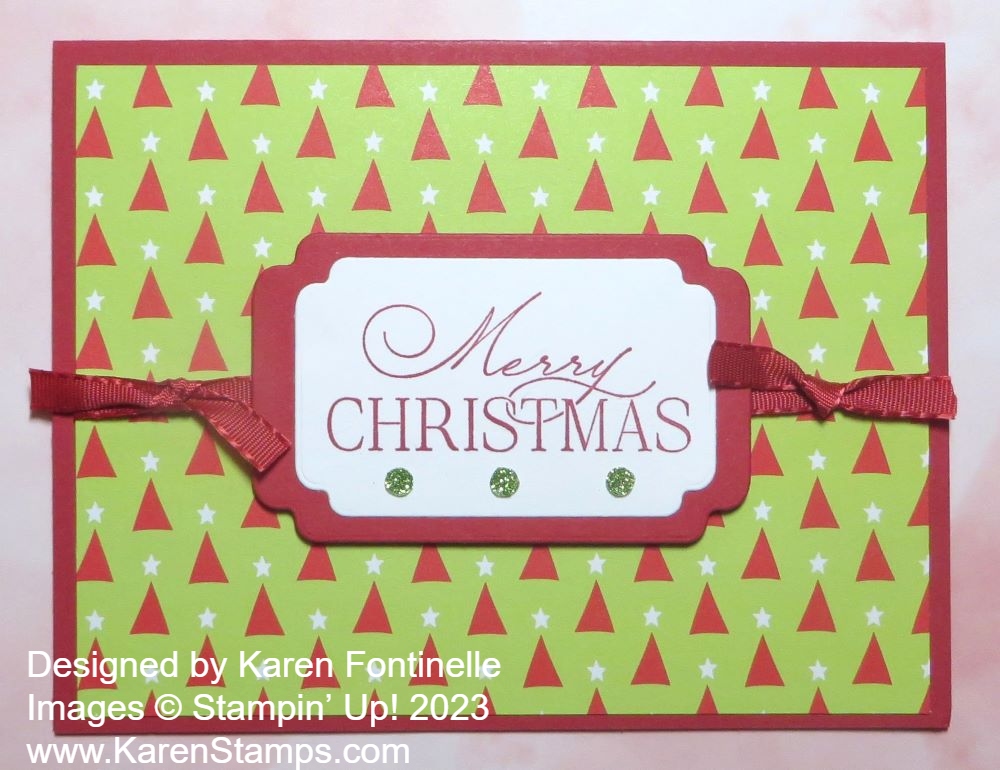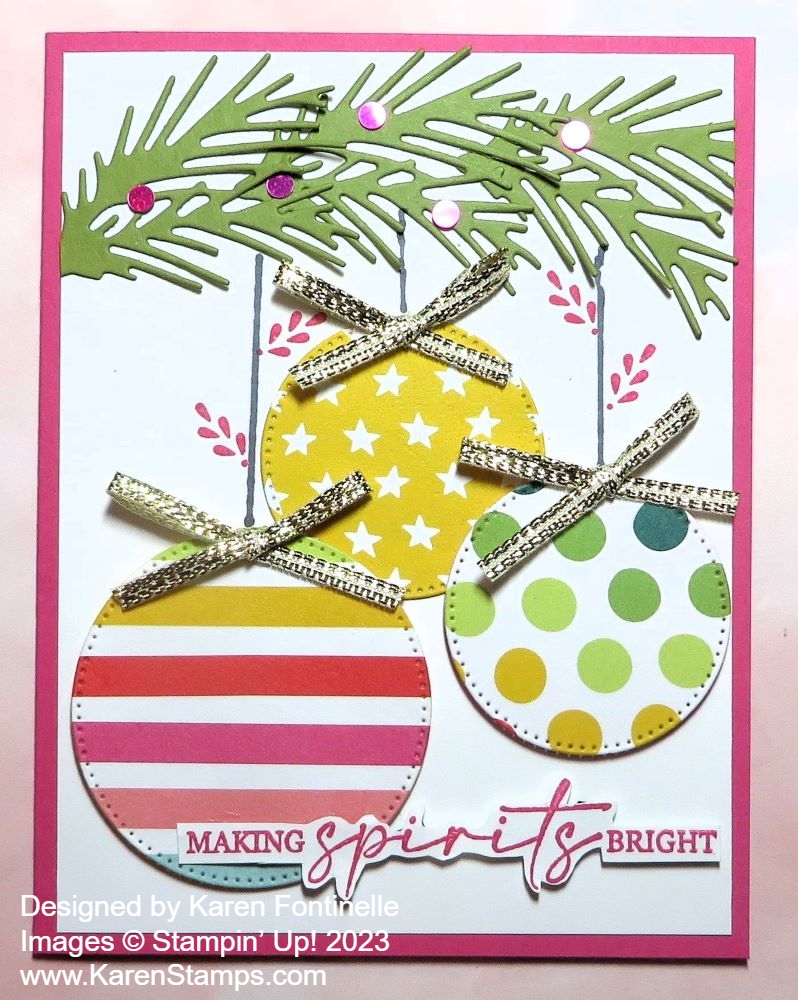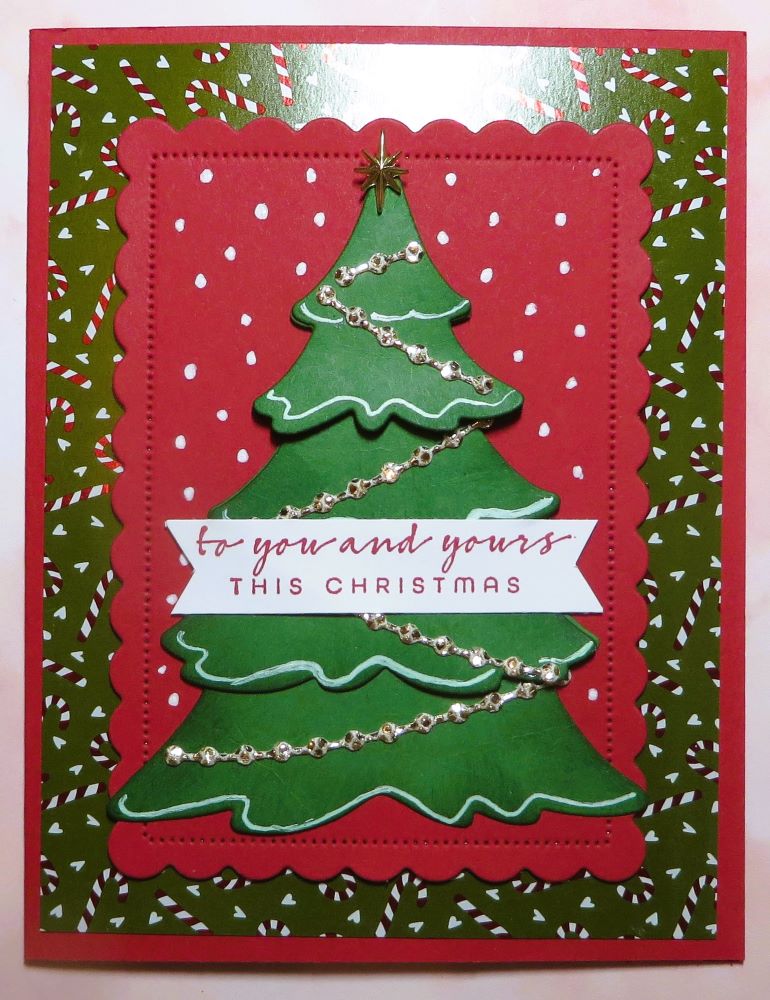
I considered naming this Shining Christmas Merriest Trees Christmas Card a DELUXE card, not because it is too hard to make but because there were a lot of steps. It just came together step by step. Just follow along, you can make this card too!
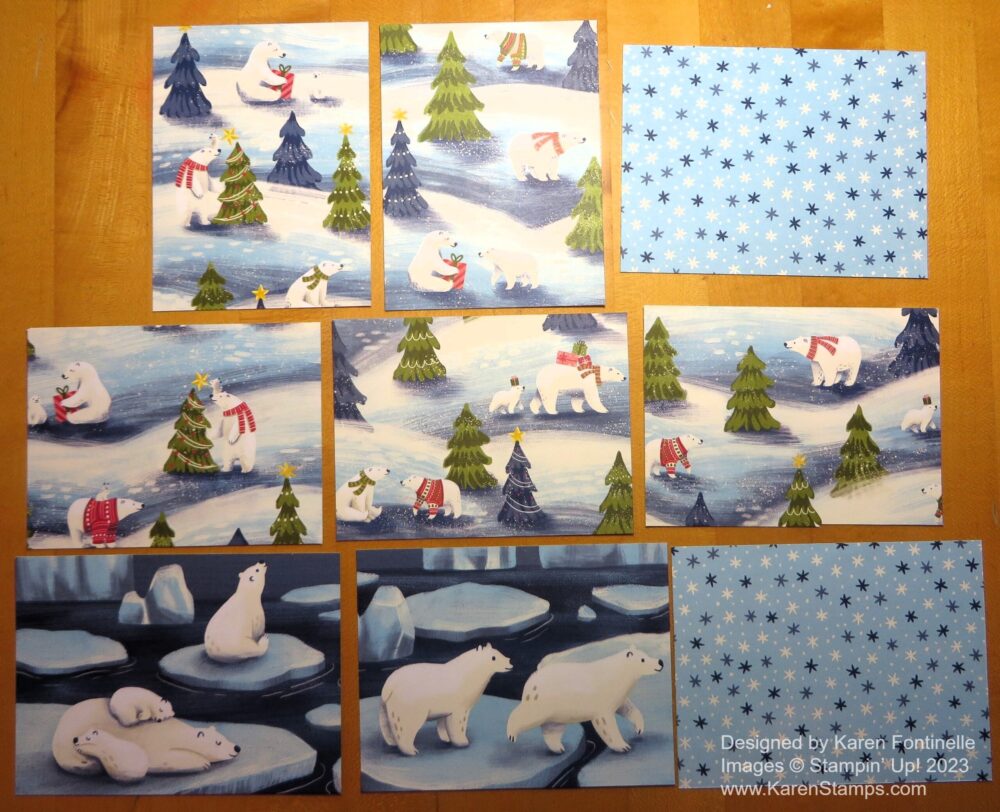
The card base is Real Red even though Cherry Cobbler is the official coordinating color, but I prefer Real Red! I adhered a layer of the Shining Christmas Designer Paper, an Online Exclusive, but I think it is no longer available. If you don’t already own it, just choose your own holiday designer paper for the background.
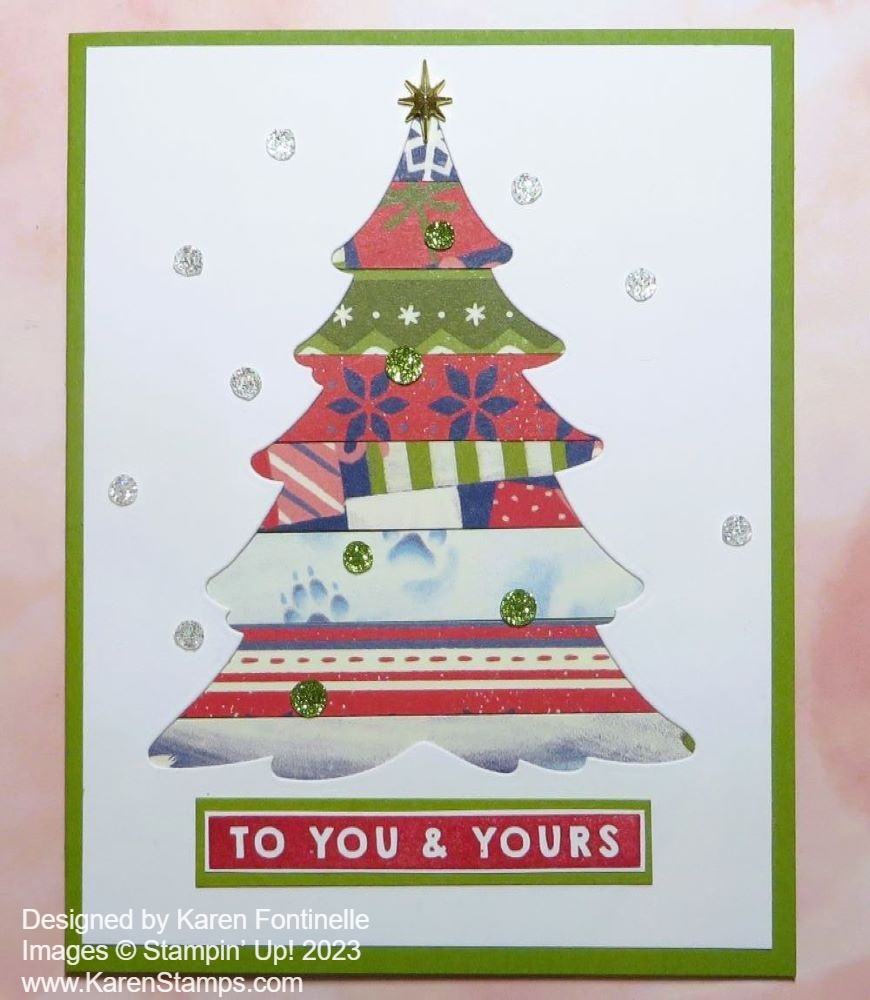
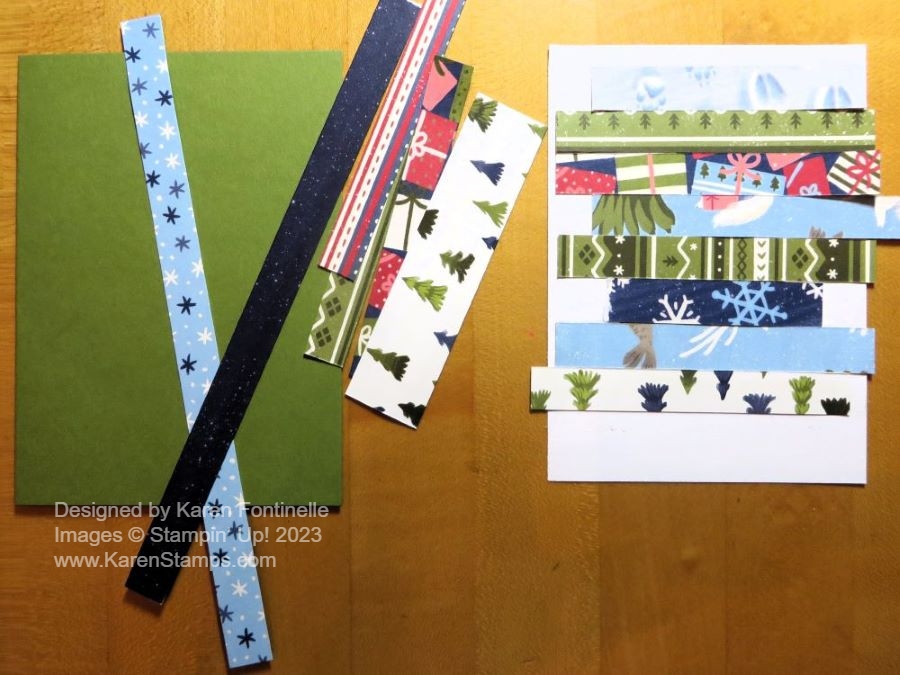
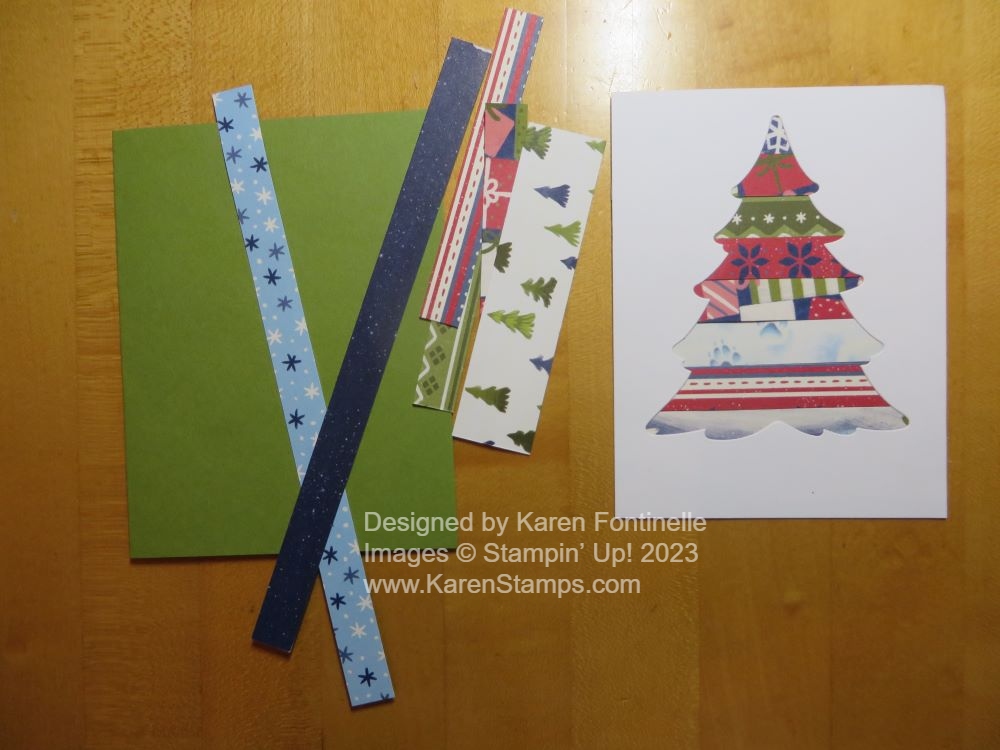
My main idea was to make a Christmas tree using the Merriest Trees Dies with all the different sizes that you can either have for separate trees or layer them all together and make it a little like a 3D tree, especially if you kind of curl the bottom edges of the layers. To help it stand out from the background paper of small candy canes on a dark Mossy Meadow green background, I used the Scalloped Contours Dies to make this Real Red background scalloped rectangle behind the tree.
The tree is made from Garden Green cardstock, diecut with the Merriest Trees Dies and sponged on the edges that would show with a little Garden Green ink. It’s barely noticeable but it’s there and I think it adds a little bit of dimension. After I had all the tree sections stacked properly and glued together, I adhered the whole tree to the Real Red rectangle. For some bling, I die cut the little garlands in the Merriest Trees Dies out of the More Dazzle 6″ x 6″ Designer Series Paper (or any gold paper you have or another color) and glued them on with the tiniest drops of glue. If you don’t have a way to add tiny drops of glue try making a little puddle of glue on a scrap and pick it up with a toothpick perhaps and use that. Or think ahead and use the Adhesive Sheets, but these garlands are so tiny and delicate it might be better to just use glue.
I also had the idea to use a white gel pen (but there are other things you could use) along the bottom edges of the tree layers to make it look like snow. The greeting is stamped in Real Red ink on Basic White from the Brightest Glow Stamp Set. Of course, I hated to cover up any part of my beautiful tree, but I think it looks okay. I cut the strip as narrow as I could and then flagged the ends like a banner. At the top of the tree I added a Star Trinket, which are no longer available.
On the inside, I added a layer of Basic White but added a 3/4″ x 4″ strip of the same designer paper at the bottom to decorate the inside. As I added the glue to the backside of the designer paper, I thought THAT side would have looks good inside the card! So before you apply the glue make sure you check both sides of the paper!