Category Archives: Cards

New Yee-Haw Stamp Set!

Yee Haw Stamp Set

Here is a new photopolymer stamp set, Yee-Haw, that was introduced at Stampin’ Up!’s convention, Inspire.Create.Share and I believe was a quite a hit!  Now you can own it and go to town making some cute cards, scrapbook pages, gifts and other projects! What a great set for a child’s birthday party, an adult party, rodeo time, many occasions! I just remembered the Cub Scout Blue & Gold Banquets where we would have a theme and I shopped for weeks looking for party decorations, favors, invitations, etc. for that particular theme.  That was before I was into stamping, and boy do I wish I have known about Stampin’ Up! back then!  I could have had a ball stamping things for all the kids’ parties, school parties, invitations, Scouts, sports and more.  I believe all young mommies should know what is available through Stampin’ Up! and all the creative ideas that are out there to use. So grab this new stamp set, Yee-Haw, while it is available and start enjoying making things with it!

Shop any time at my Stampin’ Up! Online Store HERE! Check the “New Arrivals” for this Yee-Haw Stamp Set.


Mixed Bunch Lost Lagoon Monochromatic Birthday Card

Mixed Bunch Lost Lagoon Monochromatic Card

It’s fun to just flip through the All Abloom Designer Series Paper Stack and choose a pattern that speaks to you!  I had already found, in the package of In Color card stock, an already started card with some very bad stamping on it! “Somebody” was trying to stamp a pattern on the bottom of this card and didn’t get it lined up correctly at all! Since there are no mistakes in stamping, I found this pattern that coordinated with the Lost Lagoon card stock and covered the whole messed up area at the bottom of the card! No one will ever know, except you and me! Before adhering the patterned paper, I wrapped a piece of Lost Lagoon 3/8″ Satin Stitched Ribbon around the top of the piece and then tied the bow with a separate piece of ribbon.  So much easier.  It is attached with a couple of Glue Dots. Then what to do with the empty top area?? I decided on a flower from the Mixed Bunch Stamp Set, and thought this patterned flower went the best with the paper on the bottom. I used another stamp for the center, punched with the 3/4″ Circle Punch, popped up on a Stampin’ Dimensional, with a Rhinestone Jewel in the center for a little accent.  The greeting is from the Something To Say Stamp Set. It is punched out with the Modern Label Punch and has two Rhinestones on it. I decided just a simple plain greeting was fine.

To find any of these supplies, just click HERE to go to my Stampin’ Up! Online Store!

Remember, if you are in Texas, today is the last day for the Sales Tax Holiday. Check my previous post about the items that are included in the holiday that you can order from Stampin’ Up!

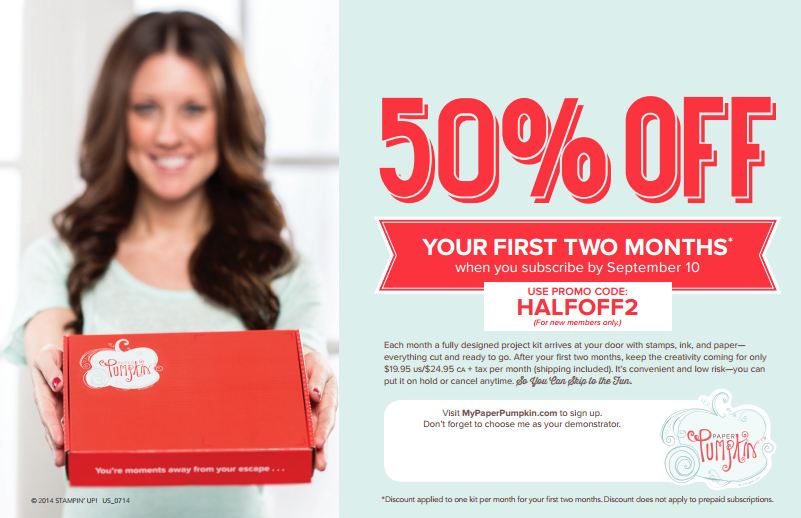
Also, if you are interested in purchasing a Paper Pumpkin subscription, the kit that comes in the mail to you with a cute project inside, sign up today, August 10th, in order to receive the August kit! Use the promo code HALFOFF2 in order to get a discount of 50% for the first two months!! Regular price is $19.95, which includes shipping! This offer is for new subscribers only.

Click HERE for Paper Pumpkin!

Easy Birthday Card to Make With All Abloom Paper Stack

All Abloom Birthday Card

There’s not an easier birthday card to make than this one using the All Abloom Designer Series Paper StackI have to admit, I’ve had this All Abloom Paper Stack since it came out, but hadn’t used it. It actually got lost under all the “stuff” on my desk! To make this card, all I had to do was flip through the stack and see which pattern caught my eye or inspired me. This one just looked so pretty, and I liked the opportunity to use my Strawberry Slush card stock! The greeting is from Four Youa stamp set I find myself using a LOT! I thought the paper was pretty enough itself so the card didn’t need much else.  I added just a little flower punched with the flower punch in the Itty Bitty Accents Punch Pack  with a little Candy Dot in the center! I probably would have added a little flower or something-something somewhere on the card, but honestly, I stamped the greeting just a tad too far to the left so the flower filled in the space perfectly and added just a little accent!  See, there ARE no mistakes in stamping!

The All Abloom Designer Series Paper Stack gives you a ton of paper choices very inexpensively. Not every pattern is a flower so no worries there! You can view them all and purchase in my Stampin’ Up! Online Store. Just think of the tons of cards you could make easily with this small stack of paper!

All Abloom Designer Series Paper Stack

(c) Stampin’ Up! 2014

Flower Fair Framelits and the Big Shot

Flower Patch Flower Fair Birthday Card

The Flower Patch Stamp Set makes beautiful flowers on a birthday card, but would you like to cut them all out after you stamped them, or would you rather use the Big Shot and the Flower Fair Framelits Dies? You could cut them with Paper Snips but it’s easier to use the Big Shot!

The background of the Crumb Cake card base is stamped with the stripe from the Work of Art Stamp Set. The Birthday greeting is from the Four You stamp setone that I love for greetings!

I really liked adding the sequins on the card from the In Color Sequin Assortment. Those three were just enough, though. I had planned to put some on the birthday greeting too. You have to know when to stop!

If you don’t own a Big Shot, you want to consider the August Big Shot special from Stampin’ Up!  Purchase a Big Shot and choose a select bundle free!  If you already own a Big Shot, choose any of the bundles at a 15% discount. Everyone who has a Big Shot loves it and uses it a lot.

If you are not familiar with a Big Shot, watch this Stampin’ Up! video! I had chosen a little notebook cover in the catalog on page 155 to copy as a card. When I watched this video again, well, check out the last project she shows you!  My ESP has been working overtime lately! Yes, I had seen this video before, but really was not thinking about it when I chose the design for the card!  Must have been buried in my subconscious!!

Just go to my Stampin’ Up! Online Store and order your Big Shot and choose your free bundle! You’ll be glad you did!

Make a Cupcake Party Card With Flashback Paper

Cupcake Party Card with Flashback Paper

As I looked through the Flashback Designer Series Paper, the Real Red and Pool Party colors on this pattern really caught my eye. I love red! I wondered if I could use it some way with the Cupcake Party stamp set and the Cupcake Builder Punch, on sale this week in the Stampin’ Up! Weekly Deals. The Cupcake Punch is used for the top and bottom of the cupcake, but I handcut the little Happy Birthday flag for the top. With the punch, I could have punched out a little cherry for the top! You wouldn’t believe how many circles and scallop circles I punched in various colors and tried different combinations to see which one worked best behind the cupcake. Finally I just decided on this one! I also put a little strip of Real Red 1/8″ Taffeta Ribbon across the card, even though you don’t see much of it.

This card is cut lengthwise, meaning the Pool Party is cut 11″ x 4 1/4″ and then folded in half. Just a little change!

Don’t judge a pack of designer paper by the first sheet in the package! This one has retro cameras, but there are other pretty patterned papers in the pack. And don’t forget that the Buy 3 DSP Get 1 Free Offer from Stampin’ Up! during July! Much to my surprise, July is almost over! Tomorrow is the last day you can take advantage of this special deal to stock up on designer paper.  Specialty papers are not included. Choose from the patterns on pages 186-7 in the new Stampin’ Up! Annual Catalog.

One more day to order 3 designer series packs and then get the 4th one free!  Add some of the Weekly Deals to your order as well!

Shop any time at my Stampin’ Up! Online Store!

Back To Black Designer Paper Congratulations Card

Back To Black Congratulations Card

I think just using black and white can make a beautiful card, and that’s why the Back To Black Designer Series Paper from Stampin’ Up! is so useful. Here is an easy black and white Congratulations card that you could be proud to send to anyone. Or change out the greeting and make it a birthday card or whatever occasion you need. I just chose several scraps of my Back To Black DSP and cut strips and made them into banners of varying widths and lengths and adhered them to my card front (stamp first in case you mess up!). I tend to just cut the flag end of the banner with my Paper Snips, it doesn’t have to be perfect, but you could also punch with the arrow punch or the square punch or some others.

The greeting is from the Hey You Stamp SetAnd for a finishing touch, I added some black Neutrals Candy Dots to look like they are holding up the banner.

Buy 3 Get 1 DSP Free Offer (last day July 31)

Stampin’ Up! Weekly Deals (last day July 28)

Subscribe to Paper Pumpkin Use HALFOFF2 code.


Back to Black Designer Paper Colored with Blendabilities

Back to Black DSP Black and WhiteWhat if you take this Back to Black Designer Series Paper from Stampin’ Up! and color all the white images on the paper with Blendabilities alcohol markers?

Back to Black DSP Colored with Blendabilities

You get this! Since the background is black, it doesn’t matter if you color outside the lines! I even used two colors on some leaves or used the Color Lifter just to add some different shades of green. I love the feel of coloring with the Blendabilities! All of the Blendabilities colors (so far!) will be available to order August 1.

Back to Black DSP back

What if you turn the designer paper over to apply Liquid Multipurpose Glue (in the green bottle) and see the other side since the color soaks through from the Blendabilities Markers and think “Wow! Even the wrong side looks kind of cool with the color showing through!”?

Back to Black Blendabilities Colored DSP CardAnd then what if you adhere the colored piece of Back to Black Designer Series Paper to a card base and layer and start adding some other elements to make a card? What if you cut off a tiny scrap strip of another pattern of the designer paper and adhered it to a strip punched with the Scallop Edge Border Punch for a little accent piece? What if you looked through stamp sets and found this greeting from the Yippee Skippee Stamp Set and then by chance pulled out an already punched piece of Melon Mambo in a tag shape with the Tag Topper Scalloped Punch and made a tag for the focal point of the card? The little flowers are punched from the Boho Blossom Punch and the flower punch in the Itty Bitty Accents Punch PackThe small leaves are from the Bird Builder Punch. I added some Daffodil Delight Seam Binding Ribbon to the tag and of course, a bit of bling with a Rhinestone and Candy Dots!

To purchase this Back to Black Designer Series Paper and two other packs so that you can get 1 pack FREE during July, please visit my Stampin’ Up! Online Store!

Back to Black with Gold Birthday Card

Back to Black with Gold Birthday Card

I’m finally taking the time to play with the new Back To Black Designer Series Paper to make a birthday card with a touch of gold. I learned a long time ago in my stamping that black and white could be very stunning – and really all you need sometimes to make a card. That’s all I was going to use on this card, but somehow a little bit of gold snuck in! Once I made the flower using the Blossom PunchI decided the Gold Baker’s Twine would look good with the Vintage Faceted Button. I thought little strips of the Gold Foil Sheets would look great against the black and while. If you could see this card in person, you would see that the extra glimmer really looks nice. Once I had the gold foil accent, I had to emboss the greeting from the Four You stamp set with my Heat Tool and Gold Stampin’ Emboss Powder. Remember, before you emboss, rub the Embossing Buddy on the card stock to try to keep stray flecks of the embossing powder from sticking. Then stamp with Versamark.

I also have another technique I saw recently that I will share with you soon using this paper!  With the July special offer on Designer Series Paper from Stampin’ Up!, now is the time to stock up on paper! Get all the new ones in the catalog while you can get one free!

Be sure the Back To Black Designer Series Paper is on your Wish List!

Stampin’ Up! Convention – Inspire.Create.Share.2014 – From Home!

InspireCreateShare 2014

I may not be attending the annual Stampin’ Up! Convention in Salt Lake City, Utah this year, but I’m trying to keep up with every tidbit of it that I can find from home!  Thank goodness for the internet! Stampin’ Up! even had a live stream yesterday morning of the opening of Convention (this year called Inspire.Create.Share.2014) and a good part of the first General Session. I was beyond thrilled that they broadcast more than a few minutes of it! My live stream worked great until it got to Becky Higgins of Project Life being interviewed by Shelli Gardner, then it konked out! I can’t wait until they live stream another segment of Convention this morning! It really is just like being there, except my feet don’t hurt! Of course my feet wouldn’t have hurt yesterday morning yet, but there is a great amount of walking all over that convention center and to and from the hotel.

Often the Stampin’ Up! convention begins with many Stampin’ Up! employees standing just inside the doors when the demonstrators enter. It’s a thrill to be greeted by all of them, it makes us feel like celebrities! But this year, the employees, by department, were part of the opening on stage which looked fun! Looked like some fireworks on stage, too! Real fireworks!

Shelli Gardner came out, tissue in hand. She often gets emotional on stage during her presentations, part of her charm, and it’s not hard to feel emotional about Stampin’ Up! She barely got started in her remarks when everyone in the audience got a free stamp!

Pam Morgan gave her presentation about the Holiday Catalog! I think most people are saying this is the best catalog ever, which I know we said last year and probably the year before that! This year’s Holiday Catalog will have lots of Sizzix products in it, so be sure you have a Big Shot (and next month will be a good time to order one!). Lots of packaging products and ideas for the holidays, kits for making cards, more stamp sets with sentiments for the front of the card AND the inside! More of the photopolymer stamps for easy alignment, Project Life, and builder sets. The beautiful photopolymer stamp set Endless Wishes, that sold out quickly last fall when photopolymer stamps were new, will be reissued. There will be gift wrap, ribbon, a gift box punch board, more Project Life for the holidays, beautiful papers, and more, of course!

Also, the most recent demonstrator to reach $1 million in sales, Connie Heisey, was brought up on stage by Shelli to be recognized! She had previously been invited to the Home Office to spend the day and celebrate this amazing milestone! While on stage, the “delivery man” wheeled out about four Stampin’ Up! boxes (you can barely see him leaving behind Connie) (wish I’d gotten a better photo of him!) as Shelli told Connie she would be receiving EVERYTHING in the Holiday Catalog! Then there was a poof of confetti to celebrate this amazing milestone!

Connie Million Dollars

Here are some more of the photos I took of my laptop screen while I watched the live stream yesterday! Didn’t think of doing it from the beginning!

Pam Morgan on stage

Holiday Catalog Package

Holiday Catalog packages

Peace on Earth Bag

Shelli Gardner and Becky Higgins

In the afternoon and evening there were classes and additional demonstrations, which, from what I read online, sounded like they were terrific!

I know that at the Paper Pumpkin party the night before, demos got to make one item in the September Paper Pumpkin kit. It looked pretty cute to me! And apparently they got to view some other months’ kits, with a guard nearby, so no one would take photos! But they say the Paper Pumpkin kits just keep getting better so if you would like a Stampin’ Up! Paper Pumpkin papercrafting kit to come to you in the mail each month, remember the special going on! Save 50% on the first two months, for new subscribers only, by using the code: HALFOFF2 

Subscribe HERE for Paper Pumpkin!

And now I have to go check on the time for the live stream from Convention!

Owl Punch Anniversary Card

Owl Punch Anniversary Card

Yesterday was our wedding anniversary and this is the card I made for my husband using the Builder Owl PunchThe Owl Punch is so incredibly versatile you can’t believe it – unless you look online and see all the ideas people have come up with for dressing up the owl shape or cutting it differently to make something else. I found this basic idea online for my card, of the owls and the moon, and changed mine up a little bit. I figured the owl silhouette shapes were fine for my husband’s card because while he might appreciate it, he wasn’t going to ooh and aah over the card if I dressed up the owls!

Since we just had a “supermoon” here in Houston, I thought the owls and the moon were appropriate.  I punched a 2 1/2″ circle out of Hello Honey, our new In Color card stock, and then shaded it a bit by sponging on some Tangerine Tango ink and White Craft ink. It’s barely noticeable but sometimes it is the tiny little things you do that add a lot.

The little branches are punched with the Builder Bird Punch but I hand cut the tree branch out of Basic Black scrap. For the Night of Navy background, I embossed it with the Cloud embossing folder (retired). Since it didn’t emboss all the way to the bottom of the layer, I used a wider strip of the Silver Glimmer Paper to cover and put my greeting from Loving Thoughts (retired) on top of that with a couple Candy Dots. Couldn’t resist playing with the Glimmer Paper some more so I punched out a few stars with the star punch in the Itty Bitty Accents Punch Pack for the nighttime sky! The little Real Red hearts are punched with the Owl Punch.

Today the Stampin’ Up! Convention gets underway! Actually, this year they are officially calling it “Inspire. Create. Share. 2014” They are livestreaming a little bit of Convention each day for those of us sad demos at home!  I can’t wait and have an alarm set so I don’t forget! I’ll keep you posted on whatever news I hear out of Convention. Check back here, or better yet, follow me on my Facebook page at www.facebook.com/stampingwithkaren by clicking the “Like” button. You can also follow me on Twitter  (which I use now and then!) at www.twitter.com/karenstamps

You can bet that Salt Palace lobby is filled with demos already in line for General Session to get a front row seat and tons of swapping of card fronts going on! They swap while waiting in line, while walking by, while sitting down, everywhere, any time!  It’s so much fun and makes for such a friendly experience!

For great papercrafting supplies, please visit my Stampin’ Up! Online Store. Check the Weekly Deals and the Buy 3 DSP Get 1 Free Special Offer.

Join Paper Pumpkin For 50% Off First Two Months

Paper Pumpkin 50% Off

If you haven’t tried Paper Pumpkin, now is a great time to sign up–get 50% off your first two months! Paper Pumpkin is the paper crafting kit that comes in the mail to you once a month. The projects vary and it’s always a surprise. Just take 30 minutes for yourself, once a month, to enjoy some fun crafting time.  All you need (sometimes) are scissors and adhesive. The rest all comes in the box!

Offer Dates: July 16, 2014–September 10, 2014

Offer Details: Use the code HALFOFF2 to join Paper Pumpkin before September 10, 2014, and get 50% off the first two months! After that, keep the creativity coming for only $19.95 + tax per month (shipping included).

The Fine Print:

  • For new subscribers only.
  • Available for month-to-month subscriptions, not prepaid subscriptions.
  • Discount applied to one kit per month for the first two months of a new subscription. After the first two months, the price for each month’s kit will go to the regular price: $19.95.
  • Visit MyPaperPumpkin.com to join.
  • Enter the Promo Code, “HALFOFF2” when you sign up.
  • New subscribers must join by Wednesday, September 10, 2014; 11:50 PM (MT).

It’s like a class coming to your door, for brand new and experienced stampers and crafters alike! Instructions are included so anyone can follow along.  Make it according to directions or strike out on your own and make your own creation.

Kits are mailed around the 15th of every month. No risk, no obligation:  change your subscription, pause, or cancel it by the 10th of any month to take effect that month. You’re welcome to call Stampin’ Up! any time the kit doesn’t not meet your expectations or you have questions and they will try to make it right for you.

Order some extra kits or get a few friends together to order and then make a gathering out of it every month when everyone receives their kit! It’s a Girls’ Night Out with no muss or fuss, just fun!

JOIN PAPER PUMPKIN TODAY HERE!

HALFOFF2


Pop Up Box 60th Birthday Card

Pop Up Box Card 60th Birthday

When I needed a birthday card for a special friend for her 60th birthday (a special birthday for sure!), I wanted to make a “pop up box” card. Yes, the designer paper, Birthday Basics, is retired, but I love it so I used it for this personal card. The base (box) is Crisp Cantaloupe. You can see a photo of the front down below.

Even though the designer paper is retired, the stamp sets are new and current! The banner on the front flap is stamped with the Banner Banter stamp set and punched out with the Banner Punch. I added some Candy Dots to make it look like it was strung across the flap.  I LOVE the Candy Dots! They come in the color families and only cost $5.95. Just a cute touch to your cards and projects! Crisp Cantaloupe Thick Baker’s Twine is tied around the front flap.

The cupcakes are from the new stamp set Cupcake Party and punched out with the Cupcake Builder Punch. (See some more Candy Dots on the cupcakes?!) The “60” is from the Memorable Moments Stamp Set. The greeting in the back is from Chalk Talk and cut out with the coordinating framelits. You can buy the Chalk Talk Bundle and save 15%! The “Celebrate You” greeting is also from the Cupcake Party stamp set.

Here is the front of the pop up box birthday card:

Pop Up Box Card 60th Birthday Front

For all your Stampin’ Up! shopping, please visit my

Stampin’ Up! Online Store!

A few new things added to the Clearance Rack!

July Offer:  Buy 3 Designer Series Papers, Get 1 FREE!

Christmas in July: New Christmas stamp sets out early! (Beauty of the Season and Christmas Bliss)

New Photopolymer “Boy” Stamps:  Dear Heart

Another Flower Pot Designer Series Paper Card

Flower Pot DSP Hello Card

I really got into using this Flower Pot Designer Series Paper yesterday and using this simple layout. This small flowery pattern is another sheet in the pack so I just jazzed it up with some of the new Lost Lagoon 3/8″ Satin Stitched Ribbon (really nice in person!) and stamped the “hello” greeting in the corner from the Four You stamp set. I thought the Whisper White front was still a little plain so I stamped the little flower in the Something To Say stamp set. I stamped with the ink colors that coordinated with the Flower Pot Designer Series Paper which were Crushed Curry, Lost Lagoon and Tangerine Tango. I like the way the card turned out. Very simple, yet cute! And you could even embellish with a few Candy Dots or Rhinestone Jewels on the little flowers or a contrasting piece of card stock along the Flower Pot paper or the greeting stamped on a tag or punch with a layer behind it.

Be sure to get your choice of Stampin’ Up! designer paper this month during the Buy 3 Get 1 Free offer!

Also, check the Clearance Rack because Stampin’ Up! added some items today.  Click the drop down box for “Show:  ALL” to make your browsing easier instead of having to jump to the next page.

Shop Stampin’ Up! Online for all the best in stamping and papercrafting supplies!

Make an Easy Card with the Flower Pot Designer Series Paper

Flower Pot Designer Series Paper

This is an easy basic card. If you need to make a card in a hurry or just don’t have a creative idea in your head at the moment, make a card like this and everything will be right with the world! I used the Flower Pot Designer Series Paper in the new Stampin’ Up! Catalog – either side of the sheet would have been fine on this card. I cut the designer paper about 2″ high and 5 1/4″ wide to fit on the Whisper White layer over Tangerine Tango (one of the coordinating colors for the Flower Pot DSP). Do this before adhering to the card base so you can adhere a piece of ribbon around the card (just the ends tuck under the sides of the card). I used my favorite ribbon, the Whisper White 5/8″ Organza RibbonI tied the bow separately and attached it with Mini Glue Dots. The greeting is stamped with Night of Navy ink using a stamp from A Dozen ThoughtsThat’s a stamp set worth owning with all the choices of greetings included.

This is an easy layout for a card for any occasion. Make a card base, with or without a layer on top, and adhere a strip of designer series paper either horizontally like I did on this card or vertically on one side. Stamp or punch out a greeting, maybe add some ribbon or a contrasting strip of card stock and you are set. This card is just as nice as anything more complicated! Or start with this design and MAKE it more complicated if you like!

Stampin’ Up! is offering Buy 3 Get 1 Free Designer Series Paper this month, so it is a great time to get all your favorite packages or multiples to have on hand! Specialty papers and Paper Stacks are not included, but you can get all the brand new DSP right now!

Buy 3 Get 1 Free Designer Series Paper Stampin' Up! July Offer

Here is a close- up of the two sides of the Flower Pot Designer Series Paper I used on this easy card:

Flower Pot Designer Series Paper

Flower Pot Designer Series Paper

Visit my Stampin’ Up! Online Store to check out all the choices of Designer Series Paper in the new Stampin’ Up! Catalog.

Christmas in July at Stampin’ Up! Plus Weekly Deals

Beauty of the Season Stamp Set

A sneak peek from the upcoming Stampin’ Up! Holiday CatalogBeauty of the Season stamp set, available NOW in wood- or clear-mount.

Wood 135776 $21.95

Clear 135779 $16.95

Christmas Bliss Photopolymer Stamp Set

Another “Christmas in July” new stamp set from Stampin’ Up!, Christmas Bliss!

Christmas Bliss Photopolymer Stamp Set #138897   $15.95

Dear Heart Photopolymer Stamp Set

If you loved the photopolymer stamp set Sweetie Pie with the little girl faces that sold out super-quickly and you also needed little boy faces, the Dear Heart Photopolymer Stamp Set is for you!

Dear Heart Photopolymer Stamp Set       #128157     $25.95

And last, but not least!  Stampin’ Up! Weekly Deals for July 8-14:

Stampin' Up! Weekly Deal July 8 2014

All great things on the Weekly Deals!  Surely you want all of them!

And as a Heads Up — New items will be added to the Clearance Rack on Thursday, July 10th! Be there or be – left out! You know some of those items go faster than the speed of light. You can put all of these products on one order, plus any new catalog items, like the new Blendabilities Markers as well!

So whatever is convenient and works for you, you can order online any time at my Stampin’ Up! Online Store or contact me and I can put your order in for you!