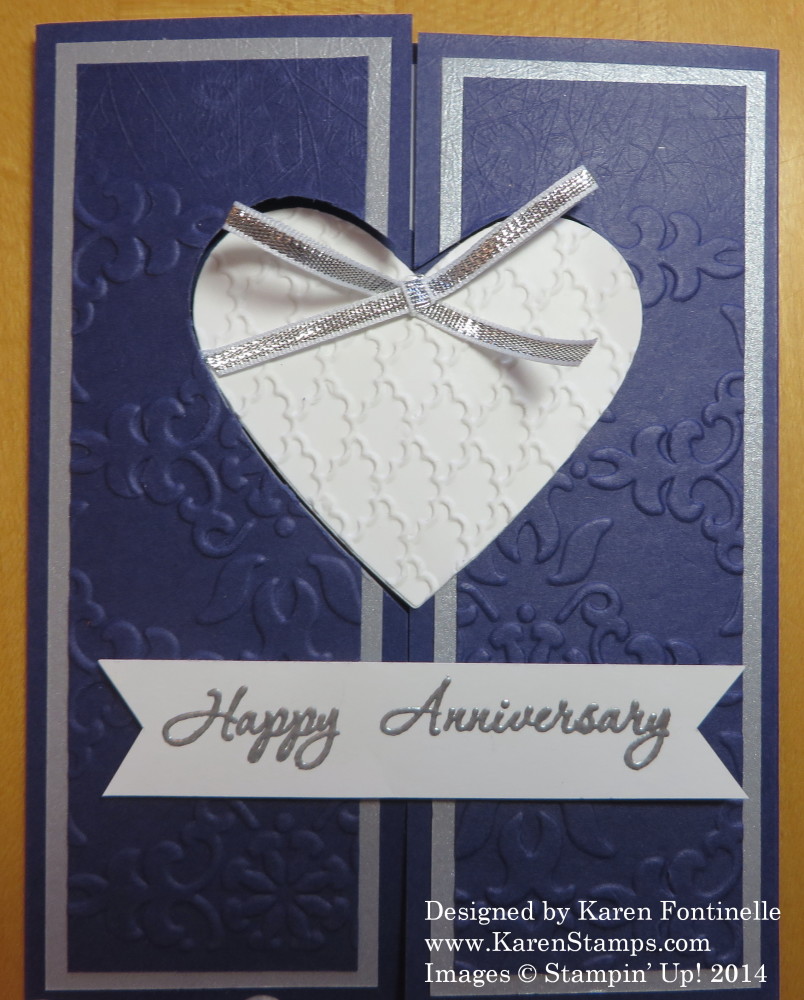
This is the wedding anniversary card I made for my daughter and son-in-law using the Heart Framelits and a technique I saw online by Deb Valder. To make the card special for them, I used the same color card stock (Concord Crush), and embossing folder (Vintage Wallpaper) I used to make their wedding invitations four years ago. (The Concord Crush color is retired now as is the beautiful Vintage Wallpaper folder.) I also used Brushed Silver Card Stock as I did on their wedding invitations, plus, of course, Whisper White.
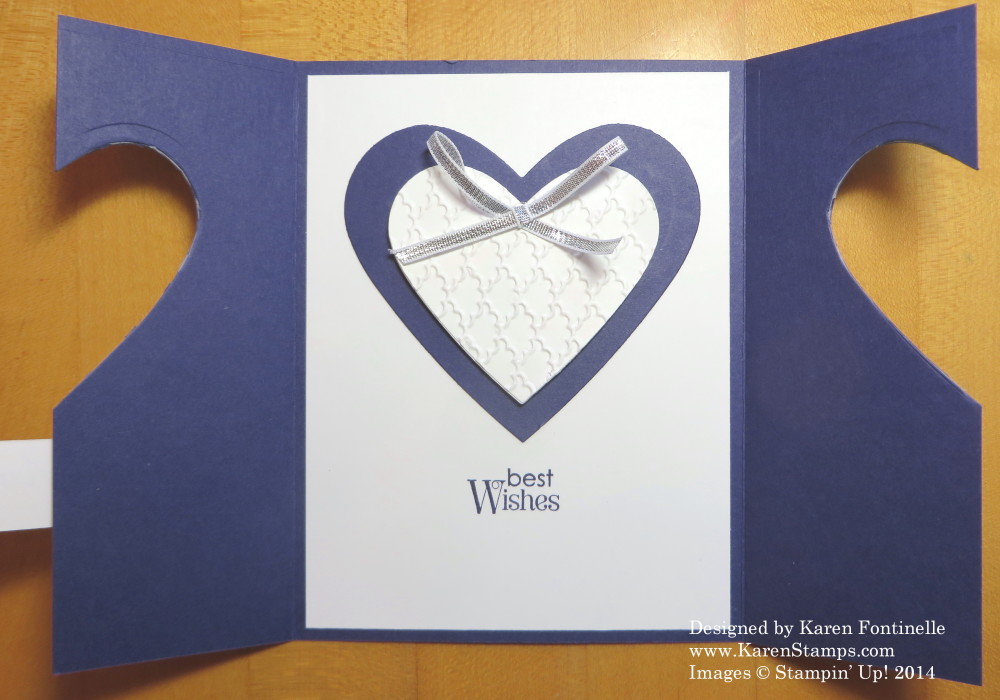
Here is the inside of the card.
The idea is that the front of the card is cut out in the shape of the framelit so that the die cut on the inside of the card decorates the front of the card! And it is not that hard to make!
Take your usual half sheet of card stock, but to make the flaps, score 2 1/8″ from each end and fold. Make sure the center meets. Layer a piece of card stock or designer paper inside the card, 4″ x 5 1/4″. On the two outer “flaps”, decorate however you like, perhaps with designer series paper, remembering that you are going to cut through those layers with a framelit so you don’t want it too thick. I made this card over a month ago so I don’t remember exactly, but I made have had to do some extra trimming to cut through entirely that the framelit couldn’t do. But you need to have the front done before you cut with the framelit. Lay the framelit cutting edge UP inside the card, centered and exactly where you want it, knowing that it is going to cut the front flaps of the card. Close the flaps over the framelit and cut out with the Big Shot. Now you want to cut the same framelit shape to go on the inside of the card, keeping in mind it needs to fit exactly in the shape you just cut out on the front of the card. This didn’t matter with the heart, but if you did another shape you need to make sure it is going in the same direction and perhaps cut with the framelit cutting edge “up” again. When you have your shape, pop it up on Stampin’ Dimensionals and adhere inside the card so that it fits perfectly with the front cut-out. Hopefully you can kind of tuck the front flaps underneath that die-cut a bit to hold them closed.
This is a neat idea to experiment with and make an elegant card. You just have to think about what you are doing and which way things are going to make it all work! But we paper engineers are pretty good at doing that!
If you don’t already own a Big Shot Die-Cutting Machine, I heartily recommend one. I use mine almost everyday.


