Category Archives: Cards

Ornament Trio Christmas Card

Ornament Trio Christmas Card

This Ornament Trio Christmas Card is another idea for a Christmas card! Keep it simple and use a few embellishments plus the greeting. Since this one uses designer series paper, you would only be able to make a certain number of this particular card, with as many sheets of this pattern of paper that are in the packages. This card was made with one square sheet with the ornaments printed on about 2/3’s of the paper and a polka dot border to one side in Crumb Cake. But it can also give you an idea for a Christmas card cutting out or stamping some ornament shapes out of the supplies you have, adhering them to a card with a background layer, and embellishing them.

This card starts with a card base of Real Red cardstock and has a layer of Gold Foil to match the bit of gold foil on the card front, the little ornament caps below the ribbon. The Gold Foil also makes the card look a little richer and special. These ornaments came from the Christmas Tags & More 6″ x 6″ Specialty Designer Series Paper. This paper is called “Specialty” because it comes with diecuts as well as paper. Some of the paper is practically ready-made gift tags if you just cut them apart!

The patterned paper with the three ornaments on it is what I used on this simple card. I trimmed it down to 3 3/4″ x 5″, trying to keep the ornaments centered. To jazz them up a bit, I cut out three gold foil caps to cover the ones printed on the paper and make the ornaments look more authentic. I didn’t have to think very much about what greeting should go on the card. I found one that fit just right in the Greetings For You Ephemera Pack. I could have peeled off the backing of the “Merry Christmas” greeting I chose in the package to use as a sticker, but instead, I just added some Mini Dimensionals to pop up the greeting for a little interest. These greetings are SO handy and so pretty, especially with the gold foil. Be sure you put at least one, maybe two packages, on your order.

If you prefer, there are diecut ornament images in the package and you could make a similar style card using those instead of the patterned paper. There are SO many possibilities for holiday cards and projects in this one 6″ x 6″ pack of designer series paper, which is more than just normal designer series paper.

To embellish the ornaments, beside adding the gold foil ornament topper, I added some retired Cherry Cobbler and Gold Ribbon, which I still had in my basket and was the only narrow red choice I had. I thought the wider ribbon in Real Red that I have would be too large for these ornaments. Use what you have. You could use a narrow gold ribbon, bakers twine, whatever you have! I also added some Traditional Sparkling Sequins in gold near the bottom portion of the card.

Besides ordering the very fine Greetings For You Ephemera Pack (or two!), I would suggest you get one or two of the beautiful Traditional Sparkling Sequins which can be used beyond Christmas. They are such pretty, sparkling embellishments and are flat on the card, a great advantage for mailing.

October is speeding by so start thinking about Christmas and holiday cards, invitations, gifts, favors, and giftwrap ideas!

Christmas Tags & More Ornament Sheet

SHOP STAMPIN’ UP! ONLINE HERE!

Spooky Sweet Haunted Street Halloween Card

Spooky Sweet Haunted Street Halloween Card

You know Halloween is really going to sneak up on us! And if you want to mail cards to people, you have to think ahead (note to self!). This Spooky Sweet Haunted Street Halloween Card is an easy card to make if you have the Spooky Sweet Specialty Designer Series Paper. This paper even comes with some diecut images that you just pop out and adhere to your card or project.

The designer paper in this package is so fun and interesting. Two of the sheets feature different Halloween scenes, such as a street of haunted houses that can be cut apart and used however you like. For this card, I cut just this single house and cut it to fit on this card front. I cut the bottom edge and also along the roof lines on the top. The card base is Petunia Pop cardstock with a layer of Basic Gray cardstock. When you trim down this image on the designer paper it will fit on the card.

After getting the basic card made, I looked at the diecut images on two of the sheets that come in the package and chose the two pumpkins with the crow on top and a couple of bats. The pumpkins are popped up. The greeting is stamped with the Spooky Halloween Stamp Set. I stamped the words with Memento Ink on Pumpkin Pie cardstock, then trimmed it down as narrow as I could and separated the words. I popped up the greeting on Dimensionals. I really like this technique of cutting the words apart or making them very narrow to make them fit better on the card. I also added several Shimmer Star Foam Stickers in purple and black. Love these things!

Just get out your designer papers, look through them, and see what ideas you come up with. You might even find a good paper to use for Halloween in a package of birthday paper or who knows what! Have fun with creating!

SHOP STAMPIN’ UP! ONLINE HERE!

Last Day! Kits Sale at Stampin’ Up!

LAST DAY for the Kits Collection Sale of all Kits are Stampin’ Up! This sale even includes the three newest sets just released last week! Save 10-30% on any of the Kits! I ordered the Nutcracker Tags Kit! I always like to make any tags kit Stampin’ Up! releases because I always need more tags for packages and they can also be used as the main image on a card!

Watch these videos showing the the newest Kits in the Kits Collection.

Remembering Christmas Kit

Calm and Bright Kit

Nutcracker Tags Kit

Today is the LAST DAY of this 3-Day Sale so hurry and get your favorite kit or a few for gifts before any more Kits sell out!

SHOP THE KITS COLLECTION SALE!

Day 2! Stampin’ Up! Kits Collection Sale!

Kit Collection Sale Oct 2025 Info Frame

Choose from all kinds of Kits in the Stampin’ Up! Kits Collection for a savings of 10-30% off! This sale even includes the newest Kits, just released October 1st! These kits come with all the supplies you need and are easy enough for anyone to make! Directions are included and you can even watch a video if you like (and I always watch the video regardless!). These Kits make birthday cards, home decor, all-occasion cards, small scrapbook-type albums, plus Kits for the fall and Christmas holidays!

Here is the Christmas Ornaments Kit in the Kits Collection that came out last year! I bought this kit and made these ornaments. I used them for an extra decoration on gift bags and packages which the recipient could then save and use on their Christmas tree or as a little decoration in the home or on future packages. A glue gun was helpful with this kit. It was fun to make and very nice! On some of the ornaments, I added some extra touches or just changed up the design a bit. You can do that with any of the kits if you like!

Christmas Ornaments Kit Stampin' Up! Kits Collection

Here is my blog post talking about making this Christmas Ornaments Kit! Put this Kit on your order if it is still available! Gold Hoops and little pinecones all included!

Sale Details:

  • All kits in the Kits Collection are 10–30% off.
  • Sale runs October 6th – 8th only.
  • Available while supplies last.
  • Sale excludes Paper Pumpkin, Scrapbooking Workshop Kits, and Starter Kits.

Choose your favorite Kits and maybe get some as gifts!
Shop early for the best selection!

Shop the Kits Sale Today!

It’s Time For the 12 Weeks of Christmas 2025!

12 Weeks of Christmas 2025 Sq Info

Who knew it was already time for me to begin sending my special 12 Weeks of Christmas emails to my newsletter subscribers?! I’m thinking about Halloween decorations but it really is only 12 weeks until Christmas! This is a special thank you gift I send to my email subscribers every year with exclusive ideas I won’t be posting anywhere else. First we start with holiday cards, then gift ideas, and finally gift bag and tag ideas for wrapping those gifts! The weeks fly by for sure!

Every Wednesday I will send out a 12 Weeks of Christmas email at 1:00 PM. Hopefully, it will be an inspiration (and reminder!) for creating your own projects for the holidays and getting a head start!

I have fun sending these emails and I think my customers enjoy receiving them and getting extra ideas that they can use for their holiday crafting. Tell your friends to sign up, too, if they like papercrafting! They might not even need to be stampers! There are always work-arounds.

How do you get them? You have to be on my Mailing List! Just sign up in the red box on the right if you are on my website. If you are on your phone, you may have to scroll all the way down to find it. Or just click HERE to go to the page to sign up. It’s free, of course, and you can unsubscribe at any time if it’s not for you. If you are already getting my Tuesday emails, then you don’t have to do anything! You are IN!

These projects will not be anywhere else…not on my blog, or Facebook page, or Instagram. They are my gift to my mailing list subscribers as a thank you for following me and stamping along with me! We’d love to have you join us if you would like! The first email goes out Wednesday, October 8, 2025! See you then!

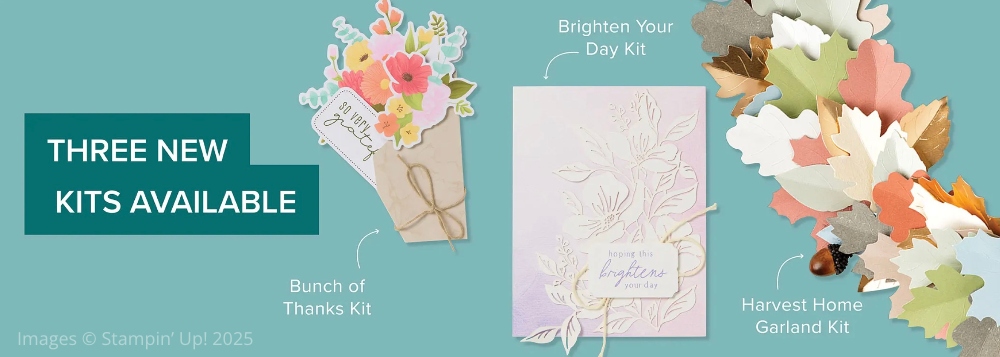
Three New Stampin’ Up! Christmas Kits Today!

I was so excited when I checked the Stampin’ Up! website this morning and saw that Stampin’ Up! had not two, but THREE, new Kits in the KIts Collection and they are all Christmas! One is a tag kit, one is a small journal/scrapbook for the holidays, and one a beautiful card kit! I can’t wait to look these over in more detail, but I think for sure I’ll be ordering the Nutcracker Tags kit! I love those because you can use them for tags or make cards with them. Check out these Kits!! And easy enough for anyone to make!

Nutcracker Tags Kit

The Nutcracker Tags Kit

Make your gifts stand out under the tree with the Nutcracker Tags Kit. Featuring festive nutcrackers and glittery sentiments, this kit makes it easy to create handmade tags bursting with festive spirit. It’s a fun and merry way to add extra magic to every gift. Now let’s get cracking!

DETAILS (#166226)
– Makes 12 tags: 3 each of 4 designs
– Colors: Basic Black, Darling Duckling, Garden Green, gold, Pecan Pie, Poppy Parade, Shy Shamrock

166226

Remembering Christmas Kit

Turn your festive moments into a cherished keepsake with the Remembering Christmas Kit! With plenty of space for photos and journaling, you can easily create a festive album filled with your favorite Christmas highlights. Combine die-cut letters, holiday-patterned paper, and fun ephemera like bows, stars, and stockings to craft a merry album full of Christmas cheer. Display it proudly each season and relive those joyful memories year after year!

DETAILS (#166230)
– Colors: Coastal Cabana, Crushed Curry, Early Espresso, Granny Apple Green, Pecan Pie, Pretty in Pink, Pretty Peacock, Pumpkin Pie, Real Red, Shaded Spruce

Calm & Bright Kit

Calm & Bright Kit

Celebrate the warmth of home and the quiet magic of Christmas with the Calm & Bright Kit. A clean and simple design style paired with a soft color palette sets the tone for creating serene, sophisticated cards. Neutral bases and intricate die-cuts—tiny houses, holly leaves, and banners—layer beautifully to form peaceful focal points, while stamped sentiments like From Our House to Yours and All is Calm, All is Bright add a heartfelt and timeless touch.

DETAILS (#166461)
– Makes 9 cards: 3 each of 3 designs
– Folded card size: 4-1/4″ x 5-1/2″ (10.8 x 14 cm)
– Colors: Basic Beige, Gray Granite, Lost Lagoon, Pecan Pie, Pool Party, Pretty in Pink, white

ALSO: Last Chance List has been updated! Check it out!

SHOP STAMPIN’ UP!

It’s World Card Making Day This Saturday!

World Card Making Day 2025 Banner

Although I can’t believe Saturday will be October, it’s time for this fun event with Stampin’ Up! You can still order the Handmade & Heartfelt Kit. Depending on where you live, you “might” get it by Saturday, but you can watch Saturday and make your kit when it arrives or watch the replay when your kit comes. Either way, its all fun!

Stampin’ Up! will be holding a FREE virtual event to celebrate World Card Making Day on October 4, 2025 and YOU are invited!! During this event all of us, Customers and Demonstrators will:

  • Celebrate the art of cardmaking.
  • Learn new stamping techniques.
  • Craft along with the presenters and create beautiful, heartfelt cards that you can send out.
  • Connect with fellow stampers.

Event Details

Who: Everyone, including new customers!

When: October 4, 2025, from 2:00 to 3:00 p.m. (MT)

Where: Online

Price of Event: Free

Registration Dates: September 3–October 3, 2025, until 2:00 p.m. (MT)

  • Registration for this event is free. Everyone must register to receive a link to view the event. Also, those who register will receive a gift after the event ends. Even if you watch with some friends, be sure each friend registers so they will get the link and receive a special registration gift.

LAST DAY to register is the day before, October 3, 2025 at 2:00 PM (MT).

This World Card Making Day event will be recorded and will be available to watch immediately following the event. So watch it live and craft along, go back and rewatch certain parts, or watch the recording later if you miss the live event.

REGISTER HERE!

Handmade & Heartfelt Kit

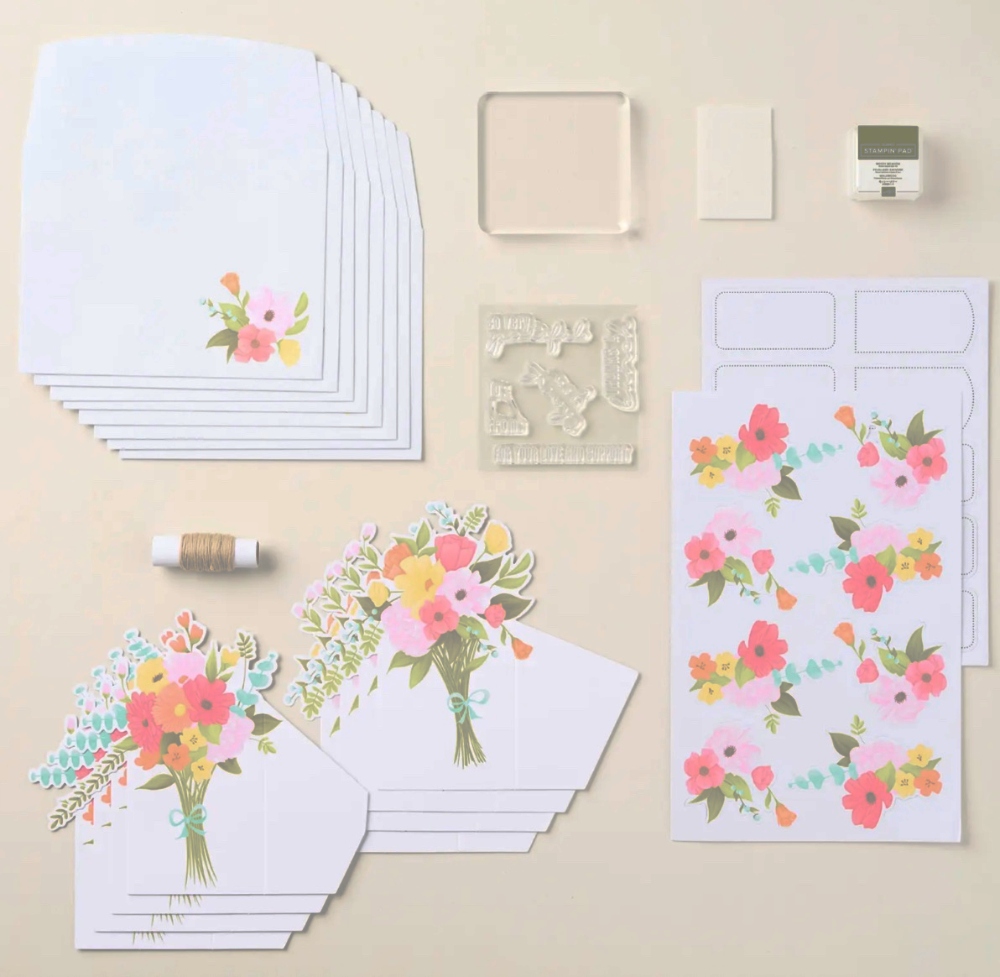
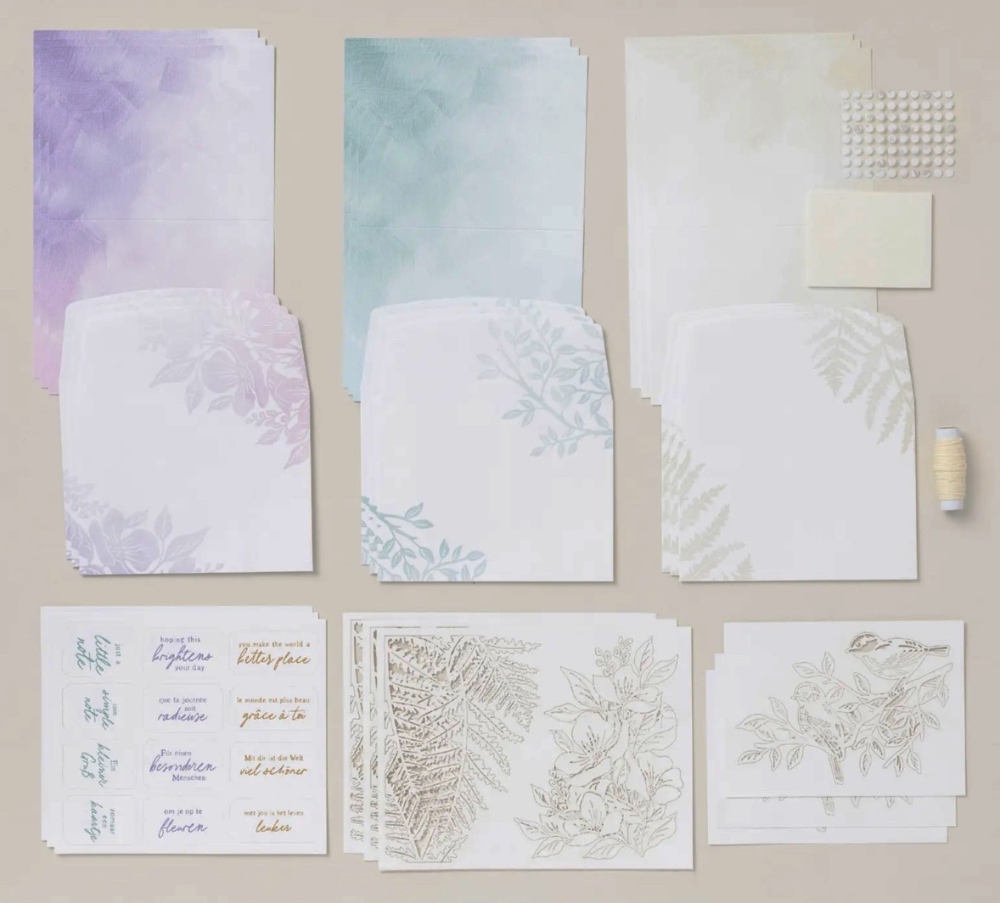
One of the best parts about this event is the opportunity to craft together! This year we’re going to create cards using the Handmade & Heartfelt Kit, an all-inclusive product that comes with everything you and your customers need to make 10 lovely, all-occasion cards.

Item: Handmade & Heartfelt Kit (166213)

Includes: A stamp set, 10 cards and envelopes, a card organizer, shaped labels, twine, glitter adhesive, embellishments, a mini ink pad

Ordering Begins: September 3, 2025

Click here to shop the kit.

Kits are only available while supplies last, so be sure to order ASAP! And you’ll want to order early to make sure you get it in time for the event!

Be sure to REGISTER for the World Card Making Day Stampin’ Up! event!

Christmas Card With Gold Metallic Rub-on

Except for cutting the paper, this Christmas Card With Gold Metallic Rub-on is probably one of the easiest cards you can make! I had ordered these Metallic Textures Rub-Ons quite awhile back, then kept forgetting to try them out. Finally I did to make this card and loved how easy they were to use and how pretty this one turned out!

I started with one of the large tags in the A Touch of Gold Tags Ephemera Pack. I am loving ALL of the ephemera packs Stampin’ Up! has now! I used the wreath Metallic Rub-on on this tag. The directions are easy. Cut out the design you want to use. Remove the backing. Place it on the cardstock where you want it with the pretty design face up. Just use your finger to rub across the design thoroughly. Carefully lift it up, making sure the metallic design transferred. Mine did perfectly!

Metallic Rub-on Application

Christmas Card with Metallic Rub-on Tag

Christmas Card with Metallic Rub-on Tag

For the greeting, I used one from the Greetings For You Ephemera Pack. I like these so much I bought an extra pack so I have plenty for Christmas cards and other projects. These are printed in gold foil and are peel-and-stick adhesive on the back. There are duplicates of each greeting. You can leave the backing on if you want to use your own adhesive or want to pop them up on Dimensionals. This one fit just right.

Christmas Card with Metallic Rub-on Tag

I originally thought I would add some Cherry Cobbler Berries to the wreath, but then I decided to leave it all just gold and white.

The card base is Basic White. I cut a layer of Basic White that I could layer the Gold Tag on. My layer is 3 1/4″ x 4 3/4″. Then I layered that on Gold Foil, a piece 3 1/2″ x 5″. Finally, I added a bow tied with the Gold Striped 3/8″ Mesh Ribbon and adhered with a couple of Mini Glue Dots.

That’s all there is to this card and I think it looks very nice with all the gold! These rub-ons are in the Stampin’ Up! Annual Catalog near the bottom of page 124 so they are for any occasions and designs, not just holidays. I feel like they could be easily overlooked on that page in the catalog because of the light color and all the interesting embellishments on the next page that draws your eye! This wreath I used could just be for summer or any time. Half of the sheets in the package are silver, so you get both gold and silver in the package.

Check out the Metallic Textures Rub Ons (165270) and put a package on your next order! You’ll love them! I think Stampin’ Up! had some many years ago and we rubbed them with like a popsicle stick. These you just use your finger. So easy and fun!

SHOP STAMPIN’ UP! ONLINE HERE!

The 12 Days Of Crafting Advent Calendar Is HERE!

SU Advent Calendar Banner Info

The 12 Days of Crafting Advent Calendar is a brand-new calendar full of products you can craft with all year long! 

Every day of this calendar contains never-before-seen dies, paper, embellishments, and even more items you won’t find in any of our catalogs or in our online store, so make sure to buy one before they’re all gone.

Watch the video below:

This Calendar does not lead to making any one particular project, but rather is a surprise assortment of different products to use any time of year for cardmaking, scrapbooking, gift-giving, journaling, whatever you like. Open one door each day or all of them at once if you can’t wait! Then use your products on whatever projects you like!

These make the perfect gifts for friends or loved ones in your life who love to craft! After all, there’s nothing better than giving the gift of crafting! There will only be a limited number of calendars in store.

PRICE:  $99.00 USD #167335

Click on the link below to see a closeup of the included stamp set and find out a little bit more information in the Online Store.

SHOP TODAY, TUESDAY, SEPTEMBER 23!!

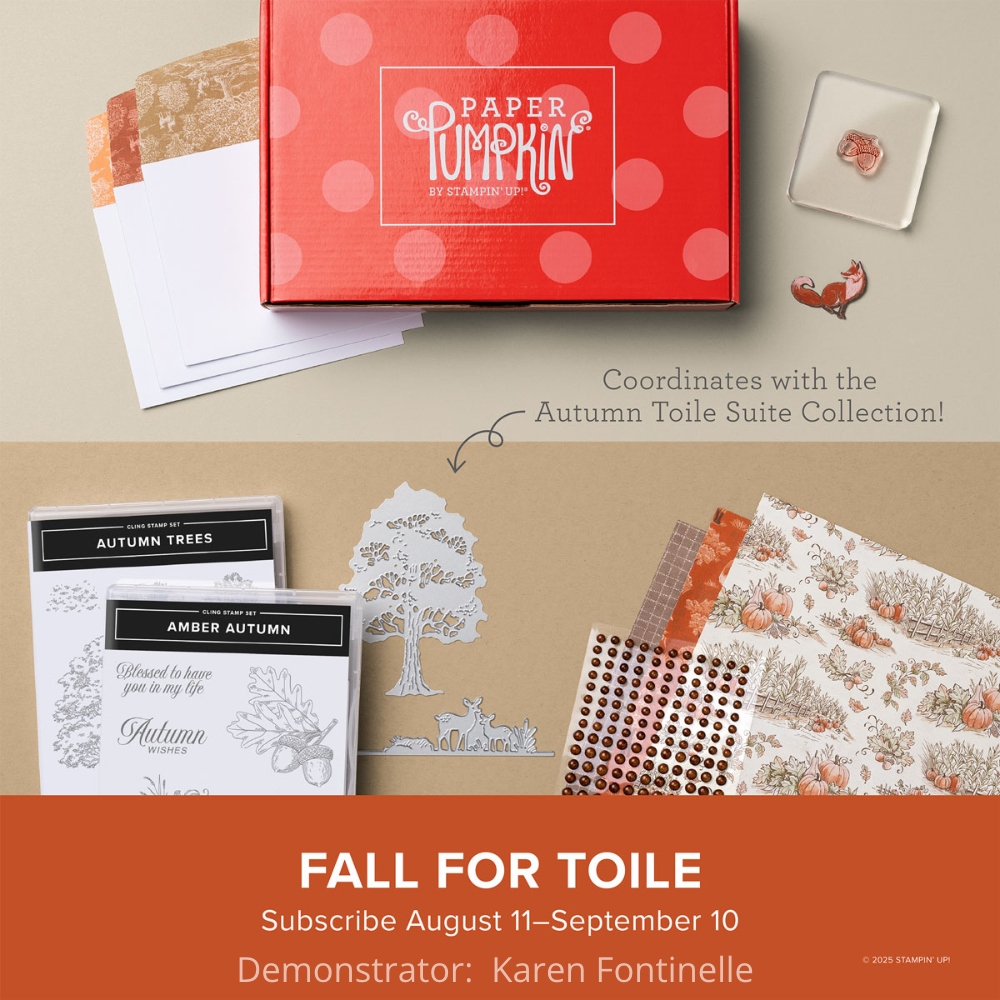
Paper Pumpkin Kit Sept 2025 Fall For Toile

Paper Pumpkin Kit Sept 2025 Contents

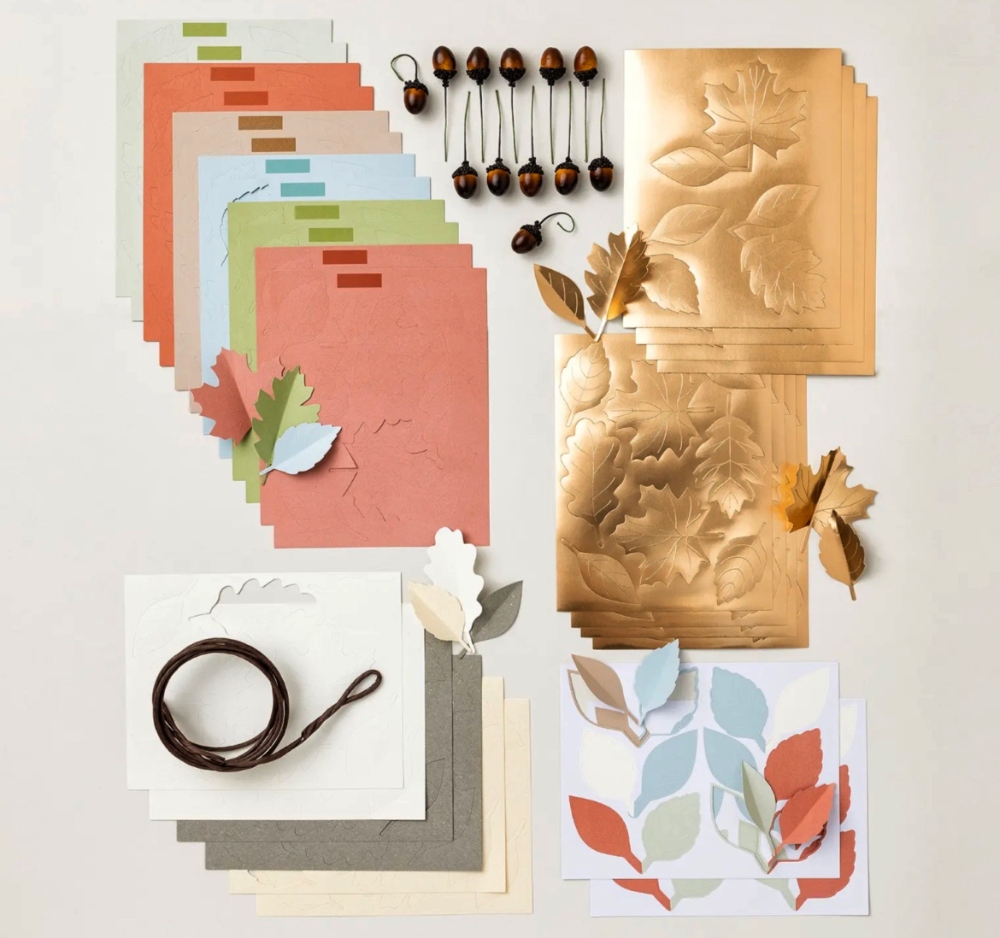
I always say having a Paper Pumpkin monthly subscription from Stampin’ Up! is a gift you give yourself! When I get my kit, it already looks like a gift when I open up the box and see the supplies wrapped up in colored tissue paper! Then I open up the supply package like it’s Christmas and see what all is included! In the photo above , you can see what I discovered when I opened everything for the September 2025 Kit, Fall For Toile! You get the card bases, envelopes with decorated flaps, diecuts, stamp set, ink spot, ribbon, and adhesives! I don’t think I even needed a scissors!

This was a set of nine cards for fall, 3 each of 3 designs. All the kits are easy enough for anyone to make. You get pictorial directions plus you can watch a video, which I usually like to do regardless. The directions show you where to put the adhesive on each piece and what kind of adhesive, which, again, is included in the kit. I would say this kit was really easy to make. Just some easy stamping on the diecut pieces for two of the greetings and some acorns for another decorative piece, a little ribbon to add to three of the cards, and the rest was just adhering the diecuts to each card. These are beautiful cards to send to friends and loved ones for fall or even Thanksgiving.

Paper Pumpkin Sept 2025 Cards

The top left card was the most “difficult”. It was fun stamping leaves around the edges of the card. I always like doing that random stamping! Then I had to placed the two diecut leaf groupings together, plus the foil-accented dark leaves on the card, all popped up on Dimensionals. Then the stamped greeting and ribbon adhered to the back was adhered over the intersection of the leaves.

The top right card is the first one I made. The card base already has that pretty toile background on it (also on the backside of the card!). The greeting was already printed, I only stamped the cute pair of acorns. The tree and frame are a diecut popped up on dimensionals.

The bottom card was the very easiest. I stamped the little birds in the corner of the cornfield and adhered it to the card base with Dimensionals. The pumpkins and fox are all diecuts and popped up also. The greeting is stamped and popped up. Nothing could be easier to make!

You, too, could get in on the fun of Paper Pumpkin Kits by subscribing before October 10th. For October you will receive a Kit to make Christmas cards that have flocked pieces to decorate the cards. For November, your Kit will make small goodie boxes perfect for the holidays to present a gift card or small gift or treat. Personally, I like the holiday kits the best, but then I love holidays of all kinds!

When you become a subscriber, besides getting the kit in the mail every month, you also have the option to purchase any past kits that are available, refills (which do not include the stamp set or ink spot, but otherwise have all the same supplies), and some add-ons like small dies that you can use to enhance your cards and projects or use any time. If you like a past kit but only see a refill, you can probably make use of that even without the stamp set and ink spot that would come in the full kit. For example, this fall kit I am showing has already been mailed out to subscribers, but once you subscribe, perhaps the “refill” kit will still be available, as it is as I write this, and you can just use some of your own stamps and ink to make the cards. Then your first kit will come in the mail, Cozy Christmas, right after October 10th.

And you can always use your supplies any way you like! Lots of alternatives are always posted online as soon as people get their kits and start creating. For example, with this month’s kit, with the card bases printed on both the front and the back, you could cut the two sides apart and make twice as many cards by adhering the printed part of the kit card to your own cardstock base. You can change it up however you like. Sometimes I make some of the cards as designed and then make my own alternatives. It just depends on what you like to do. If you are a beginner, at first you will probably just want to follow the directions for the fun of crafting. As you get more experienced, you might like to make the projects a little bit different – maybe add your own greeting instead or add your own embellishments if you have some.

To join Paper Pumpkin, just click the link below. No risk, no obligation to continue for any length of time. Stampin’ Up! guarantees every kit, so if you have a problem, just let them know. You can even skip a month if necessary or if the hint of the upcoming project doesn’t appeal to you. It used to be a total surprise what would come in the kit, but now we get somewhat of a hint, which I am happy about. Subscriber or reactivate a previous account you had, by October 10th! The 10th of the month is the date to always remember if you want to make any changes to your account as that is the date the current subscription ends and on the 11th the new kit comes out. It’s easy to go into your account and skip a month, or heaven forbid, cancel! I hope you will try out Paper Pumpkin and enjoy some pre-planned crafting with all the supplies right there in your box! And wrapped up in tissue paper like a gift!!

JOIN PAPER PUMPKIN HERE!

Beautiful Gallery Happy Halloween Card

Beautiful Gallery Happy Halloween Card

This Beautiful Gallery Happy Halloween Card I thought was somewhat of an original idea when I made it, but then I saw that Sara Douglass had made something very similar on Instagram on the @stampinupofficial account! I got the idea to use one of the scenes in the Beautiful Gallery 6″ x 6″ Designer Series Paper as the background for a Halloween card from seeing people buying framed paintings of scenery like in a thrift store and then painting extra things on the picture. I think I also saw something on an Instagram story from one of my favorite gift shops that reminded me of that. It all made me think of the Beautiful Gallery paper as a background for the two stamped characters in the Spooky Halloween Stamp Set .

I’ll tell you how I did mine, then tell you about Sara’s, and show you what the paper looks like on its own. My card base is made with Crumb Cake cardstock. I chose a scene in the Beautiful Gallery DSP that I thought could work with the two Halloween characters. It has a grayish/brownish sky, some green hilly land, and some white stalky flowers in the forefront. I cut this paper down to 4″ x 5 1/4″ to fit the front of the card. Before adhering it, I colored in the sky a little bit to make it look a little spookier. I used a Small Blending Brush to lightly add some Petunia Pop ink in the clouds and some Pumpkin Pie ink in the lighter horizon area just above the trees and hills.

The two characters were stamped from the Spooky Halloween Stamp Set on Basic White with Memento ink. Normally I would color them with Stampin’ Blends markers, but I felt they might be too vibrant for the Halloween scene so I used Watercolor Pencils instead. I chose a variety of colors of the pencils from my old set. You can choose from Assortment 1 HERE or Assortment 2 HERE. I used to love to color with these pencils! After coloring, if you like, you can use a Blender Pen to smooth out the lines or blend some colors. If you are using Basic White, you want to color lightly and not overdue it or the paper will pill a tiny bit, Or you can stamp on watercolor paper. You could also use Water Painters, which are now back in stock. I forgot I bought the Spooky Halloween Dies so I fussy-cut these two costumed characters. You can buy the stamp set and dies together in the Spooky Halloween Bundle and save 10%.

The two Halloween guys are popped up on Stampin’ Dimensionals, some little bitty pieces, although you could adhere them flat on the card as well. The greeting is in the Spooky Halloween Stamp Set and is stamped in Petunia Pop ink on Basic White, then cut apart with Paper Snips scissors. I also used my Small Blending Brush to add a little bit Pumpkin Pie ink to make it look a little spooky. The greeting is also popped up on Dimensionals. The little stars in the sky are from a gift a special friend brought back for me from Japan as she visited all kinds of stationery stores on her trip!

This was such a fun card to make and I’m happy with the way it turned out. This is what the paper looked like before I started.

Beautiful Gallery Paper Halloween Card

On the @StampinupOfficial Instagram account, Sara Douglass used one of the other papers, the one with the cottage. She used reinkers in Gorgeous Grape and Smoky Slate with a Water Painter to add color to the sky. She used White Craft ink to draw in two little ghosts in the foreground and one tiny one farther and added eyes to the ghosts with a Black Stampin’ Blend Marker. I love what she did with the scenic paper and the little ghosts! Go check it out.

Spooky Sweet Slimline Halloween Card

Spooky Sweet Slimline Halloween Card

I thought it would be fun to make a Halloween card again so I pages through the Spooky Sweet Specialty Designer Series Paper. I hadn’t used this paper with the building fronts on it, and I wondered how I would use that on a card. After seeing it in my mind as looking like a spooky high-rise apartment building, I decided on this Spooky Sweet Slimline Halloween Card. A slimline card would look like a tall building with multiple spooky windows!

The Basic Black card base is cut at 6″ x 6″ so I could score and fold it in half at 3″. That makes the card 3″ x 6″ which fits in some regular office-style envelopes I usually have on hand. You can make a slimline card taller and wider if you want.

For the designer paper layer, the Spooky Sweet Specialty Designer Series Paper, I cut it just “a smidge” smaller than the 3″ x 6″ card base. That’s technically 2 7/8″ x 5 7/8″. Or you could cover the entire front, or make the margin the normal size. For the inside of the card, I used “the other side” of this pattern with all the spooky windows which just has some light orange lines across it. Since it was fairly light, I was able to stamp “Happy Halloween” inside, from the Spooky Halloween Stamp Set. I also stamped some bats for fun!

Back to the front of the card! I stamped the word “Spooky” from the Spooky Halloween Stamp Set in Pumpkin Pie on Basic White cardstock, then just cut around each stamped word. I think the words fit better on the card this way. It’s a great technique to use when you need to save space. I popped up all the words with Mini Stampin’ Dimensionals.

For a little bit of embellishment, I added a few of the purple stars in the new Shimmer Star Foam Stickers. These little things are so fun to use! They really are foam so they feel very funny when you slide them off the sheet! The are sparkly and fun and come in three sizes and three colors – white, purple, and black.

This Spooky Sweet Paper is called “Specialty” because also included in the package are cut-apart images and diecut images you can use for extra fun on cards, Halloween projects, and scrapbook pages! Check out all the Halloween products in the Stampin’ Up! Online Exclusives!
SHOP HALLOWEEN AT STAMPIN’ UP!

Spooky Sweet Slimline Halloween Card inside

Cozy Christmas Paper Pumpkin Kit for October

Paper Pumpkin Oct 2025 Cozy Christmas

It seems Christmas is really coming early for us crafters! That’s the way it must be because we, of all people, can’t wait until the last minute to show people all the fun things to make for the holidays! Here is the Cozy Christmas Paper Pumpkin Kit that will come out right after October 10th!

I think Paper Pumpkin is always like a gift I get in the mail every month! The contents are even wrapped up pretty in colored tissue paper inside the box! Presentation is everything! And I especially love the kits that come out for holidays, like this Cozy Christmas Kit!

With this kit, you will create heartfelt Christmas cards with classic charm and flocked accents!

KIT DETAILS
• Makes 9 cards: 3 each of 3 designs with 9 coordinating envelopes
• Precut paper pieces with soft, stitched-look flocking
• Shiny red sequin embellishments
• Coordinating colors: Basic Beige, Cherry Cobbler, Garden Green, Pecan Pie
(Classic Stampin’ Spot), Real Red

In my opinion, the Paper Pumpkin Kits have only gotten better and better over time! And the holiday and Christmas ones are my favorites!

The box is even decorated for the holidays, an extra-special treat! Do a little early Christmas SHOPPING and order one kit for yourself and get a few extras for gifts! These kits are easy enough for everyone. Besides a pamphlet with directions, you can watch a video and you will also see alternate ideas online if you want to change things up a little. No risk, no obligation to continue for any length of time. Skip a month now and then if you want to. If you do already have a subscription that you “paused” last month, make sure you reactivate your subscription so you will receive this October kit!

JOIN PAPER PUMPKIN HERE TODAY!

Elegant Pine Snowflakes From Our House To Yours Card

Elegant Pine Snowflakes From Our House To Yours Card

This Elegant Pine Snowflakes From Our House To Yours Card is an easy one to make. When you are making a lot of Christmas cards, you need to think of designs that make it easy to make multiples. Of course, you might also want to make some extra-special cards for extra-special people! That is what is so fun about cardmaking – you can make “easy” cards that don’t take a lot of time but still look lovely, or you can spend more time and use more products to make something “fancy”. It’s all fun and all creative!

This card came about just because I was cutting up some designer series paper to send as little thank you samples to send to customers who had ordered from me. Since I just got this Elegant Pine Snowflakes Designer Series Paper in my order the other day, it was one I knew they didn’t have yet. Sometimes when you are just flipping through a package of designer series paper, maybe one pattern in particular will just jump out at you and you’ll want to use it next time you make a card. As I was cutting samples of this paper, this pattern just “spoke to me” and I wanted to use it for the next card I made.

The card base is Shaded Spruce cardstock. It matches perfectly with the foliage in the designer paper. I liked the red berries in the paper, so I added the Real Red 1/2″ Shiny Ribbon. I just took enough ribbon to wrap across the front and around to the back a little bit on each side. This saves a couple inches of ribbon since you don’t wrap it completely around the card. After the ribbon was attached, I could adhere the designer paper to the card base.

For the greeting, I chose a greeting in the Greetings For You Ephemera Pack in the Holiday Mini on page 15 at the top. Stampin’ Up! has quite a few ephemera packs of all kinds and they are so handy and fun to use! These are peel-and-stick stickers of gold foil Christmas greetings, even multiples so you can make more than one card with each greeting. I’ve already ordered a second pack to have on hand. And you can use them on tags, gift bags, and other projects, not just cards. For a background, I diecut a label from the Unbounded Love Dies, now retired, but you can use something similar or simply cut a rectangle piece of cardstock. I used Shaded Spruce with a partial layer of Real Red. The way to “fake” another layer when you don’t have a larger die is to cut it out, then cut it in half, horizontally as I did here or vertically, if you want it to show on the sides. Then glue one half to the top just showing a little border and the other half to the bottom. On the back, there would be a space between the two halves. I do this a lot! The greeting is popped up with Stampin’ Dimensionals right over the ribbon.

To embellish the card, I tied a bow out of the ribbon and adhered it to the card with Mini Glue Dots. It is easier than trying to wrap the ribbon all around and tie a bow, but you could do that. I also added the beautiful Traditional Sparkling Sequins, the small gold ones, to the greeting and on the designer series paper. I’m telling you, these are gorgeous and I think you should order a package or two soon while they are in stock! They won’t only have to be for Christmas either. You will be able to use them on any cards and projects where you want some sparkle!

Here is another card, the first card, I made with the Elegant Pine Snowflakes Designer Series Paper. It comes in a Suite in the Online Exclusives if you would like ALL the things!

SHOP STAMPIN’ UP! ONLINE HERE!

Holiday Mini Catalog Cover SeptDec 2025

September-December 2025 Mini Catalog (Holiday Mini Catalog)

Online Exclusives

Monochromatic Amber Autumn Acorn Card

Monochromatic Amber Autumn Acorn Card

It’s been a couple of rough days so I think it’s time to get back to stamping. Stamping is good for the soul! Stamping, creating, sewing, painting, scrapbooking, cross-stitching, knitting, crocheting….whatever it is that you love to do and takes your mind off the rest of the world for a little while.

I made this Monochromatic Amber Autumn Acorn Card as an example of a card you could make if you wanted a quick and easy card and one that doesn’t require coloring! I love to do coloring with my Stampin’ Blends, but sometimes you might not want to take the time. And that’s okay! Look at the nice card you can make with no coloring! When I think of monochromatic I think of one color, but it can also be different shades or hues of that color, lighter or darker variations.

This card uses the new Amber Autumn Stamp Set. I think this is a beautiful stamp set with nice greetings. I almost wish there were more images in this same style because the artwork is so beautiful. For this card I chose the acorns and leaves image.

The card base is Early Espresso cardstock. I intended to use Pecan Pie but I saw that Early Espresso was one of the coordinating colors of the designer paper I chose. Usually I play around with a couple of colors if I’m not positive and see which one works the best. That’s how I decided to use Early Espresso. I was afraid it might be too dark for the look I wanted but I like the finished card just fine.

The layer on the card base is a brownish diagonal plaid in the Timeless Plaid 6″ x 6″ Designer Series Paper. I think this paper is great to use for fall cards. The focal point of the card is made with the new Branching Out Dies. These dies come with six nested frame dies, plus some pine branches, sprigs, even an acorn. I like the shapes of these frames and the little stitched perforations around the borders. I bought these dies for the cute frames which we always seem to need more of, especially ones we can layer in the right size, plus I can use the extra little dies as well. You can get the stamp set along with the dies in the Branching Out Bundle. After stamping the acorn and leaves on a piece of Very Vanilla cardstock with Early Espresso ink and diecuting it with one of the Branching Out Dies, I layered it on the next larger frame in Early Espresso. The whole piece is popped up on Stampin’ Up! Dimensionals.

To embellish the card I little bit, I added a bow at the top with a double piece of Linen Thread that is adhered with a couple of rolled up Mini Glue Dots. I think of Linen Thread as one of my main staples to have on hand in my stamping products because you can use it for so many projects. I also added a few of the Iridescent Foil Gems. They are very pretty with a little sparkle and completely neutral. They have been one of my favorite and most used gems since they came out.

Next I will try a card with this same stamp but not monochromatic and see how that turns out!

SHOP ALL THE NEW THINGS AT STAMPIN’ UP!