Author Archives: Karen Fontinelle

Florals In Bloom Birthday Blooms Card

Florals In Bloom Birthday Blooms Card

I got the idea for this Florals In Bloom Birthday Blooms Card from a sample in the new Stampin’ Up! Annual Catalog on page 89. The unique part of that card and this one is that instead of having a rectangle or square of designer paper covering only the top part of the card base, the designer paper is cut by hand with Paper Snips up and down, willy nilly, along the images on the paper rather than in a straight line. In the photo of the card, you can see that curvy edge on the left side of the card.

The card base is Cloud Cover cardstock, one of the new 2025-2027 In Colors. It’s a good idea to purchase an assortment package (or two) of the In Color cardstock and then you get all the new colors and see which ones you like the most.

The floral paper is the Florals In Bloom Designer Series Paper in the Annual Catalog. The greeting is stamped in Peach Pie ink on Basic White and then diecut with one of the Spotlight On Nature Dies. The greeting is in the Textured Floral Stamp Set (retired) but you can choose one you have suitable for the occasion.

The diecut greeting is popped up on Stampin’ Dimensionals. The ribbon, folded in half, is adhered under the greeting with Stampin’ Seal to hold it in place while I tried to also place Dimensionals over the ribbon to help hold it down. I also cut out a few flowers and leaves by hand from the designer paper to embelllish the greeting a little bit. Of course I had to add a few pearls in the 2025-2027 In Color Flat Pearls in Cloud Cover. You could choose from many other gems or sequins you may have for a little sparkle on your card!

Page through the catalog and see what fun ideas speak to you when you are looking for a card to make! Don’t forget about the card templates on page 24 to give you a vision of a layout for your card.

SHOP STAMPIN’ UP! HERE!

Cheerful Daisies Just For You Card

Cheerful Daisies Just For You Card

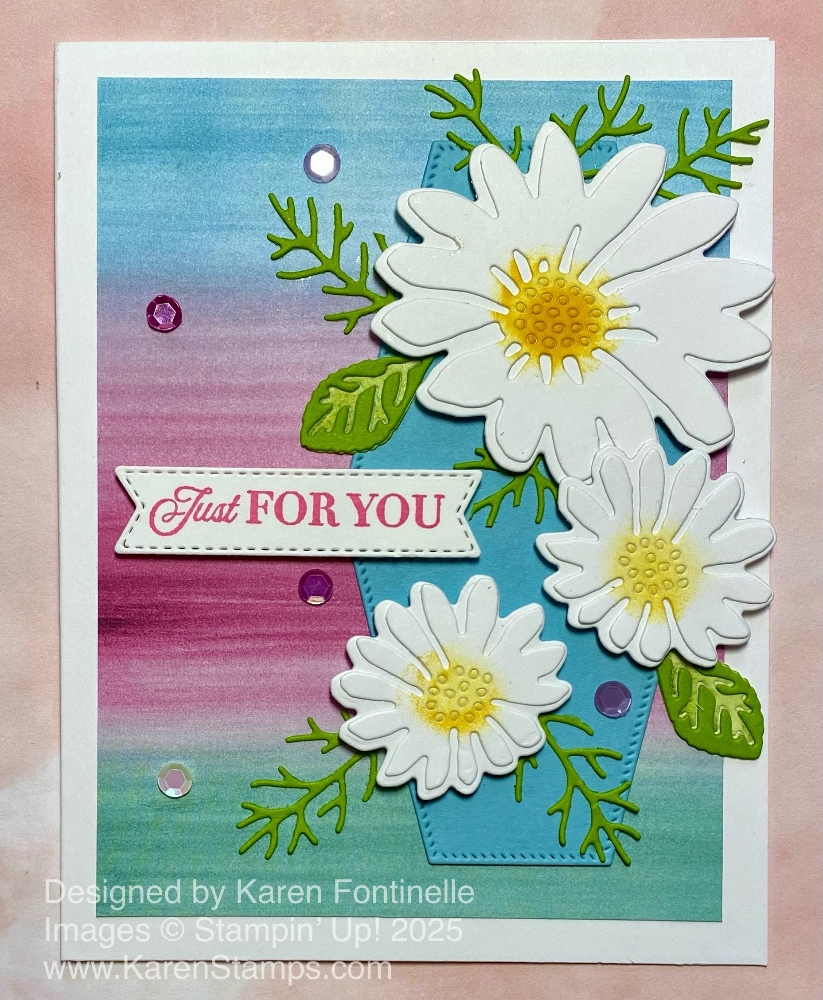
This Cheerful Daisies Just For You Card can be made for many occasions and is bound to be “cheerful” for whoever receives it! I love the paper behind the daisies! And if you like the diecut daisies, check out the Cheerful Daisies Dies in the Stampin’ Up! Online Store in the Last Chance section. They are 50% off as I write this!

The card base for this card is Basic White, or you could use the Basic White Thick Cardstock for something a little heavier and stronger. The colorful layer on the card front is the Full Of Life 6″ x 6″ Designer Series Paper. Lots of the patterns would have been fun and pretty to use but I really liked this soft, swiped look of different colors that all look beautiful together. This paper is cut at 3 3/4″ x 5″ to show off a little more of the white margin around the sides.

The daisies are all diecut and layered together. I colored in the daisy centers with a Sponge Dauber and Daffodil Delight ink. The diecut leaves are from Granny Apple Green cardstock. The daisies are popped up on Stampin’ Dimensionals and the leaves adhered with Multipurpose Liquid Glue. They are just slid under the daisies in different places.

I used the Nested Essentials Dies to cut out a Balmy Blue background to go behind the daisies. This is the die that is 4 1/4″ long. It just adds something for the daisies to look attached to.

The greeting is stamped in Melon Mambo ink and was just there in my package so I’m not sure which stamp set that greeting is from but you could use whatever suits your occasion when you make the card. For a little sparkle I added a few Purple Adhesive-Backed Sequins that were a free product to earn during Sale-A-Bration 2025. You can use any sequins or gems, of course.

If you like daisies, be sure to get these dies at a great sale price! You don’t have to have the stamp set, which is no longer available, in order to use these dies.

SHOP STAMPIN’ UP! HERE!

Storybook Moments Oh Happy Day Card

Storybook Moments Oh Happy Day Card

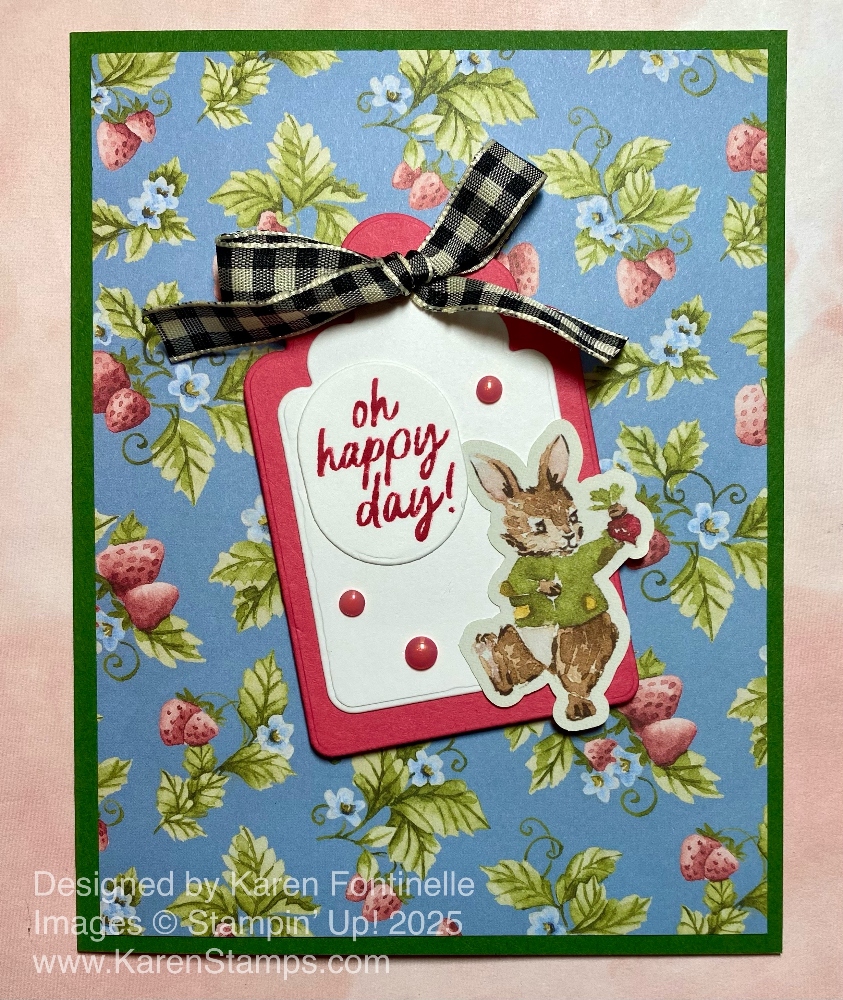
This Storybook Moments Oh Happy Day Card is just a fun card that came about when I saw this designer paper, even though I was looking for some other designer paper for another card idea I had! That’s how it goes sometimes when you are feeling creative! You could put many other greetings on the front of this card, but no matter what, I think it would be a fun card for someone to receive.

The card starts with a base of Garden Green cardstock. In the past with this paper I used Boho Blue cardstock but that is now “retired”. I did like Boho Blue but I’m not sad the other In Colors in that group are gone! The beautiful paper for the card layer is the Storybook Moments Specialty Designer Series Paper. I have very little of it left so you know I really liked it a lot and used it a lot! This paper is still available in the Online Store. This “Specialty” paper comes with two sheets of diecuts that you can use with the paper. You can see the little bunny diecut on the tag on this card. There also is the Storybook Moments Specialty Designer Series Paper & Sticker Sheet. Be careful that you choose which one you want….diecuts or sticker sheet! Fun options to have!

I absolutely love this designer paper pattern with the strawberries and blue background! I used the Something Fancy Dies, which are discounted in the Last Chance category in the Online Store. I chose these tag shapes, the larger in Strawberry Slush cardstock and the smaller one in Basic White so I could add a greeting. As it turned out, I already had this one stamped and diecut with the More Messages Bundle so I used it. It was the perfect fit! The little diecut bunny may be holding a radish but it could be a strawberry I think!

For some embellishment, I used old and new. The Black & Very Vanilla 3/8″ Large Check Ribbon is on the Last Chance list and discounted. I didn’t plan to use it but it was right there staring at me when I looked at my ribbons, and I think it works fine. The bow is adhered with a couple of Mini Glue Dots. For something new, I added three Strawberry Slush 2025-2027 In Color Flat Pearls on the tag. Then the whole tag is popped up on Stampin’ Dimensionals.

Pretty easy card to make! Check out those Something Fancy Dies if you want something useful that is discounted on the Last Chance List! And if you don’t already have the Storybook Moments Specialty Designer Series Paper that was in the Spring Mini, its a nice paper to use for all occasions and even baby cards and projects, not to mention scrapbook pages.

SHOP STAMPIN’ UP! ONLINE HERE!

Make a Card For Father’s Day Sunday!

Father's Day Card Deposit photo

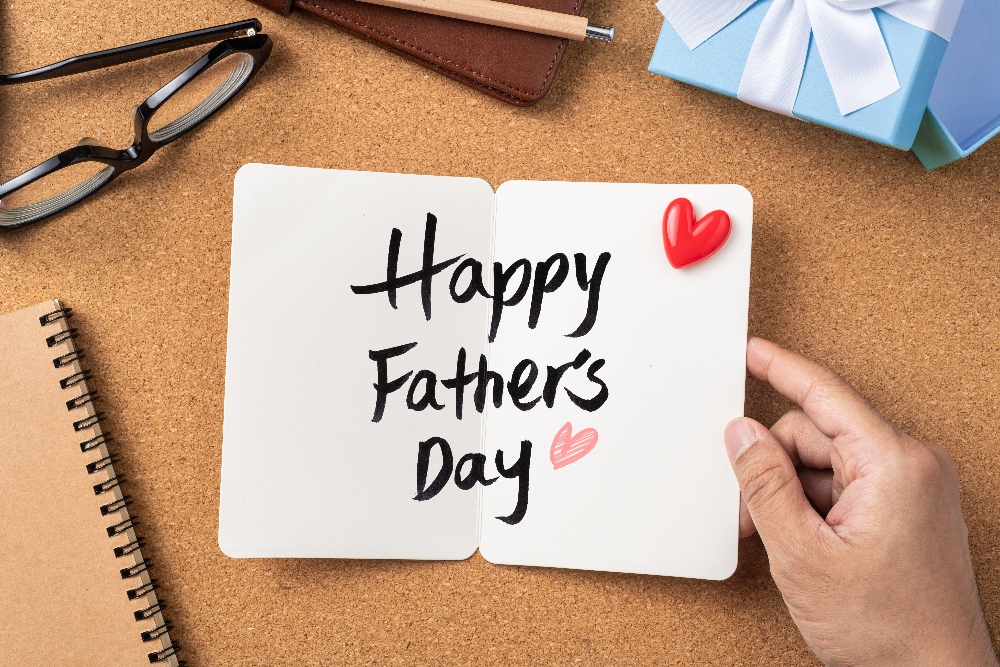
Sunday is Father’s Day! If you still need a last-minute card for your dad, your husband, your son, your uncle, your grandfather, whoever is a special father-figure in your life, here are some past ideas you might be able to use for inspiration!

In Good Taste Masculine Father's Day Card Closeup

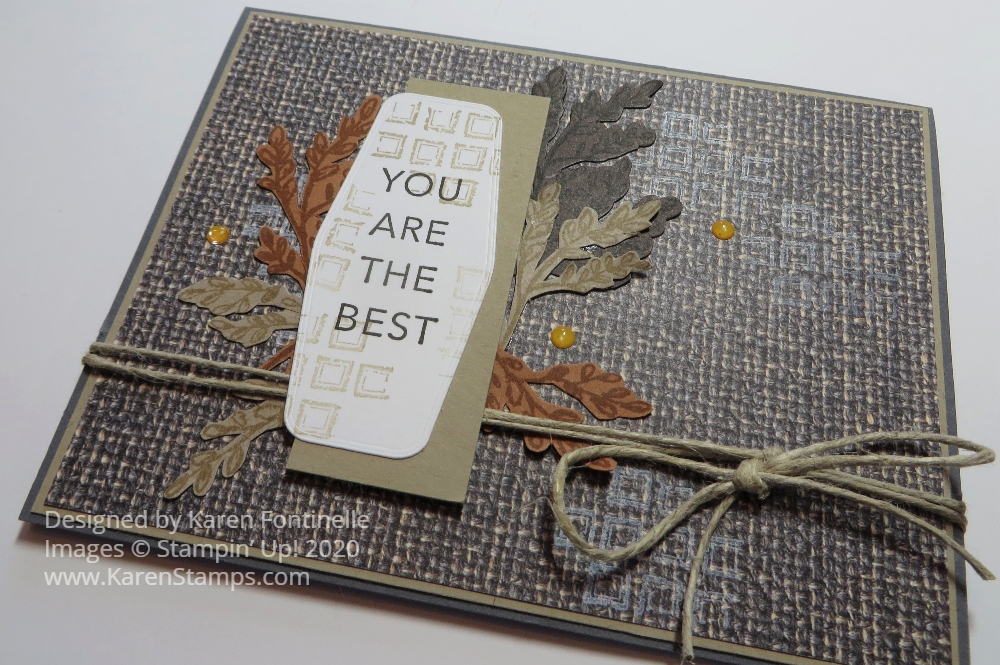
In Good Taste Masculine Father’s Day Card

This card just has a layer, a greeting with some diecut leaves behind it and some Linen Thread.

Colorful Card For Father's Day

Colorful Card For Father’s Day

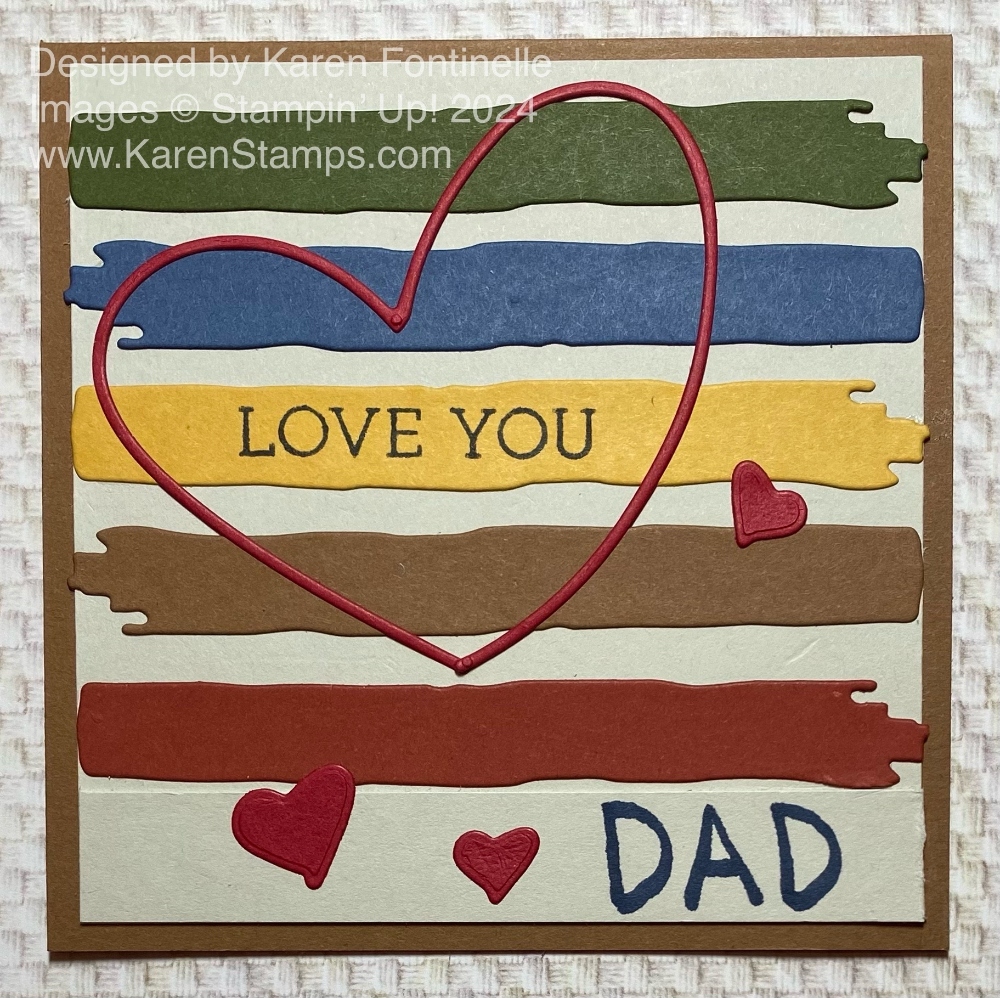
A colorful card for Dad using the Friends For Life Dies. If you don’t have an alphabet, just print what you want to say!

Zoo Crew Father's Day Card

Zoo Crew Father’s Day Card

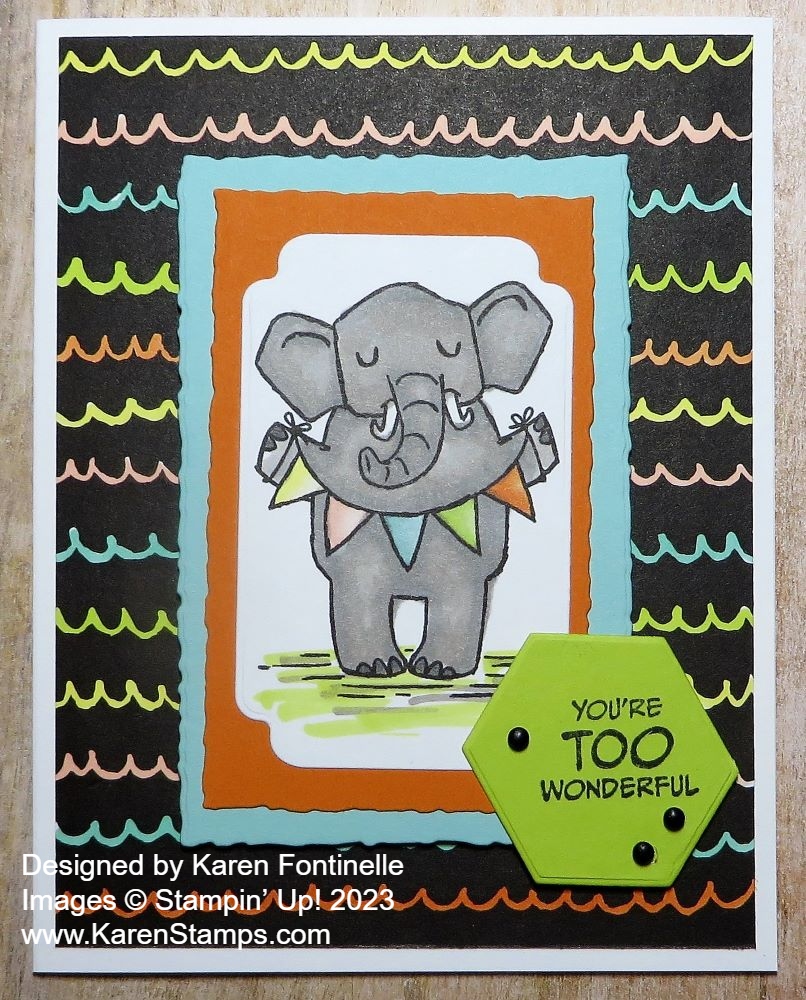
A funny card is always good for Dad, too! Make something like this fun elephant from the Zoo Crew or something similar! Use what you have!

Dad Card For Father's Day

A Dad Card For Father’s Day

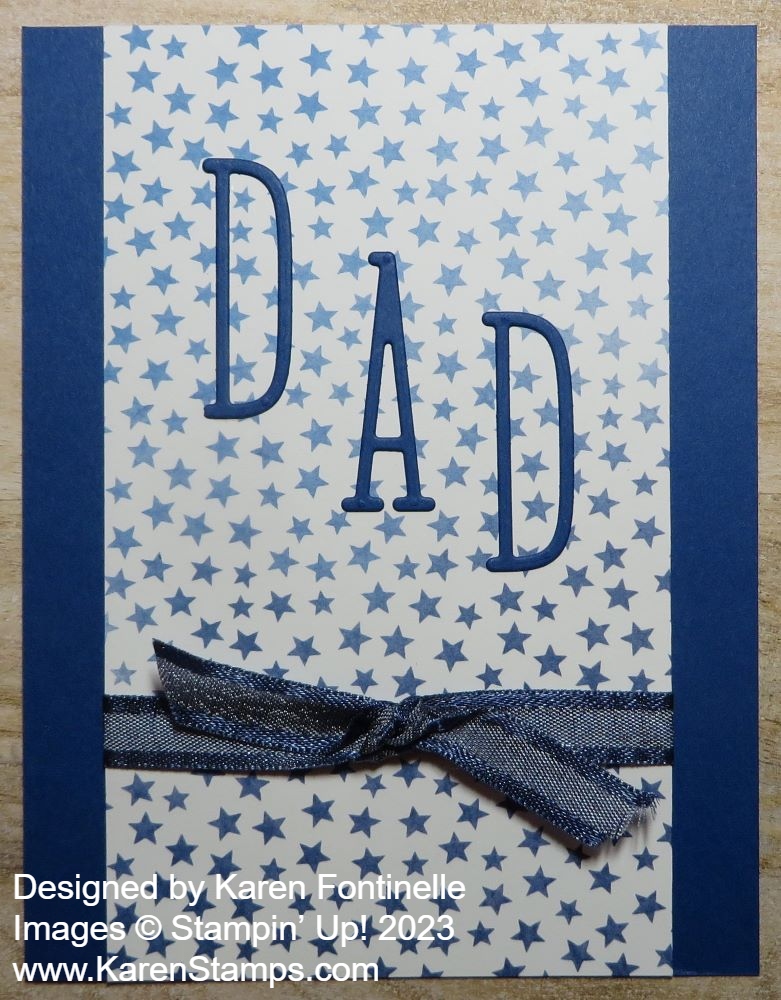
Easy card for Dad with an alphabet and stars!

Beautiful Gallery Boats Father's Day Card

Beautiful Gallery Boats Father’s Day Card

The Beautiful Gallery Designer Series Paper scenes are wonderful to use for masculine cards. Just trim off the edges so the part you want to be the focal point is centered on the card.

Full Of Life Slimline Hip Hip Hooray Card

Full Of Life Slimline Hip Hip Hooray Card

Use this colorful Full of Life Designer Paper for a happy card for Dad!

Beautiful Gallery Happy Father's Day Card

Beautiful Gallery Happy Father’s Day Card

Another card with the Beautiful Gallery Designer Series Paper with a different scene. Just add a greeting and you have a perfect card!

Paper Pumpkin Kit Sweeter With You July 2025

Paper Pumpkin Kit Sweeter With You July 2025

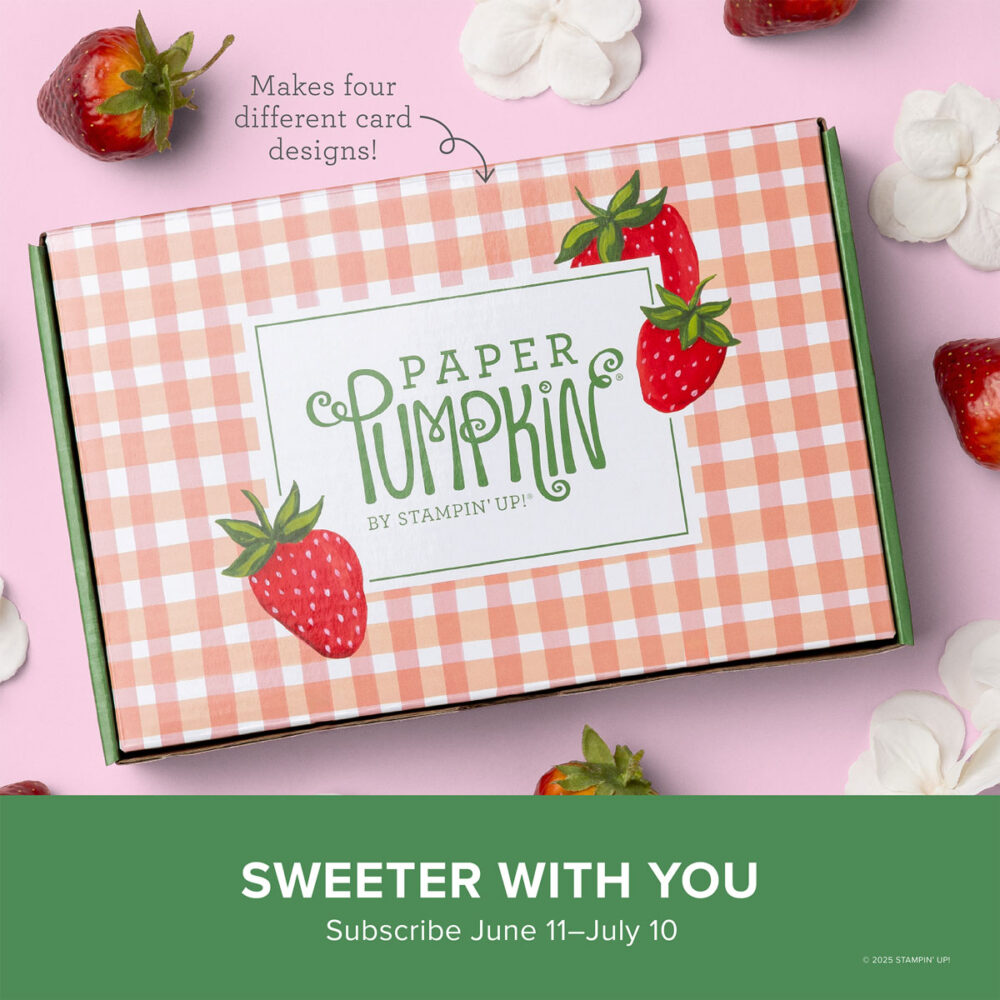
Paper Pumpkin is the gift you give yourself, I say! Sign up to get the Paper Pumpkin Kit each month beginning in July by subscribing by July 10th. Around the middle of the month, you will find this kit in your mailbox! All you have to do is open the box, maybe grab a scissors, unwrap the kit inside with all the supplies you need to make the project. Adhesive is even included! You get an exclusive stamp set for this project but you can save and use forever. With your very first Paper Pumpkin Kit you will also receive an acrylic block to hold your stamp. You also receive an ink spot to use with the kit. Save these and you’ll soon have a nice collection of mini ink pads to use anytime and great for traveling if you want to take some stamping with you! There is always a video you can watch

July Kit: Sweeter with You
Subscribe June 11–July 10
Craft sweet handmade cards featuring sun-kissed strawberries and breezy gingham.
• Makes 8 cards: 2 each of 4 designs with 8 coordinating envelopes
• Precut paper pieces and vellum accents
• Hand-painted card base designs
• Coordinating colors: Garden Green (Classic Stampin’ Spot), Granny Apple Green,
Pool Party, Poppy Parade, Strawberry Slush, Timid Tiger

And how cute is the gingham box!

Beautiful Gallery Happy Father’s Day Card

Beautiful Gallery Happy Father's Day Card

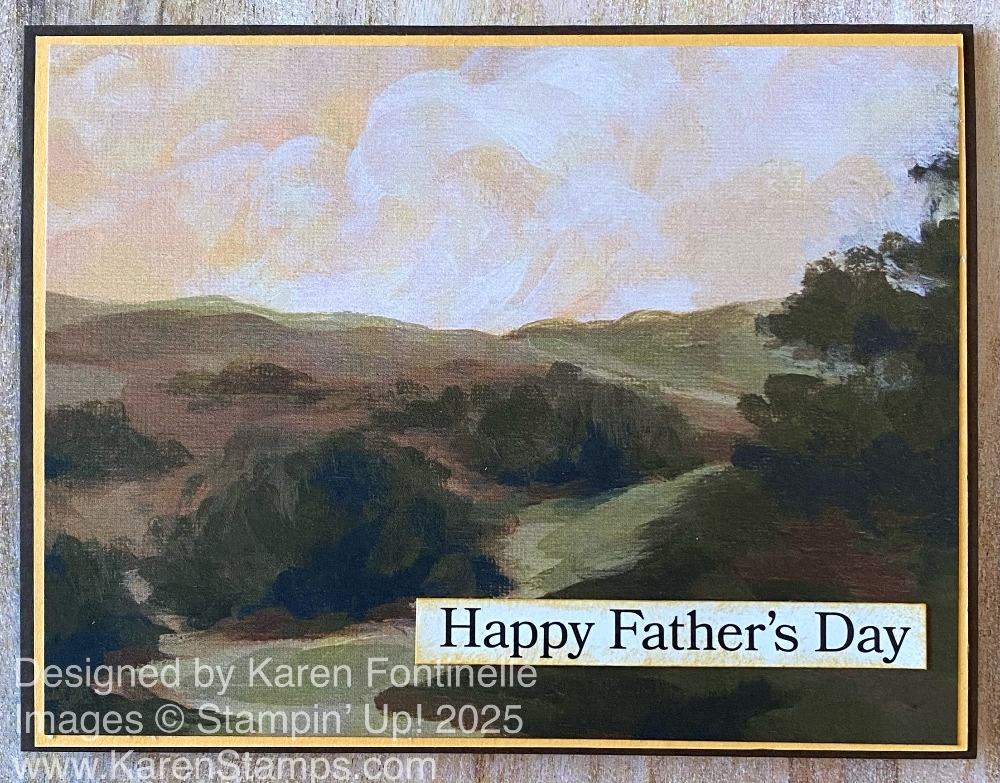
Father’s Day is coming soon on Sunday, June 15th so it’s time to make a special card for a special father in your life. Here’s an easy Father’s Day card you can make with this beautiful scenic paper. Just add a greeting and you have a nice card, the Beautiful Gallery Happy Father’s Day Card.

I chose a paper in the Beautiful Gallery 6″ x 6″ Designer Series Paper. There are several choices you could make on the paper that would be similar to this card. I loved the orangish sky in the background behind the scenic hills and mountains with a little stream coming down next to the tree. I cut this paper at the usual size – 4″ x 5 1/4″ for the front of the card, but I decided to add a layer of Peach Pie cardstock (one of the In Colors continuing on this year from last year) behind the designer paper to accent that orange sky. That cardstock is cut at 4 1/8″ x 5 3/4″ which makes for a very narrow margin around the edges. The card base is Early Espresso. I tried out several colors before I settled on this dark brown color.

The greeting is an ephemera piece in the Greetings For All Mix & Match Ephemera Pack. That makes it easy! No stamping necessary! If you didn’t have an official Father’s Day stamp or this ephemera pack, you could certainly choose another greeting from your stash! Something about love, being awesome, being incredible, you are special….anything along those lines will surely convey your feelings and you can write “Happy Father’s Day” inside the card. I trimmed down this greeting just very slightly to make it a tiny bit smaller on the card and even sponged a little Peach Pie ink on the greeting to take away some of the bright white. Probably Crumb Cake or another brown would have looked good too. This ephemera pack is “currently unavailable” but you can check off that you want to be notified when it comes back into stock if you like.

This Beautiful Gallery DSP is something special with its old-world art gallery look. You can make the paper into cards or projects or simply add to a picture frame for some home decor! Here’s another card I made using a different patterned paper in that package, but in a slimline style. Notice how it does not have a “Father’s Day” greeting on the front, but the greeting it does have would be perfectly suitable.

SHOP STAMPIN’ UP! ONLINE HERE!

Florals In Bloom Decorated Kraft Gift Bag

Floral Blooms Decorated Kraft Gift Bag

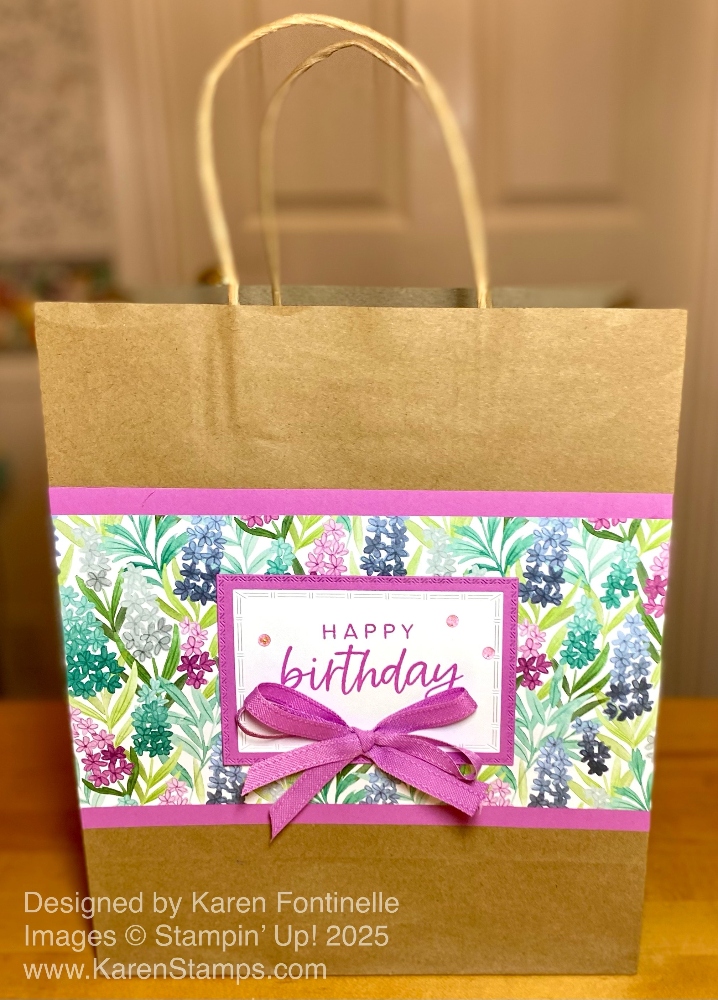
When I came across this plain kraft shopping bag, I decided it would be a good idea to decorate it for a summer birthday gift. This Floral Blooms Decorated Kraft Gift Bag was easy to make and now it is ready to go when I need a gift bag for a birthday! The beautiful paper really transformed this plain bag!

All these measurements depend on the size of your bag, obviously. My bag is 9 1/2″ wide. Just adjust your measurements according to how big or small your bag is. I used the Florals In Bloom Designer Series Paper in the new Stampin’ Up! Annual Catalog. You could use any pattern in the package you like. My paper is cut at 5″ x 9 1/2″. I also added a strip of Petunia Pop cardstock (one of the current In Colors from last year, still current this year!) at the top and bottom of the floral paper. I already had a scrap that I could use. I cut it in half so each piece was about 1″ x 9 1/2″. Half an inch was adhered underneath the designer paper, top and bottom so half an inch would show.

The greeting uses the With You In Mind Stamp Set. It’s a “returning fave” on page 37 of the Annual Catalog, carried over from the last catalog. It was perfect for the look I wanted on this gift bag with it’s large greeting. It is stamped in Petunia Pop ink on Basic White cardstock. I used the Textured Notes Dies to cut out the greeting and then cut out the next larger one out of Petunia Pop cardstock for a layer under the white. You can’t go wrong with this set of Textured Notes Dies! They are so useful and each one has a fancy border. They are part of the Botanical Textures Suite Collection so you could purchase these dies on the Suite Sale. Put your thinking cap on when you order so that the two lowest priced Suites or Suite items give you the good deal.

For a finishing touch, I tied a double bow with the Petunia Pop 3/8″ Bordered Ribbon. It’s on the Last Chance List. And a few sparkly gems, the new Strawberry Slush & Pretty In Pink Gems. Even though neither of those colors are Petunia Pop, the light-colored Pretty In Pink ones worked just fine. There are also Clear gems in that package as well.

Just that quick you have a nice gift bag that could be designed for any occasion or season! I love making these gift bags out of small shopping bags I receive at certain stores….or you can purchase a package of them at the craft store. They are handy to have on hand!

SHOP STAMPIN’ UP! HERE!

Full Of Life Slimline Hip Hip Hooray Card

Full Of Life Slimline Hip Hip Hooray Card

I knew I wanted to use the Full Of Life paper and this Full Of Life Slimline Hip Hip Hooray Card is what eventually turned out! I think this paper is so colorful and fun. You can use it for so many occasions, and if you want more subtle color, just turn over on the other side. I think this card could be for a birthday or a celebratory occasion such as a graduation. Maybe a good masculine card!

This is a slimline card for something different. The Full Of Life 6″ x 6″ Designer Series Paper worked well with that. The Basic White card base is cut at 6″ x 6″ and folded in half at 3″ to make the slimline design. I cut the paper with the little squares at five rows which is about 2 1/8″ wide. That was the section with colors of greens, blues, and purples. Just by chance, the “other side” of the scrap I cut off had a dark blue stripe which I liked against the many colors of the squares. I cut that in half so I could adhere about 1/4″ to the top and the bottom of the squares piece.

I wasn’t sure what greeting I wanted to put on this card, but I found the “Hip Hip Hooray” in the Saying Something Ephemera. While it doesn’t show up dramatically on the front of this card, I think it shows up well enough and gives the card an interesting look. I also added a few Iridescent Foil Gems to the empty space over on the left side.

Try out the Full Of Life Designer Paper and see what fun cards you can make with it!

Florals In Bloom Foldover Birthday Card

Florals In Bloom Foldover Birthday Card

IMPORTANT ABOUT THIS SALE: The Online Cart computer will not think like our (my!) brain thinks so in getting the BOGO 50% off price, think in terms of similarly priced items. The Cart will discount the lowest priced item(s) of Suites in your cart. If you order two Suites, you get 50% off the lower-priced Suite. If you order ribbon in a Suite and add it on the same order as the Suites, the Cart will discount the ribbon since it is the lowest-priced item, not the second Suite that you were “pairing” in your mind with the first Suite as the one you wanted as a discount. If you order two Suites and two rolls of ribbon, the Cart will discount the two rolls of ribbon, not one Suite and one roll of ribbon. Get it?! It’s still a great sale, we just have to have our thinking caps on and I did not until I saw this in a forum online! But you can add items NOT in Suites because they won’t qualify to be discounted anyway. ALSO: The Last Chance list has been updated so you might find more discounts. Go check! The Sale includes Annual Catalog Suites, Online Exclusives Suites (and preorder of new ones for Demos), and Last Chance Suites.

Today, June 3rd, is the first day of the Stampin’ Up! Suite Sale – BOGO Suite or Suite product and get one Suite or Suite product 50% off with the lower price discounted! This special new promotion from Stampin’ Up! started today but goes the whole month of June! You can read more of the details on my blog post yesterday HERE.

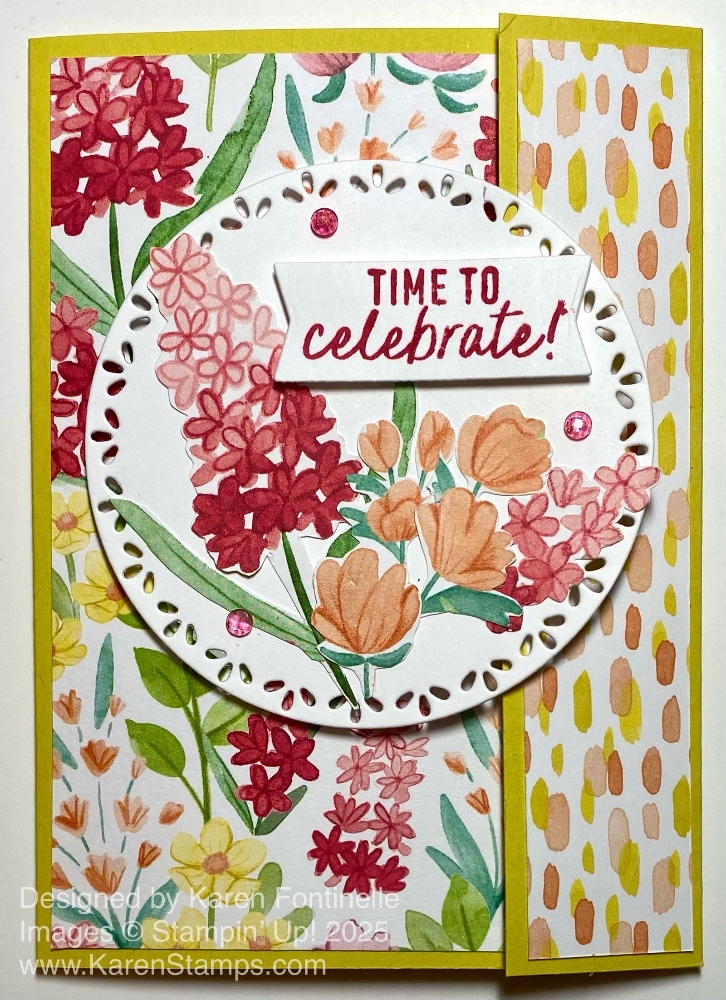
I made this Florals In Bloom Foldover Birthday Card to commemorate this new special for all of us. For example, if you loved this designer series paper in the Florals In Bloom Suite and you also wanted one of the Bundles, you could buy the Bundle and get the designer paper 50% off! Or you could purchase the whole Florals In Bloom Suite and then choose another Suite 50% off! Mixing and matching is allowed as long as they are Suites or products within a Suite. So you can buy one pack of designer paper in one suite and choose another designer paper in another suite and get the lower-priced one 50% off! So even though the sale is about “Suites”, it’s all pretty flexible as long as the product is contained in a Suite or the Suite itself.

This card has a Darling Duckling cardstock base. Darling Duckling is one of the new In Colors for 2025-2027. But this card is folded a little differently just to make it interesting! The card base is cut at 5 1/2″ x 8 1/2″ as usual. Instead of scoring in the middle, this card has an extra little side fold. I don’t know what the correct term is if there is one, but I’m calling it the “Foldover” card. Score at 1 1/4″ and 5 1/4″. Fold and crease the score lines. This will give you a fold over on the right which meets the front of the card. That narrow fold can overlap the card front or tuck under. For my card, I will tuck it under the focal point of the card with the greeting. You can do it either way.

The Florals In Bloom Designer Series Paper is cut at 3″ x 5 1/4″ for the front of the card. The fold on the right side has the other side of the patterned paper and is cut at 1″ x 5 1/4″. If you want to put a Basic White cardstock inside, it would be cut at 3 3/4″ 5 1/4″.

For the focal point of the card, I diecut a large circle in the Spotlight On Nature Dies in Basic White cardstock. I love these dies with the bordered edge designs! I cut out several of the flowers with my Paper Snips scissors to decorate the diecut. The greeting is stamped in Strawberry Slush ink and diecut using the More Messages Bundle. You can do one greeting at a time or stamp the whole stamp at one time and cut out all the messages at one time, then save them. I also added a few of the Strawberry Slush & Pretty In Pink Gems. The greeting is popped up on the diecut circle and the circle is also popped up with Stampin’ Dimensionals. If you want the side fold to tuck under the circle, it might be better to not pop it up with Dimensionals, but it is okay.

Florals In Bloom Foldover Birthday Card Inside

Now that you have been inspired with the beautiful Florals In Bloom Designer Series Paper, it’s time to go check out the Suite Sale! You will earn Stampin’ Rewards on any order over $20 as always to use on a future purchase. And if you already have Stampin’ Rewards, you can apply them to your order. You don’t have to do the math on the discounted products. The discount will appear in your cart once you’ve added two items within the sale parameters to your cart. And your Rewards will be based on the discounted total of your whole order.

Check the Suites on the Suite Sale HERE!

Have fun shopping and let me know if you have any questions! It’s not really as complicated as it sounds!

Suite Sale 50% Off Flyer

Happy June! And Happy Suite Sale at Stampin’ Up!

Suite Sale 50% Off Flyer

IMPORTANT: Click HERE to read an update about how your Cart will discount the Suite Sale items!

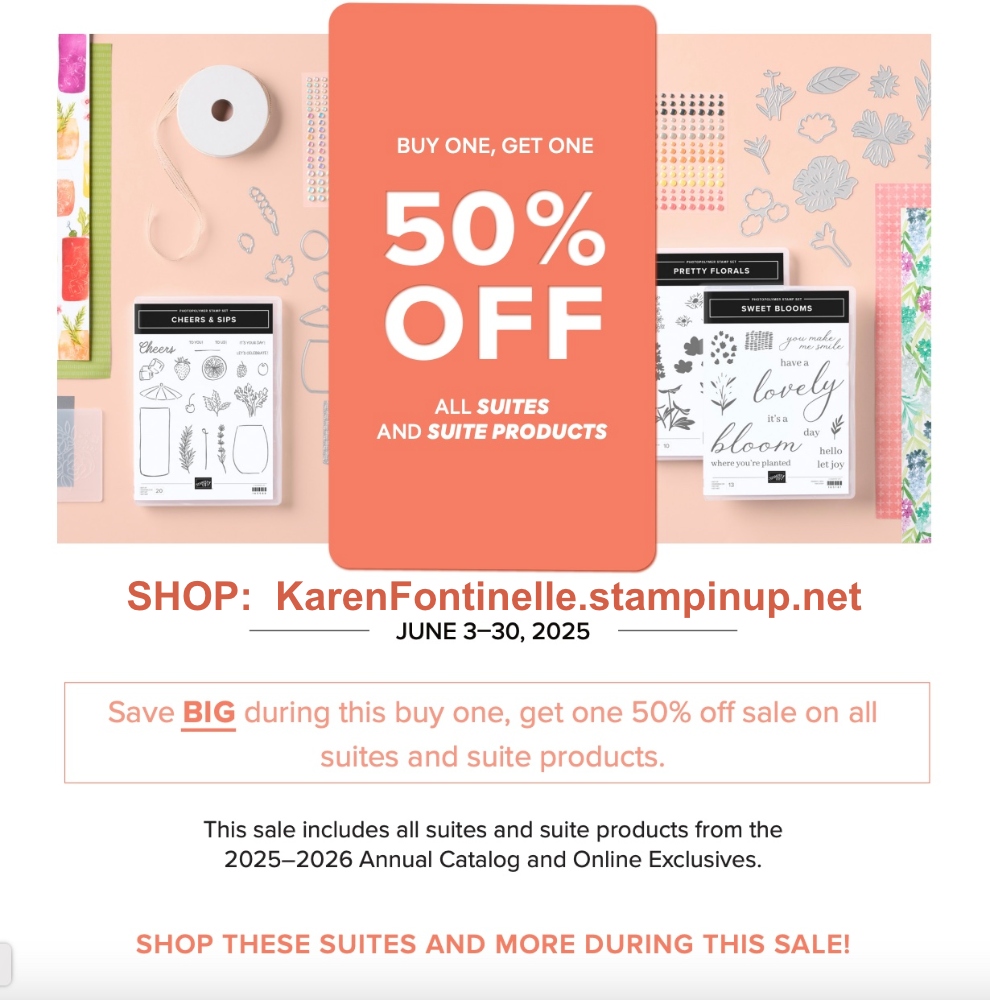
Something new this month, starting Tuesday, June 3rd at Stampin’ Up! It’s a Suite Sale! Buy one, get one 50% off sale on all Suites and suite products!

  • All available suites and suite products from the 2025–2026 Annual Catalog and Online Exclusives are buy one, get one 50% off. So, if you buy two items, the one with the lower price gets the discount. Buy three? The lowest-priced one gets the deal. Buy four? The two lowest-priced items get discounted. Want max value? Pair a full-price suite with another suite of equal or lesser value, and the second one is half off (unless, of course, the order also contains suite items of lesser value)
  • When you shop the sale, the 50% off discount will apply to the lower-priced item (for example, if you buy a suite collection and a stamp set from a suite, the suite would be full price, and the stamp set would be 50% off).
  • Suite collections are available if all items are in stock; if all items are not in stock, you can still shop the available suite products.
  • You don’t have to buy a suite and suite products all from the same suite collection for the discount to apply. You can buy any suite products from any suite. Mix and match!
  • The discount will appear in your cart once you’ve added two items within the sale parameters to your cart.
  • Products are available only while supplies last.

Bundles are already discounted 10% so you can “double-dip” with the Suite Deal.

You can use previously earned Stampin’ Rewards to pay. And yes, you will earn Stampin’ Rewards on your order of $20 or more. The Reward will be based on your total after all the discounts.

Suites and Suite items on the Last Chance list also qualify for this deal.

Of course, you can shop more than once during the month!

Any more questions? Just ask! Now go make that list!

Wildflower Birthday Tag Card

Wildflower Birthday Tag Card

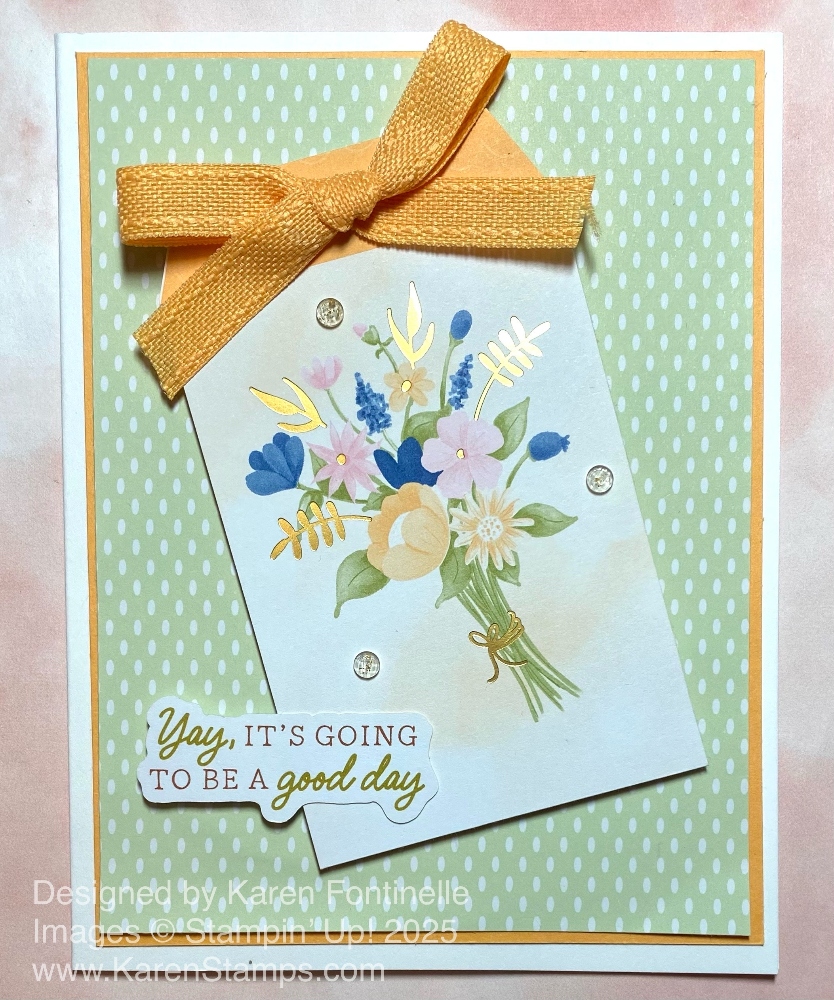
I wish I could express to you how easy this card was to make! I had no plans in mind except to use the Wildflower Birthday Specialty Designer Series Paper and out came this Wildflower Birthday Tag Card. I had forgotten about the two sheets of paper in the package that are full of individual tags and images that you can cut apart and use on your cards and projects. You also get two sheets of diecuts which are so fun to use! This designer paper is so pretty for a birthday but lots of other occasions as well. It is definitely not all birthday.

This card has a base of Basic White cardstock and a layer of Peach Pie cardstock. The green dotted designer paper is “the other side” of one of the themed papers in the Wildflower Birthday package. It’s so soft and pretty.

The tag is cut out of the sheet of tags and images I mentioned that also come in this Specialty paper. There are flowers, cakes, and balloons plus others. Just cut them apart and use them on your project. I chose this floral bouquet with a Peach Pie top of the tag. That’s why I added a thin layer of Peach Pie underneath the designer paper. That’s the only thing that took me any time – deciding on just the designer paper on the card base and on which color? White or Peach Pie? I just left a narrow margin of the Peach Pie peeking out under the Soft Sea Foam designer paper pattern and I liked the white card base. However, using Peach Pie for the card base was pretty too!

The tag is popped up on Stampin’ Dimensionals with a Peach Pie 3/8″ Bordered Ribbon bow adhered to the top. I don’t usually like things placed on an angle, but I liked it on this card! The greeting practically fell out of the package of words in the Saying Something Ephemera Pack so I figured it was the greeting to use! I also added a few Strawberry Slush & Pretty In Pink Gems in the clear color. Even though the name mentions two colors, there is actually three colors in the package!

If you don’t already own the Wildflower Birthday Specialty Designer Series Paper I’d recommend putting it on your shopping list because you can make lots of cards or scrapbook pages with it!

SHOP STAMPIN’ UP! ONLINE HERE!

Get Ready For the Virtual Album Retreat in July!

Virtual Album Retreat Kit Contents

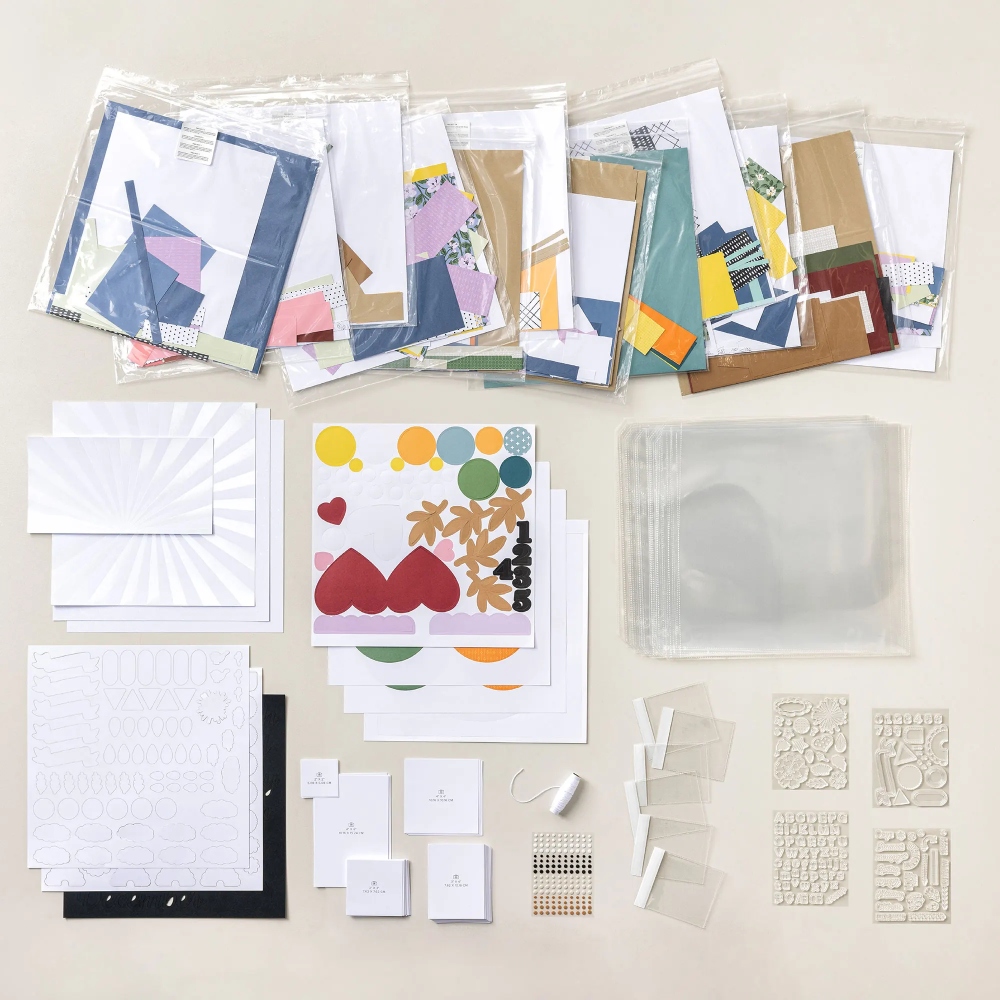
What is this combination of products? It is called the Month by Month Album Retreat 2025 Kit and it is available to order NOW! It’s a brand-new event unlike anything Stampin’ Up! done before! During this three-day, virtual event, you’ll create 12 scrapbook spreads using the Month by Month Album Retreat 2025 Kit, open to customers and Demonstrators who love scrapbooking, want to learn new techniques, and connect with others with the same interest! It will be held in a private Facebook group. You can even be a new scrapbooker because all you have to do is follow along with you kit with all the materials you need (except for a few basic things like extra adhesive, ink pads, etc). Here is the Stampin’ Up! list of additional products you may need and probably already have if you are a stamper or scrapbooker.

There is no extra cost to register or to sign up for the retreat. Just purchasing this kit covers everything. After you order this kit in your online account, making sure your email address is correct and current, closer to the date of the retreat you will be emailed the link to the private Facebook group where this retreat will be held. The recordings will be available in the group for you to watch again or watch for the first time if you couldn’t watch live.

When: July 16–18, 2025, 2:00–10:30 p.m. (MT)

Where: Private Facebook Group

Registration: There is no registration for this event! By purchasing the Month by Month Album Retreat 2025 kit, you’ll get access to an exclusive Facebook group where the live event will stream.

Price of Month by Month Album Retreat 2025 kit: 
$250 USD 

Language of Event: This event will be presented in English only. However, about a month later, this retreat will be available to you on YouTube with captioning in other languages if English is not your first language.

After the Event: You can access the recorded event videos on the Virtual Album Retreat Facebook group page.

The Month by Month Kit will contain exclusive stamp sets, designed precut sheets, cardstock, embellishments, and more! Kits are only available while supplies last, so be sure to order ASAP. Ordering early will also ensure that you get your products in time for the event.

This Kit does NOT include an album. Stampin’ Up! says there are different kinds of albums available and people often have certain preferences. They feel it is best for everyone to choose their own album according to the style they like. Page Protectors are included though.

The price of the kit may sound like a lot, but consider that you are getting three days worth of “retreat” and guidance with the Stampin’ Up! Home Office in Riverton, a community of other scrapbookers, and access to the recordings.

If you have any questions, just let me know!

You can view the kit and all the products HERE! It is in the Stampin’ Up! Online Store like all other products. You can scroll through all the photos and see the page layouts you will be making.

Keep in mind, with the new Stampin’ Rewards, you will be receiving 10% Rewards when you purchase the kit to use on a future order….AND if you already have received rewards from previous orders, you can apply those to the purchase of the kit! That may help a little on the pricing. Remember, if you USE rewards when you purchase the kit, that brings down the order amount and then you get new rewards based on that total.

Please don’t hesitate to ask if you need more information that I can provide! The Retreat is a ways off in July but depending on interest, the kits Stampin’ Up! has prepared could sell out as they only have a limited amount of kits. They went on sale yesterday so check it out! When you are finished with the retreat, you will have a two-page spread for each month of the year….and of course, you can modify your pages as you go! If you prefer the layout or colors on the February spread to be for April, just change the month. No Scrapbooking Police will be checking on how you make your own pages! 🙂

SHOP THE MONTH BY MONTH ALBUM RETREAT 2025 KIT!

Coming June 3! BOGO 50% Off Suites & Suites Products!

Stampin' Up! Suites BOGO 50% Off 2025

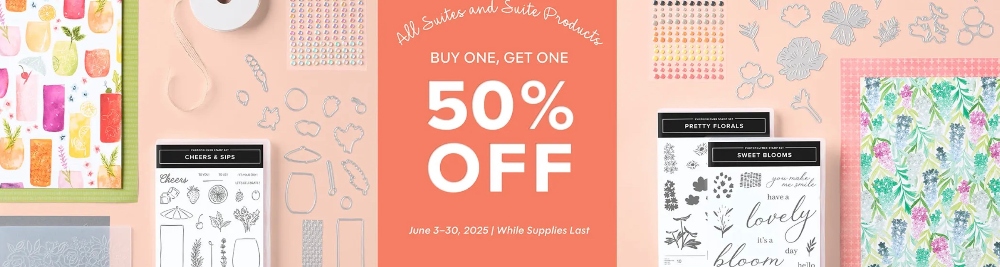
Starting June 3, all available suites and suite products from the 2025–2026 Annual Catalog and Online Exclusives are buy one, get one 50% off! If you’ve had your eye on a new suite from the annual catalog or you really like the look of a stamp set from an Online Exclusives suite, you don’t have to choose—you can get both!

  • All available suites and suite products from the 2025–2026 Annual Catalog and Online Exclusives are buy one, get one 50% off.
  • When you shop the sale, the 50% off discount will apply to the lower-priced item (for example, if you buy a suite collection and a stamp set from a suite, the suite would be full price, and the stamp set would be 50% off).
  • Suite collections are available if all items are in stock; if all items are not in stock, you can still shop the available suite products.
  • You don’t have to buy a suite and suite products all from the same suite collection for the discount to apply. You can buy any suite products from any suite.
  • The discount will appear in your cart once you’ve added two items within the sale parameters to your cart.
  • Products are available only while supplies last.

Here is a Stampin’ Up! video showcasing the Suites, so you can watch and then start thinking about what you want to put on your Shopping List!

Happy Shopping June 3 – 30, 2025!