Author Archives: Karen Fontinelle

Get the Haunted Home Kit While You Can!

Kits Collection Haunted Home Kit

You may remember that this Haunted Home Kit in the Kits Collection came out last year and sold out before Halloween! Stampin’ Up! said they would make it available again this year and it is in the Online Store NOW. Due to the popularity last year, I’m thinking if you want this, although it is July, order it now in case it should sell out again! Also, “some” Kits in the Kits Collection will have a price increase July 22. I don’t know which ones, but it would be a good time to get this Kit and any others you are interested in this week!

This Kit comes with all the materials you need to make your own haunted paper house with cardboard walls, vellum, and other pieces to accessorize. Just follow the directions to assemble the house, then add your own ghostly touches to it if you like!

Kit includes:
*Cardboard Home Pieces
* Predesigned projects
* Step-by-step instructions
* Precut vellum and die cut paper pieces
* Enough adhesive to complete projects
*A 10-1/2″ x 8-1/2″ x 1-1/4″ (26.7 x 21.6 x 3.2 cm) printed designer box for storage or crafting on the go.

Product colors: Basic Black, Crushed Curry, Gray Granite, Moody Mauve, Pumpkin Pie

Kits Collection Haunted Home Kit

AND….you might want to order two Haunted Home Kits and decorate one for Christmas! Yes, some people did that last year! You can use the pieces however you like. Now you might have to use some creativity to see how to make it into a Christmas house….or any other house….but I’m sure you can do it!

Get the Haunted Home Kit before everyone else does!

About the August Paper Pumpkin Kit!

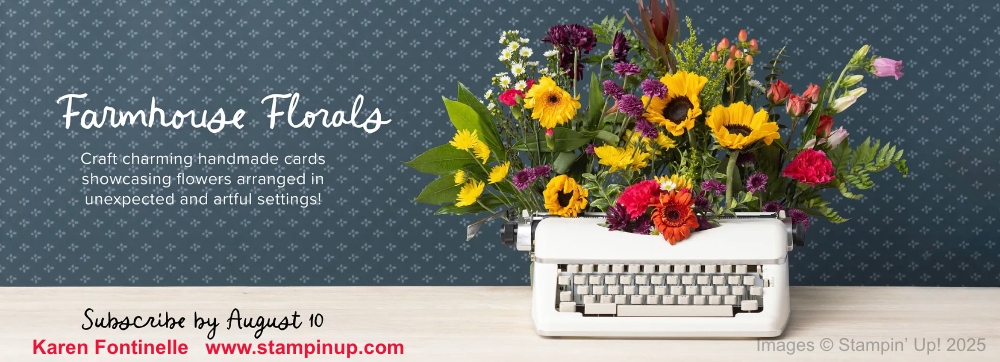
Paper Pumpkin Aug 2025 Farmhouse Florals Banner Info

It’s time to sign up for Paper Pumpkin, the papercrafting kit that comes to you in the mail each month! It’s a gift you give yourself, your creative escape! And if you want to double or triple the fun, order extra kits whenever you want and craft with a friend or loved one.

No risk, no obligation. You can cancel your subscription if Paper Pumpkin is not for you or better yet, skip a month or two if other things come up and you don’t have time to craft that month. Just check your account no later than the 10th of any month to pause, cancel, or reactivate your account for the next month’s kit.

All supplies are included. With your first kit, you get an acrylic block on which to mount the stamps you need in the exclusive stamp set included in your kit. Other than scissors, everything you need including adhesive is wrapped up like a gift in your Paper Pumpkin box. Sometimes the box is just as cute as the project inside! I especially love the holiday kits! Get signed up now so you won’t miss out on those!

Here are the details about the August Paper Pumpkin Kit, Farmhouse Florals, which you will receive about mid-August. Did you see the typewriter and flowers on the banner above? That’s a clue about some of the card designs!

August: Farmhouse Florals
Subscribe July 11–August 10
Send whimsical cards featuring flowers nestled in delightfully unexpected places.
• Makes 9 cards: 3 each of 3 designs with 9 coordinating envelopes
• Precut paper pieces and linen thread
• Sentiment stamps for the outside and inside of the cards
• Coordinating colors: Calypso Coral, Darling Duckling, Gray Granite, Lost Lagoon,
Pecan Pie, Secret Sea (Classic Stampin’ Spot).

One 1″ x 1″ Stampin’ Spot is included in each kit as your mini ink pad! Collect them each month and you’ll have lots of colors of ink to use on other projects!

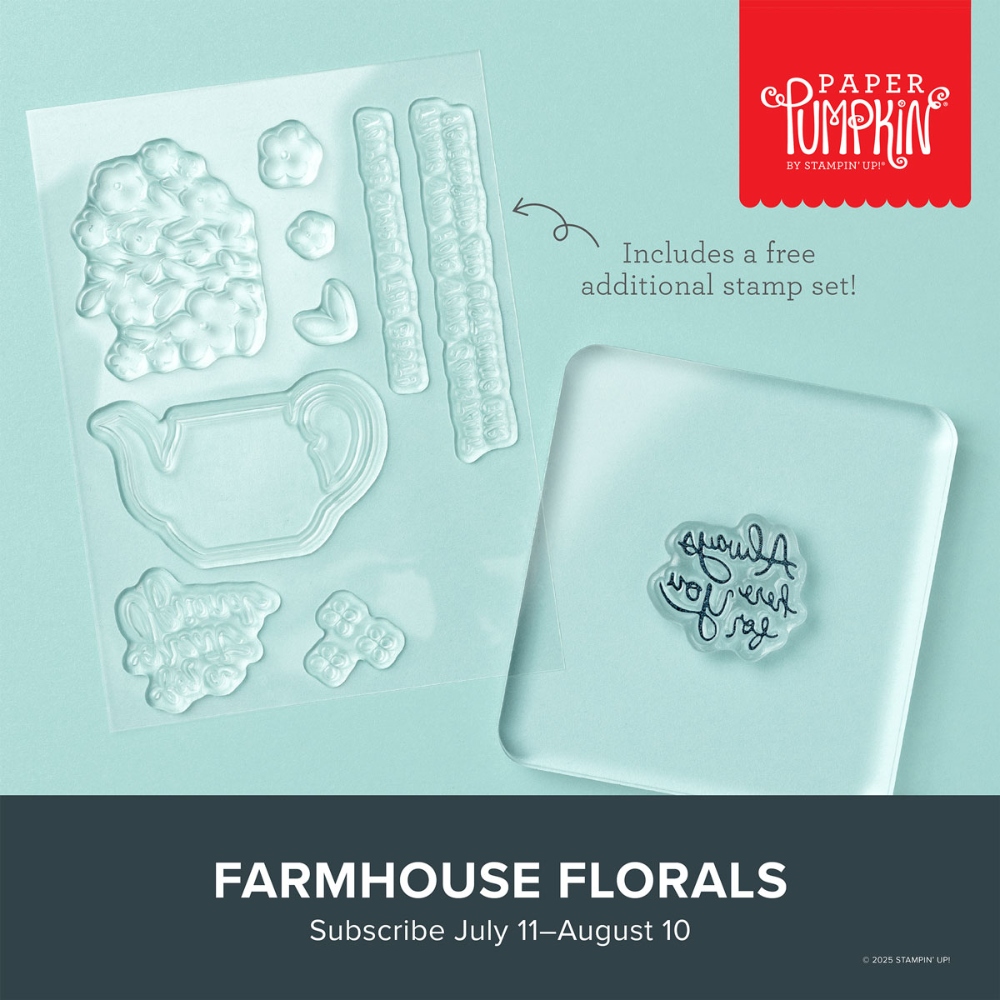
With this August Paper Pumpkin Kit you will even receive a FREE additional stamp set!

Paper Pumpkin Farmhouse Florals Free Stamp Set Aug 2025

CLICK HERE TO JOIN PAPER PUMPKIN!

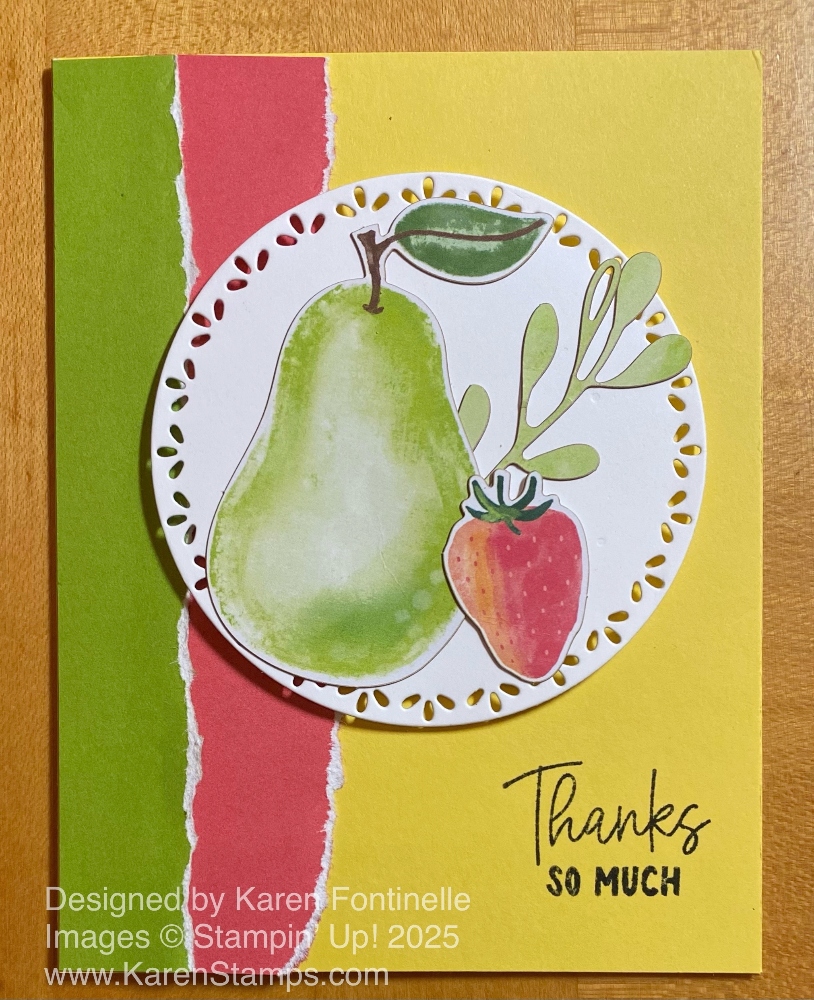
Two Tone Cardstock Torn Strips Card

Two Tone Cardstock Torn Strips Card

This Two Tone Cardstock Torn Strips Card is so easy to make and shows another way you can use the Stampin’ Up! Two-Tone Cardstock! Today is the LAST DAY for the 20% off sale on all two-tone cardstock! You can choose some or all of your favorite colors to try out, or I suggest, buying one or more of the assorted packs. That way you get two sheets of each of six colors! These are 12″ x 12″ sheets so you will have lots of cardstock for cards and other projects and certainly perfect for scrapbooking.

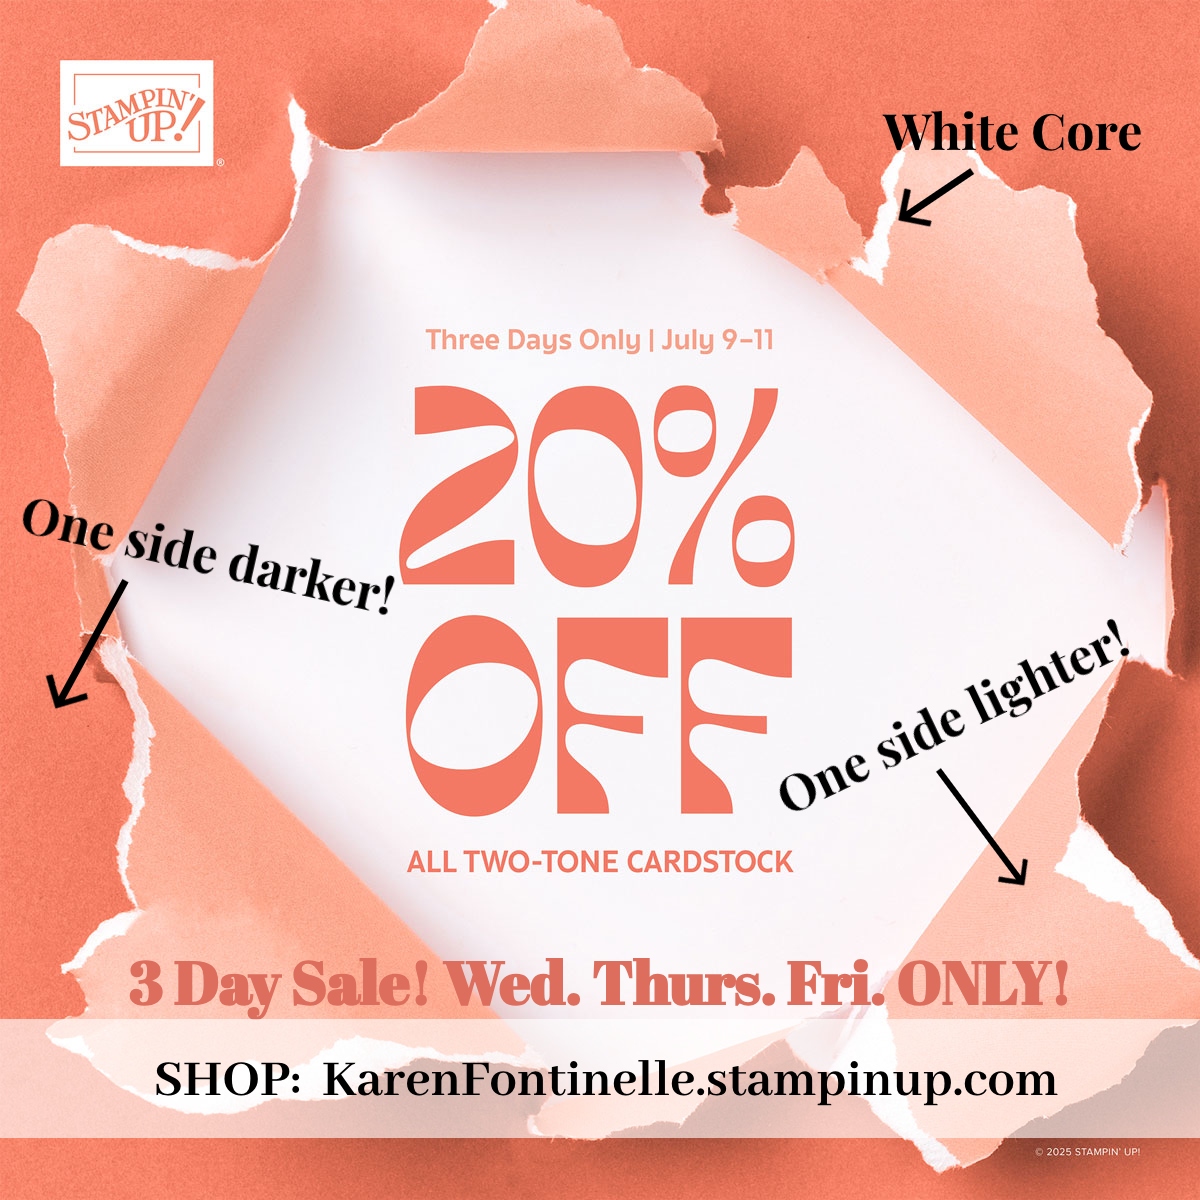
Each piece of cardstock has a smooth texture for stamping and a white core that works great for techniques like tearing, sanding, crumpling, embossing, etc. This cardstock is two-sided with shades of the same color on each side.

106 Color Variations. This two-tone cardstock offers 53 lighter and darker Stampin’ Up! colors on double-sided sheets. It’s available in single or mixed-color packs for harmonious colorful or monochromatic projects. 

A Crafting Necessity. Two-tone cardstock has so much to offer! It’s an ideal layering option without adding bulk and its white core means you can tear, crumple, sand, and emboss your way to fun effects whatever your crafting skill level. Its smooth texture is great for stamping, clean cuts, crisp folds, and seamless color applications. And because it’s 12″ x 12″, you can use it as a scrapbook base, or you can cut it to use as part of your card-making projects.

This is how you make this card. I used “regular” Daffodil Delight cardstock for the card base. For the two strips on the side, I cut 1″ x 5 1/2″ strips from the Two-Tone cardstock I already had, one Granny Apple Green and one Poppy Parade. If you tear any cardstock TOWARD yourself, you will get that ragged edge. We used to do that a lot during my early days of stamping! When you tear this Two-Tone cardstock like this, it reveals the white core of the paper which just adds a little interest! If you use this paper but don’t want the white showing, just sponge a little ink on along the edge, which is interesting in itself.

For the focal point of the card, I used a new product I had. I die cut a circle with the Spotlight on Nature Dies in Basic White. Then I used a pear, strawberry, and foliage from the Good Times Mix & Match Ephemera Pack. You’ll find this new product on page 25 in the Annual Catalog. It looks like our other ephemera packs, but I noticed it was thicker. They are actually stickers! Just peel off the paper on the back if you want to use them as stickers or leave it on and perhaps use Dimensionals or other adhesive depending on your project. I used mine as stickers on this diecut circle base but then popped up the circle on Stampin’ Dimensionals. For a simple greeting, I just stamped directly in the corner of the card using a stamp from the Memorable Blooms Stamp Set.

These are the assortments of Two-Tone cardstock:

Celebrate Together

Memories In Bloom

Weekend Adventures

Turtle-y Sweet

Wildflower Celebrations

Everyday You & Me

Meant To Bee

Check your stash because maybe you purchased one of the scrapbooking workshop kits that Stampin’ Up! offered last year when this two-tone cardstock first came out. You may already have some sheets of this fun paper!

Today is the LAST DAY for the Two-Tone Cardstock Sale! Don’t miss it!

SHOP the TWO-TONE CARDSTOCK SALE TODAY!

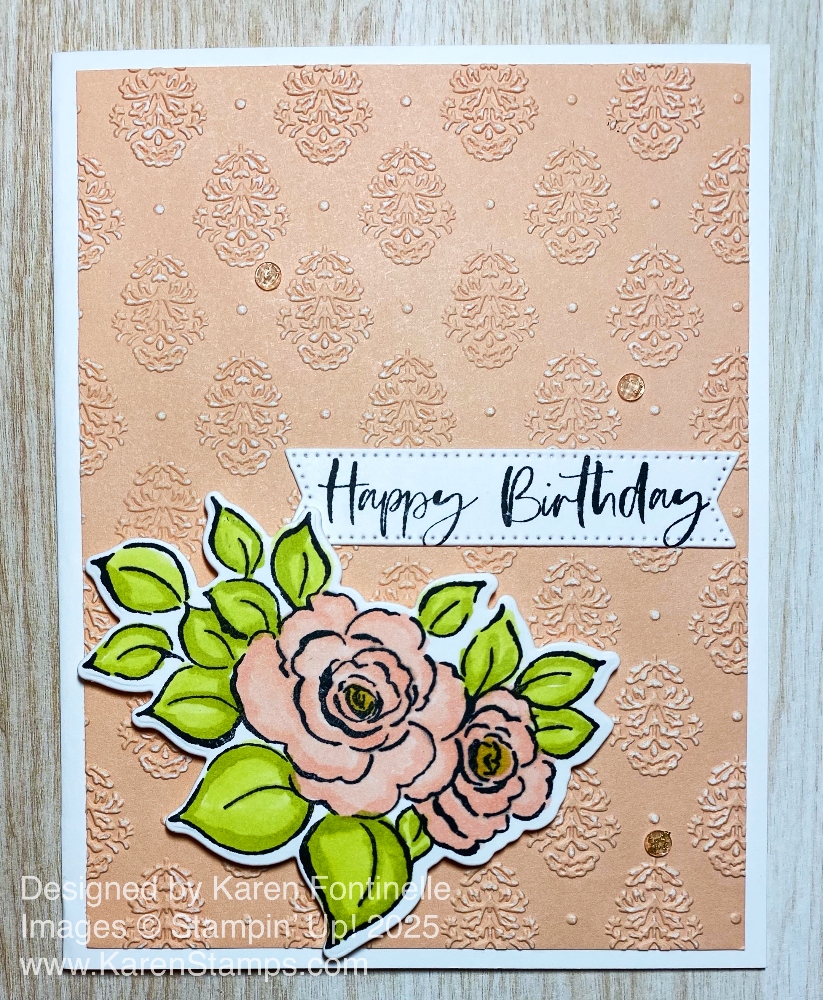
Charming Day Damask Birthday Card

Charming Day Damask Birthday Card

This Charming Day Damask Birthday Card was a fun card to make! I used a Petal Pink Two-Tone cardstock for the background to show one of the techniques you can use with this two-tone cardstock. This paper has a light shade on one side and a darker shade of the same color on the other side, plus a white core. I took advantage of the white core of the paper with the embossed background.

In order to create the interesting background for this card, I embossed the Petal Pink Two-Tone cardstock with the Damask Designs Embossing Folder. This is a pretty embossing folder to use just as it comes out, but if you have two-tone cardstock, you can do something extra with the embossed paper. After embossing the pretty design, use a sanding block, or whatever you have, to lightly rub across the top of the embossed images. Go lightly at first. You can always do more as long as you don’t tear the paper. When you do the sanding, it will expose the white core of the paper! It’s very subtle on this card with the light-colored paper, but you can see it.

The card base is Basic White cardstock and the embossed Damask Designs layer is adhered to it. If you wanted a more dramatic background, use a darker color of the two-tone cardstsock.

For the flowers, I stamped this little cluster of flowers in the Charming Day Stamp Set with Memento Ink on Basic White cardstock. The flowers are colored in with Petal Pink Stampin’ Blends and the leaves with Lemon Lime Twist Stampin’ Blends. Then it was diecut with the Charming Day Dies. If you want the stamp set and dies, you can get the Charming Day Bundle and save 10%. The greeting is also in the stamp set and is stamped in Memento ink. It is diecut with my go-to…. the banner in the Stylish Shapes Dies. The flowers are popped up with Stampin’ Dimensionals, but the greeting is adhered flat to the card.

For a little embellishment, I used three of the Strawberry Slush & Pretty In Pink Gems on the embossed layer. They are small and just add a little sparkle. I didn’t want to add too much to this particular card because I wanted to show off the sanded embossing on the card using the two-tone cardstock.

If you are interested in any of the colors in the Two-Tone cardstock, there is a sale going on today and tomorrow, July 10 – 11. You can check out all the colors on page 77 in the Annual Catalog. The paper is 20% off on these last two days of the three-day sale! This cardstock is great for cardmaking and other projects as well as scrapbooking!

Before you decide on individual colors, check out the various assortment packs. There are seven assortments with two sheets of each of six colors which would give you several colors to try. They are mixed in on the Two Tone Sale page so just scroll through. Choose the grouping of colors you like the best or get all of them!

Read more about the Two-Tone cardstock HERE.

SHOP THE TWO TONE SALE!

Two Tone Cardstock Stampin’ Up! Sale Today!

Today begins the 3-day sale on all Two-Tone Cardstock at Stampin’ Up! You’ll find all the colors on pages 76-77 in the Annual Catalog and samples on pages 78-79. All Two-Tone cardstock is 20% off!

This sale is the perfect opportunity to stock up on a crafting essential that’s great for both card making and scrapbooking. Check out the wide variety of available colors and decide which ones you will want to have. Act fast before your favorite colors are gone! It is a 3 day only sale!

What is two-tone cardstock?? Each piece of cardstock has a smooth texture for stamping and a white core that works great for techniques like tearing, sanding, crumpling, embossing, etc. This cardstock is two-sided with shades of the same color on each side.

106 Color Variations. Our two-tone cardstock offers 53 lighter and darker Stampin’ Up! colors on double-sided sheets. It’s available in single or mixed-color packs for harmonious colorful or monochromatic projects. 

A Crafting Necessity. Two-tone cardstock has so much to offer! It’s an ideal layering option without adding bulk and its white core means you can tear, crumple, sand, and emboss your way to fun effects whatever your crafting skill level. Its smooth texture is great for stamping, clean cuts, crisp folds, and seamless color applications. And because it’s 12″ x 12″ (30.5 x 30.5 cm), you can use it as a scrapbook base, or you can cut it to use as part of your card-making projects.

Choose a few colors to try and see how you like it and what you can do with it! Remember, the sale begins today and runs through Friday, July 11th. While supplies last. Don’t miss it! Have fun!

If you are looking at the catalog online, here is the catalog PDF in which you can scroll to around pages 76-79 to view the Two-Tone cardstock. Or click the link below.

SHOP THE SALE!

Two-Tone Cardstock Sale Starts July 9th!

Two-Tone Cardstock Sale July 2025 Info

Starting tomorrow, July 9th, Stampin’ Up! is having a 3-day sale on all of the Two-Tone Cardstock! Did you know we have two-tone cardstock? What is it?! You’ll find all the colors on pages 76-77 and samples on pages 78-79 of the Annual Catalog.

All Two-tone cardstock will be 20% off! This sale is the perfect opportunity to stock up on a crafting essential that’s great for both card making and scrapbooking. Check out the wide variety of available colors and decide which ones you will want to have. Act fast before your favorite colors are gone! It is a 3 day only sale!

What is two-tone cardstock?? Each piece of cardstock has a smooth texture for stamping and a white core that works great for techniques like tearing, sanding, crumpling, embossing, etc. This cardstock is two-sided with shades of the same color on each side.  

Here’s a card I put on my blog a little while back using Two-Tone cardstock and showing the two shades of the same color! The circles are diecut from the same paper, but they are the other side of the paper! See the difference in shading?

Two Tone Circles Let's Celebrate Card

106 Color Variations. Our two-tone cardstock offers 53 lighter and darker Stampin’ Up! colors on double-sided sheets. It’s available in single or mixed-color packs for harmonious colorful or monochromatic projects. 

A Crafting Necessity. Two-tone cardstock has so much to offer! It’s an ideal layering option without adding bulk and its white core means you can tear, crumple, sand, and emboss your way to fun effects whatever your crafting skill level. Its smooth texture is great for stamping, clean cuts, crisp folds, and seamless color applications. And because it’s 12″ x 12″ (30.5 x 30.5 cm), you can use it as a scrapbook base, or you can cut it to use as part of your card-making projects.

Something different to try!  Choose a few colors and see how you like it and what you can do with it!

The sale runs Wednesday, Thursday, and Friday – July 9-11th! Don’t miss it!

SHOP THE SALE!

Use this ANNUAL CATALOG PDF to go pages 76-77 to see the listing in the catalog of all the colors.

Painterly Pears Hello Card

Painterly Pears Hello Card

This Painterly Pear Hello Card introduces the new Painterly Pears Suite Collection which was released in the Online Exclusives on July 1st last week. This is a beautiful set. The Painterly Pears Designer Series Paper has all kinds of pear images in a soft, vintage kind of look, plus blossoms and foliage. It is similar to the Mediterranean Blooms Designer Series Paper which had lemons and oranges along with pretty blossoms and foliage also. (The Mediterranean Blooms DSP is still available in the Online Store, by the way.)

This card has an Old Olive cardstock card base. I used to use Old Olive a lot, but it seems I am into other greens now. However, Old Olive is still a very useful color and is one of the coordinating colors in the Painterly Pears Designer Series Paper. The layer of designer paper on the card is similar to what we have had in other papers. The whole 12″ x 12″ paper has a large border of the Painterly Pears with a blank center area. You can cut the paper into 4″ x 5 1/4″ pieces to have pears on different sides of the paper to make a multitude of cards. Or it would be like a ready-made page background for scrapbooking. This piece I used was cut from the bottom left corner of the designer paper.

Painterly Pears Hello Card Assembly

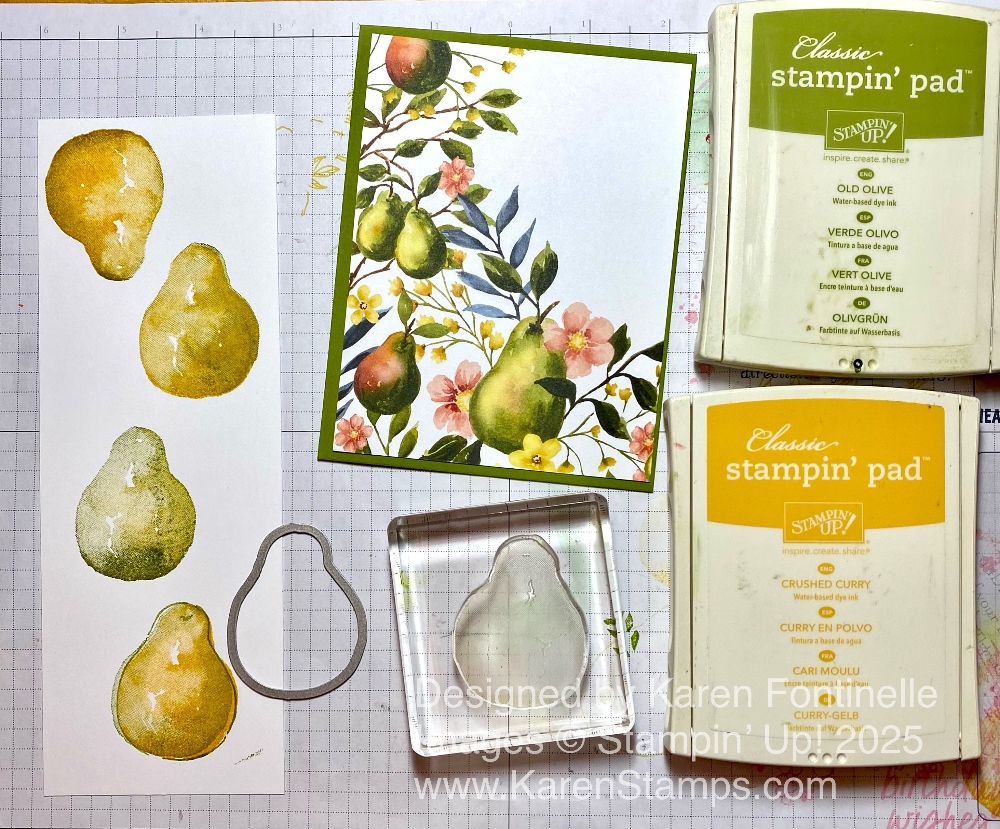
Here you can see what I used to make this card. The pears were stamped and diecut with the Perfectly Pears Bundle in the Suite. Of course, you can purchase any of the products separately if you do not want the whole Suite. The stamp really does most of the work for you giving the pears different colorations even with just one stamp or you can play around with inking up the stamp with one color and then kind of rounding the edge of the stamp in the ink pad with a second color. You can also stamp an outline around the pear as you see in the bottom pear. The dies leave a white margin around each pear so I just trimmed that off because I didn’t want that on this card. The leaves on the yellow pear were stamped in Old Olive and on the green pear the leaves are stamped in Mossy Meadow ink. Both pears are layered on a Petal Pink diecut circle from the Stylish Shapes Dies. This is popped up on Stampin’ Dimensionals.

To greeting on the card is from the Perfectly Pears Stamp Set and is stamped in Mossy Meadow ink. It is diecut with the smallest banner die in the Stylish Shapes Dies. To add a little embellishment, I used the new Low Profile Sparkle Dots in the Suite. They come in three colors: Darling Duckling, Mossy Meadow, and Secret Sea. Low Profile means that they don’t poke into the envelope when mailed which is really nice!

Check out this Painterly Pears Suite in the Online Exclusives along with many other newly released products!

SHOP STAMPIN’ UP!

Try This July 4th Treat Pouch!

4th of July Candy Treat Pouch

This July 4th Treat Pouch is a project from several years ago, but you could make it easily right away for a little treat for your 4th of July picnic, barbeque, or fireworks gathering. Use designer series paper which is a little easier to fold if you have some in appropriate colors. If not, you can use red, white, and blue cardstock! Or just use white if that’s what you have and do some patriotic stamping. Stars are ALWAYS good for an occasion like this so you can always add stars of any kind.

Use a sheet of 6″ x 6″ designer series paper for each pouch.  This 6″ x 6″ size makes a pretty small pouch, so if you want to put very much candy inside, you might want to use a 9″ x 9″ piece of designer paper or even cardstock. (It’s a good way to use up some of your retired designer paper if you are hoarding it for a special occasion!!) You could even make a big one at 12″ x 12″!

Fold the square paper in half to form a triangle.  Place the base of the triangle at the bottom, and fold down the top point to just about 1″ from the bottom edge. Then fold down the front layer of the point just as a guide.  Take the point on the right side and fold it over to the left side, but not all the way, so that it will fit underneath that point you folded down from the top.  Later you will fold that point down to stay, but for now, just make sure folding that point from the right will fit under it.  Then take the point on the left side and fold it over toward the right side. Now fold the front piece of that point at the top down. Tack it down with a little Stampin’ Seal or Glue Dot. Stick your hand inside to just poof it out a bit and it feels like everything locks in place when you do that!

For the candy, I always love decorating chocolate nuggets with designer paper. It just takes a 1″ x 3″ (or 3 1/4″) strip to wrap around the candy.  Be sure not to get adhesive on the candy itself!! Or use any candy of your choosing that will fit inside the pouch. Maybe a cookie will be perfect!

I hope you have a fabulous 4th of July planned to celebrate the birth of our country. We will go see fireworks that are close to home with friends. I’d love to see the gigantic fireworks display the city puts on, but I like getting home in ten minutes instead of sitting in traffic for who knows how long!

Growing up, my family and lots of the neighbors would take turns shooting off some fireworks in our driveways, but that’s not considered safe any more (and wasn’t then either, but my dad always had the garden hose and a bucket of water ready just in case). I have so many memories of my brother and I hitting some wooden thing with a cap or two or three inside on the concrete of the carport and the “bang” would kind of echo a bit. The first firework to get set off each year was something that a little parachute would fall out of, always landing on the roof of course! I loved the little colored balls we would throw down on the ground that would pop! Sometimes our grandparents would bring over a bag of fireworks to add to what my dad bought! What a thrill for little kids back then! When a shopping center did a big fireworks display my girlfriend across the street and I would stand at the top of our street on a hill and watch them.

Whatever your plans, be safe, have fun, and be thankful we are celebrating our country’s birthday!

New Products at Stampin’ Up! Today!

New Products Sq Ad July 2025 Info

Happy July and Happy New Products Day at Stampin’ Up! Click the link below for all the new Online Exclusives available today! Remember, this is a way to get new products to us quickly instead of waiting on the next catalog which is compiled a few years in advance! And we get to improve our computer skills!

Click HERE for new ONLINE EXCLUSIVES!

Lots of new products! I got the new Painterly Pears Suite and the Floral Charm Suite in my preorder last month. Both very pretty! The Painterly Pears Designer Series Paper is beautiful! Also some Halloween and even Christmas if you want an early start!

Two New Kits in the Kits Collection!

A birthday card kit and a HALLOWEEN KIT!!! Guess which one I’ve got to have!

I have to make this short and sweet but now you can go check out all the new goodies! Let me know if you have any questions!

SHOP STAMPIN’ UP! HERE!

LAST DAY: Stampin’ Up! Suite BOGO Sale!

Stampin' Up! Suites BOGO 50% Off 2025

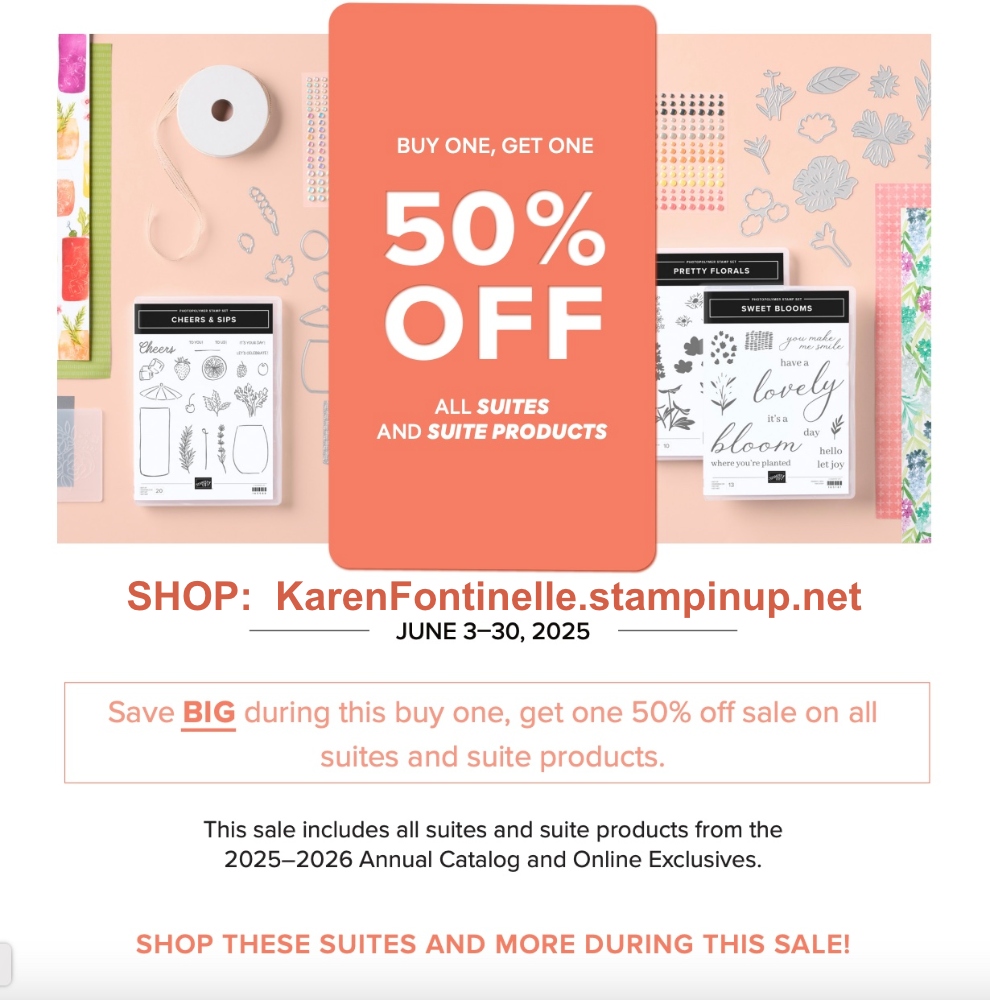
I hate to say it, but today, June 30th, is the LAST DAY for the Suite Sale at Stampin’ Up! Buy one Suite or Suite product and get one 50% off! It’s not quite as easy as it sounds because you do need to use some strategy! You can buy entire Suites or you can pick and choose Suite products and they can be from different Suites. You do not have to purchase an entire Suite. Just pay attention that you have products with prices that are closely alike. For example, if you want to buy two Suites but you also add a roll of ribbon and a package of embellishments from any Suite, the Online Store computer will give you 50% off the lowest price items. It doesn’t match up the items you are ordering.

You may be better off doing one order with two or four Suites and not put any other Suite product on that order. You can order two Suites and other products that are NOT part of Suites and the discount will be applied to your second, lower-priced Suite. So it is a little confusing, but you just have to be aware that’s how it works. Probably similar to how it works in stores with a similar sale.

CLICK HERE TO SEE ALL THE SUITES TO CHOOSE FROM!

Or go to the main Stampin’ Up! website and click on Menu and then Suites.

When you get to the Suites page, be sure to SCROLL DOWN to see the long list of Suites!

These Suites can be in the Annual Catalog, in the Online Exclusives, or even in the Last Chance category!

You will EARN Stampin’ Rewards for a future order on this order of $20 or more! If you already have some earned Rewards, you can apply those to your order. A pop up will show you how much in Rewards you have. You can use some or all of it.

  • All available suites and suite products from the 2025–2026 Annual Catalog and Online Exclusives are buy one, get one 50% off.
  • When you shop the sale, the 50% off discount will apply to the lower-priced item (for example, if you buy a suite collection and a stamp set from a suite, the suite would be full price, and the stamp set would be 50% off).
  • Suite collections are available if all items are in stock; if all items are not in stock, you can still shop the available suite products.
  • You don’t have to buy a suite and suite products all from the same suite collection for the discount to apply. You can buy any suite products from any suite.
  • The discount will appear in your cart once you’ve added two items within the sale parameters to your cart.
  • Products are available only while supplies last.

Watch this Stampin’ Up! video for a refresher on just a few of the Suites that are available!

SHOP STAMPIN’ UP! ONLINE HERE!

Kintsugi Inspirations Thinking Of You Card

Kintsugi Inspirations Thinking Of You Card

I only recently got this paper to make this Kintsugi Inspirations Thinking Of You Card. What in the world is Kintsugi? According to the explanation in the Stampin’ Up! Annual Catalog, “Kintsugi is a traditional Japanese technique of repairing broken pottery with gold lacquer. The mended gold veins become a celebration of imperfection instead of hiding it.”

This Kintsugi paper, the Kintsugi Inspirations Specialty Designer Series Paper, is one that when you open the package and start paging through the sheets you absolutely gasp out loud because it is so stunning! The gold foil and the designs on many of the papers just take your breath away. And on the “other side” of the paper are soft petite florals and other generic designs that you can use any time.

For my first card with this designer paper, I chose a Mistly Moonlight card base. The background layer on the card base is one with swirly blue lines on a dark background. I cut it at 4″ x 5 1/2″ because I wanted it to be the length of the card base. Then I chose a center panel with pretty blue flowers and gold accents. It is cut at 3″ x 5 1/2″.

I only bought the package of designer paper in this Kintsugi Inspirations Suite Collection. There is also a stamp set, embossing folder, dies. and flower accent gems. Sometimes I feel like I can make a lot of things with just the designer paper since I can’t buy EVERYTHING. And you can make pretty things with just this Kintsugi paper, but I think at least the stamp set and dies would be good to have with this paper. Since the paper is so different, you almost need other parts with the same style.

For my card, since I do not have the dies, I cut out two vases from a sheet of the designer series paper. I chose two vases in the same color, different sizes, and difference gold foil patterns on them. The bases are popped up with Stampin’ Dimensionals. I also cut out the flower that is on this same paper with the vases. The flower is a little tedious to cut out for sure! I made a little slit in the short vase in which to slip the flower and it also has a Dimensional on the back.

The greeting is from the Saying Something Ephemera Pack. I wasn’t sure what I would use, but when I saw this in that pack, I thought it blended well with the look of the card, so no need for me to stamp a greeting on my own! Something stamped and embossed with gold would look pretty, though!

This is one of the Suites in the Annual Catalog, so you could pair it with another Suite anywhere in the Stampin’ Up! Online Store and get the second Suite at 50% off. Just don’t add any other Suite products to that order that cost less.

This Kintsugi Specialty Designer Series Paper is really beautiful and different so if that is something you are looking for and you can take advantage of the Suite BOGO 50% off sale as well, it’s time to do some shopping!

SHOP STAMPIN’ UP!

Wildflower Birthday Hidden Tag Card

Wildflower Birthday Pull Out Tag Card

Last Saturday Stampin’ Up!® held a virtual event, Creativity Now, for Demonstrators to “attend”. I made this card, Wildflower Birthday Hidden Tag Card, in the same design as one of the cards but with paper I already had. They used a specific upcoming Suite, Peaceful Garden, to do their projects. This Suite will be one in the new September-December 2025 Mini Catalog (Holiday Mini). We could preorder that Suite or any of the products in the Suite to stamp along during Creativity Now, but I decided to wait and see what would be in the Mini Catalog. I did find I was more drawn to the Suite seeing it being used in making cards and one little box, and it’s not just for Christmas cards at all, but you could use it for holiday cards.

I mostly copied the Creativity Now design of this card that they made, but I used the Wildflower Birthday Specialty Designer Series Paper. I changed up the design a little bit from how Stampin’ Up! made their card but it is basically the same and easy to make.

The card base is Pool Party cardstock but other colors could have been used also. Stampin’ Up! just used the square of designer paper and the greeting block underneath on the card base, but I adhered them to a layer of Pretty In Pink cardstock first before adhering to the card. The Wildflower Birthday Designer Paper is cut at 3″ x 3″ and the Basic White block is 3″ x 1 1/4″. On this block, I stamped a sentiment in the Simply Said Stamp Set in Pretty In Pink ink. I measured the size of both of these blocks of paper together which was 4 1/2″ x 3″ and then cut the Pretty In Pink cardstock at 4 5/8″ x 3 1/8″ so there would be just a little margin around the edge. Before adhering to the card, I added a piece of Pretty In Pink Ribbon and bow around the seam of the DSP and the greeting.

Now I should have popped up that panel described above of the designer paper and greeting with Stampin’ Dimensionals to make it easier to slide the tag in and out from underneath, but I didn’t think of it in the moment! However, I did remember not to put glue on the right side where the tag would slide in and out, so it still works. Just not as easily. For the tag, I used one on the sheet of tags included in the Wildflower Birthday Specialty DSP and trimmed it down to fit better. I stamped the “Happy Birthday” greeting in Pretty In Pink ink from the same Simply Said Stamp Set on the tag. I decided to adhere it to a piece of Basic white cardstock to make it a little sturdier and then just trimmed off the excess white cardstock around the shape of the tag. To make sure the recipient would notice this tag should be pulled out, I added one of the diecut flowers across the gold top that is included in the DSP plus added a bit of Pretty In Pink Ribbon to the end of the tag. You could also write a message on the back of the tag if you wanted to.

To the side of this front panel with the Designer paper and the greeting is a strip of the designer paper. At the Creativity Now event, they used a small embossed piece and a piece of glimmer paper on that side. I decided to just use one strip of the coordinating designer paper instead. It is cut at 3/4″ x 4 5/8″. I think the gold scallops on the paper add a nice accent to that side of the card.

Wildflower Birthday Hidden Tag Card

This is a fun card design and you can make it with whatever paper and greetings you have for many occasions while you wait for the Peaceful Garden Suite Collection to come out in the next Mini Catalog in September! Maybe you will want that Suite or part of it. I always find it just as fun to watch others stamp and make pretty things as making them myself so I enjoyed Creativity Now even though I wasn’t stamping along with the new sneak peek Suite!

Remember, we are entering the LAST DAYS of the SUITE BOGO 50% OFF SALE so make your list and put in your order if you want to take advantage! Click on that link and scroll down to list the list of the many Suites we have that you can choose from. Read my blog post from yesterday to get more information.

SHOP STAMPIN’ UP! ONLINE HERE!

Stampin’ Up! Suite Sale Nearing An End!

Suite Sale 50% Off Flyer

I don’t know about you, but the month of June has flown by me so fast I have to look at the calendar to see how close we are to the end of the month! It is almost July and we haven’t even planned a summer vacation yet. All that to say, you have the weekend coming up to think about if there are products you want to order by June 30 in order to take advantage of the Suite BOGO 50% Off Sale. June 30th is this coming Monday and that is the last day of the sale.

This sale has seemed a little confusing because there is a “strategy” you have to consider in order to get the best deal. It is the same kind of sale any of us might find at a store….buy one pair of socks, get a second pair 50% off. In this Stampin’ Up! sale, it basically is the same except you get to choose between all the products in all the available Suites and you have to remember not to pair up two Suites or Bundles and then some other two spools of ribbon from other Suites or any other less expensive products in any Suite, because instead of the 50% coming off the second Suite, it will come off the least expensive Suite products. Therefore, if you want to purchase multiple Suites or Suite products, in order to get the best deal, you may need to put in two separate orders. Just ask if you have any questions! You can add other products to your order that are not in any Suite and they don’t affect the pricing of the BOGO Sale.

With all that said, Monday is the LAST DAY to order and take advantage of the BOGO 50% off Sale. Don’t worry! When that sale ends, fun new products will be available in July! Stampin’ Up! has been keeping it coming, making our heads spin sometimes, but always fun to have new products to order, play with, and with which to create beautiful cards, scrapbook pages, gifts, home decor, and more without waiting months for the next catalog to be released!

Click HERE and SCROLL DOWN to see the pictures and list of Suites that you can choose from. Remember that you can choose from whole Suites or separate products IN A SUITE and you can mix and match from different Suites. Have fun shopping!

SHOP STAMPIN’ UP! ONLINE HERE!

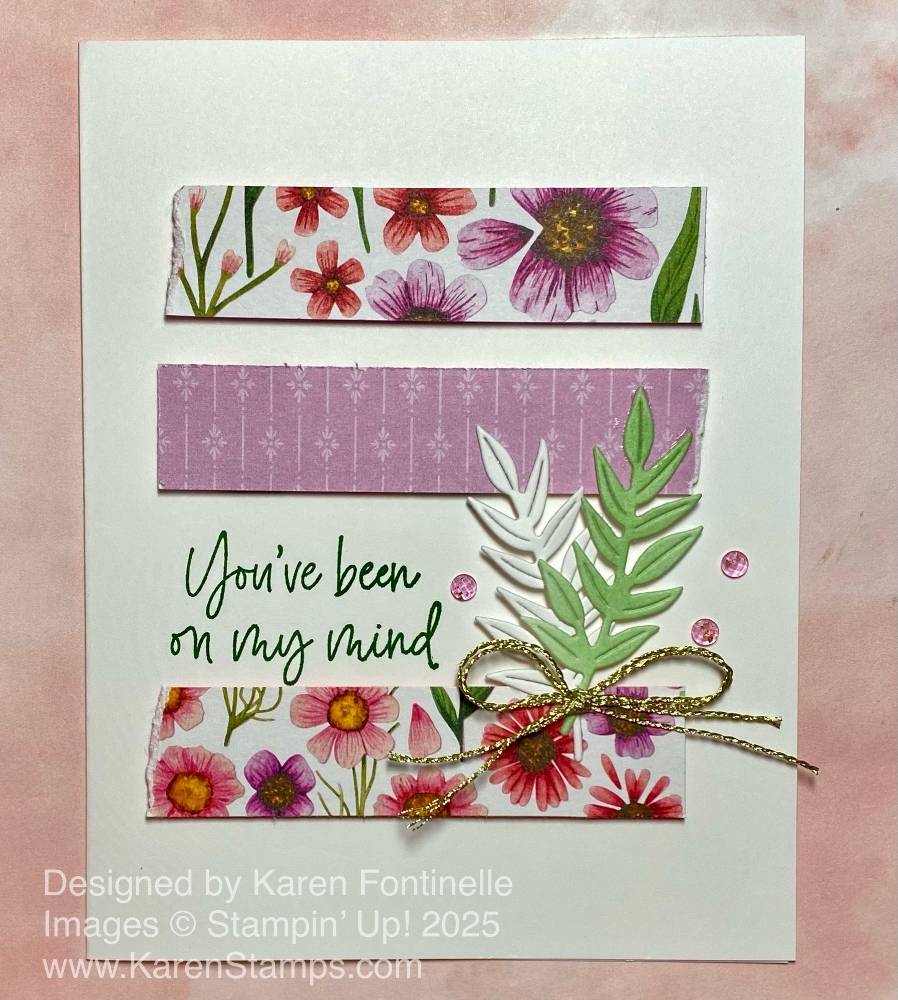
Floral Impressions You’ve Been On My Mind Card

Floral Impressions You've Been On My Mind Card

On Saturday I spent a lovely afternoon attending a virtual Stampin’ Up! event called Creativity Now! So nice to get to sit at home and watch people stamp from my computer! In person is better, but this is plenty fine! This Floral Impressions You’ve Been On My Mind Card is my own copy of the first card one of the Stampin’ Up! staff made at the event. Part of the purpose of the event was to showcase a new suite called Peaceful Garden coming in the September-December 2025 Mini Catalog (or Holiday Mini as I like to call it and type it!). Demonstrators had a chance to order this whole suite or any part of it, but it didn’t totally appeal to me and before I spent that much money for a suite I wasn’t sure about, I wanted to see my other choices when the new mini catalog comes out. After seeing the samples they made with the Suite I may have to rethink that! That’s how I am….sometimes I don’t care for a new product until someone makes something with it, and then I love it and want it!

Since I don’t have the new products they used to make this card at the Creativity Now event, I just made the exact same design with the Floral Impressions Designer Series Paper and other products I already have. This card has a Basic White base, the usual size 8 1/2″ x 5 1/2″, scored and folded at 4 1/4″. The strips of designer series paper is a great way to use scraps! You could vary the size, too. Make them longer or wider if you would like more color on the card. These strips are cut at 3/4″ x 3 1/2″. I used two different papers plus the other side of one of the papers. For this card, each strip has a torn edge on the end. The top strip has a torn edge on the left side. The middle strip has a torn edge on the right side, and the bottom strip has a torn edge on the left side. You can see the white core of the paper when you tear it. Online, they used a Blending Brush to lightly add some ink to each torn edge, but I skipped that step on this card.

Tearing paper used to be something we did a lot for a little pizzazz when we made a card way back when. Not that it necessarily ever went away, but I think it has made a resurgence recently! Generally, you want to tear toward yourself. That’s the point to remember.

The designer paper strips are adhered to the card using Stampin’ Dimensionals. Before adhering them, however, decide on what greeting you are going to use in between the second and third strip so you leave enough space. Just lay them out without adhering the strips, especially the bottom one, so you have room to stamp. My greeting is from the Memorable Blooms Stamp Set. You can use whatever you need to say. I used Garden Green ink.

The directions for the Peaceful Garden card said to cut two pieces of Basic White cardstock at 2″ x 3 1/2″. They diecut two sprigs of leaves to add to the card with the die set in the Peace on Earth Bundle. The stamp set in the Bundle has a lot of nice sayings perfect for cards. I just looked through my die sets and found a leafy sprig in the Citrus Blooms Dies. By the way, these dies are in the Last Chance section at a good discount! The directions said to use a Blending Brush on one of the white cardstock pieces. I used Garden Green ink, very light. Then when you diecut the sprig, it is already colored! The other sprig is just white. Adhere each sprig of foliage wherever the backs are going to touch on the popped up designer paper. For mine, I only put Multipurpose Liquid Glue on the top leaves and stems since the middle would not be touching the card.

To embellish the card, they used Linen Thread to tie a bow and adhered it to the foliage. I happened to grab some Gold Trim I had leftover from something, maybe Paper Pumpkin. I do have Linen Thread and have used it lots of times over years and years so it is a good staple you should have. I used a Mini Glue Dot to adhere the bow, but you could use a drop of the liquid glue. Coming in the Peaceful Garden Suite are some little blue flower gems, so instead, I substituted some Strawberry Slush & Pretty In Pink Gems to each side of the foliage. I used the Pretty In Pink color since it was a little lighter.

If you wanted to, you could use a colored cardstock for the card base and then a white panel on which to adhere the paper strips. Lots of possibilities with this card design. It certainly is an easy one to make!

SHOP STAMPIN’ UP! ONLINE!

Remember: The Suite BOGO 50% Off Sale only has a week left! Don’t miss out!

Two Tone Circles Let’s Celebrate Card

Two Tone Circles Let's Celebrate Card

Last year Stampin’ Up! released the new Two-Tone cardstock, which we had years and years ago. I got several packages of it and have just now tried it! I guess it got lost in the shuffle and I forgot about it! But it is current in the new Stampin’ Up! Annual Catalog on pages 76-77 if you want to learn more about it and see all the colors. It is sold in packages of 12″ x 12″ paper, 12 sheets in a package. When Stampin’ Up! introduced it, it came in scrapbooking kits in an assortment of several colors. This card is made with the Two-Tone Granny Apple Green.

The big deal about the Two-Tone cardstock is that one side of the paper has a light shade and one side has a darker shade both of the same color! So you can do all sorts of things with just one sheet and two shades of colors! PLUS, the paper has a “white core” which means that you can emboss the paper and sand it lightly and expose the white underneath the color. Or if you tear the paper, the white inside will show.

For this card, I chose Granny Apple Green and went off a sample I saw in the Stampin’ Up! catalog on page 79. The card base is Basic White with a layer of the darker shaded side of the Two-Tone Granny Apple Green as the layer on the front of the card. Next I took another piece of the same paper and diecut smaller and larger circles using the Stylish Shapes Dies and the Stampin’ Cut & Emboss Machine.

Before adhering the Granny Apple Green layer to the card base, I glued these circles on to the front of the paper. Since the layer on the card is the darker shade of green, adhere the circles with the lighter shade facing up. You can play around with their placement or only use on size. Allow some to go off the sides of the paper, then trim along the edge when they are all glued down.

Next, either stamp a floral image or some focal point you like and adhere that to the card. I chose some yellow flowers in the Fully Flowering Ephemera Pack on page 29 in the Annual Catalog. This piece is popped up on Stampin’ Dimensionals. The greeting is stamped in Granny Apple Green Ink using the Simply Said Stamp Set. I wanted something narrow that I could place over the flower stem. I used Dimensionals on each end of the greeting so it would be even with the popped up flowers. I also added my last three Iridescent Foil Gems to the card. These were some of my favorite gems to use out of my whole collection.

That’s all there is to the card! You can definitely see the difference in the lighter and darker shades of the Granny Apple Green two-tone cardstock on this card, having the lighter side of the circles facing up against the darker side of the card background layer. I’ll be playing around more with the things you can do with the two-tone cardstock! Check it out in the catalog!

SHOP STAMPIN’ UP! ONLINE HERE!