Monthly Archives: January 2025

Mediterranean Blooms Hello Card

Mediterranean Blooms Hello Card

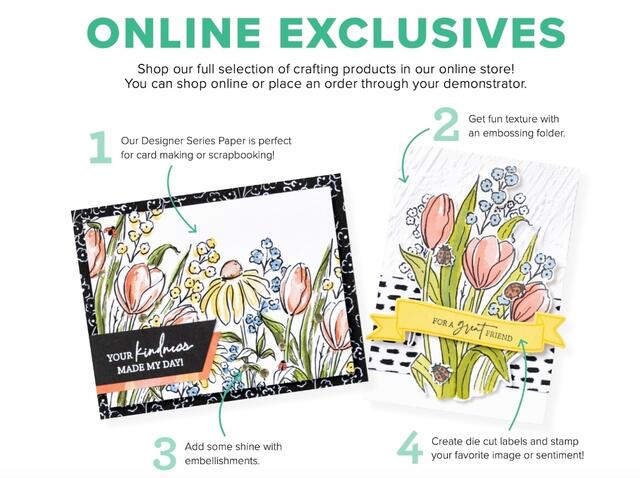
My thought was let’s make something besides “new” or Valentine for this post! I looked through my designer papers and ended up with this Mediterranean Blooms Hello Card. After making a lot of simpler cards lately, I’m inclined to call this card a “masterpiece”. And that made me think that we stampers should more often think of our creations as “masterpieces” because they really are unique and special and while stamping is simple enough that anyone can do it, each card we make is almost always pretty special!

For this card I used a sample in the Stampin’ Up! Annual Catalog with the Mediterranean Blooms Suite for inspiration. Or to copy, you might say! As always, though, mine came out slightly different from the original sample. You can see it on page 34 of the Annual Catalog.

The card base is Night of Navy cardstock. I think the sample may have used a piece of cardstock stamped with the small images in the stamp set randomly for a background. I used a piece of the Mediterranean Blooms Designer Series Paper for the background. On top of that designer paper I adhered a diecut leafy frame piece. This piece was cut out of Basic White cardstock using two dies in the Citrus Blooms Dies set. One die is the leafy design but there is also a frame with decorative corners to be placed around it so that the edge is diecut in a decorative way. You can place these two dies together on the paper and run through the Stampin’ Up! Cut & Emboss Machine or you can cut out the leafy frame leaving a border around the edge and then run that through separately with the frame.

In the center I have a piece of Boho Blue cardstock, cut at 1″ x 4″. It is popped up on Stampin’ Dimensionals. I used some Lemon Lolly twine from the Baker’s Twine Three Color Pack to wrap around this Boho Blue piece and around the designer paper that will layer on the cardstock. This was done before anything was adhered to the card base. In the sample, the different thread went under the center piece and around the entire card, meaning the thread would show on the inside of the card, which is fine, I’m just describing the placement. I also tied a separate bow and adhered it with a single glue dot underneath.

To embellish the card design, I diecut a bunch of leaves out of Soft Sea Foam cardstock. It would have been good to use Adhesive Sheets underneath before diecutting since the leaves are so narrow, but I just put tiny dots of glue on the backs of the leaves. I have a special bottle that does put out tiny drops of glue, but otherwise I would probably make a puddle of the Multipurpose Liquid Glue on a scrap piece of cardstock and use a toothpick to apply it to the small pieces. I just stuck these leaves randomly under the center piece, so you don’t want a solid piece of adhesive foam underneath the Boho Blue piece because you want to be able to find space for the leaves to go underneath.

Now if you like the Soft Sea Foam green but want a little bit more color in it, you can take a Soft Sea Foam Stampin’ Blend, in both Light and Dark, to just “slightly” add color to the leaves for a little shading. If you forget, you can still do it after they are adhered on the card, just don’t get the ink on the white leafy frame.

The greeting on the card is stamped with two stamps in the Citrus Blooms Stamp Set. The white circle is diecut with one of the small circles in the Stylish Shapes Dies. “Hello” is stamped in Night of Navy ink. The second greeting is just stamped on a strip of Lemon Lolly cardstock, also in Night of Navy ink. The circle is popped up on Stampin’ Dimensionals. The word strip is adhered flat over the circle with a Stampin’ Dimensiona or two to hold up the end.

There are die cut flowers out of Daffodil Delight with dies in the Citrus Blooms Dies. I tried to poke the center of some of these to make the petals stick up a little bit. These are just glued down randomly. Finally, I used some Opal Rounds gems in Clear and one Daffodil Delight in the center of the one large flower above the greeting. You could use many other gems, sequins, or jewels to embellish this card.

Here is another Citrus Blooms card I made and used the same die frame to cut out designer paper for the background of the card.

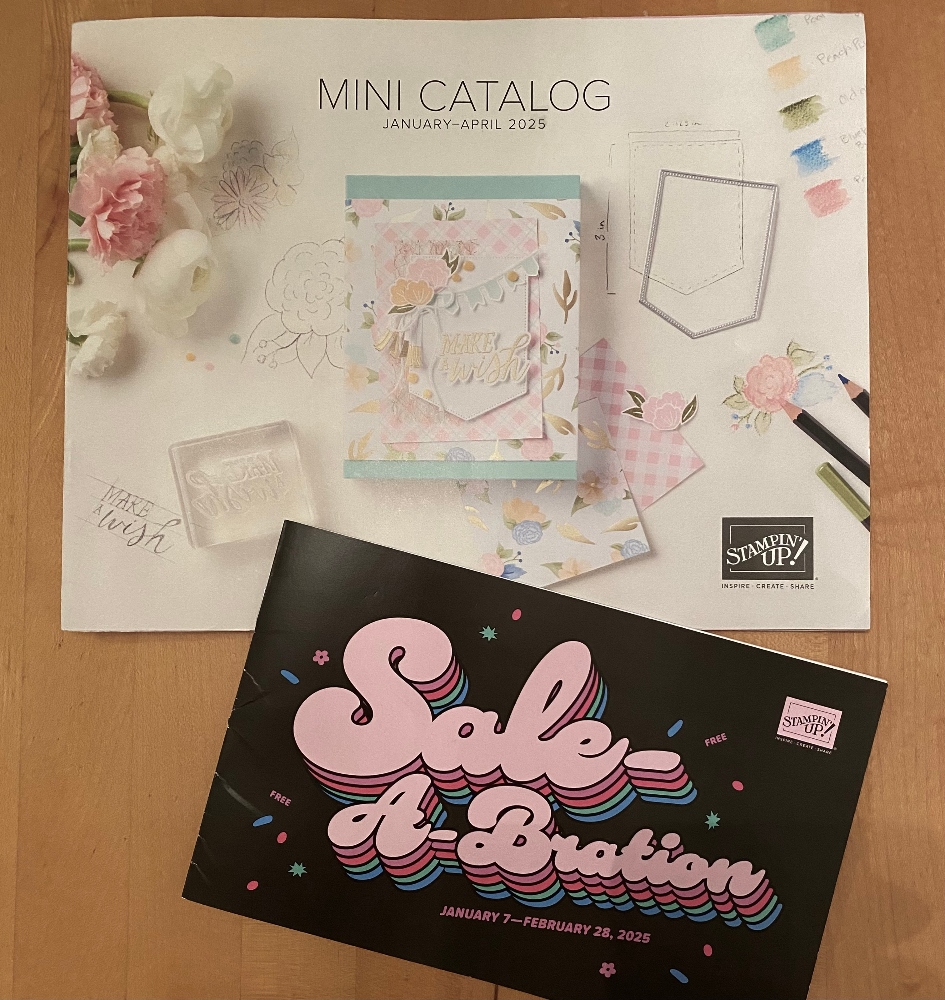
I know sometimes we forget about the Annual Catalog products which we only use exclusively for a couple of months until the Holiday Mini comes out, followed by the Spring Mini catalog. Don’t forget to look back at your older products and see what you’d like to use!

Additional Sale-A-Bration choices are coming on Tuesday, February 4th if you want to see what those products will be. Remember, with every $60 purchase, you earn a FREE product from the Sale-A-Bration brochure, available through the end of February. This is a promotion Stampin’ Up! offers every year which we all love because we love free Stampin’ Up! products any time!

SHOP STAMPIN’ UP! ONLINE HERE!

Valentine Book Treat Box

Valentine Book Treat Box

Remember the Book Treat Boxes that were in the Holiday Mini Catalog last fall? I decided to make one into a Valentine Book Treat Box! You can still find these boxes in the Stampin’ Up! Online Store and they are handy to have on hand any time for a small gift or treat. Then just decorate for whatever occasion!

First step is to assemble the box. These Book Treat Boxes come ten in the package and are easy to assemble. They look like books! There are two pieces to each box. One is the box itself that fits inside the cover. They are all scored and even have adhesive strips to adhere everything together. You will easily see how to do it. The boxes are 3″ x 4″ with a 1″ side spine. You can decorate as little or as much of all the sides as you like. On this box, I decorated the front, the back, the spine, inside the front cover and inside the box. All you would have to do is decorate the front.

I used the Marbled Elegance Specialty Designer Series Paper, cutting the paper at 3″ x 4″ for the front and back of the cover, also inside the cover. The spine measures 1″ x 4″. The measurement for inside the box is just a tad smaller that 3″ x 4″. You can measure yours with a ruler after you assemble it to see the exact size.

For the hearts on the front, I used the Hearts of Elegance Dies to cut out a large Gold Foil heart and the same size heart in Melon Mambo. Then I layered on a Petal Pink pierced heart on top of the Melon Mambo and a small Gold Foil heart on top. The background gold heart is adhered flat on the box, while the other three hearts are first glued together then popped up on Stampin’ Dimensionals. The side tab that could be adhered to the top of the box is 1″ wide and I covered it with designer paper, then trimmed around the curved end. Since I wanted to be able to slip it underneath the hearts rather than adhere it, I popped up the hearts but didn’t put Dimensionals where I wanted that tab to go underneath.

The greeting is in the Hearts of Elegance Stamp Set. I stamped it in Melon Mambo ink on Basic White cardstock. To make it fit better on the box without taking away from the hearts, I decided to cut out around the word “Love”. I completely left off the “You” but it probably would have fit okay. This is a great way to save space with a greeting or you can cut the words apart and do your own spacing according to your project. You can decorate or not decorate the inside of the box before you add your treat! I did a little bit.

Valentine Book Treat Box Inside

I think these boxes are great to have on hand so be sure to add them to your next order for a little different gift wrap or treat box idea. Or create a little scene inside as I did at Christmas on a project for my 12 Weeks of Christmas email.

There are lots of fun things you can make with these Book Treat Boxes! Try one!

Valentine Book Treat Box side

Paper Pumpkin Kit Hearts For You January 2025

Paper Pumpkin Kit January 2025 Contents

It was a rainy Sunday afternoon yesterday so the perfect time to get out my January 2025 Paper Pumpkin Kit, Hearts For You. If you aren’t already a Paper Pumpkin subscriber and you didn’t get this kit in the mail maybe a week ago and you’ve GOT to have it, I can help you out a little bit on that! Stay tuned!

The weekend always seems like a good time to work on a Paper Pumpkin Kit. It certainly was a good time to work on this kit and get a bunch of Valentines made instead of at the last minute! If you aren’t familiar with Paper Pumpkin, it is a monthly subscription program for creative success! Paper Pumpkin subscription kits are designed for anyone who wants to quickly and easily achieve beautiful, handcrafted projects—anytime and anywhere! You’ll get a new project every month—one that’s great for all types of crafters.  Inside the box and the pretty tissue paper, you’ll find a pre-designed, pre-cut paper crafting project. Everything is ready to stamp and assemble. The only thing you might need is a scissors. The kit even comes with adhesives! And anyone can make these projects, whatever they are!

In the photo above, you see I have opened up my box and the packages inside with all the supplies, have the directions out, and the exclusive stamp set. Your first kit will come with an acrylic block for mounting the stamps. Every kit also comes with one ink spot. I usually hoard mine and use my regular ink pad but the 1″ ink spots don’t take up hardly any space! There is always a video of the assembly of the project that you can watch, and I do like to watch it, but the pictorial directions in the box are easy to follow. It tells you exactly where to put the adhesive and how long the string or ribbon should be, etc.

Of course, you can always “go rogue” and make your own creations with the supplies you are given in the kit. There are always alternate designs you can find online using the kit.

Here are the three designs of the finished cards! You also get matching envelopes and in this kit, foil hearts to seal the envelope flap!

Paper Pumpkin Kit Hearts For You January 2025

It was funny, when I made my first card (which is the second card in the top row), I stamped the hearts and greeting, tied on the twine, glued that piece to the marbled card base and I thought “Well, this card is okay but it lacks some pizzazz!” Then I realized I hadn’t added all the “things” yet!! There was the champagne foil outline of a heart, a smaller champagne foil heart, and the large Flirty Flamingo diecut heart with the foil accents. I added those things and then discovered there were also tiny little heart gem embellishments!! Once I actually completed the card with all the intended supplies, I thought it was beautiful for a valentine!

The second card I made was the bottom one in the photo. That card had a really creative background – lines of attached small white hearts! All I had to do, thought, was put the dimensionals on the back of each row, punch them out and adhere to the very faint guidelines shown on each card base. It went perfectly smoothly adhering all those rows of hearts! Then it was just a matter of adhering the two diecut hearts one layered on another, adding the foil word “Love” and stamping the little banner to put below the word Love. To complete it, I just added a twine bow.

The very first card in the photo was probably the easiest except for adding the dimensionals to the back of the foil heart so they wouldn’t show! But the directions showed how to cut one of the dimensionals in half to make them smaller. It worked fine.

All three cards for Valentine’s Day are very pretty and were fun to make! If you would like to get this kit, this is how you can do it. First of all, you must subscribe to Paper Pumpkin to purchase any extra full kits that are available or the refill kits. In this case, it looks like there is a Hearts For You Paper Pumpkin Refill that is available. With the refill kit, you will not get the ink spot and you will not get the exclusive stamp set. But if you have any stamps in your stash, you probably have an assortment of heart stamps and greetings that you could use on these cards, and if not, you can draw your own hearts with a red marker or red pencil or cut some out of red paper. You can write your own Valentine message on the banners with a marker or pen if you don’t have appropriate stamps. Just be creative! Actually, the only stamping you would need to do would be the card with all the hearts and on the greetings. And even if you omitted the greeting, the cards would still look pretty on their own!

If you are interested, subscribe to Paper Pumpkin and then order the Refill right away so it doesn’t sell out. It will count toward your Sale-A-Bration total as well! Once you subscribe, if Paper Pumpkin is not for you, then simply go into your account and cancel, or skip a month. It’s easy and no risk or obligation.

If you are already a subscriber and you’d like another kit or two to make more valentines, just order this Hearts For You Refill Kit right away!

JOIN PAPER PUMPKIN!

Hearts For a Valentine’s Day Card

This Hearts For a Valentine’s Day Card has to be one of the quickest and easiest cards I’ve ever made with no idea of what I was going to make! I know that sounds crazy, but yes, I didn’t know what I was going to make until I got out the Marbled Elegance Specialty Designer Series Paper and looked at the Hearts of Elegance Dies. Since I hadn’t tried all the dies yet, I just chose one. Then after diecutting with that, I chose another heart shape, and another one, and another one. Pretty quickly I had this card made!

The card base is Melon Mambo cardstock. There are several coordinating colors listed for these designer papers, but I mostly keep coming back to Melon Mambo….or Real Red on some cards I made. First I chose the second largest heart die, the one with the pierced border around the edge. I used a piece of the Marbled Elegance Paper, thinking at first I would use “the other side” and not the marbled size. Luckily, in my package I already had a 4″ x 5 1/4″ piece cut and luckily, I centered the heart die on this paper. After I cut it out it looked like the best idea was the adhere the negative piece to the card base with the marbled side up. I thought it was so pretty with that heart opening in the center. I didn’t even use the heart I had just cut out, but I saved it for another card another time.

Next I cut out another smaller heart from another piece of the marbled paper and placed it in the center of the open heart space. It needed something, so I cut out a larger heart from Gold Foil. Then for one more heart, I diecut a small gold heart with the decorative edge to place in the center. As you can see, once the hearts were all stacked on top of each other they looked so pretty!

I already had this greeting stamped and cut out in my scraps so I just adhered that flat in the corner of the card. For a moment, I thought about using the banner in the Mixed Labels Stamp Set to go across the hearts, but I liked the greeting I already had so I kept it simple and just used that. If you are trying to make a quick card, don’t overthink everything.

You could pop up some of the hearts or the negative piece on the card base. You could add some embellishments for a little sparkle. Or you can just leave it simple as is because the Marbled Elegance Designer Paper is so pretty on its own! It’s named Marbled Elegance for a reason!

You’ll find these supplies in the Stampin’ Up! Online Exclusives!

Don’t forget…Sale-A-Bration is going on! Try to have a total of $60 or more on your order before tax and shipping or with $120 order you can choose from a couple of special Bundles or get TWO $60 Level products for FREE!

SHOP STAMPIN’ UP! ONLINE HERE!

To the Point Punch Berry Burst Card

To the Point Punch Berry Burst Card

Sometimes you don’t even know how or where you came up with an idea for a card, and this To the Point Punch Berry Burst Card is one of those! I just had the idea of using this new punch in this design so I just started stamping and punching. And it worked out!

The card base is Berry Burst, one of the colors in the Brights Family. I don’t use this color a lot, but it is what I chose glancing at my cardstock. The Basic White layer on top of the Berry Burst is stamped with the little flowers in the Bright Borders Stamp Set. They are just randomly stamped around on the cardstock because the background needed something.

I stamped the outline image on Basic White with Berry Burst ink. I chose one of the greetings from the Bright Borders Stamp Set to stamp in the center. For the other two side border pieces I stamped the flower from the Hearts of Elegance Stamp Set. I punched those out, but after placing them on the card, I decided they needed a Berry Burst layer behind them. I trimmed down each white stamped piece with Paper Snips, then punched three Berry Burst pieces with the To the Point Label Punch. I adhered the stamped pieces on the punched pieces and then they could show up better on the card.

The center border image is popped up with Stampin’ Dimensionals, but first I applied Stampin’ Seal to the back so I could wind the Gold Twisted Thread back and forth on the back so some loops would stick out from the sides. For a little more embellishment, I added two gold dots from the Low Profile Dots.

That’s all there is to this card. It is monochromatic but you could add other colors instead of making your card monchromatic.

SHOP STAMPIN’ UP! ONLINE HERE!

Storybook Moments Village Gate Fold Card

Storybook Moments Village Gate Fold Card

This Storybook Moments Village Gate Fold Card is made with the pretty Storybook Moments Specialty Designer Series Paper. You will find this paper and entire Suite in the Spring Mini Catalog. I had the idea of putting the patterned paper with little cottages on it on the inside of this card. When I looked at the diecut sheets and saw these two characters, I thought they looked like the lady and lord of the manor on the inside of the card!

This is called a gate fold card because the two sides of the card fold in and meet in the middle. There is nothing complicated about it! To make this card base, cut the Old Olive cardstock at 5 1/2″ x 4 1/4″ as always. Then score at 2 1/8″ from each horizontal end so that those two ends fold and meet in the middle. The inside panel will measure 4 1/4″ x 5 1/2″. When you fold in the two side panels to the center they should meet up perfectly. If they overlap a tiny bit which prevents them from laying flat, just trim as slightly as you can with your Paper Trimmer to help them fit next to each other.

On the inside center panel, I adhered the paper on the Storybook Moments DSP that has images of lots of little cottages. It looks like a little scene when you open the card. That paper would be 4″ x 5 1/4″. On the outside folded side panels, the DSP is cut at 1 7/8″ x 5 1/4″. This designer paper is “the other side” of the paper that has all sorts of different frames and designs in rectangles that can be cut apart to use on cards or scrapbook pages. As you can imagine, it was very difficult to cut into that paper to use the other side and ruin some of the images on the “main” side. But I really liked this leafy side so I gritted my teeth and cut into the paper! Sometimes you have to do hard things! 🙂

The center panel is a piece of Old Olive cardstock cut at 3 1/2″ x 3 1/2″. You can vary the size for your card if you want it smaller or a different shape. The layer on top is Flirty Flamingo 3 1/4″ x 3 1/4″. It happens to be an embossed piece of scrap cardstock in the package, embossed with a retired folder called Scripty. I decided to use it because I liked the little bit of texture it provided in the background, even though it is retired.

The two sheep characters on the square panel are images you will find on the pages of diecuts that coordinate with this Storybook Moments Designer Paper. That is why it is called “Specialty” paper because it has these extra two sheets of all kinds of diecut images, ready to go! These two “lords of the manor” are just glued flat to the card although you could pop them up on Dimensionals. They fit just right on that square.

The greeting is stamped from the Layers of Beauty Stamp Set which I haven’t used for awhile and almost forgot about. You will find it in the Stampin’ Up! Annual Catalog. I stamped it on a narrow strip of Basic White cardstock and flagged both ends. To help it work just a little better with the card, I sponged the edges very lightly with Old Olive ink and an old piece of sponge I had that Stampin’ Up! used to sell. You could use Sponge Daubers or one of the Blending Brushes. We used to do this all the time when I started stamping and I rarely do it nowadays, but I think it is the perfect touch sometimes.

When you adhere this center panel to the card, you will adhere it to the left front panel. Only put glue on the left side of the square so that it doesn’t also stick to the right side panel. Sometimes it’s hard to remember not to put the glue everywhere! Don’t ask me how I know!

https://www.twopeasandtheirpod.com/potato-soup/

On the inside of the card, if the cardstock you used for the card base is rather dark, you might want to put plain cardstock on the inside of those side panels. I used Basic Beige which looks good with the cottage paper in the center. You can stamp a greeting or write a personal message on those plain inner panels. Or you could cut or diecut a plain piece for a greeting adhered to the inside center panel, even though it covers some of the cottages.

Any gate fold card similar to this one is easy to make so I hope you will try one!

SHOP STAMPIN’ UP! ONLINE HERE!

Snowy Day in Houston Texas!

Snow Day Backyard

It’s a snowy day in Houston, Texas and that’s pretty rare!! And the snow is still coming down as I write this! I had a project for you today but the snow is just too exciting so I have to show you snow instead! I know it’s not much compared to other parts of the country, but this is amazing for us, down here in the tropics!! There is even snow on the beach in Galveston!!! Snow On The Beach!!!

I love snow anyway being from Missouri, as long as I’m home baking cookies or brownies and not driving in it. I have driven in a few snowstorms, even blizzards and that’s not good and not fun. But being inside and watching a pretty snow coming down is magical! I wasn’t expecting snow to still be falling when I got up this morning but it was really coming down!

I haven’t ventured outside yet so I only have photos taken from my front door or back door or window. If it is not too slippery I will get out there and make a snowman! Maybe not a big one but at least a few inches tall! We do get snow, sometimes just flakes coming down that don’t stick or accumulate, every few years maybe, but this is a pretty good snow. Everything closed…schools, restaurants, stores, everything possible. Someone on TV had made a sled out of two crutches as the runners! We don’t have sleds, snow shovels (well, we do have one leftover from a few years in Oklahoma!), or maybe not even windshield ice scrapers. The land is pretty flat here but there is one halfway decent hill where people are sledding, I see on the news. Some people are using baking sheets to slide on! I see cardboard, plastic bin covers, anything you can think of to slide on! The reporter said it’s like skiing in Aspen on that hill!

Snow Day Garage

Snow Down the Street

Snow front yard

Street Out Kitchen Window

That photo is out my kitchen window so you can see the screen! When I went to bed last night at midnight there was snow sticking to the roof but not the ground yet. I was so afraid the forecast wasn’t going to pan out and we’d wake up to birds chirping and the sun shining! But no, the snow really happened!! I’m like a kid having a Snow Day from school! And kids in Houston don’t get those very often!

Looks like the snow is stopping here now. I’d love it to snow all day! Maybe I will venture out and see if I can make a snowman!

Hearts of Elegance Love Book Card

Hearts of Elegance Love Book Card

Here’s a fun Valentine to make! I used the book fold design which is easy to do and just gives a little different look to your card. You can make this Hearts of Elegance Love Book Card with this design and decorate it for any occasion.

To make the book fold card, cut a piece of cardstock at 4 1/4″ x 11″. Score at 4 1/4″ and 5 1/2″. Basically, you are cutting a sheet of cardstock in half vertically, scoring in half at 5 1/2″ and adding an extra score line at 4 1/4″. That’s the line that makes this a book fold card. Before adhering that book fold together you can choose to wrap some ribbon around the inside to tie on the front or punch two holes in that side book fold for some ribbon and a bow.

The card base for this card is Real Red. I adhered a 1″ x 4″ strip of the Cherry Cobbler color in the Festive Glimmer Paper. Even though it is not Real Red, I think it looks fine on the card. Before glueing the book fold, I wrapped around a very long piece of Gold Twisted Thread twice and then tied a bow. After having the book fold how I wanted it I glued it together with Multipurpose Liquid Glue or you could use Stampin’ Seal.

The front of the card is decorated with a piece of the Marbled Elegance Specialty Designer Series Paper. It is cut at 4″ x 4″. You could make it smaller and add a layer underneath if you wanted. This designer paper has gold foil marbled designs on it which is what makes it extra-special and fancy to use on Valentines and other special cards.

To decorate the card, I diecut three hearts with pierced designs with the die in the Hearts of Elegance Dies. These hearts are Gold Foil, Real Red, and Petal Pink. Before I decided on these three hearts, I used some of the other heart dies to cut out extra hearts and the ones I didn’t use I just saved in the Hearts of Elegance Stamp Set case. As long as you are diecutting, go ahead and make some extras of general things, like hearts, that you can use any time!

Here’s a tip for diecutting gold foil without leaving marks on the foil from your very used cutting pad! Place the dies on the cardstock you are cutting, then place a scrap piece of computer printer paper over the whole piece of gold foil. Run it through the Cut & Emboss Machine and the paper will protect the gold foil from looking scratched up!

For the greeting I stamped the “Love You” sentiment on Basic White cardstock in Real Red ink, but I chose to cut out around the word “Love” and also trim the word “you” just into a rectangle. It’s plenty easy to trim around a word or phrase like this for a different look to your sentiment just by taking your time, cutting outside the inked lines for the word and don’t go into every nook and cranny of the stamped word! Just use Paper Snips or some other sharp small scissors that allow you to twist and turn the paper to reach the areas you want to cut.

Everything is glued down flat, but you could pop up the sentiment or one or more hearts if you wanted to. For some extra embellishment, I added three Petal Pink dots in the Low Profile Dots. These are great because they do not stick up on the card barely at all so they won’t poke holes in the envelope when you mail the card! On the inside, put a layer of Basic White, maybe trimmed with a piece of the designer paper or a stamped or diecut heart so you can stamp a message or write a personal note inside the card. Then mail your Valentine or special card to someone who will be happy to hear from you!

SHOP STAMPIN’ UP! ONLINE!

Marbled Elegance Trio of Valentines

Marbled Elegance Trio of Valentines

If you want to make some easy Valentines, here is a design for you!! I think I could have made 100 of these! Well, maybe not, but I did make these Marbled Elegance Trio of Valentines! They were easy and fun and came to me right away! All you really have to do is get out the beautiful Marbled Elegance Specialty Designer Series Paper and start cutting!

The card bases are just Basic White cardstock. If you have the Thick White cardstock it might be a good idea to use that or you could use Melon Mambo for a card base, then Basic White for a layer and the center design would just be a little bit smaller than these measurements.

The side of the designer paper could vary a little bit, but I cut mine at 3 1/2″ x 3 1/2″. Obviously I used one of the marbled patterns with the gold foil accent marbling. It doesn’t matter which one! I layered the designer paper on a piece of Melon Mambo cut at 3 3/4″ x 3 3/4″.

Since there is plenty of space at the bottom of the card I simply stamped the greeting in that space right on the card. Now, it might be a good idea not to glue anything on the card until after you stamp the greeting in case it doesn’t come out well! But if you have everything glued down and the stamping isn’t perfect, just cut a label or banner or shape, stamp on that, then adhere over the boo-boo. On these cards I used Melon Mambo ink. All of these greetings are in the Hearts of Elegance Stamp Set.

I made each card a little bit different. On the first card, all I added was one gold foil die cut heart with one of the hearts in the Hearts of Elegance Dies. You can purchase the stamp set and dies together in the Hearts of Elegance Bundle and save 10%!

On the second card, I liked that middle heart cut out of the designer paper but it still needed something. I added two diecut Melon Mambo hearts on each side of the DSP heart. For a touch of embellishment, I simply tied a bow with the Gold Twisted Thread and adhered it to the center heart with a Mini Glue Dot just rolled up into a teeny tiny ball. This Gold Twisted Thread is part of the Marbled Elegance Suite or you can purchase it separately. The middle heart is popped up on Stampin’ Dimensionals.

For the third card, I diecut the fancy heart with the pierced design in Gold Foil. I popped it up on Stampin’ Dimensionals. And for a little more pizzazz, I added three Gold Dots in the Low Profile Dots package.

With only the Marbled Elegance Specialty Designer Series Paper, some diecut hearts, and a greeting you can make a very pretty card….or even three!

SHOP STAMPIN’ UP! ONLINE HERE!

“Hello Spring” Paper Pumpkin Kit For February 2025

Paper Pumpkin February 2025 Hello Spring

It may be difficult to think of spring while lots of us are smack dab in the middle of winter, including snowstorms! Not here in Houston, of course, except for feeling cold to us when anyone in a real winter climate would think our temperatures are spring-like! My husband even has lettuce, radishes, and carrots coming up in his garden box on the patio!

Nevertheless, you can get a taste of spring with this “Hello Spring” Paper Pumpkin Kit from Stampin’ Up! If you subscribe to Paper Pumpkin between now and February 10th, you will receive this kit in the mail mid-February!

Kit Details:

Plant the seeds of happiness with these lovely garden-inspired cards!

Makes 9 cards: 3 each of 3 designs
• Precut pieces with bronze foil
• Unique spring-themed envelopes
• Coordinating colors: Basic Beige, Bubble Bath, Lemon Lime Twist, Lost Lagoon, Old Olive, Petunia Pop (Classic Stampin’ Spot)

Coordinates with the Grow with Love Bundle (item 164804)! One of the Stampin’ Up! New Arrivals online!

Each kit comes with all the supplies you need to make the project inside, except for scissors! You get an exclusive stamp set, a Stampin’ Spot 1” x 1″ ink pad, embellishments, cards and envelopes. It’s really fun to open the box and see what is inside, even if you have seen pictures online! Seeing it in person is always better. I like to say Paper Pumpkin is the gift you give yourself each month, a treat you get in the mail, just for you….or maybe you’d like to share the fun with a family member or friend! You can always order more than one kit in your account. And if you have a busy month coming up, you can always skip that month and look forward to the next month’s kit! No risk, no obligation. Cancel any time if you don’t feel Paper Pumpkin is for you. You can always come back!

These kits are designed for everyone! New crafters, non-crafters, and experienced crafters! Sometimes it is nice to just open the box and there is a project already designed for you and everything at hand that you will need. A video is always available online if you like to watch the assembly (I do!!) and you will always find alternate ideas for using the kit various places online if you feel more adventurous.

Don’t wait! Go ahead and join Paper Pumpkin now so you will be ready for the February Kit!

JOIN PAPER PUMPKIN HERE!

Find Out More About Sale-A-Bration 2025!

Sale-A-Bration Brochure 2025
Click to View Sale-A-Bration Brochure!

Stampin’ Up!’s biggest annual promotion, Sale-A-Bration, has already begun so don’t delay! This special promotion has been going on for years and yet it is always fun to earn FREE products from Stampin’ Up! With every $60 you spend at Stampin’ Up! on any products (before shipping and tax) you can choose a FREE product in the special Sale-A-Bration brochure! You can choose from stamp sets, designer series paper, embellishments, an embossing folder, and even a card kit! If you spend a larger amount, for $120 you can choose from the Heart Shaped Bundle or the intriguing Corner In Bloom Stamp Set. Or instead of one of the $120 level products, you can choose two of the $60 level products. Spend $180 on Stampin’ Up! products and earn three free $60 level products, PLUS Stampin’ Rewards because your order is $150 or over. With an order of $300 (a party order with others or an individual order) you can choose any extra $30 worth of products!

Watch this video below and see what Sale-A-Bration has to offer!

And if you’d like a closer look at the designer paper and sample projects, enjoy this video!

To see what is available when you spend $60 or more at Stampin’ Up!, CLICK HERE!

To see what is available when you spend $120 or more at Stampin’ Up!, CLICK HERE!

SHOP ALL OF STAMPIN’ UP! ONLINE HERE!

Storybook Moments Easy Card

Storybook Moments Easy Card

Here’s another easy card, almost like the one I made in yesterday’s post! It’s the Storybook Moments Easy Card, and it is fine that it is so simple because the paper is so cute in the background! Yesterday when I made the Quick and Easy Bright Borders Card I said I used one of the generic patterns on “the other side” of the cute paper. Today I used the themed side of the paper with the cute little squirrel and flower images.

The card base is Boho Blue cardstock. It coordinates with the Storybook Moments Specialty Designer Series Paper. This paper has darling images of little animals, gardening images, and countryside cottages. Plus you get two sheets of diecuts to go with the papers. You can use them on cards, scrapbook pages, or other projects.

Today I just flipped over the paper I used yesterday so I was using all the little squirrels swinging, playing, and doing other fun things. I made the same type of greeting as I did yesterday using the Bright Borders Stamp Set and the To The Point Label Punch. I stamped the border with Boho Bue ink and punched it out. To help it stand out a little bit, I also punched a piece of Boho Blue cardstock and cut it in half horizontally. Then I adhered it with some glue to the back of the top and bottom of the label which leaves a little white space on the back, but no one will see that. You have a choice of putting those points of the border at the top or to the side. Either way works. I liked them at the top and bottom.

For a little bit of embellishment, I added two gold Low Profile Dots in the center of the flowers at the top and bottom. These dots are great because they truly are “low profile” so they won’t stick up and poke the envelope when you mail it. This package has gold and light pink dots in several different sizes. They are great to have in your stash.

Remember, if you shop with a $60 purchase in mind, you can earn a FREE product during Sale-A-Bration at Stampin’ Up! through February 28! No limit to how many products you can earn with the proper qualifying amounts!

SHOP STAMPIN’ UP! ONLINE HERE!

Quick and Easy Bright Borders Card

Quick and Easy Bright Borders Card

This Quick and Easy Bright Borders Card is indeed quick and easy and fun to make with new products! It’s a good card design to keep on hand for when you need something “quick and easy”! And remember, quick and easy isn’t necessarily “less than” a super fancy card with all kinds of papers, textures, and embellishments, maybe a fancy fold or two. Sometimes “quick and easy” is just as elegant as anything fancy you could make.

I used the brand new Storybook Moments Specialty Designer Series Paper for the card layer. The card base is Lost Lagoon which is one of the coordinating colors of the designer paper. This paper is called “Specialty” because it contains two sheets of diecut designs. These will really be fun to play with! This paper is part of the Storybook Moments Suite Collection with lots of products included.

Although the main sides of this Storybook Moments Designer Paper have the cutest little images of bunnies, squirrels and other animals plus gardening images, for this card I chose “the other side” of the paper which can be used for almost anything. I love the colors and design.

For the greeting, I stamped one of the border images and greeting in the Bright Borders Stamp Set with Lost Lagoon ink. The new To The Point Label Punch works with this stamp set perfectly. After playing a little bit, I decided I wanted a layer under the punched greeting so I trimmed off the edge of the stamped border image so that I could punch out a piece of Lost Lagoon cardstock which would be larger than the stamped image so I would have a layer. If you don’t want to do this fussy-cutting, you can punch out the label shape and cut it in half horizontally or vertically and use that for a layer on the sides or the top and bottom.

For some embellishment, I adhered some white ribbon back and forth behind the label and popped up the whole greeting on Stampin’ Dimensionals. This ribbon is part of the Petal Pink and White Diagonal Trim Combo Pack. Additionally, I added two Lost Lagoon gems in the Tinsel Gems Three-Pack. If you will be mailing this card, you may want to adhere the greeting flat on the card so that the gems won’t interfere with mailing.

Be sure to check out the amazing number of new products that became available on January 7th at Stampin’ Up! And remember that it is also Sale-A-Bration, a promotion where you can earn free product with each $60 purchase. Have fun shopping!

SHOP STAMPIN’ UP! ONLINE HERE!

New Year! New Products Galore at Stampin’ Up! Today!

Spring Mini 2025 and Sale A Bration Catalogs

New Stampin’ Up! Spring Mini Catalog Is LIVE TODAY….

Plus It is Sale-A-Bration Time!….And More!

Today is like Christmas or your birthday at Stampin’ Up! So many new things! And what do we stampers like better than NEW PRODUCTS! Not only do we have the new January-April 2025 Mini Catalog (I like to call it the Spring Mini for short!) but Sale-A-Bration has started! Sale-A-Bration is a big promotion Stampin’ Up! has held “forever” almost and we love it because we get to earn FREE products from the Sale-A-Bration brochure with every $60 purchase (before shipping and tax, of course).

Scrapbooking Brochure Jan 2025

New Scrapbooking Brochure for January 2025!

This Scrapbooking Brochure for January 2025 incorporates new scrapbooking products available without waiting for a new catalog! You will have to scroll through the brochure online to take in all the new products available! Read the description of each. You’ll find 12″ x 12″ cardstock, designer series paper, sticker sheets and diecut images, and more! This is great for starting your New Year getting into Memory Keeping that we all just put off!

SU Online Exclusives January 2025 Partial Flyer

New Online Exclusives For January!

Check out this Flyer of new Online Exclusives for January!

SHOP HERE for ALL the Online Exclusives! Remember, these are available as long as supplies last and as long as Stampin’ Up! can restock anything that sells out.

Kits Collection New Products Jan 2025

There are 3 new Kits released today in the Stampin’ Up! Kits Collection!!

The Stampin’ Up! Kits Collection makes it easy for ANYONE to craft and make beautiful creations! Each Kit contains all the supplies you will need except maybe a scissors, if that! Follow the directions for the project OR change it up however you like! There will be information in the instructions of where to go for more help with the kit, if you need it.

Brightest Birthday Kit

Thank You Kindly Kit

Birthday Bash Kit

Just check out the Stampin’ Up! website, click all around, and you’ll get caught up with all the new products! I know after the Christmas holidays it is difficult for me to take in all the new information but I hope this post and links will be helpful to get you started! Remember, anything you REALLY want, be sure to order early just in case certain things sell out quickly. You never know what the most popular things will be!

SHOP STAMPIN’ UP! ONLINE HERE!

Easy Celebrate Love Hearts Card

Easy Celebrate Love Hearts Card

With the Christmas holidays and children home for two weeks altogether, coming and going, I haven’t had time to play with my new pre-order products for the upcoming Spring Mini Catalog on January 7th! I almost don’t remember what I ordered, but I will catch up! One thing I noticed I had was this new ephemera pack so this was something great to use to make this Easy Celebrate Love Hearts Card.

I got out the Celebrate Love Mix & Match Ephemera Pack and checked out what the coordinating colors were on the back of the pack. Pretty in Pink was one of the several colors so I started with that as a layer on a Basic White card base.

You see three precut heart images from the ephemera pack on my card, but that actually is just one in the pack. You can leave it that way or you can punch the pieces apart and use all or one or two of the hearts. There are also greetings in the pack. I loved the precut long flower image but wasn’t quite sure how to use it on my card. It took me a couple of minutes to somehow lay out the three individual hearts the way I did and then I felt like I was on my way to making a card I would like.

The long, curved flower stem was still a problem, but don’t be afraid to cut it apart as I did! That gave me two stems of flowers that were a size that fit my card better. I liked the way they looked just placed along the sides of the two hearts. I popped them up on Stampin’ Dimensionals when I was ready to adhere them to the card.

The third heart in the lower right of the card looked best placed over one of the colored hearts in the ephemera pack. These are sized just right for this purpose if you want some color underneath the white diecut heart. That heart is popped up on Stampin’ Dimensionals also.

It was easy to choose a greeting for the card and this one was in the Celebrate Love Ephemera Pack. I just adhered it flat on the card. You know I had to try out some of the new embellishments coming in the new mini catalog! I used the Pretty In Pink dots in the Party Dots package. They are fairly flat so good for mailing.

It still seemed like the card needed “something” so I used the Pretty In PInk Stampin’ Blend marker to add some very small dots on the white hearts. I was hoping this wouldn’t ruin the card, but I did like it. Not one to leave well enough alone, I wondered what some tiny little hearts scattered around in the background would look like, even if I ruined the card, I took the brush end of the Stampin’ Blend and made little hearts. If you push down a little on the brush tip and then lift up as you pull down a tiny bit you will make one side of a heart. Do it again on the other side and you’ll have a cute little heart!

That’s my Easy Celebrate Love Hearts Card that I made a little more involved than I first intended! It still was easy and would certainly be easy for you to copy! You can make this card with just the ephemera pack and none of the extra things I added to this card…except, of course, maybe the Party Dots! It’s just too fun to add some dots, gems, jewels, sequins, or whatever to a card for a little bling!

Get ready because the new January-April 2025 Mini Catalog is going live on Tuesday, January 7th, along with Sale-A-Bration! Try to order at least $60 so you can get a free product from the SAB brochure!

SHOP STAMPIN’ UP! HERE!