
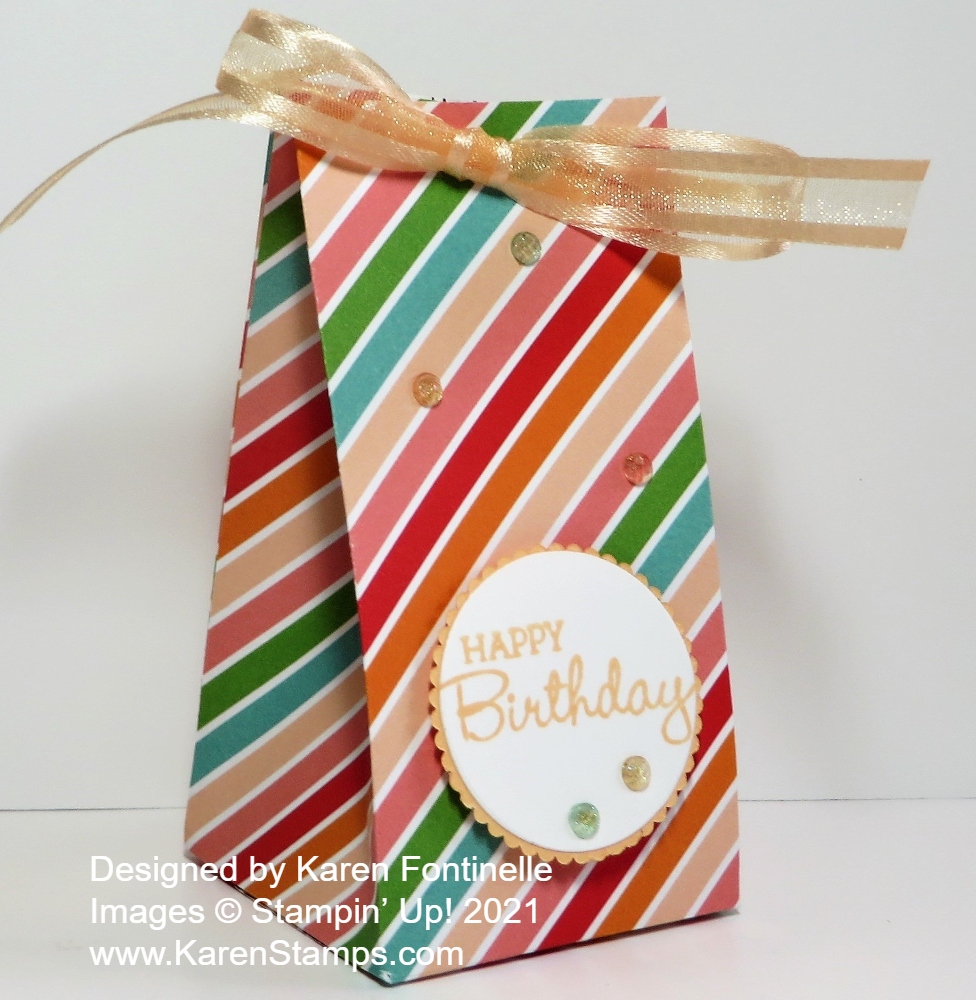
If you are able to get this Pattern Party Designer Series Paper, I think you will really enjoy using it as I did making this Pattern Party 2-4-6-8 Birthday Gift Bag! I thought this festive diagonal stripe would make a fun gift bag, at least for a small gift or treat, and certainly a 2-4-6-8 gift bag (or box) is easy enough to make!
The Pattern Party Designer Series Paper is an item you can choose as one of your Stampin’ Rewards with an order of $150 or more. That’s a big order but maybe some friends would like to go in on the order with you and you could divide up the paper because it’s a big package! Twelve different designs and four pages of each!
We’ve made this bag a bunch of times before but even I have to go back and review the directions. It is very easy though! Once you know how to do it, you can vary the size by using a larger or smaller piece of paper. Always be sure the pattern of the paper is going in the direction you want it to go in so you don’t end up with upside down flowers or animals or a stripe going sideways when you wanted it to go up and down.
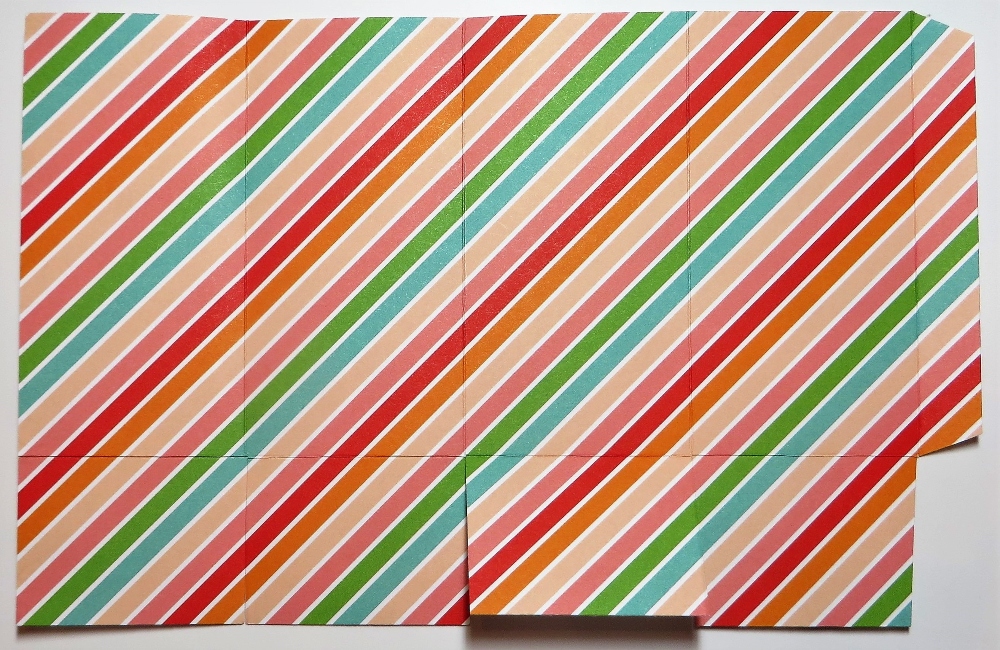
For this gift bag, I started with a piece of paper 8 1/2″ x 5 1/2″. I just scored it at 2″, 4″, 6″ and 8″ going across the paper. Then I turned it and scored at 1 1/2″ for the bottom tabs of the bag. Trim off the little 1/2″ bottom piece and cut on the 2″, 4″, 6″, and 8″ score lines for the bottom flaps up to the 1 1/2″ score line. Difficult to see in the photo below but you can get the idea.
Assemble the box, putting adhesive on that 1/2″ piece on the side. You can just fold over the other side of the bag with it laying flat on the table. You don’t have to try to maneuver it in your hands! Apply adhesive to the bottom flaps, first doing a “test” to see which way you want the flaps to go in before you glue. Then pay attention to where the seam is and try to have that face the back. Fold in the bottom flaps, trying to make the front of the bag look nice.
To decorate this bag, I stamped “Happy Birthday” in the Pansy Patch Stamp Set in Pale Papaya Ink. Then I die cut it with one of the Layering Circles Dies and layered it on a scalloped circle die in Pale Papaya Cardstock. It’s perfect fit! I needed something big enough to fit the greeting but not too big for the bag! I popped that up with two Stampin’ Dimensionals.
For the top of the bag, you can leave it open, or kind of squeeze in the sides and pinch the top together. Punch or poke some holes in the top for ribbon. I used the Pale Papaya 3/8″ Open Weave Ribbon to tie the top closed in a bow. Have I said how much I love that ribbon?! Then for a little extra, I added some of the Genial Gems on the greeting and on the bag. These come in two colors, Pale Papaya and Mint Macaron but I think you can use them even without matching colors.
Knowing how to make a 2-4-6-8 bag is something you should know how to do as a papercrafter! They are fun to make, not to mention useful when you need some cute packaging for a small gift or treat! Here’s a very similar one made for Valentine’s Day. Being able to make an easy gift bag just might save you a trip to the store!