
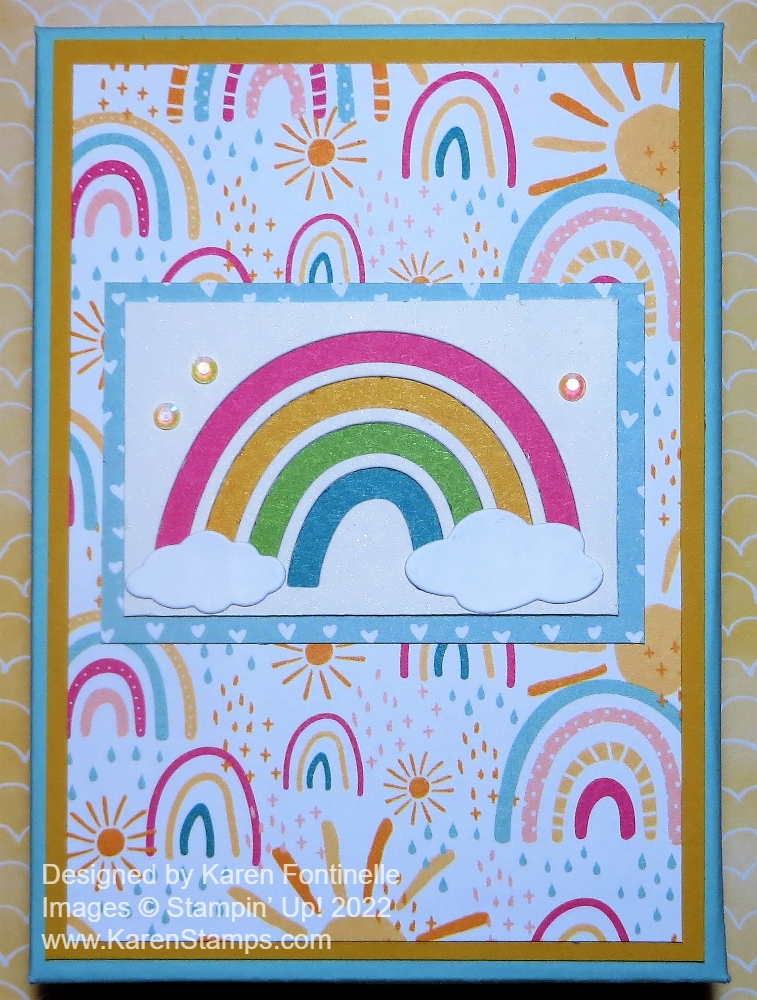
Recently I needed a birthday gift for someone, and after finding a little notebook at the bookstore that nearly matched our Sale-A-Bration Sunshine & Rainbows 6″ x 6″ Designer Series Paper, I got an idea! I bought the notebook and then made four note cards to match! Next, I needed some kind of box or bag to put the note cards and envelopes in so the photo above is the top of the gift box I made.
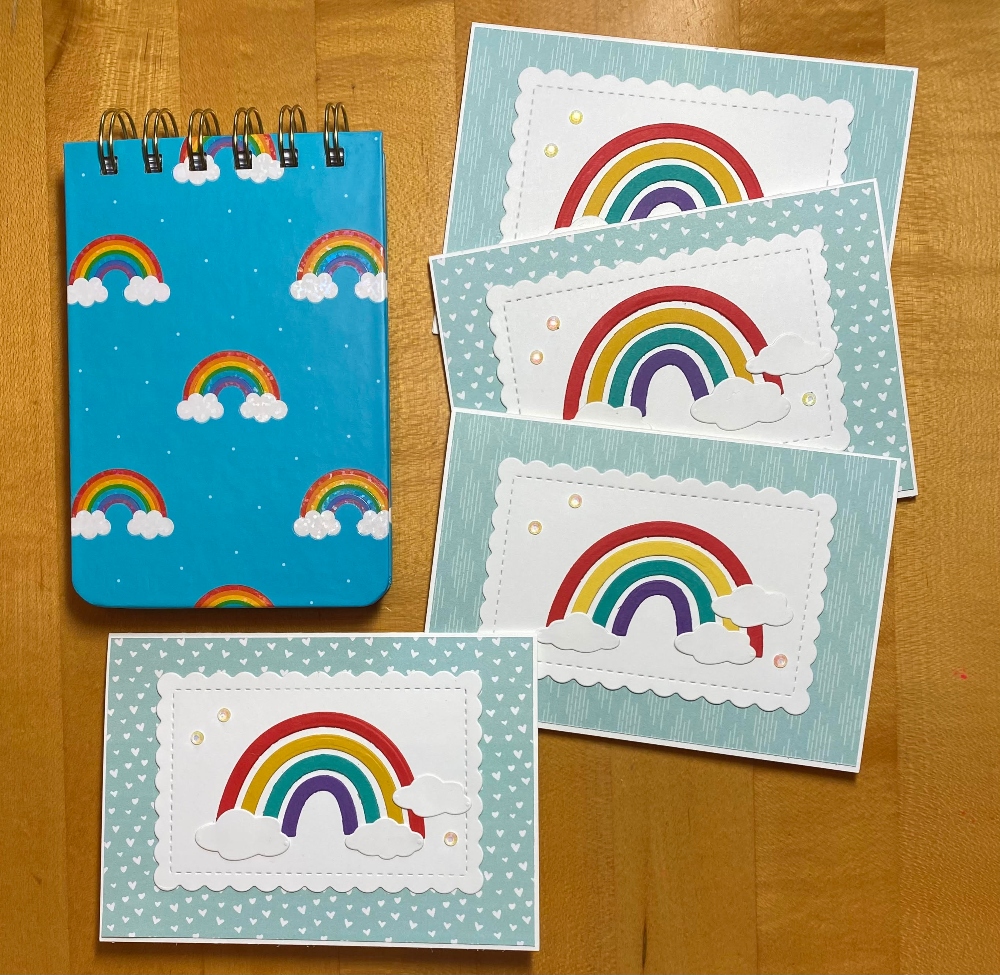
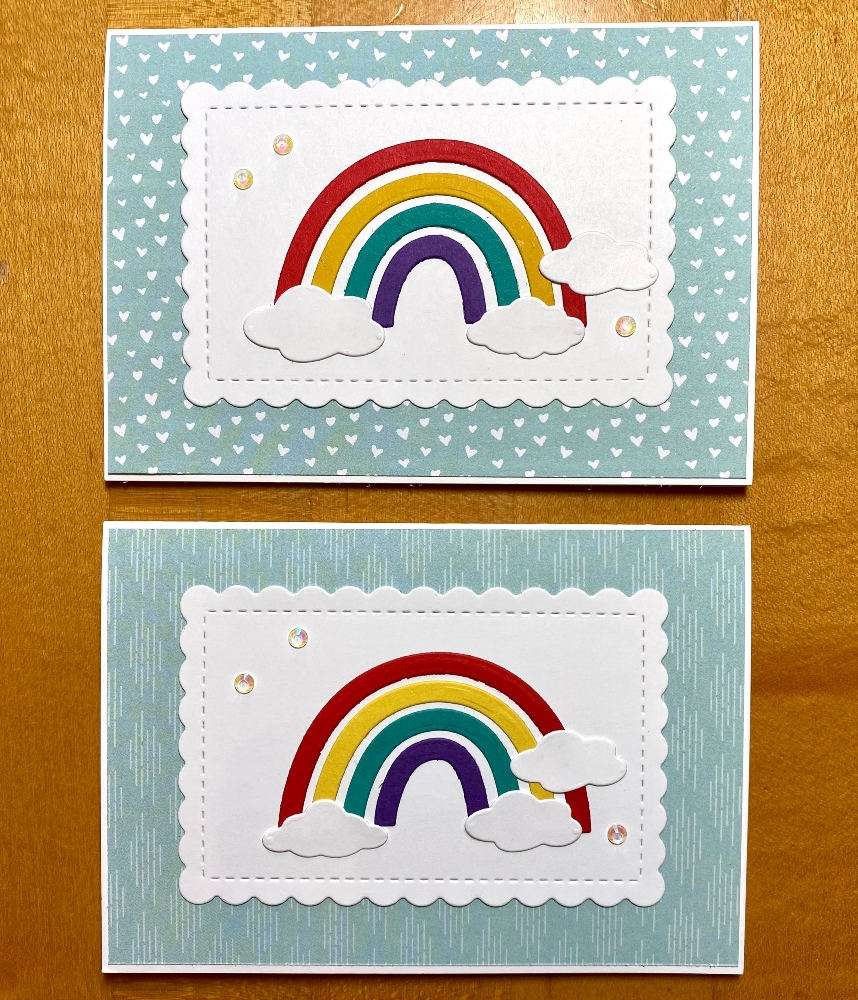
To make these cards I just used the Note Cards & Envelopes which made it so easy! You should really keep a package or two of these on hand! I have used them many times. The designer paper on the note cards are two different patterns in the Sunshine & Rainbows Designer Paper that was available during Sale-A-Bration which just ended. Perhaps you already have some from Sale-A-Bration. I die cut the rainbow pieces with the Brilliant Rainbow Dies. You can use whatever colors of cardstock or designer paper that you like. I used Poppy Parade, Crushed Curry, Bermuda Bay, and Gorgeous Grape. I was trying to copy the colors in the rainbows on the notebook as best I could. I also die cut the little clouds with the dies. I adhered the rainbows to a scalloped rectangle die cut, one of the Scalloped Contours Dies. I also added some Iridescent Rhinestone Basic Jewels to each note card.
After I had the note cards made, I wanted a cute bag or box to put the note cards and envelopes in. There are lots of box ideas out there online and once you know the basic principles you can vary the size box and lid that you need to make. I found one from the Paper Pixie that was specifically made for note cards so I used those measurements and then, of course, decorated the box lid to match my cards.
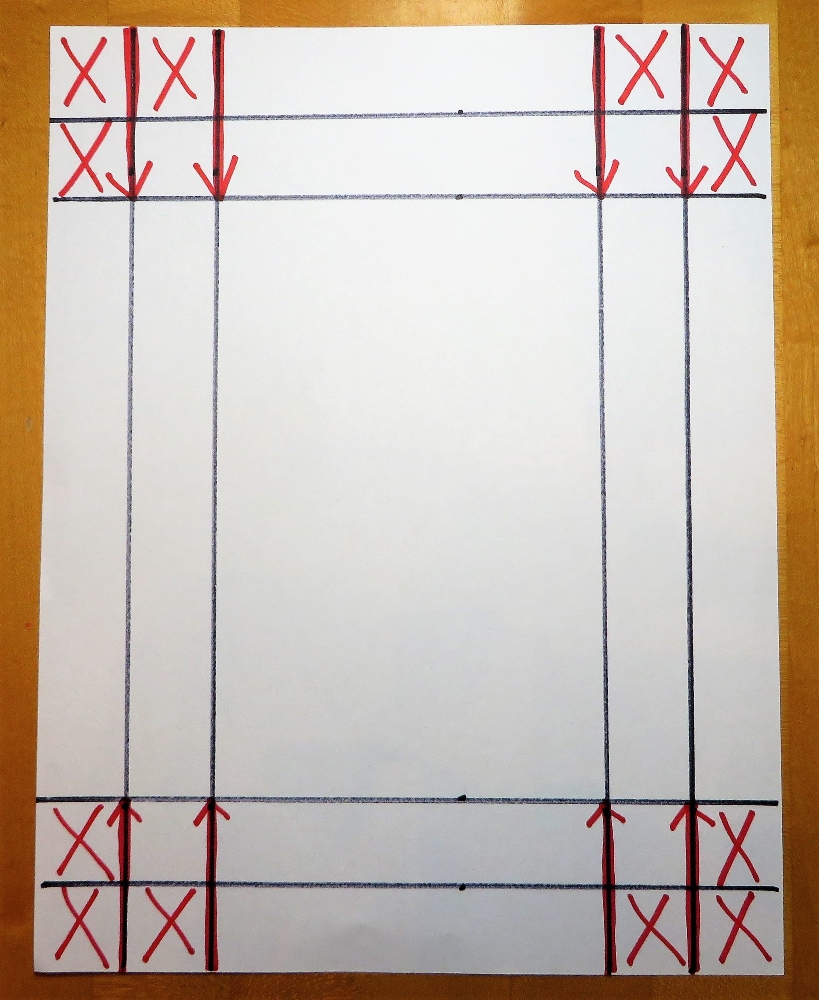
Here is the diagram, basically the same idea for the box bottom and the lid. Each has different measurements but you score and cut the same way on each. I tried making a more professional sketch on the computer but it was a mess and this was easier to just draw it!!
The box bottom starts with a piece of cardstock that is 7 3/4″ x 9 1/4″. Score at 1″ and 2″ on all four sides.
The box lid measures 6 3/8″ x 7 7/8″ but just a “smidge” less on each measurement, just a sliver! Score at 5/8″ and 1 1/4″ on all sides.
Crease and fold all score lines on the box and the lid. Use a Bone Folder if you have one to get a good crease. Then open the folded cardstock back up and following the diagram above, cut from the bottom up to the scoreline on each red line with the arrow. Turn the paper and do the same to the other end. Then cut off the squares where the X’s are. After that, you can see how the sides and tabs will fold in and form the box and the lid.
It’s probably best to use Tear & Tape to adhere the box and lid, but Multipurpose Liquid Glue works, too. Or use Stampin’ Seal+ to hold everything together. Apply the Tear & Tape to the outside edge of all the sides. You can use a bit of Multipurpose Liquid Glue on each tab to hold those in place first.
Before you assemble the box lid, you might want to decorate it first, but you could assemble it first, too. For my lid, I used a layer of Crushed Curry Cardstock under a layer of the Rainbow & Sunshine DSP. Then I die cut the rainbow with Basic White and fit it over one of the big rainbow patterns in the package. Just cut out a full rainbow carefully, they are placed closely together! Just cut a rectangle shape of the rainbow, don’t cut out the actual rainbow. Place the die-cut white piece over the DSP rainbow and adhere carefully. I also layered this on a piece of the DSP that matched one of the cards. To embellish I die cut a couple of white clouds and added some Iridescent Rhinestones.
Making a box is easier than writing about it so just give it a try! It’s handy to know how to make a box out of cardstock in case you need one for a gift or storage.