Category Archives: Christmas

Make the Easiest Christmas Tags!

Christmas Tags & More 5 Tags

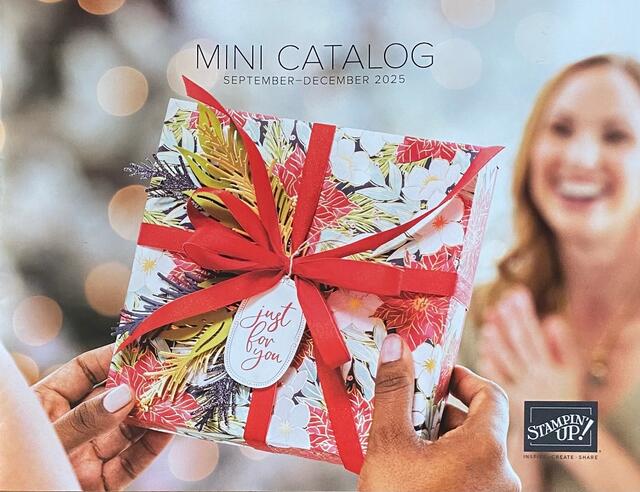
You know with the September-December 2025 Mini Catalog coming out last week it is a sign we are just about on the slippery slope to the holidays – fall and winter holidays! Once we start decorating there is no end until January! So it would be a good idea for all of us to get an early start on a few holiday preparations. I have some simple Christmas tags for you to start with!

Whether you are an experienced stamper or especially if you are new to all of this, I have something super easy for you to make! And it might be something we overlook in the new Holiday Mini because it isn’t as splashy on the page as some of the big Suites are! If you look on the bottom of page 15 you will find the Christmas Tags & More 6″ x 6″ Mix & Match Specialty Designer Series Paper.

The Christmas Tags & More is an amazing package of papers! Not only are there regular 6″ x 6″ sheets of designer series paper, but you also get two sheets of diecut holiday images as well as 8 sheets of cut-apart designs with which you can make tags and cards.

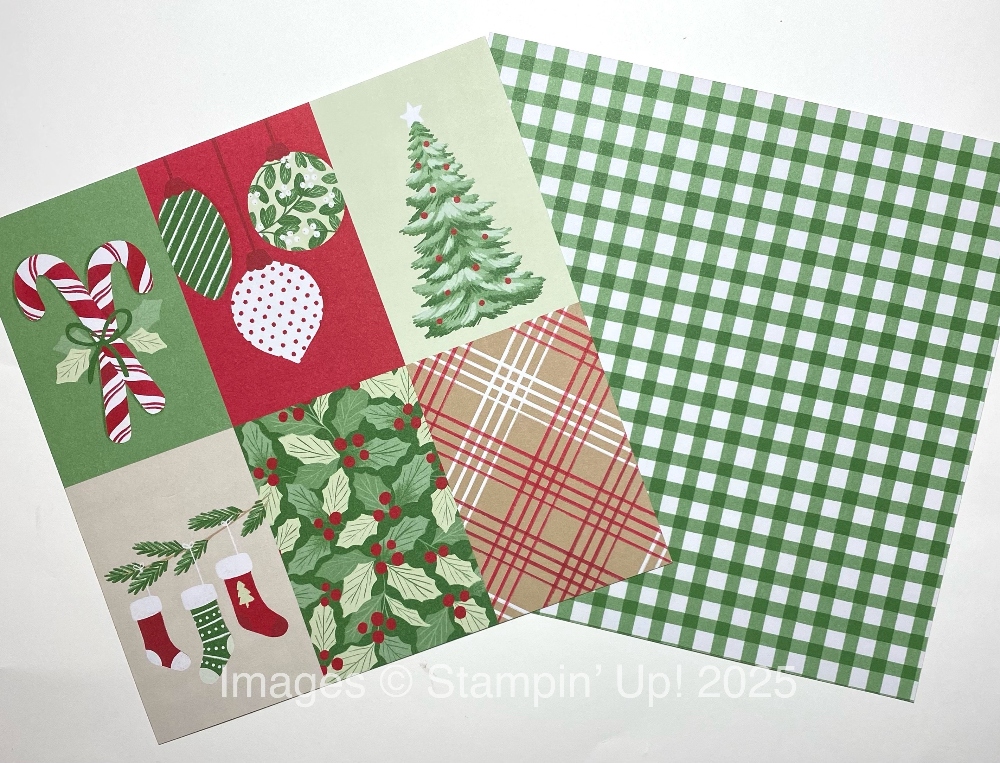
Christmas Tags & More Tags Paper & Back

In the package you get 8 copies of this sheet with cut-apart designs to make tags or perhaps Christmas cards. The green and white plaid is the backside of the tag design.

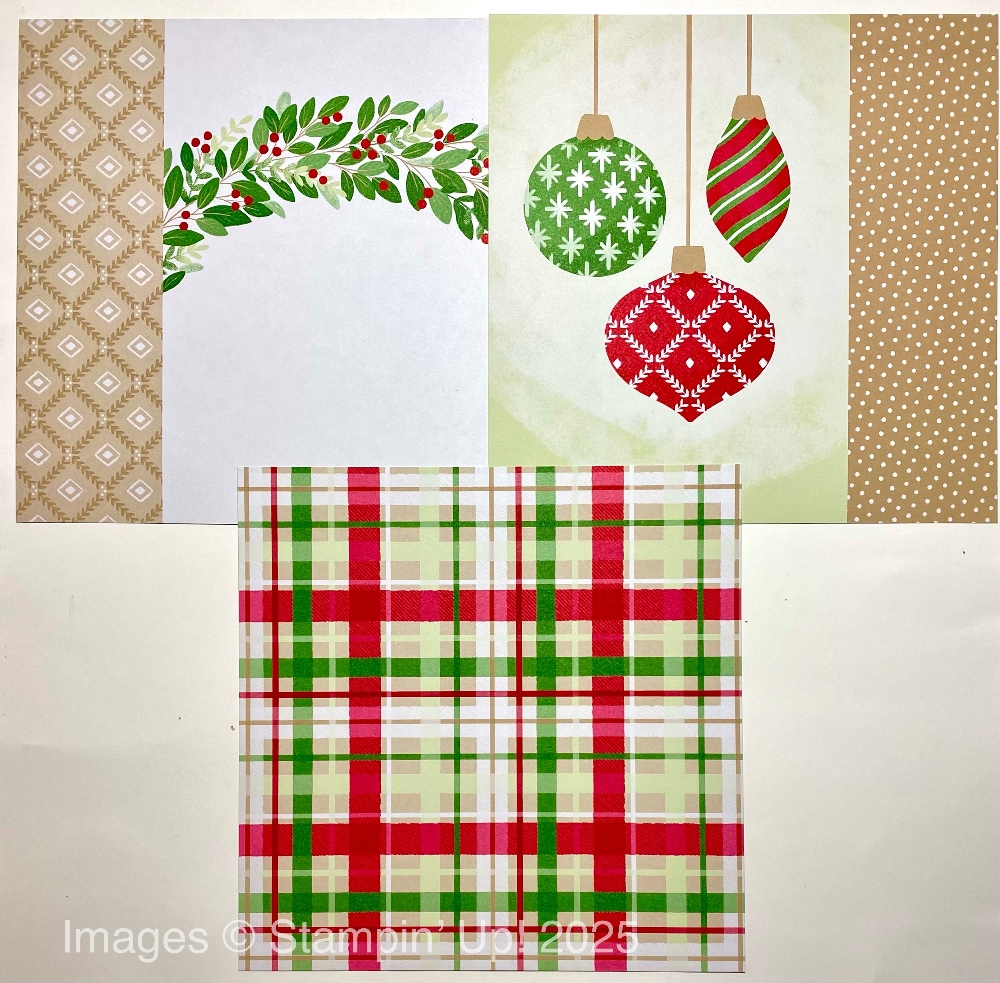
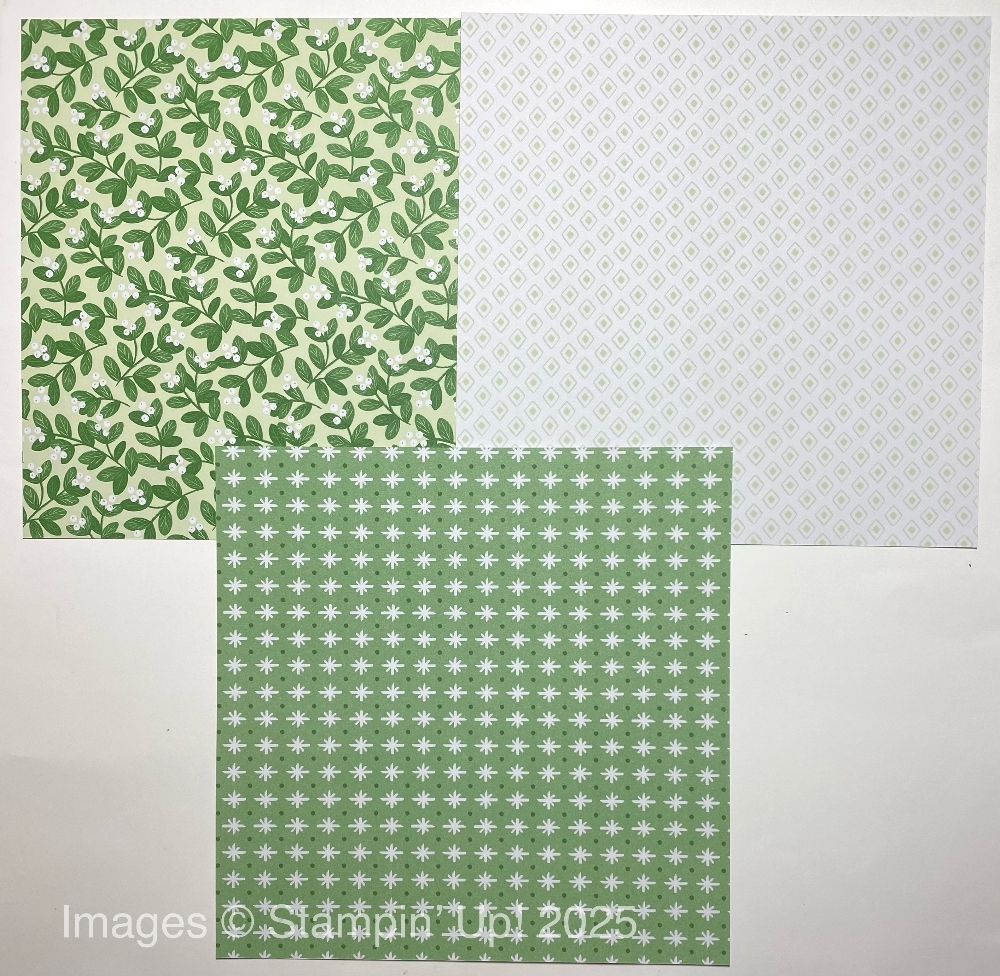
Here are the other papers in the package and the backside.

Christmas Tags & More Papers

Christmas Tags & More Papers2

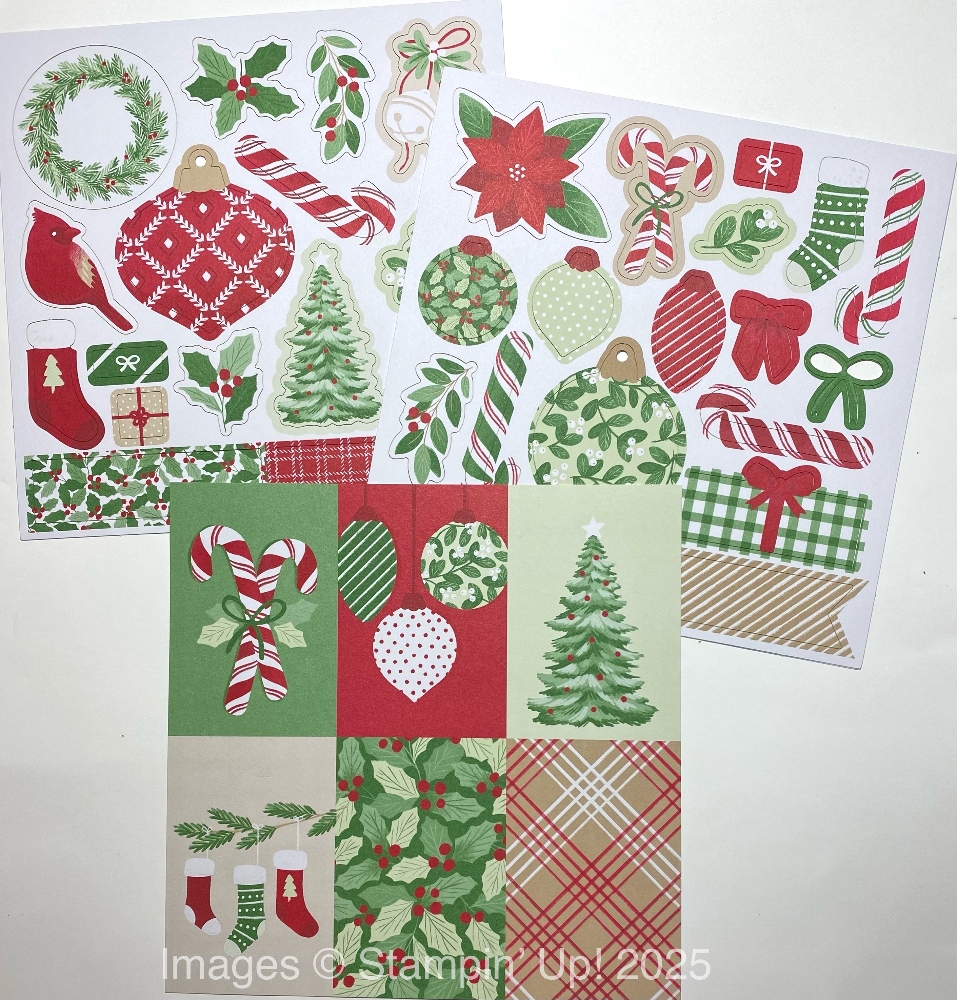
PLUS you get two sheets of diecut holiday images that you can use along with the tags or on cards and other projects, not to mention scrapbook pages! The top two pages, in the photo below, are the two sheets each of the designs and the bottom page is the cut-apart tag or “whatever” page that you want to make with the images.

Christmas Tags & More Diecuts and Tags

All in all you get 32 sheets, 8 each of 4 double-sided designs plus 4 sheets, 2 each of 2 single-sided precut designs. The colors are Cherry Cobbler, Crumb Cake, Garden Green, Real Red, Soft Sea Foam.

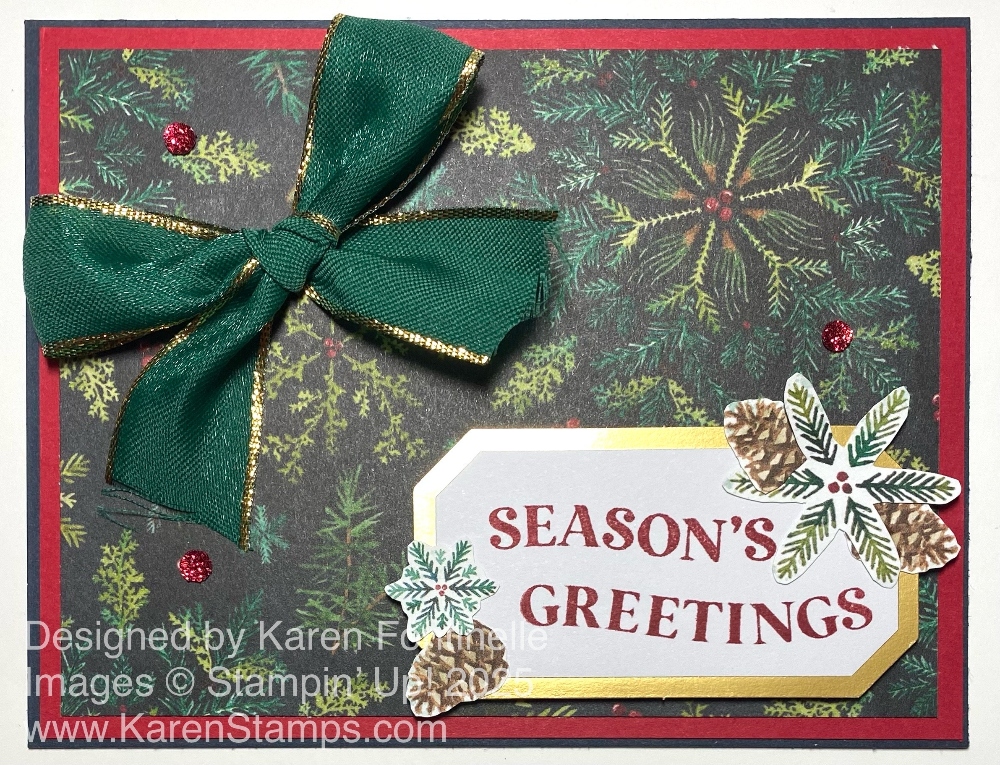
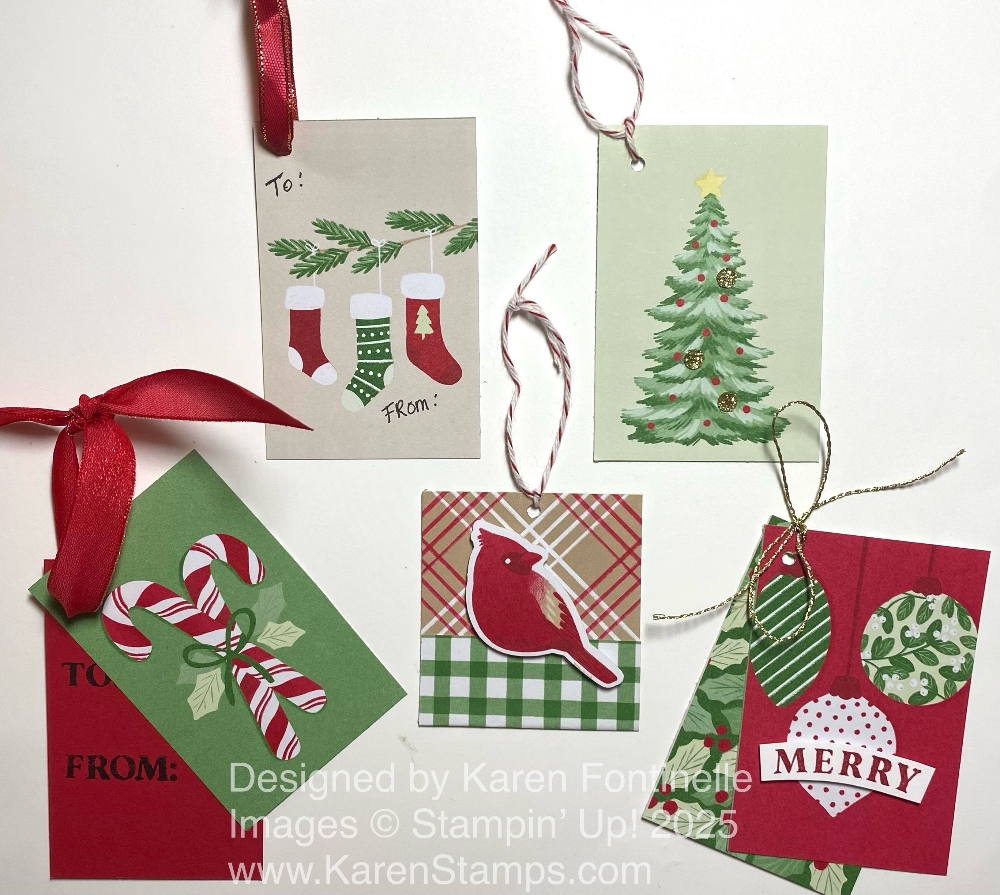
To make the easiest ever Christmas tags as I made in the top photo, start by cutting apart the six images of “tags” on one sheet.

-The tag with three stockings is only that – the tag with a “To” and “From” handwritten in the corners. I punched a hole in the top corner and put a red ribbon through it. The backside is already the green and white background. Done!

-The next tag with the Christmas tree is almost as simple. On the back, I punched and adhered a Basic White circle on which to write “To” and “From” and I embellished the tree with a few gold Traditional Sparkling Sequins. Just punch a hole and add some red and white baker’s twine.

-The tag with the candy canes has an extra layer of Real Red, cut the same size as the tag. I stamped the “To” and “From” on it from the Traditional Labels Stamp Set and ran the Real Red 1/2″ Shiny Ribbon through both tags.

-The tag with the red cardinal is the single sheet tag with no image on either side, just the plaid design on the back and the Real Red and Crumb Cake diagonal design on the front. With no planning whatsoever, I folded up the botton of the tag which shows off the plaid and makes a little smaller tag with the cute bird popped up on the front. On the back, I cut out a small square of Basic White cardstock on which to write the “To” and “From”. I tied a piece of baker’s twine through the hole in the top.

-And the last easy tag, a little more stepped up with the three ornaments, adds a stamped “Merry” on the front from the same stamp set and cut out by hand along the curve, then popped up on Dimensionals. I put a secone layer undeneath, the holly image, and actually adhered the two together on an angle to see both. You could use this as a tag or even make it the focal point of a card or adhere as an embellishment to a scrapbook page.

Just think how many tags you could make out of these eight sheets of the tag images! As I said, they aren’t exclusively for tags. They can be used on cards or scrapbook pages or decorations on gift bags, and more! Once you start paying with this Christmas Tags & More 6″ x 6″ Specialty Designer Series Paper, I bet you can’t make just one! You’ll find this in the new Mini Catalog!

SHOP THE SEPTEMBER-DECEMBER 2025 MINI CATALOG HERE!

Christmas Tags & More 5 Tags

Traditions of Christmas Bouquet Card

Traditions of Christmas Bouquet Card

Can you believe four months from today is Christmas? I thought it only appropriate that I make my first Christmas card of the season, Traditions of Christmas Bouquet Card, for my blog post today! My box of Holiday Mini Catalog preorder goodies arrived just the other day so it was time to make a Christmas card. The Holiday Mini Catalog goes live on Wednesday, September 3, 2025 so you only have about another week to wait!

When you get to see the September – December 2025 Mini Catalog online or in person, if you like traditional Christmas colors and designs, you will probably gravitate toward the Traditions of Christmas Suite Collection! I can’t link to it yet, but it is beautiful! It is a very large Suite, so you can buy it ALL with just one number on your order, or you can pick and choose which products you want and still make beautiful cards even if you don’t have everything!

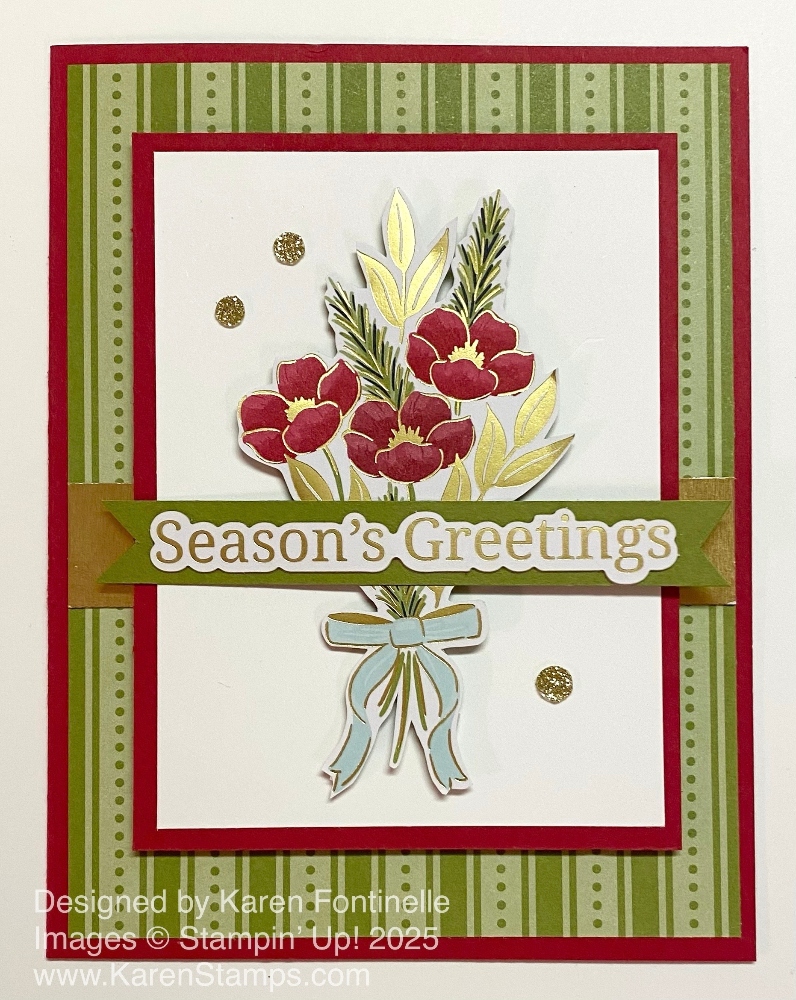
This card, of course, doesn’t do the whole Suite justice, but it does give you an idea of how pretty the designer series paper will be! I got the idea for this card from the Mini Catalog on page 24 but changed it up a little bit. The paper I used is the Traditions of Christmas Specialty Designer Series Paper. It is called “Specialty” because it has gold foil accents. The paper is made up of poinsettias and other Christmas flowers plus generic patterns on “the other sides” of the pretty floral papers. And one surprising, but fun color, in the package is the new In Color, Secret Sea! You wouldn’t think that deep blue color would be for Christmas cards in these traditional red and green colors, but it really is stunning.

The card base is Real Red with a layer of this Olive Green striped and dotted paper. The “other side” has the pretty flowers that I used for the focal point of the card. The bouquet may be able to be cut with a die in the Christmas Greenery Dies in the Suite or you can stamp a bouquet just like this one and color and cut out. My bouquet is fussy-cut so I’m not positive if the die fits it, but I think it might. The Basic White background is cut at 3″ x 4″ with a Real Red layer of 3 1/4″ x 4 1/4″. There are many bouquets on that designer paper page with flowers of varying colors. The bouquet is popped up on Stampin’ Dimensionals on this card, then a greeting is placed across the stems

The greeting in the catalog sample is stamped and gold embossed, but for my card I chose a greeting in the Greetings For You Ephemera Pack. It is on page 15 up at the top of the Mini Catalog. The greetings are all in gold foil and are diecut and adhesive-backed! Just peel off the release paper on the back and stick the greeting to your card or project. I adhered mine to a strip of Old Olive cardstock to help it stand out and flagged the ends. You may barely notice a strip of Gold Foil 4″ x 3/4″ going across the card under the popped up center piece but lined up underneath the greeting. The gold foil is glued flat on the card. The greeting is glued flat where it intersects the bouquet, but it’s probably a good idea to add a Dimensional on each end of the greeting to make it sturdier going across the popped up bouquet.

For some embellishment and sparkle, I added three of the gold Traditional Sparkling Sequins. You will want these for sure for your holiday projects. They look like gems but are nearly flat so will be good for mailing. They come in three different sizes in Real Red, Old Olive, Pool Party, and gold.

This beautiful Traditions Of Christmas Specialty Designer Series Paper will be wonderful for scrapbook pages and other projects, even giftwrap, not just for cards! Although you don’t have your new holiday products today, just for fun, to celebrate 4 months until Christmas, get out some paper from your stash and make a Christmas card! And mark your calendar for September 3 when there will be the new September-December Mini Catalog (Holiday Mini!), new Kits in the Kits Collection, and new Online Exclusives!

This beautiful Traditions Of Christmas Specialty Designer Series Paper will be wonderful for scrapbook pages and other projects, even giftwrap, not just for cards! Although you don’t have your new holiday products today, just for fun, to celebrate 4 months until Christmas, get out some paper from your stash and make a Christmas card! And mark your calendar for September 3 when there will be the new September-December Mini Catalog (Holiday Mini!), new Kits in the Kits Collection, and new Online Exclusives!

Christmas Kits For A Spring Day

Paper Pumpkin Filled With Joy Kit 2024

What did I do on a beautiful second day of spring yesterday?! Of course, I worked on a Christmas Paper Pumpkin Kit from 2024! It’s the Filled With Joy November 2024 Paper Pumpkin Kit that I did not get around to making before the holidays! I just had some free time and I thought of two kits that I had wanted to work on and they were just taking up space in my head. I simply said I’m stopping the world and doing these kits! So now instead of being behind for Christmas 2024, I’m AHEAD for Christmas 2025!

This Filled With Joy Kit was pretty quick and easy to make. I just had to stamp the tags, turn down the collar of the stocking, and pin on the tag! The kit came with the cute little pins! A stamp set is included with every Paper Pumpkin Kit so I used that to stamp the tags and the ornaments. Then I just had to adhere the gold ornament top on the ornament and add Stampin’ Dimensionals to the back to adhere to the tags. I’ll save them for next year and either use them for little gifts or make them decorations for a Christmas meal.

Christmas Ornament Wreath Kit 2024

I also had this Christmas Ornament wreath kit from the Kits Collection sitting on my desk since Christmas! I DID make these cute little wreaths on the gold rings and even put some as tags on gift bags. But then I saw another Demonstrator, Linda Heller, jazz them up a bit with some gold paint on the leaves and white paint for snow on the pinecones. I wanted to do that on the rest of them so I finally got that done yesterday and put the box in the closet with the Christmas gift wrap and things.

I had to do a little digging to see if I had some acrylic gold paint and I did in all my craft stuff. At least my paints are somewhat organized by color. I just put some gold paint on a brush and lightly streaked it on the leaves on the wreath. It really did add a little to the leaves to make them look a little less like paper. Then I switched to white paint and just dabbed on some “snow” on the little plastic pinecones. I found some glitter in my craft stuff and shook a little bit of that over the white paint. These were just little, easy embellishments I did to these wreaths and I thought they added a lot! I also added some of the Drusy Embellishments for a little sparkle on all of the wreaths. It was something relaxing to do on a spring afternoon! (Although my rockhounding family members would tell you it should be spelled Druzy!) I added those after I took the photo though!

Whenever you get around to making your Paper Pumpkin Kits or the kits you purchased in the Stampin’ Up! Kits Collection, it doesn’t matter! No matter when you make them it will be a relaxing, enjoyable experience! I think they are especially good to make on a weekend or on a rainy day!

JOIN PAPER PUMPKIN!

SHOP THE KITS COLLECTION!

A Poem For a Christmas Stamper

‘Twas the week before Christmas, and the house was a hush
Save the stamping of rubber in a last minute rush.
The cardstock was cut with precision and care
In hopes that a greeting would soon be stamped there.

The children were tucked in their beds around eight,
But now it’s ten-thirty… How’d it get so late?
And I in my PJs with bleary red eyes
Had finally arranged all the stamping supplies.

It started out simple. (It does every year.)
Just make a few cards for friends who are dear.
I pressed ink to paper. (It looked crisp and clean.)
A sprinkle of powder, heat to a sheen.

When what on my green Christmas card should appear?
Why, a tiny gold Santa with sleigh and reindeer.
On pigment! On powder! On heat from a gun!
Now ribbon and glitter! Can I make eighty-one?

“I can do it!” I said with all of my might
And looked at the clock – ’twas well past midnight.
I went straight to stamping out card after card.
“This might take all night, but at least it’s not hard.”

But after I finished, they looked a bit lame.
I didn’t want fancy, but these were too plain.
And then in a twinkling, a thought came to mind.
“I’ll just dress them up, and then they’ll be fine.”

So I went to my craft room and looked all around,
Then back to the table with all that I’d found.
My Fiskars I brandished (I wasn’t a quitter),
And soon I was covered in EP and glitter.

The cap of a marker I held in my teeth.
I’d lay in some color or maybe gold leaf.
My broad little face was all beaded with sweat,
But I wouldn’t give up – well, not at least yet.

There was glue on the table and ink on the floor.
I laughed at the sight though my fingers were sore.
I did not complain, just kept up my work.
When more things went wrong, I did not go berserk.

When finally finished, one card about six,
It looked pretty good after all of my tricks.
I’m keeping this one. My work on it shows.”
So clutching my card, up the stairs I arose.

I crawled into bed at the crack of dawn,
Creativity all spent, motivation all gone.
But make no mistake, I promise one thing:
You’ll all get your cards, but not ’til next spring!

–Author Unknown

I read this somewhere online years ago, but I thought it was quite appropriate! Enjoy!

Quick Christmas Gold Dipped Cards & Envelopes

Gold Dipped Blue Cards

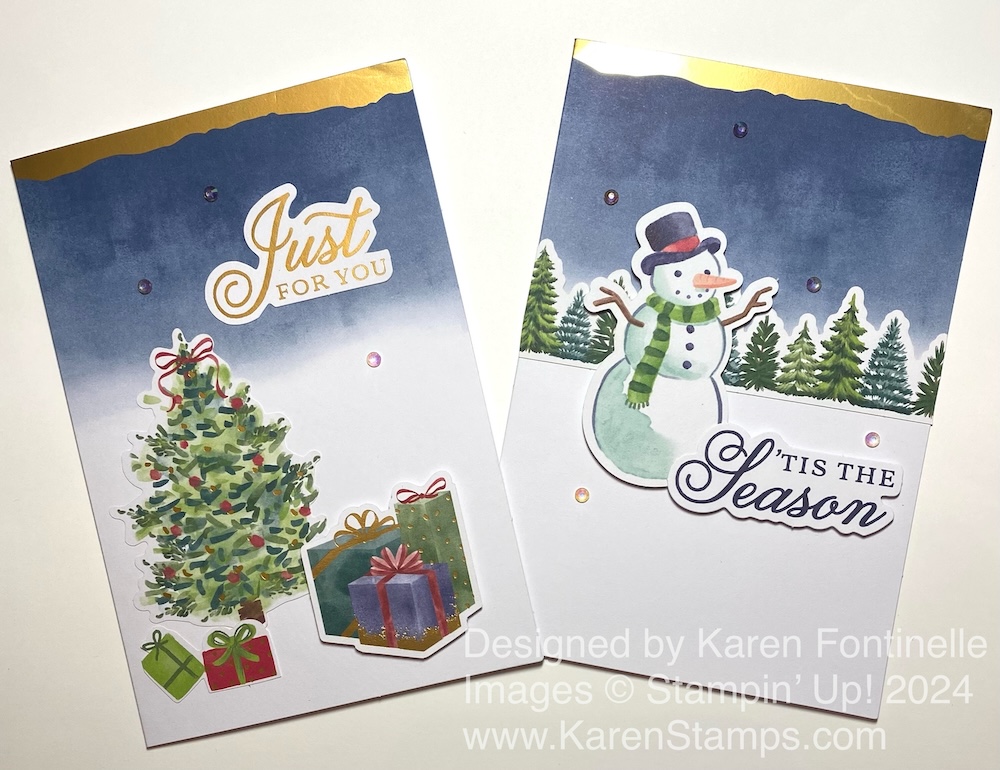
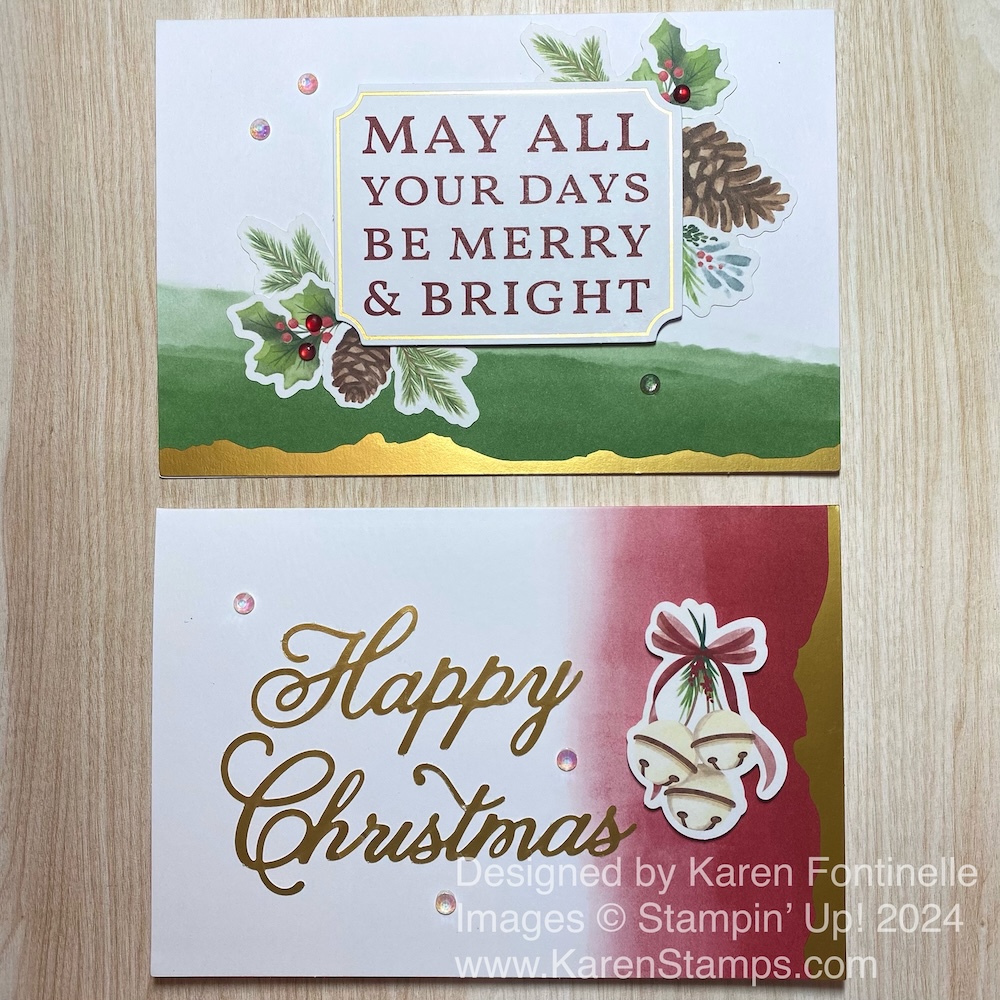
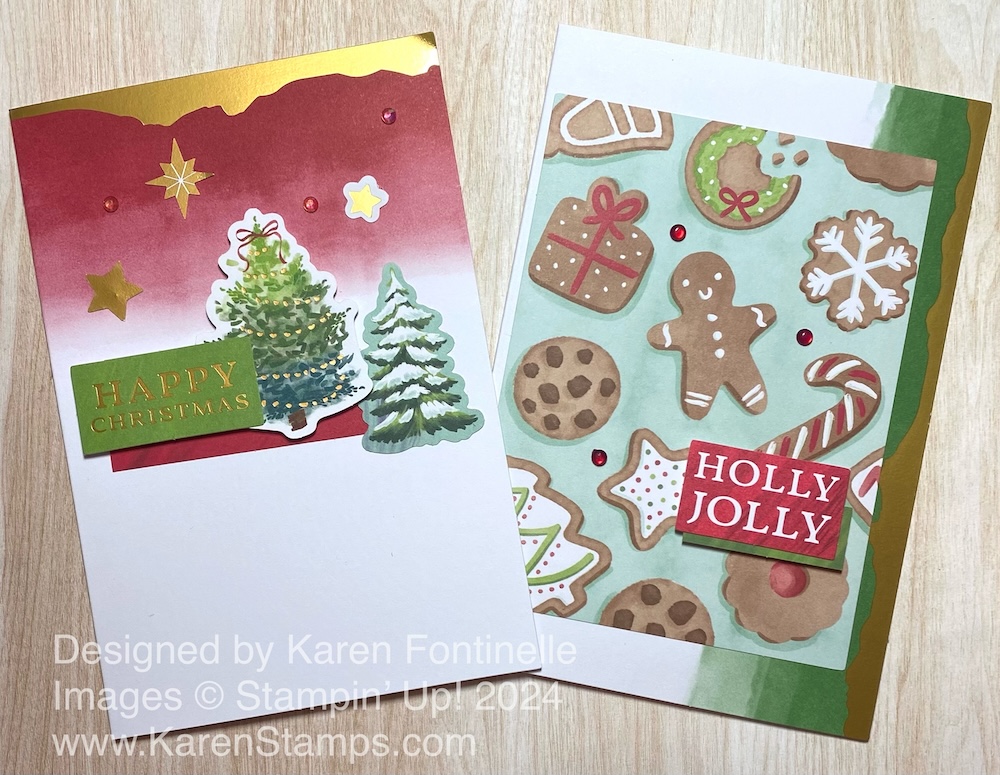
If you need “just a few more cards” for Christmas at the last minute, if you have this package of cards and envelopes, these Quick Christmas Gold Dipped Cards & Envelopes might save you! Maybe you ordered them and forgot you had them, but they are nice to have on hand and very pretty and colorful! It’s great if you have any of the Ephemera Packs in the Holiday Mini or the A Little Bit Festive Specialty Designer Series Paper with die cuts or any of the Sticker Sheets that came with some of the designer paper in the “Scrapbook Workshop” packages. Now is the time to scrounge around and use what you have!

These cards use the Gold Dipped Specialty Cards & Envelopes at Stampin’ Up! You will find them and lots of samples on pages 14-19 in the Holiday Mini. Here are some that I either copied from the sample or used my own ideas.

Gold Dipped Ephemera Christmas Cards

You can turn the cards vertically like the top two cards or horizontally like the two just above. I didn’t do any stamping except on the inside of the card where I stamped “Merry Christmas” or some other sentiment on a stamp. These larger cards are great for writing that Christmas note! Wish I’d thought of that earlier for certain people instead of cramming it in on the inside of the card or a notepaper!

Gold Dipped Christmas Cards

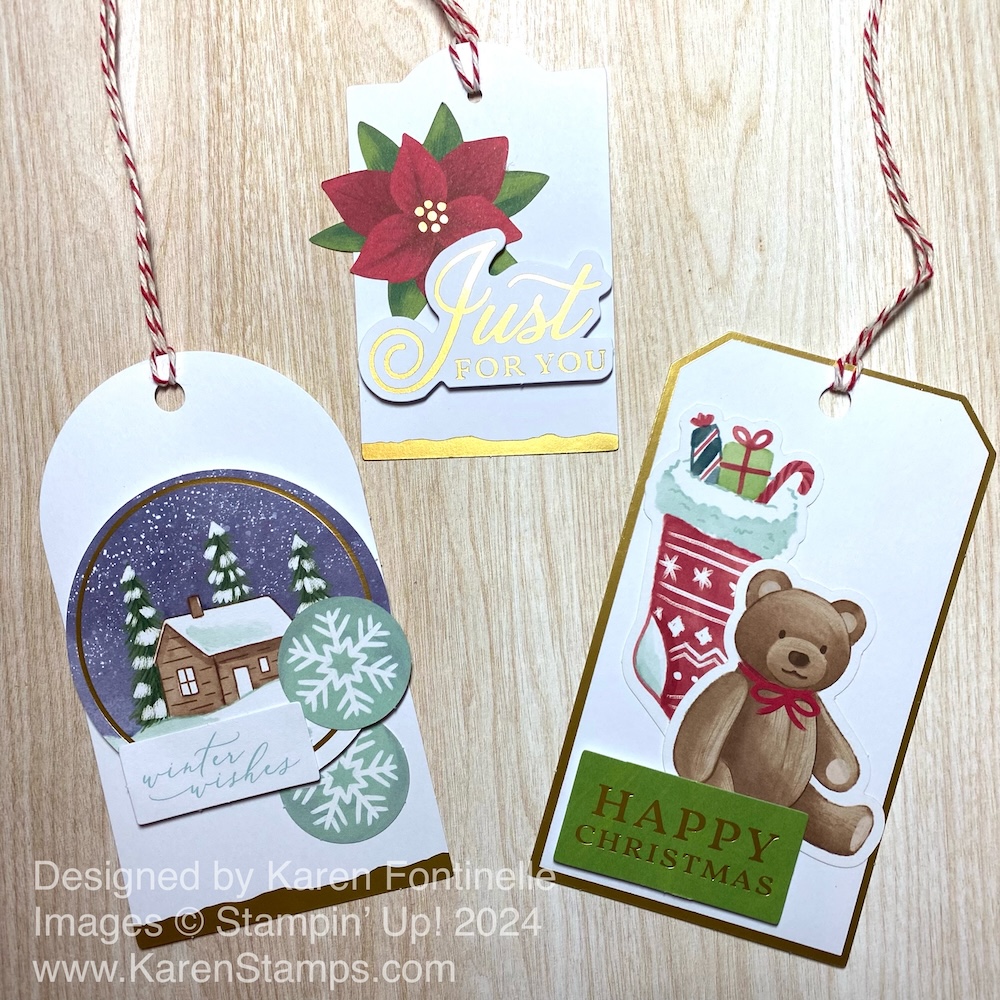
Here are a few gift tags I also made with the Tags For the Season Ephemera Pack and other pieces of ephemera.

Ephemera Gift Tags

You can pop up some of the pieces with Stampin’ Dimensionals or just adhere them flat on the card or tag. You can also make tags and then attach to the front of the card and maybe add a little bit more of designer paper or stamping or whatever you need. If you only attach it with minimal glue, maybe the recipient can remove the tag and use it for a gift! But maybe they won’t want to take apart your pretty card!

I hope these cards give you some ideas here at the end of our holiday preparations! And add a few gems, jewels, or sequins, whatever you have, for a little sparkle and bling! Even three add a lot of pizzazz to the cards!

Make This Easy Gift Card Holder

Reindeer Days Gift Card Holder (1)

It’s that time of year, that time of the holiday season, where we need some gift card holders for gifts. This Easy Gift Card Holder will fit the bill for you! There’s almost no time left for shopping before Christmas and gift cards are a great solution for those you don’t have any gift ideas for. You could fold up some cash and put in this pocket as well!

Start with a 4″ x 12″ strip of cardstock. You could make it taller if you wanted to. Score this strip of paper at 4″ and 8″, basically in thirds, since the paper is 12″ long. Then on the end section, cut from the score line down to the corner on a diagonal. This can be on either end of the card.

Gift Card Holder Diagram

Put a strip of Tear & Tape Adhesive or other strong adhesive on the bottom of that section with the diagonal cut. Then fold that diagonal piece over to the inside panel next to it.

My sample is a base of Real Red, and I used the Reindeer Days Designer Series Paper and Sticker Sheet to decorate the holder. On the front I cut a piece of designer paper with the packages at 3 3/4″ x 3 3/4″. The tree and strip of holly leaves behind it are stickers from the Reindeer Days Sticker Sheet.

You can decorate the inside however you like or leave it plain. I put another paper behind the diagonal piece and a diagonally cut piece of designer paper on that diagonal corner. Just cut a square of 3 3/4″ x 3 3/4″ and cut diagonally from one corner to the other. Just make sure you have the pattern going the right way and that you cut to and from the correct corners. You can write a message on the inside left of the holder or add a piece of Basic White on which to write or stamp something.

Reindeer Days Gift Card Holder Inside

Put your gift card or cash in the pocket. Decorate the front a little more with some bling, like these Iridescent Faceted Gems on the tree. If you prefer, make a belly band to go around the gift card holder to keep it closed. These are so quick and easy I bet you can’t make just one!

How to Decorate a Gift Box

Decorated Gift Box

The other day while searching for some tins I ordered many years ago for candy, I found these Stampin’ Up! White Gift Boxes (142000) in my retired stash. I had to change my design idea from candy in a tin to candy in a box for a few gifts. Whether or not you have these official White Gift Boxes in your stash, you can use this idea of any plain box. It would even cover up company printing on the box and the size of the box doesn’t matter. You can use this same principle.

Each side of this box is 3″ x 3″. I cut out five pieces of cardstock at 2 3/4″ x 2 3/4″, then five pieces of designer series paper at 2 5/8″ x 2 5/8″ (or you could do 2 1/2″ x 2 1/2″). Just adhere the designer paper to the cardstock and then on to the box. I like to use Multipurpose Liquid Glue because it gives you “wiggle room” to get the paper on straight on the box. On this box, I used the A Little Bit Festive Specialty Designer Series Paper and Misty Moonlight Cardstock.

The snowman on the top of the box is punched out of the Snowy Scenes Designer Series Paper with a Circle Punch and then layered on a punched circle of Daffodil Delight to match his scarf. You could use whatever you like.

For a final touch (before adding candy inside!), I wrapped around some ribbon that I had handy, which happened to be some retired Pretty Peacock ribbon, but I thought it matched okay. Use Mini Glue Dots to hold the ribbon in place at least in the back and maybe the sides, then tie a bow on the front.

Even if you had a small Amazon or other shipping box, you could use this same idea to cut out pieces of cardstock and/or designer paper to cover the sides of the box and personalize it! Just have fun with it! Time to wrap those gifts!!

A Little Bit Festive Christmas Stockings Card

A Little Bit Festive Christmas Stockings Card

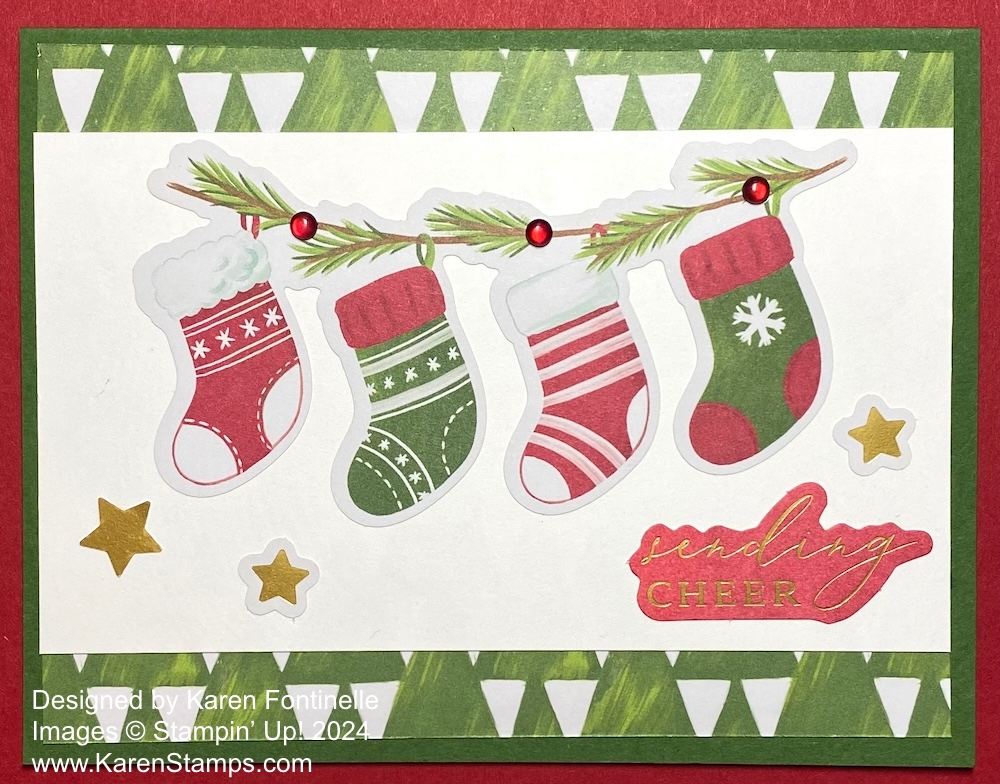
This A Little Bit Festive Christmas Stockings Card is another fun and easy Christmas card to make! All you need is the A Little Bit Festive Specialty Designer Series Paper plus one greeting. As I’ve said in other blog posts, the A Little Bit Festive paper is special because it consists of 3 double-sided sheets of designer series paper and 3 sheets of Christmas die cuts! What more can you ask for?! Everything is matched and ready for you to use right there in one package!

This card base is Garden Green although you could choose Real Red instead. It would also be pretty. The layer on the front is Basic White cardstock that measures 5 1/4″ x 3″. Underneath the top and bottom of the Basic White layer are strips of the designer paper with the green triangle trees. You could make a whole layer of it which ouls mostly get covered up by the white piece, so I just used two strips adhered underneath the white layer. You can cut them at 5 1/4″ x 1″ and that should give you enough for the margin to show top and bottom. It just adds an interesting border.

I chose the row of Christmas stockings die cut which includes the branch of greenery that they are hanging from. I added some little star diecuts to fill up some space. The greeting is in the Joyful Sayings Ephemera. I adhered everything flat to the card front but you could pop up some or all of it with Stampin’ Dimensionals. I also added some red dots for berries on the bough of greenery in the Cherry Cobbler & Pearl Adhesive-Backed Berries. I think those little red dots add a lot to the card above the stockings.

That’s all there is for that card! Using the ephemera packs in the Holiday Mini Catalog and the diecut in the A Little Bit Festive Specialty Designer Series Paper have been so fun to use and so quick and easy! Make sure you have used yours! And if you don’t need more cards, make tags for packages!

SHOP STAMPIN’ UP! ONLINE HERE!

x

Christmas Ornaments Kit Stampin’ Up! Kits Collection

Christmas Ornaments Kit Stampin' Up! Kits Collection

Finally, I got my Christmas Ornaments Kit in the Stampin’ Up! Kits Collection made! I’ve kept the box out ever since it arrived weeks and weeks ago, and yet it didn’t get made until the pressure was on here at the last Christmas minute! The kit makes nine ornaments, three each of three designs, which I posted in the photo above. Unfortunately, the kit is “currently not available” in the Online Store, but maybe you already have the kit and haven’t made it. This is your reminder to get out that kit and sit down and enjoy making the ornaments! Or if you are too busy, get it out right after Christmas when you have more free time and make the kit. Then you’ll have them ready for next year!

The kit is called Christmas Ornaments, but you could use these for fancy gift tags on packages! If you were hand-delivering a card or mailing a card inside a package, maybe you could use this ornament as a card front! Then the recipient can take it off the card and use it themselves as an ornament or decoration.

Someone suggested jazzing up these ornaments a little bit! I plan to do that this afternoon in my “spare time”! Just as with the Paper Pumpkin Kits, people always think of other creative ways to use the kit and make “alternate” projects with the contents. So even though you are given directions and a video, you can still make your project differently, however you want to make it! Some of the suggestions I saw were adding a bit of gold or maybe some Wink of Stella glimmer. Paint on a bit of white for a snowy look on the pinecones. Add a greeting or another Christmas image on the ornaments. Six red bows are included in the kit but you can add your own bows to the other three ornaments if you wish. Just play around with the kit and do what pops into your head to make it your own!

The only difficult part of this kit is tying on the gold thread onto the gold hoop. The hoops are very nice, by the way. Strong and good quality. Use the included glue dots to put glue dots where the gold thread is going to go. You will see a little bump on each hoop, some barely noticeable, so you might want to wrap the thread around those areas if you can. Be sure to watch Sara’s video assembling the kit to see how she does it. You can watch it again and again or pause it to follow along with each step. Or just go wild and crazy and do it however you like, as I’ve said!

Watch the video below about the kit. As I said, if you have the kit but haven’t made it yet, now is the time!

Here is the kit in the Online Store that you can check out and keep an eye on in case they get more in stock.

While you are there, check out the other Kits in the Kits Collection! You can purchase a kit for yourself or get an extra one to make with a friend or loved one (I hear lots of grandmas do this for their grandchildren!). Maybe you just want to purchase a kit as a gift for a friend! Lots of variety to choose from! Enjoy!!

A Little Bit Festive Cocoa & Gingerbread Card

A Little Bit Festive Cocoa & Gingerbread Card

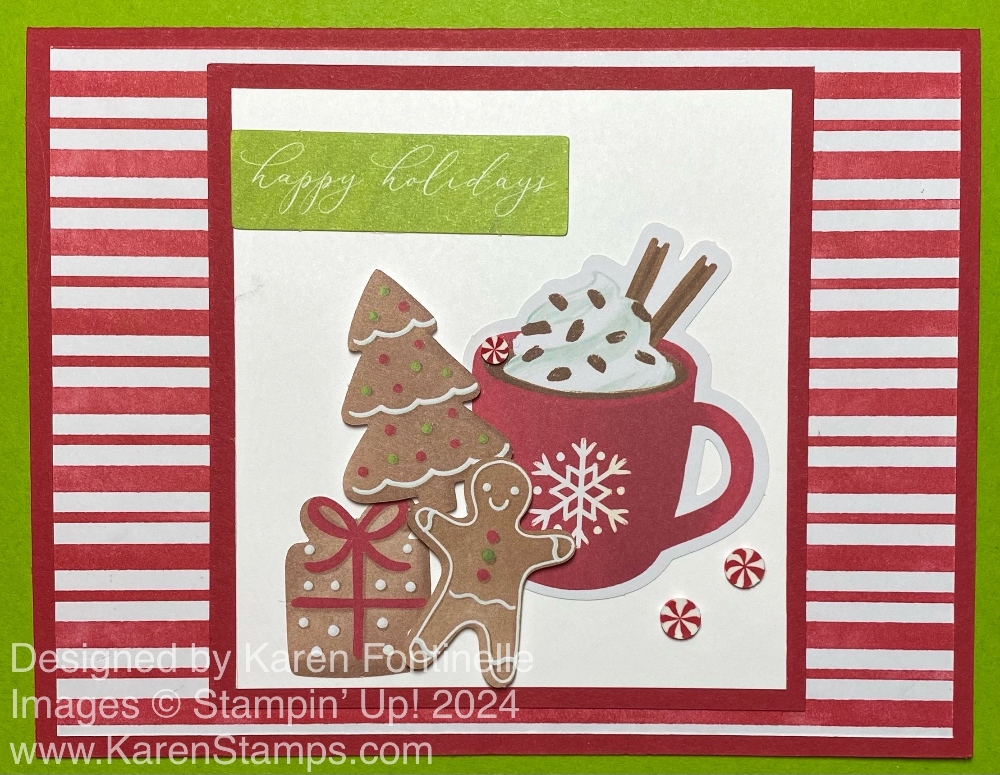
When you don’t have your own original idea, you can copy a card from the Stampin’ Up! catalog as I did with this A Little Bit Festive Cocoa & Gingerbread Card. You will find the sample that I copied on page 18 in the Holiday Mini Catalog. I changed mine just a tiny bit, but it was fun to make!

This Christmas card uses the A Little Bit Festive Specialty Designer Series Paper. This paper comes with three regular double-sided sheets of designer paper and three sheets of Christmas die cuts that you can use for cards or holiday projects. It’s really fun to work with, just playing with all the pieces!

This card has a card base of Real Red and a layer of the red and white striped designer paper in this package. After playing with the die cut pieces to get the design set, I cut a piece of Basic White cardstock at 3 1/4″ x 3 1/2″ layered on a piece of Real Red cardstock at 3 1/2″ x 3 3/4″. I arranged the die cut pieces like on the sample in the catalog. The cup of hot chocolate is adhered flat to the card, the gingerbread tree and gingerbread man are popped up on Stampin’ Dimensionals, and the gingerbread present is glued flat on the card. I chose “Happy Holidays” for the greeting in the Joyful Sayings Ephemera Pack.

For a little embellishment, this was the perfect card on which to use the Real Red & White Adhesive-Backed Peppermints. Unfortunately, these cute embellishments have been very difficult to keep in stock and are backordered even now. Hopefully, you already snagged some earlier. These do look cute with two next to the cocoa cup and one looking like it is floating in the whipped cream topping!

My card looks almost exactly like the sample card in the catalog, but if you look closely, you will see mine is the full size card and the sample looks to be square. My red and white stripes are running horizontally rather than vertically. And as I said, I used a different greeting and the peppermint embellishments. This is what usually happens when you plan to copy a card Almost always you will find your own little twist you want to put on the card and that helps get your creativity flowing!

It’s Day 2 Of FREE SHIPPING at Stampin’ Up!

Free Shipping Boxes on Cart Info

From December 9–11, you can shop and save on all qualifying orders of $75 or more. What a great way to stock up on all your favorite products from the catalog, Last Chance Products List, Online Exclusives, kits, and more!

Free shipping is for three days only so don’t delay!

Due to the high volume of orders and the Christmas season, the distribution center may fall behind their typical shipping timeframes. They will do all they can to return to the regular service levels as quickly as possible. 

Please know that any orders placed during this promotion are not guaranteed to arrive before or by December 25. 

SHOP TODAY!

(Give yourself a Christmas gift! Order what you want! 🙂 )

A Little Bit Festive Christmas Tree Card

A Little Bit Festive Christmas Tree Card

If you don’t have the A Little Bit Festive Specialty Designer Series Paper with which to make this easy and pretty A Little Bit Festive Christmas Tree Card, you ought to put it on your Stampin’ Up! order today, the first day of FREE SHIPPING! Today, December 9 is the first of three days to get FREE SHIPPING with a minimum order of $75. It’s a good time to stock up on any basics you need and all the things you “want” out of the Holiday Mini Catalog and from the Last Chance Products List where you might be able to get a few things at a discount!

I actually forgot I owned this A Little Bit Festive Specialty Designer Series Paper! It must have gotten lost in the shuffle even though I’d used it a little bit when I first got it. The interesting thing about this paper is that it is three sheets of double-sided designer series paper and three sheets of holiday diecuts! That makes it really fun to use! One side of the designer paper is Christmas designs and the other side has generic patterns you can use any time. And not just any diecuts, really cute ones and some that are frames for card fronts or photos. It would be great for scrapbooking, cardmaking, and other Christmas projects.

For this card (photographed on a Garden Green background), I started with a Real Red card base and a layer of Pretty in Pink cardstock to match some of the ornaments on the tree. The whole front panel of the card is in the A Little Bit of Festive package! It is so simple and pretty! I couldn’t find or think of a greeting that would fit on this card without interfering with the beautiful decorated tree until I found this very small rectangular diecut greeting in the Joyful Sayings Ephemera Pack. I placed it down at the bottom of the tree. Besides the colored ornaments on the tree, there are also gold foil accents on the tree, tiny dots plus the fancy star at the top. To this, I added five gems on the Christmas tree for a little more sparkle. These are the Pretty in Pink gems in the 2024-2026 In Color Shimmer Gems.

Don’t forget FREE SHIPPING December 9-11 this week at Stampin’ Up! with a $75 minimum order! Please be aware that depending on when your order is shipped (and there may be delays with a higher number of orders during these three days) your order may or may not reach you before Christmas. Some of you normally get your order in a couple of days and others take a week so take into account how long your order normally takes plus possible delays in getting the order shipped in the first place. Stampin’ Up! will be ready and working hard to get these orders out as fast as possible!

Also, don’t forget the new category of Last Chance Products which contains retiring Holiday Mini Catalog Products and also holds the Online Exclusive products, all of which are available while supplies last. This will also replace the Clearance Rack. This way things are in one place. Some retiring products are discounted and discounts may change during the time they are on the Last Chance list. Right now you can save 20% on the A Little Bit Festive Specialty Designer Series Paper that I featured with this card!

If you had already started an order before today, start over in your Cart. The free shipping offer is good on orders started today. For all the details, check out my blog post from the other day HERE.

SHOP TODAY!

Reindeer Days Circle Window Card

Reindeer Days Circle Window Card

I called this card the Reindeer Days Circle Window Card because the center focal point is actually an opening to the designer paper image underneath. It’s almost like a shaker card without covering the hole and filling it with shaker bits. But you could easily make it a shaker card if you wanted to!

The card base is Real Red cardstock. The designer paper is the white dotted paper in the Reindeer Days Designer Series Paper. I used one of the Deckled Circles Dies to cut a hole in the paper. To make a frame, I used the next larger size Deckled Circle die to cut out a piece of Basic White cardstock plus the same smaller circle inside that one. You want that diecut piece to fit around the diecut circle on the designer paper. These dies are not available right now, so if you don’t have those, just use some other circle dies you have, perhaps the circles in the Stylish Shapes Dies.

I looked over the patterned paper in the Reindeer Days DSP, the one with the reindeer and the reindeer snowmen, and chose an area that I wanted to appear in my diecut window on the front of the card. I cut it out and positioned it so it would fit exactly right in that window and adhered it to the card base. Then I popped up the whole front part of the card with the window with Stampin’ Dimensionals.

The greeting fits perfectly at the base of the card. It is in the Joyful Sayings Ephemera Pack. It’s so easy to find the right greeting in the ephemera pack and just glue it on! Plus, the Reindeer Days DSP and the Ephemera Packs are discounted now on the Last Chance list. I also added some Iridescent Foil Gems to the scene with the snowman and reindeer for a little sparkle!

Be sure to check out the Last Chance Products list as the Holiday Mini will be retiring January 6th. However, the retiring products will stay on the Last Chance list while supplies last so you might still be able to buy them longer than when they were completely gone on the retirement date.

SHOP STAMPIN’ UP! HERE