Tag Archives: Painted Patch Designer Series Paper

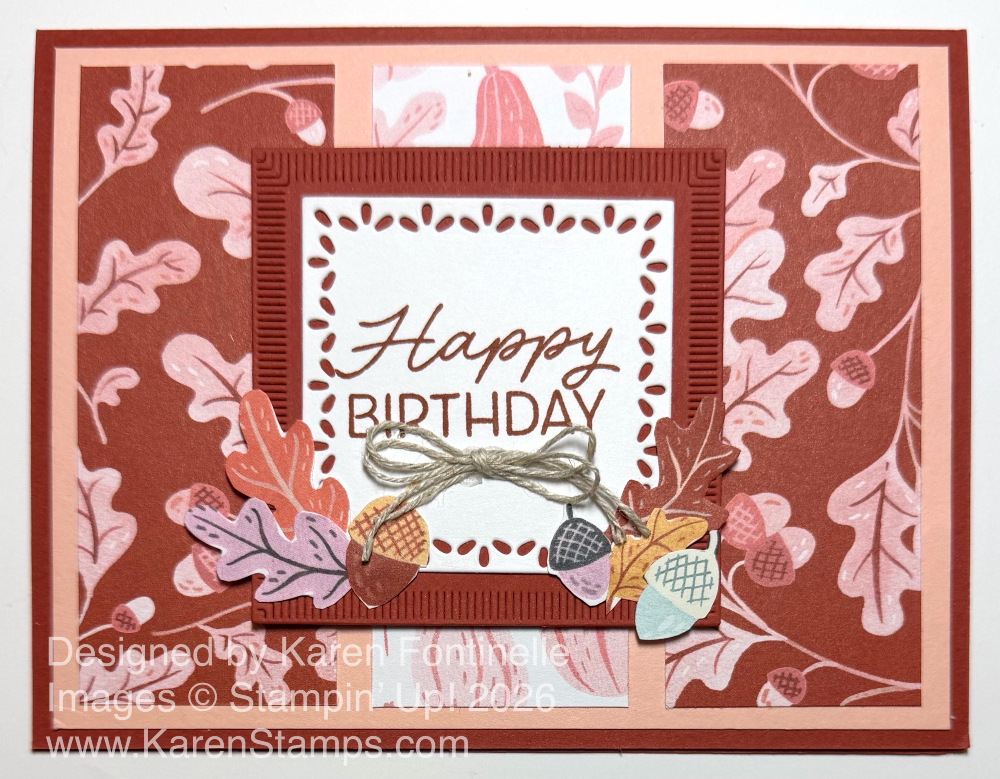
Painted Patch Birthday Card For Fall

Painted Patch Birthday Card For Fall

If you need a birthday card for fall, just grab the pretty Painted Patch Designer Series Paper in the new Stampin’ Up! Catalog. I already had the pattern with the Cajun Craze background color picked out to make a card with. But I also kind of liked the paper with the pinkish colors, so I decided to make this card with the three panels of designer series paper. I’m not sure what that design is called!

The card base is Cajun Craze. It’s a color I don’t often use, but it’s great for the fall season! After playing around with other colors, I chose Petal PInk cardstock for a layer on top of the card base. But I adhered the designer papers to this piece to line them up before adhering that to the card base. The Petal Pink piece is 4″ x 5 1/4″.

I used two of the Cajun Craze DSP pieces on the right side and left side and the pinkish panel in the middle. It is mostly covered by the greeting. I cut these three pieces at 1 1/2″ wide and 3 3/4″ long. This allows for a space in between the DSP panels and around the margins. If you want the three panels to touch and not have the spaces between them, then you’ll have to adjust the measurements.

For the greeting, I used the birthday greeting in the Framed & Fabulous Stamp Set. It is stamped with Cajun Craze ink on Basic White. I used the Tile Garden Dies to cut out the greeting and the Cajun Craze layer underneath. I love these dies, all the sizes to layer, and the different borders on them!

I could have stopped at that point, but I thought it would be fun to cut out some leaves and acorns to add to the greeting from the designer series paper. They add a little extra color and interest without taking away from the color theme of the card. I also added a little double bow made with Linen Thread. I think our Linen Thread is one of the best basics to have in your “stash” of stamping supplies. It is so useful so many times, especially when you want just a little something extra without overdoing it.

On the inside of the card, I added a white layer for a stamped or written message with a strip of designer series paper at the bottom plus two more leaves in the corner. It just makes the inside of the card look a little interesting, too, like the outside!

If you are never not quite sure what card to make, just get out a pack of designer series paper and pull out all the sheets and see what appeals to you! Maybe just one sheet, maybe a couple! Just play and see what you come up with!
SHOP STAMPIN’ UP! ONLINE HERE!

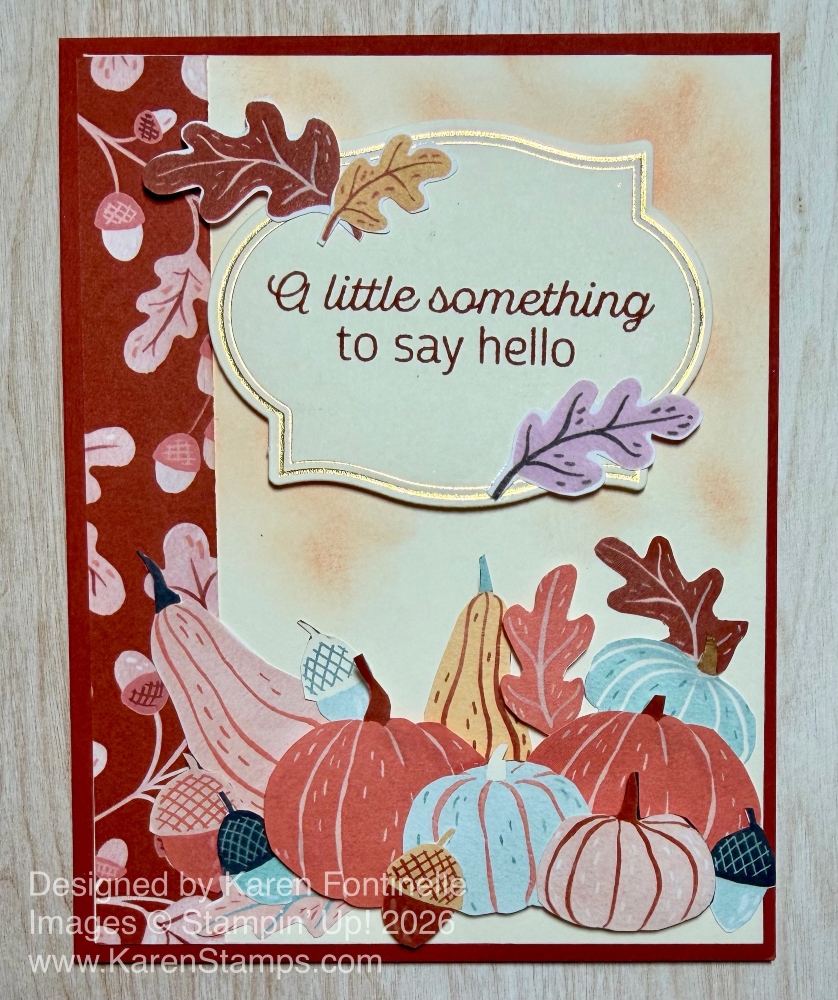
Painted Patch Fall Hello Card

Painted Patch Fall Hello Card

Here’s a card I made over the weekend, and I’m going to say it’s a little deluxe! I did lots of fussy-cutting (cutting out by hand) to make this Painted Patch Fall Hello Card. That’s partly my fault, because I could have bought the dies in the Painted Patch Suite Collection. Hopefully, this Suite will be back in stock this week. Those dies work with some of the designer series paper images, or specifically the stamped images in the Painted Pumpkins Stamp Set. But I don’t mind doing a little fussy-cutting, and in this case, I cut out plenty of pumpkins, gourds, and acorns to see what I would need.

The card base is Cajun Craze, a color I don’t use that often, but fall is a time to use it! I added a layer of Very Vanilla cardstock cut at 4″ x 5 1/4″. I added a strip of the Painted Patch Designer Series Paper to the left side. It is 3/4″ x 5 1/4. After cutting out an assortment of pumpkins, gourds, leaves, and acorns, I played around with them into the positions that I liked. Then I took a picture with my phone since I was going to have to move them around to glue. Some of the pumpkins in front are popped up on Dimensionals, others are glued down flat. You have to be careful when you want to stick things partly underneath other things so those areas aren’t glued down. It just takes a little bit of thought!

After I had all the cut-out pieces arranged and adhered, I thought the Vanilla background looked a little plain. So I added some Timid Tiger ink with the Small Blending Brush, very lightly. I love the way that looked. It helps the greeting stand out a little more.

The greeting is stamped in Cajun Craze ink on a hot-foiled label of Very Vanilla. I used gold foil with the Flourish & Frames Hot Foil Dies, first to add the gold foiling around the edges and then to cut out the piece with the regular die in the set. The greeting is in the Simply Leaves Stamp Set. It fit perfectly on this piece! It is popped up on Stampin’ Dimensionals and then I added a few fussy-cut leaves around two of the corners.

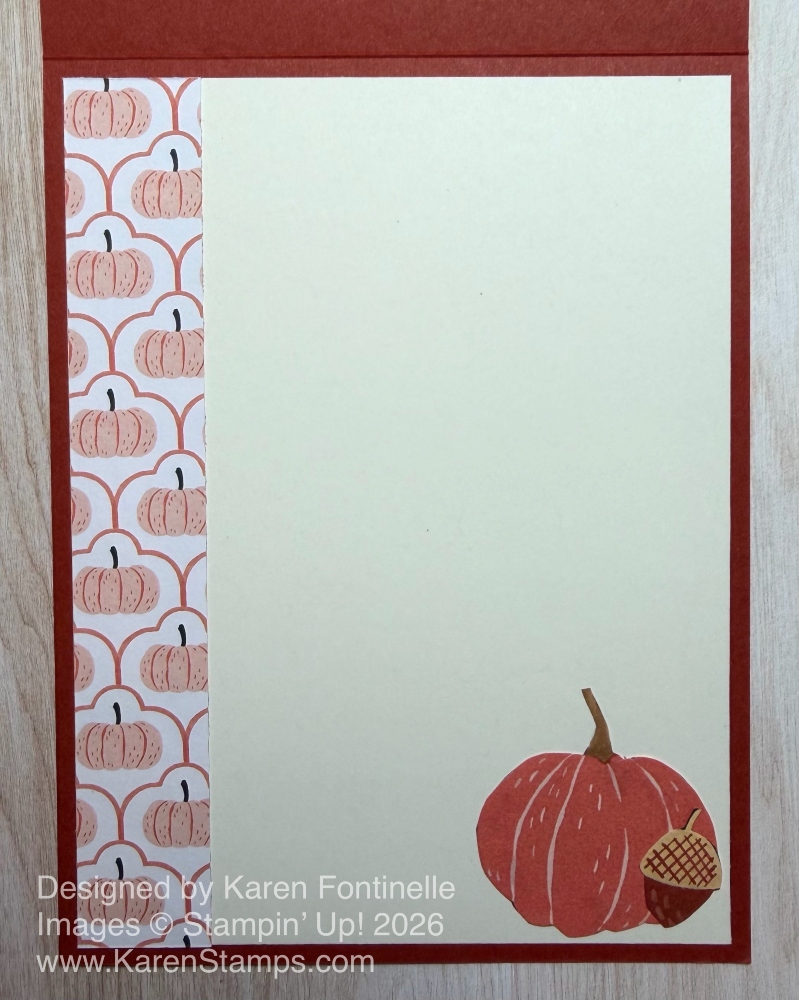
On the inside of the card, I added a Very Vanilla panel to stamp a greeting or write a personal message. I added another strip of the Painted Patch DSP to the side and adhered an extra fussy-cut pumpkin and acorn to the bottom corner.

Painted Patch Fall Hello Card Inside

I considered adding some matching dots to this card but decided maybe it was busy enough and didn’t need anything else! You could make this card simpler with fewer die-cut or fussy-cut pumpkins, etc., at the bottom, or maybe only one or two just in the lower-right corner. Whatever you like!

SHOP STAMPIN’ UP! ONLINE HERE!

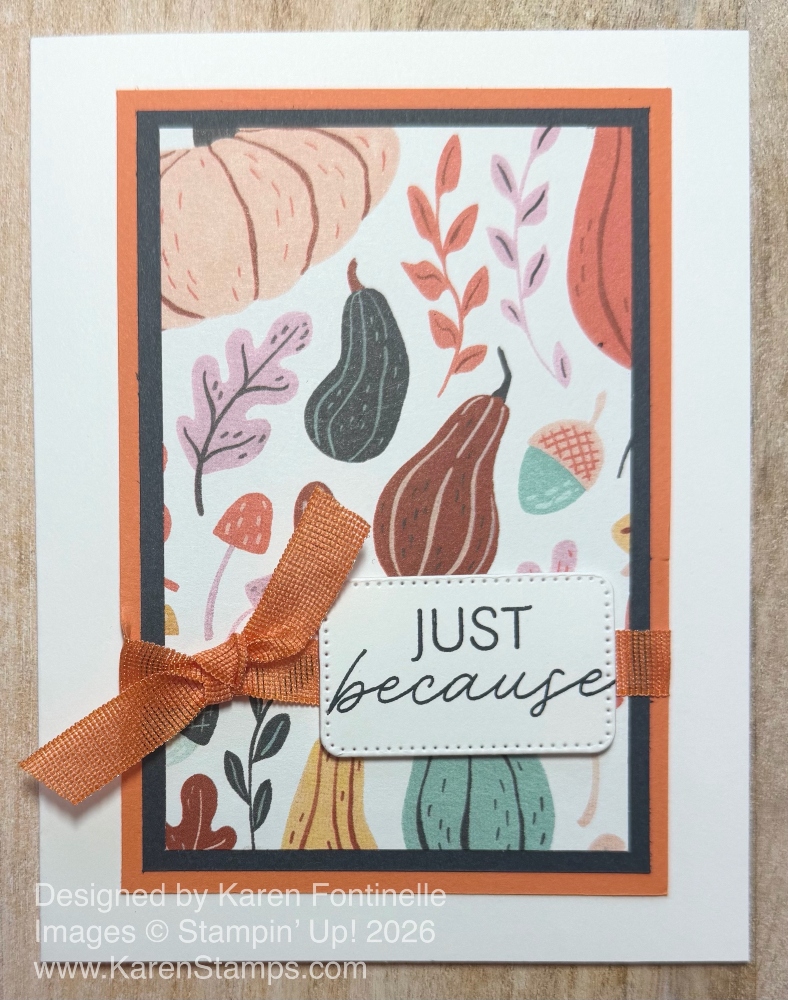
Painted Patch Just Because Card

Painted Patch Just Because Card

This Painted Patch Just Because Card is an easy one to make and show off the fun Painted Patch Designer Series Paper. I love all the different styles of pumpkins on these pages plus other designs.

The card base is Basic White cardstock, and I left a wider margin than usual on the sides. If you prefer, you could use the Basic White Thick Cardstock. The margin on the two sides is 1/2″. The top and bottom margins are about 3/8″ on each end so that the front panel is not square, but a little bit of a longer rectangle from top to bottom.

I used Timid Tiger and Secret Sea for the layers underneath the designer series paper. I think Secret Sea is one of those colors you start off not caring for and then you come to love it. On this card, the Timid Tiger layer is cut at 3 1/4″ x 4 3/4″. The Secret Sea piece is 3″ x 4 1/2″. The Painted Patch DSP is cut at 2 3/4″ x 4 1/4″.

Before adhering the designer paper piece to the Basic White card base, I wrapped around a piece of Timid Tiger ribbon. This particular ribbon from last year’s catalog is retired now, but I’d barely used it so I was going to use it on this card. You can choose whatever ribbon you would like to use depending on your card colors and designer series paper. I tied a simple knot, rather than a bow, around the ribbon. Over the ribbon, I added a greeting popped up on Stampin’ Dimensionals. It is in the Framed & Fabulous Stamp Set and is stamped with Secret Sea ink on Basic White cardstock. It is diecut in this rectangle shape with rounded corners in the Nested Essentials Dies.

This card design is easy to make. Choose what designer series paper, stamped, or embossed paper you want to use for the focal point, then choose one or two layers underneath. Leaving a wider margin just gives a little different look.

SHOP STAMPIN’ UP! ONLINE HERE!