Tag Archives: Merriest Trees Stamp Set

A Walk in the Forest Merry Christmas Card

A Walk in the Forest Merry Christmas Card

I had a different idea for this A Walk in the Forest Merry Christmas Card, but I like how it turned out. In fact, I liked it so much that as long as I had all the materials out, I made several more cards just like this one for my Christmas card stash. I modified it a little bit which I’ll tell you about later.

The card base is Balmy Blue and the designer paper layer is in the A Walk In the Forest Designer Series Paper. You’ve probably seen this paper used in cards online but you may have missed it in the Stampin’ Up! Holiday Mini Catalog. You’ll find the description of this paper at the top of page 5. If you stop and read the “Making a Difference” paragraph on that page, you’ll see that Stampin’ Up! will donate $3 for every package sold to support organizations dedicated to spreading cheer and providing support to those in need.

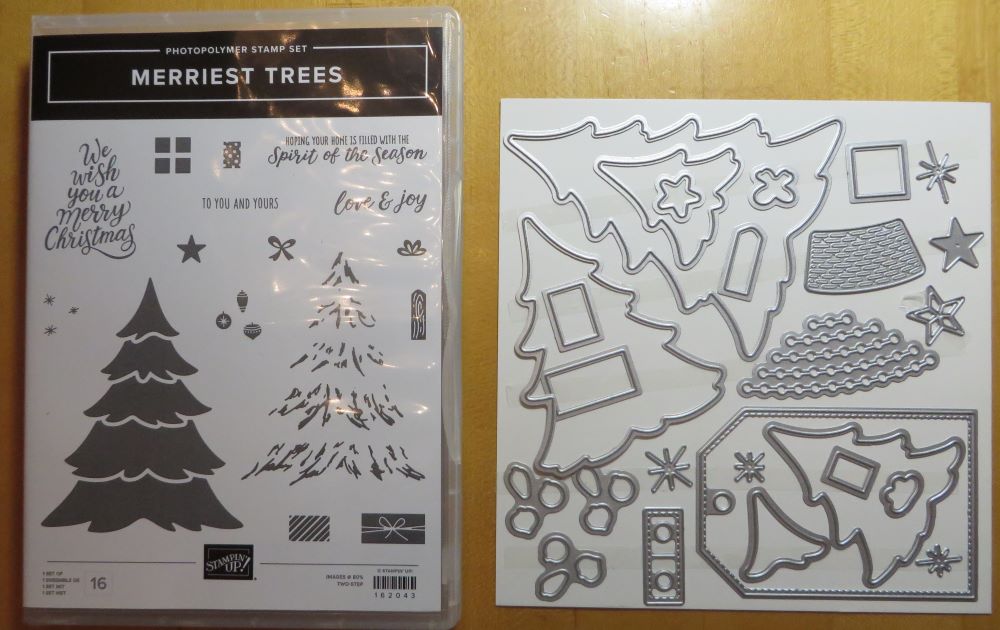
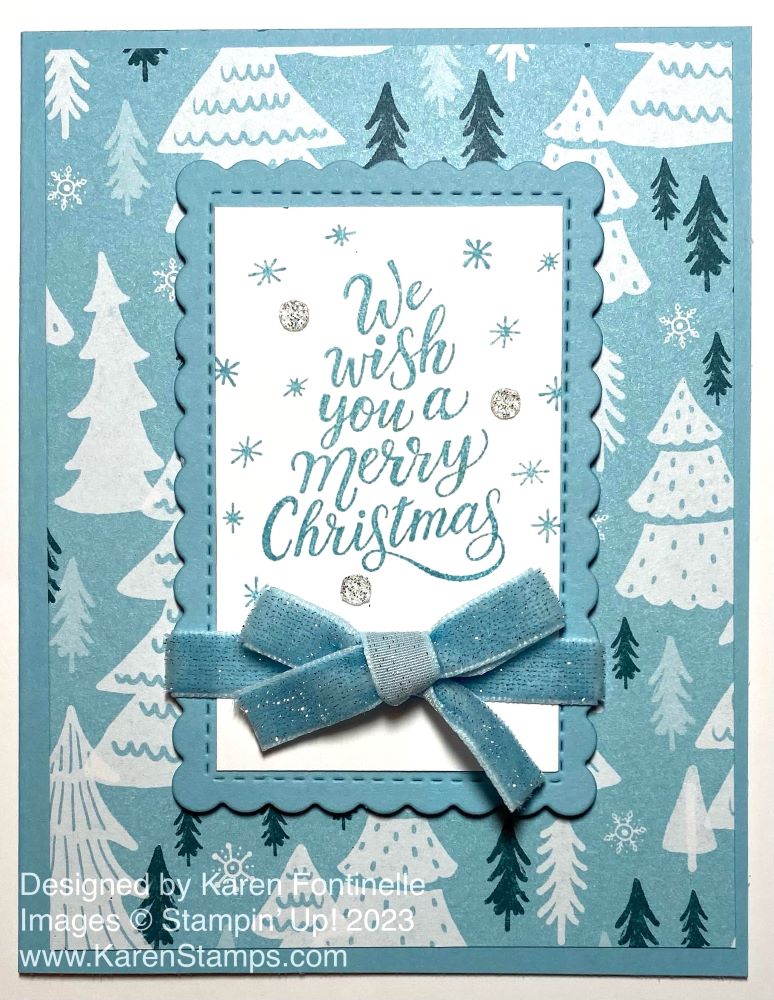
In the center, I used a Scalloped Contours die to cut a scalloped rectangle and also cut a piece of Basic White to fit inside the rectangle. I just measured and cut it with my Paper Trimmer. I stamped the greeting and some tiny snowflakes that are in the Merriest Trees Stamp Set in Balmy Blue ink. On this card, I wrapped around a piece of Balmy Blue 3/8″ Sparkle Ribbon and added a bow separately, adhered with Glue Dots. The whole greeting piece is popped up on Stampin’ Dimensionals. Then I added some white Adhesive-Backed Glitter Sequins.

On the extra cards I made, I decided to adhere the center piece flat on the card since they will be mailed. If your card gets too thick, that’s a problem when you mail it. These cards still have some bulk with the bow because the ribbon is velvety with sparkles! Beautiful but a little thicker! On these extra cards, instead of the Glitter Sequins, I added the Balmy Blue sequins in the Pastel Adhesive-Backed Sequins. They look pretty as well!

Hope you have an early start on your Christmas cards! If you need more holiday ideas, sign up for my Mailing List in the red box here on my blog to get my 12 Weeks of Christmas emails every Wednesday with an exclusive idea each week!

SHOP STAMPIN’ UP! ONLINE HERE!

Beary Christmas Spirit of the Season Card

Beary Christmas Spirit of the Season Card

I didn’t even know what card I was going to make when I started, but when I saw my package of this designer paper, I had an idea right away. I decided to use this bear and Christmas tree and came up with this Beary Christmas Spirit of the Season Card.

This Beary Christmas Designer Series Paper (162015) is a fun one for holiday cards with all the cute polar bears and other animals! For this card, I chose to use this one piece with the bear and bunny decorating the Christmas tree in the forest. If you want to cut out just a piece of this designer paper, you will have to figure out how to cut out that area properly. I used a ruler to see about how wide and tall the bear and tree were. Then I used my Paper Trimmer to cut out that image while trying not to get any neighboring images. I had to cut it down pretty close.

After I had my image cut out of the designer paper, I layered it on a piece of Real Red and then on a larger layer of Balmy Blue.

The card base is Balmy Blue with a layer of Basic White. It almost looked fine and simple with just the plain white layer, but I decided to emboss it with the Quatrefoil Tile Embossing Folder. Another good choice would be the Snowflake Sky 3D Embossing Folder.

The greeting is in the Merriest Trees Stamp Set and is stamped in Real Red ink just on a narrow strip of Basic White. I added two Iridescent Adhesive-Backed Discs (161954). They are red (really Poppy Parade) but they appear very dark in the photo. You definitely want this Discs for fun additions to your cards!

The Holiday Mini Catalog is coming next week! Woohoo!

Merriest Trees Decorated Christmas Card

Merriest Trees Decorated Christmas Card

This Merriest Trees Decorated Christmas Card is the first card I’ve made with this Merriest Trees Bundle (162048) in the upcoming Stampin’ Up! Holiday Mini Catalog! You can make all kinds of cards with this Bundle from simple to fancy. I think I started with fancy on this one! This card is for someone who likes “little bitty” things. I’ll explain as I go along in this blog post!

This Merriest Trees Bundle comes with the Merriest Trees Stamp Set and the Merriest Trees Dies. (Do you like how they are now naming the stamp set and dies the SAME?!) If you buy them both together in the Bundle, you will save 10% on the price. The stamp set has a tree that you can ink up and stamp as is, or you can use the second tree stamp for some added highlights on that tree. There are some nice sentiments to use and several accessories. There is a tree trunk, gifts, bows, ornaments, a star, and some little twinkles I suppose you would call them! The trees are actually pretty large so you will need Clear Block E for sure!

Merriest Trees Bundle

As you can see in the set of dies, there are LOTS of extra pieces! On the one hand, that is extra-fun and on the other hand, there are some LITTLE pieces there to work with! One great thing is that when you stamp the little ornaments, they are on one stamp and there is a die that matches that arrangement so the die will cut out all three ornaments at one time! The other great thing is that there are THREE ornament dies so you can stamp three sets of three ornaments and die-cut them all in one fell swoop with your machine! You can cut out chains or garlands for the tree with the one die that makes all the different lengths of garlands from that one die. It would be good if you used Adhesive Sheets on the back of the paper before you cut those out! I don’t know how you would get glue on the back of those except with the teeniest drop of glue. Even with the Adhesive Sheets on the back to turn them into stickers, they are very fragile although even if you accidentally tear them apart you can match the ends back up again.

If you stamp the solid tree, it may work better to lay the stamp and block face up on the table and then apply the ink rather than try to ink up the tree by patting it on the ink pad. Even better if you have the retired Stamparatus. Be sure to use a cushion underneath your stamp. It’s often a little difficult to get a perfect impression the first time with a large solid image like this tree.

This card has a card base of Shaded Spruce. I added a layer of Gold Foil underneath this interesting red pattern of designer paper in the Joy of Christmas Designer Series Paper (161958). This designer paper has all kinds of different patterns that can be for Christmas or for other occasions.

The Christmas tree is die-cut from Shaded Spruce. I used the other tree piece with Versamark Ink to stamp and embossed with white embossing powder using a Heat Tool. This makes it look like a little bit of snow on the Christmas tree! Then I used Adhesive Sheets on the back of a small piece of gold More Dazzle 6″ x 6″ Specialty Paper. It’s in the Annual Catalog but you may already have some from a previous catalog. Then I used the die to cut out several different lengths of garlands. If you have the Take a Pick Tool or some other piercing tool it makes it easier to pry off the backing sheet. As I said before, these little diecut garlands are very delicate and fragile.

The little ornaments are stamped in Real Red on Basic White and then diecut. They just need a tiny drop of glue on the back to adhere to the tree however you would like to place them. Use different colors of ornaments if you like. There are two different styles of stars to choose from to put at the top of the tree.

No Christmas tree would be complete without packages! You can stamp little gift boxes and bows and die-cut them, or you could die-cut the presents out of solid cardstock or scraps of designer paper.

The greeting is one in the Merriest Trees Stamp Set. It is stamped in Real Red Ink and die cut with a small banner in the Stylish Shapes Dies. I cut off the banner end on the right so it would line up with the edge of the designer paper background. Once again I will point out that this greeting is very small.

If you like lots of detail when you make a card, this card might be for you. If you want to make a few of these cards to send for Christmas, I say go for it! Once you have your design and make everything in an assembly-line fashion it will be easier than it looks. But if you are making 50 Christmas cards to send, maybe you want a simpler design with fewer little pieces! This exact card takes more than a few minutes to make, so plan ahead!

SHOP STAMPIN’ UP! ONLINE HERE!

A Walk in the Forest Christmas Card

A Walk in the Forest Christmas Card

It’s the first Christmas card of the season! It’s the A Walk in the Forest Christmas Card! One of the perks of being a Stampin’ Up! Demonstrator is getting to preorder new products coming up in the next catalog so that we can become acquainted with the new things and make samples to show our customers. I’m not usually into animals, but there are brown bears and polar bears in this upcoming Holiday Mini Catalog. For some reason, this time I had to have them! The designer paper, anyway!

For this card, I used the new A Walk in the Forest Designer Series Paper (162377), which you will find at the top of page 5. You might miss it even though there are many samples across the two-page spread, but this paper stands alone. It is not part of a suite or bundle or anything. It’s just paper.

However, if you read the Stampin’ Up! Making a Difference box on page 5, you will find that with each purchase of this designer paper, Stampin’ Up! will donate $3 to support organizations dedicated to spreading cheer and providing support to those in need. So with your fun purchase, you will be helping others during this holiday season.

This A Walk in the Forest Designer Series Paper has bears, trees, snowflakes, stripes, evergreen branches and red berries. Some of the images work with the Merriest Trees Dies and some of the bears can be punched with the Beary Cute Punch.

For this card, I decided to use Pecan Pie cardstock although I was tempted to use Real Red or Cherry Cobbler. I decided Pecan Pie would go better with the outdoor, rustic theme of the card. The “other side” of this paper with the trees and the bears, is this Garden Green with tiny little triangle trees all over it. I chose that side of the paper for the layer on the Pecan Pie card base.

The top layer with the tree in the forest was strategically cut out of the designer paper so that I would have that big tree but not part of a bear along the edge. It worked out to cut it a little smaller than a normal layer which was fine because then a larger margin of the green paper would show. The tree layer is 3 1/2″ x 4. Out of another section of the paper, I cut out the brown bear. You can purchase the Beary Cute Punch, on page 67. It is actually part of a Bundle with the Beary Cute Stamp Set. But for this card, I just used my Paper Snips to cut out the bear by hand. I used a LOT of Stampin’ Dimensionals on the back of the bear because I wanted him popped up but sturdy! It was easy enough with my mostly used-up Dimensionals because I cut along the edges and cut itty bitty pieces for on his legs.

The greeting is in the Merriest Trees Stamp Set on page 12 of the Holiday Mini. I stamped it with Garden Green ink on Pecan Pie cardstock. I wasn’t sure if it would show up well enough but it does. It was diecut with a banner in the Stylish Shapes Dies. It just barely fit but I like it. I popped it up on Stampin’ Dimensionals also.

I have to be honest and say it took everything in me to NOT put any rhinestones or jewels or bling of any kind on this card! I really wanted to add some sparkle to the tree, but I also liked the rustic look of the trees and the bear and didn’t want to spoil that.

The Holiday Mini (officially known as the September – December 2023 Mini Catalog) goes live on September 6 for you to order from. It ends on January 3 (which right now we can’t imagine!). Be sure to order your very favorite things as soon as you can so you don’t have to wait for a backorder situation.

If you liked this A Walk in the Forest Christmas Card just know that it is an easy card to make although you couldn’t make a ton of the same card because you need to work with the trees and the bears on the paper. But otherwise, you just have to glue the layers to the card, punch or cut out the bear and add a greeting. That’s it!

Shop the Holiday Mini Sept. 6th!