Tag Archives: Cheerful Daisies Bundle

Cheerful Daisies Brightest Birthday Card

Cheerful Daisies Brightest Birthday Card

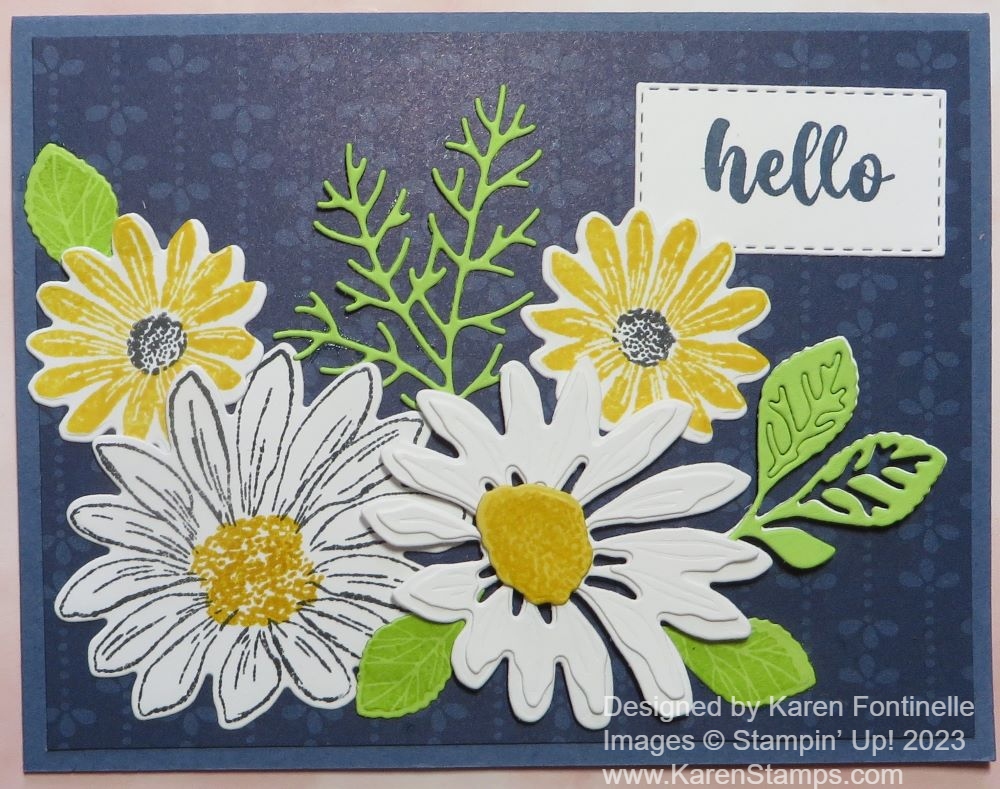
This Cheerful Daisies Brightest Birthday Card is one that I made because I haven’t used this set in a long time. There’s always something new to try out and use, and lots of times, the sets we have had for a while get buried in the pile of forgotten stamp sets! If you love this stamp set and dies, you will be happy to know it is carrying over into the new Stampin’ Up! Annual Catalog (not an April Fool’s joke!) coming in May! They have included a section called “Encore” of stamp sets returning from previous catalogs. I love new things but I’m always happy to see some of the stamps, dies, and other products returning in the new catalog.

This card uses the Cheerful Daisies Stamp Set and Cheerful Daisies Dies. Until the new catalog comes out, you can buy the Cheerful Daisies Bundle and save 10%. When the new catalog comes out, the stamp set and dies will be sold separately and you won’t get the discount. There will be new Bundles of new products but not the carryover ones.

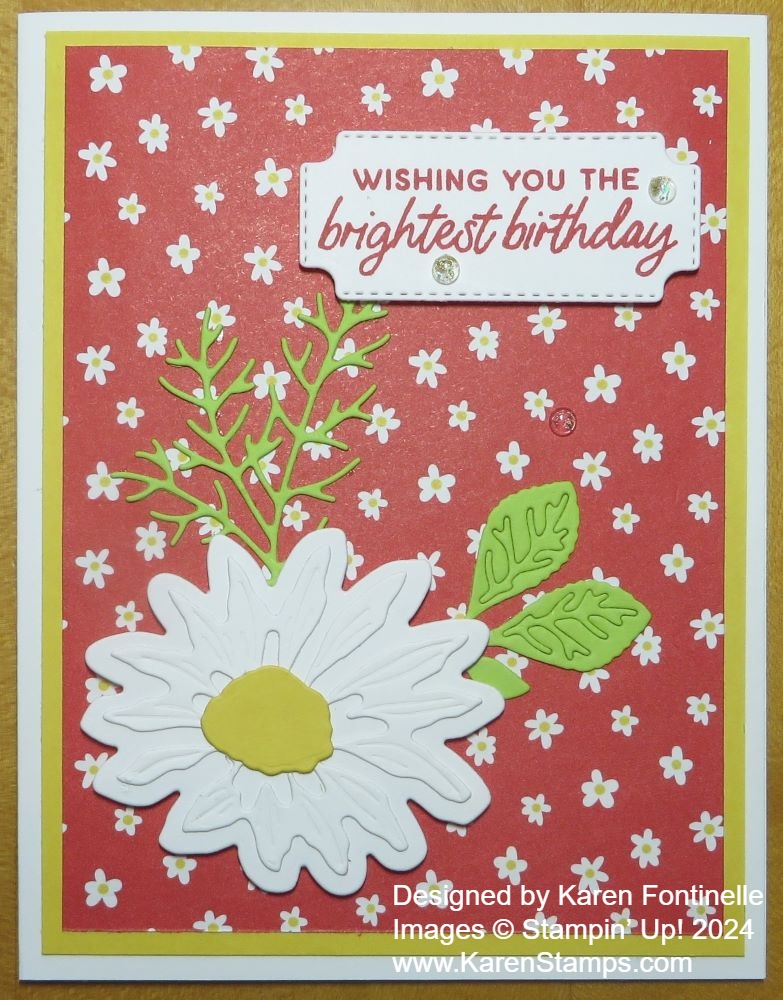
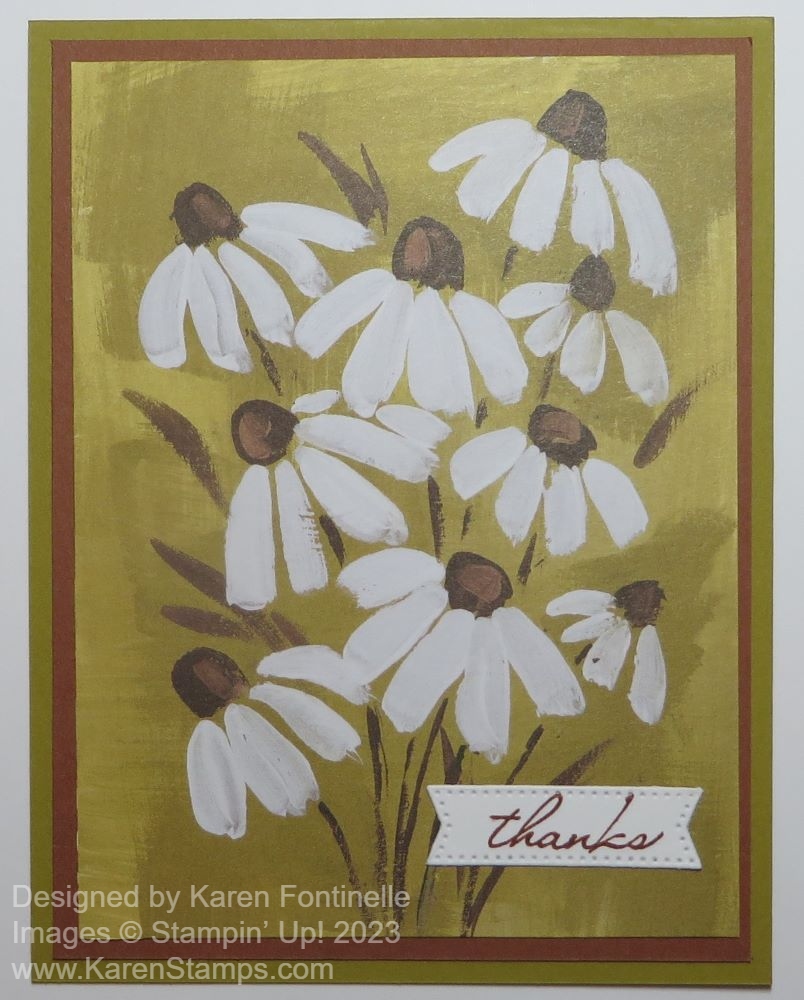
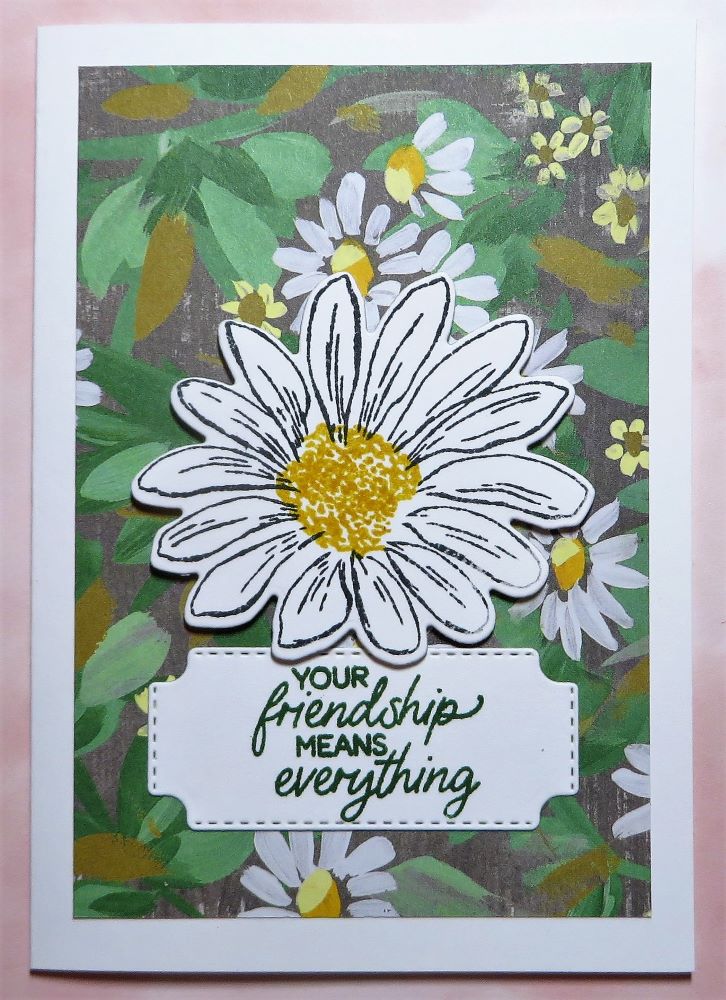
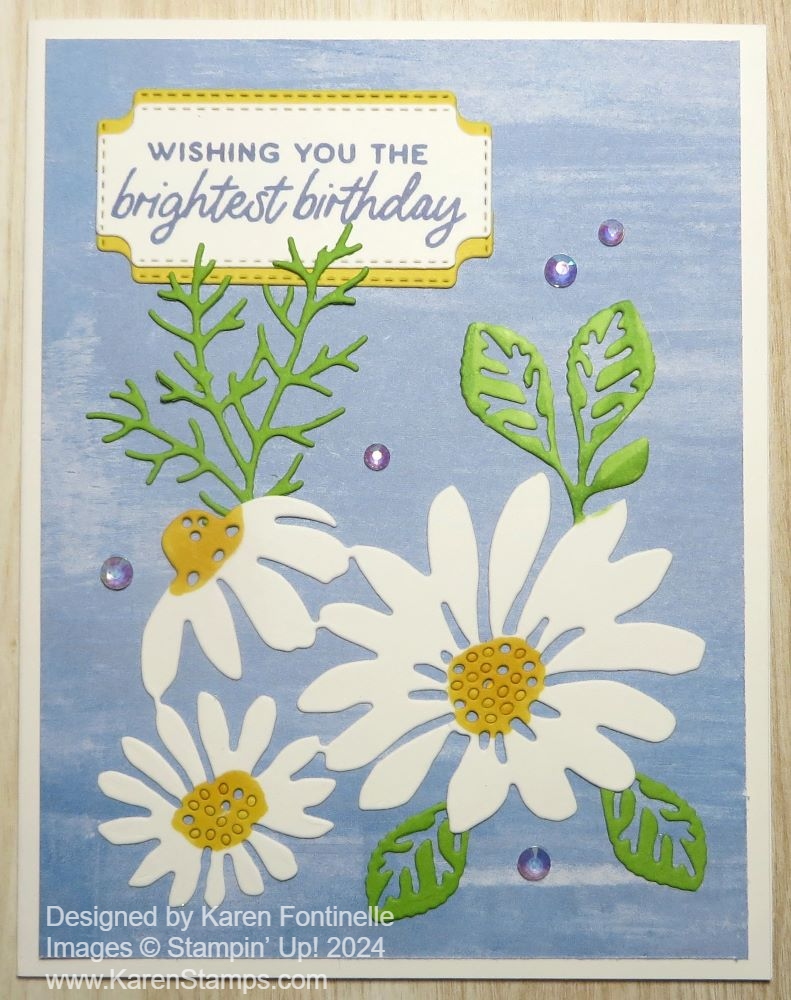
The card base is Basic White because I thought that would look good with the white daisies. The background paper is a pattern on the other side of one of the daisies papers in the Fresh As a Daisy Designer Series Paper. This paper is retiring soon even though the stamp set and dies are returning. Beginning April 9th, this paper will be discounted by 20% so if you love daisies, this paper is for you!

The group of daisies on the card is from a whole die in the Cheerful Daisies Dies. The three daisies and two leaves together are all on one die. Of course, they are all white being cut out from the Basic White cardstock, but then you can color in the flower centers and the leaves. I used Daffodil Delight and Granny Apple Green Stampin’ Blends. Then because I wanted a little more, I cut out the skinny foliage piece from Granny Apple Green cardstock that I adhered under the one diecut daisy. The extra leaves are the bottom of the large daisy are diecut from Granny Apple Green cardstock although perhaps I should have done those on Basic White and colored them with Stampin’ Blends as I did the attached ones. I cut the two leaves apart so I could adhere them where I wanted to.

The greeting is stamped from the Cheerful Daisies Stamp set on Basic White and diecut with a label in the die set. It is stamped in Boho Blue to match the background. Since I wanted a bright layer underneath it, I also diecut a Daffodil Delight label and cut it horizontally in half. Then I adhered it top and bottom to the white greeting and even though it doesn’t extend out to the sides, it looks like it was made perfectly to layer under the greeting.

For some embellishment, I added some Iridescent Rhinestones sprinkled around the card. These have been some of my favorite embellishments, but they are retiring. These will be discounted 40% beginning April 9th so be ready to grab some of those before they go away!

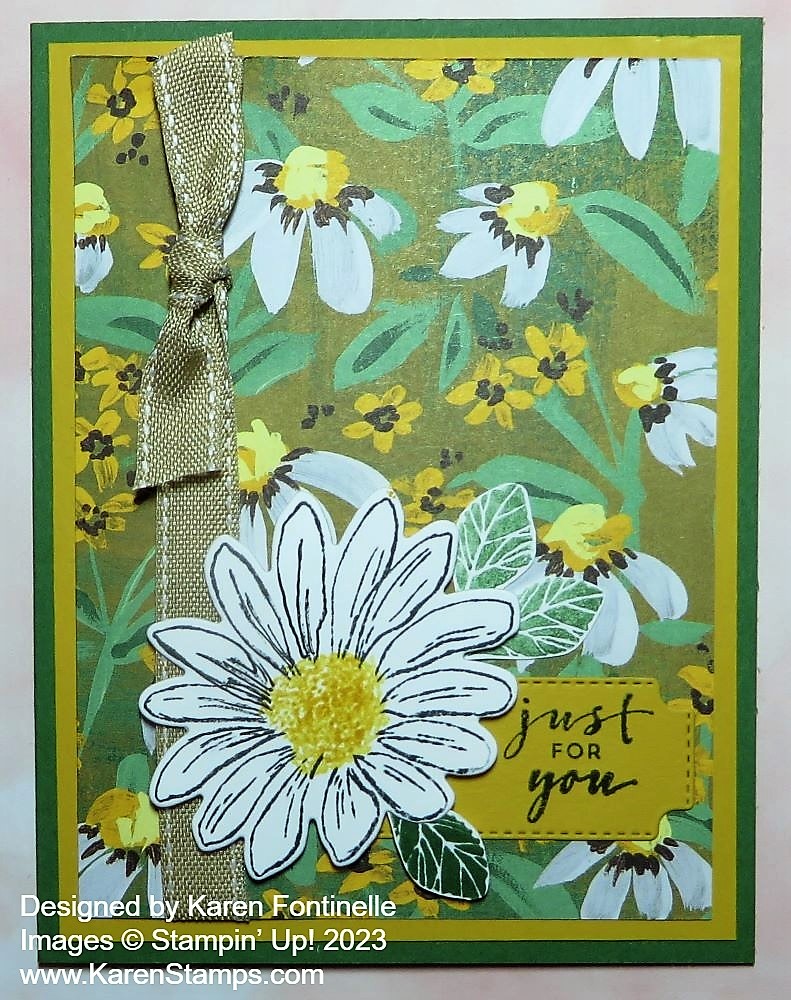
You could make this card for other occasions, just change the greeting! Daisies are almost always perfect for a card! Here is another card using the pretty Fresh As a Daisy Designer Series Paper and stamped and diecut daisies and leaves. Check out these products!

SHOP STAMPIN’ UP! ONLINE HERE!

Cheerful Daisies Birthday Card

Cheerful Daisy Birthday Card

It’s been quite a while since I have used this daisy set, but I got the idea to make this Cheerful Daisies Birthday Card since it looked so springlike! I love the background paper in any case and putting a daisy on the front seemed like the right thing to do!

The card base is Basic White Cardstock with a layer of Daffodil Delight and then the layer of the Bee Mine Designer Series Paper in the Spring Mini Catalog. This paper will be retiring April 30. This pattern, with the Sweet Sorbet background with tiny little white daisies, is nice because there are no hearts or bees so it is easy to use. And I love the color, Sweet Sorbet, which is also retiring. Sad to see that one go! You wouldn’t have to add the Daffodil Delight layer under the designer paper. I just thought it brightened everything up even more by bringing in the yellow in the daisy centers on the paper.

I used the Cheerful Daisies Dies to cut out two pieces to layer to make up the one large daisy with a Daffodil Delight center. The leaves are Granny Apple Green Cardstock and are attached to a collection of different daisies. I just used a portion of that die on the Granny Apple Green Cardstock to cut out the leaves and stems. I decided to leave in the cutout veins of the leaves since I didn’t want the background paper to show through.

There was another die, too, that cut out that very fine foliage piece. It would be good to think ahead and use Adhesive Sheets before die-cutting very delicate pieces like that foliage. Then you wouldn’t have to try to put the tiniest drops of glue on the back of the stems.

After gluing the two layers of daisies together, I popped that daisy up with Stampin’ Dimensionals in the bottom corner of the card and adhered the leaves and foliage underneath.

The greeting is in the Cheerful Daisies Stamp Set. I stamped it in Sweet Sorbet ink and used the label die in the Cheerful Daisies Dies to cut it out. I think it fits perfectly in the space on my card. Sometimes you design a card and then don’t quite know where to put the greeting! I also added three of the Iridescent Foil Gems, two to the greeting and one farther down on the card. I love adding those little embellishments and had to stop myself from adding a couple more!

I’m happy to see that this Cheerful Daisies Bundle of stamp set and dies is in the new Annual Catalog, but not as a Bundle any more. Stampin’ Up! retires Bundles although the pieces of the Bundle may still appear separately. What this means is, in the new Stampin’ Up! Annual Catalog you will still be able to buy the stamp set and you will be able to buy the dies, but you will not save 10% buying the Bundle unless you purchase the Bundle by April 30 when the current Annual Catalog retires!

Also, even though the cute Bee Mine Designer Series Paper that I used is retiring, the Bee Mine Stamp Set and Bee Builder Punch are carrying over into the new Annual Catalog, but again, not as a Bundle. I’m happy we can continue to use that fun punch!

Remember, the 2022-2024 In Colors and all their papers and accessories are retiring so if you need any of those colors, be sure to stock up. I wish they weren’t retiring as I like those better than the ones we got last year! But we will be excited for the next new In Colors!

Check my blog post HERE for the retiring lists of products in the Spring Mini and the outgoing Annual Catalog!

SHOP STAMPIN’ UP!

Cheerful Daisies Just For You Card

Cheerful Daisies Just For You Card

My mind ran through several different card ideas before I spied this green daisy paper in the Fresh As a Daisy Designer Series Paper and made this Cheerful Daisies Just For You Card. There was something about the colors on this sheet of paper that really caught my eye. And that’s how coming up with a card goes! You may think you have an idea but it changes, or you don’t have any idea but you do come up with something once you see just the right thing you want to use!

From the designer paper, I chose Garden Green cardstock for the card base and Crushed Curry for a layer because of all the yellows in the daisies.

As luck would have it, I found quite a few die-cut daisies in a little pile of unused die-cut pieces on my table. Some were just die-cuts but there were some stamped and diecut daisies. That’s where I got this daisy which I thought would look good against all the daisies on the designer paper. The daisy is stamped from the Cheerful Daisies Stamp Set and with a Crushed Curry center. To stamp the center of the flower, I stamped it several times with the flower center stamp, but I stamped off each time first on scrap paper before stamping the center of the flower. You can get the stamp set and matching dies in the Cheerful Daisies Bundle and save 10%.

I thought the big diecut daisy needed something to help set it off from the busy background. I used the label die in the Cheerful Daisies Dies in Crushed Curry, then stamped a greeting in the Charming Sentiments Stamp Set off to the side of that label in Memento ink.

Before assembling the card and layers, I wrapped around a piece of the burlap ribbon in the Real Red and Burlap Combo Pack Ribbons. I also tied a knot around the ribbon.

After the ribbon was added around the designer paper layer and all the layers glued together, I adhered the greeting flat on the card and then popped up the daisy with Stampin’ Dimensionals®. I stamped some leaves in Garden Green ink and stamped off the ink on some others. Instead of die-cutting, I simply grabbed my Paper Snips and cut them out by hand, then adhered the leaves either flat or with Dimensionals.

This was an easy card to make and perfect for summertime to send to a friend! On the inside, you can add a layer of Basic White with some stamped daisies or diecuts, or even a strip of designer paper for a decoration.

Here is a very similar card that I had forgotten about, made with a different pattern of designer paper but the same ribbon and a different greeting.

Remember, with each $50 purchase (before shipping and tax) during the month of July, you will earn a $5 coupon to spend on more product in August! It’s called Bonus Days at Stampin’ Up!

SHOP STAMPIN’ UP! ONLINE HERE!

Cheerful Daisies Friendship Card

Cheerful Daisies Friendship Card

Here’s an easy card to make, this Cheerful Daisies Friendship Card, which is perfect for sending to a friend. There is even a Best Friend Day coming up in June so plan ahead!

This card has daisies, which everyone loves, and the bright, cheerful Coastal Cabana color plus the fun polka dot designer paper. It’s a perfect card for summer and fun.

The card base is Coastal Cabana. For the designer paper, I found this pattern in the Brights 6″ x 6″ Designer Series Paper. To make this diagonal, just cut the designer paper to the normal size you would cut it for a layer, 4″ x 5 1/4″. Or if you want, cut it the full size of the card front, 4 1/4″ x 5 1/2″. Then place it diagonally on your Paper Trimmer and cut. If you don’t want your blade to bang into that tip of the paper, just place the blade somewhere else on the paper and start cutting from there to each end. Then you’ll have two diagonal pieces and you can make another card!

The three daisies are stamped in Memento Ink with the Cheerful Daisies Stamp Set. The flower centers are stamped in Daffodil Delight ink. The daisies and centers are then die-cut with the Cheerful Daisies Dies. You can purchase both the stamp set and the dies in the Cheerful Daisies Bundle and save 10%.

I popped up the center daisy with Stampin’ Dimensionals and the other two are adhered flat on the card along the edge of the designer paper. The greeting is in the Cheerful Daisies Stamp Set. It is diecut with the oval in the All That Dies.

That’s all you really need for this card unless you want to add some bling!

SHOP STAMPIN’ UP! ONLINE HERE!

Quick and Easy Fresh As a Daisy Card

Quick and Easy Fresh As a Daisy Card

Sometimes you just want to make a quick and easy card like this Quick and Easy Fresh As a Daisy Card and with this new designer paper, you can surely do that!

I wanted to use this bold daisy pattern in the Fresh As a Daisy Designer Series Paper in the new Stampin’ Up! Annual Catalog. I liked these large, bright white daisies with their golden centers on this paper.

You can choose from many coordinating colors with this paper. I played around with several and decided on Daffodil Delight, which isn’t a coordinating color but I liked the bright yellow for a Monday morning! I could have chosen Crushed Curry or Lemon Lolly to go with the flower centers, or Cajun Craze to match the background of the paper, or any of the greenish blues to match the leaves. Or you could Basic White for a card base! Or you could choose Basic White and then another cardstock color for a layer and then make the designer paper a little smaller to layer on the color cardstock. Or a colored cardstock for the base and white to set off the designer paper! Whatever you are in the mood for when you are creating is fine!

I originally intended to make this a two-tone card using the daisy paper on top and a piece of one of the colors on “the other side” of the daisy paper. But once I had this 5 1/4″ x 4″ paper cut I liked it so much I didn’t want to cover up or lose any of the white daisies.

Before adhering the designer paper to the card, I adhered a piece of the Burlap Ribbon in the Real Red and Burlap Ribbon Combo Pack. I put it on the side, where I haven’t put a ribbon in a long time, so as not to cover up too many daisies. Then I just tied on a short ribbon in a knot.

The greeting is stamped from the Cheerful Daisies Stamp Set in Tuxedo Black Memento Ink on Basic White. I tried it on the Daffodil Delight also and decided to use the White but layer it on Daffodil Delight. The label die in the Cheerful Daisies Dies is one of those perfect dies to use over and over again! It’s simple yet has that little stitched look and curved corners. But there is not a layering size die to match so what do you do? I cut out another label in Daffodil Delight, then cut it in half across the middle. Then I could layer those two half pieces under the top half and bottom half of the greeting. If you do it just a tiny bit, it really lines up with the curved corners even though it doesn’t extend out to the sides. No one will notice! It looks fine!

If you want the stamp set and dies, buy the Cheerful Daisies Bundle and save 10%! But be sure to get the Fresh As a Daisy Designer Series Paper, too!

That’s all there is to this card! You could add some jewels or sequins if you wanted to. Or you can leave it as the Quick and Easy Fresh As a Daisy Card!

Fresh As a Daisy Thank You Card

Fresh As a Daisy Thank You Card

We are getting a new floor in the kitchen so many things had to be moved out of the way – like my stamping stuff off the kitchen table and my stamping stuff off the dining room table to make room for kitchen stuff off the counters. The more we thought about it, the more we saw what was or could be in the way or might fall off the wall or get dirty somehow. Hence, this very easy card only required cardstock, designer paper, and a diecut scrap for the greeting, the Fresh As a Daisy Thank You Card! I saw this card idea in the catalog, then when I wanted to look at it again, I couldn’t find it! Finally, I remembered I saw it with the Timeless Arrangements Bundle, NOT with the daisies!

The card base is the new In Color, Wild Wheat, with a layer of another In Color, Copper Clay. I really liked adding that layer because I’m not really fond (yet) of the Wild Wheat, so the Copper Clay helped break that up a little bit.

The beautiful daisy card front is a piece of the Fresh As a Daisy Designer Series Paper. You’ll find this daisy bouquet as part of one of the sheets of paper. You just cut apart each individual square or rectangle of daisy goodness and then make something out of each section. I trimmed down this daisy piece so it would fit on the layer correctly.

The diecut piece is likely from the Stylish Shapes Dies. It was mixed in with a lot of other Basic White scraps but I wanted the greeting to be small so as not to cover up much of the designer paper. The greeting is from the Timeless Arrangements Stamp Set which has all kinds of greetings to mix and match and really fun dies of leafy things you can do all sorts of creative things with.

Be sure to look all through the new catalog for ideas, even back in the dies section there are extra card samples for inspiration!

SHOP STAMPIN’ UP! ONLINE HERE!

Cheerful Daisies Hello Card

Cheerful Daisies Hello Card

It’s already the second day of the new Stampin’ Up! Annual Catalog! How time flies!! For this Cheerful Daisies Hello Card, I played around with the Cheerful Daisies Bundle on page 111 of the catalog. Buy the stamp set and dies together in the Bundle and save 10%.

I will say you can do lots of “playing” with this Bundle. First of all, you can stamp the daisies in all kinds of ways. You can stamp the large daisy outline in Black Memento Ink and then stamp the middle of the flower. You can leave the stamped flower as is or you can color it lightly with a Blending Brush or Sponge Dauber.

For the smaller daisies, you can stamp a solid color flower. Or you can stamp an outline daisy and then color it in with markers or whatever technique you like. You could also stamp the outline stamp and then do “two-step stamping” by stamping the solid flower inside the outline. It doesn’t have to be perfect! The two yellow daisies on my card are just stamped with the solid daisy stamp and then diecut.

There are several diecuts you can experiment with. The flowers, stems, and leaves are all separate so you can arrange the pieces however you like. There is one large die that I was a little confused about at first. It has one large flower, a small daisy, and sort of a half flower plus leaves. You can leave the trio together or you can snip the tiny connections and cut them apart. It’s very easy. Then you can leave everything all white or add some color to the parts. You can even layer some diecut pieces as I did on the large daisy on the lower right. I even diecut some green leaves so I could glue them over the white leaves of the diecut.

The greeting is from the Irresistible Blooms Stamp Set (available in the Online Exclusives category). I used a diecut to cut out the greeting. I didn’t have too much space so it is tucked a little behind the one flower.

The card base is Misty Moonlight cardstock with a layer of designer paper in the Countryside Inn Designer Series Paper. I thought the white and yellow daisies would look stunning against the dark blue.

Daisies are flowers that everyone loves. They are simple and familiar, so you will get lots of creativity out of this Cheerful Daisies Bundle in the new Stampin’ Up! Catalog!

SHOP STAMPIN’ UP! ONLINE HERE!

Daisy Notecard

Daisy Notecard

I needed multiples of a card, so I decided on this Daisy Notecard, to show off the new Fresh As a Daisy Suite! It’s coming on May 2nd, in the new Stampin’ Up! Catalog! Yes, next week is May and yes, next week is finally time for the new catalog, a day we stampers live for!

You can purchase official Note Cards & Envelopes which are great to have on hand, but this time I didn’t need envelopes so I just made my own note cards with Basic White cardstock. I just cut a piece of cardstock at 5″ x 7″, then scored at 3 1/2″ so that when folded the note card would be 3 1/2″ x 5″.

I wanted to use the new Fresh As a Daisy Suite so I played around with all the pieces until I came up with a design I liked and could somewhat easily make. It’s like when you design Christmas cards and want to make multiples of the same card. If you make it too fancy, it will take forever to make multiples. This one had stamping and die-cutting so it took a little time but I just relaxed and enjoyed myself!

The Fresh As a Daisy Designer Series Paper has many color combinations in the patterns to choose from. All the new In Colors are represented! It’s a long list of coordinating colors for this designer paper. I chose this pattern with greens in the background to be the layer on my note card. I cut it at 3″ x 4 1/2″. The cute label is in the Cheerful Daisies Dies. I like the shape and the stitched edge. I stamped the greeting in the Cheerful Daisies Stamp Set in Shady Spruce ink.

The daisy is stamped in Memento Ink and the center is stamped in Crushed Curry. There is a stamp to use for the flower center, but I discovered that if I stamped it twice, partially overlapping, it covered up the empty center space a little better and I liked the darker color. The daisy was die-cut. Some of the dies fit the daisies printed on the designer paper. You can even layer die-cut daisies for a little more texture. When you get the Cheerful Daisies Bundle (save 10%!) just play with it for a while and see how all the pieces work! The daisy is popped up with Stampin’ Dimensionals. The Suite also has the Adhesive-Backed Solid Gems in Copper Clay, Boho Blue, and Lemon Lolly.

I think the Fresh As a Daisy Suite will be a popular one because who doesn’t like daisies?

SHOP STAMPIN’ UP! ONLINE HERE!