Tag Archives: Fresh As a Daisy Designer Series Paper

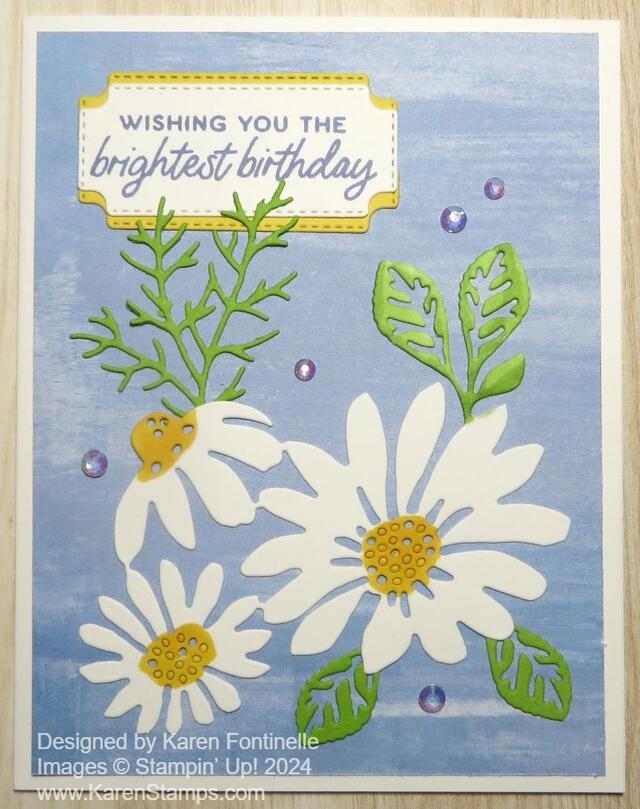
Cheerful Daisies Brightest Birthday Card

Cheerful Daisies Brightest Birthday Card

This Cheerful Daisies Brightest Birthday Card is one that I made because I haven’t used this set in a long time. There’s always something new to try out and use, and lots of times, the sets we have had for a while get buried in the pile of forgotten stamp sets! If you love this stamp set and dies, you will be happy to know it is carrying over into the new Stampin’ Up! Annual Catalog (not an April Fool’s joke!) coming in May! They have included a section called “Encore” of stamp sets returning from previous catalogs. I love new things but I’m always happy to see some of the stamps, dies, and other products returning in the new catalog.

This card uses the Cheerful Daisies Stamp Set and Cheerful Daisies Dies. Until the new catalog comes out, you can buy the Cheerful Daisies Bundle and save 10%. When the new catalog comes out, the stamp set and dies will be sold separately and you won’t get the discount. There will be new Bundles of new products but not the carryover ones.

The card base is Basic White because I thought that would look good with the white daisies. The background paper is a pattern on the other side of one of the daisies papers in the Fresh As a Daisy Designer Series Paper. This paper is retiring soon even though the stamp set and dies are returning. Beginning April 9th, this paper will be discounted by 20% so if you love daisies, this paper is for you!

The group of daisies on the card is from a whole die in the Cheerful Daisies Dies. The three daisies and two leaves together are all on one die. Of course, they are all white being cut out from the Basic White cardstock, but then you can color in the flower centers and the leaves. I used Daffodil Delight and Granny Apple Green Stampin’ Blends. Then because I wanted a little more, I cut out the skinny foliage piece from Granny Apple Green cardstock that I adhered under the one diecut daisy. The extra leaves are the bottom of the large daisy are diecut from Granny Apple Green cardstock although perhaps I should have done those on Basic White and colored them with Stampin’ Blends as I did the attached ones. I cut the two leaves apart so I could adhere them where I wanted to.

The greeting is stamped from the Cheerful Daisies Stamp set on Basic White and diecut with a label in the die set. It is stamped in Boho Blue to match the background. Since I wanted a bright layer underneath it, I also diecut a Daffodil Delight label and cut it horizontally in half. Then I adhered it top and bottom to the white greeting and even though it doesn’t extend out to the sides, it looks like it was made perfectly to layer under the greeting.

For some embellishment, I added some Iridescent Rhinestones sprinkled around the card. These have been some of my favorite embellishments, but they are retiring. These will be discounted 40% beginning April 9th so be ready to grab some of those before they go away!

You could make this card for other occasions, just change the greeting! Daisies are almost always perfect for a card! Here is another card using the pretty Fresh As a Daisy Designer Series Paper and stamped and diecut daisies and leaves. Check out these products!

SHOP STAMPIN’ UP! ONLINE HERE!

Cheerful Daisies Just For You Card

Cheerful Daisies Just For You Card

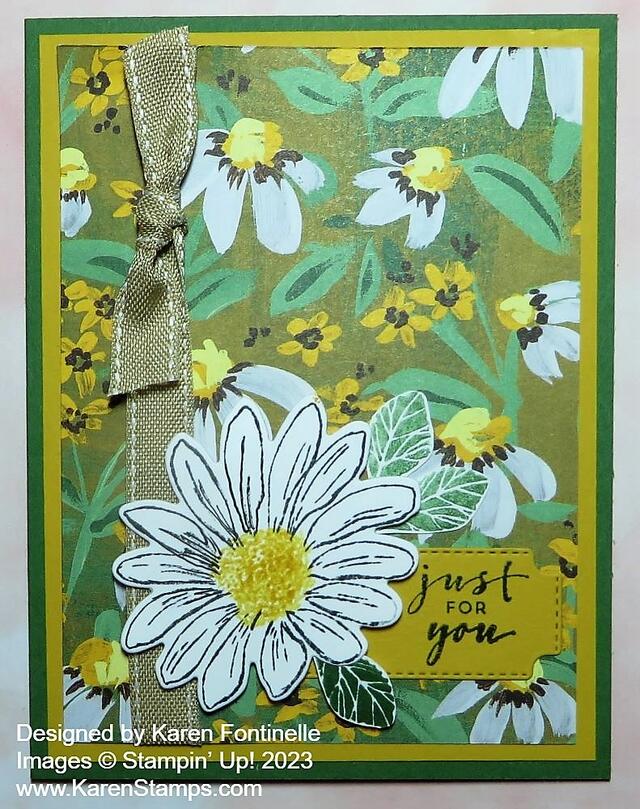
My mind ran through several different card ideas before I spied this green daisy paper in the Fresh As a Daisy Designer Series Paper and made this Cheerful Daisies Just For You Card. There was something about the colors on this sheet of paper that really caught my eye. And that’s how coming up with a card goes! You may think you have an idea but it changes, or you don’t have any idea but you do come up with something once you see just the right thing you want to use!

From the designer paper, I chose Garden Green cardstock for the card base and Crushed Curry for a layer because of all the yellows in the daisies.

As luck would have it, I found quite a few die-cut daisies in a little pile of unused die-cut pieces on my table. Some were just die-cuts but there were some stamped and diecut daisies. That’s where I got this daisy which I thought would look good against all the daisies on the designer paper. The daisy is stamped from the Cheerful Daisies Stamp Set and with a Crushed Curry center. To stamp the center of the flower, I stamped it several times with the flower center stamp, but I stamped off each time first on scrap paper before stamping the center of the flower. You can get the stamp set and matching dies in the Cheerful Daisies Bundle and save 10%.

I thought the big diecut daisy needed something to help set it off from the busy background. I used the label die in the Cheerful Daisies Dies in Crushed Curry, then stamped a greeting in the Charming Sentiments Stamp Set off to the side of that label in Memento ink.

Before assembling the card and layers, I wrapped around a piece of the burlap ribbon in the Real Red and Burlap Combo Pack Ribbons. I also tied a knot around the ribbon.

After the ribbon was added around the designer paper layer and all the layers glued together, I adhered the greeting flat on the card and then popped up the daisy with Stampin’ Dimensionals®. I stamped some leaves in Garden Green ink and stamped off the ink on some others. Instead of die-cutting, I simply grabbed my Paper Snips and cut them out by hand, then adhered the leaves either flat or with Dimensionals.

This was an easy card to make and perfect for summertime to send to a friend! On the inside, you can add a layer of Basic White with some stamped daisies or diecuts, or even a strip of designer paper for a decoration.

Here is a very similar card that I had forgotten about, made with a different pattern of designer paper but the same ribbon and a different greeting.

Remember, with each $50 purchase (before shipping and tax) during the month of July, you will earn a $5 coupon to spend on more product in August! It’s called Bonus Days at Stampin’ Up!

SHOP STAMPIN’ UP! ONLINE HERE!

Fresh As a Daisy Recycled Gift Bag

Fresh As a Daisy Recycled Gift Bag

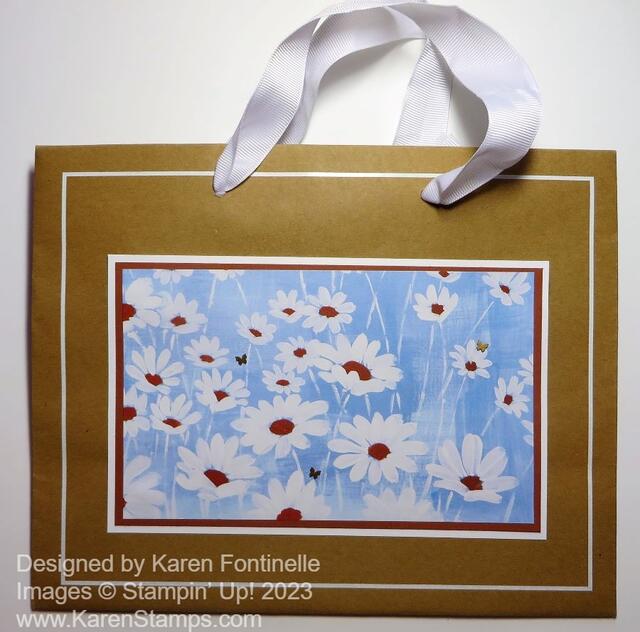
This is one of my favorite things to do with my stamping skills, making this Fresh As a Daisy Recycled Gift Bag! Actually, there isn’t even any stamping on this project and it probably only took me ten minutes are the most to make it. This is one of those quality shopping bags that I got at one of my favorite gift shops. Of course, on the front and the back it has the name of the store printed on the bag. But I love to take a shopping bag like this one I got from a store, and then decorate it and use it later as a gift bag. You can decorate it for any occasion. If every time you got one of these handled gift bags from a store, or even purchase a pack of them at the big craft stores, you stopped and decorated the front, covering up the printing, you will have a nice selection of gift bags that you personalized for a certain occasion or a certain person. It’s always handy to have gift bags in your stash for when you need one!

For this bag, I thought I would like to use the Fresh As a Daisy Designer Series Paper. I thought I would use the pattern with the green background and white daisies, but when I came upon this pattern, I chose it! For this bag, to cover up the store name, I cut it at 4 1/4″ x 7″. Of course, your measurements have to be appropriate for your bag.

I layered the daisy designer paper on a piece of Copper Clay Cardstock (one of the new In Colors). Because the handle was made with white ribbon and because of the white border around the edge of the bag, I decided to layer the designer paper and Copper Clay cardstock on a piece of Basic White Cardstock to help it all stand out on the kraft-colored bag.

For just a little embellishment, I added three of the Brushed Brass Butterflies flying around the daisies.

You could use any of the daisy patterns in the Fresh As A Daisy Designer Series Paper on a bag like this! Remember, Stampin’ Up! is having a sale on select Designer Series Papers during the month of June, so if you don’t have this summer Fresh As a Daisy Paper, or if you need more, be sure to order while you can get 15% off!

SHOP STAMPIN’ UP! ONLINE HERE!

Quick and Easy Fresh As a Daisy Card

Quick and Easy Fresh As a Daisy Card

Sometimes you just want to make a quick and easy card like this Quick and Easy Fresh As a Daisy Card and with this new designer paper, you can surely do that!

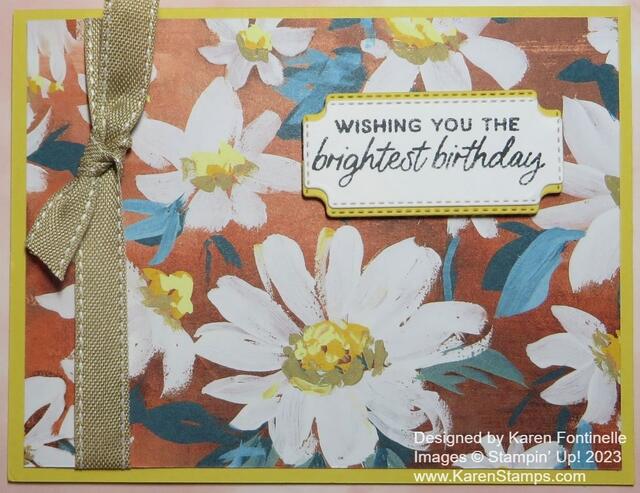
I wanted to use this bold daisy pattern in the Fresh As a Daisy Designer Series Paper in the new Stampin’ Up! Annual Catalog. I liked these large, bright white daisies with their golden centers on this paper.

You can choose from many coordinating colors with this paper. I played around with several and decided on Daffodil Delight, which isn’t a coordinating color but I liked the bright yellow for a Monday morning! I could have chosen Crushed Curry or Lemon Lolly to go with the flower centers, or Cajun Craze to match the background of the paper, or any of the greenish blues to match the leaves. Or you could Basic White for a card base! Or you could choose Basic White and then another cardstock color for a layer and then make the designer paper a little smaller to layer on the color cardstock. Or a colored cardstock for the base and white to set off the designer paper! Whatever you are in the mood for when you are creating is fine!

I originally intended to make this a two-tone card using the daisy paper on top and a piece of one of the colors on “the other side” of the daisy paper. But once I had this 5 1/4″ x 4″ paper cut I liked it so much I didn’t want to cover up or lose any of the white daisies.

Before adhering the designer paper to the card, I adhered a piece of the Burlap Ribbon in the Real Red and Burlap Ribbon Combo Pack. I put it on the side, where I haven’t put a ribbon in a long time, so as not to cover up too many daisies. Then I just tied on a short ribbon in a knot.

The greeting is stamped from the Cheerful Daisies Stamp Set in Tuxedo Black Memento Ink on Basic White. I tried it on the Daffodil Delight also and decided to use the White but layer it on Daffodil Delight. The label die in the Cheerful Daisies Dies is one of those perfect dies to use over and over again! It’s simple yet has that little stitched look and curved corners. But there is not a layering size die to match so what do you do? I cut out another label in Daffodil Delight, then cut it in half across the middle. Then I could layer those two half pieces under the top half and bottom half of the greeting. If you do it just a tiny bit, it really lines up with the curved corners even though it doesn’t extend out to the sides. No one will notice! It looks fine!

If you want the stamp set and dies, buy the Cheerful Daisies Bundle and save 10%! But be sure to get the Fresh As a Daisy Designer Series Paper, too!

That’s all there is to this card! You could add some jewels or sequins if you wanted to. Or you can leave it as the Quick and Easy Fresh As a Daisy Card!

Fresh As a Daisy Thank You Card

Fresh As a Daisy Thank You Card

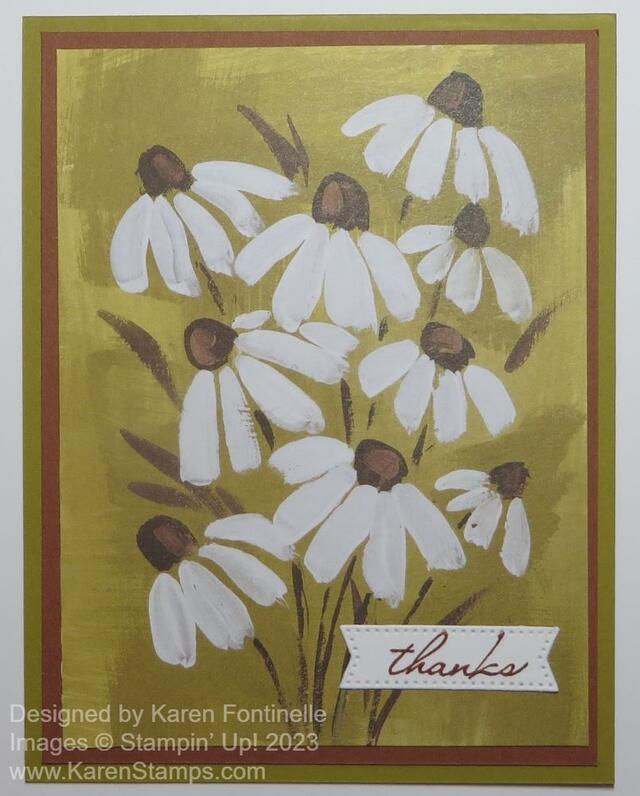
We are getting a new floor in the kitchen so many things had to be moved out of the way – like my stamping stuff off the kitchen table and my stamping stuff off the dining room table to make room for kitchen stuff off the counters. The more we thought about it, the more we saw what was or could be in the way or might fall off the wall or get dirty somehow. Hence, this very easy card only required cardstock, designer paper, and a diecut scrap for the greeting, the Fresh As a Daisy Thank You Card! I saw this card idea in the catalog, then when I wanted to look at it again, I couldn’t find it! Finally, I remembered I saw it with the Timeless Arrangements Bundle, NOT with the daisies!

The card base is the new In Color, Wild Wheat, with a layer of another In Color, Copper Clay. I really liked adding that layer because I’m not really fond (yet) of the Wild Wheat, so the Copper Clay helped break that up a little bit.

The beautiful daisy card front is a piece of the Fresh As a Daisy Designer Series Paper. You’ll find this daisy bouquet as part of one of the sheets of paper. You just cut apart each individual square or rectangle of daisy goodness and then make something out of each section. I trimmed down this daisy piece so it would fit on the layer correctly.

The diecut piece is likely from the Stylish Shapes Dies. It was mixed in with a lot of other Basic White scraps but I wanted the greeting to be small so as not to cover up much of the designer paper. The greeting is from the Timeless Arrangements Stamp Set which has all kinds of greetings to mix and match and really fun dies of leafy things you can do all sorts of creative things with.

Be sure to look all through the new catalog for ideas, even back in the dies section there are extra card samples for inspiration!

SHOP STAMPIN’ UP! ONLINE HERE!