Category Archives: Masculine

Tuxedo Pop Up Card

Tuxedo Pop Up Card

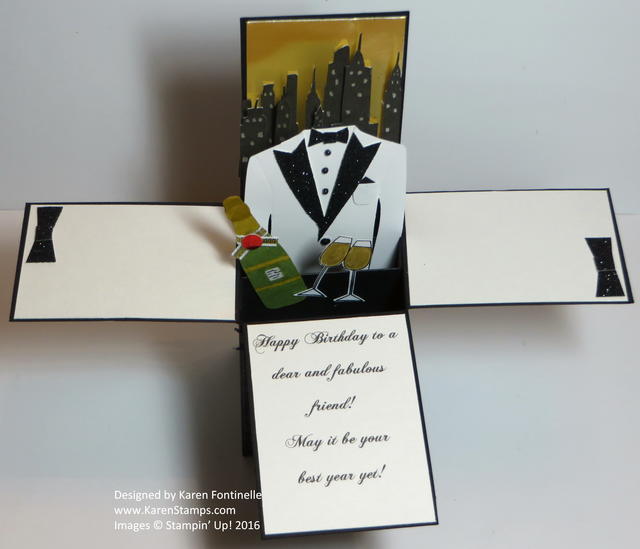
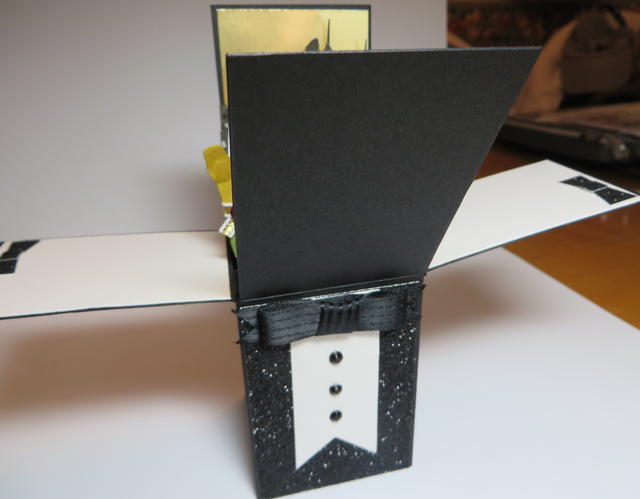
These pop up cards that fold flat and fit in an envelope for mailing are relatively easy to create and can then be customized for any occasion, such as this tuxedo card for a special gentleman’s birthday. This was a custom order for someone who knew exactly what she wanted and really designed the card, I just had to make it come to life.

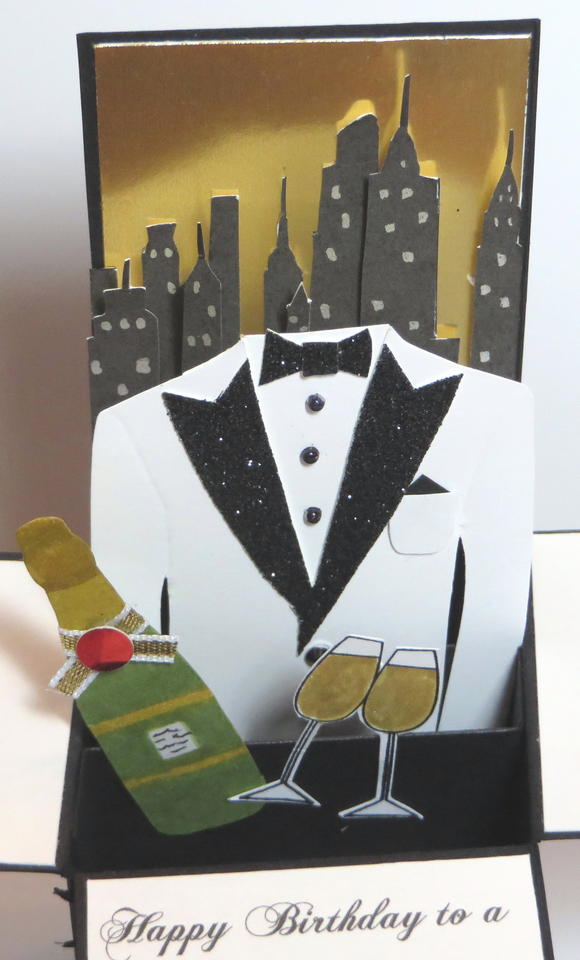
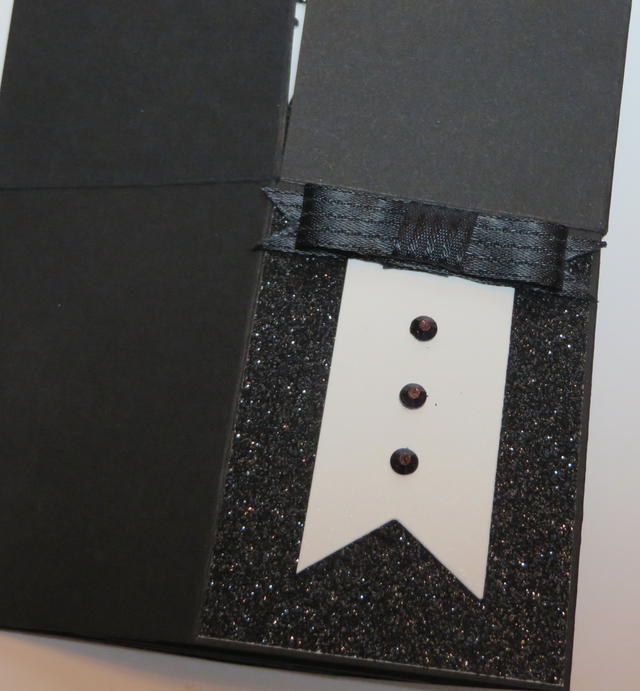
I found a template for a tuxedo jacket online, probably resized it a little bit with Whisper White Cardstock and Black Glimmer Paper (retired) for the lapels and bowtie. The buttons are tiny Pearl Jewels colored with a black Sharpie marker. Just color them on the sheet before attaching to your project.  The champagne glasses are actually from a Stampin’ Up set Cheers To You (retired). The champagne bottle is clip art that I printed on cardstock and colored in myself with Stampin’ Write Markers.

The background is a piece of Gold Foil with the New York City skyline printed on cardstock and cut out. The greeting is printed out on the computer and the little bowties in the corners are Black Glimmer Paper.

tuxedo closeup

Tuxedo Card Front

Tuxedo Card Front

Just google directions for making a pop up card and you will probably find directions.  They are pretty easy and you can add any stamped images or whatever you like to pop up from the divider(s) inside the box.  Just keep checking as you make it that they all stay within the boundaries of the box so that it will fit in the envelope, unless you are not mailing it!

Shop Stampin’ Up! Online 24/7

Remember, Bonus Days in July gets you coupons to shop with in August!


Last Minute Father’s Day Card Ideas

Happy Father’s Day to all the Dads out there! 

In case you are needing a last minute Father’s Day card idea, I thought I would go back in the files and offer some suggestions and inspiration! You won’t even need all the new stamp sets for these, some may even be retired, but if you have the products in your stash, it works!

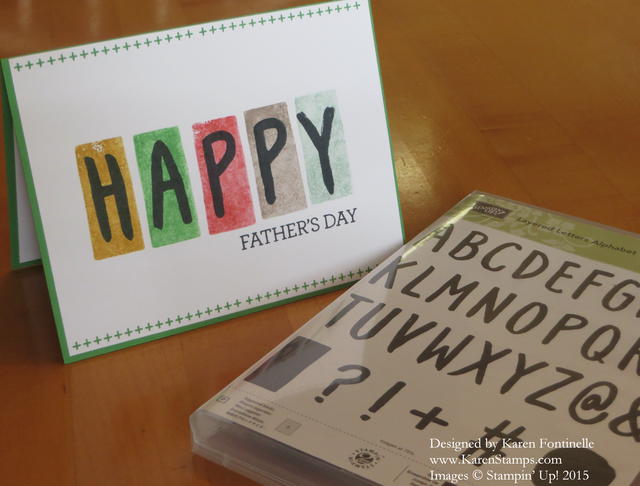
Layered Letters Father's Day Card

Layered Letters Alphabet and Crazy About You Stamp Set.  See the post HERE.

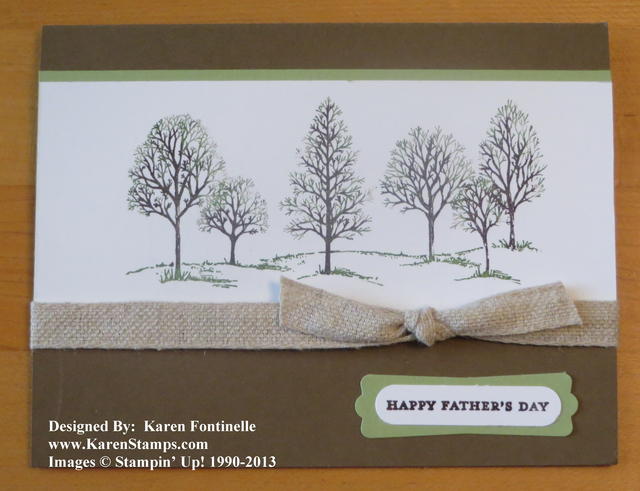
Lovely As a Tree Father's Day Card

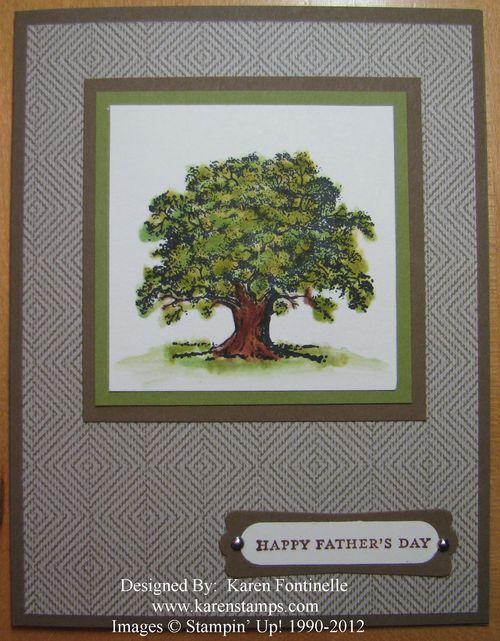
Lovely As a Tree – always a classic!!  See my post HERE.

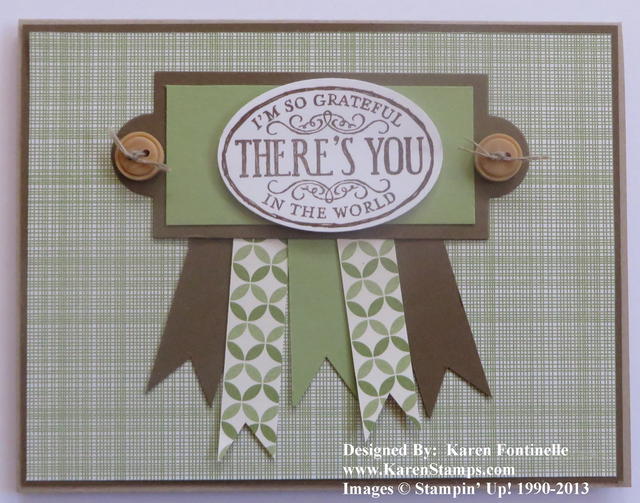
Chalk Talk Father's Day Card

Easy to duplicate with whatever supplies you have!  See my post HERE.

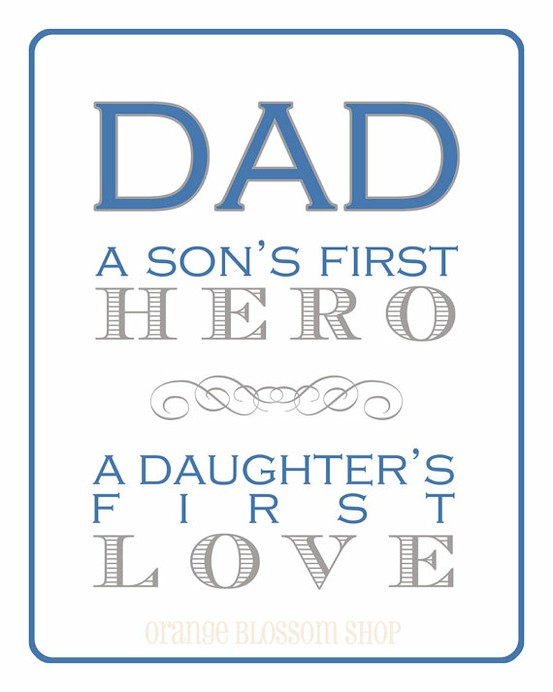
A Saying about a Dad

If you are looking for some quotes and sayings about fathers, read my post HERE.

c

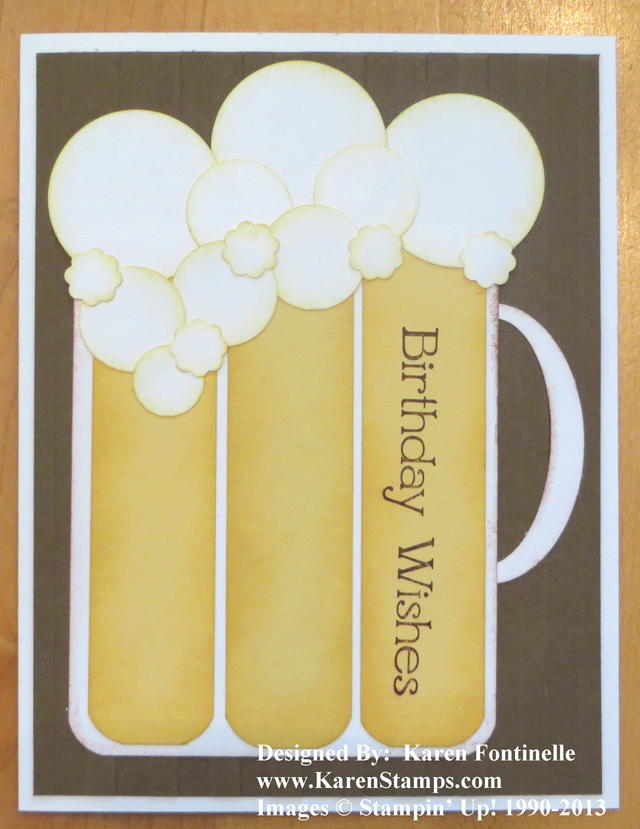
I made this as a birthday card but all you have to do is change the greeting!  See my post HERE.

Lovely As a Tree Father's Day Card

And one more, a great masculine card for any occasion, just change the greeting, using the favorite Lovely As a Tree.  See my post HERE.

Hope these ideas provide some inspiration for last minute Father’s Day card ideas for you, especially if you are a procrastinator like me!


Make a Father’s Day Pop Up Card

Father's Day Pop Up Card

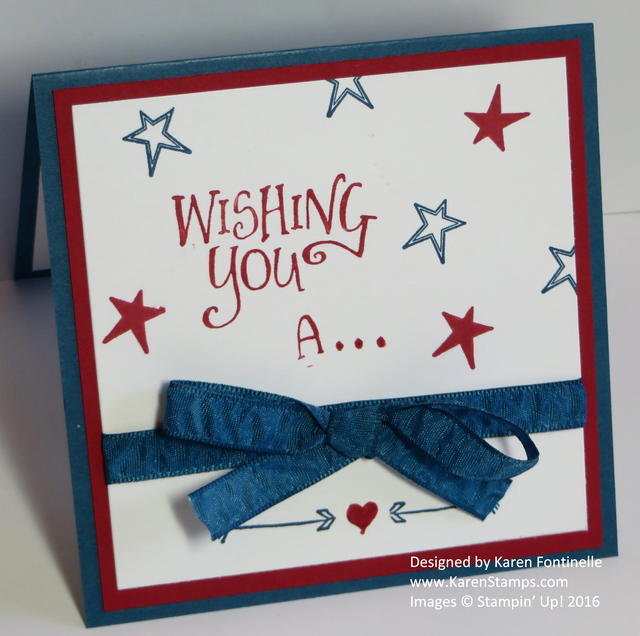
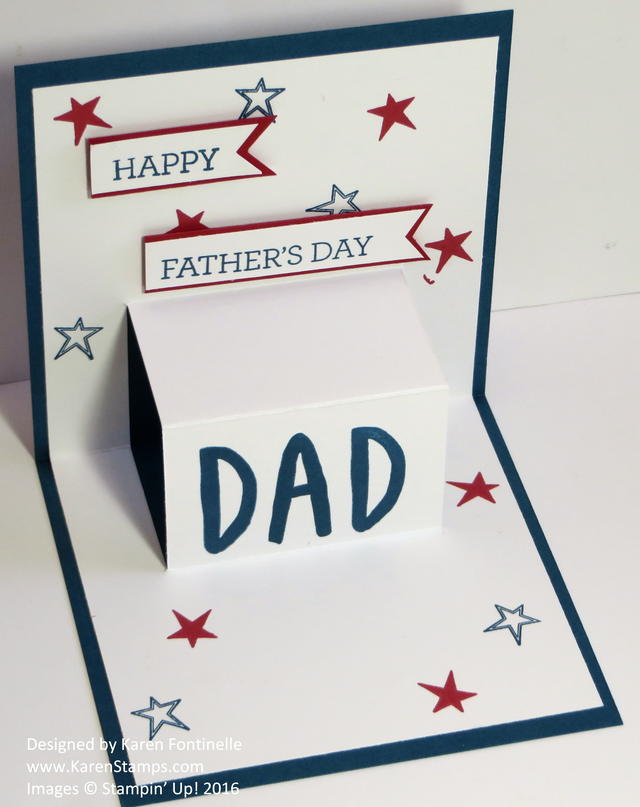
Make a Father’s Day Pop Up Card very easily for your father this weekend! Dad deserves a special card, don’t you think?! For the card base, I used one of the new In Colors, Dapper Denim. It turned out to be a red, white and blue card so I suppose you could turn this into a patriotic card for the 4th of July! There is a Real Red layer with Whisper White on top with stamping and some Dapper Denim 3/8″ Ruched Ribbon.

The greeting on the front is stamped with part of a stamp from the Better Together Stamp Set and also an “A” from the “Happy Birthday” stamp in the set.  I just colored with a Real Red Stampin’ Write Marker to get portions of the stamp that I wanted. I used the marker to put the little dots. The stars are stamps from the same set as are the arrows at the bottom.

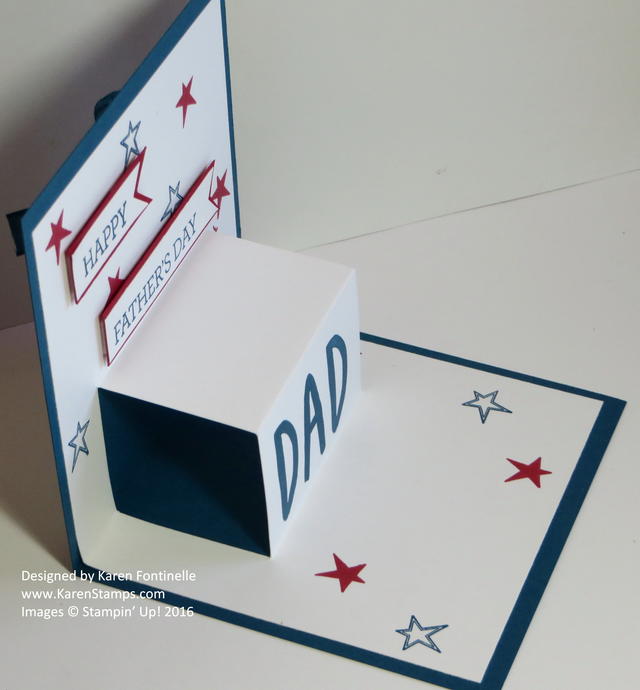
To make the pop up portion inside, just fold the cardstock layer in half like you normally would. Cut from the fold up with the Paper Trimmer or just scissors to make as large a pop up as you want. Then the pop up part folds out while the rest layers inside the card like normal.  When you do it, you will know exactly how to do it.Father's Day Pop Up Card Side View

Decorate the inside of the card however you like.  I used the Layered Letters Alphabet to spell out “Dad”.  The greeting inside is stamped with words from the Crazy About You Photopolymer Stamp Set. Lots of word and phrase choices in there!

Father's Day Pop Up Card Inside

Shop for any stamp sets, ink, paper or accessories you need from 

Stampin’ Up! at our Online Store!

Lovely As a Tree Father’s Day Card

Lovely As a Tree Father's Day Card

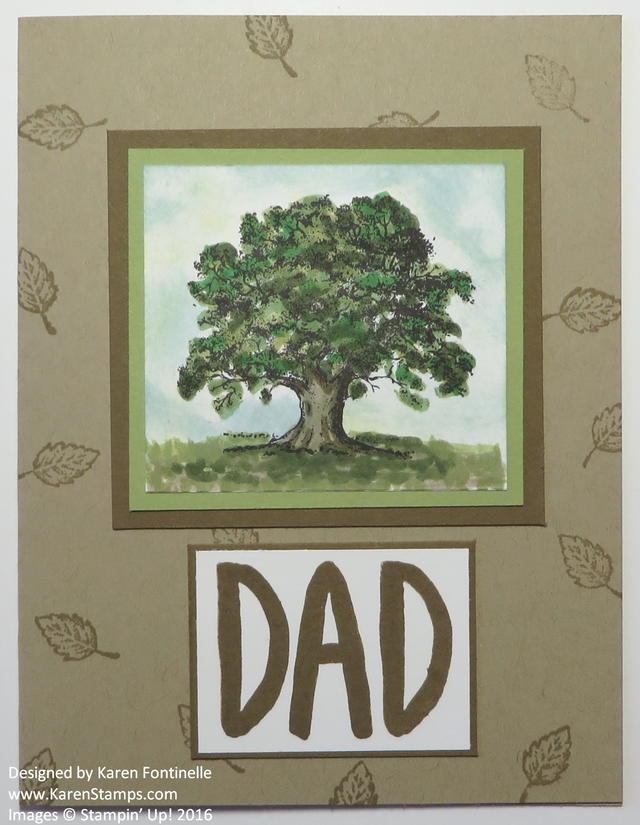
It felt so good to use this “old” stamp set to make this Lovely As a Tree Father’s Day card! Lovely As a Tree has been a favorite stamp set since I joined Stampin’ Up! many years ago and I believe it is still going strong! Every year we wonder if they will retire it, but so far they have not. It is just a classic stamp set, good for so many occasions and projects, so many techniques you can do with it. Lovely As a Tree is a must-have stamp set if you are a Stampin’ Up! stamper!

To make this card, I stamped the tree with the Basic Black Archival Stampin’ Pad and colored in with various Stampin’ Write Markers. An artist I used to know always said every green should have a little yellow in it, so first I randomly colored areas of light yellow, like So Saffron on the tree leaves. Then I colored (lightly) with lighter to darker shades of green, choose whatever colors you like. You don’t want to use a heavy hand when coloring with the markers, usually. To get a lighter look with some colors you could use a Blender Pen or Aqua Painter rather than coloring direct with the marker, which might be too dark. For the tree trunk and branches, I first colored with Crumb Cake and then used Soft Suede on the shaded areas of the tree. I also added some Crumb Cake and various greens to make the grassy area and sponged on some Soft Sky in for the sky in the background. (Cut the sponges into wedges.)

For a little background on the plain Crumb Cake card base, I was going to emboss, but then thought of just stamping the little leaf in the Lovely As a Tree Stamp Set randomly around the card in Crumb Cake ink.

“Dad” is spelled out using the Layered Letters Alphabet. I could have also made a banner across the bottom of the card with a “Happy Father’s Day” greeting instead.

If you don’t already own Lovely As a Tree, I highly recommend you put that on your next order! I love my wood-mount set, but now it is also available in Clear-Mount.

Whatever you do, be sure you have a Father’s Day card for your dad or special man in your life for Father’s Day, this Sunday June 19th! Make it today so you don’t have to rush at the last minute! If you already have the Lovely As a Tree Stamp Set, go ahead and dig it out and use it to make a Father’s Day card!

Shop Stampin’ Up! Online 24/7!

Layered Letters Father’s Day Card With Bowtie

Layered Letters Father's Day Card Bowtie

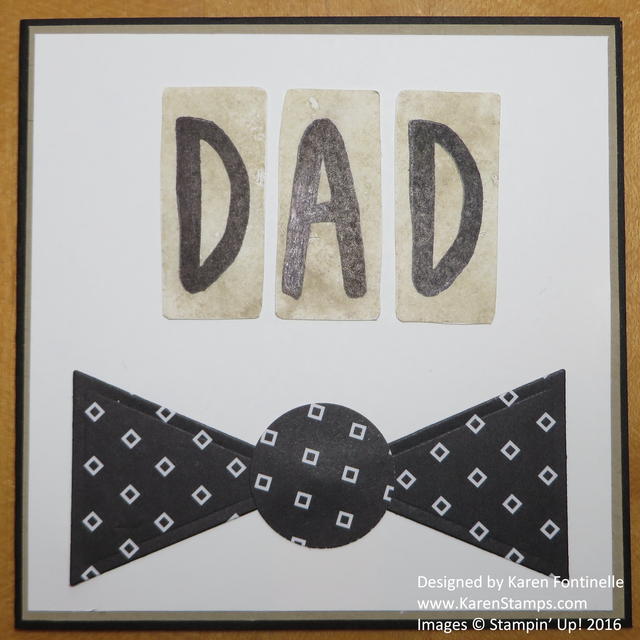
Father’s Day is Sunday, June 19th, so if you haven’t already made a Father’s Day card maybe this Layered Letters Father’s Day Card with a bowtie will provide some inspiration to you. It’s very easy to make and you can customize it to your father or husband. It doesn’t even have to be just for Father’s Day.  We are always looking for good masculine card ideas and you could customize this card to any special occasion for a man.

To make the bowtie, I checked the Pop of Pink Specialty Designer Series Paper and found that this black and white pattern would be perfect for a bowtie! You can cut two triangles and a circle any way you like, but I happened to think of the triangle in the Pyramid Pals Thinlits Dies and used that to cut two triangles. Then I used the 1″ Circle Punch for the bowtie knot.

For the greeting, I could have used the Father’s Day stamp in the Crazy about You Stamp Setbut I opted to use the Layered Letters Stamp Set.  This is another stamp set that I just find to be fun and useful. After stamping the rectangles with Crumb Cake ink on the Whisper White card front and getting some ink smudges in the corner (ugh!) I just cut out the rectangles instead and adhered them to the card!  Another proof there are no mistakes in stamping! (usually!)  Simple card to make, I think, and you can change the colors and the greeting style any way you like.

The card base is Basic Black with a Crumb Cake layer.  The letters are stamped with Basic Black Archival Ink.

Get started on the Father’s Day card or cards you need to make for the special men in your life! I hope this Layered Letters Father’s Day Card with a bowtie will give you some ideas!

If you need stamping and papercrafting supplies, check out Stampin’ Up! Online, open 24/7!

Final Four Houston Basketball Card

Final Four Houston Basketball Card

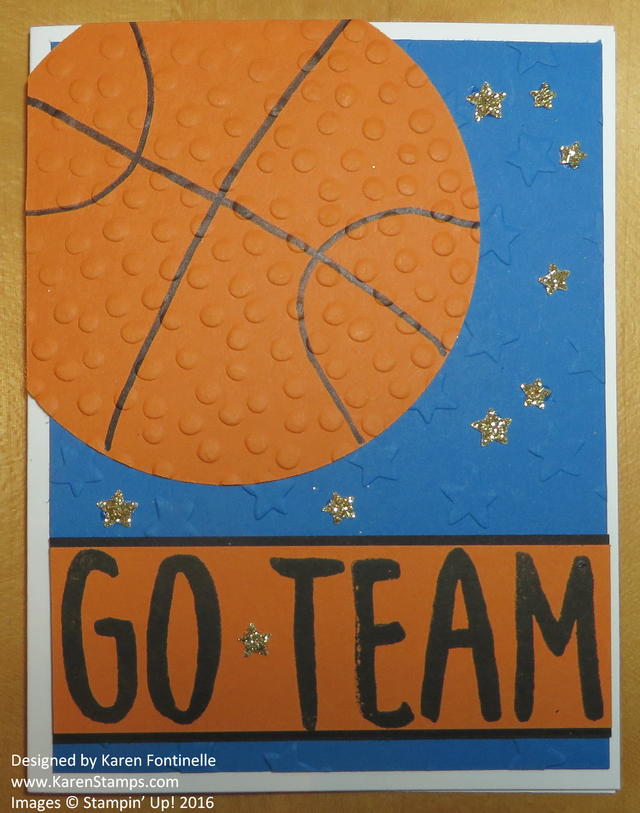
If you are a college basketball fan, then you might be interested in the Final Four this weekend here in Houston, Texas, and if you are not so much a college basketball fan, you might like to just make a Final Four basketball card! Of course this card isn’t just about the basketball tournament, but can be for any basketball fan. It was an easy card to make. Change the greeting for a birthday or congratulations or whatever you need!

I used Whisper White for the card base with a layer of Pacific Point blue embossed with the Lucky Stars Embossing Folder. To make the basketball, I die cut a circle of Pumpkin Pie cardstock with one of the Circles Collection Framelits Dies. Then I drew on the markings with a Basic Black Stampin’ Write Marker  and embossed with the Decorative Dots Embossing Folder to make it look like a basketball. The tiny Gold Glimmer stars are punched with the Confetti Stars Punch and adhered with the Fine Tip Glue Pen so that you can get the tiniest dab of glue.

The greeting is stamped with the Layered Letters Photopolymer Stamp Set. Love that set! I used Tuxedo Black Memento Ink.

Make a card like this Final Four Houston Basketball card for your favorite basketball sports fan! You can change a few things on it to make it in your own style!

Shop Stampin’ Up! Online HERE for all your stamping supplies!

Don’t forget the Stampin’ Up! Weekly Deals and Clearance Rack!

Easy Masculine Birthday All-Occasion Card For a Man

Easy Masculine Birthday All-Occasion Card For a Man

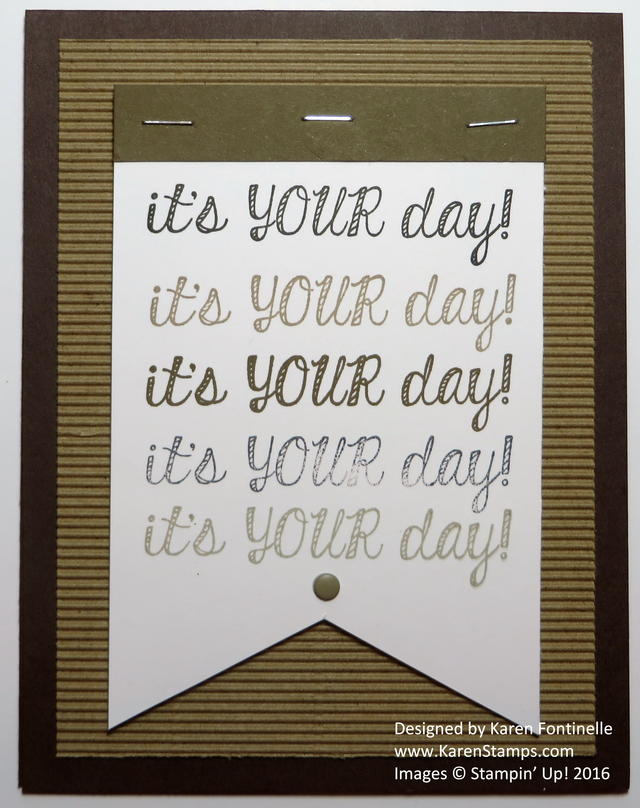
Yesterday I made a card very similar to this one HERE in this post, and then I thought about changing it up in color and texture to make an easy masculine birthday all-occasion card for a man.  I just used Chocolate Chip cardstock for the card base, making it open at the top instead of the side.  Just cut the full piece of card stock lengthwise at 4 1/4″ and then score in the middle at 5 1/2″ for the fold. I used a piece of the Kraft Corrugated Paper (you also get white sheets as well in the pack!) for the layer. The Whisper White banner is stamped with several different inks in the Neutrals family. I adhered a piece of cardstock at the top of the banner and stapled it (for that “masculine” texture!) with the Stampin’ Up! Handheld Stapler. Be sure to order a box of the Silver Mini Staples so you will have some on hand. And it all counts toward your $50 order for Sale-A-Bration!

Don’t forget to check out the Weekly Deals this weekend if you are ordering!

Weekly Deal Feb 16 2016

If you are new and need catalogs (and a Demonstrator!), please email me at Karen@KarenStamps.com.  I have a few left on hand I can mail to you.

If you are reading this and are NOT on my mailing list, be sure to sign up in the box in the upper right of my blog or in the pop-up. I hope to have my mid-month newsletter going out today, but the gremlins may have run off with it overnight!  Yikes!  I may have to start over! Gotta love computers!!

Red Mailbox for Mailing List Sign Up

Order online at my Stampin’ Up! Store for all the supplies to make cards like the ones I have on my blog!

Go Houston Astros! Baseball Card

Go Houston Astros Baseball Card

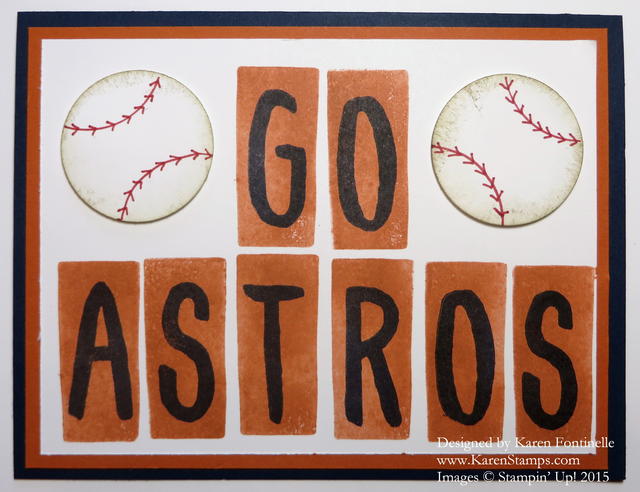
It’s been a weekend of watching baseball games on TV, and in honor of the Astros baseball game today, I have made this Houston Astros baseball card. It’s fun to have a winning home sports team for the city to rally around and enjoy! It’s been ten years since the Astros were in the baseball playoffs (I even got to go to the World Series game, thanks to my friend!)  Today is Game 4 of the American League Division Series and I’m keeping my fingers crossed for an Astros win! We’ve also been watching the St. Louis Cardinal games (because when you are from St. Louis, you are always a Cardinal fan!) and we watched one of the Dodger games because our son-in-law is a huge Dodgers fan.

The Layered Letters Alphabet Photopolymer Stamp Set is perfect for a card like this when you want to express the name of a team or place or certain words. I have loved this stamp set since I first saw it! You just need to have an alphabet stamp set on hand for certain projects, and this is a good one. I love having the background shapes you can use for each letter – or not!

The baseballs were fun to make, and you can make any size.  I used the 1 3/8″ Circle Punch because that’s what fit in the space on the card. I punched the baseball from Whisper White card stock, then I used the negative piece over the punched circle as the guide to draw the red curved lines on the baseballs. I used the Real Red Stampin’ Write Marker which has two ends, a brush tip and a narrow tip, to draw on the lines and stitching on the baseballs. Then I sponged a little Soft Suede ink around the edges of the baseballs.  I loved the look of that.  Sometimes sponging can add so much to your stamping! Use the Stamping Sponges by Stampin’ Up! or the Sponge Daubers to do any sponging around the edges of your stamped images.

Today is the last day for the Stampin’ Up! Weekly Deals!

Stampin' Up! Weekly Deal Oct 6 2015

If you are interested in making cards or other papercrafting projects, you can buy the best in stamps, paper, ink, and accessories at my Stampin’ Up! Online Store HERE.

Be ready when your team is in a good position and you want to celebrate or support! I hope I have reason to make more Houston Astros Baseball Cards after today’s game!

Last Minute Valentine’s Day Projects

Last Minute Valentine's Day Project Ideas

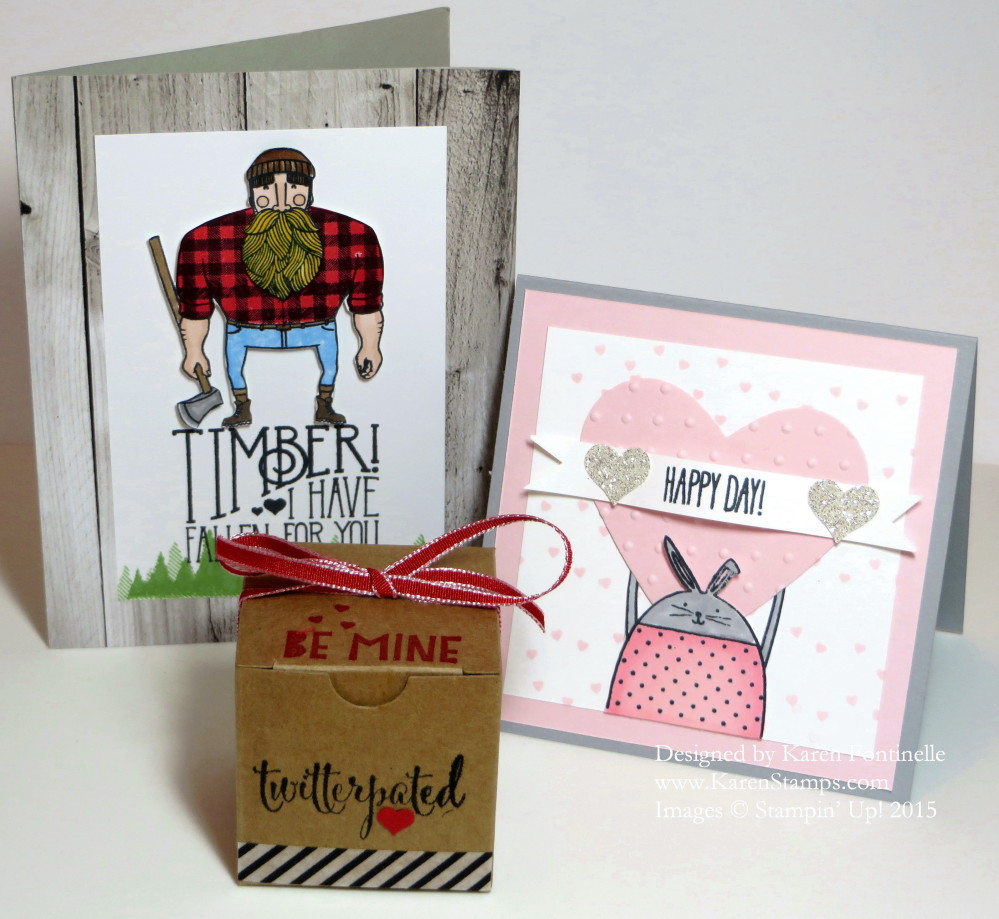
Looking for last minute Valentine project ideas?  Here are two Valentine cards and one Tiny Treat gift box decorated for Valentine’s Day.

If you have a small gift you are giving your Valentine, just use one of Stampin’ Up!’s many gift boxes, such as this Tiny Treat Box. Or use any box you have and get some inspiration for decorating from this box. Do a little stamping, embellish a little and tie on a pretty ribbon! I always keep some Stampin’ Up! packaging products on hand because you never know when you might need one, and once you have the box, it is easy to decorate! I used the You Plus Me Stamp Set and some coordinating Stacked with Love Designer Washi Tape.

The Wood You Be Mine Photopolymer Stamp Set is great for masculine cards with loving greetings that aren’t “too mushy”! I even WON this stamp set as a Prize Patrol from Stampin’ Up! during the Occasions Catalog Reveal that was livestreamed! Who would think you could win a prize sitting at your computer?! While I wasn’t crazy about this stamp set at first, you can’t but fall in love with this woodsman and his cute flannel shirt that you can stamp or color any way you want! Lots of possibilities with this stamp set, and of course it won’t just be for Valentine’s Day with different greetings. I cut out the woodsman with my Paper Snips so I could place everything on the card the way I wanted (copying a sample in the Occasions Catalog!). He was surprisingly easy to cut out so don’t be afraid! Of course using Paper Snips Scissors makes cutting easy! They REALLY make a difference! Every stamper should have a pair.

And for a fun Valentine, how about the Cheerful Critters Photopolymer Stamp Set?! These “critters” just make you happy no matter what project you are making!  And with their signs and arms up you can add any greeting you like. After coloring the bunny critter with the Blendabilities Markers, I cut out with Paper Snips and cut out her arms without the sign so she could hold up the heart, die cut with the Hearts Collection Framelits Die. The background is stamped with the little grouping of tiny hearts from the You Plus Me stamp set.  Just think of how often you can use those cute little hearts because hearts and stars are for any occasion!  Good to have on hand!

If you are making valentines at the last minute today, I hope these ideas inspire some creative ideas for you whether or not you have these exact stamp sets or materials.

Of course you can order any stamping supplies you need at your convenience online at my Stampin’ Up! Online Store by clicking this link! Remember, with a $50 purchase during Sale-A-Bration you get to choose a free Sale-A-Bration product! You will see the details at my Online Store.

Have a Happy Valentine’s Day!!!

Masculine Valentine Card for Your Husband

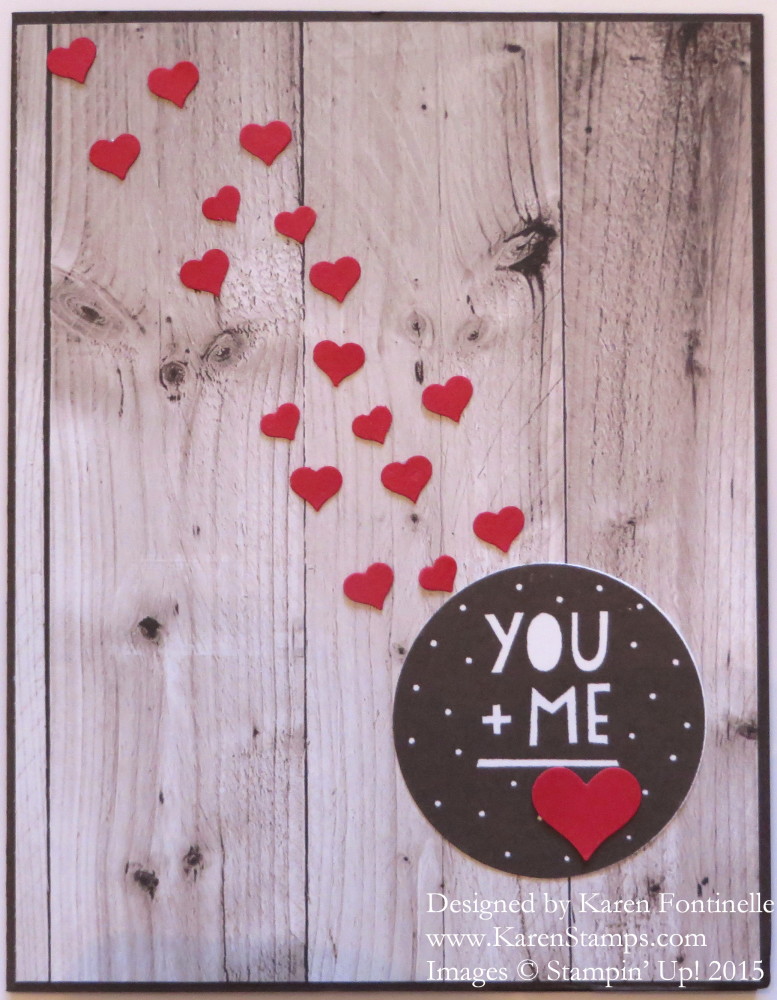
Masculine Valentine Card for Your HusbandNow that the valentines you made have been mailed and the valentines for your kids’ classes have been made and will be passed out this afternoon at the school parties, it’s probably time to think about a masculine Valentine card for your husband (or boyfriend)! Chances are, the men aren’t going to ooh and aah over our beautiful cards we make like our friends might, so you may as well keep it simple. My husband has been known to open his card, read it, put it down, and not say a word. But that’s him and I do know he has at least COME to appreciate my handmade cards. We do place some importance on the cards we give each other and what they say and how they look.

Most “masculine” cards have darker colors, simpler design, less embellishment and maybe more texture. Somehow we often feel at a loss when we go to make a card for a man, but it’s really not that hard. You just usually have to think in terms of the things I just mentioned.

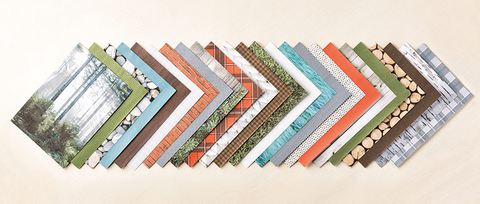
Since I just received the Adventure Bound Designer Series Paper Stack in my most recent order, I was flipping through it and spied this woodgrain paper. As it happens, we need to do some replacement of part of our wood fence and gate, so you could say the paper kind of goes along with that! Not that it matters so much, I might have picked the woodgrain paper regardless!

I was thinking about a heart, or a heart cutout or something, when I thought of this round image in the You Plus Me Stamp Set. I thought maybe it looked a little like the knots in the wood or something somebody might carve into wood. I stamped it in Early Espresso Ink to match the paper and punched out with the 1 3/4″ Circle Punch. I also punched out the little heart in the Itty Bitty Accents Punch Pack to cover the little white heart that is part of the stamp. Then since I had just received the Confetti Hearts Border Punch, I had to play with that, and punched all the tiny hearts and glued a stream of them to the card.

It’s a very simple card to make if you still need a valentine for your husband!  If you don’t own the Adventure Bound Paper Stack, use the Hardwood Stamp instead. And if you don’t own the Adventure Bound Paper Stack, put it on your next order if you ever need to make masculine cards because it will be great.  There is a coordinating stamp set as well, Adventure Awaits, that you might like. And if you want to save money, but them together in a Bundle to save 15%.

Tomorrow is Valentine’s Day! Do you have a valentine card made for your husband?

Adventure Bound Paper Stack

Click to Shop!


Calling All Heroes Birthday Card

Calling All Heroes Birthday Card

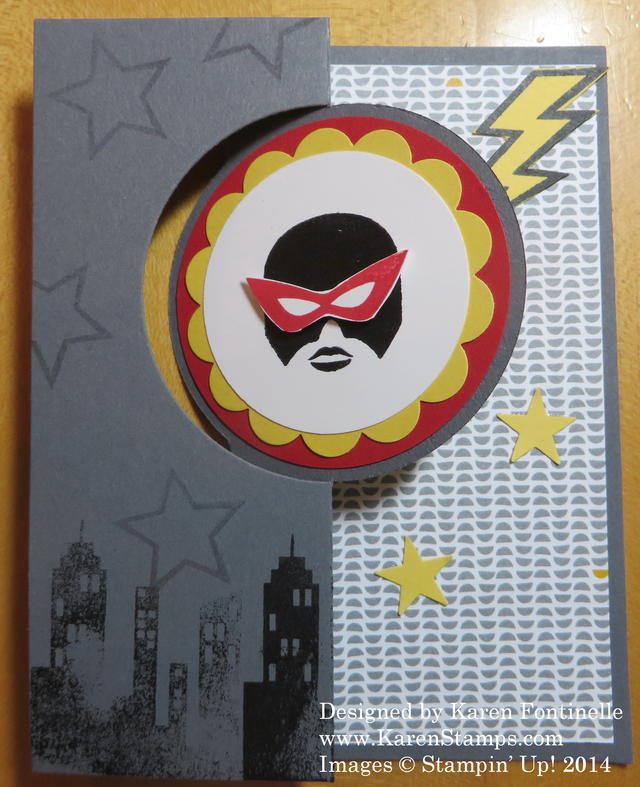
This was a pretty easy birthday card to make for my son with the Circle Card Thinlits Die and the Calling All Heroes Photopolymer Stamp Set. I love that stamp set. You might think I didn’t get the buildings stamped very well on the front of the card and you might possibly be right – except for the fact that I read where another demo didn’t get her stamp on the block right and stamped something similar to what I did here.  But instead of calling it a mistake, she thought it made the buildings look rather hazy so she just called it a new technique! My “new technique” goes even farther, as you can see almost all of the buildings look as if they are in a haze or mist, which often happens around here in Houston. It almost gives a romantic look to the city skyscrapers! So I just have another look to my city skyline stamping!  Ha!

And with the Calling All Heroes Stamp Set, you can customize your characters!  You can stamp different heads and disguises to make them heroes or villains! I think it is a fun stamp set to play with! Great for girls or boys, children or adults!

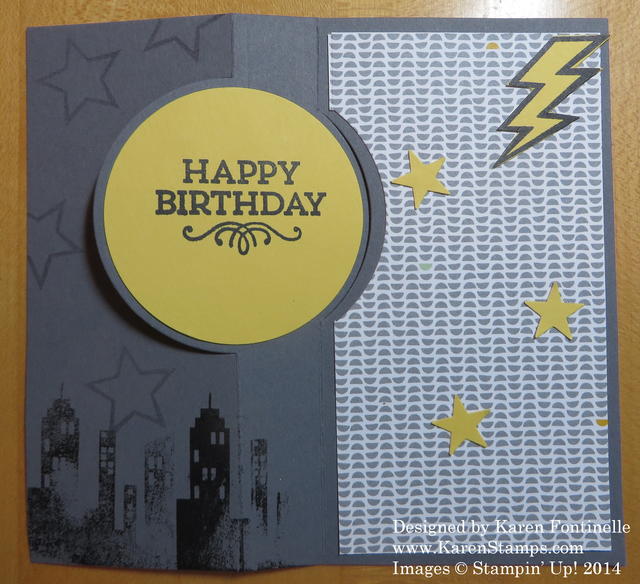
Here is the inside of the card, stamped with a greeting from the Hey You Stamp Set. The stars are punched with the star punch in the Itty Bitty Accents Punch Pack.

Calling All Heroes Birthday Card Inside

Today is the last day for these Stampin’ Up! Weekly Deals!

Stampin' Up! Weekly Deal Oct 28 2014

Click to Shop!

The Amazing Birthday Card – For A Husband

Amazing Birthday Card

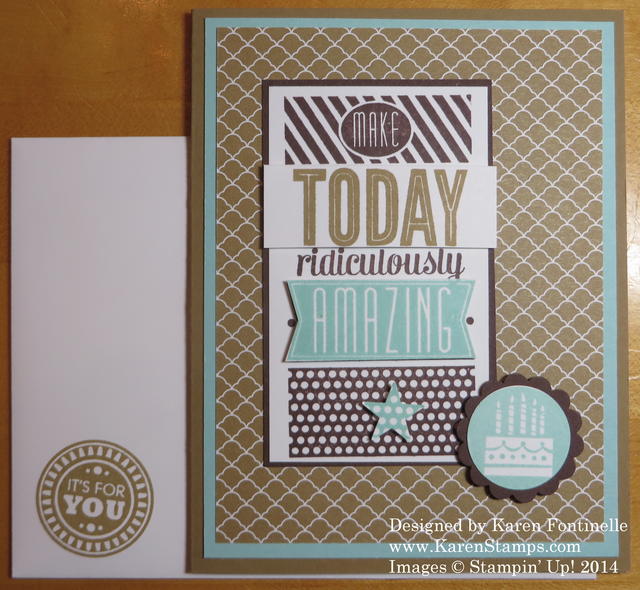
I’m not bragging, this is the Amazing Birthday card!  It’s made with the Amazing Birthday Stamp set by Stampin’ Up! and it is going to my husband. This stamp set is so versatile, you can make it for anyone, you can use the stamps to decorate birthday party favors and make decorations like cupcake toppers.  I happened to choose Soft Suede and Pool Party, along with Whisper White, with a touch of Chocolate Chip thrown in. The background paper is from the In Color stack. Stamp the large greeting stamp a couple of times, cut out some of the words and then mount them with Stampin’ Dimensionals to make them pop on the card over the same greeting. The little star I just punched to put a little something in that space.  Notice I even stamped the corner of the envelope!

For this stamp set and more, check my Stampin’ Up! Online Store!

The Best Handmade Father’s Day Card!

Father's Day Hardwood Fence Card

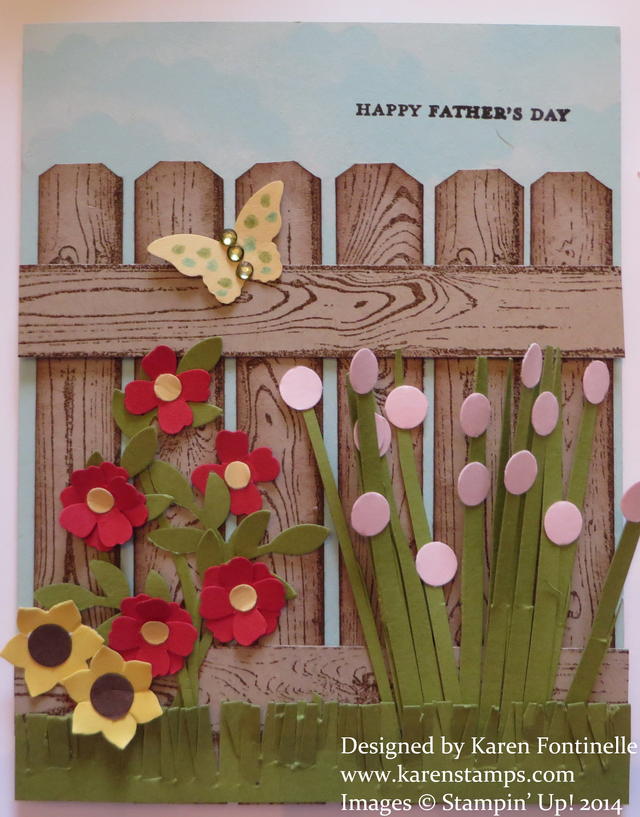
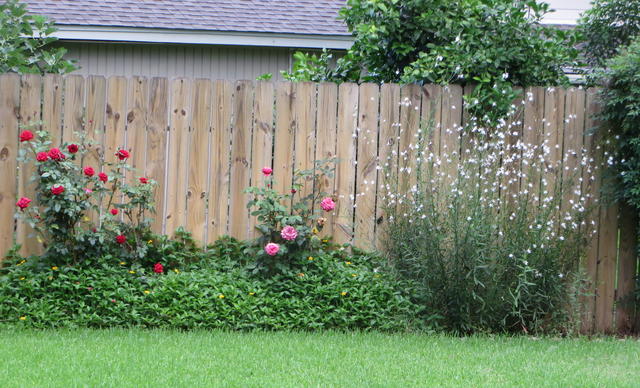
It’s the day to wish all the fathers out there a very Happy Father’s Day! And especially to my husband, the father of our three children!  Since he works out in the yard a lot and tries to have a nice garden, I thought I would make a personalized card for him that somewhat matches our back fence, the view out our window. I got the idea for this card from another demonstrator, Patty Bennett, who stamped with the Hardwood Wood background stamp with Soft Suede ink on Crumb Cake card stock. To make it into a fence, she used the Stampin’ Trimmer to cut along the Hardwood lines to make separate fence posts and sponged the edges. We have this same kind of “privacy fence” in our backyard, in face they are about the only kind of backyard fences in Houston. I like it for the privacy it provides and I don’t like it for the privacy it provides because you don’t get to know your neighbors as well, especially the ones behind you. And the kids can’t just run from one yard to another.

Here is a photo of your backyard that inspired this card:
Backyard Fence and Flowers

I forget what that flowering plant on the right is called, but it is really pretty in the morning against the fence. Whatever that plant is below the rose bushes has just taken over in the last few days. That’s how it is down here in the jungle, plants don’t stay small like they are supposed to!

Here is how to cut apart the fence posts from the Hardwood Wood stamp (even if you stamp the image crooked on the paper, just follow the straight lines in cutting the posts apart.  You will need to stamp two images so you end up with six full-size fence posts. Depending on where you place them on your card, the fence posts will likely overhang the bottom of your card. This is ok, just snip off the excess when you are finished.  Be sure to play with the spacing of the posts before you glue.  It doesn’t have to be perfect, but you want to see how the spacing works on your card.
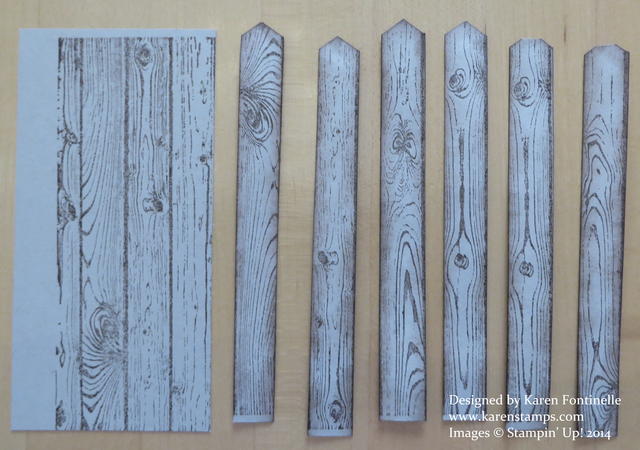
Making Hardwood Fence Posts

To get the pointy tops on the fence posts, Patty used the Border Chevron Punch. Just stick the strip into the punch as you see in the photo and punch. To match our own fence, I snipped off the pointy tip to make it flat!
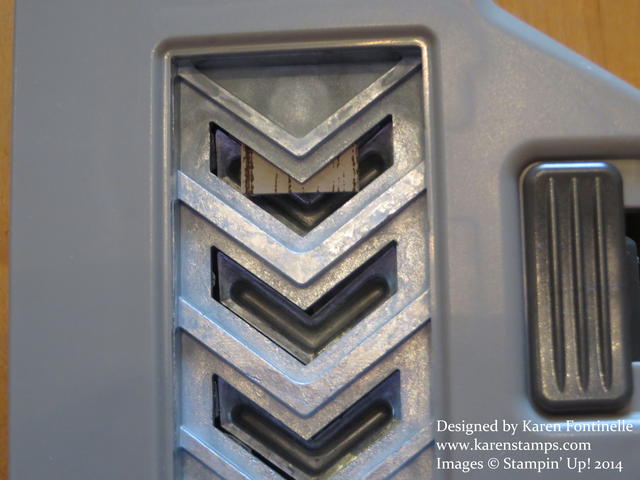
Chevron Punch Making Fence Post Tops

And to make a few clouds on the Pool Party card base, I punched a Scallop Circle out of a scrap and sponged around parts of it with White Craft Ink to look like clouds! It’s very easy to do,  Just move the punched shape around on your paper.
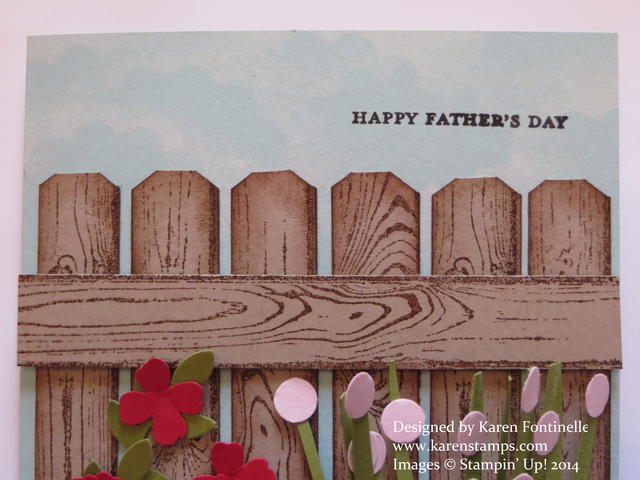
Clouds Sponging close-upTo make the flowers, I just punched various shapes. I’m sure the scale isn’t correct, but it looks ok and it is, after all, a handmade card! I used the new Itty Bitty Accents Punch Pack flower for the rose bush, circles from the Owl Punch for the pink flowers, and the good old reliable Boho Blossoms Punch for the yellow “iris” flowers. I used the new Fringe Scissors a lot for the grass and the long flower stems. For the stems and leaves on the rose bush I used the stem from the Bird Punch. I had to add a little punched butterfly and for the center, I colored the Rhinestones with the new Blendabilities Markers (which hopefully will be available soon for everyone!).

The greeting on the front of the card is from one of my favorites Teeny Tiny Wishes.  The greeting inside the card is from a new set Fabulous Four. After I stamped it I just loved the look of it!
Fabulous Four Greeting Inside Card

I hope you got a new idea for using the Hardwood Wood Stamp today and maybe how to personalize a card for someone.

For tips on stamping with a background stamp, such as this Hardwood Wood Stamp, check out one of the recent posts on my Stamping With Karen Facebook Page.  Click the Like button there so you will receive my posts.

Have a Happy Father’s Day!!

A Husband Valentine

Husband Valentine

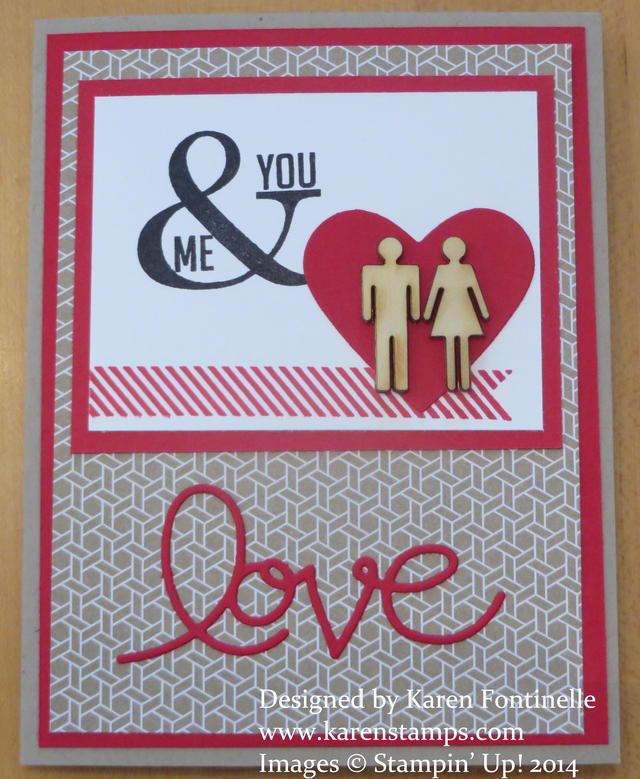
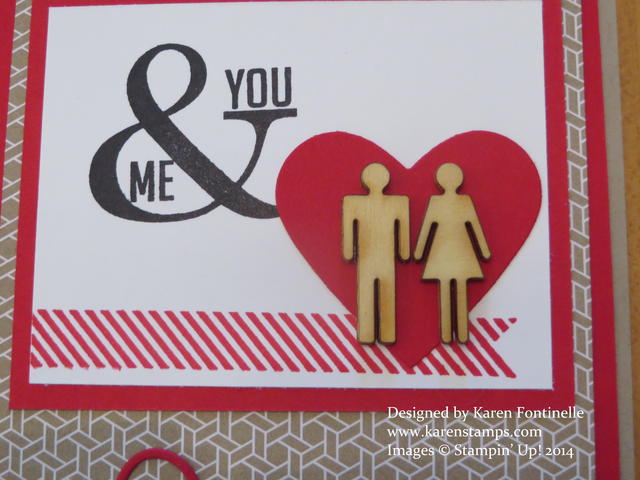
Here’s the valentine I just made for my husband!  I guess you can say I work best under pressure! At the last minute! I got the idea to use the little wooden people that came in a Paper Pumpkin Kit.  What a cute little 3D embellishment especially for a man’s card!  The ampersand and sideways banner is from Perfect Pennants. The Real Red heart is die-cut with one of the Hearts Framelits. That background paper is from the Fresh Prints Designer Series Paper Stack.  The “love” die-cut is from the Expressions Thinlits that were in the Holiday Catalog and sadly NOT carried over!  What WERE they thinking??!  I’ll keep my fingers crossed that they reappear in the next Annual Catalog!

I hope you are having a great Valentine’s Day!  The bouquet of flowers has arrived, right? And your husband will be bringing home the box of chocolates and diamond necklace later, right? Well, if not, then you get a free evening of stamping!  Treat yourself!! One year I bought myself that purple bottle of Elizabeth Taylor perfume, whatever it was called, and had it gift-wrapped at the cosmetic counter…for myself for Valentine’s Day! Why not?!
Hope this card will inspire you if you need an idea for a husband Valentine!

Husband Valentine Close-up

Stampin’ Up! Monster Hugs Valentine Ideas–But Hurry!

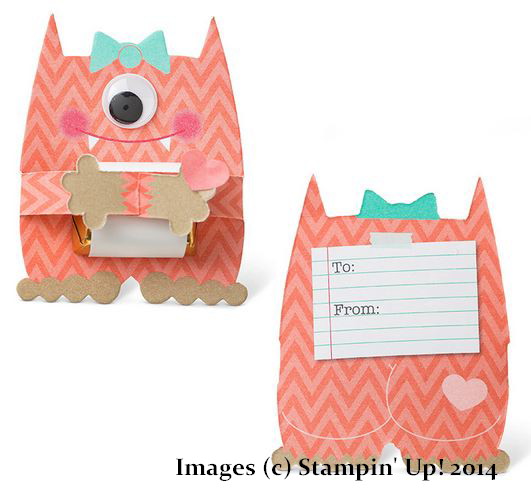
Stampin' Up! Monster Hugs Girl Valentine

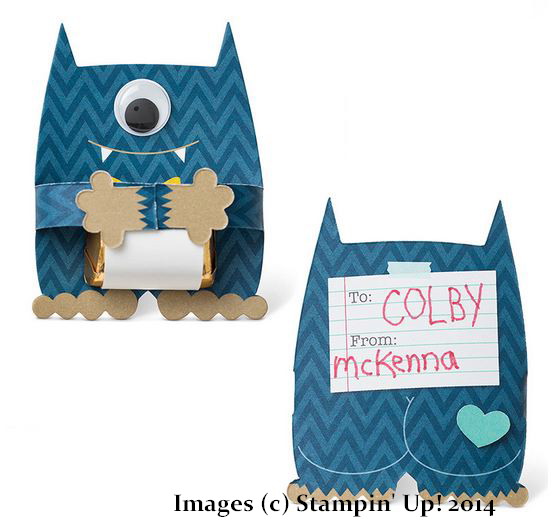
Stampin' Up! Monster Hugs Boy Valentine

Valentine’s Day is fast approaching and who doesn’t like handmade Valentines?! I think Valentine’s Day is one of the best holidays, especially for children, because everyone is included. Remember the boxes we used to decorate for Valentine’s Day and how we often made our own valentines to hand out with red construction paper and doilies and maybe some glitter?

Here are some easy and cute Valentines you and/or your children can make!  Just order from me through my Stampin’ Up! Online Store by January 27th, if not sooner! Monsters are so popular right now and these are adorable ones. It’s a kit! Get 18 monsters, 18 googly eyes and 18 adhesive hearts. Make them as you see with a small piece of candy tucked under the monster’s hands or a lollipop or even stick the monster on a card front.

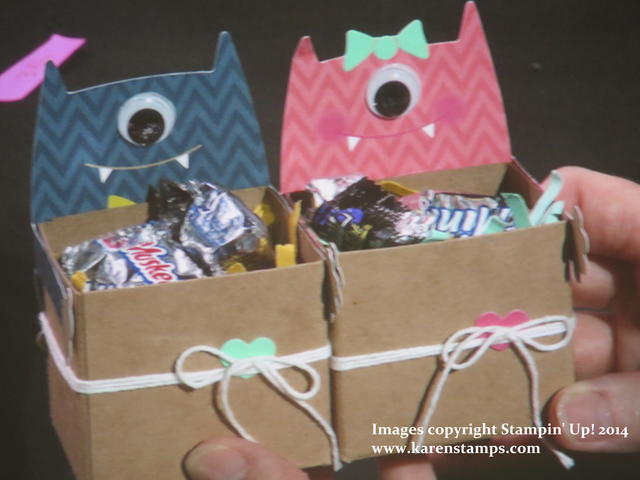
Here is another idea I saw someone from Stampin’ Up! make on stage with the Monster Hugs Valentines.  She made a box and attached it to the front of the monster, wrapped his arms around the sides and filled with candy.

Monster Hugs Valentine Candy Favors

If you would like to purchase cute Monster Hugs Valentines, you can find them in my Stampin’ Up! Online Store along with some other Valentine products! They do have to be ordered by January 27 so don’t hesitate! As we get closer to Valentine’s Day and the deadline for ordering, these Monster Hugs could go quickly.  You will also find other Valentine ideas and stamp sets in the new Occasions Catalog.

Go to my Online Store now and order your Monster Hugs Valentines! Or if you prefer, just contact me at Karen@KarenStamps.com and I can help you with your order.